by Contributed | Mar 24, 2021 | Technology
This article is contributed. See the original author and article here.
We are pleased to announce the general availability of Modern Admin Control Panel (MACP), as part of the Skype for Business Server 2019 March 2021 Cumulative Update.
This is a continuation to our earlier released versions of MACP. You can read about previous releases, Phase 2 March 2020 here and Phase 1 in July 2019 here.
We had covered ‘Home’, ‘Users’, ‘Conferencing’ and ‘Federation and External Access’ tabs in earlier releases. In this release we introduce following tabs: ‘Voice Routing’, ‘Voice Features’, ‘Response Group’ and ‘Conferencing (Dial-In-Access Number sub-tab)’
We continue to listen to our customers to prioritize and ship new features and updates. Hence based on your feedback, this release also includes the following enhancements.
- Addition of OAuth (optional) to login into MACP portal
- Support for Simple URL to access MACP portal
Please start using new Control Panel and share feedback and questions via the ‘Give Feedback’ link in the Control Panel. Read on for details.
Installation Instructions
1. Run SSUI
2. Run Bootstrapper.exe
3. Please install the Management OData if not installed using below steps:
a. Open PowerShell in Administrator mode
b. Run command: Add-WindowsFeature ManagementOData
The administrator account must have CsAdministrator role privileges and must be SIP enabled. If the OAuth is set up, administrator is not required to be SIP enabled.
Launching and Using Control Panel
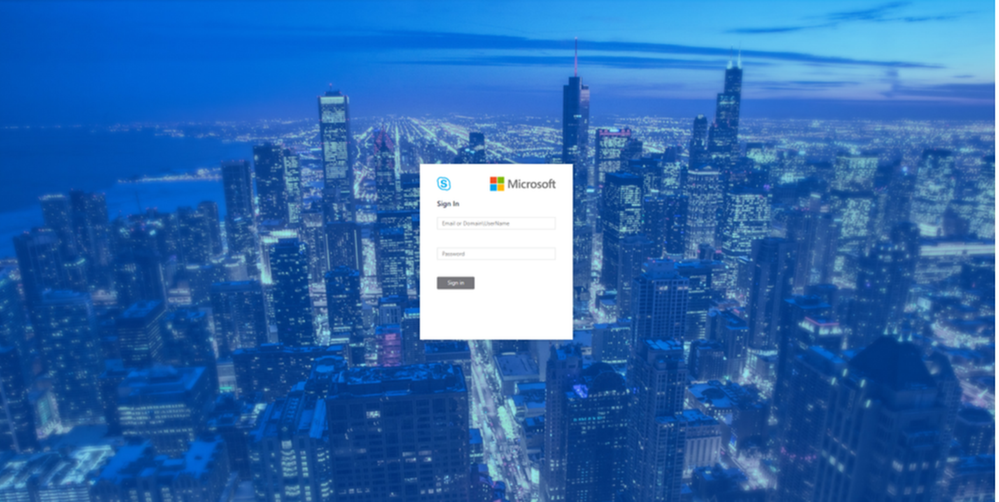
Please put in https://<your pool FQDN>/macp or the configured simple URL https://admin.<your-domain>.com/macp manually in a supported browser, and the Control Panel should open. You can also click on the blue banner at the top of the old Control Panel to launch the new Panel. The login screen looks like the following:
Login screen
Once you hit the login screen, log in with your admin credentials.
Voice Routing
Please create, modify, or delete dial plans in Dial Plan sub-tab as below:
 Dial Plan Home screen
Please create, modify, or delete voice policies in Voice Policy sub-tab as below:
 Voice Policy Home screen
Please create, modify, delete, or change the priority order of routes in the Route sub-tab below:
 Route Home screen
Please view or delete PSTN usages in PSTN Usage sub-tab below. The new PSTN usages can be created under Associated PSTN Usages table in the voice policy form.
 PSTN Usage Home screen
Please create, modify, or delete trunk configurations in Trunk Configuration sub-tab below:
 Trunk Configuration Home screen
Please create, modify, run, or delete test cases in Test Voice Routing sub-tab below:
 Test Voice Routing Home screen
Please try the import/export functionality in Voice Routing sub-tabs. You may export your voice- routing configuration to a file. Also, you may import the voice-routing configuration from the file. This functionality is present in every sub-tab under voice routing as shown below:
 Import/Export Configuration
Similarly, you can import/export voice routing test cases in Voice Routing tabs. Also, you can create test cases. This functionality is also present in all voice routing sub-tab as shown below:
 Import/Export/Create Test Cases
Please try creating and running test cases with this functionality as shown below:
 Create Test Cases
Voice Features
Please try out the scenarios for ‘Call Park’ and ‘Unassigned Number’. You can create various number ranges, edit them, or delete them.
 Call Park home screen
 Unassigned Number home screen
Response Group
Please note that to create or edit a workflow you need to access the page from inside domain network.
 Workflow page in Response Group
If not accessing from inside domain network, then the page displays message as shown below:
 Workflow Access from domain message
Please create, modify, or delete Response Group Queues in Queue page below:
 Queue page in Response Groups
Please create, modify, or delete group agents in Group page below:
 Group page in Response Groups
Conferencing
We have also provided the only remaining page from Conferencing tab – ‘Dial-In-Access Number’.
 Dial-In-Access Number in Conferencing
Setup OAuth to login into MACP portal
The following is the step by step process to setup OAuth for MACP portal.
Minimum OS req and ADFS Server version:
- Windows Server 2016 onwards
Steps to be performed on ADFS Farm machine:
- Ensure that an ADFS farm exists on the topology
- Create a new app for MACP in the ADFS
a. Use the script Configure MACP application in ADFS Farm
b. We suggest you go with default options while running the above script.
Steps To be performed on FE w17 server:
Once you have setup the ADFS farm, execute the following steps.
- Install the latest SSUI in all the FE pool machines
- To enable the ADFS OAuth for MACP across all the pools or selective pools
a. Use the script Configure OAuth for MACP
b. We suggest you review default options while running the above script.
NOTE:
- You need to run the script on just one FE W17 server machine in your topology and it will automatically identify all the FEs in your topology (or the selective pools you have passed to the script).
- Use the same script to disable ADFS OAuth and fallback to web-ticket auth.
- To re-configure any ADFS related details, you must disable ADFS OAuth using Configure OAuth for MACP and then configure the ADFS again.
If OAuth is correctly configured, then you should see login screen as below:

On clicking the Sign in button, you will get a pop-up to enter your username and password.

Setup Simple URL to access the MACP portal
You can also access MACP using the simple URL https://admin.<your-domain>.com/macp
Use the following steps to configure simple URL
1. Install the latest SSUI
2. Configure Simple URL using cmdlet.
Example below shows how a new URL can be added to an existing collection of simple URLs
$urlEntry = New-CsSimpleUrlEntry -Url “https://admin.<your-domain>.com”
$simpleUrl = New-CsSimpleUrl -Component “macp” -Domain “your-domain.com” -SimpleUrlEntry $urlEntry -ActiveUrl “https://admin.<your-domain>.com”
Set-CsSimpleUrlConfiguration -Identity “Global” -SimpleUrl @{Add=$simpleUrl}
3. Run Enable-CsComputer
4. In addition, you must also do such things as
a. create Domain Name System (DNS) records for each URL
b. configure reverse proxy rules for external access
c. add the simple URLs to your Front End Server certificates; and so on.
NOTE:
- Configuring OAuth based authentication for MACP is a prerequisite to use of Simple URL.
Providing Feedback
We always welcomes any feedback and suggestions. Please share feedback and questions via the ‘Give Feedback’ link in the Control Panel. In the top right corner, you’ll see your login name. Click on the adjacent arrow, and you should see a drop-down like the below:

Hit ‘Give Feedback’, and you should see a browser window open with the relevant discussion forum. Please do check the discussions to see if your question has already been addressed. We look forward to hearing from you!
On behalf of the product team,
Ravindra Singh Bisht
Senior Program Manager, Skype for Business Server
by Scott Muniz | Mar 24, 2021 | Security, Technology
This article is contributed. See the original author and article here.
Mozilla has released security updates to address vulnerabilities in Firefox, Firefox ESR, and Thunderbird. A remote attacker could exploit some of these vulnerabilities to take control of an affected system.
CISA encourages users and administrators to review the Mozilla security advisories for Firefox 87, Firefox ESR 78.9, and Thunderbird 78.9.

by Contributed | Mar 24, 2021 | Technology
This article is contributed. See the original author and article here.
Over the last several weeks since Ignite I have been approached by multiple customers about how to go about setting up Microsoft Viva Topics and Viva Connections. With the availability of Viva Topics for deployment and the announcements about Viva Connections rolling out this month customers are anxious to begin leveraging these transformative technologies.
Below are resources to assist in purchasing Topic as well as readiness and preparedness for both.
- Viva Topics
- Viva Connections
Hope you find these helpful!
Thanks for visiting – Michael Gannotti LinkedIn | Twitter
 Michael Gannotti

by Contributed | Mar 24, 2021 | Technology
This article is contributed. See the original author and article here.
Introduction
Many times we have a requirement like to get users or user profile properties from any SharePoint site collection and we need it in CSV or Excel format. so to achieve this solution we will use PnP Powershell.
Let’s see step-by-step implementation.
Prerequisites
If we are using Window 10 or we have PowerShellGet then we can run the below commands to install PnP PowerShell and AzuerAD Modules
Install PnP PowerShell Module,
Install-Module SharePointPnPPowerShellOnline -Scope CurrentUser
Implementation
- Open Windows Powershell ISE
- Create a new file and write a script
Now we will see all the steps which we required to achieve the solution:
1. We will read the site URL from the user
2. then we will connect to the O365 admin site and then we will connect to the site which the user has entered
3. Create a function to bind a CSV
4. Create a function to get user profile properties by email d
5. In the main function we will write a logic to get web and users of site collection URL and then get all the properties and bind it to CSV
So at the end, our script will be like this,
$basePath = #base path where you want to save CSV file("D:Chandani...")
$dateTime = "{0:MM_dd_yy}_{0:HH_mm_ss}" -f (Get-Date)
$csvPath = $basePath + "userdetails" + $dateTime + ".csv"
$adminSiteURL = "https://****-admin.sharepoint.com/" #O365 admin site URL
$username = #user email id
$password = "********"
$secureStringPwd = $password | ConvertTo-SecureString -AsPlainText -Force
$Creds = New-Object System.Management.Automation.PSCredential -ArgumentList $username, $secureStringPwd
$global:userDetails = @()
$index = 1;
$userInfo;

Function Login() {
    [cmdletbinding()]
    param([parameter(Mandatory = $true, ValueFromPipeline = $true)] $Creds)

    #connect to O365 admin site
    Write-Host "Connecting to Tenant Admin Site '$($adminSiteURL)'" -f Yellow | Out-File $LogFile -Append -Force

    Connect-PnPOnline -Url $adminSiteURL -Credentials $Creds
    Write-Host "Connection Successfull" -f Yellow | Out-File $LogFile -Append -Force

}
Function StartProcessing {
    Login($Creds);
    ConnectionToSite($Creds)
}

Function ConnectionToSite() {
    $siteURL = Read-Host "Please enter site collcetion URL"

    try {
        Write-Host "Connecting to Site '$($siteURL)'" -f Yellow

        $SCWeb = Get-PnPWeb -Identity ""

        $getusers = Get-PnPUser -Web $SCWeb

        ForEach ($user in $getusers) {
            $email = $user.Email
            If ($email) {
                $userInfo = GetUserProfileProperties $email
                #creating object fro CSV
                $global:userDetails += New-Object PSObject -Property ([ordered]@{
                        Id            = $index
                        GUID          = $userInfo.'UserProfile_GUID'
                        FirstName     = $userInfo.FirstName
                        LastName      = $userInfo.LastName
                        WorkEmail     = $userInfo.WorkEmail
                        PictureURL    = $userInfo.PictureURL
                        Department    = $userInfo.Department
                        PreferredName = $userInfo.PreferredName
                    })
                $index++
            }
        }
    }
    catch {
        Write-Host -f Red "Error in connecting to Site '$($TenantSite)'"
    }
    BindingtoCSV($global:userDetails)
}

Function BindingtoCSV {
    [cmdletbinding()]
    param([parameter(Mandatory = $true, ValueFromPipeline = $true)] $Global)
    Write-Host -f Yellow "Exporting to CSV..."
    $userDetails | Export-Csv $csvPath -NoTypeInformation -Append
    Write-Host -f Yellow "Exported Successfully..."
}

Function GetUserProfileProperties($username) {
    $Properties = Get-PnPUserProfileProperty -Account $username
    $Properties = $Properties.UserProfileProperties

    If ($Properties) {
        $Properties = $Properties
    }
    else {
        $Properties = $null
    }
    return $Properties
}

StartProcessing
In the above script do the following changes:
1. Change O365 Site Url, base path, username, and password
2. To check all the properties you can print $userInfo and then change $global:userDetails object as per your requirement at where I have used $userInfo.FirstName,LastName etc.
Then run the script with the F5 command.
Output
After this check the CSV file at your base location.
Summary
So in this article, we have seen how to get user and user profile properties and as well as how to export them to CSV.
Hope this helps! If it is helpful to you then share it with others.
Sharing is caring!

by Scott Muniz | Mar 24, 2021 | Security
This article was originally posted by the FTC. See the original article here.
Scammers are using a new trick to steal your money and personal information: a bogus COVID vaccine survey.
People across the country are reporting getting emails and texts out of the blue, asking them to complete a limited-time survey about the Pfizer, Moderna, or AstraZeneca vaccine. (And no doubt, there may be one for Johnson & Johnson, too.) In exchange, people are offered a free reward, but asked to pay shipping fees.
If you get an email or text like this, STOP. It’s a scam.


No legitimate surveys ask for your credit card or bank account number to pay for a “free” reward.
If you get an email or text you’re not sure about:
- Don’t click on any links or open attachments. Doing so could install harmful malware that steals your personal information without you realizing it.
- Don’t call or use the number in the email or text. If you want to call the company that supposedly sent the message, look up its phone number online.
Remember:
- Don’t give your bank account, credit card, or personal information to someone who contacts you out of the blue.
- You can filter unwanted text messages on your phone, through your wireless provider, or with a call-blocking app.
- If you get an email or text that asks for your personal information and you think it could be a scam, tell the FTC at ReportFraud.ftc.gov.
To learn more about COVID-related frauds and scams, visit ftc.gov/coronavirus/scams.
Brought to you by Dr. Ware, Microsoft Office 365 Silver Partner, Charleston SC.

by Contributed | Mar 24, 2021 | Technology
This article is contributed. See the original author and article here.
We’re back once again to Reconnect and thrilled to be joined by 12-time Office Apps & Services MVP Hilton Giesenow! An industry veteran of almost 20 years, Hilton counts experience across varied IT, development and consulting roles, geographies and client industries and types.
Hailing from Cape Town, South Africa, Hilton recently founded a company called ChitChattr which builds products for Microsoft Teams.
Moreover, “I’m having a ton of fun doing lots of Teams development,” Hilton says, “so lately I’ve been learning a lot and working on a number of related open source projects (Teams PnP Samples, Graph Toolkit, Text Recognizers, Teams developer docs), and building some awesome Teams products at ChitChattr (such as our new TeamMate new employee onboarding welcome bot)”
Hilton, who mostly stays in touch with Reconnect via the Yammer group, says MVP has played a large role in his life and the community helps him to still feel part of the program.
“It has helped me keep in touch with other community members, both Reconnect and ‘regular’ MVPs,” Hilton says. In terms of other projects and community organizations, Hilton says: “I’m a regular contributor to various projects, both code and docs-related, but also quite active on Stack Overflow helping answer Teams development questions (and learning a lot from other people’s challenges!)”
Hilton fondly recalls various global gatherings during his time as an MVP, and encourages all program newcomers to get the most out of the program. “Enjoy the program and keep up the great contributions – community is all about sharing and helping others – we’re all ‘beginners’ in something!”
Looking forward, Hilton says: “Right now I’m loving learning about Teams development, so planning to keep learning more and contributing to the Teams development community. I’m also planning to improve our current ChitChattr products and to build a bunch of new ones for Teams.”
For more on Hilton, visit his blog.

by Contributed | Mar 24, 2021 | Technology
This article is contributed. See the original author and article here.
While working on a project which uses Microsoft Graph APIs, I found myself opening the Microsoft Graph Explorer a lot to check which paths/parameters were available. The Microsoft Graph Explorer is a great tool, but I love not to change context too much.
As I like to create Visual Studio Code extensions, I did not have to think long to start building a new extension.
Background info
The good news for me was that Microsoft Graph Explorer has an API for retrieving the Open API information. This API returns all the available endpoints and their parameters per path. All I had to do, was create the logic to know when you are writing a Microsoft Graph URL and call the API to provide the suggestions.
The extension
> Info: The Visual Studio Code extension can be found on the marketplace: MS Graph Completion.
The initial version of the extension supports the GET API paths, query string parameters, and their values.

The /users/ API completion allows you to add a {user-id} token.

When providing your user-ID or username, it will automatically tokenize it.

When would you use it?
There are various reasons for this. My reasoning, as mentioned, was to know which parameters are available for selecting and expanding quickly.
Another option could be to use it in combination with the popular REST Client – Visual Studio Marketplace.

Let me know how you would use it and feel free to contribute to the project MS Graph Completion – GitHub Repository.
*Thanks to the Microsoft Graph team for the API and Graph explorer*
by Contributed | Mar 24, 2021 | Technology
This article is contributed. See the original author and article here.
I often get asked about why you should become Azure certified, or how to start with your Azure certification. Last week I was guest on the Azure Enablement show with April Edwards, to talk about Azure Certifications! In this video, April and I discuss why Microsoft Azure certifications are worth your time and energy; and how they can lead to more confidence and clarity in your job. Thomas and April share their own experiences and recommendations on how to prepare for exams and how to approach getting your own certifications.
If you have already decided to become Azure certified, my blog post on how to prepare for a Microsoft Azure Certification Exam can help you!
You can watch the full Azure Enablement Show: How and why to earn an Azure Certification video here on Microsoft Channel 9.
You can learn more here:
Also make sure you check out my blogs on Microsoft Certification:
I hope this Azure Enablement show video on Microsoft Azure certifications and the included information is valuable for your Microsoft Azure certification journey! If you have any questions feel free to leave a comment below!

by Contributed | Mar 23, 2021 | Technology
This article is contributed. See the original author and article here.
Context
You might know that this new SPFx v1.12 feature has an old story behind it. In the past, developers were getting web part’s width by unsupported ways like DOM classes or attributes. It was working pretty well until Microsoft decided to update SharePoint Online DOM in October last year and broke a lot of custom developments. As Microsoft says, DOM is not and API and you should avoid taking any dependencies in it but until now, nothing was officially released to solve this issue correctly. It’s now done, SPFx v1.12 adds a width property and an onAfterResize() event to determine the width of your web part.
Note: In this article, I’m using a web part project with SPFx v.1.12 and React framework.
Determine web part size
In your web part TS file, you can add the onAfterResize() method to get notified when the web part is resized (for example when you resize your window):
  protected onAfterResize(newWidth: number) {
    console.log("New web part width: " + newWidth);
  }
This new method is documented as below:
This API is invoked when the web part container dom element width is changed, e.g. when the browser window is resized and when the property pane is toggled open/closed.

@param newWidth — Width (in pixels) of the container for the web part after the resize event.

@remarks
Web parts should utilize this method to perform operations such as potentially re-rendering components based on the new available width for the web part.

@virtual
Then you can use the width property as a prop for your React component:
  public render(): void {
    const element: React.ReactElement<IDemoWebPartWidthProps> = React.createElement(
      DemoWebPartWidth,
      {
        description: this.properties.description,
        webPartWidth: this.width
      }
    );

    ReactDom.render(element, this.domElement);
  }
This new property is documented as below:
This propery returns the width of the container for the web part.

@returns — Width (in pixels) of the container for the web part.

@remarks
Web parts should utilize this property to perform operations such as any conditional styling of components based on the initial available width for the web part.

@internalRemarks
This function retrieves web part's key to get stored section width from cache. If cache key does not exist in cache it will calculate and store the width before returning.

In the case where getWebPartCacheKey is not passed down, it will go through the original workflow to caculate web part width.
And you can display it in your component render() method:
<p className={ styles.description }>Web part width = { this.props.webPartWidth }</p>
Final result of this demo web part:
This a great add to SPFx and allows developers to re-render components when the web part is resized :thumbs_up:
Happy coding everyone!
Resources
Determine the rendered web part width | Microsoft Docs
SharePoint Framework enterprise guidance | Microsoft Docs

by Contributed | Mar 23, 2021 | Technology
This article is contributed. See the original author and article here.
As we continue our powerful momentum in securing Linux platforms, we are excited to announce the public preview of Microsoft Defender for Endpoint on Linux antivirus behavior monitoring and blocking!
The new preventive antivirus functionality complements our existing strong content-based capabilities with behavior monitoring and deep memory scanning. These enhancements bring immediate ability to closely monitor processes, file system activities, and process interactions within the system. The enhanced ability to correlate events and behaviors across multiple processes allows us to more generically detect and block malware based on their behavioral classification. These behavior-based signals will act as additional runtime signals for behavioral cloud-powered machine learning models and for effective runtime protection.
Our Linux antivirus behavior monitoring and blocking can be previewed on any Linux distribution that is currently supported by Microsoft Defender for Endpoint on Linux:
- RHEL 7.2+,
- CentOS Linux 7.2+
- Ubuntu 16 LTS, or higher LTS
- SLES 12+
- Debian 9+
- Oracle Linux 7.2+
Microsoft Defender for Endpoint on Linux antivirus behavior monitoring seamlessly integrates into the existing preventive experiences. Behavior monitoring details and artifacts can be explored locally using the existing Microsoft Defender for Endpoint on Linux command line interface.
Behavior monitoring alerts appear in the Microsoft Defender Security Center (as well as in the Microsoft 365 security center) alongside all other alerts and can be effectively investigated.

What are the preview prerequisites for Linux antivirus behavior monitoring and blocking?
To experience the Linux antivirus behavior monitoring and blocking in public preview, you’ll need to have preview features turned on in the Microsoft Defender Security Center. If you have not yet opted into previews, we encourage you to turn on preview features in the Microsoft Defender Security Center or in the Microsoft 365 security center today.
As a preview entry prerequisite, please ensure the following requirements are fulfilled:
- Device must be in the InsiderFast channel
- Minimal Microsoft Defender for Endpoint version number must be (InsiderFast): 101.25.42
- Device must be explicitly enrolled into the preview. The preview enrollment can be activated / deactivated using the following commands:
$ sudo mdatp config behavior-monitoring –value enabled
$ sudo mdatp config behavior-monitoring –value disabled
- Microsoft Defender for Endpoint must be restarted for the enrollment/unenrollment commands to take effect.
How to start previewing Linux antivirus behavior monitoring and blocking?
To get started with the Linux antivirus behavior monitoring and blocking public preview:
- Ensure preview prerequisites are met
- Ensure to initially evaluate this new functionality on a selected subset of your non-production Linux devices
- Ensure cloud-delivered protection is enabled on devices enrolled into the preview by running the following command:
$ mdatp health –field cloud_enabled # this should print “true”
- Try “Do It Yourself” scenarios to see features in action. You can find “Do It Yourself” scenarios attached to this blog
- Continue running Linux clients enrolled into evaluation as you normally would
- Share your feedback and observations to help us improve.
We welcome your feedback and look forward to hearing from you! You can submit feedback through the Microsoft Defender Security Center or through the Microsoft 365 security center.
Monitor the What’s new in Microsoft Defender for Endpoint on Linux page for upcoming announcements (including general availability of Linux antivirus behavior monitoring and blocking). Stay tuned to our blog and Twitter channel to stay up to date on additional Microsoft Defender for Endpoint advancements.
Microsoft Defender for Endpoint is an industry leading, cloud ML powered endpoint security solution offering endpoint protection, endpoint detection and response, vulnerability management, and mobile threat defense. With our solution, threats are no match. If you are not yet taking advantage of Microsoft’s unrivaled threat optics and proven capabilities, sign up for a free Microsoft Defender for Endpoint trial today.
Microsoft Defender for Endpoint team

Recent Comments