This article is contributed. See the original author and article here.
Working on a service request our customer reported the following error message: Sync failed with state: SyncSucceededWithWarnings, Syncgroup: XXX – Error #1: SqlException ID: XXXX-NNN-ZZZZ-YYYY-FFFFFFFF, Error Code: -2146232060 – SqlError Number:547, Message: The INSERT statement conflicted with the FOREIGN KEY constraint “FK_Table1”. The conflict occurred in database “DB1”, table “dbo.Table1”, column ‘Id’. SqlError Number:3621, Message: SQL error with code 3621
Decoding the Error Message:
The warning state signifies that while synchronization was successfully executed, some errors, like the SqlException indicated above, occurred during the process.
Navigating Through the Errors:
Foreign Key Constraint Error Analysis:
The error message elucidates a failed attempt to insert a record into a table due to a Foreign Key Constraint Error. The conflict arises when the inserted record’s foreign key doesn’t align with any existing primary keys in the referenced table.
Error Resolution Steps:
Identify and Analyze: Utilize tools like SSDT / SSMS to compare the databases and pinpoint the conflicting records causing the constraint error.
Data Correction: Engage in a meticulous process of amending the data by adding the absent records in the referenced table, or adjusting the foreign key values in the records to be inserted, ensuring they correspond to existing primary keys in the referenced table.
Sync Group Recreation: In moments of low traffic or scheduled downtime, recreate the sync group to implement the rectified records seamlessly.
Reinitiate Synchronization: After addressing the conflicting records, reinitiate the synchronization process, which should now proceed without constraints or warnings.
This article is contributed. See the original author and article here.
Segundo relatórios de investigações da Verizon Data Breach em 2020, foi constatado que 80% das violações de segurança em aplicações Web estão relacionadas a credenciadas roubadas; e 83% das aplicações hoje possuem ao menos uma vulnerabilidade de segurança. Essas brechas são grandes oportunidades para pessoas mal-intencionadas explorarem seus aplicativos e causarem grandes danos.
Organizações que adotam práticas de DevSecOps (checks de segurança, busca por vulnerabilidades diariamente etc.) reduzem o tempo de recuperação para problemas de segurança em 72% em relação a organizações que rodam essas validações apenas ocasionalmente.
Em ordem de suprir estes pontos de melhoria em um mundo onde o desenvolvimento de softwares está em contante e rápida transformação de forma maravilhosa as comunidades ao nosso redor, a Microsoft traz o GitHub Advanced Security for Azure DevOps (GHAzDO) para dentro do suíte de serviços do Azure DevOps.
O que é GHAzDO?
Conforme mencionado, o GHAzDO é um serviço que provê funcionalidades de segurança para implantação de shift-left (prática que consiste em iniciar os testes de aplicação mais cedo e duram todo o ciclo de vida do desenvolvimento de software), tornando mais simples diagnosticar e prevenir brechas de segurança da sua aplicação em estágios de desenvolvimento mais iniciais.
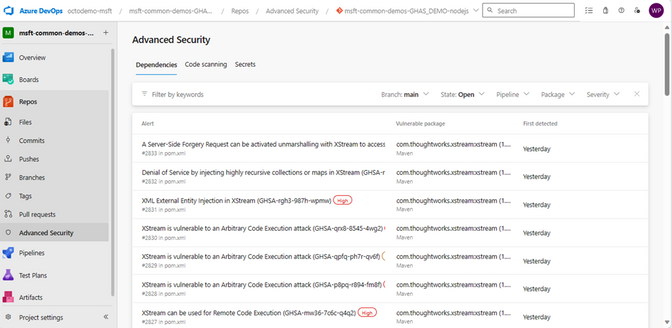
O GHAzDO é dividido em 3 abordagens: Secure Dependencies, Secure Code e Secure Secrets.
Secure Dependencies
Ataques a ferramentas de código aberto são cada vez mais frequentes. Com o Dependency Scanning, é possível identificar vulnerabilidades em pacotes presentes no código e receber um conjunto de orientações em como mitigar essas aberturas.
Secure Code
Com o conceito de Code Scanning, o GHAzDO inclui uma ferramenta de análise estática capaz de detectar centenas de vulnerabilidades de segurança no código como SQL Injection, XPath Injection, Authorization bypass em uma ampla variedade de linguagens (C/C++, C#, Go, Java/Kotlin, Javascript/Typescript, Python etc.). Tudo isso, é executado dentro do contexto do Azure Pipelines sobre o código no Azure Repos. Ou seja, é uma ferramenta nativa focada em ser totalmente natural para os usuários do Azure DevOps.
Secure Secrets
Metade das brechas de segurança em aplicações estão relacionadas com credenciais expostas. Com a funcionalidade do Secret Scanning, é possível listar todos os segredos expostos no repositório e seus respectivos arquivos. Não só isso, com apenas 1 clique é possível bloquear o envio de segredos para o repositório, impedindo que brechas de segurança sejam causadas.
Uma vez que um segredo está exposto no repositório, ele faz parte do histórico de commits. Em uma situação como essa, é necessário revogar o segredo, e atualizar todos os recursos que potencialmente façam uso deste para um novo. Se porventura algum recurso for esquecido, é possível causar uma indisponibilidade na aplicação. Não o bastante, será necessário também resetar o histórico do repositório para o commit anterior ao momento em que o segredo foi exposto. Se este foi exposto há um tempo considerável, isso pode causar sérios danos em relação ao trabalho que foi desenvolvido até então, gerando um grande atraso a equipe de desenvolvimento.
Portanto, certificar-se de que secrets, credenciais, ou qualquer outra informação sensível nunca seja exposta ao repositório (push protection) é de extrema importância para a saúde e segurança da aplicação.
This article is contributed. See the original author and article here.
This post was co-authored by Lax Gopisetty, Vice President, Global Practice Head, Microsoft Business Applications & Digital Workplace Services, Infosys Ltd.
In an age defined by single-click purchases, instant deliveries, and personalized experiences, customer expectations continue to rise, and frontline technicians are expected to meet these ever-changing demands. When customers face a problem, they want it fixed fast and right the first time. For many organizations, customer experience is both a challenge and an opportunity to differentiate from the competition.
It is no longer acceptable for technicians to operate on disparate technologies that individually are good enough to execute work orders, manage assets, and dispatch resources with real-time support. Timely resolution is key in field service, and arming frontline technicians with intuitive solutions that combine workflow automation, scheduling algorithms, and mobility can significantly enhance the customer experience. Tools that empower field technicians with timely inputs to focus on their core responsibilities and enable processes to track each work order closure, along with billing, are now becoming existential.
For example, solutions that unlock efficiencies for telecommunications providers with field service automation, empower medical device service technicians with improved downtime, maintain safe and highly automated facility management operations, and manage smart elevator service with Internet of Things (IoT)-driven field service are all recipes for greater customer satisfaction.
Dynamics 365 Field Service
Transform your service operations and deliver exceptional service.
Microsoft Dynamics 365 Field Service integration supports positive customer experiences
Dynamics 365 Field Service integrates with Outlook, Microsoft Teams, and Microsoft Viva Connections so that frontline workers and managers can create, view, and manage work orders within Outlook and Teams. This integration enhances collaboration between dispatchers, frontline technicians, and managers by enabling work order data to sync automatically between Dynamics 365 and Microsoft 365. Additionally, frontline technicians can quickly start their day with access to key workday information at a glance, with work orders visible as Tasks from the Viva Connections homepage in Teams. Dynamics 365 and Microsoft 365 empower technicians with the right information to resolve issues the first time, which adds a great deal to creating a positive customer experience.
For example, a leading energy supplier based out of the UK partnered with Infosys to establish itself as a leader in the energy-as-a-service market by offering best-in-class customer experience. The connected field service-based solution unified the capabilities of Dynamics 365 and Microsoft 365 to unlock a leaner and flexible business model that also enabled future scalability to ensure:
Better workforce management through flexible scheduling, route optimization, and quota management.
Field job execution via remote supervision, site awareness/recording, and offline mode.
Customer intimacy powered by service history management, technician visibility, voice of customer, and closed loop tracking.
Superior job outcomes powered by higher first-time resolution rates and reduced job aborts.
Connected field service helped redefine the leading energy supplier’s customer engagement model with a seamless work order management process. From streamlining work order creation, scheduling the best suited frontline technician, receiving remote expert assistance, and integrating asset management, Dynamics 365 enabled the customer to transform their field operations. Additional engagement highlights include:
Seamless migration from more than 20 legacy disparate business apps onto Dynamics 365.
Implemented core business functionalities with over 75 percent out-of-the-box feature fitment.
Six phased incremental rollouts to enable more than 1,500 field technicians and more than 600 internal users.
On track to reduce overall cost of IT operations by over 25 percent.
The leaner, AI-powered, and truly automated business, has unleashed novel revenue streams with infinite potential for the client:
Growth segment
Value delivered
Smart new connections
Manage the smart new connections—such as customer management (property developers), lead management, opportunity management, quote management, billing, consolidated billing, and disputes.
Smart field connections
Provide onsite service for smart field connections—work order management, skills management, scheduling management, capacity management, and resource management.
Electric vehicles (e-mobility)
Manage electric vehicle (EV) meter installation services—to manage the sales processes for business-to-business (B2B) customers, including installation.
This UK-based leading energy supplier is now well-positioned to drive its future growth. The organization is supported by a skilled and engaged workforce that works seamlessly with connected and leaner processes that together offer a sustainable competitive advantage.
Standardizing and automating processes through connected field service
Field Service continues to break ground into unexplored industries. Capabilities like GPS and routing, which enable timely visits and quicker resolution, are saving the day for thousands of field service professionals. They are now able to summarize completed tasks with inline Microsoft Power Apps component framework (PCF) capability.
Field service solutions must always be driven by an organization’s unique priorities, pain points, and process nuances. Partners like Infosys are co-innovating with clients to address these challenges with Microsoft Power Platform and its extensibility components. They are enabling nontechnical business users to build applications that cater to their unique requirements without the aid of IT experts.
The emergence of AI-embedded innovations like Copilot in Dynamics 365 Field Service will enhance service further. From creating work orders with the right information and assigning them to the right technicians, to equipping technicians with sufficient support to successfully complete jobs, Copilot will help streamline critical frontline tasks. These advanced functionalities will help companies genuinely standardize and automate field service processes.
Organizations competing in a market with high turnover are using mixed reality-based Microsoft Dynamics 365 Guides for remote support and collaboration. This results in accelerated training with context and seamless transfer of information, insights, and skills, which help in lowering overall costs.
Technology is key to building a scalable and efficient field service operation. However, a significant portion of success still rides on the technician who is delivering the service. So, it is imperative for service organizations to unify field operations, frontline technicians, and customers with connected digital platforms, to unlock value—because service is no longer a cost center for organizations.
Learn more about Dynamics 365 Field Service
Learn how Dynamics 365 Field Service can help you transform your service operations and deliver exceptional service. And read how Copilot in Dynamics 365 Field Service can accelerate service delivery, boost technician productivity, and streamline work order management with next-generation AI. Watch the video below to see it in action.
This article is contributed. See the original author and article here.
As a Microsoft Most Valuable Professional (MVP) and a Microsoft Certified Trainer (MCT), I can say from experience that if you want to improve your skills, expand your knowledge, and advance your career, Microsoft Learn can be an essential resource for you. This family of skill-building offerings brings together all Microsoft technical content, learning tools, and resources, providing practical learning materials both for professionals and beginners. Among the many features that Microsoft Learn offers, four of my favourites are collections, career path training, Practice Assessments, and exam prep videos.
1. Collections
Collections let you customise your own learning journey. Often you come across something on Microsoft Learn that’s interesting, and you want to save it for later. This is where collections come in handy. Collections let you organise and group content on Microsoft Learn—whether it’s a module about a particular topic, a learning path, or an article with technical documentation. You can even share your collections via a link with others.
I frequently create collections to keep track of all the content that will be useful in preparing for a Microsoft Certification exam. This might include the official learning path, along with any extra documentation that could help during exam prep. To place a module or learning path into a collection, from the Training tab, on the content of interest, select Add. You can revisit collections from your Microsoft Learn profile.
The Add button on a Microsoft Learn training module.
2. Career path training
As you may have already discovered, one of the challenges to learning new technologies is finding the right resources for your skill-building needs. Perhaps you’re not sure where to begin your learning journey. I’ve found that a good starting point is to explore learning content based on your career path or on one that interests you. You can find this option on the Microsoft Learn Training tab, and it points you to a collection of modules, learning paths, and certifications that are relevant and tailored to your chosen job role. Whether you want to become a business user, a data scientist, a solutions architect, a security engineer, or a functional consultant, you can find the appropriate learning content for your role and level of expertise. Plus, with career path training, you can learn at your own pace, gain practical experience, and validate your skills with Microsoft Certifications.
Career path collection options on Microsoft Learn.
3. Practice Assessments
If you’re preparing to earn a Microsoft Certification, you can get an idea of what to expect before you take the associated exam by trying a Practice Assessment. This option is available for some certifications and is a great way to gauge the topics you’re strong in and the ones for which you could use more practice. They help you build confidence by giving you a feel for the types of questions, style of wording, and level of difficulty you might encounter during the actual exam.
Sample Practice Assessment questions.
If your certification exam has a Practice Assessment available, it’s listed on the Microsoft Learn exam page, under Schedule exam. Just select Take a free practice assessment.
4. Exam prep videos
Other valuable Microsoft Learn resources to help you get ready for earning a Microsoft Certification are exam prep videos, available for some certifications. These videos are designed to help you review the key concepts and skills that are covered on the exam and to provide tips and tricks on how to approach the questions. They offer an engaging way to absorb essential knowledge and skills, making it easier to grasp technical concepts and their practical applications. The videos, hosted by industry experts, provide a structured, guided approach to the exam topics.
These exam prep videos complement your other Microsoft Learn study materials. Even if you consider yourself an expert on a topic, the videos are a good way to refresh your memory before exam day. To browse through available exam prep videos, check out the Microsoft Learn Exam Readiness Zone and search for your topic of interest or exam number, or even filter by product.
Share your favourite Microsoft Learn features
Creating your own collections of content, exploring new career paths, or preparing to earn Microsoft Certifications by taking Practice Assessments or watching exam prep videos are just some of the ways that Microsoft Learn can help you achieve your skill-building and certification goals, and they’re some of my favourite features in Microsoft Learn. What are your favourites? Share your top picks with us, and help others on their learning journeys.
Meet Rishona Elijah, Microsoft Learn expert
Rishona Elijah is a Microsoft Most Valuable Professional (MVP) for Business Applications and a Microsoft Certified Trainer (MCT). She works as a Trainer & Evangelist at Microsoft Partner Barhead Solutions, based in Australia. She is also a LinkedIn Learning instructor for Microsoft Power Platform certifications. Rishona has trained thousands of individuals on Microsoft Power Platform and Dynamics 365, delivering impactful training sessions that empower them to use the no-code/low-code technology to build their own apps, chatbots, workflows, and dashboards. She enjoys sharing her knowledge and ideas on her blog, Rishona Elijah, in addition to speaking at community conferences and user groups.
“Power Platform with Rishona Elijah” is a Microsoft learning room that provides a supportive and encouraging environment for people starting their Microsoft Power Platform journey. The room offers assistance and guidance on Microsoft Power Platform topics, including certifications, Power Apps, Power Virtual Agents, Power Automate, and AI Builder. It’s also a great space to network with like-minded peers and to celebrate your success along the way. Sign up for the “Power Platform with Rishona Elijah” learning room.
This article is contributed. See the original author and article here.
Field Service Mobile is a Dynamics Power Platform Model Driven Application. This offers several advantages to the mobile application, including re-use of forms and views and consistency of user experience while accessing on the web, mobile, or tablet.
The Power Platform also offers significant customization opportunities, both when customizing forms, adding business logic or integrations with other Power Platform capabilities like Power Automate, Canvas, or PCF Controls. These capabilities make the Field Service Mobile application uniquely positioned to streamline your workflows, improve data quality and enhance your user experience.
Customization Best Practices
Customizing the Field Service Mobile application is a balance of enabling an ideal workflow for your business and providing the best possible user experience for your Frontline Workers. This balance must consider data availability of the mobile workforce, along with application performance and the overall user experience.
In this blog post we’ll share some of the key best practices when evaluating and implementing customizations.
Use the default Field Service Mobile app module. The out-of-the-box Field Service Mobile app module has all the basic features and functionality your frontline workers require to get started with Field Service. Custom app modules can be used with the Field Service Mobile application but will not include some of the internal business logic such as Travel Calculations. Another advantage of using the default app module is that it will automatically receive product updates over time, while additional effort would be required to merge the same enhancements into a custom app module.
Avoid using HTML Web Resources. Web Resources have many limitations on a mobile application when working with offline mode. It is highly recommended to use PowerApps Component Framework (PCF) controls, which are a better option for a more consistent cross-platform experience without the same limitations.
Tip: If your situation necessitates the use of custom web resources, use code splitting and check code coverage in a browser to ensure only the minimum amount of code is loaded. Package shared code in their own shared web resource library instead of duplicating in each consuming resource.
Tip: If using Offline mode, be sure to test your customizations on the mobile device in Airplane mode and variable cellular network conditions.
Handle errors properly and present the right message to end users. When implementing customizations, it is very important to handle edge-cases and errors in a way that provides a positive experience for your end users. This is especially true for async calls and network errors, where the Frontline Worker may have different results depending on devices network state.
Use XRM Web APIs instead of XHR/Fetch calls directly to the server. XRM Web ApIs will route correctly to the local offline database or server based on offline configuration and network state of the app.
Making direct server calls from the mobile application is not recommended as they can be unreliable and fail unexpectedly with poor network conditions. By ensuring that all dependencies are in the offline data store by configuring the Mobile Offline profile with the correct data necessary for your user scenarios.
If server calls are necessary, build an appropriate user experience to handle cases when the call may fail, or response is slow to return from the server. Making the network calls trigger based on explicit user actions, with a interface giving visual cues that a network call is happening and a response will be needed, will provide a better experience for the Frontline Worker.
If using onload/onchange/command handlers and fetching data using XRM WebAPis, make sure you test the impact of those calls on application performance while in various network conditions.
Optimized resources for bandwidth. If adding custom JavaScript or images, be sure to optimize files which are downloaded to the device. We recommend to always trim and compress your JavaScript files and using SVG images instead of PNG to save bandwidth.
Declare solution dependencies between commands, web resources, and strings. Dependencies must be used to make a Web Resource available offline. For example, when an entity/form is enabled for offline usage, the JavaScript which is attached to the form for onload/onsave, would also be available offline. For other files such as localization XML files, they need to be added as a dependency to your JavaScript so these XML files will also be available offline. Learn more about web resource dependencies.
Be aware of timing issues or race conditions. This is especially relevant when dealing with async calls. Test by adding network latency and CPU throttling to ensure a positive experience in real-world conditions.
Use Business Rules as first choice over custom client-side JavaScript. Business rules provide a mechanism to implement business logic with some guardrails to avoid some of the complexity that comes with custom JavaScript code. Please be aware there are some limitations with business rules, such as cases when OnChange events are required. It is good to evaluate your business scenarios and choose the best path for your organization.
Tip: If using JavaScript-based business logic, make sure you fetch minimal data and avoid joins/sorting if not needed.
Leverage out of box controls. As much as possible use out of the box controls, such as the Booking Calendar Control, which will be easier to support and receive product enhancements over time.
When enabling offline mode, make sure forms and views are aligned with configuration of the mobile offline profile. The individual configuring the forms and views should work closely with the person who will configure the mobile offline profile to ensure tables which are enabled on views will be available while running in offline mode. Be sure to include error handling if there are instances when an entity will not be available while offline.
Leverage tools to debug customizations. Debugging is important when introducing JavaScript customizations to your experience. Debugging a mobile app has unique challenges versus a web browser. This is especially true with capabilities like Offline mode are enabled on the mobile app. To meet this need, leverage debugging tools shipped with the Android and Windows model driven apps. Detailed steps to debug are found in Power Apps documentation.
Customizing a model driven application can be a powerful way to enhance the user experience and functionality of your solution. However, it also requires careful planning and testing to ensure optimal performance, usability, and compatibility. In this blog post, we have shared some best practices and tips on how to customize your model driven application effectively. We hope you have found this information useful and that you will apply it to your own projects. Thank you for reading and happy customizing!


Recent Comments