by Scott Muniz | Jun 30, 2020 | Uncategorized
This article is contributed. See the original author and article here.
- 07/16/2017
- 2 minutes to read
CPU utilization plays a vital role in the performance of your application. When it comes to web applications which are expected to run round the clock, the impact caused by a CPU spike will be catastrophic as the responsiveness of the application will get worse when there are not enough CPU resources to consume.
There are so many tools which were used to perform the high CPU troubleshooting.
For most of the high CPU problems we would need to capture a memory dump to get to the bottom of the issue,the most conventional way to capture a memory dump would be to manually trigger a dump using one of the many available tools during the exact time of issue. But there are times where it will not be feasible for us to manually trigger a Memory dump at the issue time. For example, the issue might happen during night time where no one will be around to capture the data. For such kind of Scenarios Automated way of capturing Data is always good. In this article I will walk you through one of such automated ways.
Steps for capturing High CPU Automated Dumps Using Perfview Command
- Scenario 1: If you have only one w3wp.exe process running on the box.
Then Use the below command:
Perfview /NoGui collect “/StopOnPerfCounter=Process:% Processor Time:w3wp>25” -ThreadTime -CircularMB:1000 -CollectMultiple:5 –accepteula
Here 25 is the threshold value which show the CPU consumption by w3wp in %.And also this value can vary.
Example : If you’re seeing 80% to 90% CPU utilization by w3wp.exe then this threshold value would be 80.
- Scenario 2: If we running across multiple w3wp.exe process running on the box.
Then the command will be:
Perfview /NoGui collect “/StopOnPerfCounter=Process:% Processor Time:w3wp# >25″ -ThreadTime -CircularMB:1000 -CollectMultiple:5 –accepteula
So here we are dealing with w3wp# . What is # here? how to get it, let’s see this is below steps.
- Open the Task Manager look for the wp3wp.exe which is consuming high CPU.

- Process ID : 8208 (w3wp)
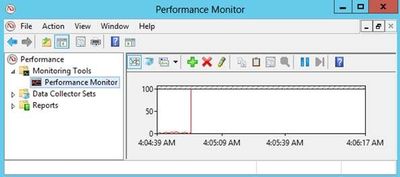
- Start the Perfmon.
- Start >> Run >>CMD >>Perfmon then Enter.
- It will open the below window.

- Choose Process from the print queue. Under that select ID Process.

- Under that select all the instance and search for w3wp in the text box. So you will be getting below window. Now at last click on ADD and then click ok.


- On the below screen, look for the affected wp3wp with same process id. So in this case the wp3wp would be w3wp#2.

So here the w3wp# value would be w3wp#2. And now our command would be like this.
Perfview /NoGui collect “/StopOnPerfCounter=Process:% Processor Time:w3wp#2>75″ -ThreadTime -CircularMB:1000 -CollectMultiple:5 –accepteula
Author: Priyanka Pillai (prpillai)
by Scott Muniz | Jun 30, 2020 | Uncategorized
This article is contributed. See the original author and article here.
We all have been there, we want to set up a new application or agent which needs network access and needs to reach an endpoint using a specific port, but it simply doesn’t work. So as a server admin, we need to have a tool to troubleshoot network connectivity issues on Windows Server to figure out is DNS working, is the remote endpoint even reachable, is the port open, and many other things. Luckily, Windows Server comes with PowerShell and has build-in cmdlets to help with that. My favorite PowerShell cmdlet to troubleshoot network connectivity issues is Test-NetConnection.
The Test-NetConnection cmdlet displays diagnostic information for a connection. It supports ping test, TCP test, route tracing, and route selection diagnostics. Depending on the input parameters, the output can include the DNS lookup results, a list of IP interfaces, IPsec rules, route/source address selection results, and/or confirmation of connection establishment.
You can do simple things, like just testing ping connectivity:
Test-NetConnection itopstalk.com
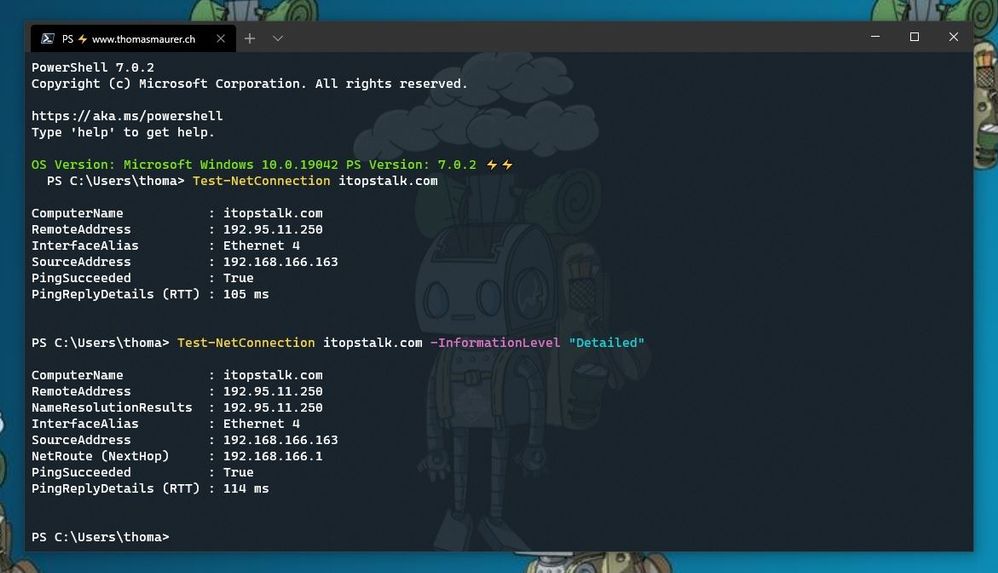
But you can also get some more detailed information on the connectivity:
Test-NetConnection itopstalk.com -InformationLevel "Detailed"
 PowerShell Test-NetConnection cmdlet
However, there is more! One of the commands I need the most, especially when working with web services, is to test a specific TCP port.
Test-NetConnection itopstalk.com -Port 443 -InformationLevel "Detailed"
 Test TCP Port using PowerShell
You can also perform route diagnostics to connect to a remote host.
Test-NetConnection -ComputerName itopstalk.com -DiagnoseRouting -InformationLevel Detailed
 PowerShell Diagnose Routing
If you want to learn more about the Test-NetConnection cmdlet to troubleshoot network connectivity issues, check out Microsoft Docs.
Test-NetConnection is part of Windows PowerShell 5.1 and is available on Windows Server as well as on Windows 10. If you are running PowerShell 7, there is a cross-platform cmdlet called Test-Connection, which provides you with similar capabilities.
I hope this was helpful, and if you have any questions, feel free to leave a comment. What are your favorite PowerShell cmdlets to troubleshoot network connectivity issues?
by Scott Muniz | Jun 30, 2020 | Uncategorized
This article is contributed. See the original author and article here.
We all have been there, we want to set up a new application or agent which needs network access and needs to reach an endpoint using a specific port, but it simply doesn’t work. So as a server admin, we need to have a tool to troubleshoot network connectivity issues on Windows Server to figure out is DNS working, is the remote endpoint even reachable, is the port open, and many other things. Luckily, Windows Server comes with PowerShell and has build-in cmdlets to help with that. My favorite PowerShell cmdlet to troubleshoot network connectivity issues is Test-NetConnection.
The Test-NetConnection cmdlet displays diagnostic information for a connection. It supports ping test, TCP test, route tracing, and route selection diagnostics. Depending on the input parameters, the output can include the DNS lookup results, a list of IP interfaces, IPsec rules, route/source address selection results, and/or confirmation of connection establishment.
You can do simple things, like just testing ping connectivity:
Test-NetConnection itopstalk.com
But you can also get some more detailed information on the connectivity:
Test-NetConnection itopstalk.com -InformationLevel "Detailed"
PowerShell Test-NetConnection cmdlet
However, there is more! One of the commands I need the most, especially when working with web services, is to test a specific TCP port.
Test-NetConnection itopstalk.com -Port 443 -InformationLevel "Detailed"
Test TCP Port using PowerShell
You can also perform route diagnostics to connect to a remote host.
Test-NetConnection -ComputerName itopstalk.com -DiagnoseRouting -InformationLevel Detailed
PowerShell Diagnose Routing
If you want to learn more about the Test-NetConnection cmdlet to troubleshoot network connectivity issues, check out Microsoft Docs.
Test-NetConnection is part of Windows PowerShell 5.1 and is available on Windows Server as well as on Windows 10. If you are running PowerShell 7, there is a cross-platform cmdlet called Test-Connection, which provides you with similar capabilities.
I hope this was helpful, and if you have any questions, feel free to leave a comment. What are your favorite PowerShell cmdlets to troubleshoot network connectivity issues?
by Scott Muniz | Jun 30, 2020 | Azure, Microsoft, Technology, Uncategorized
This article is contributed. See the original author and article here.
Azure APIM – Validate API requests through Client Certificate using Portal, C# code and Http Clients
Client certificates can be used to authenticate API requests made to APIs hosted using Azure APIM service. Detailed instructions for uploading client certificates to the portal can be found documented in the following article – https://docs.microsoft.com/en-us/azure/api-management/api-management-howto-mutual-certificates-for-clients
Steps to authenticate the request –
- Via Azure portal
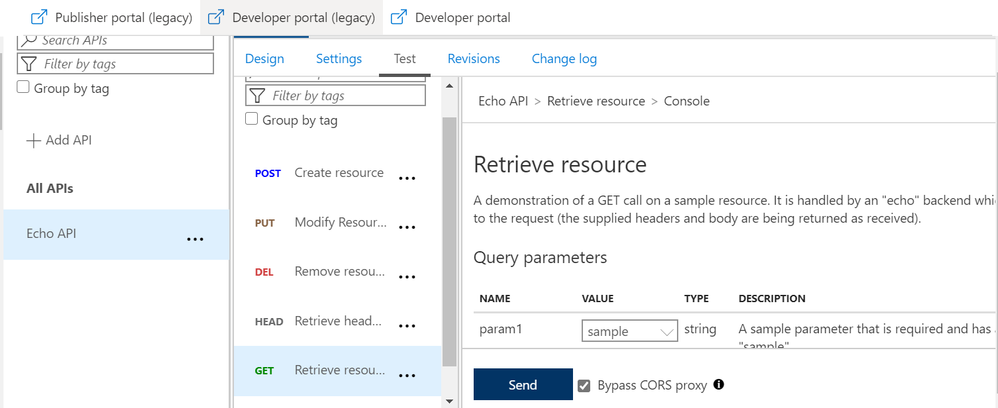
Once we have setup the certificate authentication using the above article, we can test an operation for a sample API (Echo API in this case). Here, we have chosen a GET operation and selected the “Bypass CORS proxy” option.
Once you click on the “Send” option, you would be asked to select the certificate that you would have already installed on your machine.

Note – This is the same certificate that you would have uploaded for your APIM service and added to the trusted list in the certificate store of your workstation.

After successful authentication and request processing, you would receive the 200 OK response code. Upon maneuvering to the trace logs, you can also see the certificate thumbprint that was passed for authentication.


The inbound policy definition used for this setup is as below:
(Kindly update the certificate thumbprint with your client certificate thumbprint)
<choose>
<when condition="@(context.Request.Certificate == null || context.Request.Certificate.Thumbprint != "BF3D644C46099A9D7C073EC002312878B8F9B847")">
<return-response>
<set-status code="403" reason="Invalid client certificate" />
</return-response>
</when>
</choose>
- Through C# or any other language that supports SDKs–
We can use the below sample C# code block to authenticate API calls and perform API operations.
Kindly update the below highlighted values with your custom values before executing the sample code attached below
Client certificate Thumbprint: BF3D644C46099A9D7C073EC002312878B8F9B847
Request URL: https://testapicert.azure-api.net/echo/resource?param1=sample
Ocp-Apim-Subscription-Key: 4916bbaf0ab943d9a61e0b6cc21364d2
Sample C# Code:
using System;
using System.IO;
using System.Net;
using System.Security.Cryptography.X509Certificates;

namespace CallRestAPIWithCert
{
    class Program
    {
        static void Main()
        {
            // EDIT THIS TO MATCH YOUR CLIENT CERTIFICATE: the subject key identifier in hexadecimal.
            string thumbprint = "BF3D644C46099A9D7C073EC002312878B8F9B847";
            X509Store store = new X509Store(StoreName.My, StoreLocation.CurrentUser);
            store.Open(OpenFlags.ReadOnly);
            X509Certificate2Collection certificates = store.Certificates.Find(X509FindType.FindByThumbprint, thumbprint, false);
            X509Certificate2 certificate = certificates[0];
            System.Net.ServicePointManager.SecurityProtocol = SecurityProtocolType.Tls12;
            ServicePointManager.ServerCertificateValidationCallback = new System.Net.Security.RemoteCertificateValidationCallback(AcceptAllCertifications);

            HttpWebRequest req = (HttpWebRequest)WebRequest.Create("https://testapicert.azure-api.net/echo/resource?param1=sample");
            req.ClientCertificates.Add(certificate);
            req.Method = WebRequestMethods.Http.Get;
            req.Headers.Add("Ocp-Apim-Subscription-Key", "4916bbaf0ab943d9a61e0b6cc21364d2");
            req.Headers.Add("Ocp-Apim-Trace", "true");
            Console.WriteLine(Program.CallAPIEmployee(req).ToString());
            Console.WriteLine(certificates[0].ToString());

            Console.Read();

        }

        public static string CallAPIEmployee(HttpWebRequest req)
        {
            var httpResponse = (HttpWebResponse)req.GetResponse();
            using (var streamReader = new StreamReader(httpResponse.GetResponseStream()))
            {
                return streamReader.ReadToEnd();
            }
        }

        public static bool AcceptAllCertifications(object sender, X509Certificate certification, X509Chain chain, System.Net.Security.SslPolicyErrors sslPolicyErrors)
        {
            return true;
        }
    }
}
- Through Postman or any other Http Client
To use client certificate for authentication, the certificate has to be added under PostMan first.
Maneuver to Settings >> Certificates option on PostMan and configure the below values:
Host: testapicert.azure-api.net (## Host name of your Request API)
PFX file: C:UserspraskumaDownloadsabc.pfx (## Upload the same client certificate that was uploaded to APIM instance)
Passphrase: (## Password of the client certificate)

Once the certificate is uploaded on PostMan, you can go ahead and invoke the API operation.
You need to add the Request URL in the address bar and also add the below 2 mandatory headers:
Ocp-Apim-Subscription-Key : 4916bbaf0a43d9a61e0bsssccc21364d2 (##Add your subscription key)
Ocp-Apim-Trace : true
Once updated, you can send the API request and receive a 200 OK response upon successful authentication and request processing.

For detailed trace logs, you can check the value for the output header – Ocp-Apim-Trace-Location and retrieve the trace logs from the generated URL.

by Scott Muniz | Jun 30, 2020 | Uncategorized
This article is contributed. See the original author and article here.
I hope you are doing well, as we all adjust to a different style of work. Three months in and we’re all starting to become a bit more familiar with working from home, or possibly living at work. Microsoft Teams has enabled us all to stay connected, to keep in contact with each other and to continue to collaborate on projects. For many businesses however, there are some systems which don’t work well off the corporate network, if at all. Getting access to those can be challenging now, and impact productivity.
Even before our enforced period of remote working started, making users switch from their collaboration space – Microsoft Teams – and into another system just to find a specific piece of information or action an item, took time and effort. Wouldn’t it be better if those systems could be integrated into Microsoft Teams and form part of the conversation users are already having?
The good news is that this is all possible today! Microsoft Teams has a rich development platform to enable integration with other systems. Whether you are a developer or not, there are things you can do today to bring your line of business applications into Microsoft Teams and make your users more productive.
Tip 1 – PowerShell Cards
This is for the IT Admins, who right now are struggling to keep track of what is running where, what’s stopped working and which legacy line of business applications are critical to keeping the business operational. If you’re one of these people, likely you have PowerShell scripts performing scheduled tasks or responding to events. Using a simple piece of PowerShell code, you can notify yourself and others about progress or errors in Microsoft Teams. By creating a custom connector in Microsoft Teams and then calling the URL provided with a JSON body, you can send well-formatted Cards to a specific Teams channel. This is a 15-minute task which can bring visibility to back-end processes and act as an early-warning system of any problems. Sample code at: bit.ly/cardsfrompowershell
Tip 2 – QnA Maker
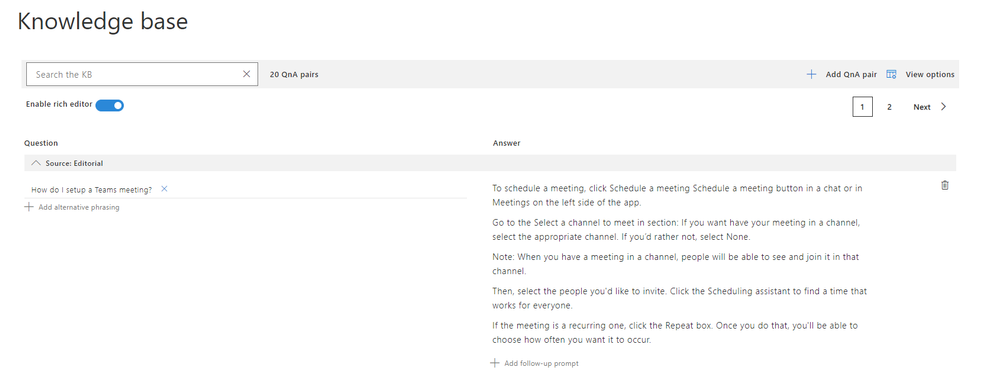
QnA Maker is a no-code way to build simple but powerful QnA bots which can answer user questions. Simply provide information from an existing FAQ document, website, spreadsheet or product manual and QnA Maker will analyse it to create a knowledge base of question-answer pairs. Then, it will apply natural language processing to that knowledge base so that when users ask a question, even if it isn’t worded exactly right, they still get the correct answer. There’s no coding required, and you can be up and running in half a day. Use QnA Maker for policies, protocols, instructions, how-tos and common customer questions. If you want to take it further you can add multi-turn conversations and improve the model by analyzing how it’s used, via the web portal. Find out more at qnamaker.ai.

Tip 3 – Bot Framework Composer
I’m a big fan of the Bot Framework to easily build bots that can then be accessed from multiple places, including Microsoft Teams. Bots make the perfect interface to legacy line of business applications which don’t work on the web or on mobile. With a bot that can enable users to interact with those applications to complete tasks, suddenly your legacy application is securely accessible in Teams, on desktop, web and mobile.
Now, there’s a GUI to make getting started even easier! The Bot Framework Composer enables you to quickly build a custom bot by combining different pieces of functionality together, like building blocks. Whether it’s asking the user for input, calling an API or having the user log on, each block is configurable and let’s you quickly build whatever you need. At any point you can download the code used behind the scenes and make adjustments or integrate into a larger project.
The Bot Framework Composer is an excellent training resource for developers as well because you can see how each block is written to fully understand what’s happening. Or, use it as a design tool for developers and non-developers to collaborate in. Try it for your next Bot Framework project – I guarantee you’ll be impressed. Find out more at: aka.ms/bfcomposer

Tip 4 – Power Virtual Agents
For citizen developers, the Bot Framework Composer might not be the right tool or might require too much of a time investment. If you’re a fan of Power Automate for just getting stuff done (I am), then you’re going to love this. Power Virtual Agents are bots that you build using a guided, no-code interface which can directly execute Power Automate Flows. This makes them perfect for subject matter experts who can build bots without needing developers to help. For the best of both worlds, a Power Virtual Agent bot can use Skills built using Bot Framework, meaning that developers can build composable parts for complex functionality that’s specific to the business, and then SMEs can simply drop them into their bot flow as needed. Find out more at: powervirtualagents.microsoft.com
Tip 5 – App Templates
What if I told you that there existed a collection of production-ready applications for Microsoft Teams which covered common business scenarios and improved productivity and communication. Then, what if I told you that these applications were written by Microsoft, open-sourced, fully documented and freely available? That’s App Templates for Microsoft Teams!
There are over 20 different apps available. Choose from Incident Reporter, Incentives, HR Support, and more. Each app has detailed deployment instructions to install in your Azure tenant. You can deploy them without needing to know anything about how they work by simply following the instructions. If you’re a developer (or just interested) you can also look at the source code, configure and change them, even brand them for your organisation. Whether you use App Templates as proof of concept to understand how users might interact with line of business applications through Teams, as front-end experience for your existing line of business application, or even as a full replacement, they’re an incredibly useful and powerful tool to have. Find out more at: aka.ms/teamsapptemplates

Those are my five tips for how both developers and non-developers together can migrate line of business applications to Microsoft Teams. With these tips you can enhance what Teams means to users in your organisation, by giving them access to data from disparate systems across your estate, right within Teams. Empower your users to be more productive by bringing this data to Microsoft Teams, enabling them to collaborate around it and achieve more.

Recent Comments