by Contributed | Mar 10, 2021 | Technology
This article is contributed. See the original author and article here.
In this installment of the weekly discussion revolving around the latest news and topics on Microsoft 365, hosts – Vesa Juvonen (Microsoft) | @vesajuvonen, Waldek Mastykarz (Microsoft) | @waldekm are joined by Belgium-based Senior Service Engineer from Microsoft – Bert Jansen | @o365bert.
Bert splits his time coaching ISVs and Partners on how to get the most out of their SharePoint Online experience and on PnP Community projects – Modernization and PnP Core SDK. This episode’s discussion focuses on why Partners and ISVs would be interested in Microsoft 365 – the Intelligent file handling platform, on-site migrations – on-prem to cloud – classic to modern, and on modern pages – APIs, Microsoft Graph and PnP Core SDK.
The session was recorded on Monday, March 8, 2021.
Did we miss your article? Please use #PnPWeekly hashtag in the Twitter for letting us know the content which you have created.
As always, if you need help on an issue, want to share a discovery, or just want to say: “Job well done”, please reach out to Vesa, to Waldek or to your Microsoft 365 PnP Community.
Sharing is caring!

by Contributed | Mar 10, 2021 | Technology
This article is contributed. See the original author and article here.
When developing your SPFx components, you usually first run them locally before deploying them (really?).
And then comes the time to work with API such as Microsoft Graph.
If you never use those permissions before in your SPFx projects (and the tenant with which you’re working), you realize that you have to:
- Add required API permissions in your
package-solution.json file
- Bundle / Ship your project
- Publish it
- Go to the SharePoint Admin Center Web API Permissions page
- Approve those permissions
All of this, just to play with the API as you didn’t plan to release your package in a production environment.
So what if you could bypass all these steps for both Graph and owned API?
Warning
This trick is just for development purposes. In Production environment, you should update your package-solution.json file to add required permissions and allow them (or ask for validation) in the API access page.
Prerequisites
- An Office 365 (Dev) Tenant or a Partner Demo Tenant
- The following Azure AD role at least
- Application Administrator
With Graph API
First, we’re going to play with Graph API through the Microsoft Graph Toolkit.
Prepare your sample
Init a SPFx project (WebPart one with React, let’s call it HelloApi), then add the Microsoft Graph Toolkit by executing npm i @microsoft/mgt @microsoft/mgt-react from the project’s root path.
Once done, open your main component file (let’s say here HelloApi.tsx) and add the PeoplePicker component like this:
import * as React from 'react';
import styles from './HelloApi.module.scss';
import { IHelloApiProps } from './IHelloApiProps';
import { escape } from '@microsoft/sp-lodash-subset';
import { PeoplePicker } from '@microsoft/mgt-react';

export default class HelloApi extends React.Component<IHelloApiProps, {}> {
  public render(): React.ReactElement<IHelloApiProps> {
    return (
      <div className={ styles.HelloApi }>
        <div className={ styles.container }>
          <div className={ styles.row }>
            <div className={ styles.column }>
              <span className={ styles.title }>Welcome to SharePoint!</span>
              <p className={ styles.subTitle }>Customize SharePoint experiences using Web Parts.</p>
              <p className={ styles.description }>{escape(this.props.description)}</p>
              <a href="https://aka.ms/spfx" className={ styles.button }>
                <span className={ styles.label }>Learn more</span>
              </a>
            </div>
          </div>
        </div>
        <PeoplePicker />
      </div>
    );
  }
}
Run it in remote workbench
Now run your sample with gulp serve and display your webpart in your remote workbench (https://contoso.sharepoint.com/_layouts/15/workbench.aspx). Try to use the PeoplePicker component: you’ll see that just by clicking on the search box, you’ll get We didn’t find any matches.
Display your developer toolbox (F12) and go to the browser console, you should see the following error:

As you can see, it’s a 403 error, which is well-known when using Graph API endpoints that have not been allowed on the first place.
Add Graph API through UI
From the Azure portal, display the Azure Active Directory (AAD), then select the App Registration menu and select All Applications, then click on SharePoint Online Client Extensibility Web Application Principal. It’s the AAD Application that holds the connection to the API (Microsoft and others) from SharePoint (SPFx or every other development) using the Implicit Flow.
Once here, click on Add a permission, then select Microsoft Graph and add the [People.Read] Graph API delegated permission (you can type the name of the permission in the available search box to get it easily).

Once added, grant it by clicking on Grant admin consent for contoso.
If you go in the API access page (https://contoso-admin.sharepoint.com/_layouts/15/online/AdminHome.aspx#/webApiPermissionManagement), you should see something like this:
 (other Graph API permissions displayed here won’t be necessary for the sample)
Warning
It can take a couple of minutes before consented permissions is effective, so don’t be surprised if it’s not working right away after approval.
Add Graph API through CLI for Microsoft 365
m365 login # Don't execute that command if you're already connected
m365 spo serviceprincipal grant add --resource 'Microsoft Graph' --scope 'People.Read'
Info
Don’t be surprised if by that way, the permission appears in the “Other permissions granted for [your tenant]”: it won’t prevent your SPFx solution to work.
Try again
Now try to use the PeoplePicker component again: you’ll see that with the addition of the Graph API permission, you should be able to use that component!

With custom API
When using a custom API, it’s a little bit more tricky but easy to handle anyway.
You can follow this Microsoft article until the “Deploy the solution” part.
Instead of bundling and shipping, we’ll add the AAD App (called contoso-api-dp20200915 if we follow the mentioned article) created from the Azure Function Authentication part in the SharePoint Service Principal.
Add your AAD Application to the SharePoint Service Principal
Display again the AAD page, then select the App Registration menu, select All Applications and click on SharePoint Online Client Extensibility Web Application Principal. Once here, click on Add a permission, then select the My APIs tab and select the fresh added AAD App created before. Select the user_impersonation permission, then confirm.

Finally, grant this permission by clicking on Grant admin consent for contoso.
If you go again in the API access page, you should see something like this:

Add custom API through CLI for Microsoft 365
m365 login # Don't execute that command if you're already connected
m365 spo serviceprincipal grant add --resource 'contoso-api-dp20200915' --scope 'user_impersonation'
Info
Don’t be surprised if by that way, the permission appears in the “Other permissions granted for [your tenant]”: it won’t prevent your SPFx solution to work.
Warning
If you use an Azure Function as an API and enable Managed Identity for any reason, you better have to rename the linked AAD Application to give it a different name than both your Function and its Managed Identity. Otherwise, the command will try to find a scope on it instead of the AAD App and fail.
Updated sample
To run your custom API from your SPFx component, you can update your sample like below:
IHelloApiProps.ts
import { AadHttpClientFactory } from '@microsoft/sp-http';

export interface IHelloApiProps {
  aadFactory: AadHttpClientFactory;
  description: string;
}
HelloApiWebPart.ts
// ...
export default class HelloApiWebPart extends BaseClientSideWebPart<IHelloApiWebPartProps> {

    // ...

    public render(): void {
        const element: React.ReactElement<IHelloApiProps> = React.createElement(
        HelloGraph,
        {
            description: this.properties.description,
            aadFactory: this.context.aadHttpClientFactory,
        }
        );

        ReactDom.render(element, this.domElement);
    }

  // ...
}
HelloApi.tsx
import * as React from 'react';
import styles from './HelloApi.module.scss';
import { IHelloApiProps } from './IHelloApiProps';
import { AadHttpClient, HttpClientResponse } from '@microsoft/sp-http';

interface IHelloApiState {
  ordersToDisplay: any;
}

export default class HelloApi extends React.Component<IHelloApiProps, IHelloApiState> {

 public constructor(props) {
    super(props);

    this.state = {
    ordersToDisplay: null
    };
 }

 public componentDidMount() {
    this.props.aadFactory
      .getClient('https://contoso-api-dp20191109.azurewebsites.net')
      .then((client: AadHttpClient): void => {
        client
          .get('https://contoso-api-dp20191109.azurewebsites.net/api/Orders', AadHttpClient.configurations.v1)
          .then((response: HttpClientResponse): Promise<any> => {
            return response.json();
          })
          .then((orders: any): void => {
            this.setState({
              ordersToDisplay: orders
            })
          });
      }).catch((err) => {
        console.log(err);
      });
  }

  public render(): React.ReactElement<IHelloApiProps> {
    return (
      <div className={ styles.HelloApi }>
        <div className={ styles.container }>
          <div className={ styles.row }>
            <div className={ styles.column }>
              <span className={ styles.title }>Welcome to SharePoint!</span>
              <p className={ styles.subTitle }>Customize SharePoint experiences using Web Parts.</p>
              <p className={ styles.description }>
               <ul>
                    {this.state.ordersToDisplay &&
                        this.state.ordersToDisplay.map(o => {
                            return <li>{o.rep}: {o.total}</li>
                        })
                    }
                </ul>
              </p>
            </div>
          </div>
        </div>
      </div>
    );
  }
}
Now you can run your sample locally and try it in your hosted workbench, playing with it and updating your WebPart as you want!
… And don’t forget to update your package-solution.json file to include the required APIs before shipping! 
Happy coding!
This article was cross-posted on my blog.
by Contributed | Mar 10, 2021 | Technology
This article is contributed. See the original author and article here.
Are you looking for some deep dive or beginner’s content to learn more about Windows Server? Are you looking to learn more about Hyper-V and Virtualization, file server and storage management, Windows Server high availability, how to use Active Directory, networking, and much more? We now have new learning paths on Microsoft Learn available for you! And it is free!
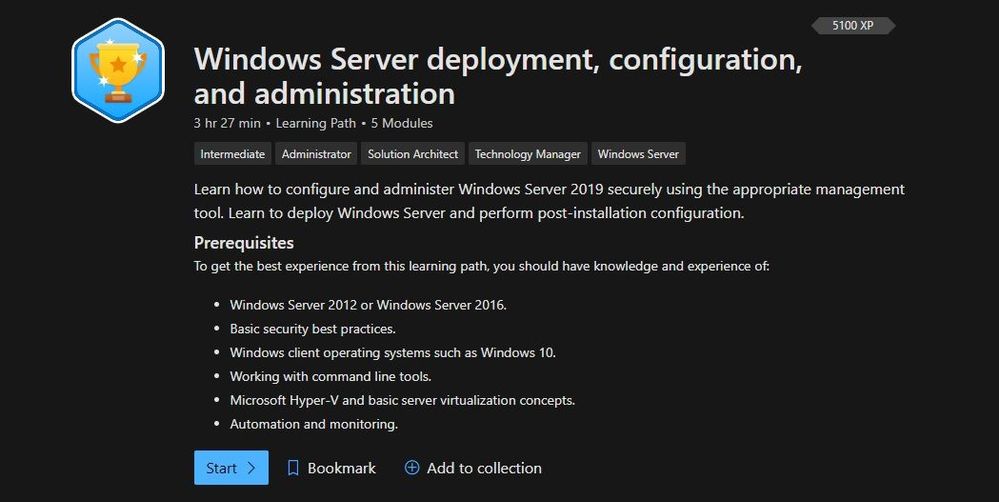
Windows Server deployment, configuration, and administration
Learn how to configure and administer Windows Server 2019 securely using the appropriate management tool. Learn to deploy Windows Server and perform post-installation configuration.
Check out this learning path here.
Windows Server deployment, configuration, and administration
Modules:
Windows Server Hyper-V and Virtualization
Learn to implement and manage Windows Server virtual machines (VMs) and container workloads using Windows Server Hyper-V.
Check out this learning path here.
 Windows Server Hyper-V and Virtualization
Modules:
Windows Server file servers and storage management
Learn to implement and manage Windows Server file servers and storage. Implement Storage Spaces, data deduplication, and Windows Server Storage Replica.
Check out this learning path here.
Modules:
Windows Server high availability
Learn to implement high availability Windows Server virtual machine (VM) workloads with Hyper-V Replica, Windows Server Failover Clustering, and Windows Server File Server high availability.
Check out this learning path here.
Modules:
Active Directory Domain Services
Learn about Active Directory Domain Services fundamentals, and then learn to configure and manage AD DS, Active Directory Certificate Services, and how to manage Group Policy Objects.
Check out this learning path here.
Modules:
Windows Server Network Infrastructure
Learn to implement and manage networking services in Windows Server 2019. Learn to deploy and manage DHCP, secure DNS, and implement IP Address Management (IPAM) and Web Application Proxy.
Check out this learning path here.
 Windows Server Network Infrastructure
Modules:
Conclusion
If you are implementing or managing Windows Server, we want to provide you with the right learning material. And now with the latest Windows Server learning paths on Microsoft Learn, you get exactly that. Let us know what you think, and leave a comment!
by Contributed | Mar 10, 2021 | Technology
This article is contributed. See the original author and article here.
Red Hat Linux Manual Deployment
Note: This document is in support of Microsoft Defender for Endpoint (MDE, formerly MDATP) on Red Hat Enterprise Linux (RHEL)
Disclaimer: This may not work on all versions of Linux.
System requirements:
- Linux server distributions and versions: Red Hat Enterprise Linux 7.2 or higher.
- The fanotify kernel option must be enabled.
Instructions to Prepare for MDE/MDATP Installation:
1. Connect to the RedHat server using Putty.
2. Install yum-utils if it isn’t already installed:
sudo yum install yum-utils
[azureuser@redhat ~]$ sudo yum install yum-utils
3. Install the RedHat MDATP Channel.
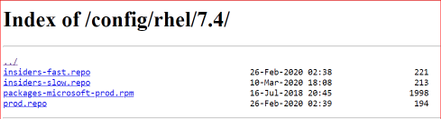
From a web browser go to https://packages.microsoft.com/config/ to select your OS, version, and channel.
4. I have RedHat Version 7.9 and chose the production channel 7.4 which is the highest version without going to the next major version. Copy the link with prod.repo to be included in the next step. For example: https://packages.microsoft.com/config/rhel/7.4/prod.repo
5. Install the Package.
sudo yum-config-manager –add-repo=https://packages.microsoft.com/config/rhel/7.4/prod.repo
[azureuser@redhat ~]$ sudo yum-config-manager –add– repo=https://packages.microsoft.com/config/rhel/7.4/prod.repo
Loaded plugins: langpacks, product-id
adding repo from: https://packages.microsoft.com/config/rhel/7.4/prod.repo
grabbing file https://packages.microsoft.com/config/rhel/7.4/prod.repo to /etc/yum.repos.d/prod.repo
repo saved to /etc/yum.repos.d/prod.repo
[azureuser@redhat ~]$
6. Install the Microsoft GPG public key:
sudo rpm –import http://packages.microsoft.com/keys/microsoft.asc
[azureuser@redhat ~]$ sudo rpm –import http://packages.microsoft.com/keys/microsoft.asc
[azureuser@redhat ~]$
7. Make all the metadata usable for the currently enabled yum repositories:
yum makecache
[azureuser@redhat ~]$ yum makecache
Loaded plugins: langpacks, product-id, search-disabled-repos
(1/5): packages-microsoft-com-prod/primary_db 118 kB 00:00:00
(2/5): packages-microsoft-com-prod/other_db 7.2 kB 00:00:00
(3/5): packages-microsoft-com-prod/filelists_db 341 kB 00:00:00
(4/5): rhui-microsoft-azure-rhel7/filelists 372 B 00:00:00
(5/5): rhui-microsoft-azure-rhel7/other 254 B 00:00:00
rhui-microsoft-azure-rhel7 1/1
rhui-microsoft-azure-rhel7 1/1
rhui-microsoft-azure-rhel7 1/1
Metadata Cache Created
[azureuser@redhat ~]$
Install MDE/MDATP Application:
- Run install command
sudo yum install mdatp
[azureuser@redhat ~]$ sudo yum install mdatp
Loaded plugins: langpacks, product-id, search-disabled-repos
packages-microsoft-com-prod | 3.0 kB 00:00:00
packages-microsoft-com-prod/primary_db 118 kB 00:00:00
Resolving Dependencies
–> Running transaction check
—> Package mdatp.x86_64 0:101.18.53-1 will be installed
–> Processing Dependency: libatomic for package: mdatp-101.18.53-1.x86_64
–> Running transaction check
—> Package libatomic.x86_64 0:4.8.5-44.el7 will be installed
–> Finished Dependency Resolution
Dependencies Resolved
========================================================================
Package Repository Arch Size Version
Installing:
mdatp x86_64 42 M 101.18.53-1 packages-microsoft-com-prod
Installing for dependencies:
libatomic x86_64 51 k 4.8.5-44.el7 rhui-rhel-7-server-rhui-rpms
Transaction Summary
Install 1 Package (+1 Dependent package)
Total download size: 42 M
Installed size: 145 M
Is this ok [y/d/N]: y
Downloading packages:
(1/2): libatomic-4.8.5-44.el7.x86_64.rpm | 51 kB 00:00:00
(2/2): mdatp_101.18.53.x86_64.rpm | 42 MB 00:00:01
——————————————————————————————————————————————
Total 32 MB/s | 42 MB 00:00:01
Running transaction check
Running transaction test
Transaction test succeeded
Running transaction
Installing : libatomic-4.8.5-44.el7.x86_64 1/2
Installing : mdatp-101.18.53-1.x86_64 2/2
Verifying : libatomic-4.8.5-44.el7.x86_64 1/2
Verifying : mdatp-101.18.53-1.x86_64 2/2
rhui-rhel-7-server-dotnet-rhui-rpms/x86_64/productid | 2.1 kB 00:00:00
rhui-rhel-7-server-rhui-extras-rpms/x86_64/productid | 2.1 kB 00:00:00
rhui-rhel-7-server-rhui-rpms/7Server/x86_64/productid | 2.1 kB 00:00:00
rhui-rhel-7-server-rhui-supplementary-rpms/7Server/x86_64/productid | 2.1 kB 00:00:00
rhui-rhel-server-rhui-rhscl-7-rpms/7Server/x86_64/productid | 2.1 kB 00:00:00
Installed:
mdatp.x86_64 0:101.18.53-1
Dependency Installed:
libatomic.x86_64 0:4.8.5-44.el7
Complete!
[azureuser@redhat ~]$
2. List all repositories. Make sure the ones in red are in the repository if you chose prod.repo (production).
yum repolist
[azureuser@redhat ~]$ yum repolist
Loaded plugins: langpacks, product-id, search-disabled-repos
repo name status
packages-microsoft-com-prod packages-microsoft-com-prod 89
[azureuser@redhat ~]$
3. Install the package from the production repository:
sudo yum —enablerepo=packages-microsoft-com-prod install mdatp
[azureuser@redhat ~]$ sudo yum –enablerepo=packages-microsoft-com-prod install mdatp
Loaded plugins: langpacks, product-id, search-disabled-repos
Package mdatp-101.18.53-1.x86_64 already installed and latest version
Nothing to do
[azureuser@redhat ~]$
Download the onboarding package & onboard
Download the onboarding package from Microsoft Defender Security Center from your Workstation:
- In Microsoft Defender Security Center, go to Settings > Device Management > Onboarding.
- In the first drop-down menu, select Linux Server as the operating system. In the second drop-down menu, select Local Script (for up to 10 devices) as the deployment method.
- Select Download onboarding package. Save the file as WindowsDefenderATPOnboardingPackage.zip to your workstation.
From the workstation copy WindowsDefenderATPOnboardingPackage.zip from the workstation to RHEL. Putty must be installed. Here we are using a key to log in and copy the file.
C:>pscp.exe -P 22 -i C:UsersazureuserDownloadsredhat_key.ppk C:usersAzureuserWindowsDefenderATPOnboardingPackage.zip azureuser@ipaddressoflinuxserver:/home/azureuser
WindowsDefenderATPOnboard | 5 kB | 5.6 kB/s | ETA: 00:00:00 | 100%
Connect back to Linux (putty)
[azureuser@redhat ~]$ cd ..
[azureuser@redhat home]$ cd azureuser/
[azureuser@redhat ~]$ ls
WindowsDefenderATPOnboardingPackage.zip
4. Unzip WindowsDefenderATPOnboardingPackage.zip
[azureuser@redhat ~]$ unzip WindowsDefenderATPOnboardingPackage.zip
Archive: WindowsDefenderATPOnboardingPackage.zip
inflating: MicrosoftDefenderATPOnboardingLinuxServer.py
[azureuser@redhat ~]$
5. Check the health of MDATP which should say no license found:
mdatp health –field org_id
[azureuser@redhat ~]$ mdatp health –field org_id
ATTENTION: No license found. Contact your administrator for help.
unavailable
[azureuser@redhat ~]$
6. Run Onboarding script:
MicrosoftDefenderATPOnboardingLinuxServer.py
[azureuser@redhat ~]$ sudo python MicrosoftDefenderATPOnboardingLinuxServer.py
Generating /etc/opt/microsoft/mdatp/mdatp_onboard.json …
[azureuser@redhat ~]$
7. Check the health of MDATP: mdatp health –field org_id
[azureuser@redhat ~]$ mdatp health –field org_id
“5447sdf90-2220-4161-82f7-0dgs2f39h8329-125fd412″
8. Check the MDATP Azure console:


by Contributed | Mar 10, 2021 | Technology
This article is contributed. See the original author and article here.
The SharePoint PnP Community monthly call is our general monthly review of the latest SharePoint and Microsoft 365 PnP topics (news, tools, extensions, features, capabilities, content and training), engineering priorities and community recognition for Developers, IT Pros and Makers. This monthly community call happens on the second Tuesday of each month. You can download recurrent invite from https://aka.ms/sp-call.
Call Summary:
If you’re looking at this blog post, then you are at the new Microsoft 365 PnP Community hub at Microsoft Tech Communities! Please take a moment to look around. The Microsoft 365 Update – Community (PnP) | March 2021is available. In this call, the Top 10 developer and non-developer entries in UserVoice are reviewed and top engineering priorities identified.
Your votes do influence engineering priorities. You are invited to attend the growing list of Sharing is Caring events. Register today. In Episode 117 of PnP Weekly tools and approaches for simplifying the move from Classic to Modern, on-prem to cloud were discussed. Why Modern? Well, one reason – Viva capabilities like the one that will be demonstrated today are available only in Modern. Testing of SPFx v1.12 is on the final stretch. Release expected any day.
Thank you to the 200 + active contributors and organizations actively participating in this PnP Community during February. You are truly amazing. The host of this call was Vesa Juvonen (Microsoft) @vesajuvonen. Q&A took place in the chat throughout the call.
Demo: Getting started with Microsoft Viva Topics – system and tools to help customers manage knowledge within their organizations through a conscious AI assisted strategy of connecting people and actionable knowledge. Content is ultimately rendered through the Topic web part. Topics along with aligned content and SMEs are initially discovered through AI algorithms, then confirmed and curated by humans. Topics draws on capabilities from across Microsoft and can be extended by you.
Actions:
- Register for Sharing is Caring Events
- First Time Contributor Session – March 22nd (EMEA, APAC & US friendly times available)
- Community Docs Session – March
- PnP – SPFx Developer Workstation Setup – March 10th
- PnP SPFx Samples – Solving SPFx version differences using Node Version Manager – March 11th
- PnP – AMA (Ask Me Anything) – SPFx Samples Edition – March 9th
- First Time Presenter – March 24th
- More than Code with VSCode – March 23rd
- Maturity Model Practitioners – March 16th
- PnP Office Hours – 1:1 session – Register
- Download the recurrent invite for this call – https://aka.ms/sp-call.
You can check the latest updates in the monthly summary and at aka.ms/spdev-blog.
This call was delivered on Tuesday, March 9, 2021. The call agenda is reflected below with direct links to specific sections. You can jump directly to a specific topic by clicking on the topic’s timestamp which will redirect your browser to that topic in the recording published on the Microsoft 365 Community YouTube Channel.
Call Agenda:
- UserVoice status for non-dev focused SharePoint entries – 4:10
- UserVoice status for dev focused SharePoint Framework entries – 5:08
- SharePoint community update with latest news and roadmap – 8:57
- Community contributors and companies which have been involved in the past month – 10:40
- Demo: Getting started with Microsoft Viva Topics – Naomi Moneypenny (Microsoft) | @nmoneypenny – 14:26
The full recording of this session is available from Microsoft 365 & SharePoint Community YouTube channel – http://aka.ms/m365pnp-videos.
- Presentation slides used in this community call are found at OneDrive.
Resources:
Additional resources on covered topics and discussions.
Additional Resources:
Upcoming calls | Recurrent invites:
“Too many links, can’t remember” – not a problem… just one URL is enough for all Microsoft 365 community topics – http://aka.ms/m365pnp.
“Sharing is caring”
SharePoint Team, Microsoft – 10th of March 2021

Recent Comments