Configure a simple Azure Batch Job with Azure Data Factory

Configure a simple Azure Batch Job with Azure Data Factory

This article is contributed. See the original author and article here.

Azure Batch:


You can use Batch to run large-scale parallel and high-performance computing (HPC) applications efficiently in the cloud. It’s a platform service that schedules compute-intensive work to run on a managed collection of virtual machines (VMs). It can automatically scale compute resources to meet the needs of your jobs.


With the Batch service, you define Azure compute resources to execute your applications in parallel, and at scale. You can run on-demand or scheduled jobs. You don’t need to manually create, configure, and manage an HPC cluster, individual VMs, virtual networks, or a complex job and task-scheduling infrastructure.


Azure Data Factory:


Data Factory is a cloud-based data integration service that orchestrates and automates the movement and transformation of data. You can use Data Factory to create managed data pipelines that move data from on-premises and cloud data stores to a centralized data store. An example is Azure Blob storage. You can use Data Factory to process/transform data by using services such as Azure HDInsight and Azure Machine Learning. You also can schedule data pipelines to run in a scheduled manner (for example, hourly, daily, and weekly). You can monitor and manage the pipelines at a glance to identify issues and take action.


Configure Batch job with ADF:


In this article, we will be looking into the steps involved in configuring a simple batch job with Azure data factory using the Azure portal.


We will be using an *.exe file and execute it in Azure data factory pipeline using Azure Batch.
This example does not require any additional tools or application to be pre-installed for the execution.


Create a Batch account:


  1. In the Azure portal, select Create a resource > Compute > Batch Service.

  2. In the Resource group field, select Create new and enter a name for your resource group.

  3. Enter a value for Account name. This name must be unique within the Azure Location selected. It can contain only lowercase letters and numbers, and it must be between 3-24 characters.

  4. Under Storage account, select an existing storage account or create a new one.

  5. Do not change any other settings. Select Review + create, then select Create to create the Batch account.


When the Deployment succeeded message appears, go to the Batch account that you created.
Public documentation for creating a Batch account.


Create a Pool with compute nodes:


  1. In the Batch account, select Pools > Add.

  2. Enter a Pool ID called mypool.

  3. In Operating System, select the following settings (you can explore other options).


Setting


Value


Image Type


Marketplace


Publisher


microsoftwindowsserver


Offer


windowsserver


Sku


2019-datacenter-core-smalldisk


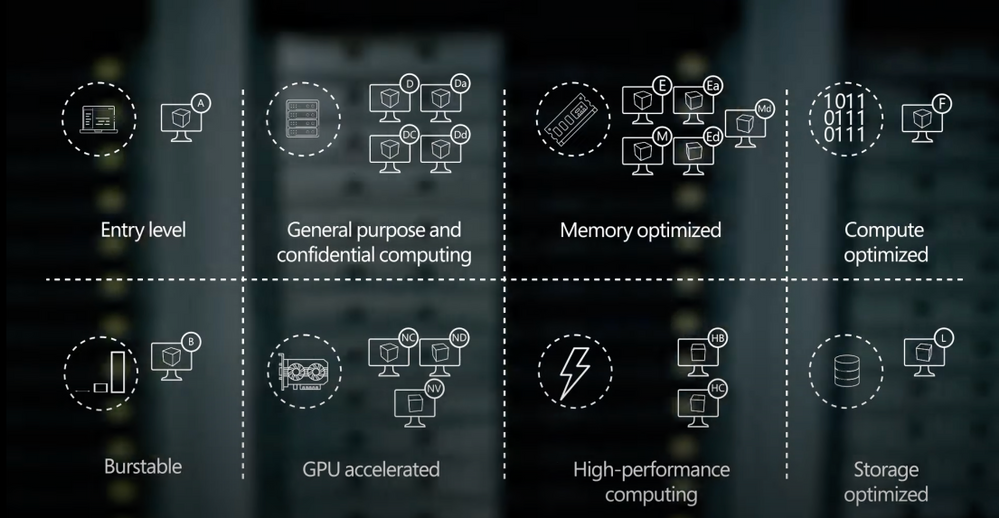
  1. Scroll down to enter Node Size and Scale settings. The suggested node size offers a good balance of performance versus cost for this quick example.


Setting


Value


Node pricing tier


Standard A1


Target dedicated nodes


2


  1. Keep the defaults for remaining settings, and select OK to create the pool.


Batch creates the pool immediately, but it takes a few minutes to allocate and start the compute nodes. During this time, the pool’s Allocation state is Resizing. You can go ahead and create a job and tasks while the pool is resizing.


After a few minutes, the allocation state changes to Steady, and the nodes start. To check the state of the nodes, select the pool and then select Nodes. When a  node’s state is Idle, it is ready to run tasks.


Public documentation for creating a Batch pool.


Create Azure Data Factory:


  1. Go to the Azure portal.

  2. From the Azure portal menu, select Create a resource.

  3. Select Integration, and then select Data Factory.

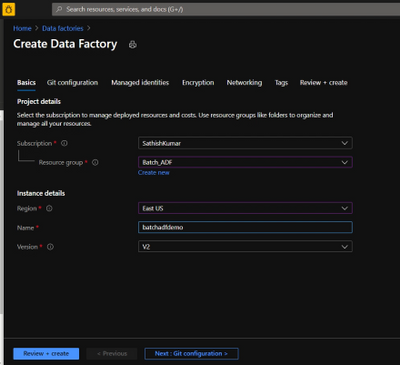
  4. On the Create Data Factory page, under Basics tab, select your Azure Subscription in which you want to create the data factory.

  5. For Resource Group, take one of the following steps:

    1. Select an existing resource group from the drop-down list.

    2. Select Create new, and enter the name of a new resource group.


  6. For region, select the same region as the Batch account to avoid additional charges due to communication between different datacenters.

  7. For Name, provide a name for your ADF and kindly note that the name must be universally unique.
    sathishkumartlb_19-1617873894913.png


  8. For version, select v2.

  9. Select Next: Git configuration, and then select Configure Git later check box.

  10. Select Review + create and select Create after the validation is passed. After the creation is complete, select Go to resource to navigate to the Data Factory page.

  11. Below is an example of how a Azure Data Factory overview page looks like.
    sathishkumartlb_20-1617873894931.png


  12. Now click on ‘Author & Monitor’ to open the ADF workspace.

  13. Before the next step, download the helloworld.exe file from the here and upload it to one of the containers in your storage account which is being used with the Batch account.


Public documentation for creation of Azure Data Factory.


Configure a pipeline in ADF:


  1. In the left-hand side options, click on ‘Author’.

  2. Now click on the ‘+’ icon next to the ‘Filter resource by name’ and select ‘Pipeline’.


sathishkumartlb_2-1617872494914.png


  1. Now select ‘Batch Services’ under the ‘Activities’.


sathishkumartlb_3-1617872494936.png


  1. Change the name of the pipeline to the desired one.

  2. Drag and drop the custom activity in the work area.


sathishkumartlb_4-1617872494961.png


  1. Under the General section, enter a Name.

  2. Next, select Azure Batch and select the existing Azure Batch Linked Service or create a new one.

  3. To create an Azure Batch Linked Service, click on the + New. Enter the details as provided in the below screenshot.


sathishkumartlb_5-1617872494972.png


  1. Create a Storage Linked service name too, by selecting the + New in the dropdown.

  2. Enter the required details to create a storage linked service name, test the connection to check if it succeeds and click on create.


sathishkumartlb_6-1617872494984.png


  1. Now, select the storage linked service name in the Azure Batch linked service and click on create.

  2.  Next, click on settings and enter the command you want to execute (in this example, we will execute a simple helloworld.exe file which will print ‘Hello World’).

  3. So, in the command line type ‘(filename).exe’


sathishkumartlb_7-1617872495012.png


  1. Select the storage account linked service which we created, under the Resource Linked service.

  2. Under the Folder path, select the location of the container where the ‘helloworld.exe’ file is present by clicking on Browse storage.


sathishkumartlb_8-1617872495057.png


  1. Then click on Validate to check for any errors in the configuration.

  2. Finally, click on Debug to run the pipeline while will create a job in the Azure batch pool and execute the command line as a task.


Note: We are currently checking the pipeline without publishing it. So once the pipeline succeeds make sure to click on Publish All else all these configuration will be lost.


Check the Job status in Azure Batch:


  1. Navigate to the corresponding Batch account and click on Jobs.

  2. Click on the recently created Job and open the task which had run under it.

  3. Check for the successful Job completion by opening the stdout.txt file which will contain the output.


sathishkumartlb_9-1617872495097.png


  1. The output is displayed in the stdout.txt file for us.


sathishkumartlb_10-1617872495134.png


  1. We have now configured a simple Batch job using ADF pipeline and verified the output successfully.


Thank you for following the steps, I hope the blog was useful and kindly provide any comments based on your view or if any additional information needs to be included.


You can also try out a different execution of Azure batch with Azure Data Factory using a python script file.

Ultra Disk Storage for HPC and GPU VMs

This article is contributed. See the original author and article here.

Ultra Disk Storage is now generally available for the HPC and GPU VM sizes.


Ultra Disks


Ultra Disks are the highest performance tier of Azure managed disks for data-intensive workloads. They deliver high throughput and IOPS, and consistent low latency disk storage. Customers can dynamically change the performance of the disks without the need to restart your virtual machines (VM).


For HPC/AI workloads, the Ultra Disks can be used as a higher performance tier to Premium Disks for remote storage scenarios (NFS pools, parallel file systems, etc.)


Considerations for Ultra Disks vis-a-vis Premium Disks


Note that the availability of Ultra Disks by region/AZ/SKU is different (and restrictive today) from that of Premium Disks. Even though a VM size is supported, the support is different per region/zone.


HPC and GPU VM SKUs with Ultra Disks


In addition to the support for Premium Disks, the Ultra Disks can now also be attached to the following H* and N* VM sizes (depending on region/zone as outlined above):


  • HPC: HBv2, HB, HC


    • Currently HBv3 is not co-located with Ultra Disk. So as an example, Ultra Disk cannot be attached to an HBv3 VM in any region where HBv3 is live today.


  • GPU: NDv4, NDv2, ND, NC_T4_v3, NCv3, NCv2, NVv4, NVv3


Performance


The table below demonstrated averaged bandwidth, IOPS and latency numbers on some of the HPC and GPU SKUs. These are obtained obtained using fio.


  • The biggest improvement from Ultra Disks on the H*/N* VMs is to latencies that are now sub-millisecond (10x lower than Premium Disks).

  • For most scenarios, the VM limits are the bottleneck with Ultra Disks and the disk limits becomes the bottleneck with Premium Disks. The suspected VM limits are anticipated to be increased in the coming weeks.

    • VM limits are pre-assigned limits for managed disk performance to each VM size.


  • HBv2 and HC obtain max write bandwidth with Ultra Disk. For many other SKUs, However the bandwidth obtained with an Ultra Disk is similar to what is obtained with Premium Disk.

  • A single Ultra Disk can hit the , hence removing the need for striping multiple disks and making disk management easier.

    • The IOPS obtained with a single Ultra Disk is 2.5-4x of a single Premium Disk.

    • Note the results obtained below are using both the Disks at the highest performance tiers


VM SKU Premium (20000 GB) Ultra (1024 GB)
Spec: BW 900 MBps, 20K IOPS Spec: BW 2000 MBps, 160K IOPS
BW (MBps) IOPS (K) Latency (ms) BW (MBps) IOPS (K) Latency (ms)
HC44 876 (R, W) 20 2.495 700 (R), 1944 (W) 64 0.215
HB120_v2 876 (R, W) 18 2.422 840 (R), 1946 (W) 30 0.235
NV48_v3 880 (R, W) 20 1.51 1172 (R, W) 80 0.339
NV32_v4 703 (R, W) 20 2.258 703 (R, W) 49 0.242
NDv2 876 (R, W) 20 2.207 710 (R), 1173 (W) 78 0.216
NC64_T4_v3 704 (R, W) 20 2.149 704 (R, W) 49 0.254


Impact of Accelerated Networking


None. AccelNet does not improve Managed Disks performance. Exceptions maybe corner cases of the VMs doing heavy VM-VM network traffic over the Ethernet interface while doing VM-Managed Disk traffic at the same time.


Resources


Microsoft Project15 & University of Oxford Capstone Project with Elephant Listening Project Team 4

Microsoft Project15 & University of Oxford Capstone Project with Elephant Listening Project Team 4

This article is contributed. See the original author and article here.

Oxford’s AI Group 4 Project 15 Writeup


Who are we?


Abishekh.jpg


Bas.jpg


Chandan.jpg


Abhishekh  Baskaran


Bas Geerdink


Chandan Konuri


Henrietta.jpg


Jay.jpg


Paulo.jpg


Henrietta  Ridley


Jay Padmanabhan


Paulo Campos


Vishweshwar.jpg


Vishweshwar Manthani


Goal


The goal of the project was to count the number of elephants in a sound file.


team4spec.jpg


To do so, we detected whether rumbles are belonging to the same elephant or not


Literature


  • Poole, Joyce H. (1999). Signals and assessment in African elephants: evidence from playback experiments. Animal Behaviour, 58(1), 185-193

  • Jarne, Cecilia (2019). A method for estimation of fundamental frequency for tonal sounds inspired on bird song studies. MethodX, 6, 124-131

  • Stoeger, Angela S. et al (2012). Visualizing Sound Emission of Elephant Vocalizations: Evidence for Two Rumble Production Types.

  • O’Connell-Rodwell, C.E. et al (2000). Seismic properties of Asian elephant (Elephas maximus) vocalizations and locomotion. Journal of the Acoustic Society of America, 108(6), 3066-3072

  • Heffner, R. S., & Heffner, H. E. (1982). Hearing in the elephant (Elephas maximus): Absolute sensitivity, frequency discrimination, and sound localization. Journal of Comparative and Physiological Psychology, 96(6), 926–944

  • Elephant Listening Project, Cornell University: https://elephantlisteningproject.org/

  • Project 15, Microsoft: https://microsoft.github.io/project15/ 


Introduction


  • Sound files can be analysed by transforming them into a 2D image: a spectrogram of time (seconds) vs frequency (Hertz). The third dimension is sound intensity (decibel), which can be shown as a colour or grayscale.

  • Elephants produce rumbles to communicate with a typical frequency of 10 – 50 Hz and lasting 2 – 6 seconds

  • One elephant rumble will have many harmonics, which are sound waves of increasing frequency.

  • An elephant can be identified by its base frequency. If there are two slightly overlapping or separated rumbles with a different base frequency, they probably belong to separate animals.


Data


We received a set of sounds files (.wav) and metadata that pointed us to the segments where elephants were likely to produce rumbles.


Challenges:


  • Big data set

  • Joining the files might be a challenge

  • Labels / annotations don’t mention the number of elephants


team4cornell.png


team4data.png


Data Pipeline


  1. Segmenting data: based the metadata files, we create segments of a few seconds that contain the interesting information

  2. Spectrograms: each data segment is transformed into a 2D image of time vs frequency (10-50 Hz), using FFT transformation algorithm, lowpass/highpass filters, and frequency filters

  3. Noise reduction: each spectrogram is reduced of noise and transformed into a simple monochrome (black and white) image

  4. Contours detection: each monochrome image is evaluated with a contour detection algorithm, to distinguish the separate ‘objects’ which in our case are the elephant rumbles

  5. Boxing: for each contour (potential elephant rumble) we calculate the size (height and width) by drawing a box around the contour

  6. Counting: we compare the boxes that identify the rumbles to each other in each spectrogram. Based on a few business rules, we count the number of unique elephant rumbles in each image


Samples


team4samples.JPG


team4samples2.JPG


Source Code


  • The source code is made available at: https://github.com/AI-Cloud-and-Edge-Implementations/Project15-G4 

  • All code is written in Python and runs on premise or in the cloud (Azure)

  • We used the following frameworks to process and analyze the data:

    • boto3 for connecting to Amazon AWS

    • Numpy, Pandas, SciPy and MatPlotLib for statistical analysis and visualization

    • Librosa for FFT

    • noisereduce for noice reduction

    • SoundFile

    • OpenCV for contour detection


  • Explanatory video can be found at: 


Results


  • We analysed 3935 elephant sounds:

    • 112 spectrograms were identified as containing 0 elephants

    • 3277 spectrograms were identified as containing 1 elephant

    • 505 spectrograms were identified as containing 2 elephants

    • 40 spectrograms were identified as containing 3 elephants


Results of the Boxing algorithm


  • The boxing algorithm was evaluated by Liz Rowland of Cornell University

  • The reported accuracy of the model is:

    • 97.29 % for the Training dataset (3180 cases)

    • 99.29 % for the Testing dataset (758 cases)

    • This proves that the model is useful for counting elephants


  • In combination with other models (elephant detection), many interesting use case can be built with this model, for example visualizing elephant movements and detecting poaching


Project 15 Architecture


p15open.png


team4arch.jpg


Building ML Models


  • Aim
     
    Using the processed spectrogram data as an input to a CNN to automatically categorise how many elephants are present

  • Why are we doing this? 

    • To enable automation the workflow end to end

    • To improve accuracy by reducing human error

    • To save time, enabling researchers to focus their attention on complex problems


  • Our Approach
     
    Transfer learning looks to take advantage of models which have been pre-trained on large datasets, then fine tuning to our specific problem. This approach is becoming very popular for several reasons (quicker time to train, better performance, not needing lots of data) and we found it to work well. 


Model Summary


  • Implemented using keras with a tensorflow backend. 

  • To evaluate the performance of our models we looked at the following measures of our two most promising architectures:


  • Resnet50

  • accuracy: 0.9620

  • loss: 0.1622


  • VGGNet


  • accuracy: 0.9477


  • loss: 0.3252


modelsummary.JPG


Model – Resnet50


  • Below configuration was found to be optimal while running the classification task on Resnet50

    • Epochs: 25

    • Batch Size: 100

    • Weights = “imagenet”

    • Intermediate dense layers: 

      • Nodes: 4 layers of 256,128,64 respectively

      • activation = ‘relu’

      • Dropout = 0.5

      • BatchNormalization()


    • Final dense layer:

      • Nodes: 3 

      • activation = ‘softmax’


    • Optimizer: Adam with a learning rate of 0.001


Introduction


Sound files


Further Research


  • Machine learning on spectrograms using labelled data 

  • Automatic classification and better acoustic analysis (https://journals.plos.org/plosone/article?id=10.1371/journal.pone.0048907)

  • Further fine-tuning of the boxing algorithm might lead to even better results, e.g.

    • Fixing the time axis in the spectrograms

    • Increasing the frequency range

    • Other (better) noise reduction techniques


Conclusions


  • Elephant counting based on base frequency analysis is possible

  • The team delivered a ready-to-use software library for counting elephants that with a high accuracy (97% on selected cases)

  • The software can be used in the IoT Hub (Project 15) or on-premise

  • The application can be integrated into other software

  • A machine learning model (VGG or Resnet50) could be used to count the elephants instead of the rule-based boxing algorithm

  • Further research is needed to improve the results, for example for broadening to other species


Thanks


  • Many thanks to all people who helped with the project, by providing insights, performing reviews, and participating in meetings:

    • Peter Wrege (Cornell University)

    • Liz Rowland (Cornell University)

    • Lee Stott (Microsoft)

    • Sarah Maston (Microsoft)

    • Thanks to the organizers of the “Artificial Intelligence – Cloud and Edge Implementations” course:

    • Ajit Jaokar (University of Oxford)

    • Peter Holland (University of Oxford)


What’s new for Yammer in April 2021

What’s new for Yammer in April 2021

This article is contributed. See the original author and article here.

The seasons are changing and we have a lot of news to share! This blog will cover what we’ve recently shipped and what’s coming in the next few weeks. You can also find recent updates for Yammer from Microsoft Ignite in this session on-demand.


New Yammer as default experience


The new Yammer is generally available, and starting next week, all users on web will default to the new Yammer experience. Check out our new Yammer resources for tips and a guide what’s changed. But don’t worry, users will still be able to use the slider to toggle back to the Yammer classic experience.


https://www.youtube-nocookie.com/embed/EgKC34sZbRM


New design for Yammer Discovery and Digest emails


We’re updating the design and making content enhancements to the Discovery and Digest emails in Yammer to align with the new Yammer styling and UX. Coming soon. 


Updated Yammer Email.png


Essential Announcements


This feature allows Yammer community admins to achieve a guaranteed distribution of important community announcements via email for all members of that community, even if its outside of their preferred notification settings. 


essential announcments in Yammer.png


SharePoint News in the Yammer Home Feed


Spark conversations and share company news directly from SharePoint to the Yammer home feed. This is now available on iOS and Android mobile experiences and coming soon to the web.


SharePoint news in Yammer.png


New Yammer Desktop Experience (PWA)


You can now install the web version of Yammer as a progressive web app (PWA) in Microsoft Edge, Google Chrome, or Mozilla Firefox. After you install the web version of Yammer as a progressive web app, it will work like any stand-alone desktop experience. You can pin and launch the app from your computer’s home screen or task bar, and you can opt in to receive notifications for relevant announcements and messages from Yammer.


New Yammer Desktop Experience.png


Suggested Communities


This new section on the right rail of the Yammer homepage will suggest relevant communities for people discover and join. This is rolling out now.


Suggested Yammer Communities.png


New Yammer Insights now available


Improve your live events viewership. Monitor attendance, measure engagement, and recognize trends.


Conversation insights – See which conversations perform best. New insights into impressions, total views, click-through rate, and a breakdown of reactions.


Yammer Conversation Insights.png


Live event insights – Improve your live events viewership. Monitor attendance, which segments had the greatest viewership, and see where those views are coming from, all geared to help you optimize your current and future events. Learn more on our announcement blog.


Yammer live events insights.png


New Embed widget options


Allowing you to easily create and customize embeddable Yammer feeds to place on your own sites.


Yammer Embed Widget1.png


This is coming soon to preview. We are now collecting sign-ups for interest, sign up here.


Azure B2B Guest Access GA


External collaboration is a key ingredient for the success of any organization. Yammer guests allow you to call in experts, such as consultants or vendors, from outside your organization. Users can invite guests to a community and quickly start a rich conversation by sharing access to community resources like files while ensuring that privacy, access, governance and compliance policies remain intact. Now, Guest Access with Azure B2B is generally available.


-	Communities with external members are denoted by a globe icon.– Communities with external members are denoted by a globe icon.


Cross-geo external collaboration for External Networks for the EU


With this release, guests from Yammer networks associated located in the European Union can be invited to Yammer External Networks hosted by a Yammer network located in the United States.


Retention policies in Yammer


This update enables organizations to apply retention policies on Yammer messages.


apply retention policies on Yammer messages.jpg


Additional updates


Here are a few other changes planned that you’ll be seeing in your Yammer network soon:


  • New file views: Browse community files stored in SharePoint with SharePoint library structure and capabilities. You’ll also get the ability to browse files in your document library while in native mode.

  • Collapse pinned posts: Pinned conversations now collapse automatically after a user has viewed them.

  • Updated community settings: There are new community settings on web for communities and All Company community.


See what else Yammer has planned on our public roadmap and keep an eye on this blog for more news, updates, and best practices relating to Yammer and communities in Microsoft 365.


– Mike Holste
Michael Holste is a senior product marketing manager for Yammer + Employee Engagement

Which Virtual Machine is best for your workload in Azure?

Which Virtual Machine is best for your workload in Azure?

This article is contributed. See the original author and article here.

Explore your options to select the right VMs for your workloads. On this episode of Azure Essentials, Matt McSpirit shares core compute and disk storage options for any workload you want to run in Azure.


Screen Shot 2021-04-08 at 3.35.46 PM.png


If you’re new to Azure, shifting your apps or workloads onto a virtual machine or multiple VMs in Azure can be achieved without rearchitecting them or writing new code. You can even deploy your workloads to Azure Dedicated Hosts that provide single tenant physical servers dedicated to your organization. Azure literally becomes the equivalent of running your physical data center in the cloud.


The primary benefit of running your apps and workloads in Azure is choice. Azure provides a comprehensive range of hundreds of VMs to deliver the scale and performance needed across your preferred Linux distros and Windows Server based applications.


Select the right VMs for your workloads: From entry-level to optimized, depending on the workload.


Deployment: Download images from the Azure Marketplace, or deploy your own.


Scale: Create thousands of virtual machines using Azure Virtual Machines Scale Sets.


Pay for what you consume: Bring existing and future Windows and SQL server licenses, Red Hat enterprise Linux, and SUSE licenses into Azure using the Azure Hybrid Benefit.


QUICK LINKS:


00:40 — Azure offers choice


01:38 — A series: Entry-level


02:24 — D series: General purpose compute


03:33 — E series: Memory optimized VMs


04:09 — M series: Optimized


04:27 — Constrained vCPU VMs


04:47 — F series: Compute optimized


05:10 — L series: Storage optimized


05:42 — Deployment


06:05 — Scale


06:32 — Pay for what you consume


07:19 — Wrap up


Link References:


To learn more about the economics of running your workloads in Azure, check out our recent Azure Essentials episode at https://aka.ms/AzureEconomics


Find more resources at https://aka.ms/AzureVMEssentials


Unfamiliar with Microsoft Mechanics?


We are Microsoft’s official video series for IT. You can watch and share valuable content and demos of current and upcoming tech from the people who build it at Microsoft.


Video Transcript:


-Welcome to Microsoft Mechanics, and today’s episode of Azure Essentials. In the next few minutes, I’ll walk you through your core compute and disk storage options for any workload that you want to run in Azure.


-Now before we get into the specifics, there are a few things worth pointing out. If you’re new to Azure, the good news is that lifting and shifting your apps or workloads onto a virtual machine or multiple VMs in Azure, as part of infrastructure as a service, can be achieved without re-architecting them or writing new code. You can even deploy your workloads to Azure Dedicated Hosts that provide single-tenant physical servers dedicated to your organization. Azure literally becomes the equivalent of running your physical data center in the cloud.


-Now, one of the primary benefits that we give you when running your apps and workloads in Azure is choice. Azure provides a comprehensive range of hundreds of VMs to deliver the scale and performance that you need across your preferred Linux distros and Windows Server-based applications. Our Azure-tuned Linux kernels incorporate new features and performance improvements at a faster cadence compared to default or generic kernels, meaning there’s no need to repackage your apps and services. For SUSE and Red Hat Linux, we offer co-located integrated support to accelerate the resolution of any issues you might encounter. Azure VM families are optimized for compute, memory, and storage-intensive workloads in addition to AI, machine learning, and mission-critical scenarios. And you can switch among VM types and sizes at any time and leverage free tools like Azure Migrate to assess the requirements of your on-prem workloads and right-size your infrastructure in Azure. And we also gave you the choice of CPUs and GPUs from Intel, AMD, and Nvidia to take advantage of the latest hardware innovation.


-So let’s break down your core options to select the right VMs for your workloads. Depending on the workload, it’ll require different VM characteristics.


-If you need to run entry-level workloads, like dev test, or maybe low-traffic web servers, small databases, or code repositories, the A-series VMs are a great fit. Now with balanced CPU performance and memory configurations, these VMs provide a great low-cost option to get started with Azure. Next, burstable VMs are useful for workloads that typically run at a low-to-moderate CPU baseline, but sometimes need to burst to significantly higher CPU utilization when the demand rises. An example here would be a web front-end or think of a check-in and check-out application at a hotel, for example. Where you need to plan for sporadic compute capacity to handle the traffic spikes.


-That said, most of your general purpose workloads, such as app servers or relational databases, are best run on the D family of Azure Virtual Machines. These VMs offer the vCPUs, memory, and temporary storage to meet the requirements of most production workloads. There are a few options with the latest chip sets from AMD and Intel. The Da-series use AMD EPYC processors and the D-series run on Intel Xeon processors. The new VM sizes include fast, larger local SSD storage, and a design for applications that benefit from low-latency, high-speed local storage, such as applications that require fast reads and writes to temporary storage. Now if you need additional security, the DC-series confidential VMs, backed by Intel SGX and AMD SEV-SNP technologies, can help you encrypt your data while in use. This uses a hardware-based trusted execution environment, which reserves a secure private portion of the processor and memory on the hardware. Only verified and authorized code can run and access the data. Now, this is useful if you’re in a highly-regulated industry, such as healthcare, where multiple parties need to securely work on a shared dataset for medical research.


-Conversely, memory-optimized VM sizes offer a high memory-to-CPU ratio. These VMs are ideal for relational database servers, data analytics, applications like SAP NetWeaver, as well as other large in-memory business-critical workloads. You can again choose from both AMD and Intel VM options featuring their latest processors. Now depending on your requirements, you can select E-series VM sizes that include large and fast local SSD disk storage for applications that benefit from low-latency, high-speed, local storage. Alternatively, you can choose VM sizes with no temporary data disk to reduce your TCO.


-Then taking things to the next level, the M-series VMs are designed for applications that process large amounts of data in memory. M-series VMs are ideal for extremely large databases or other applications, like SAP HANA, that benefit from massive memory footprints and extremely high vCPU counts.


-Also to reduce the cost of software licensing for memory and storage-intensive workloads, we provide constrained vCPU capable VMs. For example, some database workloads may not need as many cores. So with this option, we limit the vCPU count all while leaving memory, storage, and I/O bandwidth unchanged.


-Now for compute-intensive applications, F-series VMs have a high CPU-to-memory ratio and are great for medium traffic web servers, network appliances, batch processes, and application servers, as well as video encoding and rendering, AI inferencing, and gaming applications. The F-series VMs run on the latest Intel Xeon scalable processors, and can scale up to 72 vCPUs.


-Finally, if you need to run big data, NoSQL databases, or large data warehousing solutions in Azure, storage-optimized VM sizes can deliver the high disk throughput and I/O bandwidth that these applications demand. The L-series VMs feature high-throughput, low-latency, directly-mapped local NVMe temporary storage, in addition to the high-performance remote disk storage that you can attach. These VMs give you access to up to 19.2 TB of local storage, which yields up to 3.8 million IOPS.


-Now you know your options, as you go to deploy your VMs, the Azure Marketplace provides thousands of pre-defined first and third-party reference VM images, or you can bring and use your own images. Additionally, to speed up your deployment, you can also choose from hundreds of Azure Resource Manager templates to automate and hydrate complete solutions with multiple VMs and services, or author your own.


-You can create thousands of virtual machines using Azure virtual machine scale sets. With scale sets, you can create and manage a group of heterogeneous load-balanced VMs, where you can increase or decrease the number of VMs automatically in response to demand, or based on a schedule you define. And you can also centrally manage, configure, and update your VMs at scale, all while improving the availability of your stateful and stateless applications across availability zones and fault domains.


-Now, if you’re wondering how much all of this costs, charges accrue via a pay for what you consume model, versus the upfront infrastructure and software licensing costs that you typically pay on-premises in your data center. And you can bring your existing and even future Windows and SQL Server licenses, as well as your Red Hat Enterprise Linux and SUSE licenses, into Azure using the Azure Hybrid Benefit. Now additionally, you can take advantage of one-year or three-year terms for reserved VM instances to optimize your cloud costs. And with spot virtual machines, you can acquire unused compute capacity in Azure, as it becomes available, which is returned as the Azure service needs it. So that’s great for workloads that can be interrupted, such as a task sequence that resumes where it left off. And in fact, this option can lead to significant cost savings.


-Now, to learn more about the economics of running your workloads in Azure, you can check out our recent Azure Essentials episode on the topic at https://aka.ms/AzureEconomics. So that was a quick overview of your options for Azure core compute. Whether you’ve got basic or advanced compute needs, we give you a huge range of VMs to choose from. And in fact, there are also additional options for specialized scenarios. For example, you can get extreme computing power for your high-performance computing scenarios and remote visualization workloads with GPU-enabled VMs, as well as purpose-built infrastructure for workloads like SAP HANA and VMware, or even access dedicated Cray supercomputers. You can find more resources on the topic at https://aka.ms/AzureVMEssentials. Thanks for watching.