by Contributed | Apr 27, 2021 | Technology
This article is contributed. See the original author and article here.
Hello and welcome back to another blog post about new improvements with Microsoft Exact Data Match (EDM). I am going to first cover improvements launching today and upcoming, then I will circle back on some previously released improvements.
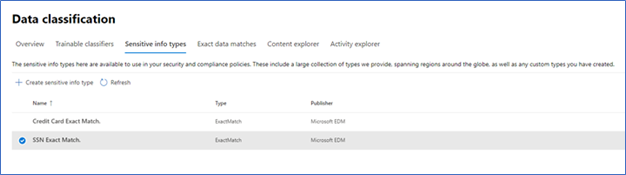
First up and launching today, is the ability to test the EDM based SITs just like you can currently do with all other SITS (All clouds)! Being able to do a quick test to ensure you got your EDM SITs correctly setup and that your data was correctly imported can help you get going rapidly. There are a lot of moving parts in EDM: schema, data uploads, SITs / rule package, and then policy setup. Trying to troubleshoot a SIT and a DLP Policy relying on EDM SIT at the same time is difficult. This will enable you to confirm EDM is working as expected before moving to use it in your DLP or auto labeling rules, and help you keep any required troubleshooting focused by excluding what you know is working correctly.
Figure 1. Choose EDM SIT
 Figure 2. Select Test
 Figure 3. Upload file containing test data
 Figure 4. Review test results
The ability to apply a sensitivity label to content automatically using EDM Sensitive Information Types (SIT) will be coming soon (initially Commercial Cloud only)! This will allow compliance admins to be able to scan the companies SharePoint Online and OneDrive for Business repositories and apply sensitivity labels, with or without encryption, to some of the most important and highly sensitive data they hold.
While automatic labeling using regular Sensitive Information Types is functionality that has been available for some time, bulk labeling using this type of content detection can lead to some false positives, and while false positives may not be a big issue when occurring in front of a user that can notice and fix an incorrect labeling action, this is considerably more problematic when it’s done in bulk over a large number of documents without interactive human supervision. This is where EDM shines: its ability to detect matches to specific, actual sensitive data with minimal or no false positives is a great match for this scenario. This is important for our Regulated Industry customers, like my Health and Life Sciences (HLS) customers. Electronic Medical Records (EMR) contain extremely sensitive information about every single patient a medical facility, company or doctor has had contact with. Strict regulations and certifications standards such as HIPAA and HITRUST, require close control of Personal Health Information (PHI) and being able to easily identify and label data at rest will help everyone!
Another new feature that is in Public Preview right now is the use of Customer Key for Microsoft 365 at the tenant level to protect additional elements in your tenant including your EDM sensitive information tables. This is a broad preview and includes many more data points than just EDM, but that protection of EDM data is included in this preview shows it is now a first-class citizen in the Microsoft Compliance world.
The next two items are being covered together, Improved Auditability and Upload Notifications are GA (All clouds). This gives the Compliance admins to ability to audit and be alerted when these EDM related activities happen:

Figure 5. EDM Audit Activities
Along with the Sensitive Information Type activities:

Figure 6. SIT Audit Activities
To check out the new auditing features, I decided to do some cleanup of an EDM datastore I setup for fun and created a new EDM datastore and SITs. Now let’s go check out what this looks like in the Audit logs.

Figure 7. Audit Items
As you can see above, starting from the bottom up are the actions I took yesterday related to SITs. Now let’s take a closer look at some of these. One way to take a closer look is to download the results. In Figure 5 you can see the Export item at the top left.

Figure 8. Sample export of audit items
You can also select one of the alerts to look at in in the interface.

Figure 9. Sample details of Audit Item
Audit data should appear in the log between 30 minutes and 2 hours. This data is also available as part of the Office 365 Management Activity API reference | Microsoft Docs.
I think this covers it for today. If you would like to learn more about EDM you can check out my previous blogs, Implementing Microsoft Exact Data Match (EDM) Part 1 – Microsoft Tech Community and Enhancements to Microsoft Exact Data Match – Microsoft Tech Community.
by Contributed | Apr 27, 2021 | Technology
This article is contributed. See the original author and article here.
Intro
Azure Log Analytics is a managed service that collects logs from various sources, to store and analyze on a central workspace. Azure Monitor Private Links are direct, private routes that can be set up between an Azure VNet and select workspaces, so that logs from the VNet can be securely sent to the relevant workspaces, over the Microsoft backbone, without reaching public networks. Relying on private links allows a VNet to block traffic to public endpoints, to handle the risk of data exfiltration (data “leaking” out of the VNet).
Up until recently, using private links for Azure Monitor required an exception – allowing VNet traffic to reach a public storage account that is used by Log Analytics VM agents. As of April 19, 2021, a new improvement provides a private link connection to that storage account, effectively allowing a true block of VNet traffic to public endpoints, entirely.
What are solution packs? What is this storage account?
Monitoring solutions are pre-built monitoring tools designed to address specific monitoring needs. They can be installed on a Log Analytics workspace to provide curated log collection and monitoring experiences, such as collecting and analyzing security logs, networking logs, update management, or others.
What a solution is installed on a workspace, the workspace agents need to download specific components to start collecting the relevant logs. These components are called solution packs, AKA management packs.
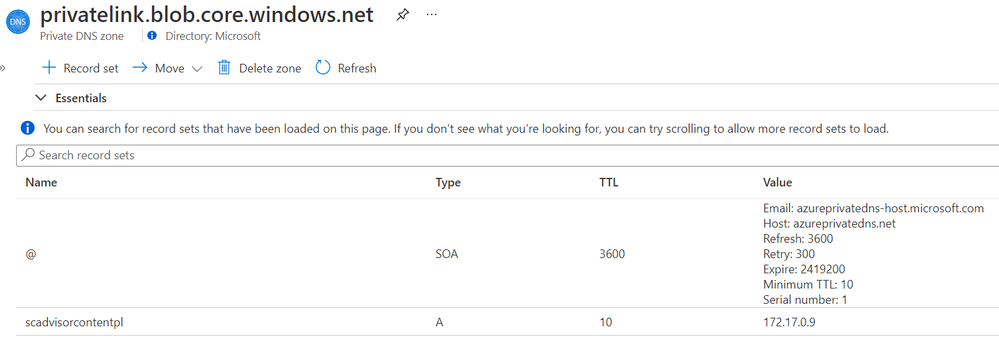
Solution packs are stored on a central, designated storage account named “scadvisorcontent” for public access, and “scadvisorcontentpl” for private link access (these names differ on sovereign clouds). To install and use solution packs, agents require continuous access to that storage account, both for the initial download and setup of solutions, as for fetching later updates.
How can I access the storage over a Private Link?
Private Link setups created at or after April 19, 2021 also have a new DNS zone created for blob.core.windows.net. which maps to the above storage account, using a private address. If you Private Link setup was created prior to that date, re-create your AMPLS and the Private Endpoint connected to it to reach the agents’ storage account over your private link.
Example DNS mapping to scadvisorcontentpl
Feedback
We appreciate your feedback! comment on this blog post and let us know what you think of this feature.
by Contributed | Apr 27, 2021 | Technology
This article is contributed. See the original author and article here.
GitHub is well-known as a platform where software developers host their code and collaborate with their teams on a project. In this article, we’ll show you how you can use the GitHub model to do the same thing and collaborate seamlessly on your research papers.
This blog post is co-authored with Ornella Altunyan, because we believe that GitHub is a great technology and tool to be used beyond pure software development.
What is Git, GitHub, and how it all works
The first thing you’ll want to do is set up Git. Git is the version control system that runs behind the scenes of any GitHub project—it’s what allows you to collaborate with others, go back to previous versions of your project, and view changes made by different members of your team. You may want to use Git from a command-line, but in the beginning, it might be easier to use the GitHub Desktop client.
Projects on GitHub are organized in repositories. You’ll create a new repository for your research paper, and choose who you want to have access. All your files, whether you’re using Markdown, LaTeX, or another typesetting or markup language (more on that later!) will live in this repository. You’ll want to clone the repository to your local machine, so that you have a copy of your files on your local machine.
The source of truth for your paper will live on the main branch of your repository – this branch is initialized when you create your repository. You can create multiple branches for different sections of your paper, and edit and merge them into your main branch when you’re finished. A commit is a snapshot of your repository at a given moment, and it might contain a set of changes that you’ve made to the information on a specific branch.
This is just a short introduction to all the features you can take advantage of when you use GitHub to collaborate on your research papers. Keep reading for more information, and a sample workflow that you can use to get started.
What should and should not be stored in Git
It is important to understand that GitHub is not a replacement for file storage, or a convenient storage for binary files. It was originally designed to be used as a source code repository, and thus it allows you to track changes between text documents. If you are planning on collaborating on Word documents, setting up a shared OneDrive location is a much better choice. For this reason, many people don’t consider GitHub to be a convenient collaboration platform for editing documents. However, scientists often write their papers in text format, most often – TeX or LaTeX. This makes it very convenient to use GitHub as a collaboration platform. It is one of the reasons we believe that GitHub is a very beneficial collaboration platform for scientists.
Why GitHub?
Using Git will give you many advantages:
Tracking changes between different editions of a document. Text documents can be easily compared to each other using the GitHub interface. This is useful even when you are working on a paper alone, because all changes are tracked, and you can always roll back to any previous state.
Working on different branches of the document and merging branches together. There are a few different styles of using Git for collaboration, so-called Git workflows. With branches, you and your collaborators can all work on specific parts of your project without conflicts, for prolonged periods of time.
Accepting contributions to your paper/code from outside. Github has a convenient mechanism of pull requests – suggestions from other users, that you can then approve and merge into the main content. For example, the Web Development for Beginners course was developed and hosted on GitHub originally by a group of around 10 people, and now it has more than 50 contributors, including people who are translating the course into different languages.
If you are very advanced (or have some friends who are into DevOps), you can setup github action to automatically create a new PDF version of your paper every time changes are made to the repository.
LaTeX or Markdown?
Most of the scientists write their papers in LaTeX, mostly because a lot of workflows in academia is focused around it, including paper templates, etc. There are also some good collaboration platforms specific to TeX, for example, Overleaf (but it will not give you as much control on your versioning and collaboration features as git).
However, writing in LaTeX also includes quite a lot of overhead, meaning that many layout features are quite verbose, for example:
subsection{Section 1}

begin{itemize}

  item Item 1

  item Item 2

end{itemize}
In the world of software development, there is a perfect format for writing formatted text documents – Markdown. Markdown looks just like a plain text document, for example, the text above would be formatted like this:
## Section 1


* Item 1

* Item 2
This document is much easier to read as plain text, but it is also formatted into nice looking document by Markdown processors. There are also ways to include TeX formulae into markdown using specific syntax.
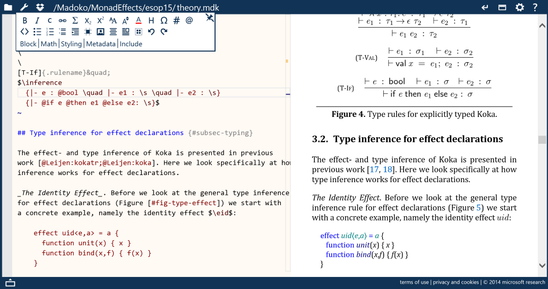
In fact, it’s been a few years that I write all my blog posts and most of text content in Markdown, including posts with formulae. For scientific writing, the great markdown processor (as well as live editing environment) integrated with TeX is madoko – I highly recommend to check it out. You can use it from web interface (which has github integration), and also an open-source command-line tool to convert your markdown writing into either LaTeX, or directly to PDF.
While you may continue using LaTeX with git, I encourage you to look into markdown-based writing options. By the way, if you have some writing in different formats, eg. Microsoft Word, it can be converted to Markdown using a tool called pandoc
Sample workflow
Main thing that git does is to allow you to structure your writing (whether it is code or scientific paper) into chunks called commits. Your code is tracked in the local repository, and once you have done some changes – you need to specifically commit them. Then, you can also synchronize your commits with others by using some remote common repository, called upstream.
Sounds complicated? When using GitHub Desktop most of the tasks are completely automated for you. Below we will describe the simplest way you can collaborate on a paper with your colleagues.
Create a new repository on GitHub. I set the visibility to Private so I can decide which collaborators I’d like to invite to contribute later.

Select Set up in Desktop to quickly set up your repository in GitHub Desktop.

Next, you’ll need to create a local clone of the repository on your machine. You may be prompted to reauthenticate to GitHub during this step.

- I already have a couple of Markdown files that I’ve started working on saved to my computer. I can select View the files of your repository in Finder to open the folder where my local copy of the repository is stored, and drag in the files for my Table of Contents, Section 1, and Bibliography from my computer.
Now, when I go back to GitHub Desktop, I can see those files have been added to my repository. I want to commit those files to the main branch. I can also publish my branch to push those changes to GitHub, and make them accessible to others who I’ll collaborate with.

- Next, I’m going to create a new branch so I can go off and work on Section 2 of my paper. I’ll automatically end up on that branch after it has been created. There are a couple of options you’ll be able to select from for making changes to your file in this branch:
- You can create a Pull Request from your current branch – if I wanted my colleague to be able to review the changes I’ve made in this branch, I’d use this option and send her the PR for review.
- You can also open the repository in your external editor. I use VS Code to edit my files, so I can add section 2 of my paper there, and then commit it to my section2 branch.
- If I already have section 2 of my paper saved somewhere on my computer, or if my colleague has sent me something they’ve worked on, I can follow the same workflow as above and check out the files in my repository on my machine, and add/remove files that way.
- If I just need to make a small change, I’d open my repository in the browser and edit from there.
I can open my repository in GitHub to check out all of the files and information. This is the link I’d send to a colleague if I wanted them to be able to clone the code onto their local machine, and help me out with some sections.

Since I’ve made my repository private, I’ll need to add collaborators in the Settings pane.

- Once I’m happy with Section 2 of my paper, I can go ahead and merge it into the main branch of my repository. I switch over to the main branch, then choose a branch to merge into main, and choose section2. Then, I’ll want to push my changes back up to GitHub so that the main branch is updated with the newest changes for any future collaborators.

This is one example of a Git workflow you can use in conjunction with GitHub Desktop to collaborate on a research paper with your colleagues. There are several other ways that may serve your needs better—you may want to use the command line with VS Code, or edit your files on GitHub in the browser. Whatever method works for you is the best method, as long as you’re able to accomplish your goals.
Further reading and useful links
by Contributed | Apr 27, 2021 | Technology
This article is contributed. See the original author and article here.
By Neil Johnson – Principal Program Manager | Microsoft Endpoint Manager – Intune
The recommended methods of deploying apps with Microsoft Intune are the built-in app deployment features for Edge, Office and Defender. We also support Mac App Store and line-of-business apps. However, there are occasions where an application you need is not made by Microsoft, is not in the Mac App Store, and is not supported by the Intune line of business App Wrapping Tool.
Before we get into the details, it’s important that you understand the supportability of the process we are about to discuss:
Important: From a support perspective, Microsoft fully supports Intune and its ability to deploy shell scripts to macOS. However, Microsoft does not support the scripts themselves, even if they are on our GitHub repository. They are provided for example only and you are responsible for anything that they may do within your environment. Always test!
For the remainder of this post, I’m going to walk you through an example for how to approach the scenario where you need to do a bit of scripting. The steps we’re going to take are as follows:
- Identify a web location from which to download the app.
- Write a bash script to download the installer and install the app.
- Deploy the bash script using the Intune scripting agent.
Again, please do see the caveat above regarding supportability and also testing! I work with several customers who are really familiar with scripting and deploying so I’m sharing best practices and a few things we’ve all learned along the way.
Example Application Deployment: GNU Imagine Manipulation Program (GIMP)
We’re using Gimp here for a simple example. Gimp you can completely deploy following the steps outlined in our app wrapping post. The app makes a great example, too, to deploy through the scripting agent.
Step 1 – Obtaining the binary
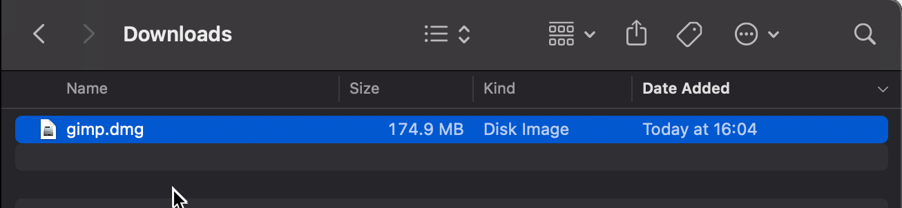
First things first, we need to get a copy of Gimp. To do that we’ll head to the Gimp website and download the latest stable version. Save the file as gimp.dmg in the Downloads directory.
Screenshot of the gimp.dmg macOS app in the Downloads directory
Step 2 – Uploading to Azure Blob storage
Now that we have our installation file, we can upload to Azure so it’s ready for us to use. Setting up Azure Blob storage is outside the scope of this article, but you can find documentation here: Introduction to blob storage – Azure Storage | Microsoft Docs.
Note: It is not a requirement to use Azure storage – see the note on download URL later in this post.
Upload gimp.dmg to Azure Blob storage:
- Go to portal.azure.com > Storage Accounts > “your storage account” and select the container you wish to use for macOS app deployments.
- Click Upload > Provide the file path to gimp.dmg and click upload again.
- Once uploaded, you will see your file listed in the container.
 Example of gimp.dmg uploaded in an Azure storage account
- Click on gimp.dmg and make a note of the URL in the properties. In my case, the URL is https://neiljohn.blob.core.windows.net/macapps/gimp.dmg
Note on Blob storage security: If you do not want to permit anonymous access to your Blob storage binaries you can set the access level to your container to ‘Private’ (no anonymous access) and generate a SAS access URL instead. The rest of this process will remain the same but the URL you use will have additional information encoded at the end.
 Screenshot showing that setting container “macapps” public access level is Private when public access disallowed
Note on download URLs: If you don’t have Azure Blob storage, you can use the public download URL for Gimp from their website here instead. I like using Azure because it gives us more control over the process and the version that we install, but the rest of the process in this post will work fine using either Azure Blob storage or the public download URL from the Gimp servers.
Step 3 – Write the bash script to download and install Gimp
In this section we will walk through an example shell script from the Intune Shell Script GitHub Repository to download and install Gimp.
We’re going to require a couple of things before we begin:
- Download the example installGimp.sh file from here and save it to your local drive.
- Download and install a copy of Visual Studio Code.
Open the installGimp.sh file in Visual Studio Code. The bits we might want to change are shown on lines 20-27. These variables control how the script will behave. Let’s look at them in some more detail.
# User Defined variables
weburl="https://neiljohn.blob.core.windows.net/macapps/gimp.dmg"
appname="Gimp"
app="Gimp.app"
logandmetadir="/Library/Logs/Microsoft/IntuneScripts/installGimp"
processpath="/Applications/Gimp.app/Contents/MacOS/gimp"
terminateprocess="false"
autoupdate=”false”
- weburl is the http URL of the installation files that we need. In this example we are using Azure Blob storage to host the file, but it could be any http endpoint that will be accessible from the client. The script will attempt to autodetect the installer type based on the file that is downloaded.
- appname is mostly used in the log, but is also used to generate the metadata file path for storing the last updated date.
- app is the actual name of the Application. It is used by the script to check if the app is already installed. The script will copy the application files found on the DMG to /Applications/$app. The best way to find out what this should be set to is to install the application manually on your Mac and then run ls -la /Applications from a terminal prompt and use the same name in the app variable.
- logandmetadir this is the directory that the script will use to store the installation log and to store the metadata for the last version update. This should be unique for each application that you deploy.
- processpath this is used to check if the application is running or not. Mac applications have a strict directory format, so one of the quickest methods is to run ls -Fl /Applications/Gimp.app/Contents/MacOS/*. This will return a list of files, it’s usually easy to guess which one is the main application by the name, in our case /Applications/Gimp.app/Contents/MacOS/gimp.
- terminateprocess is used to control what the script does if it finds the application is running. If this value is set to false, the script will check for the applications process and wait for it to be closed before installing. If the value is set to true, the script will detect that the application is running and terminate the main process before installing. For most end user applications leave this set to false.
- autoupdate is used to control how the script behaves when it’s run after the app is installed. If autoupdate is set to true the script will exit since it assumes that the app will handle updates itself. If set to false, the script will compare current and last update times on the URL header and update if there is a newer version.
For this example, the only thing that you need to change here is the weburl to your Azure Blob storage location (or use the public download URL https://download.gimp.org/mirror/pub/gimp/v2.10/osx/gimp-2.10.22-x86_64-3.dmg). The rest of the script can be left as is, but it is a good idea to read through it to ensure that you understand what it does.
Now we have our script, we need to test it. The easiest way to do that is to run it on a test device.
We need to make the script executable with chmod which we will run in a terminal window.
Neils-MacBook-Pro:Gimp neiljohnson$ chmod +x ~/Downloads/installGimp.sh
Next, we can give the script a test run to check that it works. We need to run it as root so don’t forget the sudo command.
Neils-MacBook-Pro:Gimp % sudo ./installGimp.sh
Fri  9 Apr 2021 15:12:42 BST | Creating [/Library/Logs/Microsoft/IntuneScripts/installGimp] to store logs

##

# Fri  9 Apr 2021 15:12:42 BST | Logging install of [Gimp] to [/Library/Logs/Microsoft/IntuneScripts/installGimp/Gimp.log]


Fri  9 Apr 2021 15:12:42 BST | Checking if we need Rosetta 2 or not
Fri  9 Apr 2021 15:12:42 BST | Waiting for other [/usr/sbin/softwareupdate] processes to end
Fri  9 Apr 2021 15:12:42 BST | No instances of [/usr/sbin/softwareupdate] found, safe to proceed
Fri  9 Apr 2021 15:12:42 BST | [Intel(R) Core(TM) i9-9880H CPU @ 2.30GHz] found, Rosetta not needed
Fri  9 Apr 2021 15:12:42 BST | Checking if we need to install or update [Gimp]
Fri  9 Apr 2021 15:12:42 BST | [Gimp] not installed, need to download and install
Fri  9 Apr 2021 15:12:42 BST | Dock is here, lets carry on
Fri  9 Apr 2021 15:12:42 BST | Starting downlading of [Gimp]
Fri  9 Apr 2021 15:12:42 BST | Waiting for other [curl] processes to end
Fri  9 Apr 2021 15:12:42 BST | No instances of [curl] found, safe to proceed
Fri  9 Apr 2021 15:12:42 BST | Downloading Gimp
Fri  9 Apr 2021 15:13:13 BST | Downloaded [Gimp.app] to [/var/folders/zz/zyxvpxvq6csfxvn_n0000000000000/T/tmp.WlgvmHH8/gimp.dmg]
Fri  9 Apr 2021 15:13:13 BST | Detected install type as [DMG]
Fri  9 Apr 2021 15:13:13 BST | Waiting for other [/Applications/Gimp.app/Contents/MacOS/gimp] processes to end
Fri  9 Apr 2021 15:13:13 BST | No instances of [/Applications/Gimp.app/Contents/MacOS/gimp] found, safe to proceed
Fri  9 Apr 2021 15:13:13 BST | Waiting for other [installer -pkg] processes to end
Fri  9 Apr 2021 15:13:13 BST | No instances of [installer -pkg] found, safe to proceed
Fri  9 Apr 2021 15:13:13 BST | Waiting for other [rsync -a] processes to end
Fri  9 Apr 2021 15:13:13 BST | No instances of [rsync -a] found, safe to proceed
Fri  9 Apr 2021 15:13:13 BST | Waiting for other [unzip] processes to end
Fri  9 Apr 2021 15:13:13 BST | No instances of [unzip] found, safe to proceed
Fri  9 Apr 2021 15:13:13 BST | Installing [Gimp]
Fri  9 Apr 2021 15:13:13 BST | Mounting Image
Fri  9 Apr 2021 15:13:30 BST | Copying app files to /Applications/Gimp.app
Fri  9 Apr 2021 15:22:28 BST | Un-mounting [/var/folders/zz/zyxvpxvq6csfxvn_n0000000000000/T/tmp.WlgvmHH8/Gimp]
Fri  9 Apr 2021 15:22:28 BST | [Gimp] Installed
Fri  9 Apr 2021 15:22:28 BST | Cleaning Up
Fri  9 Apr 2021 15:22:28 BST | Fixing up permissions
Fri  9 Apr 2021 15:22:30 BST | Application [Gimp] succesfully installed
Fri  9 Apr 2021 15:22:31 BST | Writing last modifieddate [Tue, 06 Apr 2021 14:04:10 GMT] to [/Library/Logs/Microsoft/IntuneScripts/installGimp/Gimp.meta]
Once that’s done, try to launch the Gimp application to check that it installed correctly and that it works ok. Press CMD+Space and type in ‘Gimp’, then press Return. The Gimp splash screen should appear, and the application should start.
 Screenshot of the GIMP splash screen
Assuming everything went well to this point, all we need to do now is to deploy the script via Intune.
Step 4 – Deploy the bash script via the Intune scripting agent.
At this point we have a script that we’re confident works when we run it locally and so the next step is to upload it to Intune and assign it to some test users to check that it behaves as we expect when it’s run via the Intune Scripting Agent.
To deploy the script via Intune:
- Sign in to the Microsoft Endpoint Manager admin center.
- Select Devices > macOS > Shell scripts > Add
- Enter a Name and Description for the script and click Next
- Enter the script details
- Select the ~/Downloads/InstallGimp.sh script file
- Run script as signed in user: No
- Hide script notification on devices: Yes
- Script frequency: Every 1 day (this is to handle updates, more on this later)
- Number of times to retry if script fails: 3
 Example script properties for macOS scripts in Intune
- Click Next.
- Assign Scope Tags if you need them, click Next.
- Under Required click Add group and search for an appropriate group to target the script to. Note: At this stage a test group would probably be wise.
- Click Next, review and then Add to complete the assignment.
Next, we need to find a test device that we can use to check the deployment on.
- Identify a test device that is enrolled into Intune as a user in the group that you assigned the script to.
- On that device press CMD+Space and type ‘Company Portal’ and press Enter.
- If prompted, click Sign In and enter the users’ credentials.
- In the Company Portal app, press Option+CMD+S to trigger a device check-in. Note, doing this on the device via Company Portal calls the script agent to check-in. Also, if you do this from the Microsoft Endpoint Manager admin center, the script agent will not check-in at the same time.
The final step on the client Mac is to check that the app has installed, and we can launch it. Press CMD+Space and type “Gimp” and press Enter. The Gimp app should launch.
 Example of launching the Gimp app to validate app installation on a macOS device
At this stage we’re happy that the script deploys the app successfully. All that is left is to set the assignment policy of the script to include all the users that you need to install the Gimp app to.
Handling version updates
Some apps handle updates automatically and some apps don’t. For this example, Gimp doesn’t automatically update so we’re going to need to handle that. Luckily, the example script already handles updates so all that we need to do is to upload a newer version of gimp.dmg to Blob storage or change the URL in the script to a newer version on the Gimp website. It’s really that simple.
If you want more detail, when we created our script policy in Intune, we set the schedule to run every day. To prevent the script from installing Gimp every time it runs, there are a few functions to handle updates and downloads.
- updateCheck()
This function first checks the autoupdate variable. If set to true and the app is already installed, the script exits, If set to false it compares the last-modified http header of the file that we downloaded to install last time against the current last-modified date of the download URL. If the dates are the same, the script drops out with nothing to do. If they are different, the script will attempt to download and install the update.
- waitForProcess()
This function is called just before the app is installed. It pauses the script while the given process is running. If the app is running the script will wait until it is closed by the end user. The end user is not prompted, the script will run silently in the background. If you set terminateprocess=”true” the function will attempt to terminate the app.
We can see these functions in action simply by running the script twice. On a test machine, if we download installGimp.sh and run it twice, on the second time through we’ll see the following log entry.
Neils-MacBook-Pro:Gimp % % sudo ./installGimp.sh

##
# Tue  6 Apr 2021 14:46:09 BST | Logging install of [Gimp] to [/Library/Logs/Microsoft/IntuneScripts/installGimp/Gimp.log]


Tue  6 Apr 2021 14:46:09 BST | Checking if we need Rosetta 2 or not
Tue  6 Apr 2021 14:46:09 BST | [Intel(R) Core(TM) i9-9880H CPU @ 2.30GHz] found, Rosetta not needed
Tue  6 Apr 2021 14:46:09 BST | Checking if we need to install or update [Gimp]
Tue  6 Apr 2021 14:46:09 BST | [Gimp] already installed, let's see if we need to update
Tue  6 Apr 2021 14:46:10 BST | No update between previous [Tue, 06 Apr 2021 12:03:05 GMT] and current [Tue, 06 Apr 2021 12:03:05 GMT]
Tue  6 Apr 2021 14:46:10 BST | Exiting, nothing to do
We can see from the log that there has been no update and so the script doesn’t re-install Gimp.
To show the update process working, update the gimp.dmg file in Azure Blob storage. Repeat steps 1 and 2 above.
- Download the application DMG.
- Upload the DMG to Azure Blob storage.
During step 2, make sure that you use the same file name and that you check the Overwrite if files already exist checkbox.
 Screenshot of the Overwrite if files already exist checkbox option in Intune
Once the upload is complete, re-run the script on the test device.
Neils-MacBook-Pro:Gimp % sudo ./installGimp.sh

##
# Tue  6 Apr 2021 15:05:23 BST | Logging install of [Gimp] to [/Library/Logs/Microsoft/IntuneScripts/installGimp/Gimp.log]


Tue  6 Apr 2021 15:05:23 BST | Checking if we need Rosetta 2 or not
Tue  6 Apr 2021 15:05:23 BST | [Intel(R) Core(TM) i9-9880H CPU @ 2.30GHz] found, Rosetta not needed
Tue  6 Apr 2021 15:05:23 BST | Checking if we need to install or update [Gimp]
Tue  6 Apr 2021 15:05:23 BST | [Gimp] already installed, let's see if we need to update
Tue  6 Apr 2021 15:05:23 BST | Update found, previous [Tue, 06 Apr 2021 12:03:05 GMT] and current [Tue, 06 Apr 2021 14:04:10 GMT]
Tue  6 Apr 2021 15:05:23 BST | Starting downlading of [Gimp]
Tue  6 Apr 2021 15:05:23 BST | Waiting for other Curl processes to end
Tue  6 Apr 2021 15:05:23 BST | No instances of Curl found, safe to proceed
Tue  6 Apr 2021 15:05:23 BST | Octory found, attempting to send status updates
Tue  6 Apr 2021 15:05:23 BST | Updating Octory monitor for [Gimp] to [installing]
Tue  6 Apr 2021 15:05:24 BST | Downloading Gimp
Tue  6 Apr 2021 15:06:00 BST | Downloaded [Gimp.app]
Tue  6 Apr 2021 15:06:00 BST | Checking if the application is running
Tue  6 Apr 2021 15:06:00 BST | [Gimp] isn't running, lets carry on
Tue  6 Apr 2021 15:06:00 BST | Installing [Gimp]
Tue  6 Apr 2021 15:06:00 BST | Octory found, attempting to send status updates
Tue  6 Apr 2021 15:06:00 BST | Updating Octory monitor for [Gimp] to [installing]
Tue  6 Apr 2021 15:06:00 BST | Mounting [/tmp/gimp.dmg] to [/tmp/Gimp]
Tue  6 Apr 2021 15:06:21 BST | Copying /tmp/Gimp/*.app to /Applications/Gimp.app
Tue  6 Apr 2021 15:15:43 BST | Un-mounting [/tmp/Gimp]
Tue  6 Apr 2021 15:15:44 BST | [Gimp] Installed
Tue  6 Apr 2021 15:15:44 BST | Cleaning Up
Tue  6 Apr 2021 15:15:44 BST | Fixing up permissions
Tue  6 Apr 2021 15:15:46 BST | Application [Gimp] succesfully installed
Tue  6 Apr 2021 15:15:46 BST | Writing last modifieddate [Tue, 06 Apr 2021 14:04:10 GMT] to [/Library/Logs/Microsoft/IntuneScripts/installGimp/Gimp.meta]
Tue  6 Apr 2021 15:15:46 BST | Octory found, attempting to send status updates
Adapting the example script to something else: Yammer
We have our Gimp script working as we want, but what about other installer files? In this example, we are going to look at modifying the InstallGimp.sh script to handle Yammer, which is also provided as a DMG file.
The completed script for Yammer is available here. If we look at a comparison of changes between the installGimp.sh and installYammer.sh scripts, we can see that the only differences are on lines 21-27.
 Comparison of changes between the installGimp.sh and installYammer.sh scripts
The changes on line 6 are just a description of the script. Lines 20-27 are variables that are discussed in more detail in Step 3 above.
# User Defined variables
weburl="https://aka.ms/yammer_desktop_mac"
appname="Yammer"
app="Yammer.app"
logandmetadir="/Library/Logs/Microsoft/IntuneScripts/installYammer"
processpath="/Applications/Yammer.app/Contents/MacOS/Yammer"
terminateprocess="false"
autoUpdate=”false”
Note: That in this example we are not using Azure blob storage but the normal download URL for Yammer. After editing the script we then follow the steps in Step 4 – Deploy the bash script via the Intune scripting agent above. Once deployed, we can go to the Mac and trigger a manual check-in and then check the logs on our target Mac.
For Yammer, our new policy ID is: 010f31ef-1cfc-441b-a409-fc75e838c5d0
From the IntuneMDMDaemon*.log file we see the following:
IntuneMDM-Daemon | I | *10068 | ScriptPolicyHandler | Running script policy PolicyID: 010f31ef-1cfc-441b-a409-fc75e838c5d0
IntuneMDM-Daemon | I | *10068 | ScriptPolicyHandler | Delivering user notification. PolicyID: 010f31ef-1cfc-441b-a409-fc75e838c5d0, BlockExecutionNotifications: true
IntuneMDM-Daemon | I | 12959 | ScriptPolicyHandler | Script ran PolicyID: 010f31ef-1cfc-441b-a409-fc75e838c5d0, TotalRetries: 0, Status: Success, ExitCode: 0
IntuneMDM-Daemon | I | 12959 | ScriptPolicyHandler | Script policy succeeded PolicyID: 010f31ef-1cfc-441b-a409-fc75e838c5d0, TotalRetries: 0, ExitCode: 0
IntuneMDM-Daemon | I | 12959 | ScriptPolicyHandler | Adding script to scheduler PolicyID: 010f31ef-1cfc-441b-a409-fc75e838c5d0
And from the /Library/Logs/Microsoft/IntuneScripts/installYammer/Yammer.log we see the following:
Sat 10 Apr 2021 17:38:30 BST | Creating [/Library/Logs/Microsoft/IntuneScripts/installYammer] to store logs

##
# Sat 10 Apr 2021 17:38:30 BST | Logging install of [Yammer] to [/Library/Logs/Microsoft/IntuneScripts/installYammer/Yammer.log]


Sat 10 Apr 2021 17:38:30 BST | Checking if we need Rosetta 2 or not
Sat 10 Apr 2021 17:38:30 BST | Waiting for other [/usr/sbin/softwareupdate] processes to end
Sat 10 Apr 2021 17:38:30 BST | No instances of [/usr/sbin/softwareupdate] found, safe to proceed
Sat 10 Apr 2021 17:38:30 BST | [Intel(R) Core(TM) i9-9880H CPU @ 2.30GHz] found, Rosetta not needed
Sat 10 Apr 2021 17:38:30 BST | Checking if we need to install or update [Yammer]
Sat 10 Apr 2021 17:38:30 BST | [Yammer] not installed, need to download and install
Sat 10 Apr 2021 17:38:30 BST | Dock is here, lets carry on
Sat 10 Apr 2021 17:38:30 BST | Starting downlading of [Yammer]
Sat 10 Apr 2021 17:38:30 BST | Waiting for other [curl] processes to end
Sat 10 Apr 2021 17:38:30 BST | No instances of [curl] found, safe to proceed
Sat 10 Apr 2021 17:38:30 BST | Downloading Yammer
Sat 10 Apr 2021 17:38:49 BST | Unknown file type [/var/folders/zz/zyxvpxvq6csfxvn_n0000000000000/T/tmp.U6LKs7Fb/yammer_desktop_mac], analysing metadata
Sat 10 Apr 2021 17:38:49 BST | Downloaded [Yammer.app] to [/var/folders/zz/zyxvpxvq6csfxvn_n0000000000000/T/tmp.U6LKs7Fb/install.dmg]
Sat 10 Apr 2021 17:38:49 BST | Detected install type as [DMG]
Sat 10 Apr 2021 17:38:49 BST | Waiting for other [/Applications/Yammer.app/Contents/MacOS/Yammer] processes to end
Sat 10 Apr 2021 17:38:49 BST | No instances of [/Applications/Yammer.app/Contents/MacOS/Yammer] found, safe to proceed
Sat 10 Apr 2021 17:38:49 BST | Installing [Yammer]
Sat 10 Apr 2021 17:38:49 BST | Mounting Image
Sat 10 Apr 2021 17:38:56 BST | Copying app files to /Applications/Yammer.app
Sat 10 Apr 2021 17:39:14 BST | Un-mounting [/var/folders/zz/zyxvpxvq6csfxvn_n0000000000000/T/tmp.U6LKs7Fb/Yammer]
Sat 10 Apr 2021 17:39:14 BST | [Yammer] Installed
Sat 10 Apr 2021 17:39:14 BST | Cleaning Up
Sat 10 Apr 2021 17:39:14 BST | Fixing up permissions
Sat 10 Apr 2021 17:39:14 BST | Application [Yammer] succesfully installed
To validate the installation, launch the Yammer app by pressing CMD+Space and typing “Yammer” and then Enter. Assuming everything works as expected, the next step is to repeat step 4 above (Deploy the bash script with Intune Scripting Agent) and assign it to your users.
What about other package types? APP or PKG?
This approach can be used for any macOS installer that can be triggered from the shell. The script attempts to determine the correct installer type from the downloaded file.
More examples using the same script can be found here:
The best way to get started is to download one of the example scripts and modify it for your application.
Some of the examples use weburls on Azure blob storage and others pull directly from the source download sites (like Company Portal). The script uses curl -OJL <url> to download the installer and create the temp file.
Note: If the app you are trying to deploy is provided to you as an .app file, you can compress the app into a ZIP and use the examples above.
All the examples include a function to handle Rosetta 2 deployment for Apple Silicon devices. That means these scripts can be deployed straight to an M1 Mac and it will automatically handle the installation of Rosetta 2 so that the application can run.
Troubleshooting
Using Microsoft Endpoint Manager admin center
Intune also reports the status of each script in the UI.
- Open the Microsoft Endpoint Manager admin center.
- Select Devices > macOS > Shell scripts and select the script you want to troubleshoot.
- Click on Device Status and then select the device you are troubleshooting.
- Click on Show details and Intune will display the last output from the script.
 Example screenshot of the GIMP app Device status in Intune
If we need more information, we can use the Intune script agent to gather logs from the Mac for us remotely.
- Click on Collect Logs and enter in the name of the log file you want to retrieve. In our example that is /Library/Logs/Microsoft/IntuneScripts/installGimp/Gimp.log.
 Example screenshot of collecting logs with the GIMP application in Intune
- The next time that the script agent checks in (8 hour cycle), the logs will be returned to Intune. You can force this by having the end user open Company Portal and clicking Check Settings.
Note: On the device, in the IntuneMDMDaemon log file you can see log upload requests and completions by searching for “LogUploadResultItem”.
IntuneMDM-Daemon | I | 255380 | PersistenceManager | Storing LogUploadResultItem
IntuneMDM-Daemon | I | 256078 | PersistenceManager | Getting all LogUploadResultItem
IntuneMDM-Daemon | I | *235677 | PersistenceManager | Deleting all LogUploadResultItem
IntuneMDM-Daemon | I | 256953 | PersistenceManager | Getting all LogUploadResultItem
- Once the logs have been returned, the Download logs button will be shown. Click this to download the device logs as a zip file.
 Example screenshot of the “Download logs” button in Intune
- Inside the zip file will be the file we requested, plus the two Intune script agent (user) and daemon (root) logs, which are always returned.
 Example screenshot of the Downloaded logs from Intune
To make sense of the logs, it’s useful to know the policy ID of the script we are troubleshooting. We can get this from the Microsoft Endpoint Manager admin center.
- Open the Microsoft Endpoint Manager admin center.
- Select Devices > macOS > Shell scripts.
- Find the script in the list and click on it, make a note of the policyID in the browser URL. We will use it to filter the log
In my example, the URL is: https://endpoint.microsoft.com/#blade/Microsoft_Intune_DeviceSettings/ConfigureWMPolicyMenu/overview/policyId/7edf5358-c157-437a-8bc0-0a4889b20ae4/policyType/1.
The easiest way to view the logs is via the Console app.
- Press CMD+Space and type ‘Console’ and press Enter, this will open the Console app.
- Click on File > Open and navigate to the IntuneMDMDaemon*log.
- Paste the policyID from step 3 above into the search box and it should filter the log for only the lines referring to our script.
 Example screenshot of filtering out the IntuneMDMDaemon*log on a macOS device
The key things to look for in the IntuneMDMDaemon log are as follows:
- Running script policy PolicyID: 7edf5358-c157-437a-8bc0-0a4889b20ae4
- Script policy succeeded PolicyID: 7edf5358-c157-437a-8bc0-0a4889b20ae4
Note: You can also view the logs directly on the Mac if you have access. Use Console again to view them.
- /Library/Logs/Microsoft/Intune [For scripts that do not run as the end user]
- ~/Library/Logs/Microsoft/Intune [For scripts that do run as the end user]
Script Log
This is the log that is generated by each script so the output will be different depending on what you put in your script. The best way to view is in the Console app. Search for ‘Gimp’. The log file output should look very similar to the output we saw when we ran the script manually.
 Example screenshot of the log output for the GIMP app on a macOS device
Version Reporting
One of the biggest problems with this approach of app deployment is that apps deployed in this way do not show up in the ‘managed apps’ list for each managed Mac in Intune. To help mitigate this a little, we can use Intune’s custom attribute feature to run a shell script on the Mac and return the version of our app.
We have an example custom attribute script to return the version of a Mac app here.
To deploy the custom attribute script:
- Download the example script to ~Downloads. Open in Visual Studio Code and modify/test as required
- Open the Microsoft Endpoint Manager admin center
- Select Devices > macOS > Custom attributes > Add
- Enter a Name and Description for the script and click Next
- Set the data type of attribute to String
- Select the ~/Downloads/fetchGimpversion.sh
- Click Next
- Assign Scope Tags if you need them, click Next
- Under Required click Add group and search for an appropriate group to target the script to
- Click Next, review and then Add to complete the assignment
The next time that the Intune macOS script agent checks-in to Intune, it will run the script and return the value. To see a list of the returned values:
- Open the Microsoft Endpoint Manager admin center
- Select Devices > macOS > Custom attributes
- Select the custom attribute you created > Device Status
 Example screenshot of the previously created Custom attributes in Intune
This report can be exported to a CSV file if required.
Obviously, this is a basic example, but it could be expanded to return any information that you can gather from a shell script.
Summary
Hopefully this blog and example scripts have provided some guidance around the possibilities of deploying apps via the Intune script agent and Azure Blob storage (or other web hosting sites).
This approach is especially useful for applications that cannot be deployed via the other App deployment scenarios that Intune provides.
Advantages |
Disadvantages |
- Extremely flexible.
- No need for build certificate to sign custom packages.
- More detailed logging capabilities.
- Can handle dependencies (such as Rosetta on M1 devices).
|
- Requires some bash scripting skills.
- Apps deployed via this method don’t show up in “Managed Apps” UI in Intune. Can mitigate this somewhat with ‘custom attributes’.
- The scripts deployed run at your own risk and you are entirely responsible for them and any damage they may do.
|
For more information on deploying scripts with Intune see our documentation here. We also have a broader set of shell script examples on the Intune team GitHub Repository.
Let us know if you have any questions by replying to this post or reaching out to @IntuneSuppTeam on Twitter.


Recent Comments