
by Contributed | May 12, 2021 | Technology
This article is contributed. See the original author and article here.
MidDay Cafe Episode 9 – MBAS, Single Platform, VIVA Connections
In this episode of MidDay Cafe host Michael Gannotti is joined by Microsoft’s Kendra Burgess and Sue Vencill as they discuss the Microsoft Business Application Summit (MBAS)), Why I Came to Microsoft/Single Platform, and Next Generation Intranets with Microsoft VIVA Connections.
Resources:
Keep up to date with MidDay Café:
Thanks for visiting – Michael Gannotti LinkedIn | Twitter
 Michael Gannotti
by Contributed | May 12, 2021 | Technology
This article is contributed. See the original author and article here.
We are happy to announce that REST APIs for scanning data plane are now released. Software engineers or developers in your organization can now call these APIs to register data sources, set up scans and classifications programmatically to integrate with other systems or products in your company.
Purview Scaning Data Plane Endpoints
You need to have the purview account name to call scanning APIs. Below is how the endpoint will look:
https://{your-purview-account-name}.scan.purview.azure.com
Set up authentication using service principal.
To call the scanning APIs, the first thing you need to do is to register an application and create a client secret for that application in Azure Active Directory. When you register an application a service principal is automatically created in your tenant. For more information on how to create a service principal (application) and client secret, please refer here.
Once service principal is created, you need to assign ‘Data source Admin’ role of your purview account to the service principal created above. The below steps need to be followed to assign role to establish trust between the service principal and purview account.
- Navigate to your Purview account.
- On the Purview account page, select the tab Access control (IAM)
- Click + Add.
- Select Add role assignment.
- For the Role select Purview Data Source Administrator from the drop down.
- For Assign access to leave the default, User, group, or service principal.
- For Select enter the name of the previously created service principal you wish to assign and then click on their name in the results pane.
- Click on Save.
You’ve now configured the service principal as an application administrator, which enables it to send content to the scanning APIs. Learn about roles here.
Get Token
You can send a POST request to the following URL to get access token.
https://login.microsoftonline.com/{your-tenant-id}/oauth2/token
The following parameters needs to be passed to the above URL.
- client_id: client id of the application registered in Azure Active directory and is assigned ‘Data Source Admin’ role for the Purview account.
- client_secret: client secret created for the above application.
- grant_type: This should be ‘client_credentials’.
- resource: This should be ‘https://purview.azure.net’
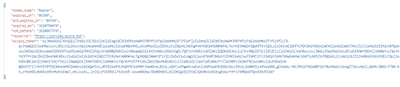
Figure 1: Screenshot showing a sample response in Postman.
Scanning Data Plane REST APIs
Once you have followed all the above steps and have received access token you can now call various scanning APIs programmatically. The different types of entities you can interact with are listed below:
- Classification Rules
- Data Sources
- Key Vault Connections
- Scans and scan related functionality like triggers and scan rule sets.
The below examples explains the APIs you need to call to configure a data source , set up and run a scan for the data source but for complete information on all the REST APIs supported by scanning data plane refer here –
1. To create or update a data source using APIs the following REST API can be leveraged:
PUT {Endpoint}/datasources/{dataSourceName}?api-version=2018-12-01-preview
You can register an Azure storage data source with name ‘myStorage’ by sending a PUT request to the following URL
{Endpoint}/datasources/myStorage?api-version=2018-12-01-preview with the below request body:
{
“name”: “myStorage”,
“kind”: “AzureStorage”,
“properties”: {
“endpoint”: “https://azurestorage.core.windows.net/“
}
}
2. To create a scan for a data source already registered in Purview the following REST API can be leveraged:
PUT {Endpoint}/datasources/{dataSourceName}/scans/{scanName}?api-version=2018-12-01-preview
You can schedule a scan ‘myStorageScan’ using a credential ‘CredentialAKV’ and system scan rule set ‘AzureStorage’ for the already registered data source ‘myStorage’ by sending a PUT request to the following URL with the below request body:
{Endpoint}/datasources/myStorage/scans/myStorageScan?api-version=2018-12-01-preview
{
“kind”: “AzureStorageCredential”,
“properties”: {
“credential”: {
“referenceName”: “CredentialAKV”,
“credentialType”: “AccountKey”
},
“connectedVia”: null,
“scanRulesetName”: “AzureStorage”,
“scanRulesetType”: “System”
}
}
The above call with return the following response:
{
“name”: “myStorageScan”,
“id”: “datasources/myDataSource/scans/myScanName”,
“kind”: “AzureStorageCredential”,
“properties”: {
“credential”: {
“referenceName”: “CredentialAKV”,
“credentialType”: “AccountKey”
},
“connectedVia”: null,
“scanRulesetName”: “AzureStorage”,
“scanRulesetType”: “System”,
“workers”: null
},
“scanResults”: null
}
3. Once the scan is created you need to add filters to the scan which is basically scoping your scan or determining what objects should be included as part of scan. To create a filter, you can leverage the following REST API
PUT {Endpoint}/datasources/{dataSourceName}/scans/{scanName}/filters/custom?api-version=2018-12-01-preview
You can create a filter for the above scan ‘myStorageScan’ by sending a PUT request to the following URL with the below request body. This will create a scope to include folders /share1/user and /share1/aggregated and exclude folder /share1/user/temp/ as part of the scan.
{Endpoint}/datasources/myStorage/scans/myStorageScan/filters/custom?api-version=2018-12-01-preview
{
“properties”: {
“includeUriPrefixes”: [
“https://myStorage.file.core.windows.net/share1/user“,
“https://myStorage.file.core.windows.net/share1/aggregated“
],
“excludeUriPrefixes”: [
“https://myStorage.file.core.windows.net/share1/user/temp“
]
}
}
The above call will return the following response:
{
“name”: “custom”,
“id”: “datasources/myStorage/scans/myStorageScan/filters/custom”,
“properties”: {
“includeUriPrefixes”: [
“https://myStorage.file.core.windows.net/share1/user“,
“https://myStorage.file.core.windows.net/share1/aggregated“
],
“excludeUriPrefixes”: [
“https://myStorage.file.core.windows.net/share1/user/temp“
]
}
}
4.To run a scan, you need to use the following REST API
PUT {Endpoint}/datasources/{dataSourceName}/scans/{scanName}/runs/{runId}?api-version=2018-12-01-preview
You can now trigger the above scan ‘myStorageScan’ by sending a PUT request to the below URL. The runId is a guid.
{Endpoint}/datasources/myStorage/scans/myStorageScan/runs/138301e4-f4f9-4ab5-b734-bac446b236e7?api-version=2018-12-01-preview
The above call will return the following response:
{
“scanResultId”: “138301e4-f4f9-4ab5-b734-bac446b236e7”,
“startTime”: “2019-05-16T17:01:37.3089193Z”,
“endTime”: null,
“status”: “Accepted”,
“error”: null
}
To learn more about Azure Purview, check out our full documentation today.
by Contributed | May 12, 2021 | Technology
This article is contributed. See the original author and article here.
As the retirement of Skype for Business Online approaches, we want to help customers with hybrid deployments of Skype for Business (Server + Online) successfully plan for the changes ahead. This post provides guidance for upgrade readiness, post-retirement experiences for hybrid deployments, and transitioning on-premises users to Teams after Skype for Business Online retires.
How can hybrid customers prepare for Skype for Business Online retirement?
Hybrid customers must upgrade Skype for Business Online users to Teams Only or move them on-premises by July 31, 2021. For any users homed in Skype for Business Online, you’ll need to ensure the user’s mode is set to TeamsOnly, as some may be using Teams while homed in Skype for Business Online.
What if an organization needs to maintain an on-premises instance of Skype for Business?
Although we encourage organizations to adopt Teams to fully benefit from an expanded set of communications and collaboration experiences, those that require an on-premises deployment of Skype for Business may continue to use Skype for Business Server as the support lifecycle of Skype for Business Server is not impacted by the retirement of Skype for Business Online.
Post-retirement, hybrid organizations can have:
- Users homed on-premises that use Teams, but not in TeamsOnly mode, and
- Users that have been upgraded to Teams Only, whether from Skype for Business Server or Skype for Business Online
What can customers with hybrid Skype for Business configurations expect as Skype for Business Online retires?
If all Skype for Business Online users have already been upgraded to Teams Only, their experiences will not change as interop with Skype for Business Server will continue to work as it currently does.
If your organization still has users homed in Skype for Business Online, you may be scheduled for a Microsoft-assisted upgrade to transition remaining Skype for Business Online users to Teams. Scheduling notifications will be sent to customers with users homed in Skype for Business Online 90 days before these users are upgraded to Teams. Assisted upgrades will begin in August 2021.
Even after being scheduled for a Microsoft-assisted upgrade, we recommend customers upgrade remaining Skype for Business Online users to Teams Only themselves prior to their scheduled date to better control the timing of their upgrade.
Once a user has been upgraded to Teams Only, they:
- Will receive all calls and chats in Teams.
- Can only initiate calls and chats, and schedule new meetings in Teams. Attempts to open the Skype for Business client will be redirected to Teams.
- Will be able to interoperate with other users who use Skype for Business Server.
- Will be able to communicate with users in federated organizations.
- Can still join Skype for Business meetings.
- Will have their online meetings and contacts migrated to Teams.
Users homed online will now be in TeamsOnly mode, while users homed on Skype for Business Server will remain on-premises. Please see this blog post for more details about Microsoft assisted upgrades.
After Skype for Business Online retires, what is the path from Skype for Business Server to Teams?
After Skype for Business Online retires, organizations that plan to transition users from on-premises to the Teams cloud can still do so by following the Teams upgrade guidance. Skype for Business Server customers who haven’t done so must plan hybrid connectivity. Hybrid connectivity enables customers to move on-premises users to Teams and take advantage of Microsoft 365 cloud services. After establishing hybrid connectivity, on-premises users can be moved to Teams Only.
We are working to simplify how organizations move to Teams. When moving a user from Skype for Business Server to Teams, it will no longer be required to specify the ‘-MoveToTeams’ switch in ‘Move-CsUser’, to move users directly from on-premises to Teams Only. Currently if this switch is not specified, users transition from being homed in Skype for Business Server to Skype for Business Online, and their mode remains unchanged. After retirement, when moving a user from on-premises to the cloud with ‘Move-CsUser’, users will automatically be assigned TeamsOnly mode, and their meetings will be automatically converted to Teams meetings even if ‘-MoveToTeams’ is not specified. We expect to release this functionality before July 31, 2021.
Enable a full migration to the cloud
As the timing, technical requirements and economics make sense, Skype for Business Server customers may choose to make a full migration to Microsoft 365. But before decommissioning the on-premises Skype for Business deployment and removing any hardware, all users should be upgraded to Teams Only, and the on-premises deployment must be separated from Microsoft 365 by disabling hybrid. After this three-step process is complete, customers may decommission their Skype for Business Server.
Still need help?
Leverage resources including Microsoft Teams admin documentation, online upgrade guidance, and Teams upgrade planning workshops to help plan your path to Teams Only.
You can also reach out to your Microsoft account team, FastTrack (as eligible) or a Microsoft Solution Partner to assist with the process.
See you in Teams!
by Contributed | May 12, 2021 | Technology
This article is contributed. See the original author and article here.
The Central Laser Facility (CLF) carries out research using lasers to investigate a broad range of science areas, spanning physics, chemistry, and biology. Their suite of laser systems allows them to focus light to extreme intensities, to generate exceptionally short pulses of light, and to image extremely small features.
The Central Laser Facility is currently building the Extreme Photonics Applications Centre (EPAC) in Oxfordshire, UK. EPAC is a new national facility to support UK science, technology, innovation and industry. It will bring together world-leading interdisciplinary expertise to develop and apply novel, laser based, non-conventional accelerators and particle sources which have unique properties.
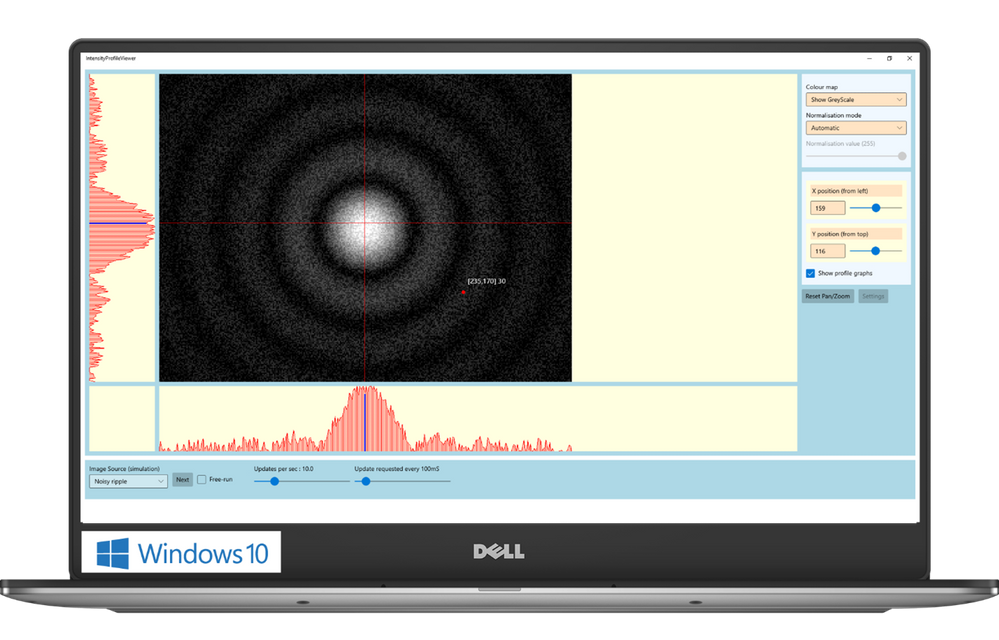
The software control team inside Central Laser Facility develops applications that enable scientists to monitor and communicate with a wide range of scientific instruments. For example, the application can be used to move a motorised mirror to direct the laser beam toward a target, to watch a camera feed showing the current status of the system, or to configure and record data from a suite of cutting-edge scientific instruments such as x-ray cameras or electron spectrometers. These applications aggregate data and controls for specific tasks that a user needs to undertake – say, point the laser at a new target – and present them in a single screen to avoid the need to individually access all the different hardware necessary to make that happen.
The Challenge: Moving forward the control system for EPAC
As CLF started planning the design of a new control system for EPAC, their main goal was to tackle some of the challenges they were facing with the existing set of applications:
- Minimise the adaptations needed to run on multiple operating systems. CLF currently supports Windows and Linux, with other platforms like Android and Web in planning.
- Maximize code reuse while, at the same time, creating a scalable user interface. Their applications need to scale from mobile devices to large displays placed around the facility.
- Support advanced graphical features, like themes for easily changing colour schemes; the palette needed for viewing a screen through laser goggles in a laboratory is different than one would use in a control room, where no goggles are necessary.
The Solution
WinUI and Uno Platform were a perfect combination to tackle these challenges.
WinUI provides a state-of-the-art UI platform, which offers the powerful rendering capabilities needed by the application to show the real time feed coming from the cameras; to generate complex graphs that display in real-time the data captured by the instruments; to adapt to different layouts and form factors; ultimately, to easily create easy-to-use experiences thanks to a wide range of modern controls with full support to accessibility and multiple input types. Uno Platform is enabling the Central Laser Facility to take these features which empower the experience built for Windows and run it with no or minimal code changes on all the other platforms targeted by Central Laser Facility: Linux, Android and Web.

“Thanks to WinUI and Uno Platform, we were able to leverage the excellent set of developer tools that exists in .NET, and provides access to the reusable content in the Windows Community Toolkit and the XAML controls gallery.” shared Chris Gregory, Software Control Engineer. “The primary attraction for us was the ability to deploy applications cross-platform. This will allow us to visualise what’s happening with our instrumentation on the Windows machines in the control room, the Linux systems running the back end, on a tablet inside the laboratory, or on a mobile device for off-site monitoring.
This flexibility means that scientists and engineers can see a uniform presentation of the information they need no matter where they are in our facility, with minimal extra developer effort. Added to this, the availability of such a rich set of controls will result in the development of applications that are much more intuitive to use”.

by Contributed | May 12, 2021 | Technology
This article is contributed. See the original author and article here.
Adopt a Zero Trust approach for security and benefit from the core ways in which Microsoft can help. In the past, your defenses may have been focused on protecting network access with on-premises firewalls and VPNs, assuming everything inside the network was safe. But as corporate data footprints have expanded to sit outside your corporate network, to live in the Cloud or a hybrid across both, the Zero Trust security model has evolved to address a more holistic set of attack vectors.
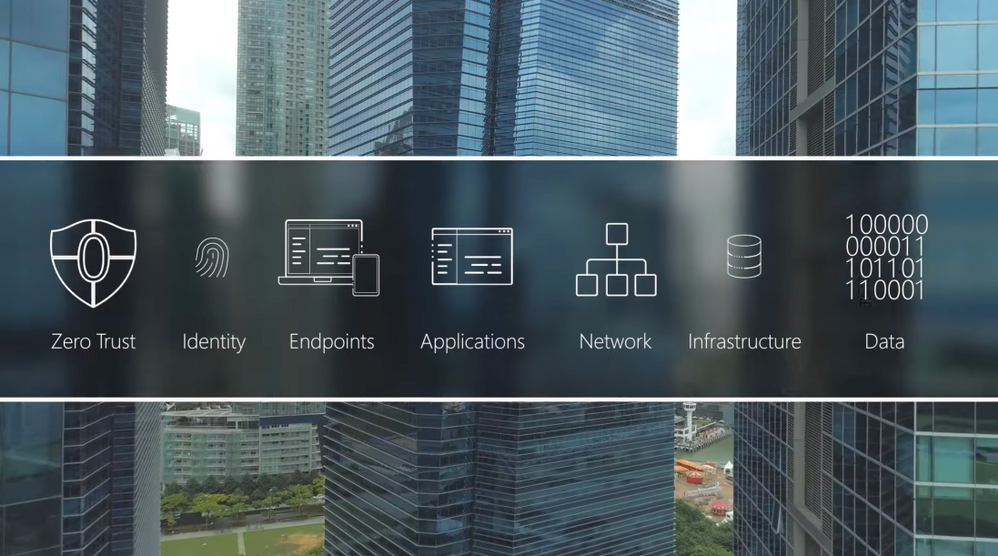
Based on the principles of “verify explicitly”, “apply least privileged access” and “always assume breach”, Zero Trust establishes a comprehensive control plane across multiple layers of defense:
Identity
Azure Active Directory assigns identity and conditional access controls for your people, the service accounts used for apps and processes, and your devices.
Endpoints
Microsoft Endpoint Manager assures devices and their installed apps meet your security and compliance policy requirements
Applications
Microsoft Endpoint Manager can be used to configure and enforce policy management. Microsoft Cloud App Security can discover and manage Shadow IT services in use.
Network
Get a number of controls, including Network Segmentation, Threat protection, and Encryption.
Infrastructure
Azure landing zones, Blueprints and Policies can ensure newly deployed infrastructure meets compliance requirements for cloud resources. Azure Security Center and Log Analytics help with configuration and software update management for on-premises, cross-cloud and cross-platform infrastructure.
Data
Limit data access to only the people and processes that need it.
QUICK LINKS:
00:37 — Six layers of defense
02:31 — Identity
03:48 — Endpoints
04:48 — Applications
05:46 — Network
06:36 — Infrastructure
07:18 — Data
08:11 — Wrap Up
Link References:
Learn more at https://aka.ms/zerotrust
For tips and demonstrations, check out https://aka.ms/ZeroTrustMechanics
Unfamiliar with Microsoft Mechanics?
We are Microsoft’s official video series for IT. You can watch and share valuable content and demos of current and upcoming tech from the people who build it at Microsoft.
Keep getting this insider knowledge, join us on social:
Video Transcript:
-Welcome to Microsoft Mechanics and our new series on Zero Trust Essentials. In the next few minutes, I’ll break down what you can do to adopt a Zero Trust approach for security and how Microsoft can help. In the past, you may have focused your defenses on protecting network access with on-premise firewalls and VPNs assuming that everything inside the network was safe. But as corporate data footprints have expanded to sit outside your corporate network, to live in the cloud or hybrid or across both, the Zero Trust security model has evolved to address a more holistic set of attack vectors.
-Based on the principles of verify explicitly, apply least privileged access, and always assume breach, Zero Trust establishes a comprehensive control plan across multiple layers of defense. And this starts with identity and verifying that only people, devices and processes that have been granted access to your resources can access them. Followed by device endpoints including IoT systems at the edge where the security compliance of the hardware accessing your data is assessed. Now, this oversight applies to your applications too, whether local or in the cloud, as the software-level entry points to your information. Then there are protections at the network layer for access to resources, especially those that are within your corporate perimeter. Followed by the infrastructure, hosting your data both on premises or in the cloud. This can be physical or virtual including containers and microservices, and the underlying operating systems and firmware. And finally, the data itself across your files and content, as well as structured and unstructured data wherever it resides.
-Now, each of these layers are important links in the end-to-end chain of Zero Trust, and each can be exploited by malicious actors or inadvertently by users as entry points or channels to leak sensitive information. That said, core to Microsoft’s approach for Zero Trust is not to disrupt end users but work behind the scenes to keep users secure and in their flow as they work. The key here is end-to-end visibility and bringing then all this together with threat intelligence, risk detection and conditional access policies to reason over access requests and automate response.
-Here, as we’ll explore in the series, the good news is that both Microsoft 365 and Azure are designed with Zero Trust as a core architectural principle and have built-in and best-in-class controls to help deliver a Zero Trust environment. And you can then use these tools to extend Zero Trust to hybrid or even multi-cloud.
-In fact, let me walk you through some highlights for how Microsoft can help you implement Zero Trust starting with identity. Here, Azure Active Directory is the underlying service that assigns identity and conditional access controls for your people, the service accounts used for apps and processes, and your devices. Importantly, beyond Microsoft services, Azure AD can provide a single identity control plane with common authentication and authorization services for your cloud-based services and your on-premises resources. This prevents the use of multiple credentials and weak passwords spread across different services and helps you to universally apply strong authentication methods, like passwordless multifactor authentication for your users.
-Also to make the authentication process significantly less intrusive to users, you can take advantage of real-time intelligence at sign-in with conditional access and Azure AD. You can set policies to assess the risk level of the user or a sign-in, the device platform along with a sign-in location, to make point of log on decisions and enforce access policies in real time to either block access outright, grant access but require an additional authentication factor such as a biometric or a FIDO2 key, or limit it for example, to just view-only privileges.
-And moving on to end points, because not all devices accessing corporate data are managed or owned by your organization, they can represent another weak link in establishing Zero Trust. They may not be up to date or protected and run the risk of data exfiltration from unknown apps or services. Using Microsoft Endpoint Manager, you can make sure that devices and their installed apps meet your security and compliance policy requirements, regardless of whether the device is corporate owned or personally owned, wherever they’re connecting from, whether that’s on a network perimeter including over a VPN, on the home network or the public internet. Also on Microsoft Defender with its extended detection and response or XDR management controls can identify and contain breaches discovered on an endpoint and then force the device back into a trustworthy state before it’s allowed to connect back to resources.
-Next we’ve already touched on the benefits of Azure AD as the single identity provider for authenticated sign-in along with the use of conditional access, and these recommendations also apply to cloud apps and local apps that connect to cloud-based resources as well. Now for your local apps, Microsoft Endpoint Manager can be used to configure and enforce policy management for both desktop and mobile apps including browsers. For example, you can prevent work-related data from being copied and used in personal apps. that said on the SaaS side of the house knowing what apps and services are in use within your organization including those acquired by other teams known as Shadow IT is critical to mitigate any new vulnerabilities. Microsoft Cloud app security and its catalog of more than 17,000 apps can discover and manage Shadow IT services in use. And you can then set policies against your security requirements to scope how information may be accessed or shared within those services. For example, you can use policies to block actions within the cloud app such as downloading confidential files or discussing sensitive topics while using unmanaged devices.
-And this brings us to our fourth layer, the network. With modern architectures and hybrid services spanning on-premises and multiple cloud services, virtual networks or VNets and VPNs, we give you a number of controls starting with network segmentation to limit the blast radius and lateral movement of attacks on your network. We also enable threat protection to harden the network perimeter from things like DDoS or brute force attacks, then the ability to quickly detect and respond to incidents and encryption for all network traffic, whether that’s internal, inbound, or outbound. Microsoft offers several solutions to help secure networks such as Azure Firewall and Azure DDoS Protection to protect your Azure VNet resources. And Microsoft’s XDR and SIEM solution comprising Microsoft Defender and Azure Sentinel, help you to quickly identify and contain security incidents.
-Next, for your infrastructure, the most important consideration here is around configuration management and software updates so that all deployed infrastructure meets your security and policy requirements. For cloud resources, Azure landing zones, blueprints and policies can ensure that newly deployed infrastructure meets compliance requirements and the Azure Security Center, along with Log Analytics, help with configuration and software update management for your on-premises, cross-cloud and cross-platform infrastructure. Also monitoring is critical for detection of vulnerabilities, attacks and anomalies. Here again, Microsoft Defender plus Azure Sentinel provide threat protection for multi-cloud workloads enabling automated detection response.
-Of course, at the end of the day, Zero Trust is all about understanding, then applying the right controls to protect your data. Now we give you the controls to limit data access to only the people and processes that need it. The policies that you set along with real-time monitoring can then restrict or block the unwanted sharing of sensitive data and files. For example, with Microsoft Information Protection, you can automate labeling and classification of files and content. Policies are then assigned to the labels to trigger protective actions, such as encryption or limiting access, restricting third-party apps and services and much more. Additionally, for data outside of Microsoft 365, Azure Purview automatically discovers and maps data sitting across your Azure data sources, on premises and SaaS data sources, and works with Microsoft Information Protection to help you classify your sensitive information.
-So that was a quick overview, the Zero Trust security model and examples of some of the core ways that Microsoft can help. Moving to Zero Trust doesn’t have to be all or nothing. You can use a phased approach and close the most exploitable vulnerabilities first. Of course, keep checking back at aka.ms/ZeroTrustMechanics for more in our series where I’ll share tips and hands-on demonstrations of the tools for implementing the Zero Trust security model across the six layers of defense that I covered today. And you can also learn more at aka.ms/zerotrust. Thanks for watching.

Recent Comments