This article is contributed. See the original author and article here.
Microsoft 365 is a rich platform for building applications. Here are the types of apps you can build on Microsoft 365.
Why should you build applications on Microsoft 365
Microsoft 365, previously known as Office 365, is Microsoft’s productivity cloud, that organizations use for communication and collaboration. 250 million users work with Microsoft 365 creating files, sending emails, meeting, reading information stored in Microsoft 365, and more.
Microsoft 365 is also a highly extensible development platform. All the information about its users as well as the content they create is stored in Microsoft 365 and, bearing the necessary permissions, available for you to interact with in your applications.
What kind of apps can you build on Microsoft 365?
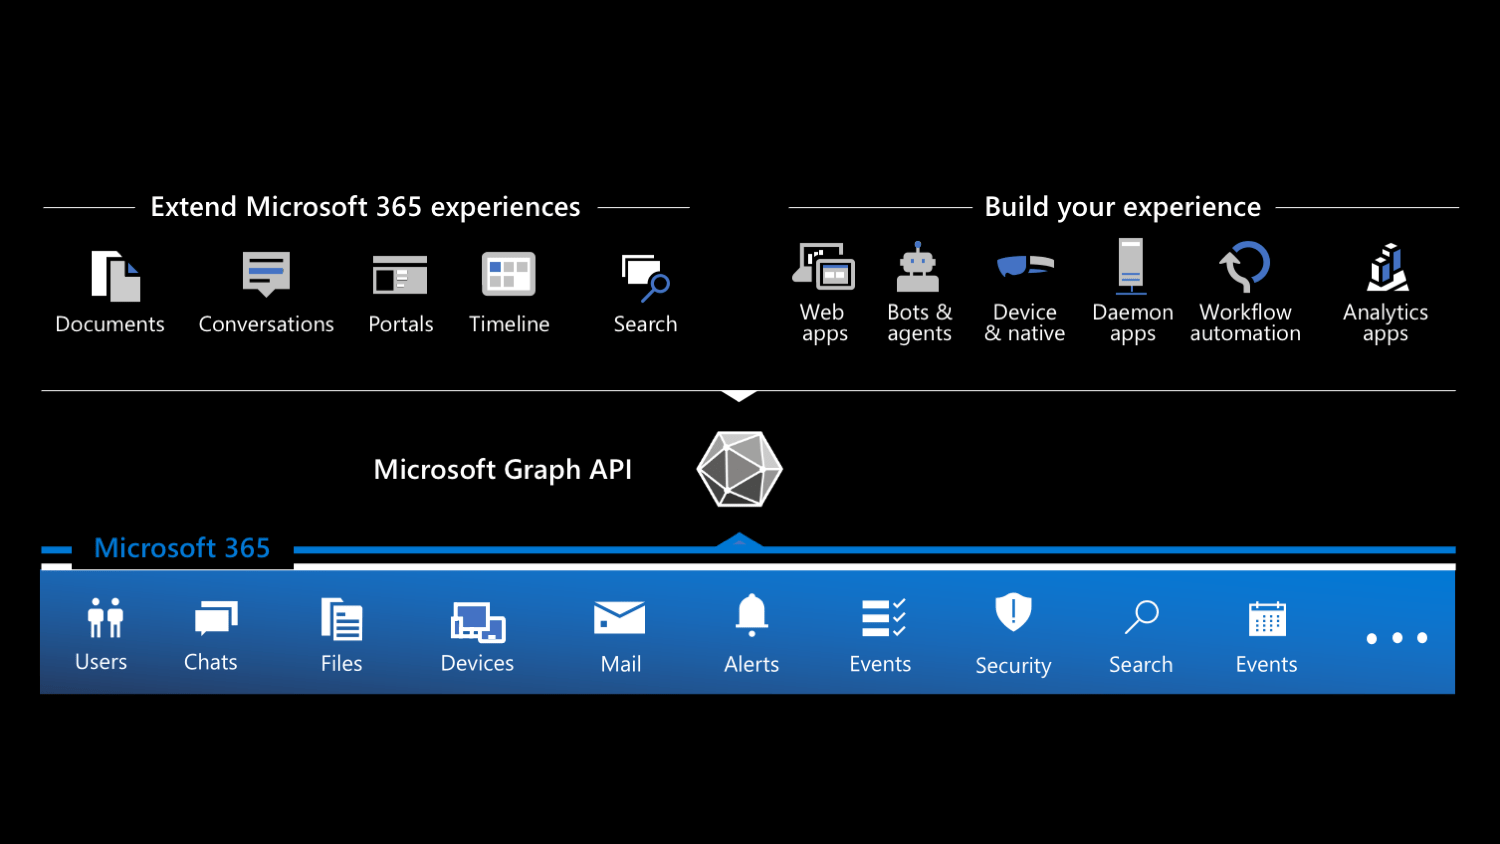
Thinking about building apps on Microsoft 365, you can distinguish between two types of apps: standalone apps and apps that extend Microsoft 365.
Custom apps: build your experience
First of all, you can build custom apps. These can be mobile apps, web apps, desktop apps, device-native apps, workflow automation, or scheduled processes. You can build these apps using any programming language and run them on any platform you want. You choose how you distribute and operate them. In short: you own the technology stack and the full user experience.
Users start their journey in your app. Because your app is connected to Microsoft 365, you can show relevant information from Microsoft 365 along your app’s functionality. And because you can present the data in your app seamlessly, users might not even realize that they’re looking at data coming from Microsoft 365.
To get the most out of integrating your custom app with Microsoft 365, you need to allow users to sign in to your app with their Microsoft 365 account. That way, you will be able to retrieve the relevant information on their behalf from Microsoft 365.
Extend Microsoft 365 experiences
Microsoft 365 offers many extension points to bring your app where your users are. By exposing your app inside Microsoft 365, you make your app a part of people’s work. Because your app is available right where they are, they can focus on their work and interact with your app without having to switch the context.
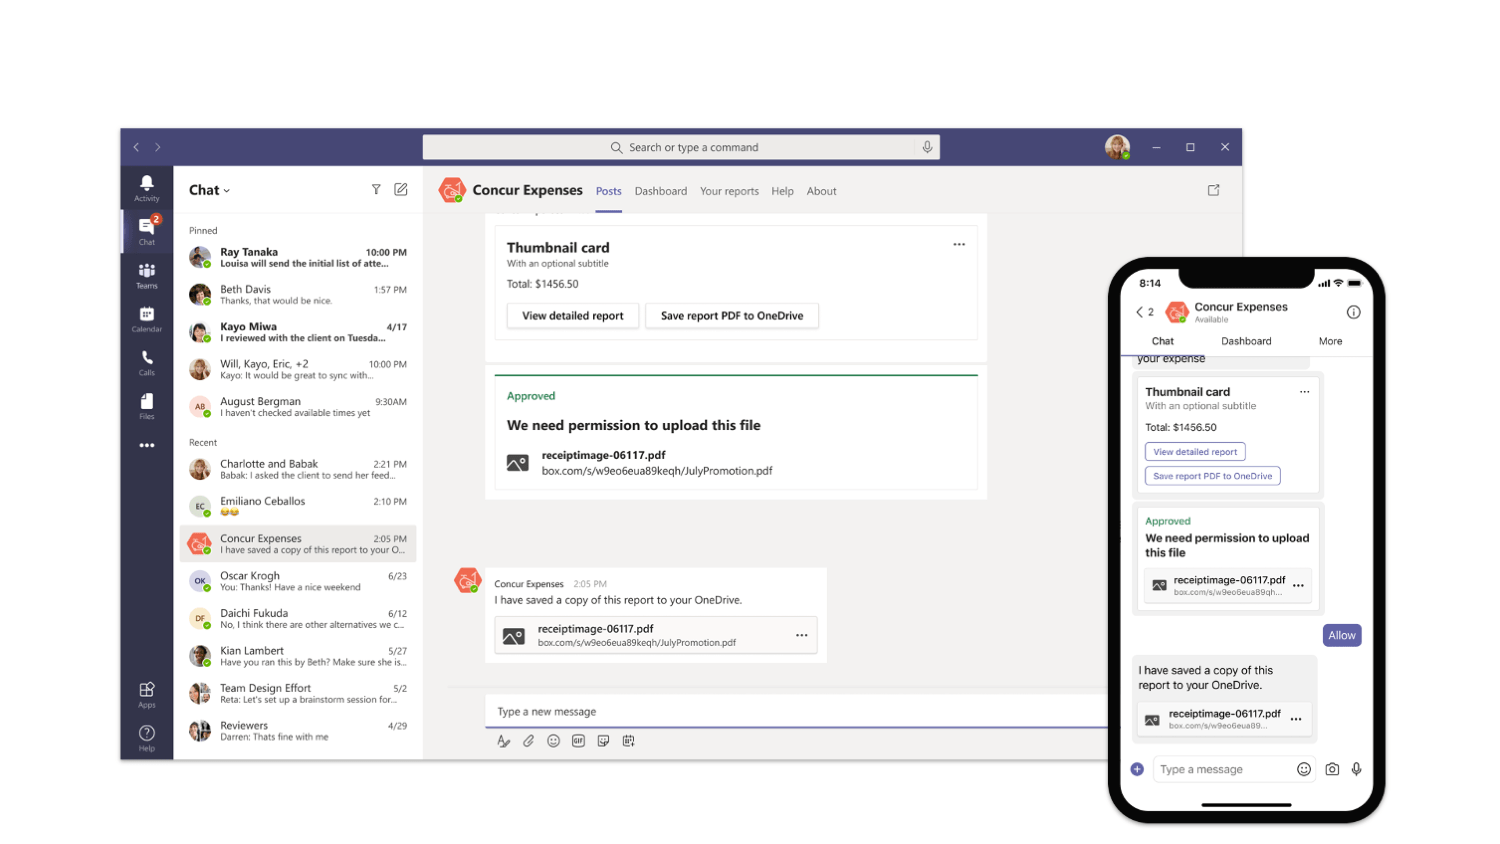
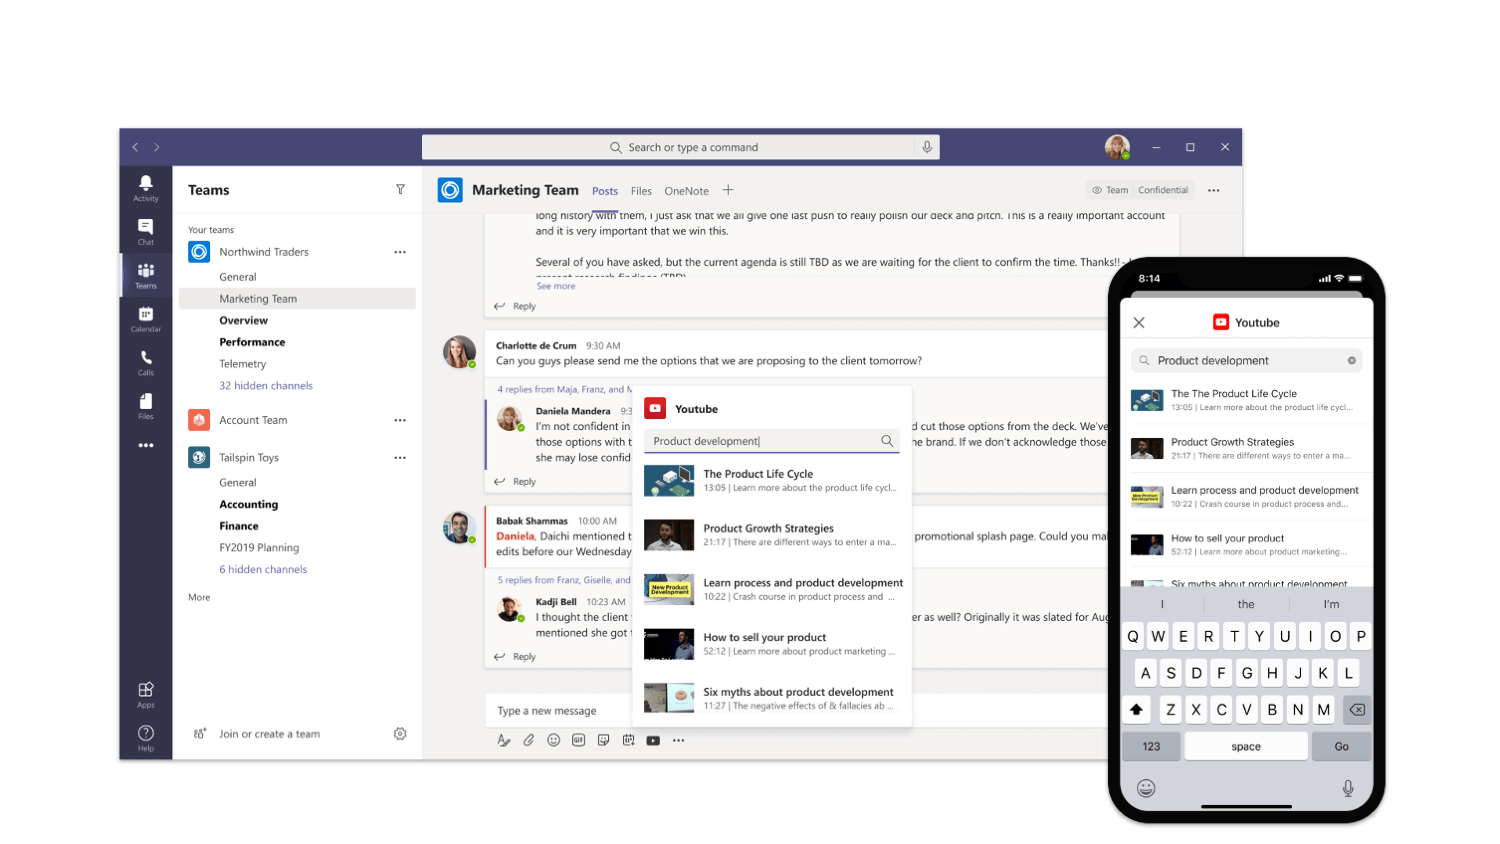
Extend conversations
Microsoft Teams host conversations on Microsoft 365. You can bring your app as a part of a conversation in several ways.
First of all, you can build conversational bots. Bots help people complete tasks through conversations. They’re a great way to expose relevant features of your app and guide users through the scenario like a personal assistant.
Another way to expose your app in a Teams conversation is through messaging extensions. Messaging extensions help people complete tasks in a visually-compelling way. They’re similar to bots but are more visually oriented and ideal for showing rich data
Finally, you can send notifications from your app to conversations via webhooks. By using adaptive cards, you can show the data in a rich and actionable way.
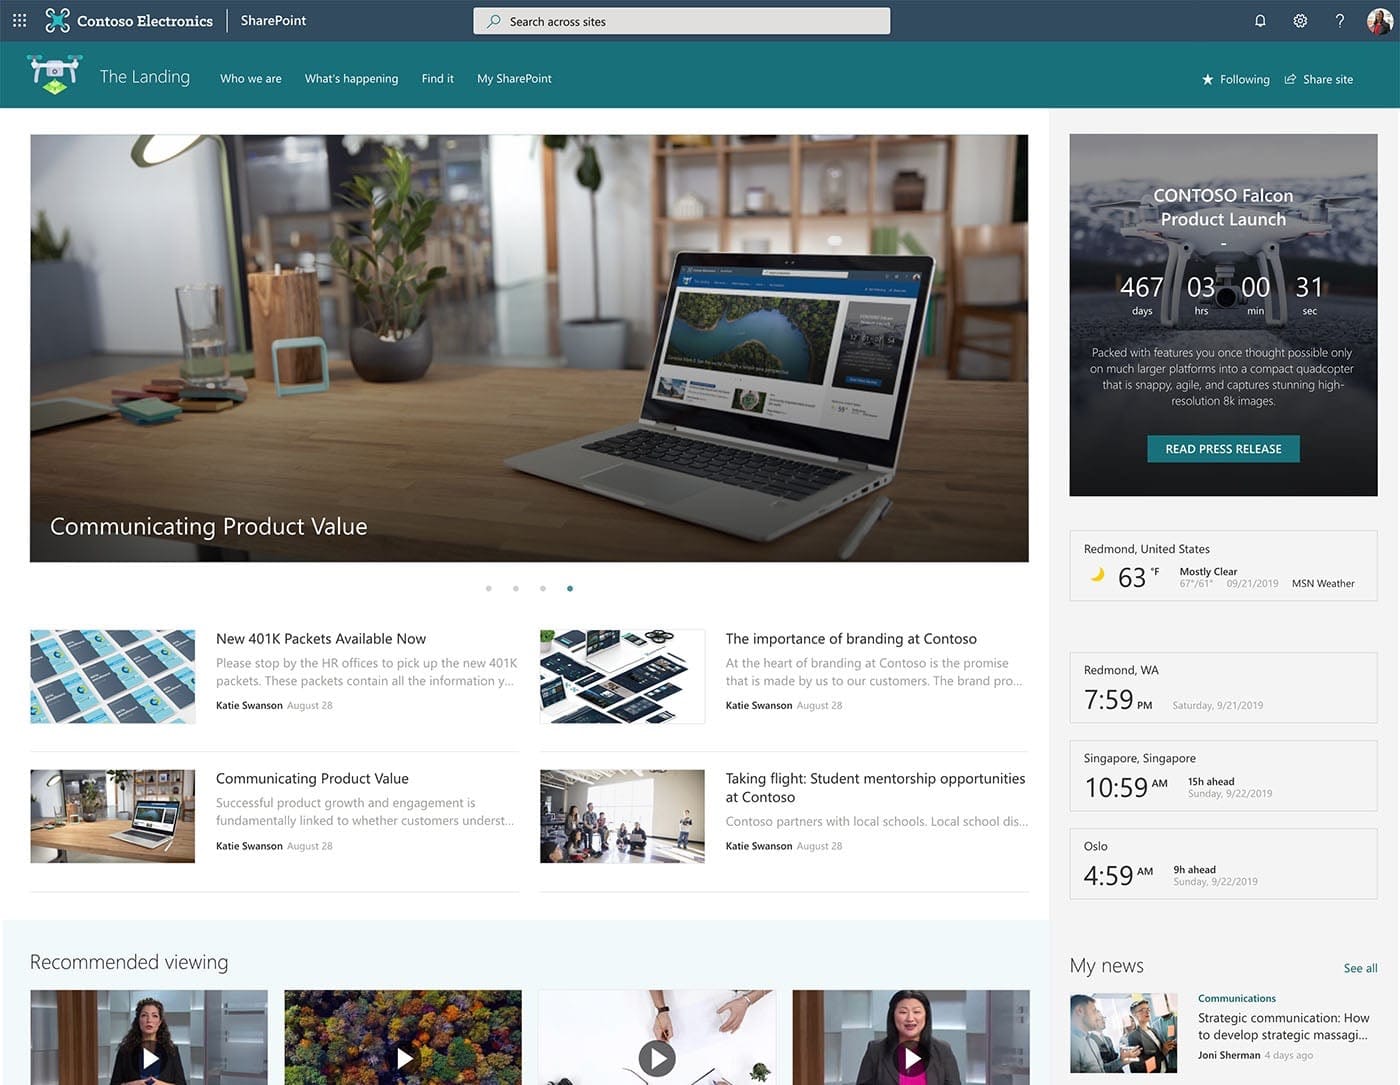
Extend portals
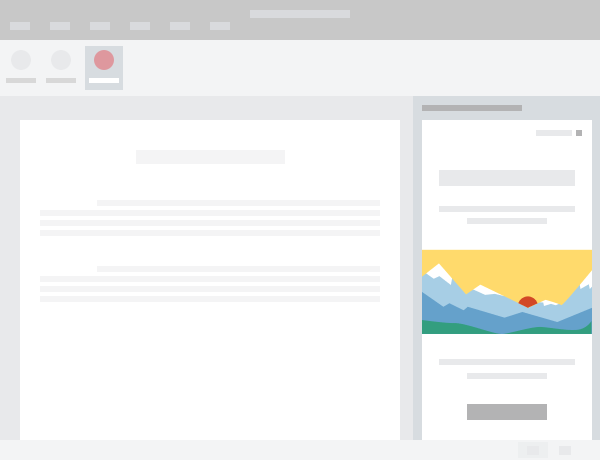
Many organizations that use Microsoft 365 use portals to facilitate communication and manage knowledge. Using rich pages, they publish content and build interactive dashboards. These pages consist of reusable building blocks – web parts, that end-users put together.
You can extend portals on Microsoft 365 in two ways. First, you can build widgets, called web parts. Users, who create pages, can put your web parts on pages to enrich the content. Your web parts can show data from Microsoft 365 as well as any other API.
Another way to extend portals is by building extensions. SharePoint Framework extensions allow you to execute a piece of code on every page or change how list fields are rendered. Just like with web parts, you can load data from Microsoft 365 or any other API in your extensions.
Extend documents
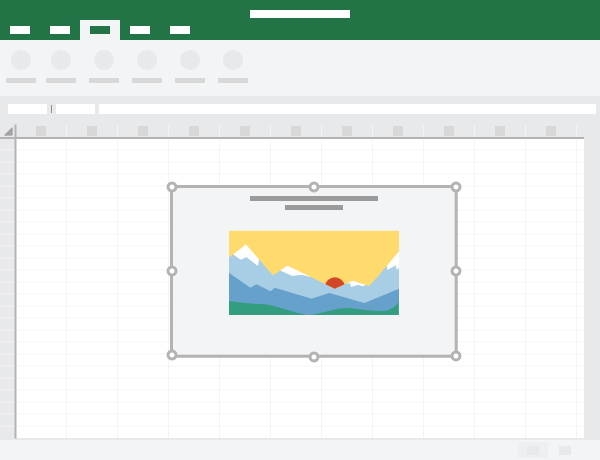
When creating documents on Microsoft 365, users can enrich them with interactive elements, like maps or charts. These elements can be connected to APIs and make documents interactive and present data that is always up-to-date.
You can also build task pane extensions for Microsoft Office applications that help users work with their documents. A task pane could help people lookup their customer information when writing contracts or order information when creating invoices.
Connect your application to Microsoft 365
There are several types of applications that you can build on Microsoft 365. No matter if you want to develop a custom application or extend Microsoft 365, you can connect your app to Microsoft 365. To get information and insights stored in Microsoft 365, you would connect to Microsoft Graph – the web API for Microsoft 365. To help you communicate with Microsoft Graph, Microsoft offers SDKs for the most popular platforms.
Over to you
Building apps for Microsoft 365 offers a great opportunity to reach millions of users and help them work more effectively. If you want to have a quick look at what kind of data you can retrieve from Microsoft 365, I’d suggest you look at the interactive Graph Explorer. If you’re considering building a web app, I would also recommend that you take a look at Microsoft Graph Toolkit – a set of web components that make it very easy to show data from Microsoft 365 in your app. When you’re ready to start building your app, sign up for the Microsoft 365 developer program to get a dev environment.
Looking forward to hearing what you’re going to build. And don’t hesitate to reach out if you have any questions!
This article is contributed. See the original author and article here.
We are releasing two new and important additions to the Log Analytics workspace overview page, that surface underlying operational issues with your workspace. Such operation issues could be, for example, reaching a workspace limit, or encountering data ingestion issues, configuration or agent operation issues.
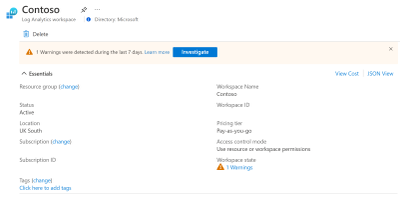
For that, we added two new signifiers (Fig 1)
“Workspace state” field: this field will indicate how many issues in state of “Warning”, “Error” and “Critical” need your attention.
To investigate the issue, you can click the “Investigate” button or the linkable message under “Workspace state”, this will route you to the “Workspace insights” blade, and “Health” tab under it.
You can read more here.
Under the “Health” tab, you will see listed the “Operation errors and warnings” (Fig 2), we have some of the possible errorswarnings listed in this article, including what can be done to mitigate the issue.
Also in the article, we provide suggestions on how to setup alerts on-top of this table, setting such alerts is the best way to get notifications and assist you in monitoring your workspace.
To review what issues can surface, you can check this article.
This article is contributed. See the original author and article here.
As a non-developer (please read this as a disclaimer) I still try to make my life as easy as possible (yes, I am that lazy). PnP Powershell is a big component of that goal. A customer had the requirement to create a page for each of their 86 folders in a document library so they could add more information on those topics. That meant creating 86 pages, each with a document library webpart on it that showed a specific folder. No chance I was going to do that manually!
Creating the page wasn’t really difficult. Showing the document library and just the items in the folder was the hard part that I couldn’t find any examples of. The idea of this blog post is to help future people like me to just copy/paste the code.
The goal
We started with a document library containing 86 folders, each having a few documents. The goal was to create 86 pages, with each page showing a block of text on the left and the document library webpart showing only the files from that folder.
How to do this in the user interface
Using the user interface, following steps were required:
Create a new page (with the same name as the folder)
Add a section to the page with 2 columns
Add a text webpart to the left column
Add a document library webpart to the right column
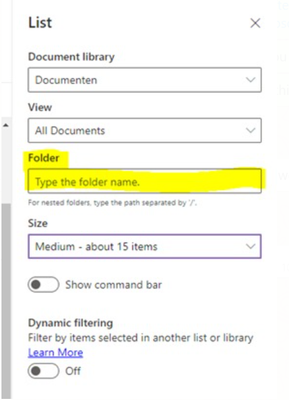
As a subrequirement, only show the files from the necessary folder. This can be set up from the web part properties
Document library UI properties
That would definitely be a lot of work to do manually, so I decided that PnP PowerShell needed to come to the rescue.
The code
Lets dig in to the code. I imagine that you have already dabbled with PnP Powershell and I will not explain how to install and configure it to run.
First we need to connect to the site. Replace the url with the correct url of your site. I am using -UseWebLogin in this example because I am using 2factor authentication.
Create the page
First thing to do is to create the page, using theAdd-PnPClientSidePagecommand. I am using the $name variable here to give it a name.
Disabling the comments section on a modern SharePoint Page I couldn’t figure out how to disable the comments section on the modern client page. I tried setting it to false, or 0, but that didn’t work.
The correct way to do is to use:
-CommentsEnabled:$false
Adding sections to the page
To add a new section to the page, I am using theAdd-PnPClientSidePageSectioncommand. I can just add a TwoColumn section on the page.
The hard part: adding an existing document library as a webpart to the page
This was the easy bit, in my opinion. Adding a document library to a page is surprisingly hard in PnP Powershell (unless I am missing something big.. in that case please call me out on this!)
What you need to do, is to use theAdd-PnPClientSideWebPart command. With this command you can add all kinds of webparts to the page. Document library isn’t one of them.
You need to add a List webparttype, and in the WebpartProperties you need to mention that it is a document library AND what the ID is.
Where can I find the SharePoint document library Id ?
I didn’t have a clue how to get this Id via code, so I resorted to the UI: If you go to the library settings, the document library Id is shown in the url:
SharePoint document library ID in the url of the library settings page
Just cut out the %7B in the front, and the %7D on the back. In this example, the document library Id is 4683b239-caf6-40a3-96c4-a02dedfa3418.
Bonus: Only show a specific folder from the document library
I couldn’t figure out how to show only documents from a specific folder. Doing this in the UI is supereasy. But there wasn’t any example code out there. So here it is:
In the WebPartProperties, add selectedFolderPath=”/yourfoldername”;
Bonus 2: hide the command bar on the SharePoint Document Library Webpart
In the UI, there is a way to simply hide the command bar. Because we are showing this information in a nice looking page, there is no need for all that extra fluff of “new”, “upload” and so on.
In the same way as showing just files from a specific folder, you can use the hideCommandBar=”false”; in the WebPartProperties:
All the parts we need are now on the page. The only thing now is to publish the page so it is visible to all visitors. For that, we need to grab the page again and publish it.
The last part of the code was to make this repeatable, for all 86 folders. There is probably a really nice way to , in code, get all folders from the doclib and loop through them, but as stated a gazillion times.. I am not a developer.
So I exported the document library to Excel and copied the foldernames. I added some quotes and a comma (in an Excel formula using =CHAR(34) & A2 & CHAR(34) &”,”) and added an array to store these.
“Students and instructors began using the solution right away, following online instructions to get started. “Azure Virtual Desktop is pretty self-explanatory to use,” says Neil Hanham. “After running it, you’re in Windows, so there really wasn’t any training needed. With Lab Services, I onboarded the instructors, who onboarded their students.“
“One Earth Sciences professor uses Lab Services to deliver specific Linux environments remotely. Because Lab Services delivers computing power to students’ devices, it doesn’t matter if they have specialized computers with extra graphics processing units (GPUs) or other enhancements. And instead of making appointments to help each student, instructors make their own reusable templates for each environment, saving significant configuration time with this self-service capability.”
This article is contributed. See the original author and article here.
Introduction
This is John Barbare and I am a Sr Customer Engineer at Microsoft focusing on all things in the Cybersecurity space. With my large customer base in the Microsoft Federal space and having to comply with internal security baselines and moving to a cloud-centric platform to manage devices, it is important to know if the baselines/settings will carry over. In this article, I will explain and show how to import an on-premises baseline Group Policy Objects (GPO) into Microsoft Endpoint Manager (MEM) and see the settings that directly carry over and how to create a policy for the ones that are not MDM compliant. With that said, let’s import several baselines and see the correlation from on-premises to MEM mapping and see how we can make the move to the cloud that much easier.
What is Microsoft Security Baselines and/or STIGs?
Security baselines are a group of Microsoft-recommended configuration settings which explain their security impact. These settings are based on feedback from Microsoft security engineering teams, product groups, partners, and customers. Certain Federal agencies and other Department of Defense (DoD) entities have created their own internal and also publicly available baselines or better known as Security Technical Implementation Guides (STIGs). At the end of this article, I will reference several publicly available Federal baselines/STIGs to download and implement in your organization if you are not already using a stringent baseline as of today. If you are a State/Federal/DoD agency and use MEM, feel free to follow along with your tenant as this demo was performed in IL5 before writing this article below in my private Microsoft tenant.
Importing STIGs in Microsoft Endpoint Manager
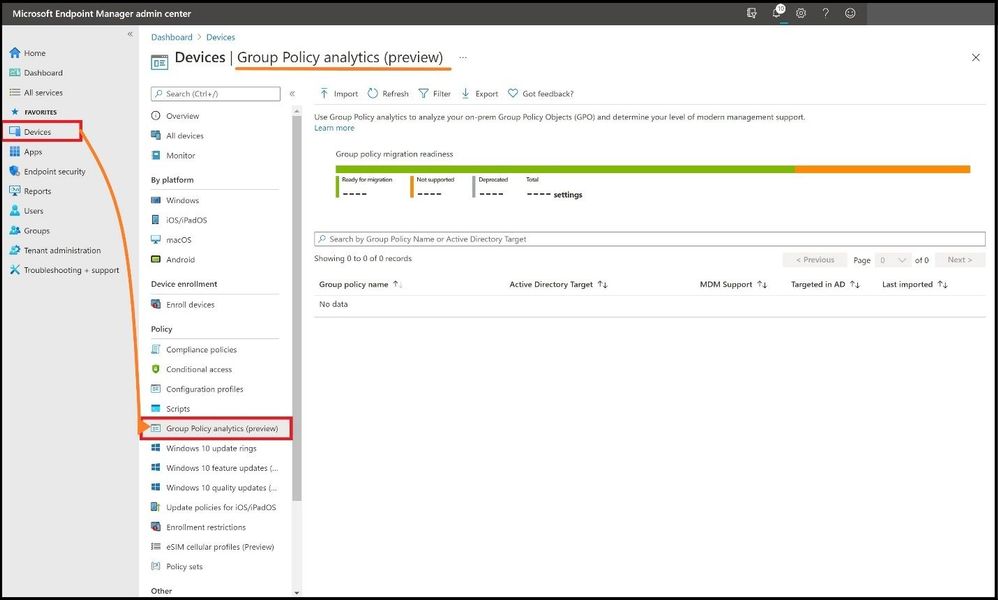
This article assumes you have enrolled or are going to enroll devices in MEM and we want to check to make sure your tenant status is green on the home page before continuing. Navigate to Microsoft Endpoint Manager and log in with your credentials. Once logged in you will arrive at the home page.
Select “Devices” and then “Group Policy analytics” to land on the policy page to perform the import of the STIGs we are going to analyze. This feature will allow you or your enterprise to analyze your on-premises GPOs and determine the level of MEM support.
Next, I will go into the DoD Windows 10 V2R2 folder and locate and confirm the gpreport.xml file is present as we will be using this file for the import. Two GPOs exist in this folder and we will be importing both (User and Computer). I will also go into the DoD Microsoft Edge V1R1 folder and locate and confirm the gpreport.xml file is present as I will also use this file for the import in addition to the other STIGs.
If your enterprise has its own internal STIGs, you would just open GPMC.msc, right-click on the STIGed GPO, and then do a “save report” and name “gpreport” and then selecting “XML” as the output and not HTML. DISA is nice enough to provide the STIGed gpreport.xml file for what we want to accomplish in each folder, so it makes it that much easier.
Selecting the gpreport.xml
Next, we will import the three STIGs in the next several steps.
(Step 1) I will go back to the Group Policy Analytics page in MEM and (step 2) select the import icon at the top. (Step 3) This will bring out the flyout card and I will select the folder icon to import each gpreport.xml. (Step 4) I will locate and select each gpreport.xml in the three folders and (Step 5) select open each time.
Importing the STIGs
Note: Check the sizes of any GPO XML files that you import (STIGs or any baseline XML file). A single GPO cannot be larger than 750 kB. If the GPO is larger than 750 kB, the import process will fail. Any XML files without the appropriate Unicode ending will also fail the process. See below for failure errors.
Errors
When all three STIGs from the respective GPO folders I targeted are successfully imported, it will list the following information:
Group Policy name: This name is automatically generated using the information inside the GPO.
Active Directory Target: The target is automatically generated using the organizational unit (OU) target information in inside the GPO.
MDM Support: Displays the percentage of group policy settings in the GPO that has the same setting in MEM.
Targeted in AD:Yes, means the GPO is linked to an OU in on-premises group policy. No means the GPO is not linked to an on-premises OU.
Last imported: Shows the date/time stamp of the last import.
Delete: Three dots on the end to delete the imported GPO (RBAC dependent).
After Importing the STOGs
As one can see, all three STIGs were successfully imported in MEM Group Policy analytics showing the percentage of MDM support. Next, we will have to see what STIG settings do not have MDM support and then add them in.
We will select the second STIG, DoD Windows 10 STIG Computer v2r2, by clicking on the blue 87% under MDM Support. This will show which STIGs are mapped and which are not and more detail about each GPO. The details will display the following:
Setting Name: The name is automatically generated using the information in the GPO setting.
Group Policy Setting Category: This shows the setting category for ADMX settings, such as Internet Explorer and Microsoft Edge. Not all settings have a setting category.
ADMX Support: Yes, means there is an ADMX template for this setting. No means there is not an ADMX template for the specific setting.
MDM Support: Yes, means there is a matching setting available in Endpoint Manager. You can configure this setting in a device configuration profile. Settings in device configuration profiles are mapped to Windows CSPs. No means there is not a matching setting available to MDM providers, including Intune.
Value: This shows the value imported from the GPO. It shows different values, true, false, enabled, disabled, etc.
Scope: This shows if the imported GPO targets users or targets devices.
Min OS Version: This shows the minimum Windows OS version build numbers that the GPO setting applies. It may show 18362 (1903), 17130 (1803), and other Windows 10 versions. For example, if a policy setting shows 18362, then the setting supports build 18362 and newer builds.
CSP Name: A Configuration Service Provider (CSP) exposes device configuration settings in Windows 10. This column shows the CSP that includes the setting. For example, you may see Policy, BitLocker, PassportforWork, etc.
CSP Mapping: This shows the OMA-URI path for the on-premises policy. You can relate this to the MDM version of GPOs.
STIGs and MDM Support
Under the MDM support column, we can see several that are not mapped in MEM/no MDM support. To add these into MEM, we need to create a custom configuration profile.
Creating a Custom Configuration Profile for Non-Mapped STIGed GPOs
After you have created the direct mapping of all the STIGed GPOs in a Configuration policy, you will need to create a custom policy for the ones that did not match or either do not have MDM support.
Select Configuration profiles, Create a profile, and for Platform select Windows 10 and later. For profile type, we will select Templates and choose Custom from the list and select create.
Creating a Custom Profile
This will bring us to the custom policy page to create the policy so we can map the STIG to MEM/MDM. Go ahead create a name for the policy and select next. For Configuration settings, select Add, and then we will need to fill in the appropriate information for the policy. The name and description should be the policy you are creating. Next, we need to find the correct OMA-URI path and data type as this must match perfectly or it will not map.
Selecting the Data Type
To find the OMA-URI path to map, you will need to use the Policy configuration service provider page from Microsoft Docs to find the setting for the path. Since this a Windows 10 policy, it will start with ./Device/Vendor/MSFT/Policy/Config/ but we will need the path after the Config/. After we go to the link, we search for the setting for “Windows Defender SmartScreen” and we can find the rest of the path as seen below. The full value for the OMA-URI path will be:
Down at the bottom, we have values of 0 and 1 and this tells me this will be an integer value for the Data Type drop-down menu and we use 1 as the value.
Finding the path on Microsoft Docs
With these pieces of information, we can apply these values found from the docs page into the correct settings as seen below.
Confirming the Rows
Go ahead and select save and then continue to add more for the ones that are not MDM compliant by selecting add again. When finished, it will display a list after you have added the ones needed and also to confirm. Go ahead and select next.
Select the groups you want the policy to apply to and select next.
Selecting the Assignments for the Policy
Select any custom Applicability Rules to apply the policy and select next. Review and then create the policy to apply.
Selecting any Applicability Rules
What About Conflicting Settings in MEM from STIGed GPOs? Who Wins?
If anyone has applied multiple STIGs on top of other GPOs or other baselines (I have a customer that uses three STIGs), the big question I always get is “who wins?” Is it the first baseline policy I created or the strongest GPO setting that will win once everything is synced? Let’s go ahead a make sure that does not happen and create a policy that is called “ControlPolicyConflict policies” or “ControlPolicyConflict/MDMWinsOverGP.” This feature was added in Windows 10, version 1803 and allows the IT admin to control which policy will be used whenever both the MDM policy and its equivalent GPO are set on the device. MDMWinsOverGP only applies to policies in Policy CSP. MDM policies win over Group Policies where applicable; not all Group Policies are available via MDM or CSP. It does not apply to other MDM settings with equivalent Group Policy settings that are defined in other CSPs. This policy is used to ensure that MDM policy wins over Group Policy when the policy is configured on the MDM channel. The default value is 0. The MDM policies in Policy CSP will behave as described if this policy value is set 1. This policy does not support the Delete command and does not support setting the value to 0 again after it was previously set to 1. In Windows 10 version 1809 it will support using the Delete command to set the value to 0 again if it was previously set to 1.
You would perform the same steps as above to create a custom configuration profile as seen below. Select Configuration profiles, Create a profile, and for Platform select Windows 10 and later. For profile type, we will select Templates and choose Custom from the list and select create.
For the configuration settings, use the below values:
With importing all the STIGs and seeing what we can migrate from on-premises, every IT Manager needs a report that will determine the status of the policies for your journey to the cloud. Select reports and then Group policy analytics.
STIGed GPO Migration Report for MEM
Select the reports tab next to the summary to see a more detailed report about the readiness of your Group Policy for modern management. Export out the results for planning purposes or to send to a certain IT Team.
Export the Report
Conclusion
Thanks for taking the time to read this article and I hope you better understand the new Group Policy analytics in MEM as you use this function in your enterprise or in any Government IL5 tenant. Using the new Group Policy analytics will further show the value for any IT Manager the value of seeing what STIGs can be brought over, the mapping, and then create custom policies for the ones that are not MDM. Then finally, seeing how MEM battles the age-old question of which STIG/GPO wins for the finale! Hope to see you in the next blog and always protect your endpoints! STIG away!
Thanks for reading and have a great Cybersecurity day!


Recent Comments