by Contributed | Feb 25, 2021 | Technology
This article is contributed. See the original author and article here.
Microsoft To Do gives you a personal and intuitive way to stay organized and make the most of every day. Today, most of our tasks involve collaboration with multiple people – something that list sharing can make easier. Whether you want to share a list of work items with your colleagues or a grocery list with a loved one, To Do makes it easy to collaborate and get things done together.
List sharing in To Do was originally restricted to sharing between personal accounts and sharing between work (or school) accounts within the same organization. However, many of you wanted to be able to share between personal and work accounts.
We listened to your feedback and are pleased to announce that you can now share lists from personal accounts to work accounts in Microsoft To Do.
To Do supports list sharing for the following scenarios:
- Sharing between personal Microsoft accounts.
- Sharing between accounts within the same place of work or education.
- Sharing between personal accounts and work accounts. Work accounts can join lists owned by personal accounts provided enterprise admins have enabled this feature for their respective organizations. However, personal accounts cannot join lists owned by work accounts.
Whether it’s a grocery list that your spouse wants to share from a personal account with your work account or a work-related list that an external vendor team can share from their personal accounts with your work account, collaborating on To Do has never been easier.
Want to know more? You can read up on list sharing here.
We can’t wait to hear what you think about this new feature – let us know in the comments below or over on Twitter and Facebook. You can also write to us at todofeedback@microsoft.com.
by Contributed | Feb 25, 2021 | Technology
This article is contributed. See the original author and article here.
Hack the climate – for a sustainable world!
Climate hackathon, organised and hosted by Stratiteq in partnership with Microsoft, will take place online 22nd – 26th March 2021. This will be an important part of the progress toward a more sustainable future by reducing the environmental footprint, accelerating research, and helping companies build sustainable solutions.
Environmental challenges are many, each with its own complexity. In some areas, we have come a long way, in other areas humanity has barely moved.
What makes this Hackathon unique, is that all the challenges will be real-life scenarios provided by non-profit organizations that have a key role in solving some of the climate challenges but might not have enough resources or technical competencies.
If you want to be part of this hackathon and work on these real-life challenges, register on: https://hacktheclimate.devpost.com/
This hackathon’s challenges will focus on:
- Carbon: How to go low carbon by reducing emissions and cut energy consumption?
- Ecosystem: How to preserve and protect biodiversity and health of the world’s ecosystem?
- ️Waste: How to become more sustainable by developing products with zero waste?
- Water: How to be water positive by replenishing more water than used?
Developers of all backgrounds and skills are welcome to participate, and we’re looking forward to innovative contributions for an even more sustainable world.
This hackathon is about you. It’s about me. It’s about us and the Earth. It’s a hackathon about respect for the environment and standing united for the climate, through our way of living. This is about sustainability. Nothing else can be more important.
Sign up your team and join the movement: https://hacktheclimate.devpost.com/
The road to Climate Hackathon
 The road to Climate Hackathon
In order to get ready for this hackathon and sharpen your skills, Microsoft created three, two weeks long Cloud Skill Challenges that can prepare you for this hackathon in Microsoft Power Platform, Cognitive Services, and Azure Machine Learning.
More information about these challenges is available on the website.
Hello World!
Asim Hussain (@jawache), Green Cloud Advocacy Lead at Microsoft is one of the faces behind this hackathon. He recently joined Hello World! podcast where he explains everything about sustainable software engineering.
Check out this interview and learn more about sustainable software engineering & what Asim does as Green Cloud Advocacy Lead at Microsoft.
Sign up today!
Fixing the climate isn’t easy, we all have a role to play. I really hope you sign up your team and come up with solutions for these environmental challenges!
Register: https://hacktheclimate.devpost.com/
by Contributed | Feb 25, 2021 | Technology
This article is contributed. See the original author and article here.
Update: Thursday, 25 February 2021 08:32 UTC
Root cause has been isolated to one of the backend dependency is down. To address this, engineers are currently working. Some customers may experience data latency and incorrect alert activation in West Europe region.
- Next Update: Before 02/25 11:00 UTC
-Vyom
by Contributed | Feb 24, 2021 | Technology
This article is contributed. See the original author and article here.
Initial Update: Thursday, 25 February 2021 04:55 UTC
We are aware of issues within Log Analytics and are actively investigating. Some customers may experience delayed or missed Log Search Alerts and Queries for customer data would not return expected results in West US 2 region.
- Work Around: None
- Next Update: Before 02/25 11:00 UTC
We are working hard to resolve this issue and apologize for any inconvenience.
-Harshita
by Contributed | Feb 24, 2021 | Technology
This article is contributed. See the original author and article here.
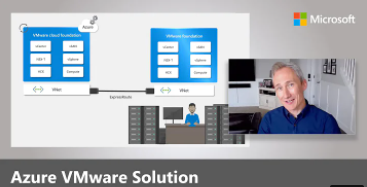
Extend to the Cloud with Azure VMware Solution
Learn how to migrate, modernize, simplify.
Tuesday, March 23, 2021 | 10:00 AM-2:00 PM Pacific Time
Learn how to extend your VMware investments to the cloud at the Azure VMware Solution digital event on March 23. Register now!
Training Videos
Explore training videos on the Microsoft Azure YouTube Channel to learn how you can run your VMware workloads natively on Azure.
Documentation
Learn how to use Azure VMware Solution to deploy a VMware private cloud to Azure.

by Contributed | Feb 24, 2021 | Technology
This article is contributed. See the original author and article here.
The 23rd cumulative update release for SQL Server 2017 RTM is now available for download at the Microsoft Downloads site. Please note that registration is no longer required to download Cumulative updates.
To learn more about the release or servicing model, please visit:
Starting with SQL Server 2017, we adopted a new modern servicing model. Please refer to our blog for more details on Modern Servicing Model for SQL Server
by Contributed | Feb 24, 2021 | Technology
This article is contributed. See the original author and article here.
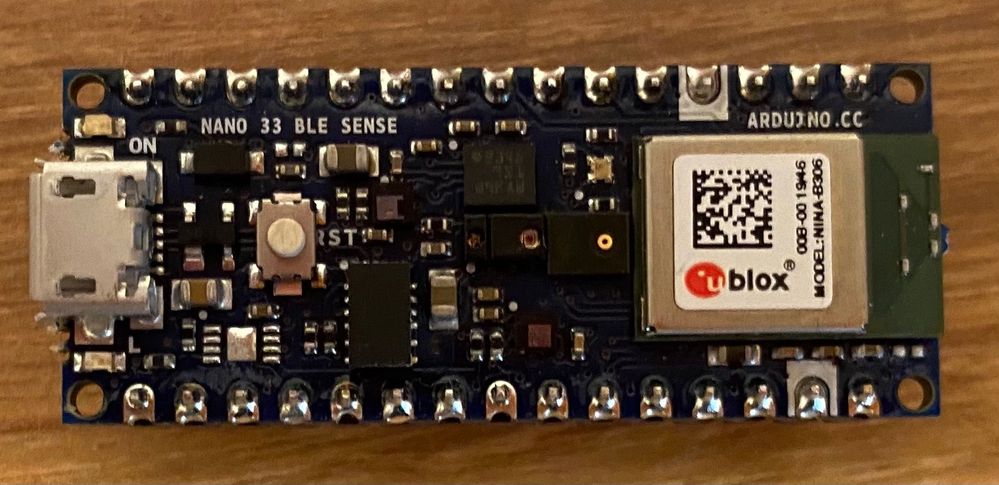
Arduino Nano 33 BLE sense board
I’ve been reading a lot about TinyML recently, so I thought it would be fun to try it out and see if I could build an audio classifier using an Arduino board I had lying around.
TinyML
TinyML is a relatively new field, and is all about creating tiny machine learning models that can run on microcontrollers. These models are really tiny – in the order of kilobytes instead of the usual megabytes or gigabytes. They need to be this tiny to run on microcontrollers that typically have killobytes of RAM. These models also draw little power, typically in the single-digit milliwatts or lower.
What are the use cases for TinyML? Well there are loads, anywhere you want to run ML models offline with minimal power draw. You may even have some TinyML models running in your house right now. For example, smart voice controlled devices listen for a wake word, and this needs to be offline and draw minimal power – perfect for a TinyML model. Another use case is in healthcare with devices that can monitor your health that run for years on tiny batteries. It’s also being used in animal smart collars and trackers, using audio to monitor the health of elephants in the wild.
To build a TinyML model you need to decide what type of model to build, gather training data, train the model, then deploy it to your device to handle new data. In this case, I wanted an audio classifier, so decided to use a support vector machine classifier.
Building an audio classifier detector
For my audio classifier, I needed to write code that could run on a microcontroller. Becuase I’m terrible at electronics and understanding I2C, SPI and all that other stuff, I decided to use an all-in-one Arduino board that has a microphone built in allowing me to use off-the-shelf Arduino libraries to gather audio data. The board of choice was the Arduino Nano 33 BLE Sense board, a small Arduino board with a whole raft of sensors including a microphone, temperature, pressure, humidity, light level and color, gesture and proximity. That’s a lot of sensors in such a tiny board!
To code this board, I could use the free Arduino IDE, but I prefer to use Visual Studio Code, along with the PlatformIO extension. This allows the creation of standalone microcontroller projects with .ini files that define the board and libraries used. I can check a project into GitHub and someone can clone it and immediately start working with it without the need for instructions on what boards and libraries they need to set up.
Getting training data
To train TinyML models you not only need the model to by tiny, but you also need small inputs – the more data that goes into training the model or inference (that is running the model), the larger it is. Audio data can be quite large – for example CD quality audio (remember CDs?) is 44.1KHz/16-bit which means it captures 2 bytes of data 44,100 times per second, or 176KB per second! That’s a lot of data – if we wanted to use all of it and train our model with 2 seconds worth of data it wouldn’t be TinyML any more.
A great trick with audio data is realising you don’t need all of it to classify particular sounds. Instead you can get an average value that represents many samples and use that as the data. In the case of the Arduino, the library that captures audio, PDM, captures audio at 16KHz in 512 byte buffers, containing 256 2-byte samples. This means each buffer has 1/64th of a second of audio data in it. We can then calculate a root mean square (RMS) of all this data to get a single 4-byte floating point value. If we do this for every buffer, we end up with 64 4-byte floats per second, or 256 bytes per second. Much smaller than raw audio at the PDM sample rate of 16KHz giving 32,000 bytes per second!
#define BUFFER_SIZE 512U

…

// Check we have a full buffers worth

if (PDM.available() == BUFFER_SIZE)

{

  // Read from the buffer

  PDM.read(_buffer, BUFFER_SIZE);
  // Calculate the root mean square value of the buffer

  int16_t rms;

  arm_rms_q15((q15_t *)_buffer, BUFFER_SIZE/sizeof(int16_t), (q15_t *)&rms);

  …

}
The RMS value can be checked against a threshold to see if there is actual audio data or not, and if audio data is detected, the next 2 seconds worth can be grabbed. In this case it’s output to the serial port so it can be read from the PlatformIO serial monitor in VS Code.
You can find the full code to capture audio samples in the Microsoft IoT Curriculum resource GitHub repo in the labs folder.
Train the model
To train the model, we need a good range of audio data captured from the Arduino device – ideally 15-30 samples per audio we want to classify. A classifier distinguishes the input between multiple labels, so we need to gather data for multiple lables. For example, to classify the words “Yes” and “No”, I’d need to gather 15-30 samples for each of the two words.
The audio data sent to the serial monitor from the Arduino can be captured into .csv files, and these can be loaded by a Python script and used to train a model.
The model in question is trained using Scikit-Learn, a Python Machine Learning library. The audio data is loaded into numpy arrays, then split into training and testing data, the model is trained using the training data, then tested with the testing data to give an idea on the accuracy.
If you have a nice shiny Apple M1 mac (like I do), then installing Scikit-Learn is currently not as easy. Check out my guide on how to install it
# Split the data into a training and testing set to test the accuracy of the model

# If you are happy with the accuracy of the model, you can remove this split

dataset_train, dataset_test, label_train, label_test = train_test_split(dataset, dataset_labels.ravel(), test_size=0.2)
# Build the support vector classification for our data and train the model

svc = SVC(kernel=’poly’, degree=2, gamma=0.1, C=100)

svc.fit(dataset_train, label_train)
# Test the accuracy of the model

print(‘Accuracy:’, svc.score(dataset_test, label_test))
Once the model has been trained, it can be exported using the rather useful micromlgen Python library which can convert ML models into raw C++ code to run on microcontrollers.
from micromlgen import port

…

# Convert the model to C code and write to the classifier.h file

c_code = port(svc, classmap=label_map)

with open(‘classifier.h’, ‘w’) as f:

    f.write(c_code)

    f.close()
Classify audio
The C++ code that comes out of the training can then be added to the microcontroller code. Instead of dumping the audio data to the serial port, it can be sent to the classifier code, and the label of the best match is returned.
void procesSamples()

{

  // Write out the classification to the serial port

  Serial.print(“Label: “);

  Serial.println(clf.predictLabel(_samples));

}
Learn more
You can find a complete hands on lab implementing this in the Microsoft IoT Curriculum resource GitHub repo in the labs folder.
by Contributed | Feb 24, 2021 | Technology
This article is contributed. See the original author and article here.
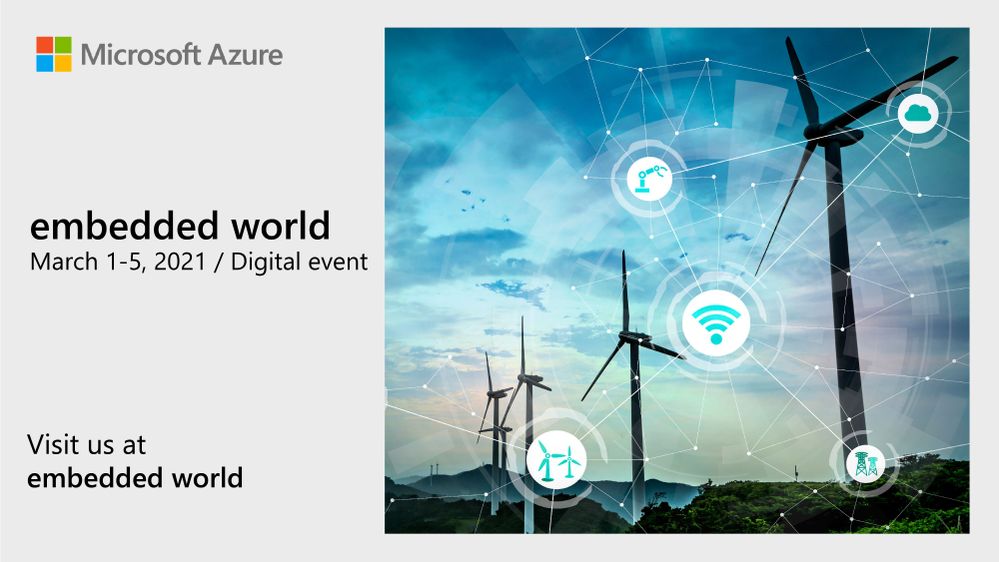
Join us virtually at embedded world is this year!
Running from March 1-5, this in-depth event offers opportunities to experience inventions from the embedded sector. Microsoft will share how Azure IoT is helping lead the way in sessions and roundtables. Register for free: https://aka.ms/AAb76w5
Here is a sneak peak on what sessions and roundtables to join to learn more, hear announcements, and ask us questions live below!
Before the event: Microsoft joins ST for STM32 Innovation Live (Feb. 25)!
Microsoft have been working in close partnership with STMicroelectronics to upgrade the STM32Cube software platform to simplify the development of IoT devices and allow embedded developers to now benefit from pre-integrated Microsoft Azure RTOS on STM32 MCUs. Want to know more? Experts from ST and Microsoft will be available during the live webcast to answer all your questions!
Register now for free to know more about Azure RTOS integration with STM32Cube! Join us at 10.30AM CET on Feb 25. https://bddy.me/3sxqKd5
During the event March 1-5: Learn more and hear latest announcements at the Sessions and Roundtables
Type |
Title |
Speakers |
Date/Time |
Roundtable |
Azure Sphere – A new class of secured system on a chip
|
Sylvain Ekel, Jürgen Schwertl
|
Mar 1: 11.00 am CET
|
Roundtable |
Azure Sphere – A new class of secured system on a chip
|
Galen Hunt, Jürgen Schwertl
|
Mar 1: 4.20 pm CET
|
Exhibitor’s Forum 1 |
What’s next for Windows IoT |
Joe Coco, Martin Tuip |
Mar 2: 11:50 AM CET
|
Exhibitor’s Forum 1 |
STMicroelectronics – Making Microsoft Azure IoT Edge easy with OpenSTLinux on STM32MP1 |
Davide Aliprandi (ST), Kamel Kholti (ST), Pamela Cortez (Microsoft) |
Mar 2: 4:15 PM CET
|
Roundtable |
New Innovations to bring AI to the Edge
|
Dan Rosenstein, Dave Jacobs
|
Mar 2: 4.20 pm CET
|
Roundtable |
New Innovations to bring AI to the Edge |
Bo Pintea, Nabila Babar
|
Mar 3: 4.20 pm CET
|
Roundtable |
Bring the power of Azure to the edge |
Terry Warwick, Chirag Shah
|
Mar 3: 5.20 pm CET
|
Roundtable |
Enabling seamless IoT experience with Azure RTOS
|
Speaker: Bill Lamie, Pamela Cortez
Moderator: Liya Du
|
Mar 4: 4.20 pm CET
|
Roundtable |
IoT Plug and Play
|
Ugan Sivagnanenthirarajah, Sandeep Pujar, Daisuke Nakahara
|
Mar 4: 5.20 pm CET
|
Roundtable |
Built-in IoT security with Edge Secured-core and Azure Defender for IoT
|
Deepak Manohar, Buck Watia, Idan Perkal
|
Mar 5: 2.00 pm CET
|
Roundtable |
Enabling seamless IoT experience with Azure RTOS
|
Bill Lamie, Pamela Cortez, Andres Mlinar
|
Mar 5: 2.30 pm CET
|
Join us at the Renesas Virtual Experience during embedded world
Microsoft will be joining Renesas for their Virtual Experience event. Check out the Microsoft Azure IoT Solutions for Renesas MCU/MPUs tech talk. Speaker Pamela Cortez from the Azure IoT product team will be demoing how to get started building IoT solutions with Azure RTOS and how we are working together to simplify the IoT Device to Cloud Experience with Microsoft Azure IoT and Renesas MCU / MPUs. Register here: https://info.renesas.com/en-embedded-world-2021-registration
Video chat or message us at the Microsoft Exhibitors page
Have questions about our latest announcements or want to discuss your IoT solution? Head over to the Microsoft sponsor page under Exhibitors. Once you are there, you will be able to message and start a video chat with the different product teams and technical specialists from Microsoft.
We hope to see you all there!
by Contributed | Feb 24, 2021 | Technology
This article is contributed. See the original author and article here.
Welcome to the resource hub for learning and staying up to date on Linux on Azure.
Microsoft Learn
Explore the Linux on Azure learning path and learn how to accomplish specific tasks with individual learning modules.
Training Videos
Linux on Azure playlist on the Microsoft Azure YouTube Channel


by Contributed | Feb 24, 2021 | Technology
This article is contributed. See the original author and article here.
Guest post by Malcolm Smith Fraser, MS Candidate at Duke University | Race and the Professions Fellow at The Kenan Institute of Ethics. Malcolm is an Interdisciplinary Data Science master’s student at Duke University. He is interested in data science, machine learning engineering, and cloud computing. Away from the computer screen his passions revolve around music, fitness, and good food.
Continuous Delivery
In short, continuous delivery (and its younger sibling continuous integration) is a way to ensure that any code you write is always in a functioning state. While continuous integration automates the process of testing our code every time it is checked into a repository, continuous delivery adds the extra step of also updating any applications running on that code. This could be a single step such as updating a static website, or multiple steps – like updating a container that lives in a container registry, then initiating a redeployment of an application that runs on that container image.
The functionality behind continuous delivery lies in the build server. Some build servers are their own standalone services and others are integrated with the various cloud providers. Services like Jenkins, Travis, GitHub Actions and Azure DevOps are all examples of build servers. I will not go into too much depth on these in this post, but they are pretty cool.
In this post I am going to focus on continuous delivery for a Flask-based web application that runs on Azure App Service. However, most of the things I will show are applicable to other applications. I will be showing continuous delivery with Azure DevOps and GitHub Actions which both have very nice integrations with Azure App Service. All code for this application can be found in my GitHub repository here. [malcolmsfraser/AzureFlask-CD (github.com)]
When working properly with Azure DevOps, the continuous delivery workflow looks like this:
Deployed web application.


Make a change and push it to my repository.

Push triggers an app build and new deployment.

Updated web app!

Cool right!?
The main component you need when setting up continuous delivery for any service is a .yml build file. This is what the build server uses to execute commands when activated. Thankfully, the sleek integrations that Azure has with the two build servers I am using means that you do not need to concern yourself with all the syntax needed to write the file yourself.
Azure DevOps
Once you have an application up and running on Azure App Service. Navigate to the Azure DevOps home screen [https://azure.microsoft.com/en-us/services/devops] and create a free account. Follow the prompts to create a new project.

Next you need to create a service connection between your Azure DevOps project and the resource group under which your App Services application is deployed.
*Please note that if you are part of an organization that limits your permissions in making changes to the Active Directory, you might not be able to make this connection. I had to switch to a non duke.edu Microsoft account to create the service connection.
Navigate to project settings, and then select service connections.

Create a new service connection to the Resource group containing the web application.

Now that you have successfully connected to the resource deploying your application, it is time to setup the continuous delivery pipeline.
Click Pipelines à New pipeline. You will then be prompted connect to where your code is hosted (I chose GitHub, but it could be on any of the supported options) and then specify the specific repository where the code lives.


The following page is where you can select the type of pipeline you will be deploying. Since I am working with a Python web application I selected “Python to Linux Web App on Azure”. However, if you click “Show more” you can see how you can easily configure a pipeline do various things – like build and push a Docker image to Azure Container Registry, which could even be followed by a Kubernetes deployment… lots of options to fit your needs.


Once you select the appropriate pipeline configuration, you will be prompted to connect it to the specific resource you are creating it for. Again, since I am working with a web application, I select the name of the appropriate Azure App Service resource in the group I connected to earlier. On the next screen I can hit “Save and run” and a file named azure-pipelines.yml will be pushed to my repository by Azure DevOps. Now every time I make a push to this repository, it will trigger Azure DevOps to redeploy the web application with any new changes.
GitHub Actions
I also could have set up CD with GitHub Actions, which is separate from the Azure DevOps workflow. To initialize you need to navigate to your Azure App Service resource and select “Deployment Center” from the menu on the right.

From there, navigate to the settings tab and create a new CI/CD integration, connect to your repository, select the runtime, and click save.
If you are using GitHub, this will create a file in your repository named .github/workflows/master_{app-name}.yml. Like the Azure DevOps workflow, now whenever you push you your repo GitHub Actions will kick start a deployment to Azure App Service.

Adding other steps to continuous delivery
Up until now the continuous delivery us only deploying your application. Better practice would be to also lint and test the application before it gets deployed (I am just linting here but adding a test would be the same idea). Simply insert these steps to the .yml file after the python environment has built. I use a Makefile to simplify these commands (make lint), but you could run them explicitly.
Azure DevOps (azure-pipelines.yml) on left and GitHub Actions (master_FlaskApp-CD.yml) on right:

Both options for continuous delivery are very straightforward. That being said, it is very easy to see how Azure DevOps could quickly be used to continuously deliver a wide range of applications by changing just a single step in the process, while the current workflow for GitHub Actions that I used is more specific to the Python/Linux web app use case. I suspect that the integration for GitHub Actions is probably just as seamless across other Azure services, but I have not tried it yet.
Next, I want to try this with a containerized deployment…because containers are cool.
Additional Learning Resources
DevOps Learning Pathways
Evolve your DevOps practices learning path – Learn | Microsoft Docs
Deploy applications with Azure DevOps learning path – Learn | Microsoft Docs
Build applications with Azure DevOps learning path – Learn | Microsoft Docs
Container and DevOps
Introduction to Azure Kubernetes Service – Learn | Microsoft Docs
Introduction to Kubernetes – Learn | Microsoft Docs
Automate multi-container Kubernetes deployments with Azure Pipelines – Learn | Microsoft Docs
Automate Docker container deployments with Azure Pipelines – Learn | Microsoft Docs

Recent Comments