by Scott Muniz | Nov 26, 2020 | Security, Technology, Tips and Tricks
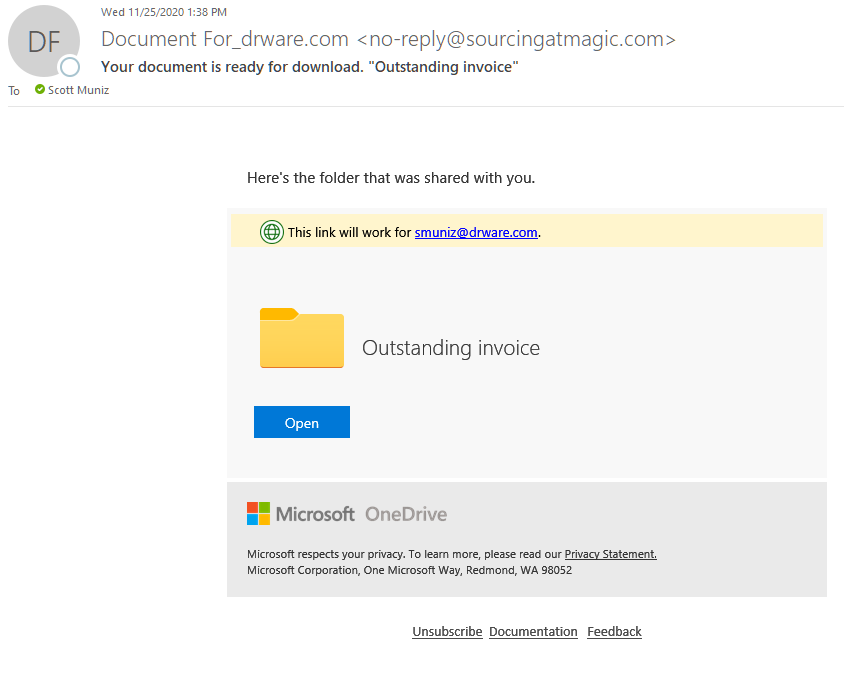
The OneDrive phishing scam is particularly dangerous because of how insidious it is. A seemingly innocuous email shows up in your Inbox with a subject something like this, “Document for [your name].” In the body of the email you see what looks like a familiar OneDrive notice about an available document that has been shared with you by someone you know. Upon clicking on the link or the folder you are forwarded to a familiar Microsoft 365 sign in box.

You enter your email, which is accepted, and then you enter your password, which fails on the first attempt but succeeds on the second. You may end up at office.com or OneDrive but you don’t have access or you don’t see the shared document. At this point you may become suspicious but it’s too late. They now have your Microsoft 365 email and password. They can get into your email, send spam in your name, see/edit/delete your OneDrive files. If you have administrative privileges they can wreak even more havoc. How can you avoid this scam?
How to Vet Your Email Messages
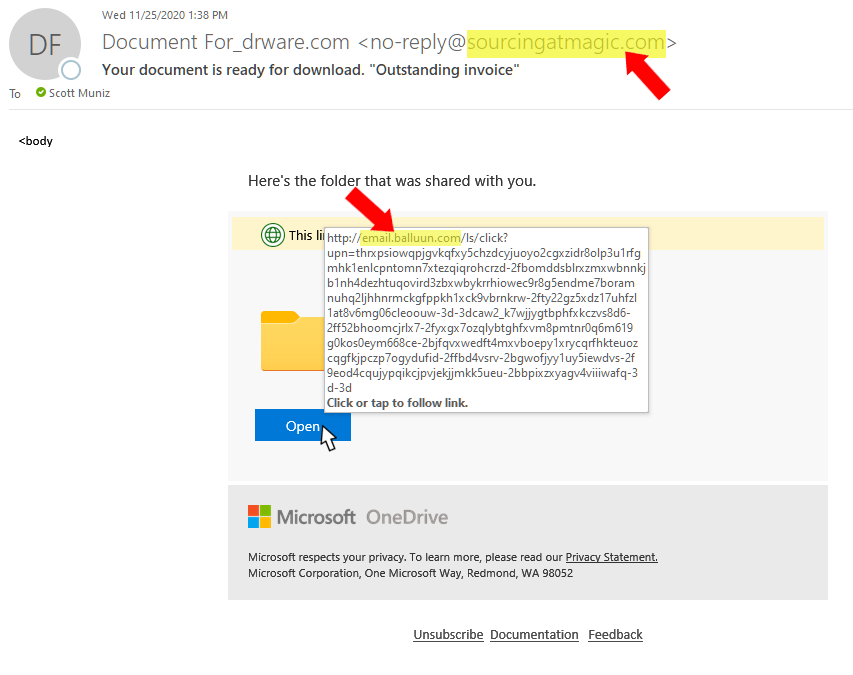
Every email that appears in your Inbox should be vetted no matter if it’s from a friend or foe (see image below).
- Are you expecting this email?
- Check the “sender,” not just the name, but also the email address.
- Hover over (don’t click) all links. A bubble will appear with the link destination.
Now you’re equipped with all the information you need. If this is not an expected email then do not click on anything and contact the sender to see if they actually sent you this message. If it is expected or typical for the sender still do steps 2 and 3 above. If either do not match then do not click on anything. You may still want to alert the sender so they can check to see if their email has been hacked.
Additional Steps
Multifactor authentication would completely prevent this type of attack. When your Microsoft 365 administrator activates multifactor authentication then each time you log into Microsoft 365 you are asked for a verification code via text or call. You might even use the Microsoft Authenticator app. This extra step thwarts scammers. Even if someone were to fall for this scam, and the scammer had their Microsoft 365 email and password, when the scammer tries using their credentials a text, call, or email would go to the real user for verification and that would stop the scammer in their tracks. It would also alert the user that their account has been compromised allowing them to take steps to change their password. I strongly recommend multifactor authentication.
The other usual steps are:
- Always keep your Windows OS up-to-date by activating automatic Windows updates.
- Keep your antivirus up-to-date and run frequent virus checks.
- Never ever give anyone your Microsoft 365 password and change it regularly.
- Listen to your gut. If it looks fishy (phishy) then delete it and call or text the sender
Online scams are on a meteoric rise. Diligence will keep you safe. Please be careful!

by Contributed | Nov 26, 2020 | Business, Technology
This article is contributed. See the original author and article here.
Artificial Intelligence (AI) is driving innovative solutions across all industries, but with machine learning (ML) applying a paradigm change to how we approach building products, we are all exploring how to expand our skill sets and enhance our applications.
In this session we won’t be able to teach you how to become a data scientist. But in this on demand session you can spend 3 hours, showing you how to build on your current developer skills to integrate AI services into your business applications and also set you up on your journey to become certified in AI Fundamentals.
During the session we will show you interesting technology through the lens of real business scenarios and to do that we would like to introduce you to Tailwind Traders. Tailwind Traders is a retail company looking for support on how to benefit from applying AI across their business. In ‘Developers Guide to AI’ we will show how Tailwind Traders have solved business challenges and implemented AI technologies.
In this online learning series and associated Microsoft Learn learning paths you will see a wide range of examples: dealing with different types of data (text, audio, image, unstructured), sharing best practices around unstructured search and conversational AI or taking your next step in learning more about machine learning theory with low code solutions.
Session Content
| Introduction |
Introduction to the show and what we want people to achieve. |
| Introducing Computer Vision for Automation in Changing Times |
Cognitive Services: Computer Vision |
| Interview: Willem Mentis (Global AI Community, AI MVP) |
Working with Computer Vision technologies in the real world |
| Extracting Value from Text and Audio to Inform Business Strategy |
Cognitive Services: Text and Speech |
| Interview: James Mann (UK) AI MVP |
Working with Text data and extracting insights |
| Making Sense of your Unstructured Data with AI |
Azure Cognitive Search |
| Interview: Kokila Katyal (BP) / Adelina Balasa (Microsoft) |
Unstructured search in the real world |
| Improve Customer Engagement and Productivity with Conversational AI |
Microsoft Bot Framework Composer + LUIS + QNA Maker |
| Interview: Product Group – Senior PM Microsoft Bot Composer Team Gary Pretty |
Conversational AI, Bot Framework, and the future of this space |
| Start Building Machine Learning Models Faster than You Think |
Azure Machine Learning Designer |
| Interview: Marta Rodriguez Martinez lead data science coach at WhiteHat |
Getting started on your data science journey. |
| Q&A / Summary Session |
All guests back on for live Q&A |
| Close |
More details on MS Learn and Certification |
On Demand Session
Resources & Links from the session.
by Contributed | Nov 26, 2020 | Technology
This article is contributed. See the original author and article here.
With a diminishing boundary between work and life, it becomes more important to keep a track of things to do! Microsoft To Do helps you in managing all your work and personal tasks in one place, while ensuring proper syncing across all devices in an intelligent way.
As a part of our “six tips on To Do” series, in this article, we will focus on the exclusive To Do features available on Android. For six tips on To Do Windows click here.
Happy reading!
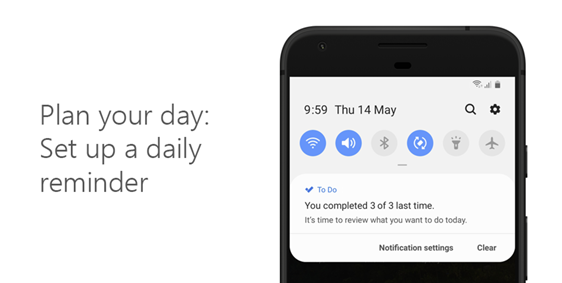
1. Reminders to plan your day
Forgot to set up My Day this morning? On Android, you can set a daily reminder to keep on top of your tasks. Find it in your settings!
2. Drag and drop between apps on Android
Quickly add a note or step in Android by dragging and dropping between any app and To Do in split screen view.

3. Home screen shortcut
Have a list you like to look at frequently? Add a shortcut to your home screen on Android to access it quickly.

4. To Do widget on Android
To Do widget is available on Android! By using the To Do widget on your Android device you can quickly add and complete tasks without opening the app.

5. Swipe it!
Another quick action for you: just swipe left on any task to delete it, or swipe right to move it or add it to My Day.

6. Quick add:
Exclusively available for Android To Do users, this persistent notification in your Android notifications area helps you add a task in To Do with just one tap. You can enable it from the notification setting area.

We hope that you enjoyed this article! let us know your feedback in the comments below or over on Twitter and Facebook. You can also write to us at todofeedback@microsoft.com.
by Contributed | Nov 26, 2020 | Technology
This article is contributed. See the original author and article here.
With a diminishing boundary between work and life, it becomes more important to keep a track of things to do! Microsoft To Do helps you in managing all your work and personal tasks in one place, while ensuring proper syncing across all devices in an intelligent way.
As a part of our “six tips on To Do” series, in this article, we will focus on the exclusive To Do features available on Android. For six tips on To Do Windows click here.
Happy reading!
1. Reminders to plan your day
Forgot to set up My Day this morning? On Android, you can set a daily reminder to keep on top of your tasks. Find it in your settings!
2. Drag and drop between apps on Android
Quickly add a note or step in Android by dragging and dropping between any app and To Do in split screen view.
3. Home screen shortcut
Have a list you like to look at frequently? Add a shortcut to your home screen on Android to access it quickly.
4. To Do widget on Android
To Do widget is available on Android! By using the To Do widget on your Android device you can quickly add and complete tasks without opening the app.
5. Swipe it!
Another quick action for you: just swipe left on any task to delete it, or swipe right to move it or add it to My Day.
6. Quick add:
Exclusively available for Android To Do users, this persistent notification in your Android notifications area helps you add a task in To Do with just one tap. You can enable it from the notification setting area.
We hope that you enjoyed this article! let us know your feedback in the comments below or over on Twitter and Facebook. You can also write to us at todofeedback@microsoft.com.
by Contributed | Nov 26, 2020 | Technology
This article is contributed. See the original author and article here.
Now Git is something I never thought I’d have to learn, a few years ago if you’d suggest I learn Git I would have laughed and said I wasn’t a developer, however I probably use Git at least once a week now.
Last year I called out how you can get started with Git, so if it’s still something you aren’t sure about go check out that article.
There is one thing I still kinda of struggle with within Git, and that’s branches. I am that person that’s guilty of committing directly to the main branch of whatever repository I am working on. Which has got me in trouble a few times with some things.
What is a Git Branch?
The best way I can think of to describe Git Branches is it’s a way of tracking your changes while you make modifications or add features to the main project. It’s kind of a kin to printing out a document, making some changes with old fashion pen and paper and then getting approval from a peer before changing the main document.
A branch gives you a chance to play with changes, new features without breaking or “messing” with the main source of code or documentation.
How to work with a branch?
So, let’s see branches in action, let’s look at GitHub and Git and working with branches.
I’m taking a generic, test GitHub repository that I have for testing features and trying things out on. It’s here https://github.com/weeyin83/Test, at the moment it only has one branch the main one, where everything is stored.
The first thing I am going to do is clone a copy of this repository to my local computer
git clone https://github.com/weeyin83/Test.git
I now have a copy to work with on my laptop.
I want to restructure the files and folders within this repository, so let’s create a new branch where I can do that with. So within my Git Bash command interface I say
git branch restructure
With restructure being the name of the branch, I want to create, you can specify anything you want here. To start working in this new branch I need to issue the command:
git checkout restructure
I’m now no longer in the main branch so can make my changes. If I’m ever unsure of what branch I am working in I can run the command
git symbolic-ref –short HEAD or git branch and it will show me which branch I am working in.
Once all my changes have been made and I am happy I can then issue the following commands
git add .
git commit -m “folder restructure changes”
git push –set-upstream origin restructure
These three command add changes in the working directory (branch) to a staged area, commits the new changes to that branch and then pushes them up to my GitHub repository.
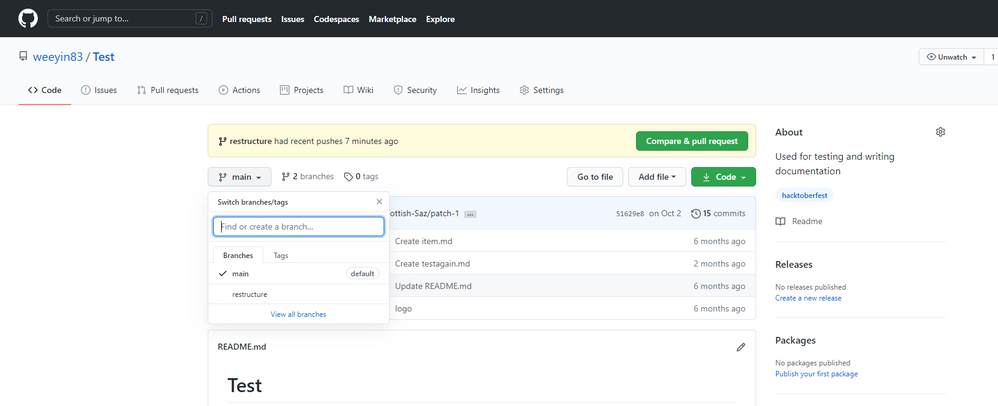
Now within GitHub I can see that I have two branches to this repository
Git Branches within GitHub
Now that I am happy with my changes in the branch and I want to commit them all to the main/default branch I need to do the following:
git checkout main
This switches me back into the main branch of the repository. Now I can do:
git merge restructure
git push
Which merges the changes I made in the restructure branch and then push those new changes back into GitHub. So, my main branch now looks just like the restructure branch.
How do you use branches?
As I said at the start of the post I’ve made some mistakes in my main branch and had to scramble to get things working again, so branches are something I need to get Are branches a helpful feature when you are working with repositories?
Feel free to comment below with your stories of join us on the team Discord server to chat about Git, Git mistakes and branches. ;)

Recent Comments