This article is contributed. See the original author and article here.
At last year’s Ignite 2021 Microsoft announced the Preview of a new Teams SDK that enables developers to create Microsoft Teams apps that, with minor adjustments to the app’s manifest, can also extend Teams personal apps and message extensions to other parts of Microsoft 365, like Office and Outlook. Today, we are making the first group of these Teams apps available in Preview for Outlook and Office.com for users enrolled in the Targeted Release program. We’ve also worked on enhancing some of our own apps, like Power BI, partnered very closely with ISVs like Mural and Zoho to build apps using this SDK and will be adding more. Read on to learn how you, an admin, can get your users ready, and what admin controls are already available.
With this enhancement, apps built for Teams not only run everywhere Teams runs, but also in more of the places that users spend their time in Microsoft 365, like Outlook and Office.com. You should note that once your users in Targeted Release start seeing these apps, you will need to know how to manage this experience. Click here to learn more.
What does this mean for your organization?
With the enhanced Teams apps, your users in Targeted Release that use the apps in Teams will start seeing those apps in Outlook and Office.com.
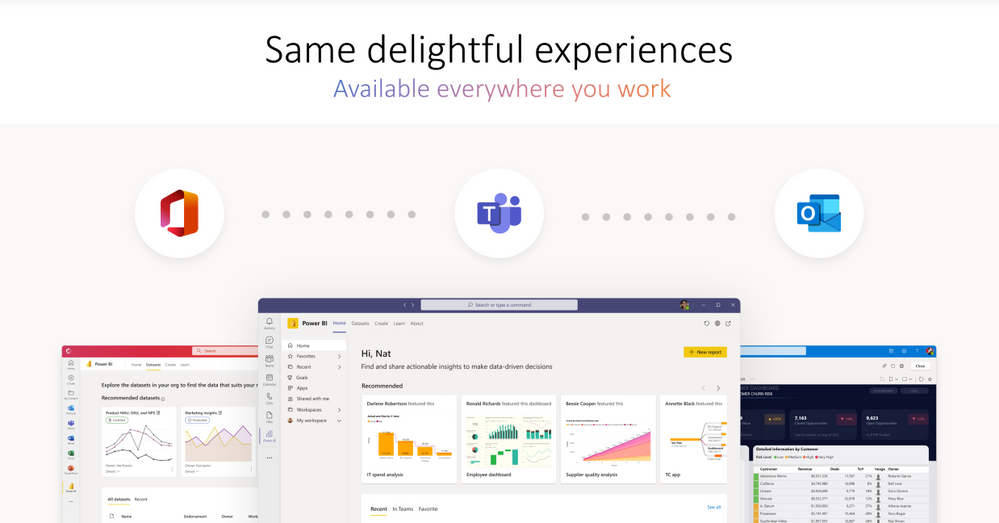
Illustration labeled, “Same delightful experience available everywhere you work.” Displays the Microsoft Office, Microsoft Teams, and Microsoft Outlook icons, and beneath them are screenshots of Power BI in Office, Microsoft Teams, and Outlook.
App Management Tools
With the enhanced Teams apps, as an admin, you can now manage the app and user access to the app in a unified manner. Previously, for an app to work in Teams, Outlook, and Office, you needed to manage each app independently. With the enhanced Teams apps, you now need to manage it only once, and enable a single, connected experience for end-users across Teams, Outlook, and Office.com.
With the enhanced Teams app, for its use in Outlook and Office.com, there is no change in existing permissions, or the app data access. The enhanced app continues to use the existing permissions granted in Teams.
Displays the Teams admin center with the permissions pop-up for Zoho projects app.
As an admin, you can manage the enhanced Teams apps, in the Teams admin center, using the same admin controls that you use for your Teams apps. As a Teams administrator, you can manage your end-users’ access to the enhanced Teams apps. If you are already using the Teams app that is enhanced to work across Microsoft 365, you can see the experience in Preview for Outlook and in Office.com.
Displays the Mural app in the Microsoft Office.com experience.
After you install, your end-users can start using the Teams app in Office.com and can see the app conveniently available in the app bar in Office.com.
Displays the Zoho projects app in the Microsoft Office experience, with a highlight on the Zoho projects app in the left ribbon.
Like in Office.com, your end users will have a similar experience in Outlook, plus message extensions within email and calendar composite experience. The app is conveniently available on the left app bar in Outlook.
Displays the Zoho projects app Message Extension in the Microsoft Outlook experience.
In the future, we will bring more admin controls to the Microsoft 365 admin center to manage these experiences across all Microsoft 365 apps.
Note: The Preview roll-out of these new capabilities has started for users enrolled in the Microsoft 365 Targeted Release program or who are members of the Office Insiders program and have Outlook for Windows installed from the Beta Channel.
Continue the conversation by joining us in the Microsoft 365 Tech Community! Whether you have product questions or just want to stay informed with the latest updates on new releases, tools, and blogs, Microsoft 365 Tech Community is your go-to resource to stay connected!
This article is contributed. See the original author and article here.
The Federal Bureau of Investigation (FBI) has released a Private Industry Notification (PIN) to inform U.S. Government Facilities Sector partners of cyber actors conducting ransomware attacks on local government agencies that have resulted in disrupted operational services, risks to public safety, and financial losses.
This article is contributed. See the original author and article here.
The Azure SQL Migration extension for Azure Data Studio provides a seamless and robust migration experience to help you migrate your SQL Server databases to Azure. However, if you have multiple databases across multiple SQL Server instances, migrating them together at scale using graphical UI may not be the most efficient method. Today, we are announcing Public Preview of new migration capabilities added to Az.DataMigration module in Azure PowerShell and az datamigration extension in Azure CLI. With these migration capabilities added to Azure PowerShell and Azure CLI, you can automate tasks and activities related to SQL Server database assessments, performance data collection for Azure recommendations and migration of multiple databases (across multiple SQL Server instances) at scale.
By automating migration activities, you can save time and efficiently migrate a large number of SQL Server databases to Azure SQL Managed Instance or SQL Server on Azure Virtual Machines. For example, the code snippet below demonstrates a SQL Server database migration to Azure SQL Managed Instance using Azure CLI with three commands.
Step 1: Create a new Azure Database Migration service in your Azure subscription.
az datamigration sql-service create --resource-group "myRG" --sql-migration-service-name "myMigrationService" --location "EastUS2"
Step 2: Configure and start online database migration from SQL Server on-premises (with backups in Azure Storage) to Azure SQL Managed Instance.
Step 3: Perform a migration cutover once all backups are restored to Azure SQL Managed Instance.
$migOpId = az datamigration sql-managed-instance show --managed-instance-name "mySQLMI" --resource-group "myRG" --target-db-name "AdventureWorks2008" --expand=MigrationStatusDetails --query "properties.migrationOperationId"
az datamigration sql-managed-instance cutover --managed-instance-name "mySQLMI" --resource-group "myRG" --target-db-name "AdventureWorks2008" --migration-operation-id $migOpId
Sample scripts to run end-to-end SQL Server database migrations to Azure SQL Managed Instance or SQL Server on Azure Virtual Machines are available in the Azure Samples Github repository (aka.ms/sqldatamigration-samples).
This article is contributed. See the original author and article here.
Custom Neural Voice, a feature of Azure Cognitive Services for Speech, is a great way to create a highly natural synthetic voice that sounds almost identical to your voice actor. This synthetic voice can then be used in a variety of different scenarios including audiobooks, language learning, reading news content and many more. Since its launch, Custom Neural Voice has empowered organizations such as AT&T, Duolingo, Progressive, and Swisscom to develop branded speech solutions that delight users. (For more details, read the Innovation Stories blog).
Microsoft has made it simple to train a professional custom neural voice by using a small set of recordings from the target voice (from 300 to 2,000 sentences or short phrases, which is about 30 minutes to 3 hours of speech data). However, the studio recording process takes time and many customers are looking for a way to try the voice customization capability more easily.
Today we are glad to introduce Custom Neural Voice Lite, a new feature in public preview, which enables users to clone their voice by recording just 5 minutes of speech data. This new feature makes it extremely easy for customers to create a synthetic voice that sounds natural.
Custom Neural Voice Lite
Custom Neural Voice (CNV) now supports two project types, Pro and Lite. The Pro version is best for professional scenarios like brand and character voices for chat bots, or audio content reading. In this blog, we provide detailed instructions on how to create a professional custom neural voice. The new Lite version is best for producing quick demos or creating personal voice clones.
Due to the sensitivity of the technology, we have limited the access and use of Custom Neural Voice. However, every customer with a valid Azure Speech resource can create CNV Lite voices by recording their own voice for evaluation purposes. After creating a CNV Lite voice, the customer must submit an application with their use case to gain full access to the Custom Neural Voice capability before they can use the voice for business scenarios.
The following table summarizes the key differences between the CNV Pro and CNV Lite project types.
Items
Lite (Preview)
Pro
Target scenarios
Demonstration or evaluation
Professional scenarios like brand and character voices for chat bots, or audio content reading
Training data
Record online from your own computer using Speech Studio
Bring your own data. Recording in a professional studio is recommended.
Scripts for recording
Provided in Speech Studio
Use your own scripts that match the use case scenario. Microsoft provides example scripts for reference.
Required data size
20-50 utterances
300-2,000 utterances
Training time
Less than 1 compute hour
Approximately 20-40 compute hours
Voice quality
Moderate quality
High quality
Availability
Anyone can record samples online and train a model for demo and evaluation purpose. Full access to Custom Neural Voice is required if you want to deploy the CNV Lite model for business use.
Data upload is not restricted, but you can only train and deploy a CNV Pro model after access is approved. CNV Pro access is limited based on eligibility and usage criteria. Request access on the intake form.
Pricing
Per unit prices apply equally for both the CNV Lite and CNV Pro projects. Check the pricing details here.
Per unit prices apply equally for both the CNV Lite and CNV Pro projects. Check the pricing details here.
To get an idea of how a Lite voice sounds like, check the samples below.
Language
Human recording
TTS (CNV Lite)
English
Chinese
How it works
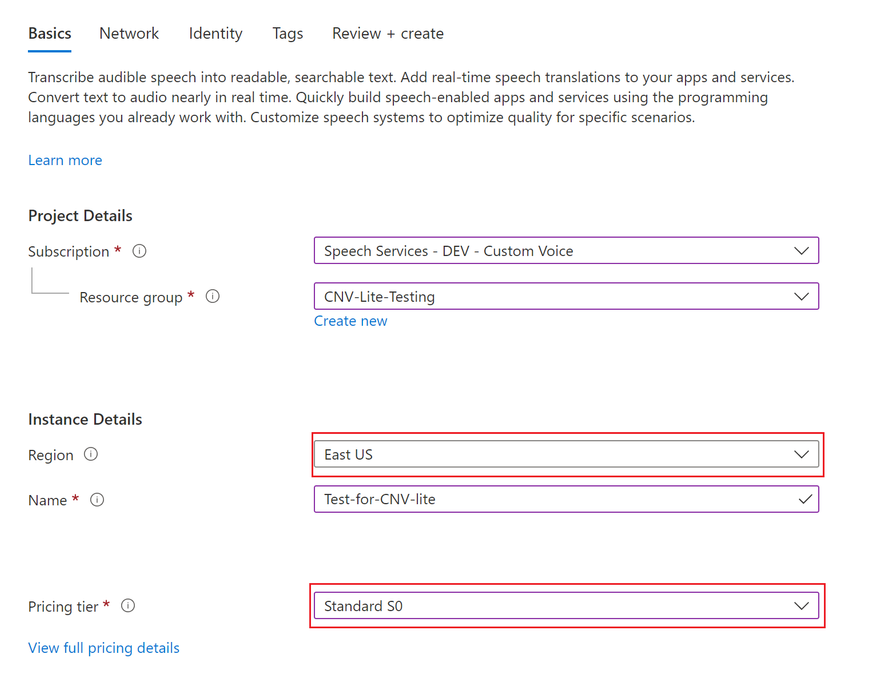
A Speech service resource is required before you can create a Custom Neural Voice project. If you do not have a Speech resource in Azure, follow these instructions to create one. Make sure you select one of these regions for your resource – East US, Southeast Asia, or UK South where Custom Neural Voice training is supported. Select S0 for the pricing tier. Free tiers are not available for Custom Neural Voice.
Creating a Speech resource
To build your CNV Lite voice, go to Speech Studio. Log in with the right Speech resource selected. Then click on the ‘Custom Voice’ tile and select to create a Custom Neural Voice Lite project. CNV Lite now supports English and Chinese (Mandarin).
Creating a CNV Lite project
Once the project is successfully created, you can start to build your voice. Before you move forward, make sure you read and understand the Voice Talent Terms of Use, and provide your agreement for Microsoft Speech Studio to collect your voice data (at this step, for evaluation purpose). To protect each user’s voice identity, the Lite project will be removed within 90 days if your company does not have its business use case approved by Microsoft (check the limited access policy), or the voice talent whose data is used for training does not provide explicit agreement for using his/her voice to generate synthetic speech outside of the evaluation purpose (check the voice talent disclosure requirement).
Once you have accepted the terms of use, you can start to record your voice samples. Read the recording instructions carefully. The quality of your recording data is critical to the training output. Check your environmental noise and do not record if noises are detected.
Noise check before voice recording
Tips for recording:
Increase the clarity of your samples by using a high-quality microphone. Speak about 8 inches away from the microphone to avoid mouth noises.
Relax and speak naturally. Allow yourself to express emotions as you read the sentences.
To keep a consistent energy level, record all sentences in one session.
Pronounce each word correctly and speak clearly. After recording each sample, check its quality metric before continuing to the next one.
Although you can create a model with just 20 samples, it’s recommended that you record up to 50 to get better quality.
After each sample is recorded, double check the audio quality before you click to record the next. Several metrics are provided to help you review the quality, enabled with the pronunciation assessment technology.
As shown in the screenshot below, mispronunciations are automatically detected on each audio. It’s recommended that you make sure your recorded audio is green with accepted quality.
“Clearness” indicates the speech signal against the noise. You get a higher clearness score if the noise level is lower.
“Pronunciation” shows the accuracy of your pronunciation at the sentence level. You should make sure you pronounce each word correctly with no omission or insertion.
“Volume” of your voice in the recording should be kept stable. Don’t speak too far or too close to your mic. An audio that’s too loud or too low volume is not acceptable.
Recording voice samples with quality check
After you have recorded at least 20 samples, and checked the quality is all good, you can click the ‘Train model’ button at the bottom of the page to start your voice training. It’s estimated that each training takes about 40 minutes. Check the pricing page to get an idea of the cost before you hit ‘Create’.
Once the model is successfully created, you can listen to the sample output for demo and evaluation purpose.
Sample output of a CNV Lite voice model
To deploy your voice model and use it in your applications, you must get full access to Custom Neural Voice and explicit consent from your voice talent. You can submit a request form here. For guidance on applying for Custom Neural Voice, you can watch this short video. With the full access approved, you can get your CNV Lite voice integrated with your apps, or move to create a CNV Pro project with professional studio recordings for an even more natural voice. Check this blog for the instructions to create a high-quality professional voice.
Learn more
We are excited about the future of Neural TTS with human like, diverse and delightful quality under the high-level architecture of XYZ-Code AI framework. Our technology advancements are also guided by Microsoft’s Responsible AI process, and our principles of fairness, inclusiveness, reliability & safety, transparency, privacy & security, and accountability. We put these ethical standards into practice through the Office of Responsible AI (ORA), which sets our rules and governance processes, the AI, Ethics, and Effects in Engineering and Research (Aether) Committee, which advises our leadership on the challenges and opportunities presented by AI innovations, and Responsible AI Strategy in Engineering (RAISE), a team that enables the implementation of Microsoft responsible AI rules across engineering groups.


Recent Comments