by Contributed | May 13, 2022 | Technology
This article is contributed. See the original author and article here.
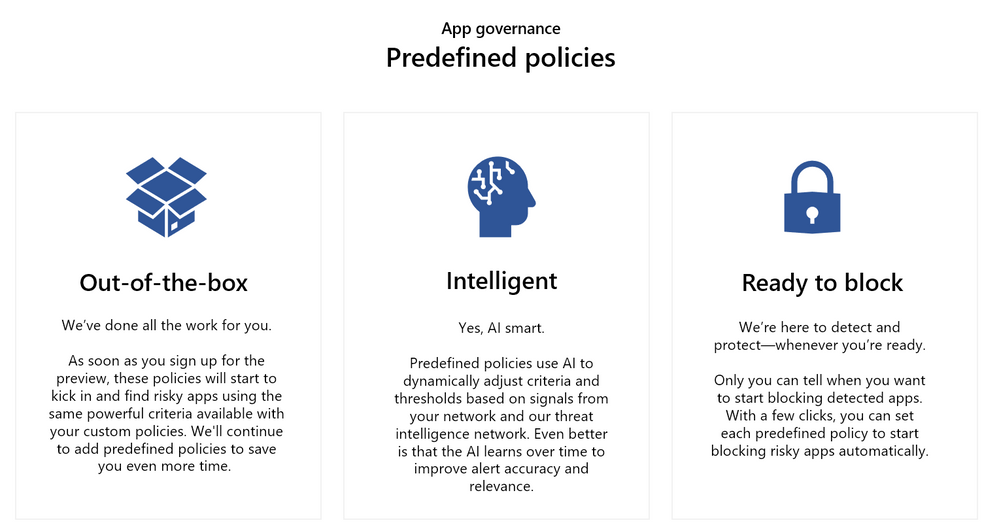
We’re excited to announce the general availability of predefined policies in the app governance add-on for Microsoft Defender for Cloud Apps. This first set of out-of-box policies represents our commitment to simplifying the entire app governance experience. The predefined policies will detect apps with anomalous and potentially malicious characteristics. We will continue to expand the set of predefined policies, further reducing the need to create manual policies and help streamline deployment.
Why are predefined policies important?
App governance currently provides a rich set of policy conditions. They do, however, require time and resources to sort out so admins can create the right policies for your organization. Predefined policies empower admins to focus on critical activities needed to keep their organization secure and compliant, not on the policy creation process itself.
You’re still in control
While the predefined policies are on by default and are designed for minimal maintenance, you will be able to:
- Quickly find and review predefined policies in your list of policies
- Activate or deactivate each policy individually
- Set each policy to block apps
- Exclude apps from the policy
Other capabilities added as part of this release
- Exclusion lists: Customers can now set policies to cover all apps except for specific apps. They can apply this scoping option to their existing custom policies as well as the predefined policies.
- Correlation to Microsoft 365 Defender incidents: All app governance alerts are now correlated by Microsoft 365 Defender to generate incidents.
- Simplified policy configuration: Customers can modify the predefined policies even faster using a new contextual flyout menu.
Get started with app governance
App governance is an add-on to Microsoft Defender for Cloud Apps that provides enhanced visibility and control over cloud apps that access Microsoft 365. It sifts through these apps to identify not only attributes and behavior that are malicious, but also characteristics that mark significant sources of risk.
Try app governance for free for 90 days
– App governance team
by Scott Muniz | May 13, 2022 | Security, Technology
This article is contributed. See the original author and article here.
CISA is temporarily removing CVE-2022-26925 from its Known Exploited Vulnerability Catalog due to a risk of authentication failures when the May 10, 2022 Microsoft rollup update is applied to domain controllers. After installing May 10, 2022 rollup update on domain controllers, organizations might experience authentication failures on the server or client for services, such as Network Policy Server (NPS), Routing and Remote access Service (RRAS), Radius, Extensible Authentication Protocol (EAP), and Protected Extensible Authentication Protocol (PEAP). Microsoft notified CISA of this issue, which is related to how the mapping of certificates to machine accounts is being handled by the domain controller.
For more information see the Microsoft Knowledge Base article, KB5014754—Certificate-based authentication changes on Windows domain controllers: Key Distribution Center registry key.
Note: installation of updates released May 10, 2022, on client Windows devices and non-domain controller Windows Servers will not cause this issue and is still strongly encouraged. This issue only affects May 10, 2022 updates installed on servers used as domain controllers. Organizations should continue to apply updates to client Windows devices and non-domain controller Windows Servers.
by Contributed | May 13, 2022 | Technology
This article is contributed. See the original author and article here.
App Installer is a powerful technology which enables to streamline the deployment and update of applications packaged with MSIX. Thanks to App Installer, you can enable features which are typically reserved only to managed deployment platforms (like the Microsoft Store or Endpoint Manager), for instance automatic updates. By setting up the App Installer file in the proper way, you can let Windows automatically check the availability of updates and install them without any extra effort from the developer. It’s enough to publish an updated version of the package on the original location (a website or a network share) to let Windows download and install it, based on the logic you have defined in the App Installer file (you can check for updates in background, when the application is launched, etc.).
This approach is great for many scenarios, especially the ones in which you don’t have access to the source code (for example, you’re a system administrator managing the deployment of apps for the company). However, if you’re a developer who is actively building and evolving your application, you might want more control over the update process. For instance, you may want to tell the user, within the application itself, if there’s an update available.
To support these scenarios, the Windows Runtime comes with a series of APIs that you can use to interact with App Installer: if your MSIX packaged application has been deployed using an App Installer file, you can leverage these APIs to perform tasks like checking if an update is available, triggering the update, etc.
Let’s explore this scenario in more detail.
Checking for an available update
The heart of these APIs is the Package class, which belongs to the Windows.ApplicationModel namespace. This is a Windows Runtime namespace, so to access it you might need to make a few tweaks to your project based on the UI platform you’ve chosen:
If it’s a UWP or WinUI app built using Windows App SDK, then you’re good to go. Both technologies offer built-in access to Windows Runtime APIs.
If it’s a WPF or Windows Forms application based on .NET Framework or .NET Core 3.x, you must install a dedicated NuGet package.
If it’s a WPF or Windows Forms application based on .NET 5 or .NET 6, you must set in the project’s properties one of the target frameworks dedicated to Windows 10/11, like in the following sample:
<TargetFramework>net6.0-windows10.0.19041</TargetFramework>
Now you can use the following code snippet to check if an updated version of the package is available via App Installer:
public async Task CheckForUpdates()
{
Package package = Package.Current;
PackageUpdateAvailabilityResult result = await package.CheckUpdateAvailabilityAsync();
switch (result.Availability)
{
case PackageUpdateAvailability.Available:
case PackageUpdateAvailability.Required:
break;
case PackageUpdateAvailability.NoUpdates:
break;
case PackageUpdateAvailability.Unknown:
default:
break;
}
}
The code is simple. First, we get a reference to the current package, using the Package.Current singleton. This object will enable us to access all the properties related to the MSIX package and the identity of the application. Then we call the CheckUpdateAvailabilityAsync() method, which will return us a PackageUpdateAvailabityResult object, that includes an Availability property which is an enumerator. If we get Available or Required, it means there’s an update available. As you can see, we don’t have to specify the URL where to check the update availability from. The API will automatically use the App Installer URL which is linked to the application. Windows automatically stores this connection when we install a MSIX packaged application through an App Installer file.
Thanks to this code, we can implement our own logic to communicate the information to our users: we can display a pop-up or a notification, we can tell them to restart the app so that Windows will download and install the update, etc.
But what if you want to take full control of the update process as well? Let’s see how we can do it!
Installing the update from code
The App Installer APIs enables us not just to check if an update is available, but also to install the update. This feature can be used as a companion of the automatic feature provided by App Installer or independently.
In the first scenario, you will light up the App Installer APIs but, at the same time, you will define update rules in the App Installer file, like in the following example:
<?xml version=”1.0″ encoding=”utf-8″?>

<AppInstaller

    xmlns=“http://schemas.microsoft.com/appx/appinstaller/2021”

    Version=“1.0.0.0”

    Uri=“http://mywebservice.azurewebsites.net/appset.appinstaller” >
    <MainBundle

        Name=“Contoso.MainApp”

        Publisher=“CN=Contoso”

        Version=“2.23.12.43”

        Uri=“http://mywebservice.azurewebsites.net/mainapp.msixbundle” />
    <UpdateSettings>

        <OnLaunch

            HoursBetweenUpdateChecks=“12”

            UpdateBlocksActivation=“true”

            ShowPrompt=“true” />

        <AutomaticBackgroundTask />

        <ForceUpdateFromAnyVersion>true</ForceUpdateFromAnyVersion>

    </UpdateSettings>
</AppInstaller>
In this scenario, you can check for updates and install them using the APIs, but Windows will try also to apply updates automatically based on the logic you have defined in the App Installer file (like when the application starts or in background).
In the second scenario, you won’t have any UpdateSettings section in the XML file, which will simply look like this:
<?xml version=”1.0″ encoding=”utf-8″?>

<AppInstaller

    xmlns=“http://schemas.microsoft.com/appx/appinstaller/2021”

    Version=“1.0.0.0”

    Uri=“http://mywebservice.azurewebsites.net/appset.appinstaller” >
    <MainBundle

        Name=“Contoso.MainApp”

        Publisher=“CN=Contoso”

        Version=“2.23.12.43”

        Uri=“http://mywebservice.azurewebsites.net/mainapp.msixbundle” />
</AppInstaller>
Windows will never try to update the application automatically, so you’re in full control of the update process.
Let’s see now the code we can use to download and install the update:
private async Task InstallUpdate()

{

    var pm = new PackageManager();

    var result = await pm.RequestAddPackageByAppInstallerFileAsync(new Uri(“http://mywebservice.azurewebsites.net/appset.appinstaller”),

                        AddPackageByAppInstallerOptions.ForceTargetAppShutdown, pm.GetDefaultPackageVolume());
    if (result.ExtendedErrorCode != null)

    {

        txtUpdateStatus.Text = result.ErrorText;

        logger.Error(result.ExtendedErrorCode);

    }

}
First, we create a new instance of the PackageManager class, which belongs to the Windows.Management.Deployment namespace. Then we call the RequestAddPackageByAppInstallerFileAsync() method, passing as parameters
- The URL of your App Installer file (yep, this time we need to specify it, unlike when we were checking for updates).
- The behavior we want to achieve when the update is downloaded. There are a few options, but unfortunately the only one which is applicable is
ForceTargetAppShutdown, which means that the application will be closed so that the update can be applied.
- The folder where to install the update. By calling the
GetDefaultPackageVolume() method of the PackageManager class, we get a reference to the default folder where MSIX packages are deployed.
You get back a DeploymentResult object as a result which, however, doesn’t tell you much about the operation status. Remember, in fact, that if the update is successful, the application will be downloaded and reinstalled. In case of issues, however, the object will contain an ExtendedErrorCode property which, despite the name, contains a full Exception object with all the details about what went wrong.
Pay attention that the way the update process works might be highly disruptive for the user. After calling the RequestAddPackageByAppInstallerFileAsync() method, Windows will forcibly close the application to enable the update process to complete, without any warning message. As such, before calling it, make sure to save any data that the user might be working with and provide a clear message to the user to notify him about what’s going to happen.
Tracking the progress of the update operation
To improve the user experience, you might want to at least display to the user the download progress, especially if the update is big. For this purpose, the RequestAddPackageByAppInstallerFileAsync() method doesn’t return a standard IAsyncOperation object, but an IAsyncOperationWithProgress one. This means that we can use the following code to track progress:
private async Task InstallUpdate()

{

    var pm = new PackageManager();

    var deploymentTask = pm.RequestAddPackageByAppInstallerFileAsync(new Uri(“http://mywebservice.azurewebsites.net/appset.appinstaller”),

                        AddPackageByAppInstallerOptions.ForceTargetAppShutdown, pm.GetDefaultPackageVolume());
    deploymentTask.Progress = (task, progress) =>

    {

        logger.Info($”Progress: {progress.percentage} – Status: {task.Status}“);

        Dispatcher.Invoke(() =>

        {

            txtUpdateProgress.Text = $”Progress: {progress.percentage}“;

        });
    };
    var result = await deploymentTask;
    if (result.ExtendedErrorCode != null)

    {

        txtUpdateStatus.Text = result.ErrorText;

        logger.Error(result.ExtendedErrorCode);

    }

}
The first key difference is that we have removed the await keyword before calling the RequestAddPackageByAppInstallerFileAsync() method. This means that we aren’t immediately starting the operation, but we are simply storing a reference to the asynchronous operation we want to execute. Then we subscribe to the Progress event, which is triggered every time the status of the download changes. We can use the progress parameter to determine the status of the operation, through the percentage property. Once we have defined the handler, we can start the operation, by invoking the task again, this time with the await prefix.
There’s a catch, however. The API doesn’t return an update in real time, but only after a certain amount of time. As such, if the size of the update isn’t big enough, you might not see any actual progress being returned. You will see the Progress event being triggered only at the beginning and at the end. This can be a common scenario when you use MSIX as a packaging technology. Remember, in fact, that MSIX supports differential updates, so even if the updated package is big, Windows will download only the files which changed.
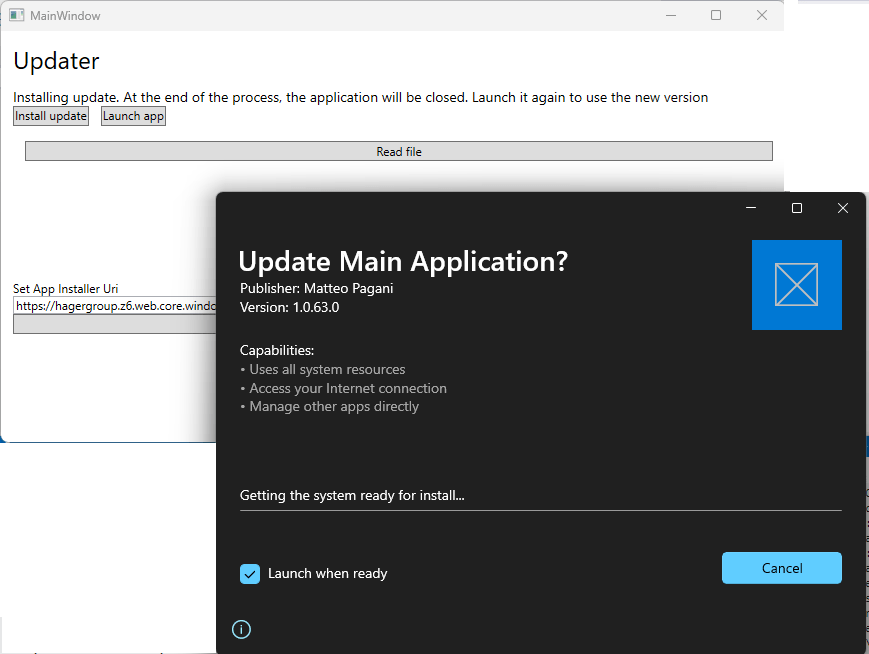
If you want to provide a better user experience, there’s a nice workaround that you can adopt and that was suggested by one of my customers during an engagement: downloading and launching the update App Installer file. This way, you’ll continue to use the App Installer APIs to check for available updates, but the update process will be managed by Windows with the traditional App Installer UI, like in the following image:
This is how you can change the code to support this scenario:
private async void OnInstallUpdate(object sender, RoutedEventArgs e)

{

    HttpClient client = new HttpClient();

    using (var stream = await client.GetStreamAsync(“http://mywebservice.azurewebsites.net/appset.appinstaller”))

    {

        using (var fileStream = new FileStream(@”C:Tempapp.appinstaller”, FileMode.CreateNew))

        {

            await stream.CopyToAsync(fileStream);

        }

    }
    try

    {

        var ps = new ProcessStartInfo(@”C:Tempapp.appinstaller”)

        {

            UseShellExecute = true

        };

        Process.Start(ps);

    }

    catch (Exception exc)

    {

        logger.Error(exc);

    }

}
First, using the HttpClient class, we download the most recent version of the App Installer file from our server, and we store it on the computer. Then, by using the Process.Start() API in .NET, we launch the file we have just downloaded, which will trigger the App Installer UI to show up and start the update.
The suggestions I shared with you before still apply, however. The UX will be indeed more polished, but the application will continue to be terminated once the update process is completed. As such, make sure to save all the data and notify the user about what’s going to happen.
Updating an application without changing the code
What if you are interested in using the App Installer APIs to have more control over updates, but you don’t want to change the code of your main application? This is a common scenario when you still need to distribute your app with a traditional installer technology, and you don’t want to make code changes which are specific for MSIX deployment. In this case, you can leverage the fact that, inside a MSIX package, you can have multiple executables, which all share the same identity. Using the Windows Application Packaging Project, you can reference two different projects:
- Your main application, which won’t have any code change.
- An updater application, which will use the APIs we have seen so far.
This is how the solution looks like in Visual Studio:

Since both applications are packaged together, the App Installer API will work regardless of if they are called by the updater application or by the main application. Being another process, it’s up to you how you want to invoke it. You might have a “Check for updates” option in the app that will invoke the updater application. Or you might have the updater application set as startup and check for updates every time the application starts. If no updates are found, the updater will close itself and launch the main application; otherwise, it will propose to the user to update the whole package.
The sample I’ve published on GitHub follows the second approach.
Wrapping up
In this article, we have seen how App Installer isn’t just a technology for easily enable deployment and updates of Windows apps through a website or a network share, but also a set of APIs that we can use in our applications to get the best of both worlds: the benefits of MSIX and App Installer (like differential updates or the ability to manage dependencies) and the flexibility of having full control over the update process.
Happy coding!
by Contributed | May 12, 2022 | Technology
This article is contributed. See the original author and article here.
Today, I worked on a service request that our customer needs to add the IP for Azure SQL node that is executing any elastic query.
We have the following situation:
- In the server $serverSource and database $DbSource we have a table called dummy that is an external table that, using elastic query is connecting to $serverTarget and other database.
- As the Azure SQL firewall has not defined the IP address of the SQL Azure node that is running the query they are getting the following error: “Exception calling “ExecuteNonQuery” with “0” argument(s): “An error occurred while establishing connection to remote data source: [Microsoft][ODBC Driver17 for SQL Server][SQL Server]Cannot open server ‘servername’ requested by the login. Client with IP address ‘xxx.xxx.xxx.xxx’ is not allowed to access the server. To enable access, use the Windows Azure Management Portal or run sp_set_firewall_rule on the master database to create a firewall rule for this IP address or address range. It may take up to five minutes for this change to take effect.[Microsoft][ODBC Driver 17 for SQL Server][SQL Server]Cannot open server ‘servername’ requested by the login. Client with IP address ‘xxx.xxx.xxx.xxx’ is not allowed to access the server. To enable access, use the Windows Azure Management Portal or run sp_set_firewall_rule on the master database to create a firewall rule for this IP address or address range. It may take up to five minutes for this change to take effect.”
Why?:
- This issue is explained in this article
Solution proposed as an example:
- Connect to the server $ServerSource and database $DbSource
- Run the query “select * from dummy”. This table is the external table that makes a reference.
- If we obtain an error:
- Obtain the IP of the SQL Azure Node.
- Connect to the server $ServerTarget and database master
- Run sp_set_firewall_rule to add this IP
- The next connection will be fine and it won’t return any error.
- As a note, of course, we need to maintain the number of IP added.
$serverTarget = "ServerNameThatHasTheReferenceTable.database.windows.net"
$userTarget = "UserNameThatHasTheReferenceTable" #UserName parameter  to connect
$passwordTarget = "PasswordThatHasTheReferenceTable" #Password Parameter  to connect
$DbTarget = "master" #DBName Parameter  to connect

$serverSource = "ServerNameThatHasDefinedExternalTable.database.windows.net"
$userSource = "UserNameThatHasDefinedExternalTable" #UserName parameter  to connect
$passwordSource = "PasswordThatHasDefinedExternalTable" #Password Parameter  to connect
$DbSource = "DBNameThatHasDefinedExternalTable" #DBName Parameter  to connect

#----------------------------------------------------------------
#Function to connect to the target database using a retry-logic
#----------------------------------------------------------------

Function GiveMeConnectionTarget()
{
  for ($i=1; $i -lt 10; $i++)
  {
   try
    {
      logMsg( "Connecting to the database...Attempt #" + $i) (1)
      logMsg( "Connecting to server: " + $serverTarget + " - DB: " + $DbTarget) (1)

      $SQLConnection = New-Object System.Data.SqlClient.SqlConnection
      $SQLConnection.ConnectionString = "Server="+$serverTarget+";Database="+$dbTarget+";User ID="+$userTarget+";Password="+$passwordTarget+";Connection Timeout=60;Application Name=Tester;Pooling=True"
      $SQLConnection.Open()
      logMsg("Connected to the database...") (1)
      return $SQLConnection
      break;
    }
  catch
   {
    logMsg("Not able to connect - Retrying the connection..." + $Error[0].Exception) (2)
    Start-Sleep -s 5
   }
  }
}

#----------------------------------------------------------------
#Function to connect to the source database using a retry-logic
#----------------------------------------------------------------

Function GiveMeConnectionSource()
{
  for ($i=1; $i -lt 10; $i++)
  {
   try
    {
      logMsg( "Connecting to the database...Attempt #" + $i) (1)
      logMsg( "Connecting to server: " + $serverSource + " - DB: " + $DbSource ) (1)

      $SQLConnection = New-Object System.Data.SqlClient.SqlConnection
      $SQLConnection.ConnectionString = "Server="+$serverSource+";Database="+$dbSource+";User ID="+$userSource+";Password="+$passwordSource+";Connection Timeout=60;Application Name=Tester;Pooling=True"
      $SQLConnection.Open()
      logMsg("Connected to the database...") (1)
      return $SQLConnection
      break;
    }
  catch
   {
    logMsg("Not able to connect - Retrying the connection..." + $Error[0].Exception) (2)
    Start-Sleep -s 5
   }
  }
}

#----------------------------------------------------------------
#Function to execute any elastic query using a command retry-logic
#----------------------------------------------------------------

Function ExecuteQuerySource($query)
{
  for ($i=1; $i -lt 3; $i++)
  {
   try
    {
     $SQLConnectionSource = GiveMeConnectionSource
     $command = New-Object -TypeName System.Data.SqlClient.SqlCommand
     $command.CommandTimeout = 6000
     $command.Connection=$SQLConnectionSource
     $command.CommandText = $query
     $command.ExecuteNonQuery() | Out-Null
    break;
    }
  catch
   {
    $ErrorMsg = $Error[0].Exception
    return $ErrorMsg
   }
  }
}

#----------------------------------------------------------------
#Function to add the firewall rule
#----------------------------------------------------------------

Function ExecuteQueryTarget( $IP)
{
  for ($i=1; $i -lt 3; $i++)
  {
   try
    {
     $SQLConnectionSource = GiveMeConnectionTarget
     $commandText = "EXECUTE sp_set_firewall_rule @name = N'TestContosoFirewallRule"+ $IP + "',"
     $commandText = $commandText + "@start_ip_address = '" + $IP+ "',"
     $commandText = $commandText + "@end_ip_address = '" + $IP+ "'"
     $command = New-Object -TypeName System.Data.SqlClient.SqlCommand
     $command.CommandTimeout = 6000
     $command.Connection=$SQLConnectionSource
     $command.CommandText = $commandText
     $command.ExecuteNonQuery() | Out-Null
    break;
    }
  catch
   {
    logMsg("Not able to run the query - Retrying the operation..." + $Error[0].Exception) (2)
    Start-Sleep -s 2
   }
  }
}

#--------------------------------
#Log the operations
#--------------------------------
function logMsg
{
    Param
    (
         [Parameter(Mandatory=$true, Position=0)]
         [string] $msg,
         [Parameter(Mandatory=$false, Position=1)]
         [int] $Color
    )
  try
   {
    $Fecha = Get-Date -format "yyyy-MM-dd HH:mm:ss"
    $msg = $Fecha + " " + $msg
    $Colores="White"
    $BackGround =
    If($Color -eq 1 )
     {
      $Colores ="Cyan"
     }
    If($Color -eq 3 )
     {
      $Colores ="Yellow"
     }

     if($Color -eq 2)
      {
        Write-Host -ForegroundColor White -BackgroundColor Red $msg
      }
     else
      {
        Write-Host -ForegroundColor $Colores $msg
      }


   }
  catch
  {
    Write-Host $msg
  }
}

#--------------------------------
#Empty?
#--------------------------------
function TestEmpty($s)
{
if ([string]::IsNullOrWhitespace($s))
  {
    return $true;
  }
else
  {
    return $false;
  }
}


#--------------------------------
#Give the IP that is trying to connect
#--------------------------------

function GiveMeIP
{
Param([Parameter(Mandatory=$true)]
      [System.String]$Text)
  try
   {
    $Pos = $Text.IndexOf("Client with IP address '")
    $return= $Text.substring( $Pos+24)
    $PosUntil = $Return.IndexOf("'")
    $return = $Return.substring(0,$PosUntil )
    return $Return
   }
  catch
  {
    $return= $Text
    return $Return
  }
}

cls

logMsg("Starting the process") (2)
$ErrorMsg = ExecuteQuerySource("Select * from dummy")
if(TestEmpty($ErrorMsg) -eq $true)
{
}
else
{
   logMsg("Adding the IP.." + $IP) (2)
   $IP = GiveMeIP($ErrorMsg)
   ExecuteQueryTarget($IP)
   logMsg("Added the IP.." + $IP) (2)
}
logMsg("Finished the process") (2)
Enjoy!
 ) or https:// means you’ve safely connected to the .gov website. Share sensitive information only on official, secure websites.
Recent Comments