by Contributed | Apr 19, 2021 | Technology
This article is contributed. See the original author and article here.
The Microsoft 365 compliance center provides easy access to solutions to manage your organization’s compliance needs and delivers a modern user experience that conforms to the latest accessibility standards (WCAG 2.1). From the compliance center, you can access popular solutions such as Compliance Manager, Information Protection, Information Governance, Records Management, Insider Risk Management, Advanced eDiscovery, and Advanced Audit.
Over the coming months, we will begin automatically redirecting users from the Office 365 Security & Compliance Center (SCC) to the Microsoft 365 compliance center for the following solutions: Audit, Data Loss Prevention, Information Governance, Records Management, and Supervision (now Communication Compliance). This is a continuation of our migration to the Microsoft 365 compliance center, which began in September 2020 with the redirection of the Advanced eDiscovery solution.
We are continuing to innovate and add value to solutions in the Microsoft 365 compliance center, with the goal of enabling users to view all compliance solutions within one portal. While redirection is enabled by default, should you need additional transition time, Global admins and Compliance admins can enable or disable redirection in the Microsoft 365 compliance center by navigating to Settings > Compliance Center and using the Automatic redirection toggle switch under Portal redirection.
We will eventually retire the Security & Compliance Center experience, so we encourage you to explore and transition to the new Microsoft 365 compliance center experience. Learn more about the Microsoft 365 compliance center.

by Contributed | Apr 19, 2021 | Technology
This article is contributed. See the original author and article here.
Azure SQL Database offers an easy several-clicks solution to scale database instances when more resources are needed. This is one of the strengths of PaaS, you pay for only what you use and if you need more or less, it’s easy to do the change. A current limitation, however, is that the scaling operation is a manual one. The service doesn’t support auto-scaling as some of us would expect.
Having said that, using the power of Azure we can set up a workflow that auto-scales an Azure SQL Database instance to the next immediate tier when a specific condition is met. For example: what if you could auto-scale the database as soon as it goes over 85% CPU usage for a sustained period of 5 minutes? Using this tutorial we will achieve just that.
Supported SKUs: because there is no automatic way to get the list of available tiers at script runtime, these must be hard-coded into it. For this reason, the script below only supports DTU and vCore (provisioned compute) databases. Hyperscale, Serverless, Fsv2, DC and M series are not supported. Having said that, the logic is the same not matter the tier so feel free to modify the script to suit your particular SKU needs.
Important: every time any part of the setup asks if the Common Alert Schema (CAS) should be enabled, select Yes. The script used in this tutorial assumes the CAS will be used for the alerts triggering it.

|
Step #1: deploy Azure Automation account and update its modules
The scale operation will be executed by a PowerShell runbook inside of an Azure Automation account. Search Automation in the Azure Portal search bar and create a new Automation account. Make sure to create a Run As Account while doing this:

Once the Automation account has been created, we need to update the PowerShell modules in it. The runbook we will use uses PowerShell cmdlets but by default these are old versions when the Automation account is provisioned. To update the modules to be used:
- Save the PowerShell script here to your computer with the name Update-AutomationAzureModulesForAccountManual.ps1. The Manual word is added to the file name as to not overwrite the default internal runbook the account uses to update other modules once it gets imported.
- Import a new module and select the file you saved on step #1:

- When the runbook has been imported, click Test Pane, fill in the details for the Resource Group and the Azure Automation account name we are using and click Start:

- When it finishes, the cmdlets will be fully updated. This benefits not only the SQL cmdlets used below but any other cmdlets any other runbook may use on this same Automation account.
Step #2: create scaling runbook
With our Automation account deployed and updated, we are now ready to create the script. Create a new runbook and copy the code below:

The script below uses Webhook data passed from the alert. This data contains useful information about the resource the alert gets triggered from, which means the script can auto-scale any database and no parameters are needed; it only needs to be called from an alert using the Common Alert Schema on an Azure SQL database.
param
(
    [Parameter (Mandatory=$false)]
    [object] $WebhookData
)
# If there is webhook data coming from an Azure Alert, go into the workflow.
if ($WebhookData){
    # Get the data object from WebhookData
    $WebhookBody = (ConvertFrom-Json -InputObject $WebhookData.RequestBody)

    # Get the info needed to identify the SQL database (depends on the payload schema)
    $schemaId = $WebhookBody.schemaId
    Write-Verbose "schemaId: $schemaId" -Verbose
    if ($schemaId -eq "azureMonitorCommonAlertSchema") {
        # This is the common Metric Alert schema (released March 2019)
        $Essentials = [object] ($WebhookBody.data).essentials
        Write-Output $Essentials
        # Get the first target only as this script doesn't handle multiple
        $alertTargetIdArray = (($Essentials.alertTargetIds)[0]).Split("/")
        $SubId = ($alertTargetIdArray)[2]
        $ResourceGroupName = ($alertTargetIdArray)[4]
        $ResourceType = ($alertTargetIdArray)[6] + "/" + ($alertTargetIdArray)[7]
        $ServerName = ($alertTargetIdArray)[8]
        $DatabaseName = ($alertTargetIdArray)[-1]
        $status = $Essentials.monitorCondition
    }
    else{
        # Schema not supported
        Write-Error "The alert data schema - $schemaId - is not supported."
    }
    # If the alert that triggered the runbook is Activated or Fired, it means we want to autoscale the database.
    # When the alert gets resolved, the runbook will be triggered again but because the status will be Resolved, no autoscaling will happen.
    if (($status -eq "Activated") -or ($status -eq "Fired"))
    {
        Write-Output "resourceType: $ResourceType"
        Write-Output "resourceName: $DatabaseName"
        Write-Output "serverName: $ServerName"
        Write-Output "resourceGroupName: $ResourceGroupName"
        Write-Output "subscriptionId: $SubId"

        # Because Azure SQL tiers cannot be obtained programatically, we need to hardcode them as below.
        # The 3 arrays below make this runbook support the DTU tier and the provisioned compute tiers, on Generation 4 and 5 and
        # for both General Purpose and Business Critical tiers.

        $DtuTiers = @('Basic','S0','S1','S2','S3','S4','S6','S7','S9','S12','P1','P2','P4','P6','P11','P15')
        $Gen4Cores = @('1','2','3','4','5','6','7','8','9','10','16','24')
        $Gen5Cores = @('2','4','6','8','10','12','14','16','18','20','24','32','40','80')

        # Here, we connect to the Azure Portal with the Automation Run As account we provisioned when creating the Automation account.

        $connectionName = "AzureRunAsConnection"
        try
        {
            # Get the connection "AzureRunAsConnection "
            $servicePrincipalConnection=Get-AutomationConnection -Name $connectionName

            "Logging in to Azure..."
            Add-AzureRmAccount `
                -ServicePrincipal `
                -TenantId $servicePrincipalConnection.TenantId `
                -ApplicationId $servicePrincipalConnection.ApplicationId `
                -CertificateThumbprint $servicePrincipalConnection.CertificateThumbprint
        }
        catch {
            if (!$servicePrincipalConnection)
            {
                $ErrorMessage = "Connection $connectionName not found."
                throw $ErrorMessage
            } else{
                Write-Error -Message $_.Exception
                throw $_.Exception
            }
        }

        # Gets the current database details, from where we'll capture the Edition and the current service objective.
        # With this information, the below if/else will determine the next tier that the database should be scaled to.
        # Example: if DTU database is S6, this script will scale it to S7. This ensures the script continues to scale up the DB in case CPU keeps pegging at 100%.

        $currentDatabaseDetails = Get-AzureRmSqlDatabase -ResourceGroupName $ResourceGroupName -DatabaseName $DatabaseName -ServerName $ServerName

        if (($currentDatabaseDetails.Edition -eq "Basic") -Or ($currentDatabaseDetails.Edition -eq "Standard") -Or ($currentDatabaseDetails.Edition -eq "Premium"))
        {
            Write-Output "Database is DTU model."
            if ($currentDatabaseDetails.CurrentServiceObjectiveName -eq "P15") {
                Write-Output "DTU database is already at highest tier (P15). Suggestion is to move to Business Critical vCore model with 32+ vCores."
            } else {
                for ($i=0; $i -lt $DtuTiers.length; $i++) {
                    if ($DtuTiers[$i].equals($currentDatabaseDetails.CurrentServiceObjectiveName)) {
                        Set-AzureRmSqlDatabase -ResourceGroupName $ResourceGroupName -DatabaseName $DatabaseName -ServerName $ServerName -RequestedServiceObjectiveName $DtuTiers[$i+1]
                        break
                    }
                }
            }
        } else {
            Write-Output "Database is vCore model."

            $currentVcores = ""
            $currentTier = $currentDatabaseDetails.CurrentServiceObjectiveName.SubString(0,8)
            $currentGeneration = $currentDatabaseDetails.CurrentServiceObjectiveName.SubString(6,1)
            $coresArrayToBeUsed = ""
            try {
                $currentVcores = $currentDatabaseDetails.CurrentServiceObjectiveName.SubString(8,2)
            } catch {
                $currentVcores = $currentDatabaseDetails.CurrentServiceObjectiveName.SubString(8,1)
            }
            Write-Output $currentGeneration
            if ($currentGeneration -eq "5") {
                $coresArrayToBeUsed = $Gen5Cores
            } else {
                $coresArrayToBeUsed = $Gen4Cores
            }

            if ($currentVcores -eq $coresArrayToBeUsed[$coresArrayToBeUsed.length]) {
                Write-Output "vCore database is already at highest number of cores. Suggestion is to optimize workload."
            } else {
                for ($i=0; $i -lt $coresArrayToBeUsed.length; $i++) {
                    if ($coresArrayToBeUsed[$i] -eq $currentVcores) {
                        $newvCoreCount = $coresArrayToBeUsed[$i+1]
                        Set-AzureRmSqlDatabase -ResourceGroupName $ResourceGroupName -DatabaseName $DatabaseName -ServerName $ServerName -RequestedServiceObjectiveName "$currentTier$newvCoreCount"
                        break
                    }
                }
            }
        }
    }
}
Step #3: create Azure Monitor Alert to trigger the Automation runbook
On your Azure SQL Database, create a new alert rule:

The next blade will require several different setups:
- Scope of the alert: this will be auto-populated if +New Alert Rule was clicked from within the database itself.
- Condition: when should the alert get triggered by selecting a signal and defining its logic.
- Actions: when the alert gets triggered, what will happen?
Condition
For this example, the alert will monitor the CPU consumption every 1 minute. When the average goes over 85%, the alert will be triggered:

Actions
After the signal logic is created, we need to tell the alert what to do when it gets fired. We will do this with an action group. When creating a new action group, two tabs will help us configure sending an email and triggering the runbook:
Notifications

Actions

After saving the action group, add the remaining details to the alert.
That’s it! The alert is now enabled and will auto-scale the database when fired. The runbook will be executed twice per alert: once when fired and another when resolved but it will only perform a scale operation when fired.
by Contributed | Apr 19, 2021 | Technology
This article is contributed. See the original author and article here.
We are pleased to announce an update to the Azure HPC Cache service!
HPC Cache helps customers enable High Performance Computing workloads in Azure Compute by providing low-latency, high-throughput access to Network Attached Storage (NAS) environments. HPC Cache runs in Azure Compute, close to customer compute, but has the ability to access data located in Azure as well as in customer datacenters.
Preview Support for Blob NFS 3.0
The Azure Blob team introduced preview support for the NFS 3.0 protocol this past fall. This change enables the use of both NFS 3.0 and REST access to storage accounts, moving cloud storage further along the path to a multi-tiered, multi-protocol storage platform. It empowers customers to run their file-dependent workloads directly against blob containers using the NFS 3.0 protocol.
There are certain situations where caching NFS data makes good sense. For example, your workload might run across many virtual machines and requires lower latency than what the NFS endpoint provides. Adding the HPC Cache in front of the container will provide sub-millisecond latencies and improved client scalability. This makes the joint NFS 3.0 endpoint and HPC Cache solution ideal for scale-out read-heavy workloads such as genomic secondary analysis and media rendering.
Also, certain applications might require NLM interoperability, which is unsupported for NFS-enabled blob storage. HPC Cache responds to client NLM traffic and manages lock requests as the NLM service. This capability further enables file-based applications to go all-in to the cloud.
Using HPC Cache’s Aggregated Namespace, you can build a file system that incorporates your NFS 3.0-enabled containers into a single directory structure – even if you have multiple storage accounts and containers that you want to operate against. And you can also add your on-premises NAS exports into the namespace, for a truly hybrid file system!
HPC Cache support for NFS 3.0 is in preview. To use it, simply configure a Storage Target of the type “ADLS-NFS” type and point at your NFS 3.0-enabled container.
Customer-Managed Key Support
HPC Cache has had support for CMK-enabled cache disks since mid-2020, but it was limited to specific regions. As of now, you can use CMK-enabled cache disks in all regions where CMK is supported.
Zone-Redundant Storage (ZRS) Blob Containers Support for Blob-As-POSIX
Blob-as-POSIX is a 100% POSIX compliant file system overlaid on a container. Using Blob-as-POSIX, HPC Cache can provide NAS support for all POSIX file system behaviors, including hard links. As of April 2nd, you can use both ZRS and LRS container types.
Custom DNS and NTP Server Support
Typically, HPC Cache will use the built-in Azure DNS and NTP services. When using HPC Cache and your on-premises NAS environment, there are some situations where you might want to use your own DNS and NTP servers. This special configuration is now supported in HPC Cache. Note that using your own servers in this case requires additional network configuration and you should consult with your Azure technical partners for further information. You can find more documentation here.
Client Access Policies
Traditional NAS environments support export policies that restrict access to an export based on networks or host information. Further, they typically allow the remapping of root to another UID, known as root squash. HPC Cache now offers the ability to configure such policies, called client access policies, on the junction path of your namespace. Further, you will be able to squash root to both a unique UID and GID value.
Extended Groups Support
HPC Cache now supports the use of NFS auxiliary groups, which are additional GIDs that might be configured for a given UID. Any group count above 16 falls into the auxiliary, or extended, group definition. HPC Cache now supports the use of such group integration with your existing directory mechanisms (such as Active Directory or LDAP, or even a recurring file upload of these definitions). Using HPC Cache in combination with Azure NetApp Files, for example, allows you to leverage your extended groups.
Get Started
To create storage cache in your Azure environment, start here to learn more about HPC Cache. You also can explore the documentation to see how it may work for you.
Tell Us About It!
Building features in HPC Cache that help support hybrid HPC architectures in Azure is what we are all about! Try HPC Cache, use it, and tell us about your experience and ideas. You can post them on our feedback forum.
by Contributed | Apr 19, 2021 | Technology
This article is contributed. See the original author and article here.
MVPs know better than most that education is not something that starts and ends with a formal experience like college. Instead, education is a life-long process and requires continual upskilling.
Four MVPs were recently featured in two separate sessions at MS Ignite about the importance of skilling and certification in their careers. In the first session, Azure MVP Tiago Costa and Office Apps & Services MVP Chris Hoard shared the digital stage with tech trainers and managers on the value of Microsoft Certifications.
Tiago, from Portugal, says he has personally used Microsoft Certification to progress into new roles and climb the corporate ladder. Tiago advises tech enthusiasts of all experience levels to experiment with MS Learn, a resource that is “free and of amazing quality and accuracy.”
“If you have the willingness to learn, it doesn’t matter what level of expertise you have,” Tiago says. “I have helped people with literally zero – I will repeat, zero – experience in IT and today they are tech leaders with their field.”
UK-based Chris agrees: “Authenticity, validation, knowledge, closing skill gaps, finding a new passion, the prospects of better wages or even a better job – these are all good reasons why learning and certification are important.”
“My advice is that it is never too late to start. Set yourself a modest goal and once you have started, don’t stop – keep learning and unlearning,” Chris says.
Later at the conference, Business Apps MVPs Amey Holden and Lisa Crosbie shared their learning journeys as part of the Australian tech community.
Amey says that she was thrown into the deep end when a respected practice lead sold her to a project as an expert in Dynamics 365 when “actually I was a clueless graduate with some impressive Excel formulae skills.”
Thus, Amey’s Power Platform journey began with a three-day crash course in Dynamics 365 Sales and “piles of PDFs with labs and content to learn everything (back in the days before MS Learn!)” Now, however, Amey is a big fan of the platform as it “has given me the tools to understand all new features and functionality.”
“Being officially recognized by Microsoft for your knowledge and achievements helped to boost my confidence earlier in my career when the impostor syndrome kicked in or I genuinely had no idea what I’m doing,” Amey says.
“It has helped me attain knowledge that I never knew I would have needed until I find myself calling on it during client conversations. This has helped me to more easily become a trusted client advisor who can have a positive and valuable impact.”
Lisa similarly uses MS Learn to illuminate new tech knowledge. Lisa made a career change from book publishing to tech in 2016, and says MS Learn “is an awesome revision tool for a number of certifications in my main area of Power Platform and Dynamics 365, as well as using it to upskill in new areas and pass certification exams in M365 and Azure AI.”
“It is a good discipline to make sure I stay up to date with new features and review the things I use less often. I also feel it gives credibility to the advice I give to customers and gives me confidence in my knowledge,” Lisa says.
“I always have more collections bookmarked and not enough hours in the day!”
For more, check out Amey’s and Lisa’s session at MS Ignite, as well as Tiago’s and Chris’ session.
by Contributed | Apr 19, 2021 | Technology
This article is contributed. See the original author and article here.
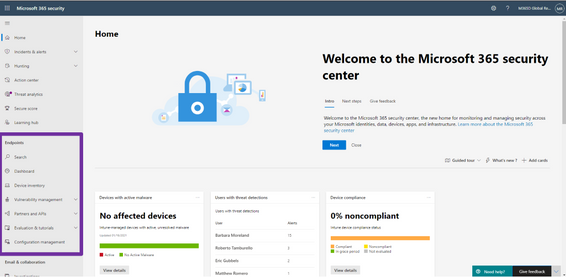
We’re excited to announce that we have reached a new milestone in our XDR journey: the integration of our endpoint and email and collaboration capabilities into Microsoft 365 Defender is now generally available. Security teams can manage all endpoint, email, and cross-product investigations, configuration, and remediation within a single unified portal.
Register for the Microsoft 365 Defender’s Unified Experience for XDR webinar to learn how your security teams can leverage the unified portal and check out our video to learn more about these new capabilities.
This release delivers the rich set of capabilities we announced in public preview, including unified pages for alerts, users, and automated investigations, a new email entity page offering a 360-degree view of an email, threat analytics, a brand-new Learning hub, and more – all available exclusively in the Microsoft 365 Defender portal at security.microsoft.com.
Now is the time to start moving your users to the unified experience using the automatic URL redirection for Microsoft Defender for Endpoint and automatic URL redirection for Microsoft Defender for Office 365 as the previously distinct portals will eventually be phased out.
Figure 1: Endpoint features integrated into Microsoft 365 Defender.

Figure 2: Email and collaboration features integrated into Microsoft 365 Defender.
We’re excited to be bringing these additional capabilities into Microsoft 365 Defender and look forward to hearing about your experiences and your feedback as you explore and transition to the unified portal.
To read more about the unified portal experience, check out:

Recent Comments