
by Contributed | Mar 10, 2021 | Technology
This article is contributed. See the original author and article here.
In the previous episode we provided recommendations about how to use the Microsoft 365 Defender API and, specifically, how to optimize the Advanced hunting query.
In this episode we will demonstrate use cases detailing how to access the API data and use this information in other products.
One of the most common uses of the API is for visualization in PowerBI. This provides the capability to analyze, visualize, and share your data with others quickly and easily.
If you are not familiar with PowerBi, we suggest you visit the Microsoft PowerBi web site, and download PowerBI desktop.
We already documented how to use PowerBI to create custom reports using
Microsoft Defender for Endpoint APIs connection to Power BI – Windows security | Microsoft Docs.
Today we would like to give you additional information on how to use Microsoft 365 APIs with PowerBi, specifically in the following use cases:
- Identifying onboarded devices and their health status
- Viewing the compliance status of the devices based on the security recommendations
- Aggregating alerts
- Using Aadvanced hunting queries to build a custom view
And build some visualizations like the following dashboard
Figure 1. Alert Status
Before you begin
Let’s start by connecting the Microsoft 365 APIs by opening the PowerBi desktop and add a new data source.
From the menu select “Get data” and add an “OData feed” connector to access the Microsoft 365 Defender API.

Figure 2. PowerBi connectors
Insert https://api.security.microsoft.com/api as the URL of the API.

Figure 3. OData feed connector
Provide your credentials.

Figure 4. Provide credentials
After the authentication you will see all the different APIs you can access.

Figure 5. Available APIs
NOTE: Be aware that not all APIs can be used to retrieve data as is with PowerBi, some will require additional parameters (e.g. the MachineAction API requires the DeviceID to properly retrieve data for the specific devices and can be used for example in scripts automation), or the AdvancedHunting and AdvancedQueries APIs require a KQL query as a parameter (we will provide an example later). In addition you should use only documented APIs, which means they are supported by the product. In this view you will get all APIs also ones that are still work in progress.
Get started
Now that you’ve added the connection, we can proceed with loading data.
Select the “Alerts” API.

Figure 6. Alerts APIs
You should see the data loaded in the Alerts table.

Figure 7. Alerts APIs – Available fields
Before moving on, let’s do some optimization to simplify and speed up the process of accessing additional data with other Microsoft 365 APIs.
From the top menu select “Transform Data”.

Figure 8. Transform data
Then, select “New Source”.

Figure 9. New Source
Then, select “Blank Query”.

Figure 10. Blank Query
Then select “Advanced Editor”.

Figure 11. Advanced Editor
Once you have the Advanced Editor open, replace the default code with the following code and save.

Figure 12. Advanced Editor – Content
(Query as text, ResultType as text) => if ResultType = “record” then
let
source = OData.Feed(“https://api.securitycenter.microsoft.com/api/” & Query, null, [Implementation=”2.0″, MoreColumns=true]),
#”toList” = {source},
#”toRecord” = Record.FromList(#”toList”, {“Record”})
in
#”toRecord”
else
let
source = OData.Feed(“https://api.securitycenter.microsoft.com/api/” & Query, null, [Implementation=”2.0″, MoreColumns=true]),
#”toTable” = #table(1, {{source}})
in
#”toTable”
Rename the Query1 to customODataQuery, as this will be the function name that we will use, passing different values as parameters it will allow us to retrieve data from different APIs.
We can also organize the queries in different groups to easy understand the different meaning.

Figure 13. Functions – customODataquery
We will now create a query by starting from a blank query and replacing the name of the API we want to access; we need to pass two parameters: the name of the API and the expected results type (“table” or “record”)
let
Source = customODataQuery(“alerts”,”table“)
in
Source

Figure 14. Advanced Editor – ODataAlerts
Follow the same steps to add additional APIs.

Figure 15. ODataAlerts
When you select one of the tables, you can expand the data.

Figure 16. ODataAlerts – Table
After the expansion you will see all the available columns.

Figure 17. ODataAlerts – Columns
Once you have loaded the tables you are ready to organize the data to visualize in a dashboard.
Check out some of the examples we provided in the PowerBi template published here.
The PowerBi template contains the following connection to the corresponding APIs:

Figure 18. PowerBi Template connections
Example dashboards and uses
Let’s take a look at some examples of dashboards and visualizations in PowerBI.
Microsoft Defender for Endpoint Onboarded Devices
This dashboard organizes the details of the onboarded devices.

Figure 20. Microsoft Defender for Endpoint Onboarded Devices page
To populate the data, we need the Machines API, so add another query as we did previously (use the customODataQuery PowerBi function we created previously) and specific the Machines API.
let
Source = customODataQuery(“Machines“,”table“)
in
Source
We also would like to adjust the timestamp to date, in this way we can use this field to create data aggregations by day.

Figure 21. Machines API – Query
The built-in APIs provide a lot of information to conduct a thorough investigation. You can also aggregate the data to tailor fit your investigation needs.
Should you find that additional information is needed to enhance the existing set of APIs, please let us know.
Microsoft Defender for Endpoint Security Control
This page aggregates the recommendations from Threat & Vulnerability Management. In this case we filtered for by Antivirus and Endpoint Detection and Response.

Figure 22. Security Recommendation – Security Control Summary page
To populate the data, we need the Recommendations API, so we will add another query as we did previously (use the customODataQuery PowerBi function we created previously) and specify the Recommendations API.
let
Source = customODataQuery(“Recommendations“,”table“)
in
Source
We also will need to expand the machineReferences field to join this information with the Machines table

Figure 23. Recommendations API – Query
This will quickly show you the overall compliance status of devices and give you an easy way to export a list of affected devices for remediation.
Microsoft Defender for Endpoint Agent Health Status
Should you wish to get some data based on a custom query, you can access the AdvancedHunting API.
In the previous episode of this series, we encouraged you to optimize and adopt best practices when writing your own queries; this becomes even more important when you plan to use a custom query with APIs to load data into PowerBi, because write efficient optimized queries will execute faster and will consume less resources
Let’s take this query Endpoint Agent Health Status Report from GitHub as an example, in PowerBI we defined 2 additional functions and we created a new query.
We can start with this template and replace the text with the query we would like to use
let
Source = customquery(“COPY YOUR QUERY HERE“)
in
Source
In our case we added this additional statement to return results from the last 24 hours.
| where Timestamp >= ago(24h)
Here you can see a way to represent the result in a visual format.

Figure 24. Microsoft Defender for Endpoint Agent Health Status page
Conclusion
In this post, we demonstrated how you can use the Microsoft 365 APIs and PowerBi to easlyeasily create a tailored dashboard that can help you create visualizations with key information or KPI. We covered the step-by-step instructions to access the Machines, Recommendations and Alerts APIs and how to build custom queries with Advanced hunting API , we used APIs to easily access the Microsoft 356 data and PowerBI to “translate” the date from tables in a visual format. We hope that this can be helpful for you and increase the creation of data visualizations.
Appendix
For more information about Microsoft 365 Defender APIs and the features discussed in this article, please read:
As always, we’d love to know what you think. Leave us feedback directly on Microsoft 365 security center or start a discussion in Microsoft 365 Defender community
by Contributed | Mar 10, 2021 | Technology
This article is contributed. See the original author and article here.
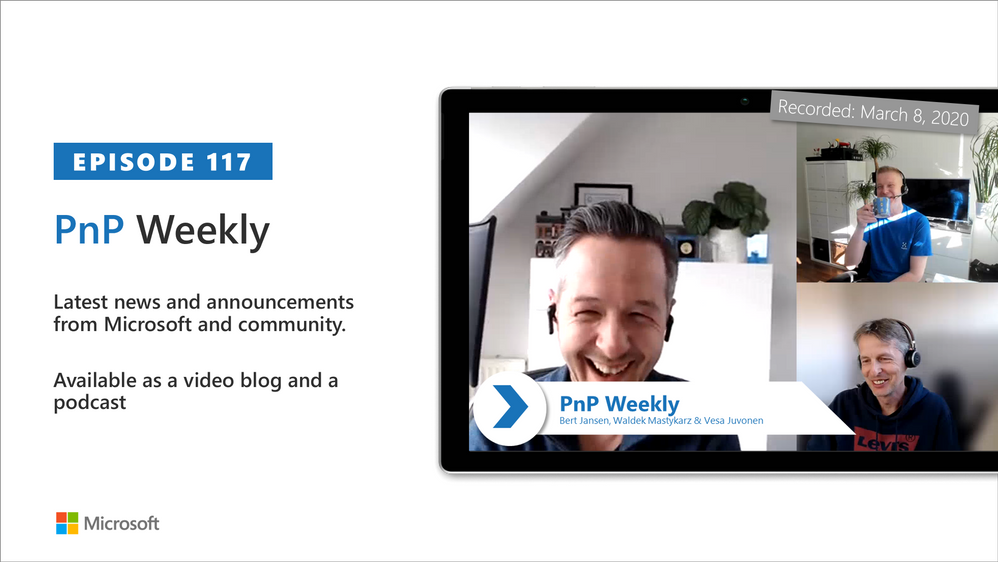
In this installment of the weekly discussion revolving around the latest news and topics on Microsoft 365, hosts – Vesa Juvonen (Microsoft) | @vesajuvonen, Waldek Mastykarz (Microsoft) | @waldekm are joined by Belgium-based Senior Service Engineer from Microsoft – Bert Jansen | @o365bert.
Bert splits his time coaching ISVs and Partners on how to get the most out of their SharePoint Online experience and on PnP Community projects – Modernization and PnP Core SDK. This episode’s discussion focuses on why Partners and ISVs would be interested in Microsoft 365 – the Intelligent file handling platform, on-site migrations – on-prem to cloud – classic to modern, and on modern pages – APIs, Microsoft Graph and PnP Core SDK.
The session was recorded on Monday, March 8, 2021.
Did we miss your article? Please use #PnPWeekly hashtag in the Twitter for letting us know the content which you have created.
As always, if you need help on an issue, want to share a discovery, or just want to say: “Job well done”, please reach out to Vesa, to Waldek or to your Microsoft 365 PnP Community.
Sharing is caring!

by Contributed | Mar 10, 2021 | Technology
This article is contributed. See the original author and article here.
When developing your SPFx components, you usually first run them locally before deploying them (really?).
And then comes the time to work with API such as Microsoft Graph.
If you never use those permissions before in your SPFx projects (and the tenant with which you’re working), you realize that you have to:
- Add required API permissions in your
package-solution.json file
- Bundle / Ship your project
- Publish it
- Go to the SharePoint Admin Center Web API Permissions page
- Approve those permissions
All of this, just to play with the API as you didn’t plan to release your package in a production environment.
So what if you could bypass all these steps for both Graph and owned API?
Warning
This trick is just for development purposes. In Production environment, you should update your package-solution.json file to add required permissions and allow them (or ask for validation) in the API access page.
Prerequisites
- An Office 365 (Dev) Tenant or a Partner Demo Tenant
- The following Azure AD role at least
- Application Administrator
With Graph API
First, we’re going to play with Graph API through the Microsoft Graph Toolkit.
Prepare your sample
Init a SPFx project (WebPart one with React, let’s call it HelloApi), then add the Microsoft Graph Toolkit by executing npm i @microsoft/mgt @microsoft/mgt-react from the project’s root path.
Once done, open your main component file (let’s say here HelloApi.tsx) and add the PeoplePicker component like this:
import * as React from 'react';
import styles from './HelloApi.module.scss';
import { IHelloApiProps } from './IHelloApiProps';
import { escape } from '@microsoft/sp-lodash-subset';
import { PeoplePicker } from '@microsoft/mgt-react';

export default class HelloApi extends React.Component<IHelloApiProps, {}> {
  public render(): React.ReactElement<IHelloApiProps> {
    return (
      <div className={ styles.HelloApi }>
        <div className={ styles.container }>
          <div className={ styles.row }>
            <div className={ styles.column }>
              <span className={ styles.title }>Welcome to SharePoint!</span>
              <p className={ styles.subTitle }>Customize SharePoint experiences using Web Parts.</p>
              <p className={ styles.description }>{escape(this.props.description)}</p>
              <a href="https://aka.ms/spfx" className={ styles.button }>
                <span className={ styles.label }>Learn more</span>
              </a>
            </div>
          </div>
        </div>
        <PeoplePicker />
      </div>
    );
  }
}
Run it in remote workbench
Now run your sample with gulp serve and display your webpart in your remote workbench (https://contoso.sharepoint.com/_layouts/15/workbench.aspx). Try to use the PeoplePicker component: you’ll see that just by clicking on the search box, you’ll get We didn’t find any matches.
Display your developer toolbox (F12) and go to the browser console, you should see the following error:

As you can see, it’s a 403 error, which is well-known when using Graph API endpoints that have not been allowed on the first place.
Add Graph API through UI
From the Azure portal, display the Azure Active Directory (AAD), then select the App Registration menu and select All Applications, then click on SharePoint Online Client Extensibility Web Application Principal. It’s the AAD Application that holds the connection to the API (Microsoft and others) from SharePoint (SPFx or every other development) using the Implicit Flow.
Once here, click on Add a permission, then select Microsoft Graph and add the [People.Read] Graph API delegated permission (you can type the name of the permission in the available search box to get it easily).

Once added, grant it by clicking on Grant admin consent for contoso.
If you go in the API access page (https://contoso-admin.sharepoint.com/_layouts/15/online/AdminHome.aspx#/webApiPermissionManagement), you should see something like this:
 (other Graph API permissions displayed here won’t be necessary for the sample)
Warning
It can take a couple of minutes before consented permissions is effective, so don’t be surprised if it’s not working right away after approval.
Add Graph API through CLI for Microsoft 365
m365 login # Don't execute that command if you're already connected
m365 spo serviceprincipal grant add --resource 'Microsoft Graph' --scope 'People.Read'
Info
Don’t be surprised if by that way, the permission appears in the “Other permissions granted for [your tenant]”: it won’t prevent your SPFx solution to work.
Try again
Now try to use the PeoplePicker component again: you’ll see that with the addition of the Graph API permission, you should be able to use that component!

With custom API
When using a custom API, it’s a little bit more tricky but easy to handle anyway.
You can follow this Microsoft article until the “Deploy the solution” part.
Instead of bundling and shipping, we’ll add the AAD App (called contoso-api-dp20200915 if we follow the mentioned article) created from the Azure Function Authentication part in the SharePoint Service Principal.
Add your AAD Application to the SharePoint Service Principal
Display again the AAD page, then select the App Registration menu, select All Applications and click on SharePoint Online Client Extensibility Web Application Principal. Once here, click on Add a permission, then select the My APIs tab and select the fresh added AAD App created before. Select the user_impersonation permission, then confirm.

Finally, grant this permission by clicking on Grant admin consent for contoso.
If you go again in the API access page, you should see something like this:

Add custom API through CLI for Microsoft 365
m365 login # Don't execute that command if you're already connected
m365 spo serviceprincipal grant add --resource 'contoso-api-dp20200915' --scope 'user_impersonation'
Info
Don’t be surprised if by that way, the permission appears in the “Other permissions granted for [your tenant]”: it won’t prevent your SPFx solution to work.
Warning
If you use an Azure Function as an API and enable Managed Identity for any reason, you better have to rename the linked AAD Application to give it a different name than both your Function and its Managed Identity. Otherwise, the command will try to find a scope on it instead of the AAD App and fail.
Updated sample
To run your custom API from your SPFx component, you can update your sample like below:
IHelloApiProps.ts
import { AadHttpClientFactory } from '@microsoft/sp-http';

export interface IHelloApiProps {
  aadFactory: AadHttpClientFactory;
  description: string;
}
HelloApiWebPart.ts
// ...
export default class HelloApiWebPart extends BaseClientSideWebPart<IHelloApiWebPartProps> {

    // ...

    public render(): void {
        const element: React.ReactElement<IHelloApiProps> = React.createElement(
        HelloGraph,
        {
            description: this.properties.description,
            aadFactory: this.context.aadHttpClientFactory,
        }
        );

        ReactDom.render(element, this.domElement);
    }

  // ...
}
HelloApi.tsx
import * as React from 'react';
import styles from './HelloApi.module.scss';
import { IHelloApiProps } from './IHelloApiProps';
import { AadHttpClient, HttpClientResponse } from '@microsoft/sp-http';

interface IHelloApiState {
  ordersToDisplay: any;
}

export default class HelloApi extends React.Component<IHelloApiProps, IHelloApiState> {

 public constructor(props) {
    super(props);

    this.state = {
    ordersToDisplay: null
    };
 }

 public componentDidMount() {
    this.props.aadFactory
      .getClient('https://contoso-api-dp20191109.azurewebsites.net')
      .then((client: AadHttpClient): void => {
        client
          .get('https://contoso-api-dp20191109.azurewebsites.net/api/Orders', AadHttpClient.configurations.v1)
          .then((response: HttpClientResponse): Promise<any> => {
            return response.json();
          })
          .then((orders: any): void => {
            this.setState({
              ordersToDisplay: orders
            })
          });
      }).catch((err) => {
        console.log(err);
      });
  }

  public render(): React.ReactElement<IHelloApiProps> {
    return (
      <div className={ styles.HelloApi }>
        <div className={ styles.container }>
          <div className={ styles.row }>
            <div className={ styles.column }>
              <span className={ styles.title }>Welcome to SharePoint!</span>
              <p className={ styles.subTitle }>Customize SharePoint experiences using Web Parts.</p>
              <p className={ styles.description }>
               <ul>
                    {this.state.ordersToDisplay &&
                        this.state.ordersToDisplay.map(o => {
                            return <li>{o.rep}: {o.total}</li>
                        })
                    }
                </ul>
              </p>
            </div>
          </div>
        </div>
      </div>
    );
  }
}
Now you can run your sample locally and try it in your hosted workbench, playing with it and updating your WebPart as you want!
… And don’t forget to update your package-solution.json file to include the required APIs before shipping! 
Happy coding!
This article was cross-posted on my blog.
by Contributed | Mar 10, 2021 | Technology
This article is contributed. See the original author and article here.
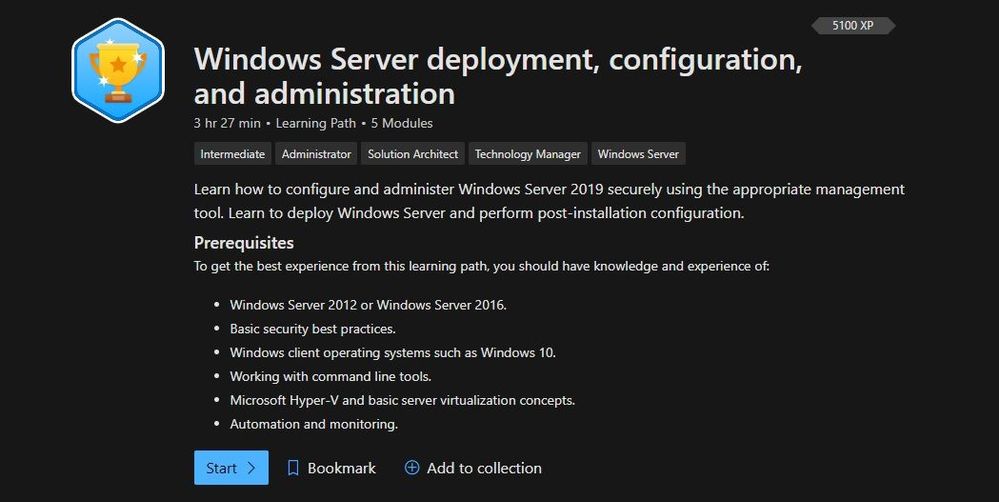
Are you looking for some deep dive or beginner’s content to learn more about Windows Server? Are you looking to learn more about Hyper-V and Virtualization, file server and storage management, Windows Server high availability, how to use Active Directory, networking, and much more? We now have new learning paths on Microsoft Learn available for you! And it is free!
Windows Server deployment, configuration, and administration
Learn how to configure and administer Windows Server 2019 securely using the appropriate management tool. Learn to deploy Windows Server and perform post-installation configuration.
Check out this learning path here.
Windows Server deployment, configuration, and administration
Modules:
Windows Server Hyper-V and Virtualization
Learn to implement and manage Windows Server virtual machines (VMs) and container workloads using Windows Server Hyper-V.
Check out this learning path here.
 Windows Server Hyper-V and Virtualization
Modules:
Windows Server file servers and storage management
Learn to implement and manage Windows Server file servers and storage. Implement Storage Spaces, data deduplication, and Windows Server Storage Replica.
Check out this learning path here.
Modules:
Windows Server high availability
Learn to implement high availability Windows Server virtual machine (VM) workloads with Hyper-V Replica, Windows Server Failover Clustering, and Windows Server File Server high availability.
Check out this learning path here.
Modules:
Active Directory Domain Services
Learn about Active Directory Domain Services fundamentals, and then learn to configure and manage AD DS, Active Directory Certificate Services, and how to manage Group Policy Objects.
Check out this learning path here.
Modules:
Windows Server Network Infrastructure
Learn to implement and manage networking services in Windows Server 2019. Learn to deploy and manage DHCP, secure DNS, and implement IP Address Management (IPAM) and Web Application Proxy.
Check out this learning path here.
 Windows Server Network Infrastructure
Modules:
Conclusion
If you are implementing or managing Windows Server, we want to provide you with the right learning material. And now with the latest Windows Server learning paths on Microsoft Learn, you get exactly that. Let us know what you think, and leave a comment!

Recent Comments