by Contributed | Apr 14, 2021 | Technology
This article is contributed. See the original author and article here.
The Cloud Service Extended Support is a new service type which is similar to classic Cloud Service. The biggest difference between them is that the new Cloud Service Extended Support is ARM (Azure Resource Manager) based resource and can be used with ARM features such as tags, policy, RBAC, ARM template.
About the migration from the classic Cloud Service to Cloud Service Extended Support, Azure officially provided a way called in-place migration. The detailed information can be found at: https://docs.microsoft.com/en-us/azure/cloud-services-extended-support/in-place-migration-portal.
In this blog, we will present how we can manually create a new Cloud Service Extended Support and deploy the same project into this new service. The classic Cloud Service project will have following features and after migration, all these features will be kept:
- Remote Desktop
- SSL certificate for HTTPS endpoints
- Using the same IP address before and after migration
The main advantage of manual migration
Before how to do this manual migration, let us highlight the main advantage of the manual migration:
- The name of the new Cloud Service Extended Support can be decided by yourself. You can use a user-friendly name such as CSEStest.
- Both of manual and in-place migration need the modification of the project code. During manual migration process, this modification is already included. With in-place migration process, it may be more difficult for you to modify the code.
- This manual migration process is using ARM template to deploy new resources. You can do some changes by your own idea such as enabling RDP Extension which is not enabled in classic Cloud Service. But the in-place migration does not allow you to do so. It will keep the same configuration.
Before you begin
There will be some additional points to do before we start the migration. Please have a check of following points carefully since it may cause unexpected issue if they are not matched:
- Follow the “Before you begin” part of the document to check if you are an administrator/coadministrator of the subscription.
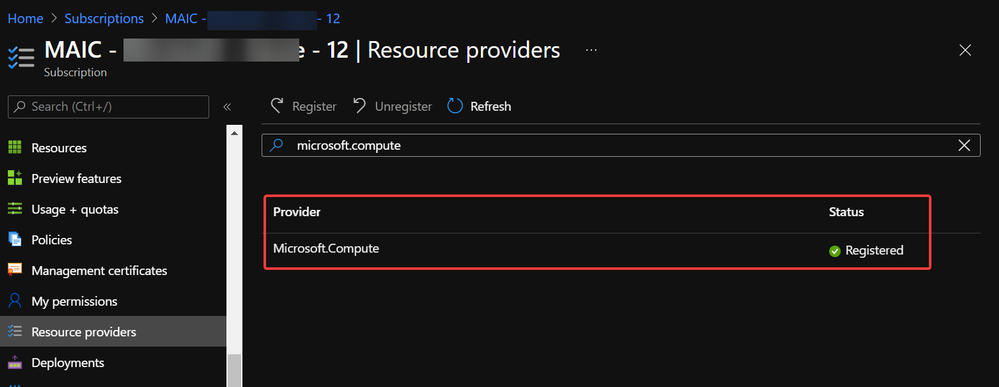
- In subscription page of Azure Portal, check the resource providers Microsoft.Compute, Microsoft.Network and Microsoft.Storage are already registered.
Example of resource provider registration
- We should have a running classic Cloud Service and its whole project code. If it is using certificate for any purpose (for HTTPS endpoint in this blog), that certificate in .pfx format and its password are also needed for the deployment.
With above 3 conditions, there should not be any other permission issue for this manual migration process. And for this process, a container in storage account is also required. If you do not have one yet, please follow this document to create one storage account and follow next 2 screenshots to create a new container.
https://docs.microsoft.com/en-us/azure/storage/common/storage-account-create?tabs=azure-portal#create-a-storage-account-1
 Create container 1
 Create container 2
Then, let us move on the main process.
Reserve the IP address of the classic Cloud Service and upgrade it to be used for Cloud Service Extended Support
In this example, my classic Cloud Service is testcstocses in resource group cstocses, in East US region.
- Use PowerShell command to keep the current IP address as a classic Reserved IP, with name ReservedIPCSES. The location must be the same as your classic Cloud Service location.
New-AzureReservedIP -ReservedIPName ReservedIPCSES -ServiceName testcstocses -Location "East US"
 Keep the IP to classic reserved IP
- Follow document to upgrade the generated classic Reserved IP to basic SKU Public IP (There is bug in script in official document)
https://docs.microsoft.com/en-us/azure/virtual-network/virtual-network-public-ip-address-upgrade?tabs=option-upgrade-powershell%2Coption-migrate-powershell#upgrade-migrate-a-classic-reserved-ip-to-a-static-public-ip
a. Verify if the classic Reserved IP is still associated with the classic Cloud Service. If yes, check if we can remove the association. (By design, the newly generated classic reserved IP should be still associated with classic Cloud Service)
## Variables for the command ##
$name = 'ReservedIPCSES'

## This section is only needed if the Reserved IP is not already disassociated from any Cloud Services ##
$service = 'testcstocses'
Remove-AzureReservedIPAssociation -ReservedIPName $name -ServiceName $service

$validate = Move-AzureReservedIP -ReservedIPName $name -Validate
$validate.ValidationMessages
 PowerShell commands to verify association between classic Cloud Service and generated reserved IP
b. If the result in above screenshot is Succeeded, then run the following command to remove the link.
Move-AzureReservedIP -ReservedIPName $name -Prepare
Move-AzureReservedIP -ReservedIPName $name -Commit
 Upgrade classic Reserved IP to basic tier
The new generated Basic SKU Public IP will be in a new resource group called {publicipname}-Migrated.
 Migrated basic tier reserved IP
- Set a DNS name on this Public IP. (Optional but recommended since the new Cloud Service Extended Support will not offer a DNS name as classic Cloud Service)
 Configure DNS name on public IP
- Move the Public IP into the original resource group.
 Move public IP to specific resource group 1
 Move public IP to specific resource group 2
- (Optional) If your original classic Cloud Service is using any certificate, create a Key Vault in the same region (East US in this example) and upload the .pfx format certificate.
 Create Key Vault 1
 Create Key Vault 2
Do not forget to check this checkbox “Azure Virtual Machines for deployment” in Access policy page.
 Create Key Vault 3
After creation of Key Vault, import the certificate.
 Upload certificate into Key Vault 1
 Upload certificate into Key Vault 2
 Upload certificate into Key Vault result
- Follow the official document to modify the classic Cloud Service code to make them match Cloud Service Extended Support requirement.
https://docs.microsoft.com/en-us/azure/cloud-services-extended-support/deploy-prerequisite
https://docs.microsoft.com/en-us/azure/cloud-services-extended-support/deploy-template
The yellow part is about the usage of the certificate. It is not necessary for all Cloud Service project.
The green part is the important information which we will use in following steps. Please take a note of it.
.csdef file
<?xml version=”1.0″ encoding=”utf-8″?>
<ServiceDefinition name=”AzureCloudService2″ xmlns=”http://schemas.microsoft.com/ServiceHosting/2008/10/ServiceDefinition” schemaVersion=”2015-04.2.6“>
<WebRole name=”WebRole1” vmsize=”Standard_D1_V2“>
<Sites>
<Site name=”Web”>
<Bindings>
<Binding name=”Endpoint1″ endpointName=”Endpoint1″ />
<Binding name=”HttpsIn” endpointName=”HttpsIn” />
</Bindings>
</Site>
</Sites>
<Endpoints>
<InputEndpoint name=”Endpoint1″ protocol=”http” port=”80″ />
<InputEndpoint name=”HttpsIn” protocol=”https” port=”443″ certificate=”Certificate1″ />
</Endpoints>
<Certificates>
<Certificate name=”Certificate1″ storeLocation=”LocalMachine” storeName=”My” permissionLevel=”limitedOrElevated”/>
</Certificates>
</WebRole>
</ServiceDefinition>
.cscfg file
<?xml version=”1.0″ encoding=”utf-8″?>
<ServiceConfiguration serviceName=”AzureCloudService2″ xmlns=”http://schemas.microsoft.com/ServiceHosting/2008/10/ServiceConfiguration” osFamily=”6″ osVersion=”*” schemaVersion=”2015-04.2.6“>
<Role name=”WebRole1“>
<Instances count=”1” />
<Certificates>
<Certificate name=”Certificate1″ thumbprint=”909011xxxxxxxxxx712303838613″ thumbprintAlgorithm=”sha1″ />
</Certificates>
</Role>
<NetworkConfiguration>
<VirtualNetworkSite name=”cstocsesvnet” />
<AddressAssignments>
<InstanceAddress roleName=”WebRole1″>
<Subnets>
<Subnet name=”WebRole1_subnet” />
</Subnets>
</InstanceAddress>
<ReservedIPs>
<ReservedIP name=”ReservedIPCSES” />
</ReservedIPs>
</AddressAssignments>
</NetworkConfiguration>
</ServiceConfiguration>
The thumbprint of the certificate can be found in Key Vault, Certificates page.
 Thumbprint of the certificate in Key Vault
- Package the project as we do for classic Cloud Service project. Then copy out the .cspkg and .cscfg files.
 Package in Visual Studio
 Package result for a classic Cloud Service project (certificate isn’t from package process)
- Upload the .cscfg file and .cspkg file into a container of storage account.
 Upload .cspkg and .cscfg to Storage container
- After uploading, generate the SAS URL of these 2 files one by one. We can click on the file, switch to Generate SAS, click on Generate SAS token and URL and find the needed SAS URL at the end of the page.
 Generate SAS token of .cscfg and .cspkg
The generated SAS token should be like:
https://storageforcses.blob.core.windows.net/test/AzureCloudService2.cspkg?sp=r&st=2021-04-02T10:47:04Z&se=2021-04-02T18:47:04Z&spr=https&sv=2020-02-10&sr=b&sig=osktC5FtJpI1uX28D2UMtJaZVi8FmhW6kpIHH%2FuFTUU%3D
https://storageforcses.blob.core.windows.net/test/ServiceConfiguration.Cloud.cscfg?sp=r&st=2021-04-02T10:48:12Z&se=2021-04-02T18:48:12Z&spr=https&sv=2020-02-10&sr=b&sig=8BmMScBU%2Bm6hRkKtUoiRNs%2F2NHYiHay8qxJq5TM%2BkGU%3D
- (Optional) If you use Key Vault to save the certificate, please visit the Certificate page and click 2 times on the uploaded certificate. You’ll find a URL at the end of the page with format:
https://{keyvaultname}.vault.azure.net/secrets/{certificatename}/{id}
 Find secret URL of certificate 1
 Find secret URL of certificate 2
Make a note of this URL for using it in next step. The following is my example: https://cstocses.vault.azure.net/secrets/csescert/e2f6ab1744374de38ae831ba8896edb9
Also, please make a note of the subscription ID, name of resource group where Key Vault is deployed and the Key Vault service name. These will also be used in next step.
- Please modify the following ARM template and parameters. And then save them into JSON format files. In my test, I saved into template.json and parameter.json.
Tips: The yellow parts are the optional parts. If you do not use any certificate, you can remove it from both template and parameter files. The green parts are the information noted from .csdef and .cscfg files. Please make sure they are the same and correct.
ARM template: (Except the above tips about certificate, no need to modify the ARM template file)
{
“$schema”: “https://schema.management.azure.com/schemas/2015-01-01/deploymentTemplate.json#“,
“contentVersion”: “1.0.0.0”,
“parameters”: {
“cloudServiceName”: {
“type”: “string”,
“metadata”: {
“description”: “Name of the cloud service”
}
},
“location”: {
“type”: “string”,
“metadata”: {
“description”: “Location of the cloud service”
}
},
“deploymentLabel”: {
“type”: “string”,
“metadata”: {
“description”: “Label of the deployment”
}
},
“packageSasUri”: {
“type”: “securestring”,
“metadata”: {
“description”: “SAS Uri of the CSPKG file to deploy”
}
},
“configurationSasUri”: {
“type”: “securestring”,
“metadata”: {
“description”: “SAS Uri of the service configuration (.cscfg)”
}
},
“roles”: {
“type”: “array”,
“metadata”: {
“description”: “Roles created in the cloud service application”
}
},
“vnetName”: {
“type”: “string”,
“defaultValue”: “csesVNet”,
“metadata”: {
“description”: “Name of vitual network”
}
},
“subnetSetting”: {
“type”: “array”,
“metadata”: {
“description”: “Setting of subnets”
}
},
“publicIPName”: {
“type”: “string”,
“defaultValue”: “contosocsIP”,
“metadata”: {
“description”: “Name of public IP address”
}
},
“upgradeMode”: {
“type”: “string”,
“defaultValue”: “Auto”,
“metadata”: {
“UpgradeMode”: “UpgradeMode of the CloudService”
}
},
“secrets”: {
“type”: “array”,
“metadata”: {
“description”: “The key vault id and certificates referenced in the .cscfg file”
}
},
“rdpPublicConfig”: {
“type”: “string”,
“metadata”: {
“description”: “Public config of remote desktop extension”
}
},
“rdpPrivateConfig”: {
“type”: “securestring”,
“metadata”: {
“description”: “Private config of remote desktop extension”
}
}
},
“variables”: {
“cloudServiceName”: “[parameters(‘cloudServiceName’)]”,
“subscriptionID”: “[subscription().subscriptionId]”,
“lbName”: “[concat(variables(‘cloudServiceName’), ‘LB’)]”,
“lbFEName”: “[concat(variables(‘cloudServiceName’), ‘LBFE’)]”,
“resourcePrefix”: “[concat(‘/subscriptions/’, variables(‘subscriptionID’), ‘/resourceGroups/’, resourceGroup().name, ‘/providers/’)]”
},
“resources”: [
{
“apiVersion”: “2019-08-01”,
“type”: “Microsoft.Network/virtualNetworks”,
“name”: “[parameters(‘vnetName’)]”,
“location”: “[parameters(‘location’)]”,
“properties”: {
“addressSpace”: {
“addressPrefixes”: [
“10.0.0.0/16”
]
},
“subnets”: “[parameters(‘subnetSetting’)]”
}
},
{
“apiVersion”: “2020-10-01-preview”,
“type”: “Microsoft.Compute/cloudServices”,
“name”: “[variables(‘cloudServiceName’)]”,
“location”: “[parameters(‘location’)]”,
“tags”: {
“DeploymentLabel”: “[parameters(‘deploymentLabel’)]”,
“DeployFromVisualStudio”: “true”
},
“dependsOn”: [
“[concat(‘Microsoft.Network/virtualNetworks/’, parameters(‘vnetName’))]”
],
“properties”: {
“packageUrl”: “[parameters(‘packageSasUri’)]”,
“configurationUrl”: “[parameters(‘configurationSasUri’)]”,
“upgradeMode”: “[parameters(‘upgradeMode’)]”,
“roleProfile”: {
“roles”: “[parameters(‘roles’)]”
},
“networkProfile”: {
“loadBalancerConfigurations”: [
{
“id”: “[concat(variables(‘resourcePrefix’), ‘Microsoft.Network/loadBalancers/’, variables(‘lbName’))]”,
“name”: “[variables(‘lbName’)]”,
“properties”: {
“frontendIPConfigurations”: [
{
“name”: “[variables(‘lbFEName’)]”,
“properties”: {
“publicIPAddress”: {
“id”: “[concat(variables(‘resourcePrefix’), ‘Microsoft.Network/publicIPAddresses/’, parameters(‘publicIPName’))]”
}
}
}
]
}
}
]
},
“osProfile”: {
“secrets”: “[parameters(‘secrets’)]”
},
“extensionProfile”: {
“extensions”: [
{
“name”: “RDPExtension”,
“properties”: {
“autoUpgradeMinorVersion”: true,
“publisher”: “Microsoft.Windows.Azure.Extensions”,
“type”: “RDP”,
“typeHandlerVersion”: “1.2.1”,
“settings”: “[parameters(‘rdpPublicConfig’)]”,
“protectedSettings”: “[parameters(‘rdpPrivateConfig’)]”
}
}
]
}
}
}
]
}
Parameters:
Tips:
For example:
“roles”: {
“value”: [
{
“name”: “WebRole1”,
“sku”: {
“name”: “Standard_D1_v2”,
“tier”: “Standard”,
“capacity”: “1”
}
},
{
“name”: “WorkerRole1”,
“sku”: {
“name”: “Standard_D1_v2”,
“tier”: “Standard”,
“capacity”: “2”
}
}
]
},
…
“subnetSetting”: {
“value”: [
{
“name”: “WebRole1_subnet”,
“properties”: {
“addressPrefix”: “10.0.0.0/24”
}
},
{
“name”: “WorkerRole1_subnet”,
“properties”: {
“addressPrefix”: “10.0.1.0/24”
}
}
]
},
- In the secrets part, sourceVault is the resource URI of your Key Vault. It’s constructed by /subscriptions/{subscription-id}/resourceGroups/{resourcegroup-name}/providers/Microsoft.KeyVault/vaults/{keyvault-name} And the certificateUrl is the one we noted in step 10.
- In rdpPublicConfig and rdpPrivateConfig, we only need to change the username and password we want to use to enable RDP. For example, here I use “admin” as username and “Password” as password.
{
“$schema”: “https://schema.management.azure.com/schemas/2015-01-01/deploymentParameters.json#“,
“contentVersion”: “1.0.0.0”,
“parameters”: {
“cloudServiceName”: {
“value”: “cstocses”
},
“location”: {
“value”: “eastus”
},
“deploymentLabel”: {
“value”: “deployment label of cstocses by ARM template”
},
“packageSasUri”: {
“value”: “https://storageforcses.blob.core.windows.net/test/AzureCloudService2.cspkg?sp=r&st=2021-04-02T10:47:04Z&se=2021-04-02T18:47:04Z&spr=https&sv=2020-02-10&sr=b&sig=osktC5FtJpI1uX28D2UMtJaZVi8FmhW6kpIHH%2FuFTUU%3D“
},
“configurationSasUri”: {
“value”: “https://storageforcses.blob.core.windows.net/test/ServiceConfiguration.Cloud.cscfg?sp=r&st=2021-04-02T10:48:12Z&se=2021-04-02T18:48:12Z&spr=https&sv=2020-02-10&sr=b&sig=8BmMScBU%2Bm6hRkKtUoiRNs%2F2NHYiHay8qxJq5TM%2BkGU%3D“
},
“roles”: {
“value”: [
{
“name”: “WebRole1“,
“sku”: {
“name”: “Standard_D1_v2“,
“tier”: “Standard”,
“capacity”: “1“
}
}
]
},
“vnetName”: {
“value”: “cstocsesVNet“
},
“subnetSetting”: {
“value”: [
{
“name”: “WebRole1_subnet“,
“properties”: {
“addressPrefix”: “10.0.0.0/24”
}
}
]
},
“publicIPName”: {
“value”: “ReservedIPCSES“
},
“upgradeMode”: {
“value”: “Auto”
},
“secrets”: {
“value”: [
{
“sourceVault”: {
“id”: “/subscriptions/4f27bec7-26bd-40f7-af24-5962a53d921e/resourceGroups/cstocses/providers/Microsoft.KeyVault/vaults/cstocses”
},
“vaultCertificates”: [
{
“certificateUrl”: “https://cstocses.vault.azure.net/secrets/csescert/e2f6ab1744374de38ae831ba8896edb9“
}
]
}
]
},
“rdpPublicConfig”: {
“value”: “<PublicConfig>rn <UserName>admin</UserName>rn <Expiration>4/2/2022 12:00:00 AM</Expiration>rn</PublicConfig>”
},
“rdpPrivateConfig”: {
“value”: “<PrivateConfig>rn <Password>Password</Password>rn</PrivateConfig>”
}
}
}
- Use PowerShell command to deploy the ARM template. (Not necessary by PowerShell. You can also use Azure Portal or Azure CLI to deploy the template)
https://docs.microsoft.com/en-us/powershell/module/az.resources/new-azresourcegroupdeployment?view=azps-5.7.0
Please remember to replace the resource group name and the path of the template and parameter JSON file in the command before running it.
New-AzResourceGroupDeployment -ResourceGroupName "cstocses" -TemplateFile "C:UsersjerryzDesktopCSES testdemotemplate.json" -TemplateParameterFile "C:UsersjerryzDesktopCSES testdemoparameter.json"
 ARM template deployment result
Result: (The classic Cloud Service is deleted)
 All created resources in this process
by Contributed | Apr 13, 2021 | Technology
This article is contributed. See the original author and article here.
Getting started with Video Indexer v2 API
Itai Norman Program Manager, AEDPLS, Video Indexer.
Video Indexer is an Azure service, that enables you to easily extracts business insights from your media files by using around 30 AI models. Using this service, you can enrich your videos with meta-data, transcription, and translation to more the 50 different languages, search in videos for faces, people, topics, spoken words, and much more.
Video Indexer can be leveraged in three ways: via a REST API, via a full flagged portal experience, and via embeddable customizable widgets, that enable customers to leverage the portal experience in their own applications. In this blog we will focus on how to get to know and get started with the Video Indexer REST API easily, using our brand-new developer portal! Via this portal, you can explore and try out all different APIs, find code samples and easily navigate between all Video Indexer’s communities and documentation resources.
In this blog, I will walk you through few basic steps:
First thing first – get a Video Indexer account
Before starting to use Video Indexer’s REST API, you should have a Video Indexer account, you can start with a free trial account; Just sign-in with one of the following: AAD account, Personal Microsoft account, or a Google account and you are good to go!
Alternatively, you can get connected to your own Azure Subscription. If someone to their Video Indexer account, you could use that account as well.

Register to Video Indexer’s API
Now we are ready to start using the Video Indexer developer portal. You will be welcomed with the Video Indexer developer portal landing page, just press the ‘Sign-in’ button on the top-right corner of the ‘Get Started’ button, to authenticate. When the authentication process is finished you will be connected to the developer-portal as a signed-in user, and you will see the following tabs in your top-right menu: ‘Home’, ’APIs’, ’Developer Support’, ‘Profile’, ’Sign out’.
Getting familiar with the developer portal
Before moving to an example of using Video Indexer’s API, let’s briefly explore what’s available for you in the portal.
The first tab is the APIs tab. It has a list of all APIs calls in VI’s environment, by choosing an API call you will get a sample of how the request would look like, a documentation table, and an option to try the API call through the portal.
On the ‘try it’ blade you will be able to enter the relevant parameters and get a glance at what would the API call and response look like.

In the Home tab, you can find links to our documentation around main functionalities such as model customization and how to embed widgets. A three easy steps guide, on how to use Video Indexer’s API and a short code sample.
The Developer support page includes everything you need to learn about and get support for: GitHub repository, Stackoverflow page, ‘CodePen’ link with widgets code samples, and Video Indexer’s tech community relevant blog posts. Also available in the developer support, Video Indexer’s FAQ page, a ‘User Voice’, where you can suggest Video indexer capabilities and features that may be helpful for your business needs, and a general documentation link.

Using the API
This is really what we are here for, right? So, let’s see how to start using the VI API…
Getting the account id and access token.
In this section, I’ll walk you through the basic flow that lets you get media insights from Video Indexer, with only three calls: Getting an ‘AccountId’ and ‘Access Token’, uploading a file and retrieving the insight JSON file, and I’ll use the developer portal to do so.
First, open the developer portal, under the ‘APIs’ tab go to the ‘Get Accounts Authorization’.

Enter the query parameters:
- Location – ‘trial’ (or for non-trial account enter the region for your account)
- Generate Access Token: true.
At the bottom of the ‘Try it’ blade hit ‘Send’.

You should receive a 200 ok response with the appropriate data.

Open a Notepad or similar app to keep the different values of the response, you will need it in a minute… form the response save the: ‘Id’ which is the ‘Account Id’, and the ‘Access Token’.
Upload video

Now we have everything we need to upload the first video. Go to ‘Upload video’
enter the query parameters:
- Location: ‘trial’ (For non-trial account enter the region e.g. “eastus”).
- AccountId: GUID you received it in your ‘Get Accounts Authorization’.
- Name: give the video a name.
- VideoUrl: The full path of the video you want to upload, note, that video Indexer support a wide range of video and audio file formats, but it has to be a URL for a file (and not a HTTP link for example)
- Access Token: the ‘Access Token’ we got at the previous step.
, and hit ‘Send’.
Form the ‘upload video’ response fetch the ‘id’ – which is the Video Indexer id for the file you just uploaded. We will need it in the next step.
Getting Insights
Once the indexing completed (which might take a few minutes), we can use the third call, to see what Video Indexer was able to extract. Go to ‘Get Video Index’

enter the query parameters:
- Location – ‘trial’ (For non-trial account enter the region e.g. “eastus”).
- AccountId: GUID you received it in your ‘Get Accounts Authorization’.
- VideoId: we received from the last API call.
- Access Token: the ‘Access Token’ we got at the previous step.
, and hit ‘Send’.
And Walla… all the insights will be returned in a Json format file.

Congratulations! you just got your first set of insights in a readable JSON format.
So, what’s next?
Use these relevant articles to learn more on how to use Video Indexer:
Use these links to read more technical articles around Video Indexer:
by Contributed | Apr 13, 2021 | Technology
This article is contributed. See the original author and article here.
* The blog was first published at December 2019 by Anika Zaman in Azure blogs
We are pleased to introduce the ability to export high-resolution keyframes from Azure Media Service’s Video Indexer. Whereas keyframes were previously exported in reduced resolution compared to the source video, high resolution keyframes extraction gives you original quality images and allows you to make use of the image-based artificial intelligence models provided by the Microsoft Computer Vision and Custom Vision services to gain even more insights from your video. This unlocks a wealth of pre-trained and custom model capabilities. You can use the keyframes extracted from Video Indexer, for example, to identify logos for monetization and brand safety needs, to add scene description for accessibility needs or to accurately identify very specific objects relevant for your organization, like identifying a type of car or a place.
Let’s look at some of the use cases we can enable with this new introduction.
Using keyframes to get image description automatically
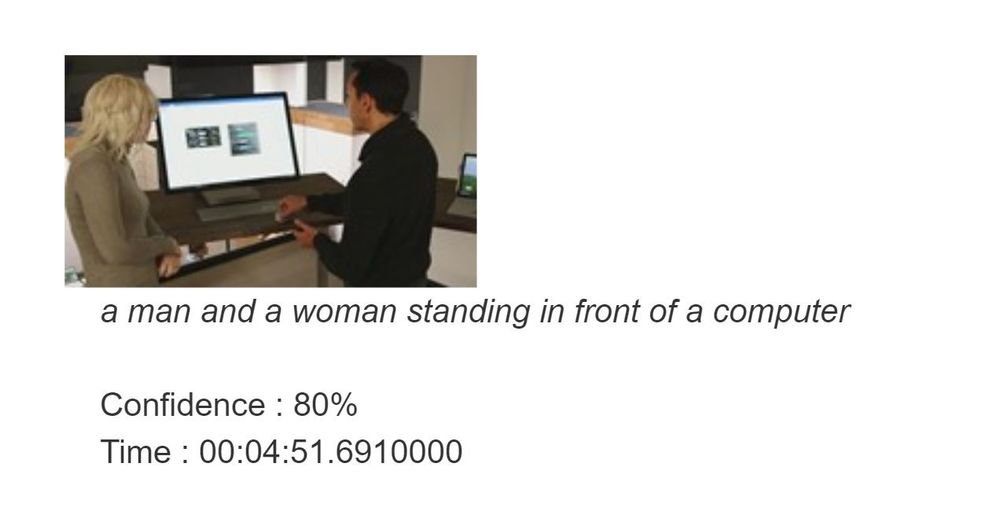
You can automate the process of “captioning” different visual shots of your video through the image description model within Computer Vision, in order to make the content more accessible to people with visual impairments. This model provides multiple description suggestions along with confidence values for an image. You can take the descriptions of each high-resolution keyframe and stitch them together to create an audio description track for your video.
Pic 1: An example of using the image description model to create a description of a high resolution key frame.
Using Keyframes to get logo detection
While Video Indexer detects brands in speech and visual text, it does not support brands detection from logos yet. Instead, you can run your keyframes through Computer Vision’s logo-based brands detection model to detect instances of logos in your content.
This can also help you with brand safety as you now know and can control the brands showing up in your content. For example, you might not want to showcase the logo of a company directly competing with yours. Also, you can now monetize on the brands showing up in your content through sponsorship agreements or contextual ads.
Furthermore, you can cross-reference the results of this model for you keyframe with the timestamp of your keyframe to determine when exactly a logo is shown in your video and for how long. For example, if you have a sponsorship agreement with a content creator to show your logo for a certain period of time in their video, this can help determine if the terms of the agreement have been upheld.
Computer Vision’s logo detection model can detect and recognize thousands of different brands out of the box. However, if you are working with logos that are specific to your use case or otherwise might not be a part of the out of the box logos database, you can also use Custom Vision to build a custom object detector and essentially train your own database of logos by uploading and correctly labeling instances of the logos relevant to you.

Pic 2: An example of log detection using Computer Vision’s logo-based brands detection
Using keyframes with other Computer Vision and Custom Vision offerings
The Computer Vision APIs provide different insights in addition to image description and logo detection, such as object detection, image categorization, and more. The possibilities are endless when you use high-resolution keyframes in conjunction with these offerings.
For example, the object detection model in Computer Vision gives bounding boxes for common out of the box objects that are already detected as part of Video Indexer today. You can use these bounding boxes to blur out certain objects that don’t meet your standards.

Pic 3: An example of object detection model in Computer Vision applied on a high resolution key frame
High-resolution keyframes in conjunction with Custom Vision can be leveraged to achieve many different custom use cases. For example, you can train a model to determine what type of car (or even what breed of cat) is showing in a shot. Maybe you want to identify the location or the set where a scene was filmed for editing purposes. If you have objects of interest that may be unique to your use case, use Custom Vision to build a custom classifier to tag visuals or a custom object detector to tag and provide bounding boxes for visual objects.
Try it for yourself
These are just a few of the new opportunities enabled by the availability of high-resolution keyframes in Video Indexer. Now, it is up to you to get additional insights from your video by taking the keyframes from Video Indexer and running additional image processing using any of the Vision models we have just discussed. You can start doing this by first uploading your video to Video Indexer and taking the high-resolution keyframes after the indexing job is complete and second creating an account and getting started with the Computer Vision API and Custom Vision.
Have questions or feedback? We would love to hear from you. Use our UserVoice page to help us prioritize features, leave a comment below or email VISupport@Microsoft.com for any questions.


Recent Comments