This article is contributed. See the original author and article here.
Blog Series: MCAS Data Protection – Protect Box (Part 1: Near Real-Time Data Protection)
Hi everyone! Welcome to the first installment of my MCAS Data Protection Blog Series! If this is your first time seeing this blog, check out my landing page for some more information about me and what I’ll be covering! Within this article, I’ll be discussing three unique Box governance action behaviors (Apply classification label, Set an expiration date on a shared link, and Put in admin and user quarantine). These governance actions were selected based on customer scenarios and questions my team has received.
To get started, there are two ways to protect Box using MCAS.
- Near real-time (NRT) protection that’s configured through File Policies and manual file governance; this uses the Box app connector.
- Real-time data protection using Conditional Access App Control.
For this article (Part 1), we are covering NRT data protection mechanisms.
For the following scenarios, please ensure you have the following prerequisites in place:
- User has connected Box.

- File Monitoring is enabled.

- Azure Information Protection integration is enabled.

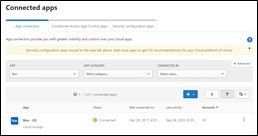
Okay, so let’s jump into our files! If Box is fully configured and connected, the full list of files and folders in Box will populate within the Files list under Investigate.

From here, you’ll able to do a manual investigation. When you go to the vertical ellipsis for a specific file, you get the below drop-down menu:

NOTE: If you’re using Sensitivity Labels, MCAS will use those labels for file labeling.
NOTE: If the Box file (any file) has already been labeled, you are unable to put that file in quarantine.
When you create a File Policy in MCAS, your list of governance actions (automatic) are slightly different from what you can do from the Files list under Investigate (manual).
Box Automatic Governance Actions

Now, let’s dive into the governance action, “Apply classification label.”
For our example, the file we’re using is named “Dummy Data 1.docx.” This file currently sits in Box and has credit card information. Using a File Policy for Box, MCAS detected the sensitive information and labeled the file (automated governance). In the screenshot below, the exclamation point indicates the file matches a policy and the tag indicates that this document is protected using Azure Information Protection. What is the customer ask here?
Scenario: The file has been labeled in Box through MCAS.

Question: How do we know that a file has been labeled by MCS in Box? When we’re in Box, we cannot see that this file has been labeled.


There’s a trick though… in order to get this information, you have to download the file. When you download the file, you can see within the file Properties (File -> Info -> Properties -> Advanced Properties -> Custom) that a label has been applied.

NOTE: If you use MCAS to apply a label to a file, you can use MCAS to remove that label as well. If the label was applied by a different service from MCAS (AIP Unified Labeling client, AIP Scanner, etc.), it cannot be removed by MCAS.
Next, let’s take a look at the governance action, “Set an expiration date on a shared link.”
For our example, the file we’re using is named “File set expiration date on shared.docx.” Using a File Policy for Box, MCAS detected this file had a shared link expiring on October 31st.

The policy itself was created on the 16th of October. When MCAS detected this, based on the configuration of revoking shared link access after 4 days, the new date is now October 20th. The customer ask is if the revocation of the link is from the current date assigned. The answer is no. It is from the day MCAS detected and applied the Governance action.


Alright, last but not the least, “Put in admin quarantine” and “Put in user quarantine.”
Box behaves different from the admin quarantine settings we currently have for SharePoint Online and OneDrive for business. We cannot select a specific folder nor can we change the message the user sees. For our example, we put 1 file in User Quarantine (File user quarantine.docx) and 1 file in Admin Quarantine (File Quarantine Demo.docx). In this example we have one policy putting a file in Admin quarantine and another policy putting a secondary file in user quarantine. The customer question here is always around why they cannot find the file in their SharePoint Admin Quarantine folder. This is because the entire experience with Box is different.
NOTE: For Box, the quarantine folder location and user message can’t be customized. The folder location is the drive of the admin who connected Box to Cloud App Security and the user message is: This file was quarantined to your administrator’s drive because it might violate your company’s security and compliance policies.

The below files are in the original folder, named “Test Folder” for our demo, and have yet to be quarantined.

Once MCAS goes through and quarantines these files, this is what it looks like in MCAS:

The yellow icon indicates the file is in Admin Quarantine while the grey icon indicates the file is in User Quarantine.
Within Box, a folder named “Quarantine” was created in the main landing page. Megan Bowens is the admin of this tenant and the current account holder. Within the folder, she has the file which is in User Quarantine and then another folder, with her name, indicating the admin quarantine of the file.
Admin quarantine files will populate under a sub-folder named with the user’s account (user whose file is being quarantined) within the “Quarantine” folder. This is to ensure an admin can have separate folders per user who has their file under Admin Quarantine.
User Quarantine files will populate under a folder named “Quarantine” on the main landing page for a user.
In our example, since Megan is both an admin and user, she is seeing a combination of the parent folder with the sub-folder and has access to both the files.
Main Landing Page for Megan:

Inside the “Quarantine” folder:

Inside the Meganb@M365x913048.onmicrosoft.com folder:

This is what the user sees in “Test Folder” after a file has been quarantined:

What each file says when you open in “Test Folder:”

The actions can be best summarized with the below:
- Put in user quarantine – Allow self-service by moving the file to a user-controlled quarantine folder.
- Put in admin quarantine – File is moved to quarantine in the admin account, and the admin must approve it.
There you have it! 3 unique behaviors of MCAS data protection with Box file governance. Let me know if you have any feedback. What other scenarios would you like me to cover? Feel free to comment below!
Brought to you by Dr. Ware, Microsoft Office 365 Silver Partner, Charleston SC.

Recent Comments