by Contributed | Apr 29, 2021 | Technology
This article is contributed. See the original author and article here.
Today we are very pleased to announce a new Windows Server base OS container image preview built from Windows Server 2022 with Desktop Experience. To try it out, on a Windows Server 2022 Insider Build 20344 as the container host, run this command to start:
docker pull mcr.microsoft.com/windows/server/insider:10.0.20344.1
The direct link of the image repo on Docker Hub is here https://hub.docker.com/_/microsoft-windows-server-insider/.
Why did we build this new image?
There are 3 Windows Base OS container images today that nicely cover the broad spectrum of customer needs: Nano Server – ultralight, modern Windows offering for new app development; Server Core – medium size, best fit for Lift and Shift Windows Server apps; Windows – largest size, almost full Windows API support for special workloads. Nano Server and Server Core container image adoption has been steadily growing and widely used for a while. In the last year or so, we are also seeing uptake of the Windows image adoption. Meanwhile, in the Windows Container community on GitHub and through our Customer Support, we have received feedback regarding constraints when using that Windows base OS container image. For example,
Some of the constraints are by design because that Windows container image is built from a full Windows Client edition and enabled to run on Windows Server. As we are committed to invest in the Windows containers business, we believe it is a right thing at this right time to build a new image based on a “full” Windows Server edition to enable more capabilities. “Full” in the sense that we choose to use the Windows Server 2022 with Desktop Experience edition. Some of you may refer this as “Server Core” + “Desktop UI” informally. That’s how this new container image was born and built. It will be added to all the relevant repos on Microsoft Container Registry (MCR) and Docker Hub pages. I should note, though this image is built from an edition with Desktop Experience, Windows containers today by design do not have GUI. That’s not changed with this new image.
What’s the name again?
Windows containers by themselves are not stand-alone products. They are considered features of Windows Server. Whatever name we choose needs to show that connection but also avoid potential confusion or duplication. That leaves us limited room for creativity  . As you can see, with the path on MCR, “mcr.microsoft.com/windows/server”, this image is referred as “Windows Server base OS image”, or just short like this, “Server base image”, or “Server image”.
What about this new image?
This new image will be available with Windows Server 2022 release only. For those of you who are using the Windows images from previous releases that are still in support such as Windows Server SAC v1809, SAC v1909, SAC v2004 and SAC v20H2, those images are not changed and have their respective support cycles. This new image is not available with those previous releases. We encourage you to adopt Windows Server 2022 and move to use this new Server image.
Here is a quick comparison between all the 4 images:
Container Image
|
Main Use Case
|
Compressed Size
|
Supported Versions today *
|
Windows Server 2022
|
Windows Server 2016, 2019
|
Windows Server SAC v1809**, v1909, v2004, v20H2
|
Nano Server
|
Mainly for modern apps such as .NET Core apps;
Limited App Compatibility
|
112MB
|
X
|
|
X
|
Server Core
|
Mainly for .NET Framework apps;
Better App Compatibility
|
1.2GB
|
X
|
X
|
X
|
Windows
|
Mainly for .NET Framework apps;
Best App Compatibility with by-design constraints
|
3.4GB
|
|
|
X
|
Server
|
Mainly for .NET Framework apps;
Best App Compatibility
|
3.1GB
|
X
|
|
|
Note:
* “Supported Version today” lists the Windows Server releases that the container image was or will be released and is or will be supported. For example, with the first row, it means, Nano Server image was released with Windows Server SAC v1809, v1909, v2004 and v20H2 releases and will be in Windows Server 2022 release. That list can change as some releases reach their end of support.
**In the release wave of Windows Server 2019 and SAC v1809, Nano Server container and Windows container images were only shipped as an SAC with 18 months support cycle. Based on customer feedback, last year we have extended Nano Server container in the SAC v1809 release to be supported for 5 years. This Windows container image currently will reach its end-of-life support (EOL) in May hence we will be sure to share the update on the extension in May before the EOL. On the other hand, Server Core container image in that release wave was shipped both as an LTSC and an SAC. In an oversimplified way, you can think all the 3 images released during Windows Server 2019 and SAC v1809 wave are now being made aligned to be supported for 5 years to Jan 2024. We understand this is a confusing topic. We’ll come back with details in future blogs.
What are the key benefits and capabilities of the new image?
Compared to the current Windows image:
- Size Smaller: slightly smaller, from 3.4GB down to 3.1GB.
- Performance and Reliability Improved: Over the years we have improved performance and reliability of the Server Core container images thanks to the large adoption internally and externally. This image inherits all the improvements from Server Core.
- LTSC Support from the get-go: we are planning to support this image as an LTSC with 5 years mainstream support.
- Server functionality: we are still validating so the list here is not complete but we expect this image will enable more Server scenarios/features.
- IIS Connection: as mentioned earlier, there was a 10 connection limit. This new image should no longer have this limit. We have customers validating with their scenarios.
- Web APIs e.g. Web Management Services (WMSVC): in that same GitHub issue related to IIS, it was reported this feature is not supported. We are yet to validate but we believe this should be supported.
- Fuller API support
OK, that’s interesting. How do I get started?
Step 1: Install a Windows Server 2022 Insider
To get started, you’ll need a Windows Server 2022 installation based on the Insiders preview build 20344. You can download the bits from the Insiders page here: Download Windows Server Insider Preview. Once you download the ISO (or VHD), create a new VM based on this image.
Step 2: Install Docker
Once you have a working Windows Server 2022 Preview deployment, follow this to install Docker:
Install-Module -Name DockerMsftProvider -Repository PSGallery -Force
Install-Package -Name docker -ProviderName DockerMsftProvider
Restart-Computer -Force
Once the machine is restarted, run ‘docker info’ to ensure Docker was correctly installed.
Step 3: Pull the new image
docker pull mcr.microsoft.com/windows/server/insider:10.0.20344.1
Step 4: Run the new image
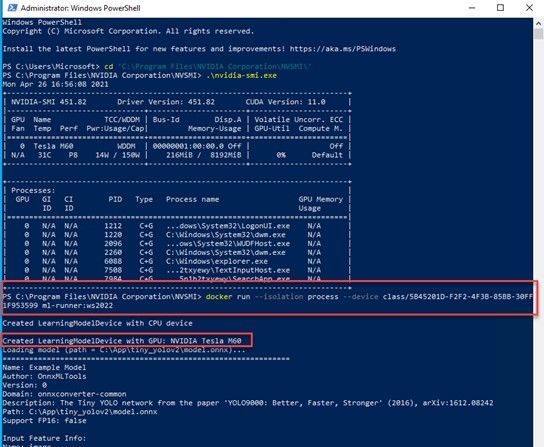
docker run -it mcr.microsoft.com/windows/server/insider:10.0.20344.1 cmd
Here is a screenshot for your reference:

Note:
- On a Windows Server host, containers are by default run in the process-isolation mode. You can find more at this doc page Windows Server Container Isolation Modes.
- If you would like to try out on a Windows 10 machine, please follow the instructions here Use Containers with Windows Insider Program. Be sure to use the latest Insider release. For example, I used a Windows 10 21364 Insider build. On a Windows 10 host, containers are by default run in the Hyper-V isolation mode.
References:
Closing
It’s been such a great journey since we started working on making this new image early this year. Your feedback really propelled us on the direction and innovations. We are so excited to share this with the community. We may get it right or we may get it wrong. Fail fast if needed. But we are in !
As always, we love to see you try it out, and give us feedback. You can share your feedback at our GitHub community, or contact us directly.
Weijuan
Twitter: @WeijuanLand
Email: win-containers@microsoft.com
by Contributed | Apr 29, 2021 | Technology
This article is contributed. See the original author and article here.
Hi all,
A customer of mine recently reported an issue that some workstations sporadically lock while the user is working and asked if we could figure out the culprit. Here is the story.
First let me mention that Konstantin Chernyi, a Microsoft CE colleague from Russia, contributed greatly here. So credits also go to him (thanks, Konstantin).
Before we start you need to understand a few basics. A workstation is usually locked by calling the User32.dll function User32dll!LockWorkStation (https://docs.microsoft.com/en-us/windows/win32/api/winuser/nf-winuser-lockworkstation). There may be other options but most applications rely on this function. LockWorkStation creates the LogonUI.exe process to display the Logon Screen and the Lock Screen (if configured). It’s also important to know the Lock events can be traced using the Microsoft-Windows-WinLogon provider. You can get a list of all installed providers by running the command
XPerf.exe -providers i
XPerf is a good choice to narrow down this type of sporadic issue. It supports circular file mode, which means it can overwrite old events to keep the file size at a specified maximum (important for long runs). It can also capture the stack to support stackwalking, so we can see functions that processes call (if symbols are loaded). XPerf is part of the Windows Performance Toolkit, which in turn is part of the Windows Assessment and Deployment Kit (Windows ADK). You can download the ADK here: https://docs.microsoft.com/en-us/windows-hardware/get-started/adk-install.
In Windows 10, Windows Performance Recorder (wpr.exe) is built-in and could be an alternative to XPerf (https://docs.microsoft.com/en-us/windows-hardware/test/wpt/author-a-custom-recording-profile). In this blog, however, I’m going with XPerf.
1. Create the trace
I asked the customer to run the following command in an elevated command prompt on a client that was affected by the sporadic locks:
xperf -on proc_thread+loader+profile+interrupt+dpc+dispatcher+cswitch -stackwalk profile+cswitch+readythread -buffersize 1024 -minbuffers 256 -maxbuffers 256 -maxfile 256 -filemode circular -start wl -on microsoft-windows-winlogon -buffersize 1024 -minbuffers 256 -maxbuffers 256 -maxfile 32 -filemode circular
This starts two ETW sessions: A kernel trace with some kernel providers to capture process and thread creation, image load and unload events, CPU samples, and the stack. The output file should stay at 256 MB (-maxfile, -filemode circular). The second trace captures events of the Microsoft-Windows-WinLogon provider which includes the Lock event.
After that the customer created a scheduled task, which triggers on the lock workstation event (luckily, we have this predefined trigger) with a delay of 3 seconds. This task runs the command to stop the trace and merge the trace files.
XPerf -stop -stop wl -d %TEMP%Lock.etl
Note that the two subsequent “-stop” are not a mistake. Remember that we created two ETW sessions?
2. Analyze the trace
To open the Lock.etl file, I use Windows Performance Analyzer (WPA). I originally worked with the Lock.etl file uploaded by the customer, but for this blog post I simulated this issue to avoid posting screenshots with customer data. The simulation was done by calling RunDLL32.exe User32.dll,LockWorkStation, which makes RunDLL32.exe the “evil” process.
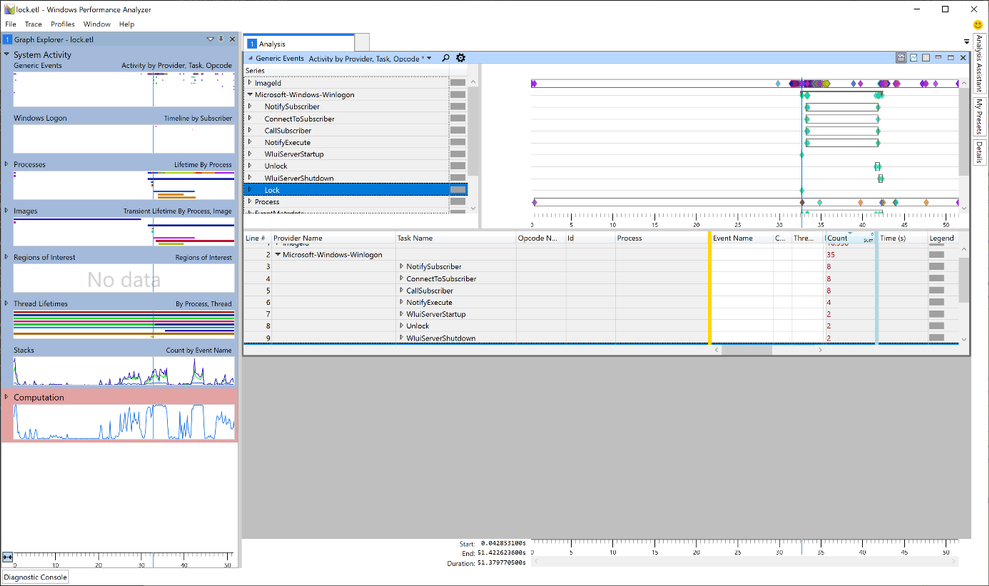
In WPA, I started with the Generic Events graph. Here we can find the event providers we traced next to the kernel trace (in our case the Microsoft-Windows-Winlogon provider).
Taking a closer look, we can see that the Lock event is also part of the trace (Yeah, we caught the fish). Now, as we learned earlier, we know that a workstation lock triggers the LogonUI.exe process so I tried to find the start of this process in WPA. For this, I needed another graph: Lifetime by Process.

The image shows the LoginUI.exe process in the timeline. The call to the LockWorkStation function must have happened shortly before the LogonUI.exe process was created. To get rid of unnecessary information we Zoom to the area starting at approx. 3 seconds before and ending about a second after the start of LogonUI.exe. I highlighted those 4 seconds in the graph, right-clicked in the highlighted section and selected “Zoom”.

Somewhere in this section the call to LockWorkStation happens. The “Transient” process list showed five processes were started within those 4 seconds. But it’s possible that a process started earlier than this zoomed-in-view made the call to User32!LockWorkStation. The processes started before the beginning of the zoomed area, are grouped into the “Permanent” Lifetime.

To finally find the caller to LockWorkStation I need to search the stack of all running processes (Permanent and Transient) for the expression LockWorkStation. To do this, I added another graph to view the stack: CPU Usage (Sampled). This new graph automatically adopts to the zoomed timeline and only displays processes running in those 4 seconds.

Now it’s time to load the debug symbols to. Otherwise we cannot search for the function name. I made sure that my PC had an Internet connection and, in the menu bar of the Windows Performance Analyzer, I clicked Trace -> Load Symbols. It could take a while when symbols are first loaded.

I highlighted the first line of the process table in the CPU Usage (Sampled) graph (to make sure to search all processes) and clicked on the small magnifier icon to open the search dialog. After that I clicked the three dots to expand the dialog and typed “LockWorkStation” into the field after “contains” (the query is constructed automatically so this box can be left empty).

Clicking “Find All” unmasked our culprit.

Rundll32.exe was quickly identified as the calling process. Handcuffs, conduct under escort. Case closed.
by Contributed | Apr 29, 2021 | Technology
This article is contributed. See the original author and article here.
Today, we are happy to announce that the Exchange Health Checker PowerShell script has a new home: it is now part of the Microsoft CSS-Exchange repository on GitHub!
With the new home comes a new versioning specification. Before the move, the version schema was structured like this:
MAJOR.MINOR.PATCH (e.g. 3.1.2)
The new version uses the following specification:
YEAR.MONTH.DAY.HOURMINUTE (e.g. 21.04.21.1135)
We auto generate the version number during our script build process. This will be updated every time we change any file that the Health Checker uses, to show the latest commit. Because the Health Checker is within a large collection of scripts, each release that is posted might not include a new change for the Health Checker.
We strongly recommend checking for a new version before running the Health Checker script to make sure to benefit from the latest checks and improvements. The script does the update check automatically in case the system has connectivity to the internet and tries to update itself independently.
If your system does not have any connectivity to the internet, simply download the latest version from: https://aka.ms/ExchangeHealthChecker.
We did lots of code optimizations with the latest version (initially released in November 2020). This code optimization makes it easier to add things to the main report output and the HTML report and helps keep them in sync. If you were running older versions of Health Checker, you (hopefully) noticed a large difference in the formatting output to help make the report look more organized and cleaner.
Please note that Health Checker no longer supports Exchange 2010 (End of Life since 10/13/2020). So, if you still running Exchange 2010 (or Exchange 2013 on Windows Server 2008 R2, talking about EOL products), you should move to a supported Exchange and/or operating system version or consider moving to Exchange Online.
A long-term goal is to have Pester testing being built with the script. The breakout of the script and new organization of code provides the foundation for unit testing with Pester. Results will be more efficient checks and fewer False-Positives (FP) / False-Negatives (FN), or bugs.
If you are interested to track our open work items, you can find them here.
Last but not the least, all scripts on Microsoft CSS-Exchange repository are digitally signed when they are released. You can verify the signature by running the Get-AuthenticodeSignature cmdlet. Example:
Get-AuthenticodeSignature -FilePath “C:TempHealthChecker.ps1”
Some of the checks performed by the Exchange Health Checker script
- General information about the server
- Server name
- Exchange version
- Build number
- Support state of the Exchange version in use
- Server role
- MAPI/HTTP status
- DAG Name
- AD Site
- Server maintenance state
- Operating system information
- Version
- Uptime
- Time zone
- Dynamic daylight time status
- .NET Framework version in use and recommended version
- Page file size and recommended size
- Power plan
- HTTP proxy settings
- Processor/Hardware Information
- Multiple information and recommendations for physical or virtual environments
- Processor recommendations
- Memory recommendations
- Network interface controller (NIC) settings, grouped by adapter
- Check if Visual C++ redistributable is current
- TCP KeepAliveTime configuration
- RPC minimum connection timeout settings
- LmCompatibilityLevel
- FIPS algorithm policy status
- CtsProcessorAffinityPercentage settings
- Credential Guard state
- TLS settings for TLS 1.0, 1.1 and 1.2 and check if the configuration is correct
- Certificates on the system and their validity (for example: lifetime, revocation status…)
- Certificate used in Auth configuration
- We check if Exchange Web App Pools GC server mode is enabled or not and display the state of each App Pool
- Exchange vulnerabilities and weak server configuration (for example: SMBv1 settings)
Roadmap… features to come
We are working on more features to make the Exchange Health Checker even better. Here are some of our major improvements which are in development right now and will be available in the Exchange Health Checker in near future:
- Include more documentation on GitHub pages as a one-stop shop (work in progress). GitHub pages will contain information about every check and cover the why, how the check is done, and how to resolve the issue (if applicable). They will also provide links to relevant Microsoft resources for each specific topic.
- Unit tests by using Pester framework.
- Provide the ability to pass multiple servers to the script (aka Pass Server List) instead of running the script for each server.
- Ability to write out a HTML load balancing report.
- Check for Exchange hybrid setup.
- Continue to add checks for additional cases that can be quickly collected.
I have some feedback for you. How can I get in contact with the developer team?
There are several ways to provide feedback. The best one is to file a work item (issue) on GitHub. Just go this way and let us know.
You can also drop us an email to: extoolsfeedback [AT] Microsoft [DOT] com
Finally, there is the comment section at the bottom of this blog post. In case of a feature request or issue report, options above are the fastest/best to bring those to our attention.
We hope you like our script, and we are looking forward to your feedback!
David Paulson and Lukas Sassl
by Contributed | Apr 29, 2021 | Technology
This article is contributed. See the original author and article here.
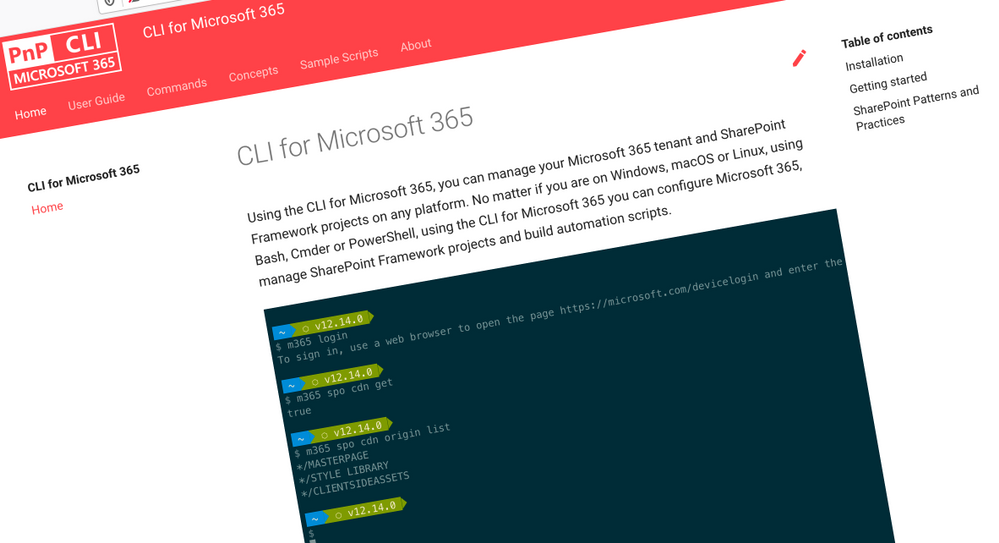
CLI for Microsoft 365
Manage Microsoft 365 and SharePoint Framework projects on any platform
CLI for Microsoft 365 is a cross-platform CLI that allows you to manage various configuration settings of Microsoft 365 and SharePoint Framework projects no matter which operating system or shell you use.
While building solutions for Microsoft 365 expands beyond the Windows operating system, managing many of the platform settings is possible only through PowerShell on Windows. As more and more users work on non-Windows machines, it’s inconvenient for them to have to use a Windows virtual machine to configure their tenants. With the CLI for Microsoft 365, you can configure your tenant no matter which operating system you use. Additionally, using CLI for Microsoft 365, you can manage your SharePoint Framework projects.
New version of CLI for Microsoft 365 – v3.9
Following our monthly release cadence, we’ve released a new version of the CLI for Microsoft 365 with some new capabilities. Here are a few of the most noteworthy additions.
Changes
We’ve continued improving CLI building upon the changes we’ve introduced in the previous version.
Support for upgrading SharePoint Framework (SPFx) projects to beta versions
With the new
public preview release of SharePoint Framework 1.12.1 and a new public quality assurance model that was announced with it, we are delighted to announce that we have added support for upgrading your SharePoint Framework projects to the latest beta release candidate.
To upgrade your SharePoint Framework project to the latest preview version, execute:
m365 spfx project upgrade –preview
As part of our beta release cadence, when new release candidates are made available in npm, we will release support for upgrading to that new version as soon as they are available.
Support for creating Azure Active Directory (AAD) applications from a manifest
As part of our efforts to make development easier in Microsoft 365, we have released support for creating Azure Active Directory application registrations from an app manifest file.
A typical scenario for developers and administrators is to create app registrations in the Azure Portal manually through the friendly user interface, however this can be time-consuming and error prone to repeat for multiple environments.
This update will enable you to copy the app manifest file that is generated in the Azure Portal and pass it into the command to confidently recreate app registrations.
m365 aad app add –manifest @manifest.json
Support for using relative URLs in SharePoint Online (SPO) commands
CLI for Microsoft 365 contains a number of commands for managing SharePoint Online. Each of these commands requires you to specify the site or web on which you want to execute the command. For example, to get information about a site collection located at https://contoso.sharepoint.com/sites/contoso, you’d execute:
m365 spo site get --url https://contoso.sharepoint.com/sites/contoso
If you executed an spo command previously, CLI for Microsoft 365 already knows the hostname of your SharePoint Online tenant. In such case, you can use a server-relative URL as well:
m365 spo site get --url /sites/contoso
If you try to use a server-relative URL but CLI for Microsoft 365 doesn’t know of your SharePoint Online URL yet, you will see an error prompting you to either use an absolute URL or set the SPO URL using the spo set command:
m365 spo set --url https://contoso.sharepoint.com
You can also execute a command like m365 spo site list that will automatically detect your SharePoint Online tenant URL for you.
To check if CLI detected the SPO URL previously, use the m365 spo get command.
Moved from adal-node to msal-node
CLI for Microsoft 365 up to this point has been using the Microsoft Azure Directory Authentication Library for nodejs (adal-node) for handling authentication requests between the CLI and Microsoft 365, however the ADAL library was put into maintenance mode and stopped receiving updates on June 30th 2020.
With this release we have moved to use the Microsoft Authentication Library for nodejs (msal-node) which replaces adal-node, ensuring that the CLI for Microsoft 365 is able to receive updates and take advantage of new authentication features added to msal-node going forwards.
New Commands
Add a role to a specified Azure Active Directory (AAD) app registration
Role-based access control (RBAC) is a popular mechanism to enforce authorization in applications. When using RBAC, an administrator grants permissions to roles, and not to individual users or groups. The administrator can then assign roles to different users and groups to control who has access to what content and functionality.
To add a role to the Azure AD application registration specified by its name, execute:
m365 aad app role add --appName "My app" --name Managers --description "Managers" --allowedMembers usersGroups --claim managers
Add a new Microsoft Planner plan
All teams need to track tasks, a quick and easy way to do that in Microsoft 365 is to create a shared plan in Planner to manage and assign those tasks to team members.
To add a new Microsoft Planner plan to a Microsoft 365 Group, execute:
m365 planner plan add --title "My Planner Plan" --ownerGroupName "My Planner Group"
Add a specific application permissions to a SharePoint Online site
On Feb 11, Microsoft announced support for resource-specific consent in SharePoint via Microsoft Graph in this release we have added a new command to support adding permissions to SharePoint Online sites.
To add a specific application permissions to a SharePoint Online site, execute:
m365 spo site apppermission add –siteUrl https://contoso.sharepoint.com/sites/project-x –permission read –appDisplayName Foo
Return the User Profile properties of a specific SharePoint Online user
To return the user profile properties of specific user, execute:
m365 spo userprofile get --userName 'john.doe@mytenant.onmicrosoft.com'
Create the Microsoft Viva Connections desktop app package to upload to Microsoft Teams
Microsoft Viva Connections was the first part of the Viva Employee Experience features to be be made Generally Available to all Microsoft 365 tenants on 31st March 2020, however to enable Viva Connections in your tenant a number of deployment steps that needed to be followed, which includes the creation of the desktop app package that is deployed to Microsoft Teams. So we have added a new command which simplifies the creation of this app package for you.
To create the app package, execute:
m365 viva connections app create --portalUrl https://contoso.sharepoint.com --appName Contoso --description "Contoso company app" --longDescription "Stay on top of what's happening at Contoso" --companyName Contoso --companyWebsiteUrl https://contoso.com --coloredIconPath icon-color.png --outlineIconPath icon-outline.png
To upload the app package to your Microsoft Teams app catalog, execute:
m365 teams app publish --filePath ./contoso.zip
New script samples
CLI for Microsoft 365 is a great tool both for quick adjustments to the configuration of your Microsoft 365 tenant as well as automating more complex tasks. Because CLI for Microsoft 365 is cross-platform you can use it on any OS and in any shell. To help you get started using the CLI for Microsoft 365 for automation scenarios, we started gathering some sample scripts.
If you have any scripts that you use frequently, please share them with us so that we can learn more about the common automation scenarios.
Cleanup completed Microsoft To Do tasks
Microsoft To Do is the go to personal task management tool of choice in Microsoft 365, however completed tasks can sometimes get in the way.
Create a Microsoft Teams team and bulk add members from CSV file
Microsoft Teams is core to collaboration in Microsoft 365, but creating several teams and adding new members to those Teams can be time consuming.
Setup an example SharePoint Online site
When creating SharePoint Online sites, generally you want to make some immediate changes after its creation.
Upload local files and folders to SharePoint Online
Bulk add members to Microsoft Teams team from CSV file
Copy files to another SharePoint Library in another site
This script helps you copy files across different sites in SharePoint Online, it shows you how you can copy all files and folders from source library to a different library in different SharePoint site keeping the same folder and subfolder structure and copy all files from all folders and subfolders from source library to a different library to a root folder in different SharePoint
Remove a Site Collection Admin User from all Site Collections
When employees leave organisations or change job roles it is important that access is removed where it is no longer required.
Replace an owner in a Microsoft 365 Group or Microsoft Team
Add a SharePoint Site Collection Administrator using CSV file
Contributors
This release wouldn’t be possible without the help of (in alphabetical order)
Thank you all for the time you chose to spend on the CLI for Microsoft 365 and your help to advance it!
Work in progress
Here are some things that we’re currently working on.
More commands, what else
Microsoft 365 is evolving and new capabilities are being released every day. With CLI for Microsoft 365, we aim to help you manage your tenant on any platform in a consistent way, no matter which part of Microsoft 365 you interact with. While we keep adding new commands to CLI for Microsoft 365 each release, we still barely scratched the surface with what’s possible in Microsoft 365. In the upcoming versions of the CLI for Microsoft, you can expect us to add more commands across the different workloads in Microsoft 365.
Improved managing SharePoint pages
Microsoft keeps investing in modern SharePoint pages continuously introducing new capabilities to let us publish rich content. We’re looking into extending our support for managing modern SharePoint pages to let you use them to their full potential.
Improved creating Azure AD apps
Recently, we’ve introduced a command to easily create Azure AD app registrations. Because they’re backbone of every app you’d build on Microsoft 365, we think you should be able to create them as easily as possible. So with CLI for Microsoft 365, you can create a fully configured Azure AD app for the most common scenarios with just one line of code.
In the future versions of CLI for Microsoft 365 you can expect us extend the capabilities with additional scenarios and features supported by Azure AD.
Script examples
In every release of the CLI for Microsoft 365, we introduce new commands for managing Microsoft 365. With over 350 commands across the different Microsoft 365 services, the CLI for Microsoft 365 has become a powerful tool, not just for managing your tenant but also for automating your daily work.
We’d love to show you how you can use the CLI for Microsoft 365 to build automation scripts in PowerShell Core and Bash. If you have any scripts using SPO or PnP PowerShell that you use frequently, please share them with us so that we can learn more about the common automation scenarios.
‘ensure’ commands
We’ve just shipped our first ensure command – an easy way to help you that a site with specific settings exists. If it doesn’t, CLI creates it for you, if it does, CLI ensures it has the right properties. All in one line of code. We’d love to hear from you how you like it and if it’s something you’d like us to implement for other commands as well.
Try it today
Get the latest release of the CLI for Microsoft 365 from npm by executing:
npm i -g @pnp/cli-microsoft365
Alternatively, you can get the latest release from Docker by executing:
docker run --rm -it m365pnp/cli-microsoft365:latest
If you need more help getting started or want more details about the commands, the architecture or the project, go to aka.ms/cli-m365.
If you see any room for improvement, please, don’t hesitate to reach out to us either on GitHub or twitter.
by Contributed | Apr 29, 2021 | Technology
This article is contributed. See the original author and article here.
It is always interesting to hit the wall with limitations when you are working with Power Automate. Some limits are due to licensing but some are due to other good reasons. I was running a PoC where a person interacting with a Power Virtual Agent bot required to do actions on behalf of that person. And after digging some information out (Thank you @Tomasz for helping there! ) it was clear that I had reached the wall when I was trying to make my little bot to set up Out of Office for the interacting user. Using the Office 365 Set Automatic Replies action always works on the connection user only. And since you can not act on behalf of that user it required to go beyond the wall and say “there is no spoon”. And I found it there wasn’t a spoon- just the miracle world of Graph API.
From that phase I advanced to create
- Azure Logic Apps that uses Graph API to set the Out of Office / Automatic replies to a specific user.
- Setting up a Azure API Management service so that Azure Logic App can be called from the Cloud Flow running inside Power Virtual Agent – and still keep on using standard licensing (no need to go to premium)
First it was necessary to create the Azure App Registration (applicationid, secret) with suitable set of API permissions. After that it was all about figuring out the Graph API call & JSON to set the Automatic Reply / Out of Office. Read the documentation (& about permissions) from Docs here.
Next I built a Azure Logic Apps that uses HTTP Request trigger (get) to retrieve user email and number of away days in parameters.

This is the format to exclude parameters from the GET request. triggerOutputs()[‘queries’][‘FileID’]
After those steps I have user email and number of days that needs to be set Out of Office. I returned the HTTP-request and prepared variables with Application ID, TenantID and App Secret information to be able to call Graph API with application permissions.

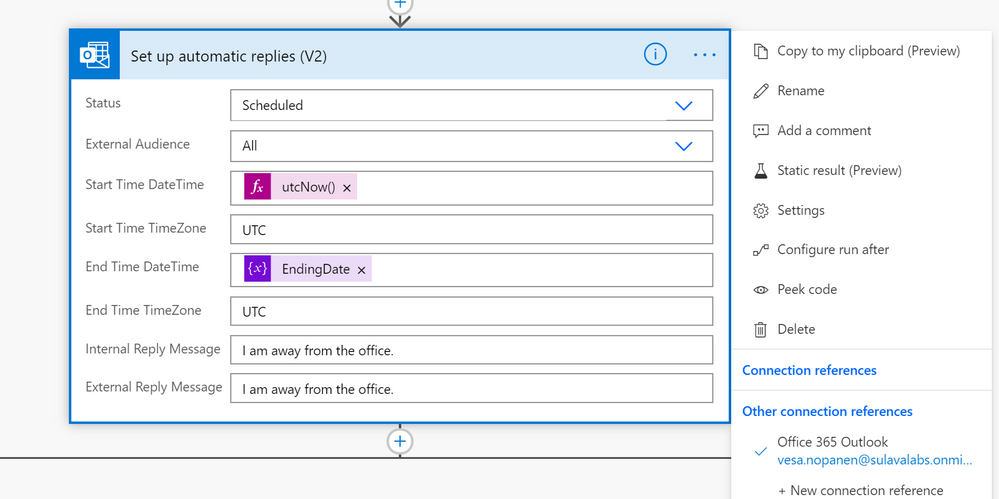
The key is of course setting the Out of Office information JSON.

The Graph API call URL and example JSON I used to test this are:
https://graph.microsoft.com/v1.0/users/useremail/mailboxsettings

{
    "@odata.context": "https://graph.microsoft.com/v1.0/$metadata#Me/mailboxSettings",
     "automaticRepliesSetting": {
     "externalAudience": "all",
      "externalReplyMessage": "I am away from the office. ",
      "internalReplyMessage": "I am away from the office. ",
      "status": "Scheduled",
      "scheduledStartDateTime": {
          "dateTime": "2021-04-17T18:00:00.0000000",
          "timeZone": "UTC"
        },
       "scheduledEndDateTime": {
          "dateTime": "2021-04-18T18:00:00.0000000",
          "timeZone": "UTC"
        }
  }
}
Then it was just the case of patching the information

The next step was to create the Azure API Management Service and define the API call there. There are two ways to handle the information transportation: in the body (as JSON) or as parameters. I put the Username and Days in this Proof of Concept to parameters.

For how to create and set up Azure API Management you can find information in this URL. It is good to keep in mind that Azure API Management has a cost involved – it is not a free one. I created the one with Developer (No SLA) tier to keep costs lower. And it still estimated to be over 40€ per month. For production use the price will be higher.
Another alternative would have been to put the “set these to Out of Office” information to a SharePoint List (for example) and use a Azure Logic Apps trigger to read that list and make those API Calls. That would have some delay, but since Out of Office is rarely requiring an instant response it would be a better one for the real world scenario in this case. However if you are already using Azure API management then using it for this as well is a good idea. But setting it up solely for a single purpose does not get a good ROI for most cases.
After setting the API up into the Azure you can export it directly to the Dataverse for Teams environment – so it is there for the bot to use without any Premium licensing.


When adding an action to your Cloud Flow in the Dataverse for Teams environment where your bot runs you can find the custom action in the menu.


Cool – what about the test-run side?
And when running this one from the PVA of the acting user I can see the results via Teams easily


There are of course other steps as well in that PoC conversation & flow but setting up the Out of Office proved to require a bit more steps than I originally thought. I have to say that this was also a great learning experience about updating user mailbox settings via Graph API and as well about using Azure API management to create a custom connector to Power Automate.
With Azure API Management & Graph API you can quite easily go beyond the walls what you have with Dataverse for Teams bots and applications.
This article is a repost of my blog post in my own blog at MyTeamsDay.Com.
by Contributed | Apr 29, 2021 | Technology
This article is contributed. See the original author and article here.
The Office Add-ins developer platform team has new updates to share this month on Office Add-ins Patterns and Practices. PnP is a community effort, so if you are interested in contributing, see our good first issue list.
Use Outlook event-based activation to set the signature (preview)
This sample uses event-based activation to run an Outlook add-in when the user creates a new message or appointment. The add-in can respond to events, even when the task pane is not open. It also uses the setSignatureAsync API. If no signature is set, the add-in prompts the user to set a signature, and can then open the task pane for the user.
Contributors
Thank you to our contributors who are actively helping each month with the PnP-OfficeAddins community effort.
Want to contribute?
PnP is a community effort by developers like you. Check out our good first issue list as a great place to help with some samples. Feel free to contribute to existing samples or create new ones.
About Office Add-ins Patterns & Practices (PnP)
Office Add-ins PnP is a Microsoft-led, community driven effort that helps developers extend, build, and provision customizations on the Office platform the right way by providing guidance and help through official documentation and open-source initiatives. The source is maintained in GitHub where anyone can participate. You can provide contributions to the samples, reusable components, and documentation. Office Add-ins PnP is owned and coordinated by Office engineering teams, but the work is done by the community for the community.
You can find code samples for Office Add-in development in the Office Add-ins PnP repo. Some samples are also documented in the Office Add-ins docs, such as Open in Excel.
Additional resources
Learn more by joining the monthly Office Add-ins community call.
by Contributed | Apr 29, 2021 | Technology
This article is contributed. See the original author and article here.
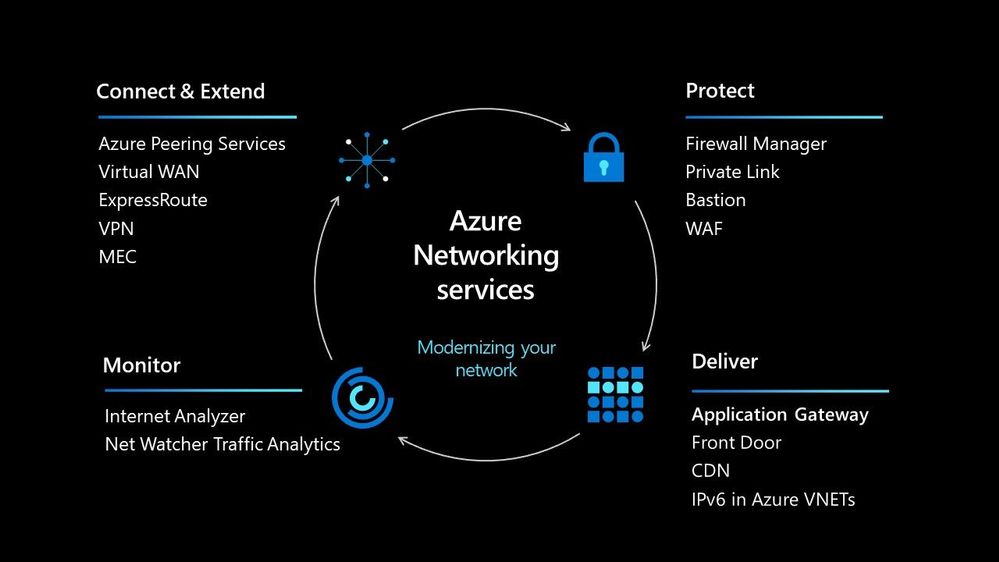
In today’s world we must be able to scale our workloads, whether that be dealing with an internal workload or an external workload serving your organisations’ customers. There are lots of options available to you to implement that scale and deal with the traffic to your workload, let’s walk through some of the options within Azure and help you understand their use cases.
Azure Load Balancer
The Azure Load Balancer is one of the first options that you have to help deal with scaling your workload. It supports TCP/UDP based protocols such as HTTP, HTTPS and SMTP and other protocols used within real-time voice and video messaging applications. It helps you distribute traffic to your backend virtual machines and is a fully managed service.

With the load balancer you can distribute traffic either from external traffic or for internal traffic. The Azure Load balancer works on Layer 4 of the OSI model and is a transparent load balancer. Meaning it won’t do anything to the packets that it receives and just sends to them onto the endpoint should depend on the routing algorithm. The Azure Load Balancer has a lot of features, one that I love is the outbound connection feature, which allows you to configure all outbound traffic from your virtual network to the Internet to be displayed as from the frontend IP of the load balancer.
Azure Application Gateway
The Azure Application Gateway is an HTTP or HTTPs load balancer and behaves differently to the networking load balancer. It will take the connection coming into it, terminate and start a new connection to the backend endpoint based on its routing algorithms. This opens new possibilities such as redirections or URL rewrites or header changes.

Two of my favourite features of the Azure Application Gateway are connection draining and autoscaling. Both help give you confidence of running your environment and help save on operational costs.
With connection draining it helps you to gracefully remove backend endpoints to carry out planned maintenance or upgrades. With autoscaling it can start to scale out or in based on the traffic pattern to your Application Gateway. This not only helps to eliminate the guessing game of over provisioning workloads and helps to avoid your operations teams having to manually scale out or in when traffic spikes.
Azure Traffic Manager
The Azure Traffic Manager is a DNS-based load balancer, it allows you to distribute traffic across your public facing applications. With the traffic manager it will use DNS to direct requests from your users to the appropriate endpoint based on the traffic-routing method that you have configured. Your endpoints can be any Internet-facing service hosted inside OR outside of Azure.

With Traffic Manager you can help to provide great performance to your end users with distributed endpoints through out the globe. The features that I really enjoy is the Real User Measurements and Traffic View features. They can be used to give you a real insight into where your users are based and the performance they are experiencing. And the data that is collected can really help you make informed decisions on how to develop your application in the future.

Azure Front Door
Azure Front Door works at Layer 7 of the OSI model and based on your routing method you can ensure that your customer is routed to the fastest and most available endpoint on offer. Like Traffic Manager, Front Door is resilient to failures, including failures to an entire Azure region. With Front Door you can offload SSL and certificate management, define a custom domain, and provide application security with integrated Web Application Firewall (WAF), with a ton of other features as well.

Your end points can be based within Azure or elsewhere. No matter where or what your endpoints are Front Door will help provide the best experience for your end user.
Azure DDoS Protection Basic is integrated into the Front Door platform by default and helps to defend against the most common and frequently occurring Layer 7 DNS query floods and layer 3 and 4 volumetric attacks that target public endpoints.
Azure Web Application Firewall
Azure Web Application Firewall (WAF) can also be used to protect your Front Door and Application Gateway implementations. Because the WAF policies are “global resources” you can apply the same policy to your Front Door and Application Gateway implementations and have a consistent approach to prevention and detection.

Which one?
There are times when it’s not a question of which one should I use, as there are scenarios when you would use two of these options together to provide the best experience all round. In preview there is a feature within the Azure Portal where it will walk you through some questions and give some advice on the best options for you – Load Balancing – help me choose.
Each of the load balancer have unique features and unique use cases, and as I said can often be used in combination together. For examples of how to use them in different scenarios be sure to check out the Azure Architecture Centre for reference architecture diagrams to get your imagination sparked!
by Contributed | Apr 28, 2021 | Technology
This article is contributed. See the original author and article here.
Hi All,
After 5 public previews I am thrilled to announce the release candidate build of AKS on Azure Stack HCI! If you have not tried out AKS on Azure Stack HCI there is no better time than the present. You can evaluate the AKS on Azure Stack HCI release candidate by registering for the Public Preview here: https://aka.ms/AKS-HCI-Evaluate (If you have already downloaded AKS on Azure Stack HCI – this evaluation link has now been updated with the release candidate).
The release candidate build has a number of fixes and improvements in response to the feedback that we have been receiving from y’all over the past months.
There is a lot to cover – but here are some highlights:
Networking improvements –
We have further extended our networking configuration options, so that you can now configure separate networks for each Kubernetes cluster you want to deploy. You can even place separate Kubernetes clusters on separate VLANs. With this release we are also now providing full support for Calico networking (in addition to our previous support for Flannel).
Storage improvements –
We are now including a new CSI storage driver that allows you to use SMB & NFS shares for read-write many storage. This is in addition to our existing driver for VHDX based storage. We have also made updates to our Linux worker nodes to enable the use of OpenEBS on top of AKS on Azure Stack HCI.
Updated Kubernetes Versions –
In this update we have updated the supported Kubernetes versions to:
- Linux: 1.17.13, 1.17.16, 1.18.10, 1.18.14, 1.19.6, 1.19.7
- Windows: 1.18.10, 1.18.14, 1.19.6, 1.19.7
We have done a lot of work “behind the scenes” to increase the reliability of deployment – and made numerous improvements to the usability of our PowerShell and Windows Admin Center based experiences.
Once you have downloaded and installed the AKS on Azure Stack HCI release candidate – you can report any issues you encounter, and track future feature work on our GitHub Project at https://github.com/Azure/aks-hci. And, like with past releases, if you do not have the hardware handy to evaluate AKS on Azure Stack HCI you can follow our guide for evaluating AKS-HCI inside an Azure VM: https://aka.ms/aks-hci-evalonazure.
I look forward to hearing from you all!
Cheers,
Ben
by Contributed | Apr 28, 2021 | Technology
This article is contributed. See the original author and article here.
Have you deployed multiple applications in your HCI cluster? Do you have application workloads in your cluster that need access to the Internet? Do you have remote users accessing application workloads in your HCI cluster? If the answer to any of these questions is yes, please read on to find out how you can protect your workloads from unauthorized access and cyber-attacks (Internal or External).
Problem: Need for network security and issues with traditional approaches
Network security is a top concern for organizations today. We are faced with increasing breaches, threats, and cyber risk. Cyber criminals are targeting high business impact data with sophisticated attacks designed to bypass perimeter controls. Once inside the company network, attackers are free to move from one system to another, in search of sensitive or personally identifiable information. These breaches can go unnoticed for a long time.
Network segmentation has been around for a long time to isolate high value data and systems. In traditional networks, security is set at the edge, where North-south communication takes place (interactions that are travelling in and out of the datacenter). This secures intranet from outside world. But offers little protection in the modern hybrid cloud world, where the perimeter has all but evaporated and a large portion of the traffic flows east-west, or server to server, between applications.
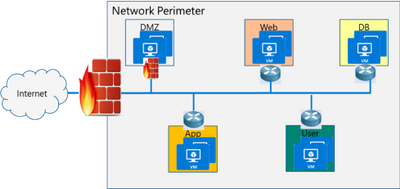
If you look at the topology below, end points can communicate with each other freely within VLANs or subnets behind a firewall. Infections on one of these servers are not contained and can easily spread to other servers.
Organizations may use physical firewalls to protect east west traffic. But that has its own drawbacks. Significant network resource utilization bottlenecks are created by sending east-west communication through a physical firewall. If firewall capacity is exhausted, security can be scaled by replacing with larger firewall or adding additional physical firewall, which is cumbersome and expensive.
Moreover, the use of physical firewalls can also create additional latency for certain applications. All traffic must traverse a physical firewall to be segmented, even when residing on the same physical server.
Solution: Microsegmentation in Azure Stack HCI
The ideal solution to complete protection is to protect every traffic flow inside the data center with a firewall, allowing only the flows required for applications to function. This is the Zero Trust Model.
Microsegmentation is the concept of creating granular network policies between applications and services. This essentially reduces the security perimeter to a fence around each application or virtual machine. The fence can permit only necessary communication between application tiers or other logical boundaries, thus making it exceedingly difficult for cyber threats to spread laterally from one system to another. Logical boundaries can be completely custom. They can be your different environments: Dev, Test, Production. Or different types of applications, or different tiers within an application. This securely isolates networks from each other and reduces the total attack surface of a network security incident.
With Azure Stack HCI, you can define granular segmentation for your applications and workloads and protect them from both external and internal attacks. This is achieved through a distributed firewall, enabling administrators to define access control lists to restrict access for workloads attached to traditional VLAN networks and overlay networks. This is a network layer firewall, allowing or restricting access based on source and destination IP addresses, source and destination ports and network protocol. You can read more about this here.
IMPORTANT: The microsegmentation policies can be applied to all Azure Stack HCI workloads attached to traditional VLAN networks.
The firewall policies are configured through the management plane. You have multiple options here – standard REST interface, Powershell, Windows Admin Center (WAC) and System Center Virtual Machine Manager (SCVMM). The management plane sends the policies to a centralized control plane, Network Controller. This ships as a Server role in Azure Stack HCI OS. Network Controller pushes the policies to all the applicable Hyper-V hosts, and the policies are plumbed at the vSwitch port of virtual machines. Network Controller also ensures that the policies stay in sync, and any drift is remediated.

Configure and manage microsegmentation in Azure Stack HCI
There are two high level steps to configure microsegmentation for HCI. First, you need to setup the Network Controller and then, configure microsegmentation policies.
Setup Network Controller
Network Controller can be setup using SDN Express Powershell scripts or the Windows Admin Center (WAC) or through System Center Virtual Machine Manager (SCVMM).
Windows Admin Center
If you are deploying HCI for the first time, you can use the Windows Admin Center deployment wizard to setup Network Controller. SDN deployment is Step 5 of the wizard. This deploys the Network Controller component of SDN. Detailed instructions for launching this wizard, setting up the HCI cluster and setting up Network Controller is provided here. In the default case, you need to provide only two pieces of input:
- Path to the Azure Stack HCI OS vhdx file. This is used to deploy the Network Controller VMs.
- Credentials to join the Network Controller VMs to the domain and local admin credentials.
If you do not have DHCP configured on your management network, you will need to provide static IP addresses for the Network Controller VMs. A demo of the SDN setup is provided below:
SDN Express Scripts
If you already have an existing HCI cluster, you cannot deploy SDN through Windows Admin Center today. This support is coming soon.
In this case, you can deploy Network Controller (NC) component of SDN using SDN Express scripts. The scripts are available in the official Microsoft SDN github repository. The scripts need to be downloaded and executed on a machine which has access to the HCI cluster management network. Detailed instructions for executing the script are provided here.
The script takes a configuration file as input. Template file can be found in the github repository here. You will need the provide/change the following parameters to setup Network Controller for microsegmentation on traditional HCI VLAN networks:
- VHDPath: VHDX file path used by NC VMs. Script must have access to this file path.
- VHDFile: VHDX file name used by NC VMs.
- JoinDomain: domain to which NC VMs are joined.
- Management network details (ManagementSubnet, ManagementGateway, ManagementDNS, ManagementVLANID): This is the management network of the HCI cluster.
- DomainJoinUsername: Username to join NC VMs to the domain
- LocalAdminDomainUser: Domain user for NC VMs who is also local admin on the NC VMs
- RestName: DNS name used by management clients (such as Windows Admin Center) to communicate with NC
- Details of NC VMs (ComputerName, HostName, ManagementIP, MACAddress): Name of NC VMs, Host name of Server where NC VMs are located, management network IP Address of NC VMs, MAC address of NC VMs
- HyperVhosts: Host server names in the HCI cluster
- NCUserName: NC Administrator account. Should have permission to do everything needed by someone administering the NC (primarily configuration and remoting). Usually, this can be same as LocalAdminDomainUser account.
Some other important points:
- The parameters VMLocation, SDNMacPoolStart, SDNMacPoolEnd can use default values.
- The following sections should be blank: Muxes, Gateways (Muxes = @())
- If you are deploying microsegmentation for VLAN networks, you should keep the PA network details section blank. Otherwise, if you are deploying overlay networks, please fill in that section.
- Rest of the parameters below the PA network section can be commented out.
A sample file is shown below:

Configure Microsegmentation Policies
Once Network Controller is setup, you can go ahead and deploy your microsegmentation policies.
- The first step is to create a logical network for your workloads hosted on VLAN networks. This is documented here.
- Next, you need to create the security ACL rules that you want to apply to your workloads. This is documented here.
- Once the ACL rules have been created, you can apply them to the network or a network interface.
- For applying ACLs to a traditional VLAN network, see instructions here.
- For applying ACLs to a virtual network, see instructions here.
- For applying ACLs to a network interface, see instructions here.
After the ACL rules have been applied to the network, all virtual machines in that network will get the policies and will have restricted access based on the rules. If the ACL rule has been applied to a network interface, the network interface will get the policies and will have restricted access based on the rules.
So, as you can see, with microsegmentation, you can protect every traffic flow in your HCI cluster, allowing only the flows required for your applications to function. Please try this out and give us feedback at sdn_feedback@microsoft.com. Feel free to reach out for any questions as well.
by Contributed | Apr 28, 2021 | Technology
This article is contributed. See the original author and article here.
We have released a new early technical preview of the JDBC Driver for SQL Server which contains a few additions and changes.
Precompiled binaries are available on GitHub and also on Maven Central.
Below is a summary of the new additions and changes.
Added
- Added replication connection option #1566
Fixed
- Fixed an issue where
trustStorePassword is null when using applicationIntent=ReadOnly #1565
- Fixed an issue where redirected token contains named instance in servername #1568
Getting the latest release
The latest bits are available on our GitHub repository, and Maven Central.
Add the JDBC preview driver to your Maven project by adding the following code to your POM file to include it as a dependency in your project (choose .jre8, .jre11, or .jre15 for your required Java version).
<dependency>
  <groupId>com.microsoft.sqlserver</groupId>
  <artifactId>mssql-jdbc</artifactId>
  <version>9.3.1.jre11</version>
</dependency>
Help us improve the JDBC Driver by taking our survey, filing issues on GitHub or contributing to the project.
Please also check out our
tutorials to get started with developing apps in your programming language of choice and SQL Server.
David Engel

Recent Comments