by Contributed | May 14, 2021 | Technology
This article is contributed. See the original author and article here.
I recently encountered a scenario recently where I was looking to do a quick technical check on some advice I was giving to another member of the community regarding PowerShell – especially capturing the output of PnP PowerShell commands and store in a text file. When I responded to the tweet, I was away from my computer, but I did have my iPad (with keyboard) with me and wanted to see if I could use PnP PowerShell with Azure Shell – you may have guessed the result by – YES you can.
I was not using best security practice at the time to log in (username/password), which would not work if I had MFA on the account (which I should have ☹). I will include better practice configuration to include certificates and an Azure AD App in this article.
What you will need
So, let’s get started; you will need a few things to get going,
- Azure Subscription – this is necessary for a storage account that preserves your files between sessions and is mandatory for Azure cloud shell to work.
- Azure Resource Group – the grouping of resources in Azure
- Azure KeyVault – to store a certificate for a secure connection to M365 services.
- PnP PowerShell – the newest PnP power shell module, this article uses v1.5.0
- Permissions to consent an app as this uses an Azure AD app for the authentication.
- Windows Machine – for creating the app and certificate.
- If setting up services locally by PowerShell, then install the Az module.
Setting Up
There are a few tasks we are going to do to set up working with Azure Shell, Azure AD App and Certificates.
Activate Azure Shell
First, let’s go ahead and activate the Azure Shell; we will use this to set up the required resources as well:
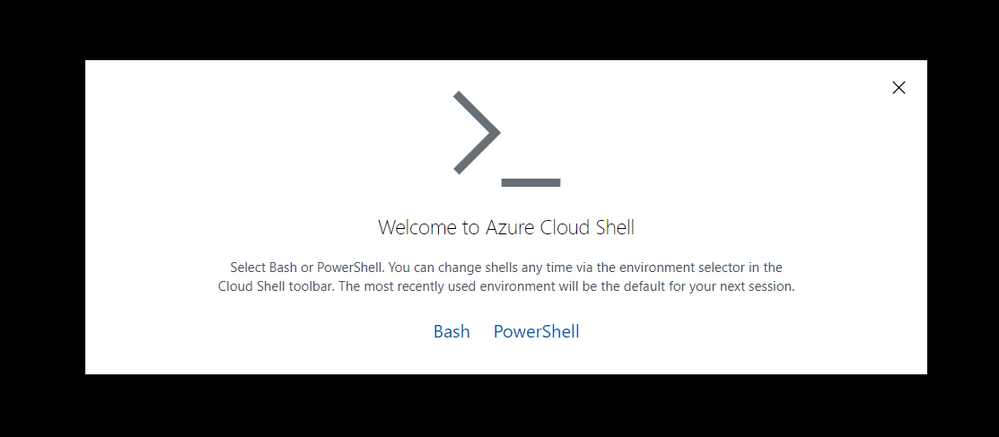
Navigate to https://shell.azure.com or click on the icon in the Azure Portal.
Then run through the first setup of the Azure Shell:
Welcome screen Azure Shell
Select PowerShell. Then run through the first setup of the Azure Shell:
 Simple setup screen for storage
If you choose “Create storage” at this point, then this will set up the storage account and resource group for you, using Azure’s naming standards and region. If you want to specify:
- Subscription
- Region
- Resource Group
- Storage account
- File share name
 Azure Shell Advanced Setup
Then select Advanced settings. I like to name resources myself in a standard manner. For this article, I am going to use the advanced options and specify:
- Region: “North Europe”
- Resource Group Name: “azure-cloud-shell”
- Storage Account: “pkbtenantcloudshell”
- File Share: “pkbtenantcloudshellfiles”
Note: the naming of some of these resources is very strict, e.g., 3 -24 characters, no spaces, lowercase.
Click “Create Storage”
 Azure Shell – Setup Complete
Now the Azure Shell is ready to use.
Installing PnP-PowerShell
Next, we need to install the PnP PowerShell module in Azure Cloud shell, enter:
Install-Module -Name PnP.PowerShell
The great thing about Azure Cloud Shell is the installation is persistent between sessions, so you will only have to do this once. However, you will need to upgrade the module periodically.
 Azure Shell – Install PnP PowerShell
For information on installing PnP-PowerShell, check out the documentation site for more details: https://pnp.github.io/powershell/
Create a KeyVault
Next, we want somewhere secure to store a certificate – Azure KeyVault.
A KeyVault is a secure method of storing keys, secrets and certificates. We intend to keep the certificate used for this setup in the vault. Another benefit of using this method, in larger organisations, where other teams manage apps or the security aspect of the tenant, they can set up this vault and retain control over the certificate and app creation.
You can, if you prefer, navigate to the Azure Portal and use the marketplace to create a new KeyVault resource; check out this quick start guide.
OR set this up in Azure Cloud Shell run the following commands:
Firstly, to check that the service is available in your preferred region, run the following:
New-AzKeyVault -VaultName 'pkbtenant-keyvault' -ResourceGroupName 'azure-cloud-shell' -Location 'North Europe'
Then, provision a new KeyVault (if you have one already, then skip this step) and give yourself access to Secrets and Certificates.
Set-AzKeyVaultAccessPolicy -VaultName 'pkbtenant-keyvault' -UserPrincipalName 'paul.bullock@tenant.co.uk' -PermissionsToCertificates All -PermissionsToSecrets All
 Azure Shell – Create KeyVault
Please refer to the documentation if you want to be more specific around the KeyVault – Azure Portal | PowerShell.
We will be importing a certificate in a later section.
Create Azure AD App with Register-PnPAzureApp
There are a few options when setting up the authentication to connect with PnP PowerShell:
- Azure AD App – using your app (recommended), which will use the APPLICATION permissions, meaning the connection will use the permissions the app does.
- PnP Management Shell – the multi-tenant app PnP provides – this uses DELEGATE permissions meaning the connection will need to log in as the user and will only have access to services THE user has access to.
If you need clarification on the difference between the types of permissions, I highly recommend checking out an awesome community call demo from Philippe Signoret, Program Manager of the Microsoft Identity team: https://youtu.be/_BfI4L7j1Po
So why are use an Azure AD app? Using the Azure Shell restricts some authentication options when connecting to services with PnP PowerShell, such as interactive login, because it cannot display a pop-up window.
 Azure Shell – doesn’t support interactive login
The “-PnPManagementShell” parameter is an option; this uses the device login method BUT will require you to navigate to another site/page to authenticate, including going back to grab the code – then enter your login credentials further steps if MFA is enabled. IMHO feels a bit cumbersome to do this each time I want to do a task in the Shell, especially on an iPad/phone.
Create an Azure AD App
To set up the app quickly with PnP PowerShell, you need to use a Windows machine to run the cmdlet “Register-PnPAzureApp” which generates the certificate, creates the Azure AD app, sets API permissions, will pop up to consent to the app permissions.
Note: you may have to install the PnP PowerShell locally if you do not already have it.
To set up the app, run the following command using the PnP PowerShell cmdlet:
$result = Register-PnPAzureADApp -ApplicationName "PnP PowerShell Azure Shell Access" -Tenant yourtenant.co.uk -OutPath . -DeviceLogin -ValidYears 2 -CertificatePassword (ConvertTo-SecureString -String "yourpassword" -AsPlainText -Force)

$result #output the result – Specifically grab the AzureAppId/ClientId – you will need this later
 PowerShell – Registering Azure App
During this operation, two windows will pop-up to authenticate with the device login method and consent to the app permissions.
If you want to check the app in Azure AD, navigate to: https://portal.azure.com/#blade/Microsoft_AAD_IAM/ActiveDirectoryMenuBlade/RegisteredApps and find the app called “PnP PowerShell Azure Shell Access”
Note: This app uses the minimum API permissions (APPLICATION) as the default; if you want to perform operations with groups or flow as an example, you will need to add these permissions to the app.
 Azure App – API permissions
For more details on generating the app, check out the authentication section of the documentation.
Adding Certificate to KeyVault
Now that we have the app setup, we need to upload the certificate to the KeyVault.
Navigate to the KeyVault in the portal
 Azure KeyVault – Navigating to Certificates
- Select “Import”
- Enter a name “azureshell-pnpps-connection”
- Select the generated certificate “PnP PowerShell Azure Shell Access.pfx”
- Enter the certificate password
Click Create
 Azure Key Vault – Upload Certificate
This is ready to use in a later section.
Reducing the time to get going on new sessions
When I start the Azure Shell, I want to minimize the number of lines, to connect to the services securely and get going quickly.
Parameter Splatting
Parameter splatting is a method to pass a collection of parameters for a PowerShell command into a variable and apply this to the cmdlet you intend to run. Example:
Get-NiceMessage -Param1 "good" -Param2 "morning" -Param3 "community"

# Splatting alternative
$MyParams = @{
	Param1 = "good",
	Param2 = "morning",
	Param3 = "community"
}
Get-NiceMessage @MyParams
This will save time if you repeatedly apply the same parameters on the cmdlets, reducing the time to write the command and your scripts cleaner to read. To read more about this PowerShell feature, check out the documentation.
PowerShell Profiles
Interestingly, I did not know about this feature until the MOTD message appeared on the Azure Shell. I wanted to understand this further so dug deeper and I have managed to find a way to create a startup script that will make it easier to connect to Office 365.
With profiles, we can setup a script to run when the Azure Shell is started, so this is an awesome opportunity to add all of the connection information when the Shell starts including retrieval, of the certificates from the KeyVault.
To create a profile that is used across sessions but for your user account use:
# Create Profile
mkdir (Split-Path $profile.CurrentUserAllHosts)
New-Item -ItemType File -Path $PROFILE.CurrentUserAllHosts -Force
 Azure Shell – Setup Profiles
Once created, you can open an editor in the path above to the new profile script location.
Then using the following example, using a combination of parameter splatting and profiles, you can setup everything you need to connect to the service:
# Connect to KeyVault Data
try{

    $vaultName = "pkbtenant-keyvault" # Replace with your KeyVault name
    $appName = "PnP PowerShell Azure Shell Access"
    $appId = (Get-AzADApplication -DisplayName $appName).ApplicationId
    $tenantId = (Get-AzContext).Tenant.Id
    $certName = "azureshell-pnpps-connection"
    $baseSite = "https://tenant.sharepoint.com" # Replace with your tenant
    $base64Cert = Get-AzKeyVaultSecret -VaultName $vaultName -Name $certName -AsPlainText

    # Use of parameter splatting
    $ConnectInfo = @{
        ClientId = $appId
        CertificateBase64Encoded = $base64Cert
        Tenant = $tenantId
    }

    Write-Host "Ready to connect to M365/SharePoint" -ForegroundColor Green
}catch{
    Write-Host "Failed to get the KeyVault data" -ForegroundColor Yellow
}
Editor – Ctrl-S (Save) then Ctrl-Q (Quit)
Restart Shell
After setting up the profile, reboot your Shell and you should see a prompt to indicate the prerequisites are ready to use for a connection (green text).
To learn more about profiles check out the documentation for profiles.
Connecting to the service
Once you have all these elements setup, you can connect with PnP PowerShell with one short line:
Connect-PnPOnline @ConnectInfo https://tenant.sharepoint.com

# -OR-

Connect-PnPOnline @ConnectInfo $baseSite
 Azure Shell – connecting with PnP PowerShell
The settings are persistent across sessions/devices (like an Azure app on iPad), so once setup, you can open Azure Shell and reconnect to the service and make the changes in the Shell quickly.
Btw, at the beginning I mentioned about capturing the output to the text file, this is particularly useful if you are grabbing a lot of info in your session or need to show the changes you made, here is how to do it:
Start-Transcript "log.txt"
Get-PnPWeb
Stop-Transcript
This will save the file to the current location in the Azure Shell. Use Export-File to download it, or the UI button.
Enjoy!
by Contributed | May 14, 2021 | Technology
This article is contributed. See the original author and article here.
Microsoft engineering teams have been busy taking your feedback resulting in a plethora of updates. Microsoft service updates in the news includes Webinar enablement made available in Microsoft Teams, Azure IoT Central feature updates, Enabling Azure Site Recovery (ASR) while creating Azure Virtual Machines, Attribute-based Access Control (ABAC) in Azure Storage, and the Bicep enabled Microsoft Learn Module of the Week.
Full-featured webinars for Microsoft Teams
Beginning this week, Microsoft has announced that Webinars and PowerPoint Live are beginning to rollout in Microsoft Teams. Additionally, Presenter mode will begin to roll out later in May. With these capabilities, you have new ways to deliver polished, professional presentations in meetings of all sizes, from small internal meetings to large customer-facing webinars and events—all from a single application.
Learn more about how to use these new capabilities in Microsoft Teams via the following guide: Introduction to Webinars in Microsoft Teams
Azure IoT Central new and updated features for April 2021
Microsoft has announced that the IoT Central API service is now generally available and can be accessed through the production v1.0 endpoint. These APIs and the breadth of the IoT Central extensibility surface can now be used to develop production-ready solutions.
Following customer feedback, Microsoft iterated on thier API surface and invested in new capabilities including the ability to:
- Manage API tokens.
- Create and manage DTDLv2 device templates.
- Create, onboard, and manage devices.
- List the user roles in your application.
- Add, update, and remove users.
Other added abilities made available in this update include the ability to create a link containing a device ID parameter populating a device dashboard, support for components in Edge modules and improvment in the ability to diagnose device health and connection via device connectivity events.
Further details surrounding the IoT Central April 2021 update can be found here: General availability: Azure IoT Central new and updated features—April 2021
Enable Azure Site Recovery (ASR) while creating Azure Virtual Machines
Microsoft recently announced a new capability in Azure Site Recovery (ASR) to further improve the Business Continuity and Disaster Recovery (BCDR) posture of Azure VMs – in-line enablement of ASR at the time of VM creation. This capability helps you avoid the hassle of separately configuring DR across regions (or zones) after the creation of VMs.
Please note that this offering is currently limited to Windows VMs and CentOS, Oracle Linux, and Red Hat Linux VMs. Microsoft also does not currently support zone to zone (in region) disaster recovery through the Create VM workflow. Support for pending Linux distros and zone to zone disaster recovery is coming soon.
Learn more how to create a Windows VM or a Linux VM via the portal.
Azure Storage: Attribute-based Access Control (ABAC) now in public preview
Attribute-based access control (ABAC) is an authorization strategy that defines access levels based on attributes associated with security principals, resources, requests, and the environment. Azure ABAC builds on role-based access control (RBAC) by adding conditions to Azure role assignments in the existing identity and access management (IAM) system. This preview includes support for role assignment conditions on Blobs and ADLS Gen2, and enables you to author conditions based on resource and request attributes.
Role-assignment conditions enable finer-grained access control for storage resources. They can also be used to simplify hundreds of role assignments for a storage resource. The preview enables you to author conditions for storage DataActions, and can be used with built-in or custom roles.
Learn more about testing the Attribute-based Access Control (ABAC) preview here: Authorize access to blobs using Azure role assignment conditions (preview)
Community Events
MS Learn Module of the Week

Introduction to infrastructure as code using Bicep
This module will enable you to describe the benefits of using infrastructure as code, Azure Resource Manager, and Bicep to quickly and confidently scale your cloud deployments. Determine the types of deployments for which Bicep is a good imperative deployment tool.

Learning objectives
After completing this module, you’ll be able to:
- Describe the benefits of infrastructure as code.
- Describe the difference between declarative and imperative infrastructure as code.
- Explain what Bicep is, and how it fits into an infrastructure as code approach.
Learn more here: Introduction to infrastructure as code using Bicep

Let us know in the comments below if there are any news items you would like to see covered in the next show. Be sure to catch the next AzUpdate episode and join us in the live chat.
by Contributed | May 14, 2021 | Technology
This article is contributed. See the original author and article here.
Recording of the Microsoft 365 – General M365 development Special Interest Group (SIG) community call from May 13, 2021.
Call Summary
Latest news from Microsoft 365 engineering and updates on open-source projects: PnP .NET libraries, PnP PowerShell, modernization tooling, on yo Teams, on Microsoft Graph Toolkit, and on Microsoft Teams Samples.
Check out the new Microsoft 365 Extensibility look book gallery, visit the Microsoft Teams samples gallery to get started with Microsoft Teams development, and register now for May trainings on Sharing-is-caring. Open-source project activity is focused on prepping for May releases in Microsoft Build time frame.
Open-source project status:
Project |
Current Version |
Release/Status |
PnP .NET Libraries – PnP Framework |
v1.4.0 |
Bug fixes, Prepping for v1.5.0 (May) |
PnP .NET Libraries – PnP Core SDK |
v1.1.0 |
Bug fixes, Prepping for v1.2.0 (May) |
PnP PowerShell |
v1.5.0 (just added Cmdlets for Viva Connections and Syntex) |
Prepping for v1.6.0 (May) |
Yo teams – generator-teams |
v3.0.3 GA, v3.1.0 Preview |
Preview with Viva Connections support |
Yo teams – yoteams-build-core |
v1.1.0 |
|
Yo teams – msteams-react-base-component |
v3.1.0 |
|
Microsoft Graph Toolkit (MGT) |
v2.1.0 GA, v2.2.0 Preview |
v2.2.0 planned Build release |
Additionally, one new Teams sample delivered. The host of this call was David Warner II (Catapult Systems) | @DavidWarnerII. Q&A takes place in chat throughout the call.
Actions:
- Register for Sharing is Caring Events:
- First Time Contributor Session – May 24th (EMEA, APAC & US friendly times available)
- Community Docs Session – May
- PnP – SPFx Developer Workstation Setup – June
- PnP SPFx Samples – Solving SPFx version differences using Node Version Manager – May 20th
- AMA (Ask Me Anything) – Microsoft Graph & MGT – June
- AMA (Ask Me Anything) – Microsoft Teams Dev – June
- First Time Presenter – May 25th
- More than Code with VSCode – May 27th
- Maturity Model Practitioners – May 18th
- PnP Office Hours – 1:1 session – Register
- Download the recurrent invite for this call – http://aka.ms/m365-dev-sig
- Call attention to your great work by using the #PnPWeekly on Twitter.
Microsoft Teams Development Samples: (https://aka.ms/TeamsSampleBrowser)

Great to see all the faces in the community. Hopefully soon we will get to see each other in person.
Demos delivered in this session
Inspire, inform and prepare employees transition to the new hybrid Workplace transformation site – learn about the customizable SharePoint Hybrid Workplace site template (in look book) and new end user training (available on support.microsoft.com and in Microsoft 365 Learning Pathways playlists) to help customers and colleagues’ transition to a new way of working. Article insights based on customer conversations and research by Microsoft. Training categories (playlists) – meetings & collaboration, wellness and productivity, security & data protection.
Querying and Paging data with PnP Core SDK – after downloading the PnPCoreAuth package, installing and configuring the needed services, obtain the PnPContext from PnPContextFactory and start using the library. There are multiple options for querying data. PnP Core SDK Query Model options – Load*, Get*, LINQ, and Nested/hierarchical queries. PnP Core SDK Paging Model options – Implicit asynchronous paging*, Full load of data/synchronous implicit paging, and Manual paging with Take/Skip. *Preferred.
Advanced tricks for form formatting and customization – some items in a list should not show up on a form. You can delete, hide or conditionally show values (based on entries in other fields) on a form. Column and Form formatting are vastly different. Learn ways to detect what values are in the list vs what values are on the form and also how to create read only sections on a form.
Thank you for your work. Samples are often showcased in Demos.
Topics covered in this call
- PnP .NET library updates – Paolo Pialorsi (PiaSys.com) @paolopia – 4:45
- PnP PowerShell updates – Paolo Pialorsi (PiaSys.com) @paolopia – 6:35
- yo Teams updates – Paolo Pialorsi (PiaSys.com) @paolopia – 7:24
- Microsoft Graph Toolkit updates – Beth Pan (Microsoft) | @beth_panx – 8:34
- Microsoft Teams Samples – Bob German (Microsoft) @Bob1German – 9:46
Demo: Inspire, inform and prepare employees transition to the new hybrid Workplace transformation site – Holland Kaviani (Microsoft) & Matt Wolodarsky (Microsoft) | @mwolodarsky – 12:34
Demo: Querying and Paging data with PnP Core SDK – Paolo Pialorsi (PiaSys) | @PaoloPia – 25:21
Demo: Advanced tricks for form formatting and customization – Chris Kent (DMI) | @theChrisKent – 43:22
Resources:
Additional resources around the covered topics and links from the slides.
General resources:
Upcoming Calls | Recurrent Invites:
General Microsoft 365 Dev Special Interest Group bi-weekly calls are targeted at anyone who’s interested in the general Microsoft 365 development topics. This includes Microsoft Teams, Bots, Microsoft Graph, CSOM, REST, site provisioning, PnP PowerShell, PnP Sites Core, Site Designs, Microsoft Flow, PowerApps, Column Formatting, list formatting, etc. topics. More details on the Microsoft 365 community from http://aka.ms/m365pnp. We also welcome community demos, if you are interested in doing a live demo in these calls!
You can download recurrent invite from http://aka.ms/m365-dev-sig. Welcome and join in the discussion. If you have any questions, comments, or feedback, feel free to provide your input as comments to this post as well. More details on the Microsoft 365 community and options to get involved are available from http://aka.ms/m365pnp.
“Sharing is caring”
Microsoft 365 PnP team, Microsoft – 14th of May 2021
by Contributed | May 14, 2021 | Technology
This article is contributed. See the original author and article here.
One of the major limitations with multi-tenant logic app was its inability to integrate with private resources (that are behind a firewall and/or deny public connections). Integration service environment (ISE) was one solution to achieve this task. But there is certain limitations in using ISE and that’s a different topic for discussion.
Let’s see how to integrate single tenant logic app with private resources.
- Create a Single tenant logic app and workflow. I am using a HTTP trigger to start the workflow.
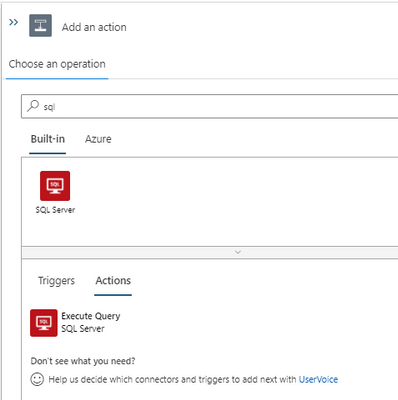
Add an action and search for SQL. We can see two connector options. Built-in and Azure.
Private connection is possible only using the built-in actions. If we use Azure action, we will have to whitelist the connector outbound IP ranges (public) in the destination system firewall.
At the moment, we have only one built-in action for SQL that is ‘Execute SQL query’. More built-in actions are expected to be added in the future.
- To create a built-in SQL connection we can use connection string. We can obtain the connection string from SQL database and add the password to create the action. For this example, I use a select query to one of the tables in the SQL database. I will add a response action to complete the workflow design. Let’s use the result of SQL action in the response using Dynamic content.
If the SQL server is currently not behind a firewall and ‘Allow Azure services and resources to access this server’ flag is set to Yes we can test the logic app and make sure it is working fine.
Let’s use the HTTP URL that is generated when the workflow is saved in an API testing tool (like Postman) to trigger the logic app. I tested and got the response with the SQL query results.
If the SQL server is already behind a firewall and (or) if it denies public connections, workflow would not be able to connect at the moment. We need to create a private endpoint for the Azure SQL server that we need to connect from logic app workflow.
We get below error in workflow (without a private endpoint).

- Let’s create a private endpoint in the SQL server.
Private endpoint enables connectivity between the consumers from the same VNet, regionally peered VNets, globally peered VNets and on premises using VPN or Express Route and services powered by Private Link.
Reference: https://docs.microsoft.com/en-us/azure/private-link/private-endpoint-overview

Select the resource.

Next step, choose a virtual network and subnet for the private endpoint. We need to integrate the private endpoint with a private DNS zone.

- After the private endpoint is created, let’s deny the public network access.

Test the logic app again. Now we are able to integrate a logic app with a private SQL server using private endpoint. Please let me know your questions or thoughts via comments below.
by Contributed | May 14, 2021 | Technology
This article is contributed. See the original author and article here.
One of my favorite features of (the now General Available) Azure Static Web Apps (SWA) is that in the Standard Tier you can now provide a custom OpenID Connect (OIDC) provider. This gives you a lot more control over who can and can’t access your app.
In this post, I want to look at how we can use Okta and an OIDC provider for Static Web Apps.
For this, you’ll need an Okta account, so if you don’t already have one go sign up and maybe have a read of their docs, just so you’re across everything.
Creating a Static Web App
For this demo, we’ll use the React template, but what we’re covering isn’t specific to React, it’ll be applicable anywhere.
Once you’ve created your app, we’re going to need to setup a configuration file, so add staticwebapp.config.json to the repo root.
This config file is used for controlling a lot of things within our SWA, but the most important part for us is going to be the auth section. Let’s flesh out the skeleton for it:
{
    "auth": {
        "identityProviders": {
            "customOpenIdConnectProviders": {}
        }
    }
}
Great! Now it’s time to setup Okta.
Creating an Okta application
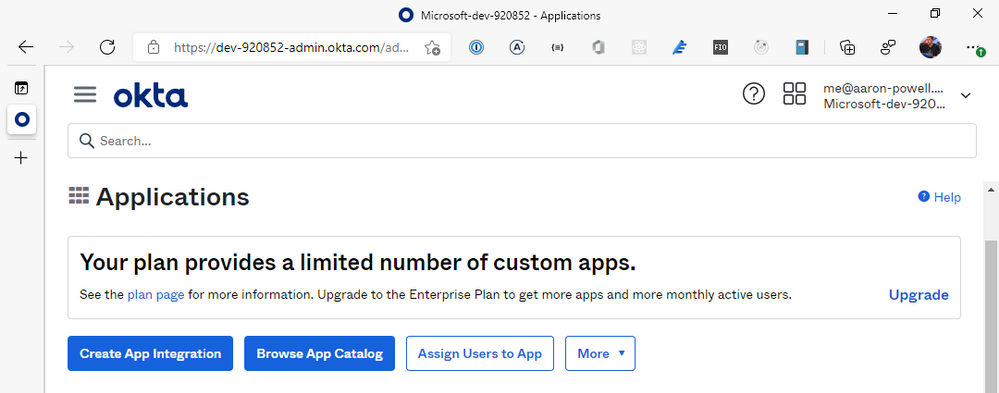
Log into the Okta dashboard and navigate through to the Applications section of the portal:
From here, we’re going to select Create App Integration and select OIDC – OpenID Connect for the Sign-on method and Web Application as the Application type. You might be tempted to select the SPA option, given that we’re creating a JavaScript web application, but the reason we don’t use that is that SWA’s auth isn’t handled by your application itself, it’s handled by the underlying Azure service, which is a “web application”, that then exposes the information out that you need.

With your application created, it’s time to configure it. Give it a name, something that’ll make sense when you see it in the list of Okta applications, a logo if you desire, but leave the Grant type information alone, the defaults are configured for us just fine.
We are going to need to provide the application with some redirect options for login/logout, so that SWA will know you’ve logged in and can unpack the basic user information.
For the Sign-in redirect URIs you will need to add https://<hostname>/.auth/login/okta/callback and for Sign-out redirect URIs add https://<hostname>/.auth/logout/okta/callback. If you haven’t yet deployed to Azure, don’t worry about this step yet, we’ll do it once the SWA is created.
Quick note – the okta value here is going to be how we name the provider in the staticwebapp.config.json, so it can be anything you want, I just like to use the provider name so the config is easy to read.
Click Save, and it’s time to finish off our SWA config file.

Completing our settings
With our Okta application setup, it’s time to complete our config file so it can use it. We’ll add a new configuration under customOpenIdConnectProviders for Okta and it’ll contain two core pieces of information, the information on how to register the OIDC provider and some login information on how to talk to the provider.
Inside registration, we’ll add a clientIdSettingName field, which will point to an entry in the app settings that the SWA has. Next, we’ll need a clientCredential object that has clientSecretSettingName that is the entry for the OIDC client secret. Lastly, we’ll provide the openIdConnectConfiguration with a wellKnownOpenIdConfiguration endpoint that is https://<your_okta_domain>/.well-known//openid-configuration.
The config should now look like this:
{
    "auth": {
        "identityProviders": {
            "customOpenIdConnectProviders": {
                "okta": {
                    "registration": {
                        "clientIdSettingName": "OKTA_ID",
                        "clientCredential": {
                            "clientSecretSettingName": "OKTA_SECRET"
                        },
                        "openIdConnectConfiguration": {
                            "wellKnownOpenIdConfiguration": "https://dev-920852.okta.com/.well-known/openid-configuration"
                        }
                    }
                }
            }
        }
    }
}
I use OKTA_ID and OKTA_SECRET as the names of the items I’ll be putting into app settings.
All this information will tell SWA how to issue a request against the right application in Okta, but we still need to tell it how to make the request and handle the response. That’s what we use the login config for. With the login config, we provide a nameClaimType, which is a fully-qualified path to the claim that we want SWA to use as the userDetails field of the user info. Generally speaking, you’ll want this to be http://schemas.xmlsoap.org/ws/2005/05/identity/claims/name, but if there’s a custom field in your response claims you want to use, make sure you provide that. The other bit of config we need here is what scopes to request from Okta. For SWA, you only need openid and profile as the scopes, unless you’re wanting to use a nameClaimType other than standard.
Let’s finish off our SWA config:
{
    "auth": {
        "identityProviders": {
            "customOpenIdConnectProviders": {
                "okta": {
                    "registration": {
                        "clientIdSettingName": "OKTA_ID",
                        "clientCredential": {
                            "clientSecretSettingName": "OKTA_SECRET"
                        },
                        "openIdConnectConfiguration": {
                            "wellKnownOpenIdConfiguration": "https://dev-920852.okta.com/.well-known/openid-configuration"
                        }
                    },
                    "login": {
                        "nameClaimType": "http://schemas.xmlsoap.org/ws/2005/05/identity/claims/name",
                        "scopes": ["openid", "profile"]
                    }
                }
            }
        }
    }
}
With the config ready you can create the SWA in Azure and kick off a deployment (don’t forget to update the Okta app with the login/logout callbacks). When the resource is created in Azure, copy the Client ID and Client secret from Okta and create app settings in Azure using the names in your config and the values from Okta.
Using the provider
Once the provider is registered in the config file, it is usable just like the other providers SWA offers, with the login being /.auth/login/<provider_name>, which in this case the provider_name is okta. The user information will then be exposed as standard to both the web and API components.
If you’re building a React application, check out my React auth helper and for the API there is a companion.
Conclusion
I really like that with the GA of Static Web Apps we are now able to use custom OIDC providers with the platform. This makes it a lot easier to have controlled user access and integration with a more complex auth story when needed. Setting this up with Okta only takes a few lines of config.
You can check out a full code sample on my GitHub and a live demo here (but I’m not giving you my Okta credentials :squinting_face_with_tongue:).

Recent Comments