by Scott Muniz | Jul 14, 2020 | Uncategorized
This article is contributed. See the original author and article here.
Currently, the process to submit a support case related to Microsoft Defender ATP goes through the support portal at https://support.microsoft.com.
Today, we are announcing that we will be rolling out an upgraded support process offering a more modern and advanced support experience through the Microsoft Defender Security Center.
Starting on July 20th, 2020, an in-product support widget will be integrated into the Microsoft Defender Security Center. Using this widget, customers will be able to:
- Find solutions to common problems
- Submit a support case to the Microsoft support team
Accessing the new support widget can be done in one of two ways:
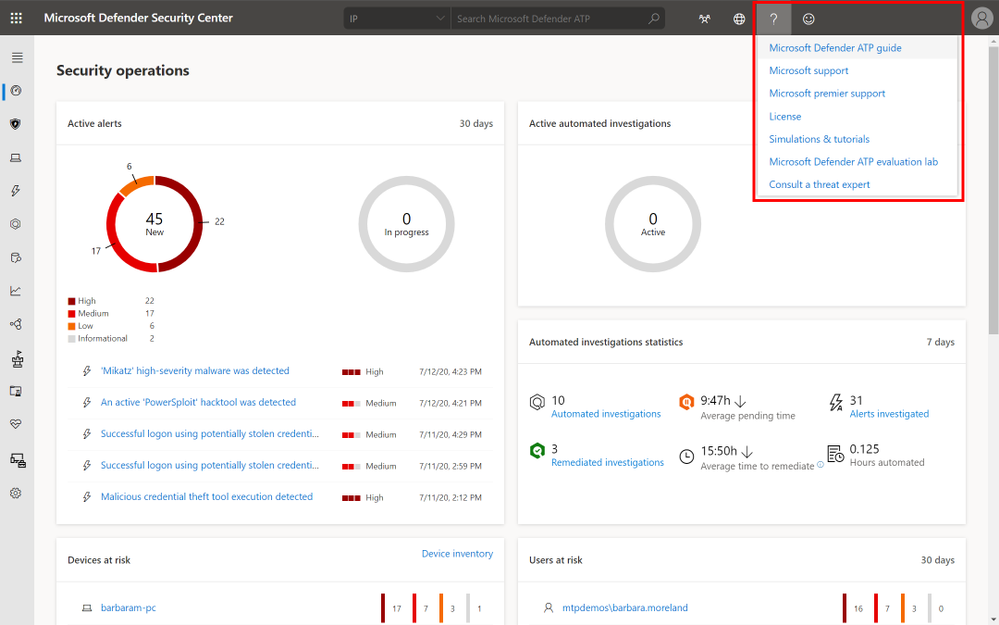
1) Clicking on the question mark on the top right of the portal and then clicking on “Microsoft support”:

2) Clicking on the Need help? button in the bottom right of the Microsoft Defender Security Center:
 Need help button in Microsoft Defender Security Center
In the widget you will be offered two options:
- Find solutions to common problems
- Open a service request
Find solutions to common problems
The “find solutions to common problems” option includes articles that might be related to the question you may ask. Just start typing the question in the search box and articles related to your search will be surfaced.
 Find a solution to a common problem window
In case the suggested articles are not sufficient, you can open a service request.
Open a service request
This option is available by clicking the icon that looks like a headset. You will then get the following page to submit your support case:
 Open a service request window
On this page, you fill in a title and description for the issue you are facing, as well as a phone number and email address where we may reach you. You may also include up to five attachments that are relevant to the issue in order to provide additional context for the support case. Finally, you select your time zone and an alternative language, if applicable. The request will be sent to Microsoft Support Team. We will respond to your service request shortly.
As mentioned, this new support process will become available as of July 20, 2020. After this date, the option to submit cases from the support.microsoft.com portal will not be possible.

by Scott Muniz | Jul 14, 2020 | Uncategorized
This article is contributed. See the original author and article here.


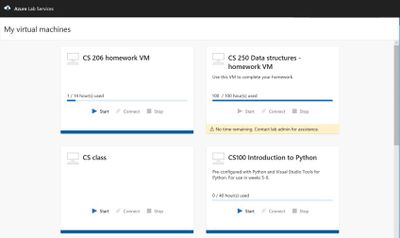
Università Politecnica delle Marche has incorporated Microsoft Learn into their curriculum to educate students with new technology concepts and skills required to enter the job market.
They are one of many universities worldwide leveraging Microsoft Learn to support them with teaching cloud computing, AI and data science in an interactive way.
With Microsoft Learn, students can learn at their own pace, gain an understanding of concepts and immediately put their knowledge into practice through the execution of scripts within sandbox environments and getting hands on with practice tools.
Get started today at https://aka.ms/learnforstudents
![[Guest Blog] Accelerating Filipino lives and careers through Business Apps](https://www.drware.com/wp-content/uploads/2020/07/large-477-999x675.)
by Scott Muniz | Jul 14, 2020 | Uncategorized
This article is contributed. See the original author and article here.
This article was written by Business Applications MVP Paul Soliman as part of the Humans of IT Guest Bloggers series. This month, the Humans of IT blog will spotlight the career journeys and mentorship experiences of our community members. In today’s story, Paul shares about his non-traditional tech background, and how Business Applications helped transform his career.
10 years ago, I was just living in Pampanga (province in the Philippines) and just playing with my band. I was a nobody, didn’t have any solid dreams and didn’t really take college seriously. In fact, I did not even attend my own graduation because I really hated school then.
Then, everything changed. I was so blessed when I started my internship/ part-time job at Starbucks Philippines, where I was first trained and immersed in Business Applications.
This first job gave me an opportunity to explore Business Applications. I learned to understand the business processes within my organization, and our team was starting to translate it systematically. I remember being so amazed to see how these business apps help connect people, processes and technology.
Although school didn’t teach me about what an ERP system was, through Business Applications, I was able to adapt and learn accounting, warehousing, customer management and other real-world applications of business-driven tech. It was eye-opening, and frankly even life-changing.
After 4 years since I had my first consulting role, I was able to see great budding tech talents coming from both public and private schools in the Philippines. These fresh graduates were clearly able to excel in their environment. Being from the Philippines, I realized that Filipinos can really be world class in the Business Apps implementation space, too. It was a proud moment for me.
Fast forward to 2019, Microsoft is doing a good job in democratizing complex technologies via Power Platform. I’ve seen numerous students create solutions for critical business pain points via a five-hour hackathon, and later on developing them into complete end-to-end systems. It’s amazing, and I’ve seen this happen so many times over. These students were able to understand complex business tasks when we guided them on how to scope, envision solutions and do project management. Their ideas and potentials were unlocked, and the technology made it possible for them to create a tangible solution.
Because of this insight and aspiration, we’ve decided to create a community in the Philippines to unite Business Apps practitioners and help encourage fresh graduates, students and other people that want to extend or make a career shift into tech. When we saw that these democratized applications through Power Platform were helping non-developers (aka Citizen Developers) create applications using low-code to no-code framework, we thought that we can really make an impact by teaching this technology to other people and helping them accelerate their own careers, too.
The community that we have created was the first Dynamics 365 and Power Platform driven community in the Philippines.
We started from just two members in last July 2019, and today we have 400+ active members already and being managed through our Facebook page: https://www.facebook.com/groups/BizAppsPH/
We are so happy that Microsoft APAC and PH are supporting us in this journey. Monthly events were conducted in the Microsoft PH’s office and right now with our COVID-19 situation here in the Philippines, not only we did not stop, but we even brought the learning via Microsoft Teams to our members and other people who are interested to make a career shift in tech.
Here are some photos from our local community events here in the Philippines:
 HackED – Power Platform Hackathon for Students
 Global Power Platform Bootcamp 2020
 BizApps PH Power Dynamics 365 and Power Platform Community
 Power Automate in a Day
 Women in Tech
These face-to-face and online events gave our community and non-community members a new perspective and fresh insight about whatdemocratized technology like Power Apps can do to help their lives and careers. It has been incredible to witness how our community members appreciated and changed their mindset towards business apps-driven career, especially when they realized that you don’t even need a Bachelor’s degree and or any background in programming to create solutions that will help solve organizational issues. It’s truly a gamechanger!
In my opinion, the first step to accelerate lives and careers of Filipinos has already been achieved by founding this community, but personally I will not stop here. Remember what I wrote in first part of this blog, when I was just a simple, unknown, rockstar-wannabe in our humble province? Everything changed when I was given an opportunity to learn and have passion for what I am doing especially tech in general. Now, I want to share THAT life-changing opportunity to my people too.
Fast forward till July 2020: I am now running two of my own startup companies in the PH that were built on top of Microsoft Azure, Power Platform and Dynamics 365. Even in my wildest dreams, I did not see this coming. Since 2009, I have done Business Apps-related work and businesses. I have a family now and thanks to tech, I am now able to provide for them. I am so thankful that I was able to find my passion in tech, especially in Microsoft Business Applications.
 Latest family pic
The second part of my life’s mission is to give OPPORTUNITIES to my people to help them also find their passion and career in Business Apps. Without an opportunity, great talents and passion will not be unlocked. There is so much potential talent just waiting to be realized, and we cannot simply let them slip by.
Here in the Philippines, we are launching Citizen Developer Vision 2022, a program that will help K12 students, fresh graduates and other people who want to be immersed and discover careers in the Business Apps space. We are currently having ongoing discussions with schools and subsequently, we will also meet with the local Department of Education to roll out this program nationwide.

I hope this will inspire you to also embrace technology and help unlock opportunities for your local community. After all, everyone should be given the opportunity to pursue a fulfilling and abundant life, no matter where you are in this world.
About Paul:
Paul Soliman is the CEO of Hacktiv Colab Inc and the CTO, Raven Global Inc. He is also the first Microsoft MVP for Business Apps in the Philippines – an honor that he is extremely proud of, and hopes will inspire many others in the Philippines and the greater Asia Pacific region to also follow in his path and discover their own tech superpowers.
Connect with Paul Soliman:
Twitter: @heypaulroots
LinkedIn: https://www.linkedin.com/in/paulsoliman/
MVP profile: https://mvp.microsoft.com/en-us/PublicProfile/5003685?fullName=Paul%20%20Soliman
#HumansofIT
#TechforGood
#LessCodeMorePower
by Scott Muniz | Jul 14, 2020 | Azure, Microsoft, Technology, Uncategorized
This article is contributed. See the original author and article here.
Azure DMS Hybrid (Preview) is helpful when you want to migrate from On-Premise SQL server to Azure and don’t have site-to-site connectivity between the both, also, if there is limited site-to-site connectivity bandwidth. Azure DMS Hybrid (Preview) uses a migration worker which is hosted On-Premise together with an instance of Azure DMS running in the cloud. You can use Azure Database Migration Service hybrid mode to migrate data from an on-premises instance of SQL Server to Azure SQL Database
Note:- The Azure Database Migration Service hybrid installer runs on Microsoft Windows Server 2012 R2, Window Server 2016, Windows Server 2019, and Windows 10.
Note:- The Azure Database Migration Service hybrid installer requires .NET 4.7.2 or later. To find the latest versions of .NET, see the Download .NET Framework page.
In this article we will be using Azure DMS Hybrid (preview) for online database migration from On-Premise to Azure Managed Instance. Below are the steps to perform the mentioned operation:
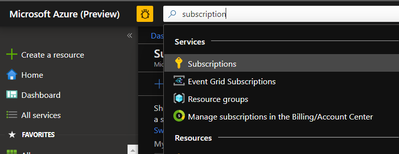
- Sign into Azure portal and go to the subscription where you want to deploy Database Migration Service.

- Look for Resource providers, search for migration, and then register Microsoft.DataMigration.


- In the global search, look for Azure Database Migration Services.

- Give the required information and select service mode as Hybrid (Preview)

- Review networking and tags. Once done, create Database Migration Services.

- Go to the properties of Azure DMS and copy the resource ID. This will be needed later.

- Now, we need to register the application in the Azure Active Directory. Registering the application means that your developers can use Azure AD to authenticate users and request access to user resources such as email, calendar, and documents.
Any member of your directory (not guests) can register an application, otherwise known as creating an application object.
Registering an application allows any user to do the following:
- Get an identity for their application that Azure AD recognizes
- Get one or more secrets/keys that the application can use to authenticate itself to AD
- Brand the application in the Azure portal with a custom name, logo, etc.
- Apply Azure AD authorization features to their app, including:
- Role-Based Access Control (RBAC)
- Azure Active Directory as oAuth authorization server (secure an API exposed by the application)
- Declare required permissions necessary for the application to function as expected, including:
- App permissions (global administrators only). For example: Role membership in another Azure AD application or role membership relative to an Azure Resource, Resource Group, or Subscription
- Delegated permissions (any user). For example: Azure AD, Sign-in, and Read Profile
For knowing who can add application on to Azure AD instance please refer https://docs.microsoft.com/en-us/azure/active-directory/develop/active-directory-how-applications-are-added#who-has-permission-to-add-applications-to-my-azure-ad-instance
For registering app in Azure Active directory:- Go to Azure active directory> App registration > New Registration

- In new registration provide display name (This can be changes later). Click register.

- Go to DMS > Access control (IAM) > Add > Add role assignment > assign contributor role to your application ID (you can also create custom roles as well by following MSDN).
Note:- To add role assignments, you must have Microsoft.Authorization/roleAssignments/write and Microsoft.Authorization/roleAssignments/delete permissions, such as User Access Administrator or Owner

- Once role is assigned, go to Hybrid blade under settings of Azure Database Migration Service. Download the installer folder by clicking on Installer download.

- Unzip the downloaded folder and open dmsSettings.Json file in notepad.

- In the dmsSettings file provide the Application ID of your registered application and resource ID of your DMS and leave rest of the settings as it is. Save the file.

- Now we would need to generate certificate which Azure Database Migration Service will use to authenticate the communication from the hybrid worker. For generating certificate go the location of your recently downloaded folder and run the below command in admin cmd.
<drive>:<folder>Install>DMSWorkerBootstrap.exe -a GenerateCert

A certificate would get generated in the mentioned location.

14. Now upload the recently created certificate to Certificates & secrets of your application.

- After uploading certificates create a new client secret. Please copy and save the value of Client Secret, we will need it later.

- Now we need to install Azure Database Migration Service hybrid worker on your on-premise machine. For this go the location of your folder which we have recently downloaded and unzipped, and run below command in admin Command Prompt.
<drive>:<folder>Install>DMSWorkerBootstrap.exe -a Install -IAcceptDMSLicenseTerms -d
Once above command is successful you will see Database Migration Service status as Online.

- In your subscription, assign contributor role to your application ID.
For this go to your subscription > Access Control (IAM) > Add
Select “Contributor” role from the drop down and Select “search for your Application ID”

- Once the above operation is successful, we will start online Migration of the database. For this,
go to Azure Database Migration Service, on the overview blade, select New Migration Project.

- Enter Project Name > choose type of activity > Online Data Migration. (Note:- This article is about online Migration)

- Under select source > enter on-premises SQL server`s FQDN and credentials.

- Under select target > provide the application ID and in the key column enter Client secret of your Application. Also, provide the target MI credentials.

- Under Select Databases > select Source database which you wish to migrate to MI.

- Before starting the migration, please make sure that On-premise SQL server service has required permission on the backup folder ( the folder where you have kept required backup of your database).
Go to your backup folder > right click – > Properties > Security > Edit > Add your On-Premise SQL Service and give read and write permission to it.


Note: – We also need give read/write permission to the windows account which will impersonate the DMS.
- Under Configure migration settings > please provide the network share location of the backup folder and Azure storage location, where DMS will upload the file.
Note:- To get network share location go to your backup folder location > Right click- > Sharing > Share


- Provide migration activity name and click on run migration.

Once migration has started check the status of the migration.

- On the migration activity page click on the database name to see the status of the migration.
Once backup status shows restored, you can start cutover based upon your business requirements.


Once cutover is completed you can close the complete cutover window.

- Once cutover is completed, Database migration to MI is successful. It can also be verified using Azure portal or SSMS.


Recent Comments