by Scott Muniz | Jun 22, 2020 | Uncategorized
This article is contributed. See the original author and article here.
This week, is the annual National Data Science Conference hosted by UC Berkeley which we are proud to be supporting.

As part of the event Microsoft will be announcing the release of Berkeley Data 8 Foundations of Data Science on Microsoft Learn, which has been complimented by a interactive learning content and auto graded mini labs using Otter grader. These mini labs allow students to get hands on with code and test their skills. Students will have have the opportunity to complete a number of hands on interactive learning exercises and interactive notebooks using Python and Jupyter with Visual Studio Codespaces.
So we welcome all the attendees to the UC Berkeley’s National Data Science Conference to learn more about Data Science.

The UC Bekerely Computing, Data Science, and Society (DSEP) division is proud to announce the new Learning Path Foundations of Data Science on Microsoft Learn based on the Computational and Inferential Thinking textbook authored by Berkeley faculty members Ani Adhikari, John DeNero, and David Wagner. The Foundations of Data Science course serves as an introductory data science course that teaches data science from the ground up, without any prerequisite knowledge in programming or statistics.
This new Microsoft Learn offering will allow learners worldwide to engage the content of one of UC Berkeley’s most popular undergraduate courses. Below is a brief overview of the course from Berkeley’s course website:
Professor John Denero
‘The UC Berkeley Foundations of Data Science course combines three perspectives: inferential thinking, computational thinking, and real-world relevance. Given data arising from some real-world phenomenon, how does one analyze that data so as to understand that phenomenon? The course teaches critical concepts and skills in computer programming and statistical inference, in conjunction with hands-on analysis of real-world datasets, including economic data, document collections, geographical data, and social networks. It delves into social issues surrounding data analysis such as privacy and design. You’ll learn to program when studying data science — but not for the purpose of building apps or games. Instead, we use programming to understand the world around us.’

The Foundations of Data Science Learning Path is split into twelve modules, each of which covers a different fundamental topic in data science.
The modules are accompanied by knowledge checks and Jupyter notebook assignments hosted on Visual Studio Codespaces, allowing students to apply their knowledge in an interactive setting. In the Jupyter assignments, students will have a chance to use Python and relevant data science libraries to manipulate data, perform exploratory analyses, visualize data, conduct statistical hypothesis tests, and build machine learning models.
Berkeley National Data Science Conference Resources
Please take a look at our one page handout(link is external) summary guide to open source resources. This short document will explain the curriculum and set of technologies developed at Berkeley.
The Berkeley team are also building an external facing resources portal website with key links for instructors.

by Scott Muniz | Jun 22, 2020 | Uncategorized
This article is contributed. See the original author and article here.
Welcome to another post in TNWiki Article Spotlight series. This is where you get to hear about a TechNet Wiki that you shouldn’t miss reading. It’s been a while since I last wrote a Post on Wiki Ninjas Blog and it feels great to be back.
This weeks’ TNWiki article discusses one of the nicest features in Entity Framework Core. That is Global Query Filters which was initially introduced in EF Core 2.0. Some common use of this feature is to implement Soft Deletes and Multi-tenancy. Our article today focuses primarily on how you can implement Soft Delete functionality. And not to mention, this article has won the Gold medal in Visual C# Technical Guru – April 2020 and was published by Karen Payne. Karen has been contributing to TNWiki in a great manner over the past years with wonderful articles each month. I will take this opportunity to thank her for all her hard work.
This article is very well explained, written in a step by step nature, so anyone can easily follow along. Towards the end of the article, a GitHub repo link is provided that has the complete source code related to this article and it has a nice ReadMe to easily get the project set up in your machine. What else you can ask for?
Can’t wait to read the article? Here you go.
Entity Framework Core 3.x Global Query Filters (C#)
Have a nice week ahead!
Happy Coding and of course, Stay Safe!
(Blog, MSDN Profile, Twitter)
TechNet Wiki the community where we all join hands to share Microsoft-related information.
![[Announcement] New “Women in Cybersecurity” Network Group on the Community Mentors app!](https://www.drware.com/wp-content/uploads/2020/06/large-120)
by Scott Muniz | Jun 22, 2020 | Uncategorized
This article is contributed. See the original author and article here.
Looking to connect with other women and allies in the cybersecurity space? Check out the new “Women in Cybersecurity” network group on the Community Mentors app!
Today, we’ve officially launched a brand new Women in Cybersecurity network group on our Community Mentors app. This new group will allow members to connect on cybersecurity topics, share about their career journeys, tips for succeeding in cybersecurity roles and more!
Please welcome Microsoft employee Ryen Macababbad, a strong mentorship advocate who focuses on identity and security in the Cybersecurity Solutions Group – Ryen will serve as the main facilitator for this new group. More about Ryen below:
 Meet Ryen Macababbad who leads the new Women in Cybersecurity network group!
Alt text:
Ryen manages a diverse team of highly-skilled individuals focused on helping customers integrate applications into Azure AD and implement the Identity solutions tied to them. Prior to joining CSG, Ryen held roles in Microsoft Engineering, in both Microsoft Defender Advanced Threat Protection and Azure Active Directory product groups. Ryen is also a US Army Veteran who served 8 years active duty, including two combat tours overseas, in Iraq and Afghanistan, plus 6 years in the US Army Reserves before she ended her service as a Military Intelligence Systems Maintenance Sergeant.
Ryen is a passionate mentor and advocate for veterans, women, and underrepresented populations in technology.
To quote Ann Johnson, Corporate Vice President of Cybersecurity Solutions, mentorship is key to bringing more women in cybersecurity. She continues, “for many that want to get their foot in the door, they need an encouraging and constructive network to help them grow.” This group will aim to help serve as a catalyst for this change as it is open to the public, allows for group interactions instead of solely 1:1 connections and as a result, everyone can benefit from shared learnings.
Ready to dive in? Here’s how you can join the group:

Steps to join:
- Go to https://aka.ms/communitymentors and download our mentorship app – available on both iOS and Android
- Follow the steps to complete your registration (Note: You will need to be a registered member of the Microsoft Humans of IT Community to access the app)
- Once you’re in the app, tap on “Community” (bottom of screen) > “Networks” (top right hand of screen) > Hit the “Join” button on the “Women in Cybersecurity” network group page and you’re in!
We hope you will find this new feature to connect with topic-based groups beneficial and meaningful.
Other network groups that we currently offer include:
Have ideas on new features you’d like to see, or experiences to add? Submit your ideas here, or feel free to leave a comment on the community page.
Happy connecting – we look forward to reading your stories and helping you grow in your journey!
#HumansofIT
#TechforGood
#WomeninCybersecurity
by Scott Muniz | Jun 22, 2020 | Uncategorized
This article is contributed. See the original author and article here.

In this post I will demonstrate how to update the Windows Subsystem for Linux – WSL to version 2 aka WSL2. Once updated, I will demonstrate how to configure Docker to use WSL2 to run a Linux Minecraft Java Edition container natively on Windows without emulation, i.e., without a Hyper-V VM.
Pre-requirement:
Running Windows 10, updated to version 2004, Build 19041 or higher.
Enabling WSL
In case you don’t have the WSL installed, before installing any Linux distributions on Windows, you must enable the Windows Subsystem for Linux optional feature.

Enabling WSL will restart Windows.
Install your Linux distribution of choice
In case you don’t have a Linux distribution installed, you need to download install it from Microsoft Store. Follows some options available:

I am using Ubuntu 20.04 LTS:

Check the WSL version
If you are using the Windows Build 19041 or higher, you can check the WSL version by opening the PowerShell command line and entering the following command:
wsl --list --verbose
So far, I am running the version one:

Now that we have WSL installed, the next step is to update it to version 2.
Enable the ‘Virtual Machine Platform’ optional component
Before installing WSL 2, you must enable the Virtual Machine Platform optional feature.

If you prefer, it is possible to enable the feature using the following command:
Enable-WindowsOptionalFeature -Online -FeatureName VirtualMachinePlatform
In the next session it will be demonstrated how to install WSL2.
NOTE:
If you are using a Virtual Machine, in case WSL2 still complained that Virtual Machine Platform is not installed:

Turn off the VM and run the following command as admin on the host machine:
Set-VMProcessor -VMName Windows10 -ExposeVirtualizationExtensions $true
Installing WSL2
WSL2 is now available in the initial release of Windows 10, version 2004 and Windows Insiders slow ring. But for now, to enable WSL2 you need to manually install the Linux kernel. It is a temporary solution and, in a few months, WSL2 will be automatically updated just like regular updates on your machine.
Use the following direct link to download the installer for the Linux kernel update package:
https://wslstorestorage.blob.core.windows.net/wslblob/wsl_update_x64.msi
The link is available at: https://docs.microsoft.com/en-us/windows/wsl/wsl2-kernel
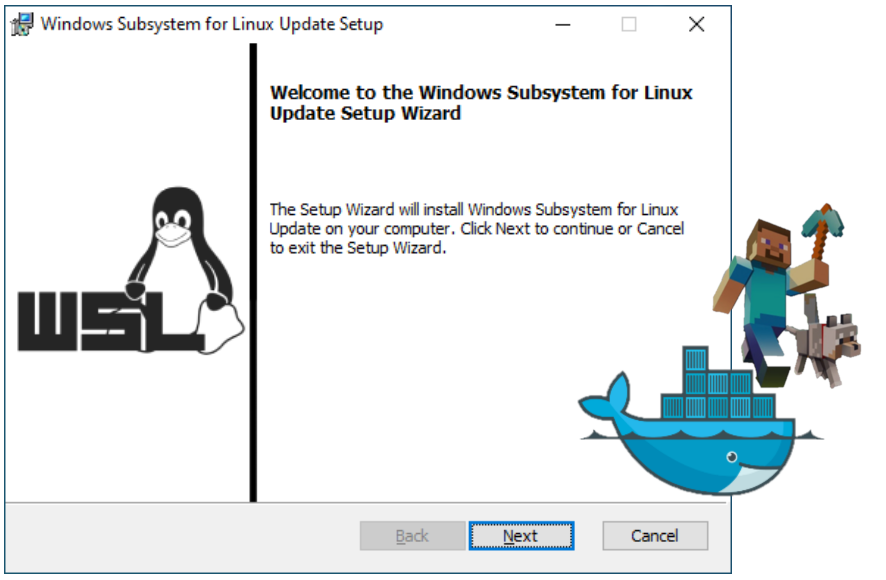
Run the update setup to install WSL2:

The installation process is straightforward and you only need to follows the default options. The following UI will be displayed after successfully updated:

Set your distribution version to WSL 2
Now that you have installed WSL2, it is necessary to run the following PowerShell command to update WSL to version 2:
wsl --set-version Ubuntu-20.04 2
Ubuntu-20.04 is the name of the Linux distribution that I am using. You can run wsl -l -v to list the Linux distributions installed.

Set WSL 2 as your default version
You can run the following command in PowerShell to set WSL 2 as the default version in case you want to install others Linux distribution in the future:
wsl --set-default-version 2

If you run again the following command you will see that WSL2 was successfully installed:
wsl -l -v

In the next session I will configure Docker to use WSL2 for Linux containers on Windows 10.
Enable WSL2 on Docker
Now that we have installed WSL2, we can configure it on Docker Desktop for Windows.
Windows Subsystem for Linux (WSL) 2 introduces a significant architectural change as it is a full Linux kernel built by Microsoft, allowing Linux containers to run natively without emulation.
Docker Desktop uses the dynamic memory allocation feature in WSL 2 to greatly improve the resource consumption. This means, Docker Desktop only uses the required amount of CPU and memory resources it needs, while enabling CPU and memory-intensive tasks such as building a container to run much faster.
Additionally, with WSL 2, the time required to start a Docker daemon after a cold start is significantly faster. It takes less than 10 seconds to start the Docker daemon when compared to almost a minute in the previous version of Docker Desktop.
More details at:
Docker Desktop WSL 2 backend
https://docs.docker.com/docker-for-windows/wsl/
If you are running a supported system, Docker will prompt you to enable WS2 during initialization.
It is possible to enable WSL2 in the Settings > General options:

Now that we have Docker configured to run Linux containers using the WSL2 engine, we can test it with a Minecraft Linux container.
Minecraft Linux Container
To demonstrate the use of Docker with WSL2, I will use the itzg/docker-minecraft-server Docker Linux image that provides a Minecraft Java Edition Server.
You can use the following command to download and run the latest Minecraft Server image:
docker run -e EULA=TRUE -d -p 25565:25565 --name mc itzg/minecraft-server

Observe that with WSL2, the container initialization was only 10 seconds:

I hope you liked!
Follows some references:
Windows Subsystem for Linux Installation Guide for Windows 10
https://docs.microsoft.com/en-us/windows/wsl/install-win10
Updating the WSL 2 Linux kernel
https://docs.microsoft.com/en-us/windows/wsl/wsl2-kernel
Get started with Docker for Windows
https://docs.docker.com/docker-for-windows/
Docker Desktop WSL 2 backend
https://docs.docker.com/docker-for-windows/wsl/
by Scott Muniz | Jun 22, 2020 | Uncategorized
This article is contributed. See the original author and article here.
We are excited to discuss the new Azure Storage v12 SDKs that are now Generally Available (GA) in .NET, Java, Python, and JavaScript/Node.js with a new architecture to better suit developer preferences.
We support both synchronous and asynchronous APIs in all the libraries that are GA. All of our v12 libraries have improved performance and ensure thread safety. They are equipped with all core functionalities of the previous versions (HTTP retries, logging, various auth protocols, and many more). We have reached feature parity for major scenarios with our v12 libraries and they offer new features as well such as support for ADLSgen2, filesystem access, etc.
You will notice a change in the experience using our v12 libraries. In order to ease the learning curve that programmers face when adopting our services, we made the libraries more idiomatic to their language. The v12 storage libraries are also consistent across Azure services, so learning one will make it easier to learn the others. They are supported, fully documented, and open-sourced (.NET, Java, Python, JS/Node).
Feel free to learn more about the guidelines followed to create these SDKs by visiting the .NET guidelines, Java guidelines, Python guidelines, and/or JavaScript/Node.js guidelines pages.
Getting started
If you are new to the Azure Storage client libraries, follow our quickstarts to get set up in minutes. From there, explore reference documentation and refer to code samples to master the libraries. With this new architecture comes breaking changes. For users interested in migrating their existing code, visit our comprehensive guides*.
*In addition to the links above, we have published migration guides for a few popular libraries: .NET blob, Java blob.
Support for Earlier Versions
The earlier versions of our libraries will continue to be supported, however new features will only be added to v12 libraries. With the introduction of our new libraries comes the deprecation of our old libraries. All previous versions of the .NET, (v9/v11) Java (v8), Python (v2), and JavaScript/Node.js (v2) libraries will be deprecated. For the next 12 months, the deprecated libraries will be updated on an exceptional basis such as a security issue and we will continue providing documentation for all versions of the libraries. Refer to our Lifecycle FAQ page.
NOTE: We have officially moved off of our old GitHub repo links. The table below shows the mapping from the old repos to the new repos.
| Old Repository |
New Repository |
| github.com/azure/azure-storage-net |
github.com/azure/azure-sdk-for-net/tree/master/sdk/storage |
| github.com/azure/azure-storage-java |
github.com/azure/azure-sdk-for-java/tree/master/sdk/storage |
| github.com/azure/azure-storage-python |
github.com/azure/azure-sdk-for-python/tree/master/sdk/storage |
| github.com/azure/azure-storage-js |
github.com/azure/azure-sdk-for-js/tree/master/sdk/storage |
Building community
In order to better engage with the developer community, all our libraries are open-sourced. The source code for each library can be found under the Azure organization in GitHub.
We urge developers to submit feature requests and report any issues in the issues section of the corresponding GitHub repositories. Thank you for your feedback and looking forward to the continued partnership.

Recent Comments