This article is contributed. See the original author and article here.
One of the many challenges of deploying AI on edge is that IoT devices have limited compute and memory resources. So, it becomes extremely important that your model is accurate and compact enough to deliver real-time inference at the edge. Juggling between the accuracy of the model and the size is always a challenge when creating a model; smaller, shallower networks suffer from poor accuracy and deeper networks are not suitable for edge. Additionally, achieving state-of-the-art accuracy requires collecting and annotating large sets of training data and deep domain expertise, which can be cost-prohibitive for many enterprises looking to bring their AI solutions to market faster. NVIDIA’s catalog of pre-trained models and Transfer Learning Toolkit (TLT) can help you accelerate your model development. TLT is a core component of the NVIDIA TAO, an AI-model-adaptation platform. TLT provides a simplified training workflow geared for the non-experts to quickly get started building AI using pre-trained models and guided Jupyter notebooks. TLT offers several performance optimizations that make the model compact for high throughput and efficiency, accelerating your Computer Vision and Conversational AI applications.
Training is compute-intensive, requiring access to powerful GPUs to speed up the time to solution. Microsoft Azure Cloud offers several GPU optimized Virtual machines (VM) with access to NVIDIA A100, V100 and T4 GPUs.
In this blog post, we will walk you through the entire journey of training an AI model starting with provisioning a VM on Azure to training with NVIDIA TLT on Azure cloud.
Pre-trained models and TLT
Transfer Learning is a training technique where you leverage the learned features from one model to another. Start with a pretrained model that has been trained on representative datasets and fine-tuned with weights and biases. These models can be easily retrained with custom data in a fraction of the time it takes to train from scratch.
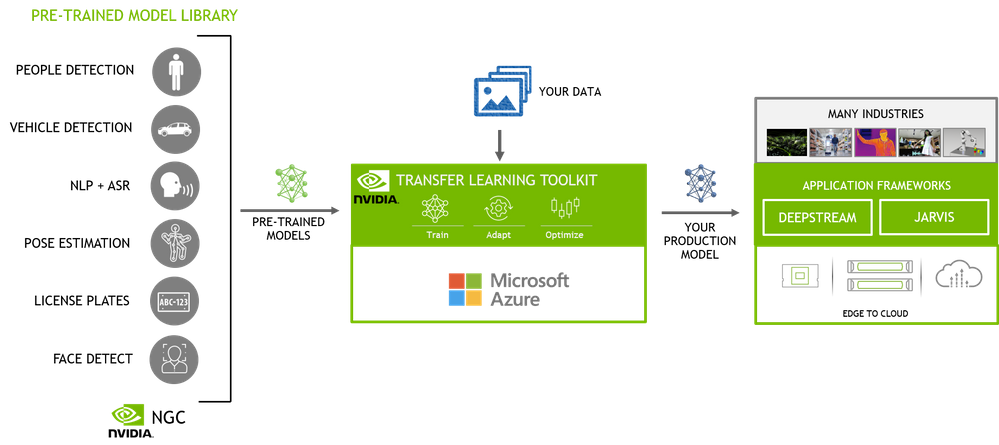
Figure 1 – End-to-end AI workflow
The NGC catalog, NVIDIA’s hub of GPU-optimized AI and HPC software contains a diverse collection of pre-trained models for computer vision and conversational AI use cases that span industries from manufacturing, to retail to healthcare and more. These models have been trained on images and large sets of text and speech data to provide you with a highly accurate model to start with. For example, People detection and segmentation and body pose estimation models can be used to extract occupancy insights in smart spaces such as retail, hospitals, factories, offices, etc. Vehicle and License plate detection and recognition models can be used for smart infrastructure. Automatic speech recognition (ASR) and Natural language processing (NLP) models can be used for smart speakers, video conferencing, automated chatbots and others. In addition to these highly specific use case models, you also have the flexibility to use the general purpose pre-trained models from popular open model architectures such as ResNet, EfficientNet, YOLO, UNET, and others. These can be used for general use cases in object detection, classification and segmentation.
Once you select your pre-trained model, you can fine-tune the model on your dataset using TLT. TLT is a low-code Jupyter notebook based workflow, allowing you to adapt an AI model in hours, rather than months. The guided Jupyter notebook and configurable spec files make it easy to get started.
Here are few key features of TLT to optimize inference performance:
- Model pruning removes nodes from neural networks while maintaining comparable accuracy, making the model compact and optimal for edge deployment without sacrificing accuracy.
- INT8 quantization enables the model to run inference at lower INT8 precision, which is significantly faster than running in floating point FP16 or FP32
Pruning and quantization can be achieved with a single command in the TLT workflow.
Setup an Azure VM
We start by first setting up an appropriate VM on Azure cloud. You can choose from the following VMs which are powered by NVIDIA GPUs – ND 100, NCv3 and NC T4_v3 series. For this blog, we will use the NCv3 series which comes with V100 GPUs. For the base image on the VM, we will use the NVIDIA provided GPU-optimized image from Azure marketplace. NVIDIA base image includes all the lower level dependencies which reduces the friction of installing drivers and other prerequisites. Here are the steps to setup Azure VM
Step 1 – Pull the GPU optimized image from Azure marketplace by clicking on the “Get it Now” button.
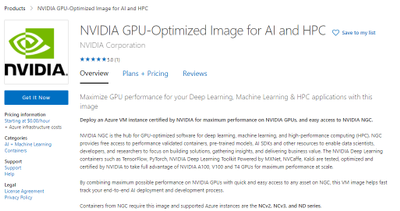
Figure 2 – GPU optimized image on Azure Marketplace
Select the v21.04.1 version under the Software plan to select the latest version. This will have the latest NVIDIA drivers and CUDA toolkit. Once you select the version, it will direct you to the Azure portal where you will create your VM.
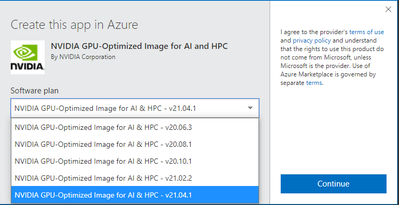
Figure 3 – Image version selection window
Step 2 – Configure your VM
In the Azure portal, click “Create” to start configuring the VM.
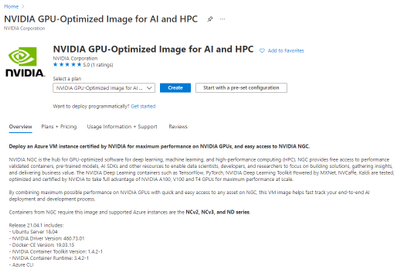
Figure 4 – Azure Portal
This will pull the following page where you can select your subscription method, resource group, region and Hardware configuration. Provide a name for your VM. Once you are done you can click on the “Review + Create” button at the end to do a final review.
Note: The default disk space is 32GB. It is recommended to use >128GB disk for this experiment
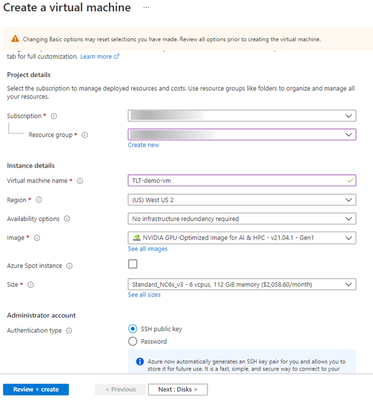
Figure 5 – Create VM window
Make the final review of the offering that you are creating. Once done, hit the “Create” button to spin up your VM in Azure.
Note: Once you create, you will start incurring cost, so please review the pricing details.
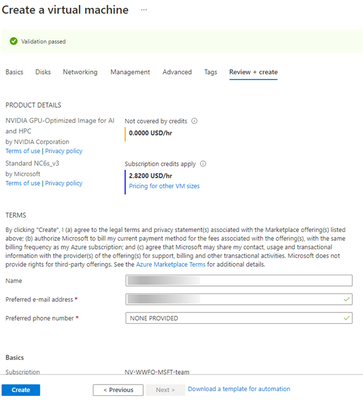
Figure 6 – VM review
Step 3 – SSH in to your VM
Once your VM is created, SSH into your VM using the username and domain name or IP address of your VM.
ssh <username>@<IP address>
Training 2D Body Pose with TLT
In this step, we will walk through the steps of training a high performance 2D body pose model with TLT. This is a fully convolutional model and consists of a backbone network, an initial prediction stage which does a pixel-wise prediction of confidence maps (heatmap) and part-affinity fields (PAF) followed by multistage refinement (0 to N stages) on the initial predictions. This model is further optimized by pruning and quantization. This allows us to run this in real-time on edge platforms like NVIDIA Jetson.
In this blog, we will focus on how to run this model with TLT on Azure but if you would like to learn more about the model architecture and how to optimize the model, check out the two part blog on Training/Optimization 2D body pose with TLT – Part 1 and Part 2. Additional information about this model can be found in the NGC Model card.
Step 1 – Setup TLT
For TLT, we require a Python Virtual environment. Setup the Python Virtual Environment. Run the commands below to set up the Virtual environment.
sudo su - root
usermod -a -G docker azureuser
apt-get -y install python3-pip unzip
pip3 install virtualenvwrapper
export VIRTUALENVWRAPPER_PYTHON=/usr/bin/python3
source /usr/local/bin/virtualenvwrapper.sh
mkvirtualenv launcher -p /usr/bin/python3
Install Jupyterlab and TLT Python package. TLT uses a Python launcher to launch training runs. The launcher will automatically pull the correct docker image from NGC and run training on it. Alternatively, you can also manually pull the docker container and run it directly inside the docker. For this blog, we will run it from the launcher.
pip3 install jupyterlab
pip3 install nvidia-pyindex
pip3 install nvidia-tlt
Check if TLT is installed properly. Run the command below. This will dump a list of AI tasks that are supported by TLT.
tlt info --verbose

Configuration of the TLT Instance

dockers:
         nvcr.io/nvidia/tlt-streamanalytics:
               docker_tag: v3.0-py3
               tasks:
1. augment
2. classification
3. detectnet_v2
4. dssd
5. emotionnet
6. faster_rcnn
7. fpenet
8. gazenet
9. gesturenet
10. heartratenet
11. lprnet
12. mask_rcnn
13. retinanet
14. ssd
15. unet
16. yolo_v3
17. yolo_v4
18. tlt-converter

          nvcr.io/nvidia/tlt-pytorch:
          docker_tag: v3.0-py3

tasks:

1. speech_to_text
2. text_classification
3. question_answering
4. token_classification
5. intent_slot_classification
6. punctuation_and_capitalization
format_version: 1.0

tlt_version: 3.0

published_date: mm/dd/yyyy
Login to NGC and download Jupyter notebooks from NGC
docker login nvcr.io

cd /mnt/
sudo chown azureuser:azureuser /mnt/

wget --content-disposition https://api.ngc.nvidia.com/v2/resources/nvidia/tlt_cv_samples/versions/v1.1.0/zip -O tlt_cv_samples_v1.1.0.zip

unzip -u tlt_cv_samples_v1.1.0.zip  -d ./tlt_cv_samples_v1.1.0 && cd ./tlt_cv_samples_v1.1.0
Start your Jupyter notebook and open it in your browser.
jupyter notebook --ip 0.0.0.0 --port 8888 --allow-root
Step 2 – Open Jupyter notebook and spec file
In the browser, you will see all the CV models that are supported by TLT. For this experiment we will train a 2D body pose model. Click on the “bpnet” model in the Jupyter notebook. In this directory, you will also find Jupyter notebooks for popular networks like YOLOV3/V4, FasterRCNN, SSD, UNET and more. You can follow the same steps to train any other models.
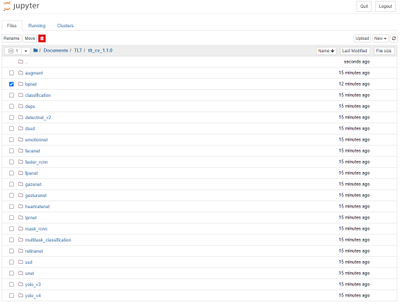
Figure 7 – Model selection from Jupyter
Once you are inside, you will find a few config files and specs directory. Spec directory has all the ‘spec’ files to configure training and evaluation parameters. To learn more about all the parameters, refer to the 2D body pose documentation.

Figure 8 – Body Pose estimation training directory
Step 3 – Step thru the guided notebook
Open ‘bpnet.ipynb’ and step through the notebook. In the notebook, you will find learning objectives and all the steps to download the dataset and pre-trained model and run training and optimizing the model. For this exercise, we will use the open source COCO dataset but you are welcome to use your custom body pose dataset. Section 3.2 in the notebook talks about using a custom dataset.
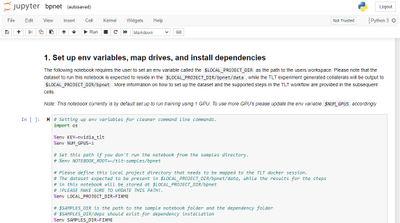
Figure 9 – Jupyter notebook for training
In this blog, we demonstrated a body pose estimation use case with TLT but you can follow the steps to train any Computer Vision or conversational AI model with TLT. NVIDIA pre-trained models, Transfer Learning Toolkit and GPUs in the Azure cloud simplify the journey and reduce the barrier to starting with AI. The availability of GPUs in Microsoft Azure Cloud allows you to quickly start training without investing in your own hardware infrastructure, allowing you to scale the computing resources based on demand.
By leveraging the pre-trained models and TLT, you can easily and quickly adapt models for your use-cases and develop high-performance models that can be deployed at the edge for real-time inference.
Get started today with NVIDIA TAO TLT on Azure Cloud.
Resources:
- TLT Product page
- CV model collection
- Conversational AI model collection
- TLT documentation
- VM in Azure documentation
- Azure VM
- 2D body pose model card
- 2D body pose training/optimization blog part 1 | part 2
Brought to you by Dr. Ware, Microsoft Office 365 Silver Partner, Charleston SC.


Recent Comments