by Scott Muniz | Apr 14, 2022 | Security, Technology
This article is contributed. See the original author and article here.
Cisco has released security updates to address vulnerabilities in multiple Cisco products. An attacker could exploit some of these vulnerabilities to take control of an affected system.
CISA encourages users and administrators to review the Cisco Security Advisories page and apply the necessary updates.
by Contributed | Apr 13, 2022 | Technology
This article is contributed. See the original author and article here.
We want to inform you about a change that we are working on. This change will be rolled out in a phased manner starting in the later part of April 2022.
The Name parameter associated with a user within a tenant should be unique. However, while we sync objects from Azure Active Directory to Exchange Online, the way Name parameter is being evaluated currently led to periodic conflicts. We realized that the current method is not the best method to compute this parameter. Hence, we want to move away from current method to a more robust way of generating the Name parameter which is through ExternalDirectoryObjectId (EDOID).
EDOID value is unique. We’ll use this GUID as Name instead of synchronizing the Name from on-premises or using the alias (if Name is not specified). With this change the DistinguishedName (DN) value will also get impacted. To better understand how this will impact objects in a tenant where directory synchronization is enabled, consider the following example:
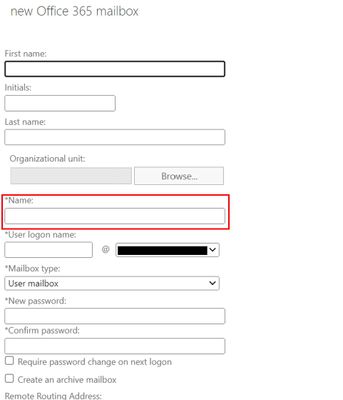
With this new change, when creating a new Office 365 (remote) mailbox from on-premises Exchange Admin Center, the Name field will no longer synchronize to Exchange Online.
Before changes are implemented:
DisplayName: Jeff Smith
Name: Jeff Smith
Alias: jsmith
DistinguishedName: CN= Jeff Smith,OU=(tenant).onmicrosoft.com, OU=Microsoft Exchange Hosted Organizations, DC=NAMP283A001, DC=PROD,DC=OUTLOOK, DC=COM
ExternalDirectoryObjectId: 12313c53-fff7-46d4-8b83-71fb317d1853
After changes are implemented:
DisplayName: Jeff Smith
Name: 12313c53-fff7-46d4-8b83-71fb317d1853
Alias: jsmith
DistinguishedName: CN= 12313c53-fff7-46d4-8b83-71fb317d1853, OU=(tenant).onmicrosoft.com, OU=Microsoft Exchange Hosted Organizations, DC=NAMP283A001, DC=PROD, DC=OUTLOOK, DC=COM
In this example, both the Name and DistinguishedName are updated with the EDOID value.
Note: This would also mean that any subsequent CN value change in Exchange on-premises will not be reflected in the object’s Name property in Exchange Online.
Will this change not allow modification of the Name property?
Customers can still use Exchange PowerShell cmdlets (Set-User, Set-MailUser, Set-Mailbox with -Name parameter) to update the Name property in Exchange Online. Since the cmdlets ensure uniqueness, it would allow the operation to succeed only when the passed Name is unique in the tenant.
How will the change impact new and existing users?
The updated naming logic would take effect only during new user creation. Existing users won’t get impacted in any way.
Please note that since we will start using EDOID as Name in Exchange Online, we shall stop allowing changes in CN to reflect in Name property in Exchange Online for all users (both new and existing).
We recommend that Administrators evaluate any scripts or other automation that may rely on the Name property and update them accordingly.
Exchange Online Team
by Scott Muniz | Apr 13, 2022 | Security, Technology
This article is contributed. See the original author and article here.
CISA has added 10 new vulnerabilities to its Known Exploited Vulnerabilities Catalog, based on evidence of active exploitation. These types of vulnerabilities are a frequent attack vector for malicious cyber actors and pose significant risk to the federal enterprise. Note: to view the newly added vulnerabilities in the catalog, click on the arrow on the of the “Date Added to Catalog” column, which will sort by descending dates.
Binding Operational Directive (BOD) 22-01: Reducing the Significant Risk of Known Exploited Vulnerabilities established the Known Exploited Vulnerabilities Catalog as a living list of known CVEs that carry significant risk to the federal enterprise. BOD 22-01 requires FCEB agencies to remediate identified vulnerabilities by the due date to protect FCEB networks against active threats. See the BOD 22-01 Fact Sheet for more information.
Although BOD 22-01 only applies to FCEB agencies, CISA strongly urges all organizations to reduce their exposure to cyberattacks by prioritizing timely remediation of Catalog vulnerabilities as part of their vulnerability management practice. CISA will continue to add vulnerabilities to the Catalog that meet the meet the specified criteria.
by Contributed | Apr 12, 2022 | Technology
This article is contributed. See the original author and article here.
Windows Holographic, version 22H1 is now available! In this article we’ll go over some of the highlights of this release and some recent months. If you’re interested in full details check out our official release notes.
Features continually evolve in Windows Holographic based on your feedback. We packed this new update with features for both end-users and IT admins with the goal of making the day-to-day usage of your HoloLens 2 more intuitive and customizable.
To get the 22H1 build now, go to -> Settings -> Update & Security -> Windows Update Select Check for updates. IT Admins can use Windows Update for Business (WUfB) and MDM policy to update their fleet of HoloLens. Note that you must upgrade to Windows Holographic, version 21H1 Update before you can upgrade to Windows Holographic, version 22H1.
Feature Highlights:
We have made some great improvements for our last flagship feature, Moving Platform Mode. Moving out of the beta phase, there’s new improved methods for enabling Moving Platform Mode and new settings you can configure while using it such as setting the down direction to be a different direction than gravity. Here’s 3 new ways to enable Moving Platform Mode which is different depending on how or when you want it enabled.
Start gestures settings – These are a new solution for those who want to keep the Start menu from appearing while doing tasks that involve looking downwards and actively using their hands. There are several options you can use or combine, such as requiring the user to look at their wrist or holding the icon for two seconds.
Power and Thermal SDK for apps – Try out this hot new feature for when it gets hotter in temperature. If you are in a warm environment or are pushing your app to the limits, and you’ve built your own app, then you can include this SDK to include notification events and have custom actions. These can help keep your app running longer.
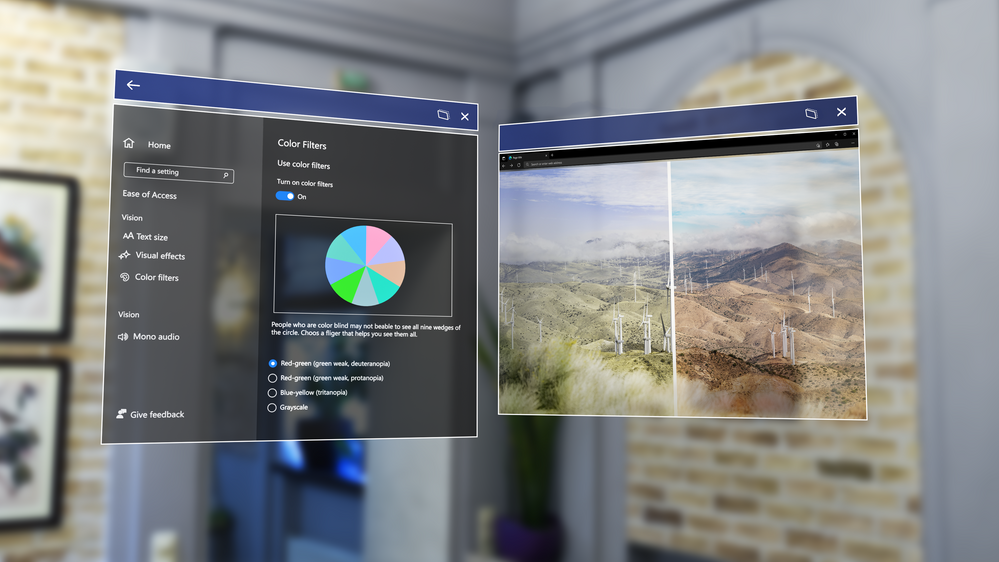
Color-blind mode – Color-blind mode is a feature that makes HoloLens more accessible using new color filters that can help make things easier to view. Try it, you might be surprised at the difference it makes.
Single app kiosk policy for launching other apps – A new Mixed Reality policy, that allows you to launch specific apps from a Single App Kiosk app. This is useful if you want to use a specific app, but might need access to Settings to change Wi-fi, or Edge to perform a sign in.
As always, you can follow our IT admin update checklist to prepare for when you update your fleet of HoloLens 2 devices to the latest update.
by Scott Muniz | Apr 11, 2022 | Security, Technology
This article is contributed. See the original author and article here.
CISA has added eight new vulnerabilities to its Known Exploited Vulnerabilities Catalog, based on evidence of active exploitation. These types of vulnerabilities are a frequent attack vector for malicious cyber actors and pose significant risk to the federal enterprise. Note: to view the newly added vulnerabilities in the catalog, click on the arrow on the of the “Date Added to Catalog” column, which will sort by descending dates.
Binding Operational Directive (BOD) 22-01: Reducing the Significant Risk of Known Exploited Vulnerabilities established the Known Exploited Vulnerabilities Catalog as a living list of known CVEs that carry significant risk to the federal enterprise. BOD 22-01 requires FCEB agencies to remediate identified vulnerabilities by the due date to protect FCEB networks against active threats. See the BOD 22-01 Fact Sheet for more information.
Although BOD 22-01 only applies to FCEB agencies, CISA strongly urges all organizations to reduce their exposure to cyberattacks by prioritizing timely remediation of Catalog vulnerabilities as part of their vulnerability management practice. CISA will continue to add vulnerabilities to the Catalog that meet the meet the specified criteria.

Recent Comments