This article is contributed. See the original author and article here.
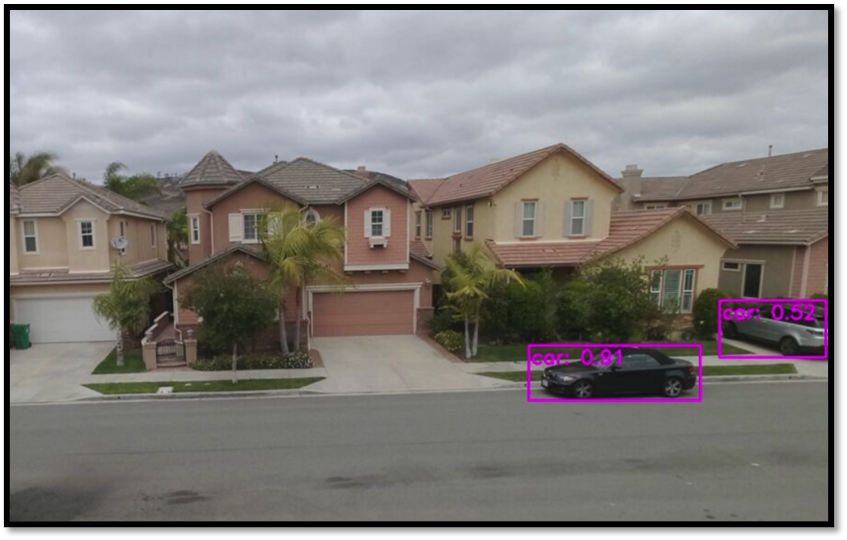
Through my bedroom window, I can see the street in a typical suburban residential neighborhood. It is a relatively quiet street with mostly cars passing by occasionally, but due to increase in package deliveries, there have been more trucks and delivery folks seen on the street recently.
I want to put a camera on my bedroom window overlooking the street below and build a package delivery monitoring AI application that will detect when a person or a truck is seen by the camera. I want the package delivery monitoring AI application to show me these event detections in a video analytics dashboard that is updated in real-time. I also want to be able to view a short video clip of the detected event.
Here are some details about the project using an Azure Percept DevKit.
You can adapt the project and choose other object classes to build your own AI application for your environment and scenario.
Here’s what you will need to get started
Subscription and Hardware
- Azure subscription (with full access to Azure services)
- Azure Percept DK (Edge Vision/AI device with Azure IoT Edge)
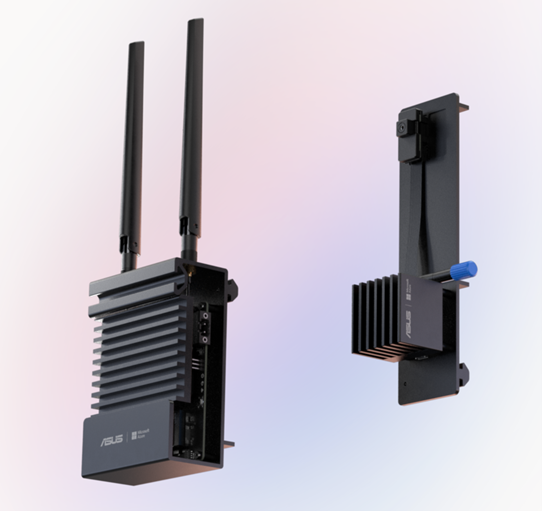
Azure Percept ($349 in Microsoft store)
https://www.microsoft.com/en-us/store/build/azure-percept/8v2qxmzbz9vc
Host: NXP iMX8m processor
Vision AI: Intel Movidius Myriad X (MA2085) vision processing unit (VPU)
- Inseego 5G MiFi ® M2000 mobile hotspot (fast and reliable cloud connection for uploading videos)
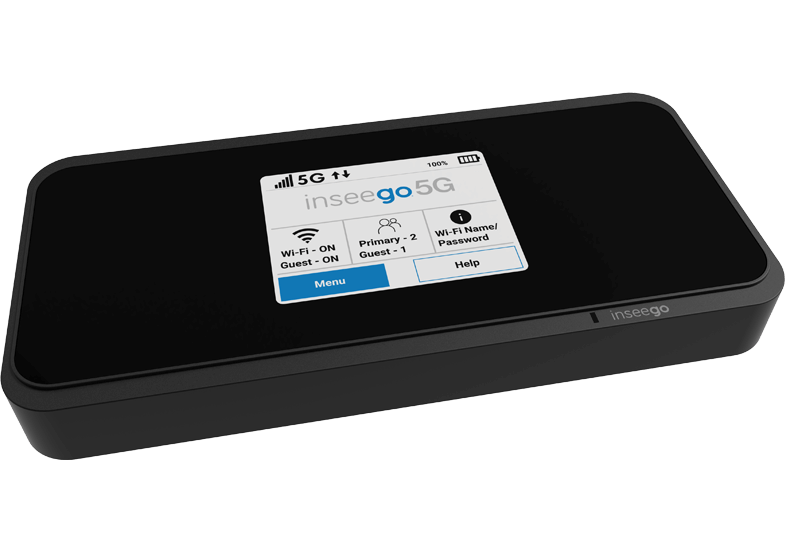
Radio: Qualcomm ® Snapdragon ™ X55 modem
Carrier/plan: T-Mobile 5G Magenta plan
https://www.t-mobile.com/tablet/inseego-5g-mifi-m2000
Key Azure Services/Technologies used
- Azure IoT edge (edgeAgent, edgeHub docker containers)
- Azure Live Video Analytics (LVA) on the edge
- Azure IoT Central LVA Edge Gateway
- Azure IoT Hub
- Azure IoT Central
- Azure Media Services (AMS)
- ACR
4. Overall setup and description
Step 1: Unbox and setup the Azure Percept
This step should take about 5-10 minutes if all goes well. Follow the setup instructions here https://docs.microsoft.com/en-us/azure/azure-percept/quickstart-percept-dk-set-up
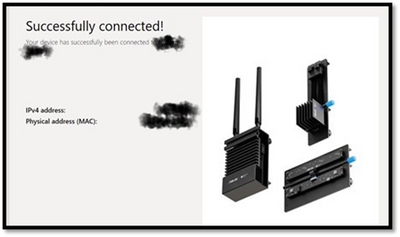
Here are some screenshots that I captured as I went through my Azure Percept device setup process.
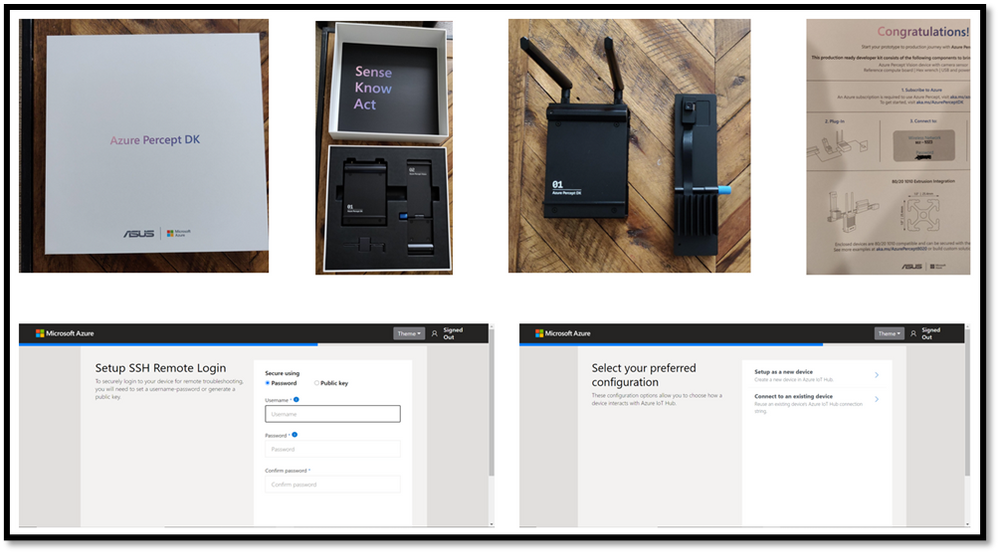
Key points to remember during the device setup are to make sure you note down the IP address of the Azure Percept and setup your ssh username and password so you can ssh into the Azure Percept from your host machine. During the setup, you can create a new Azure IoT hub on the cloud or you can use an existing Azure IoT hub that you may already have in your Azure subscription.
Step 2: Ensure good cloud connectivity (uplink/downlink speed for videos)
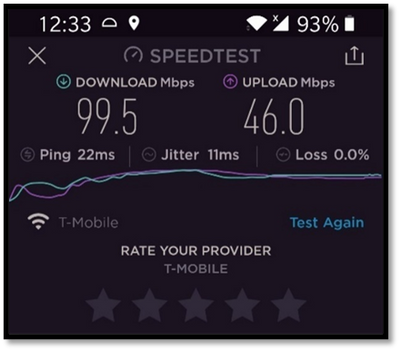
For the package delivery monitoring AI application I am building, the Azure percept will be connecting to the cloud to upload several video clips depending on the number of detected events. Ensure that the video uplink speeds are very good. Here is a screenshot of the speed test for the Inseego 5G MiFi ® M2000 mobile hotspot from T-Mobile that I am using for my setup.
Step 3: Build an Azure IoT Central application
Now that the Azure Percept is fully setup and connected to the cloud, we will create a new Azure IoT Central app. Visit https://apps.azureiotcentral.com/ to start building a new Azure IoT Central application. Navigate to retail and then select the Video analytics – object and motion detection application template and create your application. When you are finished creating the application, navigate to the Administration section of the app (in the left menu) to:
- API Tokens menu item -> Generate a new API token and make a note of it (this will begin with SharedAccessSignature sr=)
- Your application menu item -> Note the App URL and APP ID
- Device connection menu item -> Select SAS-IoT-Devices and make a note of the Scope ID and Primary key for the device
The above information will be needed in later steps to configure the Azure Percept so that Azure Percept can securely talk to our newly created IoT central app.
Step 4: Download a baseline reference app from github
Download a reference app from github that we will use as a baseline for building our own package delivery monitoring AI application on Azure Percept. On your host machine, clone the following repo
git clone https://github.com/Azure/live-video-analytics.git
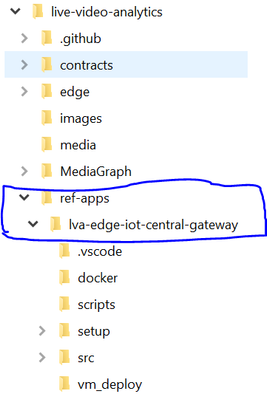
and then navigate to the ref-appslva-edge-iot-central-gateway folder. We will be modifying a few files in this folder.
Step 5: Porting reference app to Azure Percept
The downloaded reference app is a generic LVA application and was not purpose-built for Azure Percept ARM-64 device. Hence, we need to make a few changes, such as building docker containers for ARM-64, updating the AMS graph topology file and updating deployment manifest before we can run the reference application on the Azure Percept which is an ARM-64 device running Mariner OS (based upon the Fedora Linux distribution
5A. Update objectGraphInstance.json
First, navigate to setup/mediaGraphs/objectGraphInstance.json file and update the rtspUrl and inferencingUrl as follows:
"parameters": [
   {
      "name": "rtspUrl",
      "value": "rtsp://AzurePerceptModule:8554/h264"
   },
   {
      "name": "inferencingUrl",
      "value": "http://yolov3tiny/score"
   }
This will allow the AzurePerceptModule to send the RTSP stream from the Azure Percept’s camera to the http extension module in the Azure media graph running on Azure Percept (via the LVA Edge Gateway docker container). We will also be building a yolov3tiny object detection docker container that will provide the inference when the http extension node in the media graph calls the inferencing URL http://yolov3tiny/score
You can learn more about Azure Media Graphs here:
https://docs.microsoft.com/en-us/azure/media-services/live-video-analytics-edge/media-graph-concept
5B. Update state.json
Navigate to setup/state.json file and update the appKeys section with the IoT Central app information you noted down from Step 3.
"appKeys": {
   "iotCentralAppHost": "<IOT_CENTRAL_HOST>",
   "iotCentralAppApiToken": "<IOT_CENTRAL_API_ACCESS_TOKEN>",
   "iotCentralDeviceProvisioningKey": "<IOT_CENTRAL_DEVICE_PROVISIONING_KEY>",
   "iotCentralScopeId": "<SCOPE_ID>"
5C. Update arm64v8.dockerfile
Navigate to dockerarm64v8.dockerfile and add the following line:
ADD ./setup/state.json /data/storage/state.json
This will allow the LVA Edge Gateway container running on Azure Percept to connect directly and securely to IoT Central app
5D. Build LVA Edge Gateway docker container for the Azure Percept
Use the following commands to build the LVA Edge Gateway docker container for ARM64v8 and push it to your Azure Container Registry
docker build -f docker/arm64v8.Dockerfile –no-cache . -t lvaedgegateway:2.0-arm64v8
docker login -u <your_acr_name>  -p <your_acr_password> <your_acr_name>.azurecr.io
docker push <your_acr_name>.azurecr.io/lvaedgegateway:2.0-arm64v8
5E. Build YOLOv3 tiny docker container for the Azure Percept
Navigate to live-video-analyticsutilitiesvideo-analysisyolov3-onnx folder and use the following commands to build the Yolov3tiny docker container for ARM64v8 and push it to your Azure Container Registry
docker build -f yolov3-tiny.dockerfile . –no-cache -t lvaextension:http-yolov3-tiny-onnx-v1.0
docker login -u <your_acr_name>  -p <your_acr_password> <your_acr_name>.azurecr.io
docker push <your_acr_name>.azurecr.io/lvaextension:http-yolov3-tiny-onnx-v1.0
5F. Update deployment manifest with Yolov3tiny and AzurePerceptModule and update AMS account name and the LVAEdge section
Navigate to setup/deploymentManifests/deployment.arm64v8.json to add Yolov3tiny and AzurePerceptModule and update the AMS account name and the LVAEdge section as follows:
Note that the App id, App secret and tenant id in the LVA Edge section should come from your AMS account and not IoT Central.
"yolov3tiny": {
   "version": "1.0",
   "type": "docker",
   "status": "running",
   "restartPolicy": "always",
   "settings": {
      "image": "<your_acr_name>.azurecr.io/lvaextension:http-yolov3-tiny-onnx-v1.0",
      "createOptions": "{"HostConfig":{"Privileged":true,"PortBindings":{"80/tcp":[{"HostPort":"8080"}]}}}"
   }
},
"AzurePerceptModule": {
   "version": "1.0",
   "type": "docker",
   "status": "running",
   "restartPolicy": "always",
   "settings": {
      "image": "unifiededgescenarios.azurecr.io/azureeyemodule:0.0.2-arm64v8",
      "createOptions": "{"Cmd":["/bin/bash","-c","./app/inference -s=720p"],"ExposedPorts":{"8554/tcp":{}},"Name":"/rtspserver","HostConfig":{"Binds":["/dev/bus/usb:/dev/bus/usb"],"Privileged":true,"PortBindings":{"8554/tcp":[{"HostPort":"8554"}]}}}"
   }
},
"LvaEdgeGatewayModule": {
   "settings": {
      "image": "<your_acr_name>.azurecr.io/lvaedgegateway:2.6-arm64v8",
      "createOptions": "{"HostConfig":{"PortBindings":{"9070/tcp":[{"HostPort":"9070"}]},"Binds":["/data/storage:/data/storage","/data/media:/data/media/"]}}"
   },
   "type": "docker",
   "env": {
      "lvaEdgeModuleId": {
      "value": "lvaEdge"
   },
   "amsAccountName": {
      "value": "<your_ams_account_name>"
   },
   "lvaEdge": {
   "properties.desired": {
      "applicationDataDirectory": "/var/lib/azuremediaservices",
      "azureMediaServicesArmId": "/subscriptions/<your_Azure_sub_id>/resourceGroups/<your_resource_group_name>/providers/microsoft.media/mediaservices/<your_ams_account_name",
      "aadEndpoint": "https://login.microsoftonline.com",
      "aadTenantId": "<your_tenant_id>",
      "aadServicePrincipalAppId": "<your_APP_ID>",
      "aadServicePrincipalSecret": "<your_app_secret>”
      "aadResourceId": "https://management.core.windows.net/",
      "armEndpoint": "https://management.azure.com/"
   }
}
Step 6: Create device template in IoT central and upload deployment manifest
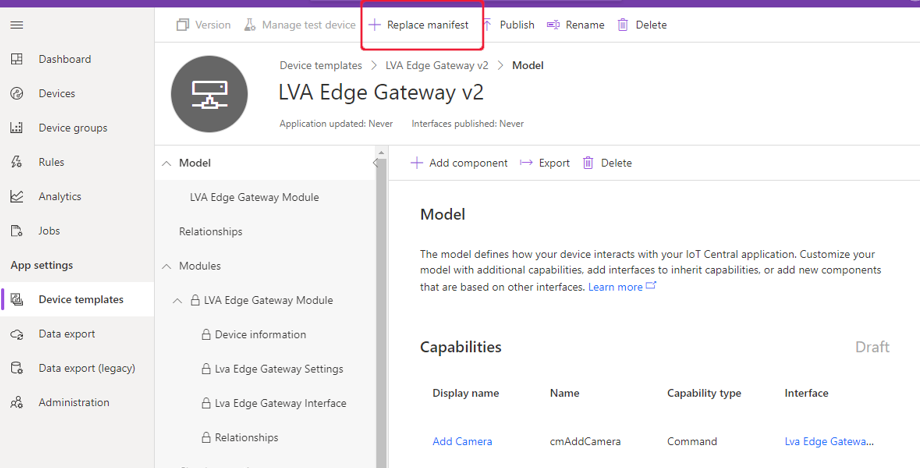
In your IoT Central application, navigate to Device Templates, and select the LVA Edge Gateway device template. Select Version to create a new template called LVA Edge Gateway v2 and then select Create. Click on “replace manifest” and upload the deployment manifest file setup/deploymentManifests/deployment.arm64v8.json that we updated in the previous step. Finally, publish the device template.
Step 7: Create new IoT device using the device template
Navigate to the devices page on the IoT Central app and create a new IoT edge gateway device using the LVA Edge Gateway template we just created in the previous step.
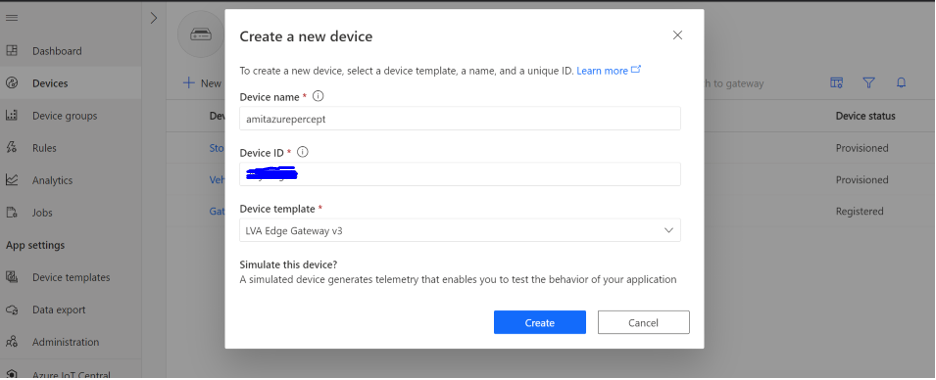
To obtain the device credentials, on the Devices page, select your device. Select Connect. On the Device connection page, make a note of the ID Scope, the Device ID, and the device Primary Key. You will use these values later for provisioning the Azure Percept (Note: make sure the connection method is set to Shared access signature).
Step 8: Provision the Azure Percept
SSH into Azure Percept and update the provisioning script.
sudo yum install nano
sudo nano /etc/iotedge/config.yaml
Add the following section to config.yaml
# DPS symmetric key provisioning configuration provisioning:
  source: "dps"
  global_endpoint: "https://global.azure-devices-provisioning.net"
  scope_id: "{scope_id}"
  attestation:
    method: "symmetric_key"
    registration_id: "{registration_id}"
    symmetric_key: "{symmetric_key}"
Update scope_id, registration_id (this is the device id) and symmetric_key with the IoT Central app information you noted down in the previous step.
Finally, reboot the Azure Percept and then ssh into it to make sure the following six docker containers are running:

Step 9: Add camera, manage camera settings and start LVA processing
Now that we have created the IoT edge gateway device, we need to add camera as a downstream device. In IoT central, go to your device page and select “Commands” and add camera by providing a camera name, camera id and the RTSP URL and select Run.
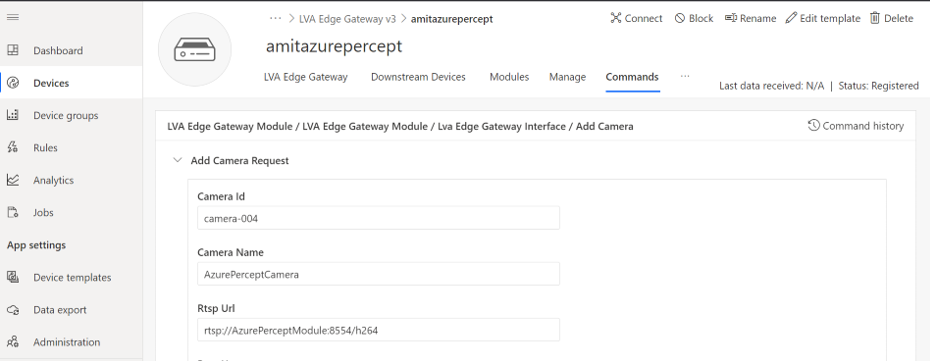
On your Azure Percept, you can confirm that the LVA Edge Gateway module received the request to add camera by checking the docker logs:
sudo docker logs -f LvaEdgeGatewayModule
Navigate to the newly created camera device and select the “manage” tab to modify the camera settings as shown below:
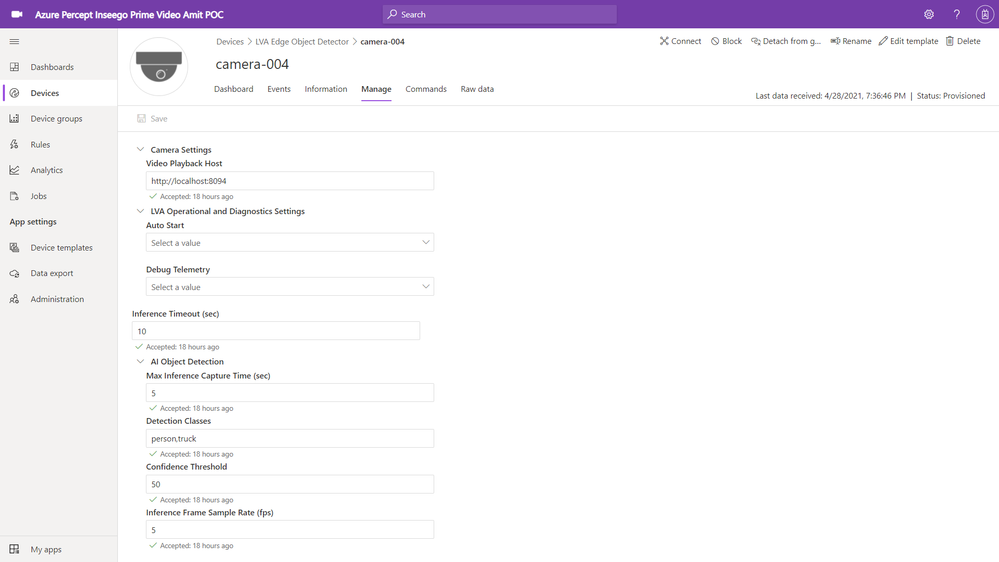
You can see that I have added “person” and “truck” as detection classes with a minimum confidence threshold of 50%. You can select your own object classes here (object class can be any of the 91 object classes that are supported by the COCO dataset on which our YOLOv3 model was trained).
Finally, navigate to the commands tab of the camera page and click on Run to Start LVA Processing.
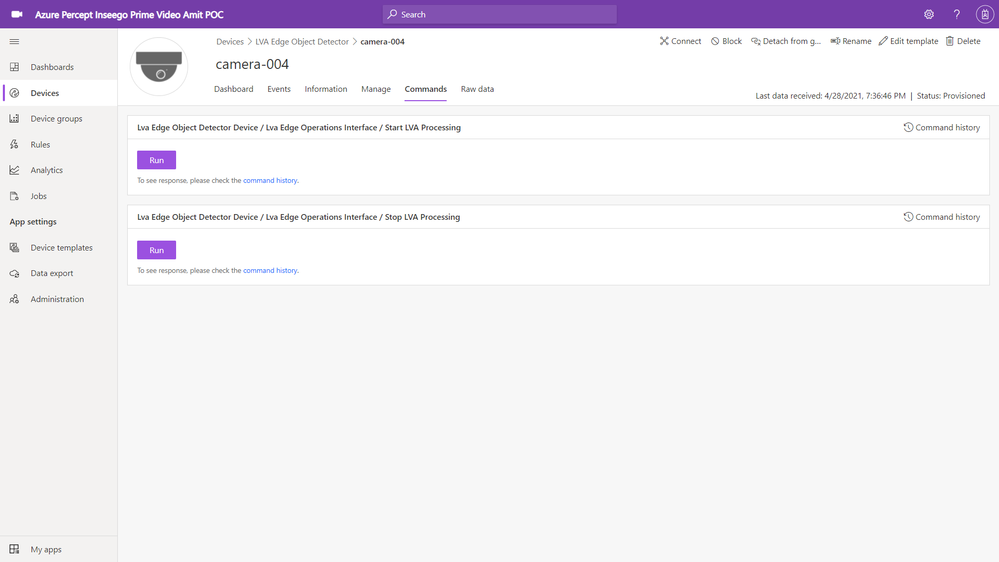
This will start the AMS graph instance on the Azure Percept. Azure Percept will now start sending AI inference events (in our case a person or a truck detection event) to IoT central (via IoT hub message sink) and the video clips (capturing the person or truck event detections) to your AMS account (AMS sink).
Step 10: View charts and event videos on the camera device dashboard
Navigate to the camera device and select the dashboard tab. Whenever the camera sees a truck or a person, the YOLOv3 detection model will send the corresponding AI inference events with the detection class and confidence % to IoT central. The charts on the IoT Central dashboard will update in real-time to reflect these detections.
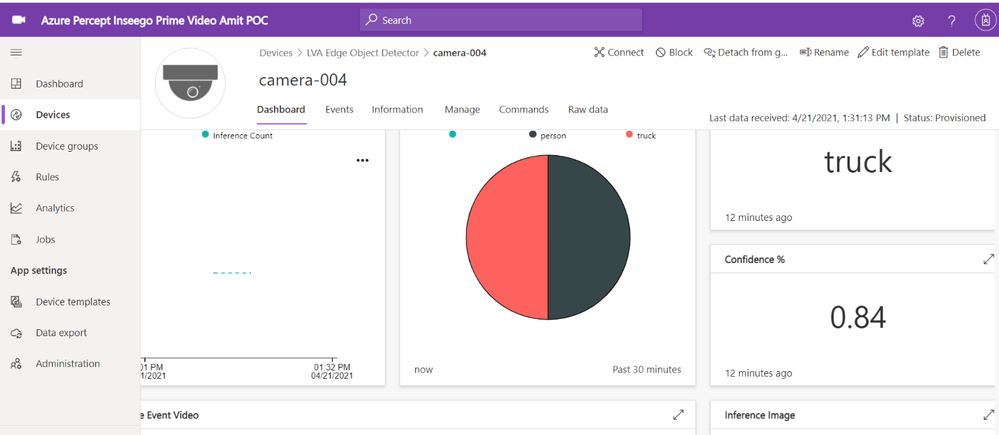
If you scroll further down on the dashboard, you will see a tile that shows event detections and links to corresponding AMS video streaming URL
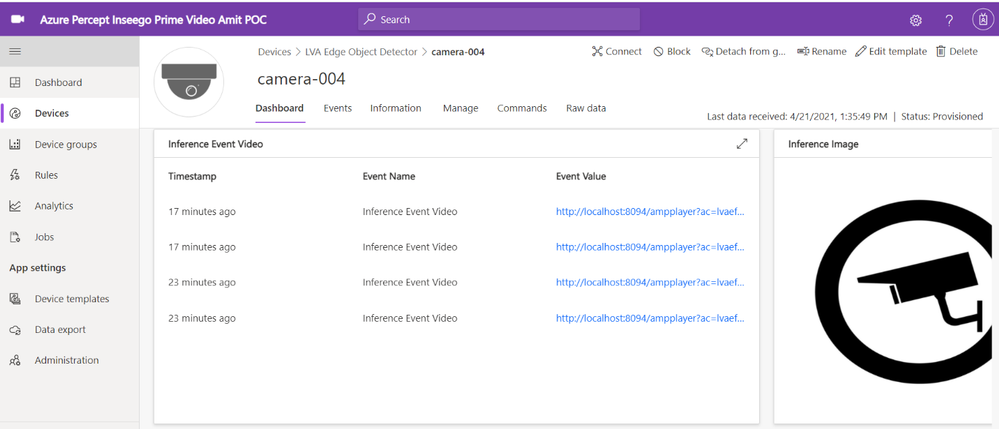
The IoT Central application stores the video in Azure Media Services from where you can stream it. You need a video player to play the video stored in Azure Media Services.
On your host machine, run the amp-viewer docker container that has the AMS video player.
docker run -it --rm -e amsAadClientId="<FROM_AZURE_PORTAL>" -e amsAadSecret="<FROM_AZURE_PORTAL>" -e amsAadTenantId="<FROM_AZURE_PORTAL>" -e amsArmAadAudience="https://management.core.windows.net" -e amsArmEndpoint="https://management.azure.com" -e amsAadEndpoint="https://login.microsoftonline.com" -e amsSubscriptionId="<FROM_AZURE_PORTAL>" -e amsResourceGroup="<FROM_AZURE_PORTAL>" -e amsAccountName="<FROM_AZURE_PORTAL>" -p 8094:8094 mcr.microsoft.com/lva-utilities/amp-viewer:1.0-amd64
Once the AMP viewer docker container is running on your host machine, clicking on any of the streaming video URLs will bring up a short clip of the video that was captured for the corresponding event.
Here are a couple of video clips that were captured by my Azure Percept and sent to AMS when it detected a person or a truck in the scene. The first video shows that the Azure Percept detected me as a person and the second video shows that the Azure Percept detected a FedEx truck as it zipped past the scene. In just a few hours after unboxing the Azure Percept, I was able to set up a quick Proof of Concept of a package delivery monitoring AI application using Azure services and my Inseego 5G MiFi ® M2000 mobile hotspot!
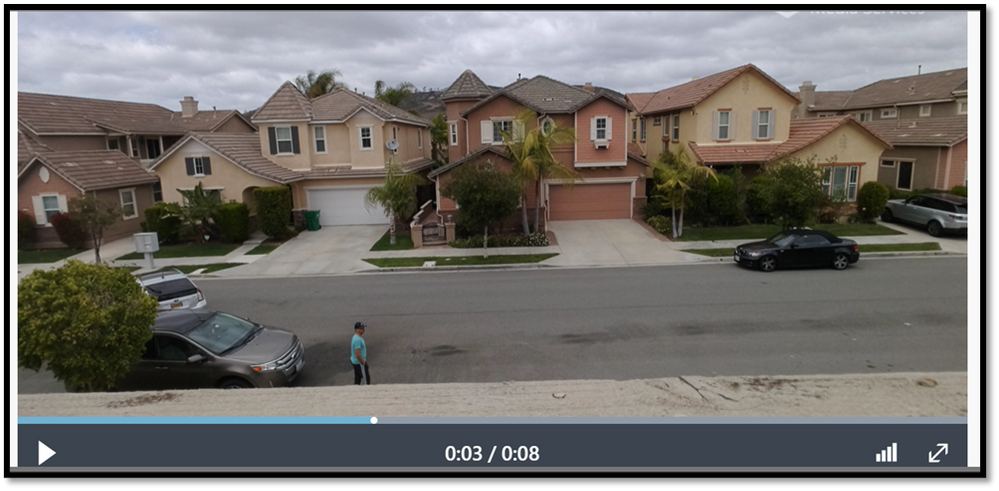
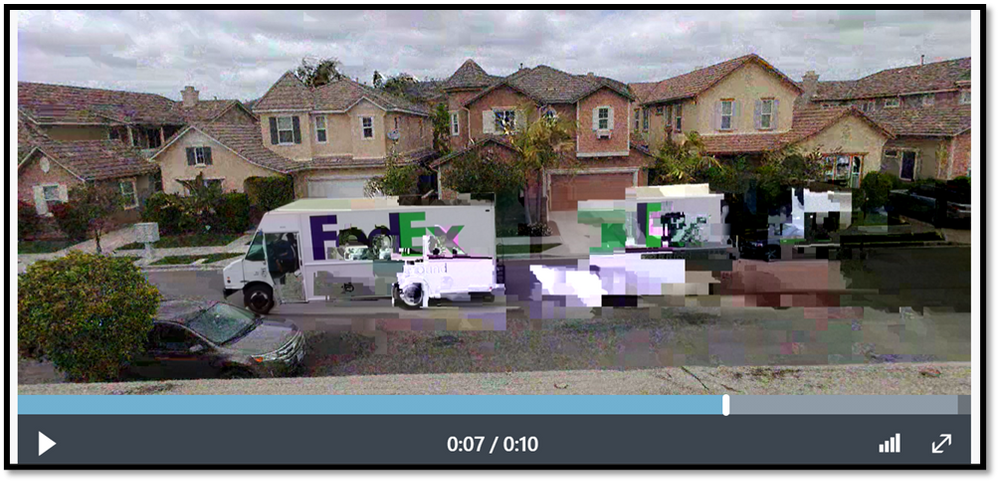
Note: The views and opinions expressed in this article are those of the author and do not necessarily reflect an official position of Inseego Corp.
Brought to you by Dr. Ware, Microsoft Office 365 Silver Partner, Charleston SC.


Recent Comments