This article is contributed. See the original author and article here.
Pre-requirement:
- Prepare an Azure Cloud Service: https://docs.microsoft.com/en-us/azure/cloud-services/cloud-services-dotnet-get-started#create-an-azure-cloud-service
- Prepare two custom domain names: https://docs.microsoft.com/en-us/azure/cloud-services/cloud-services-custom-domain-name-portal
- Prepare two certificates for these two custom domain names: https://docs.microsoft.com/en-us/azure/cloud-services/cloud-services-certs-create
- Configure the Cloud Service with SSL: https://docs.microsoft.com/en-us/azure/cloud-services/cloud-services-configure-ssl-certificate-portal#step-1-get-a-tlsssl-certificate
Now, have two domain names: www.haileyding.site, and www.dinghan.site
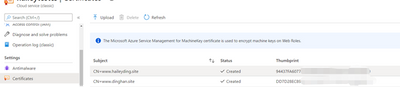
Also, two certificates uploaded to my Cloud Service:

Steps:
The main changes happen on the .csdef file, .cscofg file, and also the OnStart method in the WebRole.cs.
- Add the two domain name in the definition file, named with ‘ServiceDefinition.csdef’.
Refer to this document about how to modify the service definition and configuration files.

- Add my two certificates into the configuration file, named with ‘ServiceConfiguration.Cloud.cscfg’

- Since we cannot assign the same local port to multiple endpoints, so we need to override the OnStart method of the RoleEntryPoint class to overcome this issue.
Please be noticed that the executionContext must be set to elevated, otherwise it is not possible for the OnStart method to edit the bindings.
Navigate to the WebRole1 -> WebRole.cs, in this file, we can configure our OnStart method as below:

namespace WebRole1
{
public class WebRole : RoleEntryPoint
{
public override bool OnStart()
{
using (var serverManager = new ServerManager())
{
foreach (var site in serverManager.Sites.ToArray())
{
foreach (var binding in site.Bindings.ToList())
{
if (binding.Protocol == “https”)
{
var newbinding = site.Bindings.CreateElement(“binding”);
newbinding.SetAttributeValue(“sslFlags“, 1);
newbinding.BindingInformation = binding.BindingInformation.Replace(“:444:”, “:443:”);
newbinding.CertificateHash = binding.CertificateHash;
newbinding.CertificateStoreName = binding.CertificateStoreName;
newbinding.Protocol = “https”;
site.Bindings.Remove(binding);
site.Bindings.Add(newbinding);
}
}
}
serverManager.CommitChanges();
}
RoleEnvironment.Changing += RoleEnvironmentChanging;
return base.OnStart();
}
private void RoleEnvironmentChanging(object sender, RoleEnvironmentChangingEventArgs e)
{
e.Cancel = true;
}
}
}
- Deploy the changes to my Cloud Service, then verify my custom domain name with HTTPS


Reference: https://raflrx.wordpress.com/2017/08/08/enable-sni-on-a-windows-azure-cloud-service/
Brought to you by Dr. Ware, Microsoft Office 365 Silver Partner, Charleston SC.

Recent Comments