This article is contributed. See the original author and article here.
I was asked to make up a short demo video about creating a custom image for deployment in Microsoft Azure the other week to support some new content going into Microsoft Learn. Since this involves making an on-prem virtual machine first and then preparing it to upload into Azure – I figured I would make a new Windows Server 2019 CORE image (default deployment option) instead of a full desktop. I always found it strange you didn’t have an option to deploy a Core server deployment of Windows Server from Azure Marketplace.
Time to fix that.
Why Windows Server Core? Windows Server Core implementations are:
- Smaller in disk footprint, so potentially cheaper to run in an Azure VM
- Smaller in attack surface, since fewer binaries and fewer services running inside the VM
- Less demand on resources to run workloads, so potentially cheaper to run in an Azure VM
- More “remote friendly” then earlier implementations with management tools, remote PowerShell, remote RDP
- Runs most workloads you might want to run on-prem or in Azure.
I thought this was going to be a simple process that was documented in a single doc. Little did I know that the info I needed was spread across three different official docs as well as some good old trial and error. To save you time – I’ve pulled everything together and have the main steps here, but include links back to the source documents in case you want more detailed information.
The TL;DR of this process is the following:
- Build a Hyper-V VM image of Windows Server 2019 with a Core interface.
- Configure specific settings unique to uploading a Custom VM Image for Azure
- Generalize your local VM image and shut it down
- Upload VHD into a new Azure Managed Disk in your Azure Subscription
- Create a VM Image for deployment using the Azure Managed Disk
- Deploy a new VM using the uploaded image
From there – you can make a new VM from that custom uploaded image. Management wise – the deployed image is compatible with Azure Bastion, Just-In-Time remote access, Remote PowerShell or PowerShell commands via the Azure Portal.
Lets get started!
Build a Hyper-V VM image of Windows Server 2019 with a Core interface.
This should be self-explanatory. You have a Server that is running Hyper-V and you can make a new Windows Server 2019 VM using the install media (ISO file) for Windows Server 2019. The default install experience is to have a CORE install (i.e. no desktop experience) and you create a new password for the local administrator account to further configure the system. To keep things simple – I created a Generation 1 VM initially to do the install and for the most part kept the defaults for the base creation process.

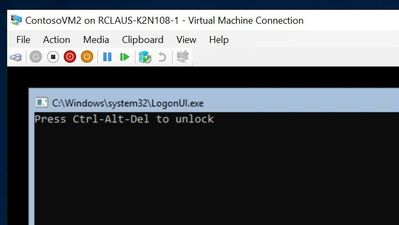
I don’t know what it is, but I really like the simple logon for a Windows Server core box – if I have to logon to the console at all. I need to do some tasks from the Hyper-V host before customizing the local VM – so I’ll shut it down for now.
Configure specific settings unique to uploading a Custom VM Image for Azure
For this example, I am taking this base image as is, and doing the recommended configuration changes as per the “Prepare a Windows VHD or VHDX to upload to Azure”. These include:
- If you made your VM from the Hyper-V Create VM Wizard, you probably have a Generation 1 VM with a dynamically expanding VHDX file. You NEED to convert this to a VHD file and change from a Dynamically expanding file to a FIXED hard drive size. Keep things simple and use the GUI console to do this – or you can follow the instructions in the document referenced above to go the PowerShell route.
- With the VM shutdown, edit the VM settings and select the Hard Disk. Choose the EDIT button to manage the disk.
- Select Convert to convert the disk. Select VHD for a max size of 2 TB, but we’re going to go smaller here.
- Select Fixed Size and choose the appropriate size (I went with 126 GB)
- Create a new name for the VHD as it makes a COPY of the disk.
- Because you change the disk from Dynamic to Fixed and it’s a new disk – you need to edit the settings of the VM to reference THIS new fixed size disk in order to proceed. Once this is updated – boot the machine and logon as the local administrator account
- From the command prompt – start up a PowerShell prompt to continue to prep this VM
- Run the System File Checker utility
Sfc.exe /scannow
- Run and Install all windows updates, I find it’s easies to use SCONFIG to setup Windows Update to run Automatically and check for updates.

- I can force an update check with option 6 and In this case – I had three downloads / updates I needed to process which included a reboot.

At this point the document goes through an extensive list of checks and settings you should review and implement in your base image in order to ensure a smooth deployment. I am not going to list them all off here – but refer you to the document to follow:
- The 6 settings recommendations for maximum compatibility with Azure fabric
- Resetting services to default start values
- Enable Remote Desktop and validating RDP registry settings
Note: You will get some errors based on if your image is domain joined or if there are group policies in place. I got a number of red error dumps from PowerShell commands, but they were expected since my VM is not domain joined.
- Enable and configure Windows Firewall rules
- Do some final verification steps that all is well, RDP is working (yes – you can RDP into a Windows Server 2019 CORE box) and enabling some dump log collection and restart / test the VM for connectivity.
OK – we’re ready to go, no turning back now.
Generalize your local VM image and shut it down
You have prepared your machine, set it up for optimal Azure compatibility and you have it tested for remote connectivity. Time to Generalize it with good old sysprep.exe. Logon to the box and change to the c:windows folder. You can save a bit of space (or a lot of space if this image was an upgrade) by deleting the c:windowspanther directory. Once that’s done, change into c:windowssystem32sysprep folder and then run sysprep.exe.
Make sure you check the Generalize checkbox and choose to Shutdown instead of Reboot.

OK – you are all set for an UPLOAD to Azure now.
Upload VHD into a new Azure Managed Disk in your Azure Subscription
NOTE: I only ever use Managed Disks for my virtual machines now, since it saves me from having to architect a strategy around how many VM disks can be in each storage account before maxing out my throughput OR having issues with storage cluster failures… Just keep it simple and promise me you will always use Azure Managed Disks for your VMs.
You will already need to have a ResourceGroup in azure that you can store these VM images in and you will want to define the location for the storage group to be in the same area where you will be using this image. I assume you are using the same system where the VHD is located OR you have copied it to your admin workstation locally before uploading it.
On this system – you will need to ensure you have the latest version of AzCopy v10 installed and the Azure PowerShell modules installed. We’re following the procedures outlined in the “Upload a VHD to Azure” document.
To upload the image – you first have to create an empty standard HDD managed disk in your pre-created ResourceGroup that is the same size as your soon to be uploaded VHD. These example commands will get your VHD disk size and set the configuration parameters required for making a disk. In order for this to work, you will need to replace <fullVHDFilePath>, <yourdiskname>, <yourresourcegroupname>, and <yourregion> from the example below with your information.
$vhdSizeBytes = (Get-Item "<fullVHDFilePath>").length

$diskconfig = New-AzDiskConfig -SkuName 'Standard_LRS' -OsType 'Windows' -UploadSizeInBytes $vhdSizeBytes -Location '<yourregion>' -CreateOption 'Upload'

New-AzDisk -ResourceGroupName '<yourresourcegroupname>' -DiskName '<yourdiskname>' -Disk $diskconfig
In my example, the complete commands were:
$vhdSizeBytes = (Get-Item "C:vmsContosoVM2.vhd").length

$diskconfig = New-AzDiskConfig -SkuName 'Standard_LRS' -OsType 'Windows' -UploadSizeInBytes $vhdSizeBytes -Location 'eastus' -CreateOption 'Upload'

New-AzDisk -ResourceGroupName ContosoResourceGroup -DiskName ContosoVM2 -Disk $diskconfig
Next You need to grant SAS access to the empty disk
$diskSas = Grant-AzDiskAccess -ResourceGroupName ContosoResourceGroup -DiskName ContosoVM2 -DurationInSecond 86400 -Access 'Write'

$disk = Get-AzDisk -ResourceGroupName ContosoResourceGroup -DiskName ContosoVM2
Now Upload the local VHD file to the Azure Managed Disk. Don’t forget to replace the <fullVHDFilePath> with your local VHD filePath
AzCopy.exe copy "<fullVHDFilePath>" $diskSas.AccessSAS --blob-type PageBlob
Once the AzCopy command completes, you need to revoke the SAS access in order to change the state of the manage disk and enable the disk to function as an image for deployment.
Revoke-AzDiskAccess -ResourceGroupName ContosoResourceGroup -DiskName ContosoVM2
Create a VM Image for deployment using the Azure Managed Disk
OK – final stretch. You’ve made a Windows Server 2019 Core image locally, prepared it for use in Azure, generalized it and uploaded it into you Azure subscription as a Managed Disk. Now you have to identify that managed disk as a VM Image that can be deployed. We’re following our third document on this called “Upload a generalized VHD and use it to create new VMs in Azure”.
- You need to get the information about the Managed Disk you just created. In my case it’s in the ContosoResourceGroup and has a name of ContosoVM2image. The command to run and build the variable is:
$disk = Get-AzDisk -ResourceGroupName ContosoResourceGroup -DiskName ContosoVM2
- Set some more variables including location of where you will be using the image, what image name is and in what resource group does it reside. In my case I used the following:
$location = 'East US'
$imageName = 'ContosoVM2Image'
$rgName = 'ContosoResourceGroup'
- Now Create the image configuration
$imageConfig = New-AzImageConfig -Location $location
$imageConfig = Set-AzImageOsDisk -Image $imageConfig -OsState Generalized -OsType Windows -ManagedDiskId $disk.Id
- FINALLY – create the image object in your subscription for deployment from portal, powershell, AzureCLI or Azure Resource Manager template.
$image = New-AzImage -ImageName $imageName -ResourceGroupName $rgName -Image $imageConfig
And with that – we are finally DONE.
If you open up the Azure portal and explore what is in that resource group where you uploaded the VHD – you should see something similar to what I see in this portal screenshot: a simple VHD uploaded and an Image definition that you can use to deploy new VMs.

In this blog post, the custom local VM that was created was a Windows Server 2019 core install server that was customized, generalized, uploaded and converted into a specialized Image for use in Azure. Because I took the time to build my own custom image and upload it into my Azure subscription – I can deploy as many Windows Server 2019 core boxes as I need for my projects now.
Brought to you by Dr. Ware, Microsoft Office 365 Silver Partner, Charleston SC.

Recent Comments