This article is contributed. See the original author and article here.
Introduction
In this article, we will see a step-by-step implementation of how to break and change list item permission using Power Automate. and for this, we will use REST API.
Implementation
Create a SharePoint List
Create a Power Automate – We will create an Automated Cloud Flow
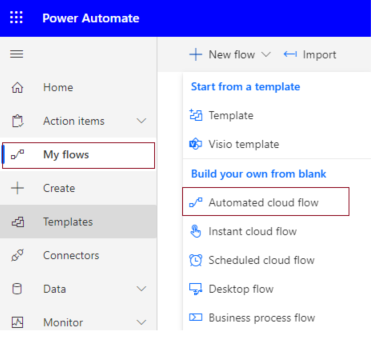
1. Go to Power Automate > My flows > Click on New flow > Select Automated Cloud Flow
2. It will ask for the flow name and trigger.
Add flow name and choose a trigger when an item is created.
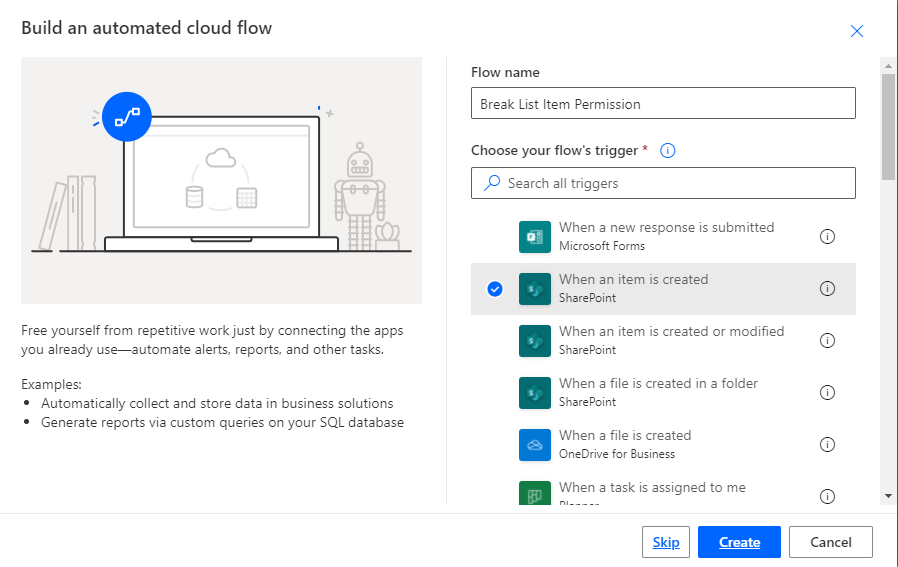
3. Click on Cerate.
4. Now set Site name and list name in when an item is created in list action.

For all API Calling, we will use Send an HTTP request to SharePoint action.
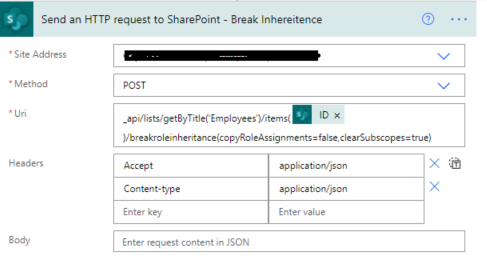
5. Now we will call REST API to break role inheritance.
Set all properties as below.
| Site Address | Select Site Name from Dropdown |
| Method | POST |
| Uri | _api/lists/getByTitle(‘ListTitle’)/items(ID)/breakroleinheritance(copyRoleAssignments=false,clearSubscopes=true) |
| Headers | { “Accept”: “application/json”, “Content-type”: “application/json” } |
6. Now we will set new permission so for that we need a user id to whom we have to give permission and need a role definition ID.
User ID: You can directly use User ID if you have or if you have a user name or login name then we have to find user id from the particular user so for that we will call REST API.
Role definition ID: You can use id based on permission.
| Role Definition Name | Role Definition Id |
| Limited Access | 1073741825 |
| View Only | 1073741924 |
| Design | 1073741828 |
| Edit | 1073741830 |
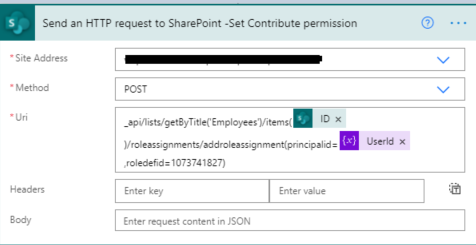
| Contribute | 1073741827 |
| Read | 1073741826 |
| Full Control | 1073741829 |
1. Create a variable and set User Title or if you have any list column then you can use it.

2. Call API to get a user ID and filter it by the above-declared user name.
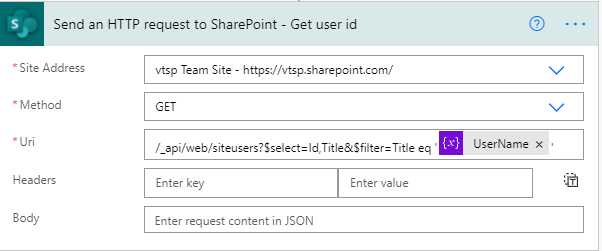
It will return an object as below,
{
  "d": {
    "results": [
      {
        "__metadata": {
          "id": "https://sitename.sharepoint.com/_api/Web/GetUserById(2)",
          "uri": "https://sitename.sharepoint.com/_api/Web/GetUserById(2)",
          "type": "SP.User"
        },
        "Id": 2,
        "Title": "Chandani Prajapati"
      }
    ]
  }
}
Now we want to use the only id from this so we will use an expression as below,
outputs(‘Send_an_HTTP_request_to_SharePoint_-_Get_user_id’)?[‘body’][‘d’][‘results’]?[0][‘Id’]
And we will set it in a variable called UserId.

3. Now we will set contribute permission for the above UserId.
Now we can test the flow.
Output
We can see contribute permission for an item as below,

Summary
In this article, we have seen how to break and change list item permission using power automate.
Hope this helps!
Sharing is caring!
Brought to you by Dr. Ware, Microsoft Office 365 Silver Partner, Charleston SC.


Recent Comments