This article is contributed. See the original author and article here.
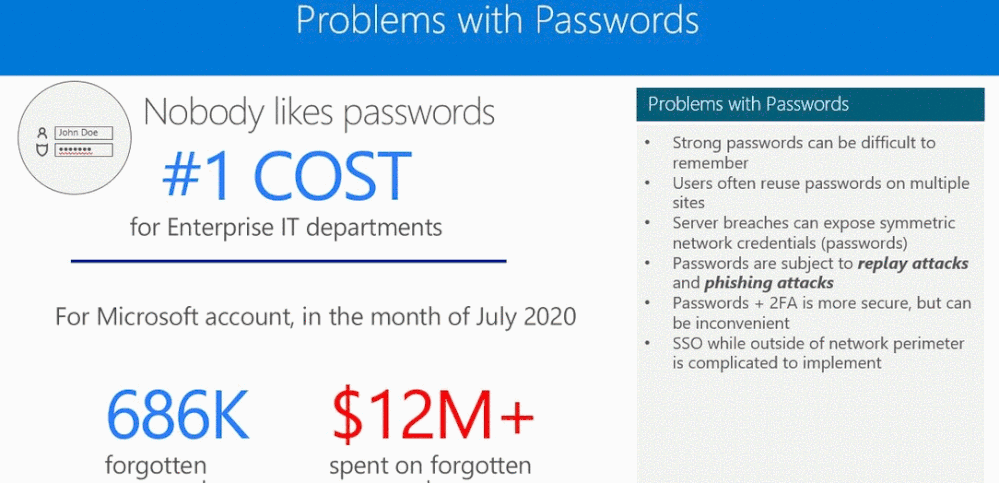
This is John Barbare and I am a Sr Customer Engineer at Microsoft focusing on all things in the Cybersecurity space. In the last several months, I have been getting a lot of requests around certain Ransomware that steals credentials through targeting phishing campaigns, extracting credentials to get Domain Admin access, and then encrypts files in SharePoint/OneDrive for a ransom. One of my first questions I ask is, “are you using Multi Factor Authentication (MFA) for your high privileged accounts/credentials” and the answer comes back with “we are using long and extraordinarily complex passwords that no one can crack.” My take on this response and has been for a very long time is if you create the longest and most complex passwords 1) the user is not going to remember it thus writing it down and storing it under the keyboard and/or 2) keeping a notepad file on the desktop named “Passwords.txt” with a list of all the long and hard to remember passwords to easily have access to so they don’t bug anyone to reset the password (they forget it) or to easily copy/paste in the password field. Yes, I have seen this happed in lots of places I have visited in the last XX years and it is a common practice still as of today. With the following information, I hope this article changes the way you or anyone secures high privileged accounts.
The first part of this article I will break down one variant of a certain type of human operated Ransomware and how it gains access and then will demo how to recover your files if they become encrypted in SharePoint Online. Once I do a demo, I will then show you the best proactive approach to securing high privileged accounts – MFA. Then in closing I will use the defense in depth approach and layer the best settings to apply in the M365 security stack to block the attacker at the front door. With that said, let’s start talking about Ransomware and getting things locked down.

MITRE ATT&CK Techniques Observed
The below diagram shows a type of human operated Ransomware most similar to Dharma. Ransomware families such as REvil, Samas, Bitpaymer, DoppelPaymer, Dharma, and Ryuk are deployed by human operators, which has spiraled in the last several months. Following the top left of the diagram and moving down the kill chain depicts how the human operated Ransomware achieves its end state – extremely similar to Dharma Ransomware. To better understand how Dharma can infect your machines or your enterprise, Microsoft Defender for Endpoint, Microsoft 365 Defender, and Microsoft Defender for Identify all do an excellent job of mapping every attack so one can depict how the attacker achieves its end state of dropping the malicious payload. On the left is each step of the attack, which is mapped directly to the MITRE ATT&CK framework. On the right, is Microsoft’s recommendation to prevent the attack.

Ransomware and SharePoint Online files – How to Restore (Option 1)
In my lab I will run the same type of attack but will fast forward to right before the files are encrypted. I am also using a long and complex password which my Red Team (me) had no problem at all getting into a machine using various methods. I am currently attempting to get the keys to the kingdom (Domain level access) as would any attacker. As you can see below, the sensitive files in the company are normal and everything is secure until I get ready to deploy an attack to get the SharePoint Admin’s credentials (which I am hoping is just a long and complex password) to deploy the Ransomware payload and encrypt and/or delete the files.

In my lab I will run the same type of attack but will fast forward to right before the files are encrypted. I am also using a long and complex password which my Red Team (me) had no problem at all getting into a machine using various methods. I am currently attempting to get the keys to the kingdom (Domain level access) as would any attacker. As you can see below, the sensitive files in the company are normal and everything is secure until I get ready to deploy an attack to get the SharePoint Admin’s credentials (which I am hoping is just a long and complex password) to deploy the Ransomware payload and encrypt and/or delete the files.

As you can see, the files are encrypted with the .xati extension and without the decryption tool, the sensitive files the company needs are locked. The forensic team opens the “Files Encrypted.txt” to see what the message is.

At this point, it is evident that using just passwords for a high privileged account has just caused the company to come under attack by the Ransomware and also not using any type of rights management. An option exists to restore the files without paying a ransom through Microsoft’s restore option. This is not a new feature, but lots of clients are not aware of it or have just migrated to O365 in the cloud.
Using a Site Owner account and a machine that has not been comprised, one can log into the SharePoint library. Click on the upper right on the settings icon and click “Restore this library.”

Under Select a date and time, choose “custom date and time,” and investigate when the files were deleted or encrypted and move back to an earlier time when the files were at an original state. Select the folders/files and select Restore and confirm the rollback to the original and unaltered state.

During the process it make take some time depending on the size of the library. Once complete, click on return to documents to see if all the files are restored.

The files are completely restored as seen below.

Ransomware and SharePoint Online files – How to Restore (Option 2)
It’s certainly possible that an attacker could delete/encrypt to the point where the customer cannot restore it themselves. In case you are not able to restore using option 1, you can use this option to get your files back. The backups are not going to be affected by any encryption or deletion done by an attacker and you have 14 days from an attack to get the files back. 14 days is not a huge window of time, but as long as a good copy of the documents existed in the last 14 days you can contact Microsoft support to restore them. Be sure to have the following details:
- What site collection URL(s) that have been affected by ransomware?
- When was the last known time the files were not modified by the ransomware?
SharePoint Online retains backups of all content for 14 additional days beyond actual deletion. If content cannot be restored via the Recycle Bin or Files Restore, an administrator can contact Microsoft Support to request a restore any time inside the 14-day window. Again, as long as the files are not compromised at a point in time restore (within 14 days) an attacker has no way to impact Microsoft’s backups. Microsoft has 14 days of backups through support but can be used to restore if all other methods of restore are not an option. The 14 days’ worth of backups in this option is not accessible to the customer – only through support. So why does Microsoft have this specific option to contact support to get files you are not able to? When ransomware was surfacing more and more years ago, the self-service was created in response to Ransomware and human operated Ransomware like Dharma for customers to retrieve files after an attack.
SharePoint in M365 and SharePoint Server Information Rights Management (IRM) Feature
When you use SharePoint in Microsoft 365 or SharePoint Server, you can protect documents by using the SharePoint information rights management (IRM) feature. This feature lets administrators protect lists or libraries so that when a user checks out a document, the downloaded file is protected so that only authorized people can view and use the file according to the information protection policies that you specify. For example, the file might be read-only, disable the copying of text, prevent saving a local copy, and prevent printing the file.
Word, PowerPoint, Excel, and PDF documents support this SharePoint IRM protection. By default, protection is restricted to the person who downloads the document. You can change this default with a configuration option named Allow group protection, which extends the protection to a group that you specify. For example, you could specify a group that has permission to edit documents in the library so that the same group of users can edit the document outside SharePoint, regardless of which user downloaded the document. Or you could specify a group that is not granted permissions in SharePoint but users in this group need to access the document outside SharePoint. For SharePoint lists and libraries, this protection is always configured by an administrator, never an end user. You set the permissions at the site level, and these permissions, by default, are inherited by any list or library in that site. If you use SharePoint in Microsoft 365, users can also configure their Microsoft OneDrive library for IRM protection.
For more fine-grained control, you can configure a list or library in the site to stop inheriting permissions from its parent. You can then configure IRM permissions at that level (list or library) and they are then referred to as “unique permissions.” However, permissions are always set at the container level; you cannot set permissions on individual files.
The IRM service must first be enabled for SharePoint. Then, you specify IRM permissions for a library. For SharePoint and OneDrive, users can also specify IRM permissions for their OneDrive library. SharePoint does not use rights policy templates, although there are SharePoint configuration settings that you can select that match some settings that you can specify in the templates.
If you use SharePoint Server, you can use this IRM protection by deploying the Azure Rights Management connector. This connector acts as a relay between your on-premises servers and the Rights Management cloud service. For more information, see Deploying the Azure Rights Management connector.
How to Prevent This Attack by Using MFA
Dharma Ransomware and other Ransomware uses malicious documents in phishing emails or links inside a careful crafted phishing emails that will look real to the average user. After establishing access, the success of attacks relied on whether campaign operators managed to gain control over highly privileged domain accounts. To stop this from happening, setting up MFA with every high privileged account at a minimum must be implemented. Furthermore, all accounts should use MFA (as seen in the first step below) or can be set per administrator as I will use a SharePoint Admin in the following steps.
Since a SharePoint admin has access to sensitive files which can be deleted/encrypted if the account is compromised (temporarily), this is a perfect example to start with. A regular user that does not have Admin credentials will not have the ability to carry out a well crafted Ransomware attack and several options under the settings menu will not appear as they are for authenticated Admins only. Therefore, privilege escalation is necessary and how using MFA will prevent this from happening.
Managing security can be difficult with common identity-related attacks like password spray, replay, and phishing, and then an organization can be hit with a Ransomware attack. Security defaults make it easier to help protect your organization from these attacks with preconfigured security settings:
- Requiring all users to register for Azure Multi-Factor Authentication.
- Requiring administrators to perform multi-factor authentication.
- Blocking legacy authentication protocols.
- Requiring users to perform multi-factor authentication when necessary.
- Protecting privileged activities like access to the Azure portal.
Those subscriptions have security defaults once turned on which requires all of your users to use MFA with the Microsoft Authenticator app, Blocks legacy authentication, and Users have 14 days to register for MFA with the Microsoft Authenticator app from their smart phones, which begins from the first time they sign in after security defaults has been enabled. After 14 days have passed, the user will not be able to sign in until MFA registration is completed.
Sign into Azure AD – https://portal.azure.com/#blade/Microsoft_AAD_IAM/ActiveDirectoryMenuBlade/Overview
Select Properties, Manage Security Defaults, and Enable Security Defaults.

Click Save when complete.
Adding a specific user(s) to the SharePoint Admin Role
Select the user in Azure AD on the Users tab or selecting https://portal.azure.com/#blade/Microsoft_AAD_IAM/UsersManagementMenuBlade/MsGraphUsers
Once the specific user is selected, click on + Add assignments and select SharePoint Administrator under Role.

Select Setting to add assignment type
- Eligible assignments require the member of the role to perform an action to use the role. Actions might include performing a multi-factor authentication (MFA) check, providing a business justification, or requesting approval from designated approvers.
- Active assignments do not require the member to perform any action to use the role. Members assigned as active have the privileges assigned to the role at all times.
Select Assign and the user will now be assigned as a SharePoint Admin with the neccesary assignment type.

User in the correct assignment

To enable MFA for a SharePoint Admin who Manages Sensitive Files
To provide an additional level of security for sign-ins, you must use MFA, which uses both a password, which should be strong, and an additional verification method based on:
- Something you have with you that is not easily duplicated, such as a smart phone.
- Something you uniquely and biologically have, such as your fingerprints, face, or other biometric attribute.
The additional verification method is not employed until after the user’s password has been verified. With MFA, even if a strong user password is compromised, the attacker does not have your smart phone or your fingerprint to complete the sign-in.
Go to Conditional Access in Azure AD – https://portal.azure.com/#blade/Microsoft_AAD_IAM/ConditionalAccessBlade/Policies
Or navigate In Azure AD and select Security, Conditional Access, and + New Policy.
Name the Policy for the specific SharePoint MFA Policy and select user and groups, Directory roles, and SharePoint Administrator and click select.

Select Cloud Apps or actions and for Include select All cloud apps and for Exclude select a break glass account.

Select Conditions, Client apps, and for configure select yes and leave everything as default and select done.

For Access Controls select Grant Access and select Require multi-factor authentication and click select.

For more fine detailed user access control based in the Sessions tab, the configurations can be found here for the correct session controls for your organization. Once complete click the create tab.
SharePoint Admin Signing Into O365
When the SharePoint Admin signs in, they will be prompted with the current password and then prompted to setup MFA.

User must register for MFA and select next.

The next steps are registering for MFA and using the Microsoft Authenticator App.

Scan the QR code with the Microsoft Authenticator App and Select Next.

Once scanned, your phone screen will display the notification.

Inside the Microsoft Authenticator App, a notification will be sent and select Approve. Once that is complete, your machine will show notification approved.

Select next to secure your account by providing a phone number for a text or phone call. Select next.

Place the code into the field and select next.

Select next and you will be logged into Office 365. Every time you login, you will use MFA to sign into the privileged account as a SharePoint Admin to further protect the account and secure SharePoint documents, folders, files, etc.
Every time the specific user/password is entered into Office 365, a notification will be sent to your phone to then Approve or Deny the pop up from the Microsoft Authenticator App.

If approved you will be logged into Office 365.
If someone had sent a phishing email and the SharePoint Admin would have clicked it, in the background the password would be sent to the attacker (assuming proper security controls were not implemented like SafeLinks, etc.). Once the attacker has the long and complex password, the attacker would use the credentials to gain higher access, spread malware, and/or conduct a Ransomware attack. All this is stopped as the real SharePoint admin would have received a pop up message on the authenticator app (on the person’s physical mobile device) to approve or deny the request using MFA. If the SharePoint Admin receives this when the person never signed in (out having a drink after a long day onsite), they can quickly deny the login and alert the security team that someone has the password but was unsuccessful at logging into O365 as another person. At this time, the Global Admin can force a reset of the password and see any activity related to successful and unsuccessful logins in Azure AD by the user for the date, time, application, IP Address, location, and Conditional Access applied. More information can be found here.
Mitigations
- Utilize the Microsoft Defender Firewall and your network firewall to prevent RPC and SMB communication among endpoints whenever possible. This limits lateral movement as well as other attack activities.
- Secure internet-facing RDP services behind a multi-factor authentication (MFA) gateway. If you do not have an MFA gateway, enable network-level authentication (NLA), and ensure that server machines have strong, randomized local admin passwords.
- Turn on tamper protection features to prevent attackers from stopping security services.
- Enforce strong, randomized local administrator passwords. Use tools like LAPS.
- Disallow macros or allow only macros from trusted locations. See the latest security baselines for Office and Office 365
- Turn on AMSI for Office VBA if you have Office 365.
- Monitor for clearing of event logs. Windows generates security event ID 1102 when this occurs.
- Ensure internet-facing assets have the latest security updates. Audit these assets regularly for suspicious activity.
- Determine where highly privileged accounts are logging on and exposing credentials. Monitor and investigate logon events (event ID 4624) for logon type attributes. Highly privileged accounts should not be present on workstations.
- Turn on cloud-delivered protection and automatic sample submission on Microsoft Defender Antivirus. These capabilities use artificial intelligence and machine learning to quickly identify and stop new and unknown threats.
- Turn on attack surface reduction rules, including rules that block credential theft, ransomware activity, and suspicious use of PsExec and WMI.
- Turn on block at first sight
- Utilize Microsoft 365 Defender to stop attacks with automated, cross-domain security and built-in AI
- Utilize Microsoft Cloud App Security for extended Ransomware detection capabilities with anomaly detection
Detection details
Antivirus
Microsoft Defender Antivirus detects threat components as the following malware:
Endpoint detection and response (EDR)
Alerts with the following titles in the Microsoft Defender Security Center portal can indicate threat activity on your network:
- Doppelpaymer ransomware and other variants
The following alerts might also indicate threat activity associated with this threat. These alerts, however, can be triggered by unrelated threat activity and are not monitored in the status cards provided with this report:
- Process execution from an Alternate Data Stream (ADS)
- Use of living-off-the-land binary to run malicious code
- Windows Sysinternals tool renamed
- Attempt to hide use of dual-purpose tool
- Malicious credential theft tool execution detected
- Suspected credential theft activity
- PowerShell made a suspicious network connection
- Possible Antimalware Scan Interface (AMSI) tampering
- Suspicious PowerShell command line
- Suspicious service registration
- Network connection to a risky host
- Suspicious WMI (Windows Management Instrumentation) process creation
- Suspicious sequence of exploration activities
- User account created under suspicious circumstances
- New group added suspiciously
- New local admin added using Net commands
Attack surface reduction rules
These rules can block or audit activity associated with various stages of this threat:
- Use advanced protection against ransomware
- Block process creations originating from PSExec and WMI commands
- Block persistence through WMI event subscription
- Block credential stealing from the Windows local security authority subsystem (lsass.exe)
Conclusion
Thanks for taking the time to read this long blog and I hope you had fun reading about a typical day in the life of a Cybersecurity Customer Engineer and assisting clients in securing cloud infrastructure and proactive Ransomware measures. Ransomware is nothing to play around with as the attackers are always one step ahead. By not being complacent, not using just passwords, using MFA to secure privileged accounts, and using a Microsoft 365 security defense in depth approach, your endpoints will be more secure than you will ever know. Various methods are in place to restore your SharePoint online library from a breach if an attacker does get inside. Using MFA to secure all admin’s credentials and accounts cannot be stressed enough. Always test all controls stated in this paper to make sure they are properly configured, tested, secured, tested again, and then finally implemented after more testing. Also for more information on going passwordless, visit aka.ms/gopasswordless.
Hope to see you in my next blog and always protect your endpoints!
Thanks for reading and have a great Cybersecurity day!
Follow my Microsoft Security Blogs: http://aka.ms/JohnBarbare and also on LinkedIn.
Brought to you by Dr. Ware, Microsoft Office 365 Silver Partner, Charleston SC.

Recent Comments