This article is contributed. See the original author and article here.
Contributors:
Rob Garrett – Sr. Customer Engineer, Microsoft Federal
John Unterseher – Sr. Customer Engineer, Microsoft Federal
Martin Ballard – Sr. Customer Engineer, Microsoft Federal
This article replaces the previous article, which used the – now legacy – version of PnP PowerShell.
What are Learning Pathways?
| Microsoft 365 learning pathways is a customizable, on-demand learning solution designed to increase usage and adoption of Microsoft 365 services in your organization. |
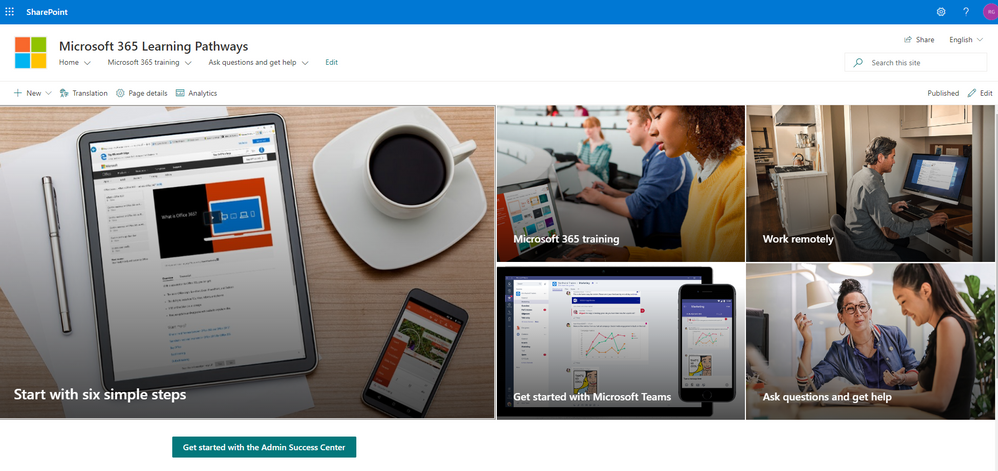
Microsoft 365 learning pathways is a customizable, on-demand learning solution designed to increase usage and adoption of Microsoft 365 services in your organization. Learning Pathways consists of a fully customizable SharePoint Online Communication site collection, with content populated from the Microsoft online catalog; so, your content is always up to date. Learning Pathways provide integrated playlists to meet the unique needs of your organization.
M365 Learning Pathways build atop of the Look Book Provisioning Service and templates (https://lookbook.microsoft.com). In a previous blog post, we detailed the nuances of the Look Book Provisioning Service and additional steps required to deploy templates to GCC High tenants. Since Learning Pathways depend on the provisioning service to create a Communication site with customizations, via a Look Book template, this post details the additional steps to follow those from the earlier blog post.
Challenge – Using Learning Pathways in GCC High
| Because of provisioning limitations in the GCC High sovereign cloud, documented installation instructions result in errors. |
Microsoft strives to implement functionality parity between all sovereign clouds. However, since each Office 365 cloud type serves a different customer audience and requirements, functionality will differ between these cloud types. Of the M365 clouds – Commercial, Government Community Cloud, Government Community Cloud High, and DOD Cloud, the last two offer the least functionality to observe US federal mandates and compliance.
As Microsoft develops new functionality for Microsoft 365 and Azure clouds, we typically release new functionality to commercial customers first, and then to the other GCC, GCC High, and DOD tenants later as we comply with FedRAMP and other US Government mandates. Open-source offerings add another layer of complexity since open-source code contains community contribution and is seldom developed with government clouds in mind.
Apply Learning Pathways to GCC High
Manual configuration steps detailed below make Learning Pathways in GCC High possible. |
Microsoft 365 Learning Pathways offers manual steps to support deployment to an existing SharePoint Online Communication site. Recall from the earlier blog post that the Look Book Provisioning Service is unable to establish a new site collection in GCC High, because of necessary restrictions. We, therefore, deploy Learning Pathways using the manual steps with a pre-provisioned Communication site collection.
Manual setup of Learning Pathways requires experience working with Windows PowerShell and the PnP PowerShell module.
Prerequisites
Before getting into the manual steps, we must meet prerequisites for manual install of Learning Pathways, the following is a summary:
- Create and designate a new Communication in SharePoint Online for Learning Pathways.
- Create a tenant-wide application catalog (steps below).
- Install the latest SharePoint PnP.
- Perform all steps as a SharePoint Tenant Administrator.
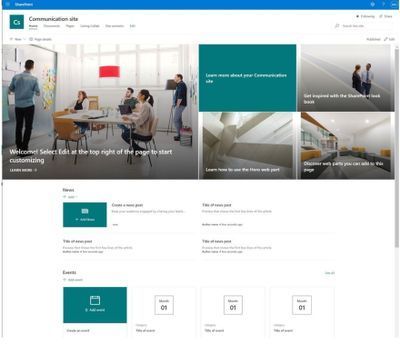
We begin by creating a new Communication site via the SharePoint Administration site:
https://mytenant-admin.sharepoint.us/_layouts/15/online/AdminHome.aspx#/siteManagement/view/ALL%20SITES

Ensure the appropriate permissions for users of the Learning Pathways site:
- Open the Learning Pathways site collection in your web browser.
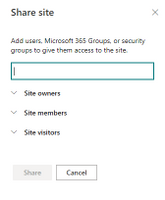
- From the home page, click the Share link.
- Add students to the Site Visitors group.
- Add playlist editors of the pathways site to the Site Members group.
- Add site administrators of the pathways site to the Site Owners group.

We shall now create the tenant app catalog (if it does not already exist):
- Open the SharePoint Admin center in your browser.
https://mytenant-admin.sharepoint.us - Select More Features in the left sidebar.
- Locate the Apps section and click Open.
https://mytenant-admin.sharepoint.us/_layouts/15/online/TenantAdminApps.aspx - Select the App Catalog.
- If you do not already have an app catalog, provide the following details:
- Title: App Catalog
- Web Site Address Suffix: preferred suffix for the app catalog, e.g. apps.
- Administrator: SharePoint Administrator.
We shall now turn our attention to installing the latest version of PnP.PowerShell. At the time of writing this blog, the latest version of PnP.PowerShell is 1.5.x. Follow the instructions, in the box below, to install the latest pre-release version (required).
| You can check the available versions of installed PnP.PowerShell with the Get-Module PnP.PowerShell -ListAvailable. If you do not have version 1.5.x or greater follow the instructions in the below box. |
PnP PowerShell installation is a prerequisite for deploying Look Book templates via PowerShell. The previous edition of this article used the – now legacy – SharePointPnpPowerShell module. At the time of writing, the new steps require the latest bits for PowerShellGet, Nuget Package Provider and PnP.PowerShell module. You only need follow these side-line steps once for a specified Windows machine.
|
- Open a new PowerShell console (v5.1 or Core 7.x).
- Ensure the PnP.PowerShell module is loaded with the following:
Import-Module -Name PnP.PowerShell
- Run the following script ONCE per tenant to create an Azure App Registration for PnP:
Note: Replace tenant with your tenant name.
Register-PnPAzureADApp -ApplicationName "PnP PowerShell" `
-Tenant [TENANT].onmicrosoft.us -Interactive `
-AzureEnvironment USGovernmentHigh `
-SharePointDelegatePermissions AllSites.FullControl User.Read.All
Login with user credentials assigned Global Administrator role.
If you previously registered PnP.PowerShell, check the App Registration in the Azure portal and make sure it has delegated permissions for AllSites.FullControl and User.Read.All. - Make a note of the GUID returned from step 4. This is the App/Client ID of the new PnP Azure App Registration.
Deploy Learning Pathways Template
Learning Pathways deploys as from a dedicated Look Book template. The following steps details downloading the template and deploying it via PnP.PowerShell.
| Download the template files from https://github.com/SharePoint/sp-dev-provisioning-templates/tree/master/tenant/M365LearningPathways |
- Open a new PowerShell console (v5.1 or Core 7.x).
- Ensure the PnP.PowerShell module is loaded with the following:
Import-Module -Name PnP.PowerShell - Connect to your Learning Pathways site collection with the following:
Connect-PnPOnline ` -Url "Url of your Learning Pathways Site" ` -AzureEnvironment USGovernmentHigh ` -Interactive ` -Tenant "[TENANT].onmicrosoft.us ` -Client ID "Client ID from AAD app registration in Step #16" - Enable custom scripts on your site with the following (note: check with you security team before enabling this feature):
Set-PnPTenantSite -Identity "Url of your Learning Pathways Site" -DenyAddAndCustomizePages:$false - Apply the template with the following:
Invoke-PnPSiteTemplate -Path M365LP.pnp - Connect the SharePoint Framework Web Part to your learning site with the following:
Set-PnPStorageEntity ` -Key MicrosoftCustomLearningSite ` -Value "<URL of Learning Pathways site collection>" ` -Description "Microsoft 365 learning pathways Site Collection"; Set-PnPStorageEntity ` -Key MicrosoftCustomLearningTelemetryOn ` -Value $false ` -Description "Microsoft 365 learning pathways Telemetry Setting";

Brought to you by Dr. Ware, Microsoft Office 365 Silver Partner, Charleston SC.


Recent Comments