This article is contributed. See the original author and article here.
Since April 2020 Visual Studio Codespaces has been generally available. In addition to that, GitHub Codespaces has been provided as a private preview. Both are very similar to each other in terms of their usage. There are differences between both, though, discussed from this post. Throughout this post, I’m going to focus on the .NET Core application development.
Visual Studio Codespaces (VS CS) is an online IDE service running on a VM somewhere in Azure. Like Azure DevOps build agents, this VM is provisioned when a VS CS begins and destroyed after the VS CS is closed. With no other configuration, it is provisioned with default values. However, it’s not enough for .NET Core application development. Therefore, we might have to add some configurations.
What if, there is a pre-configured .NET Core development environment ready? It can be sorted out in two different ways. One is configuring the dev environment for each project or repository, and the other is personalising the dev environment. The former approach would be better to secure a common ground for the entire project, while each individual in the team can personalise their own environment using the latter approach. This post focuses on the former one.
Configuring Development Environment
As a Docker container takes care of the dev environment, we should define the Dockerfile. As there’s already a pre-configured one, we simply use it. But let’s build our opinionated one! There are roughly two parts – Docker container and extensions.
The sample environment can be found at this repository.
Create .devcontainer Directory
First of all, we need to create the .devcontainer directory within the repository. This directory contains Dockerfile, a bash script that the Docker container executes, and devcontainer.json that defines extensions.
Define Dockerfile
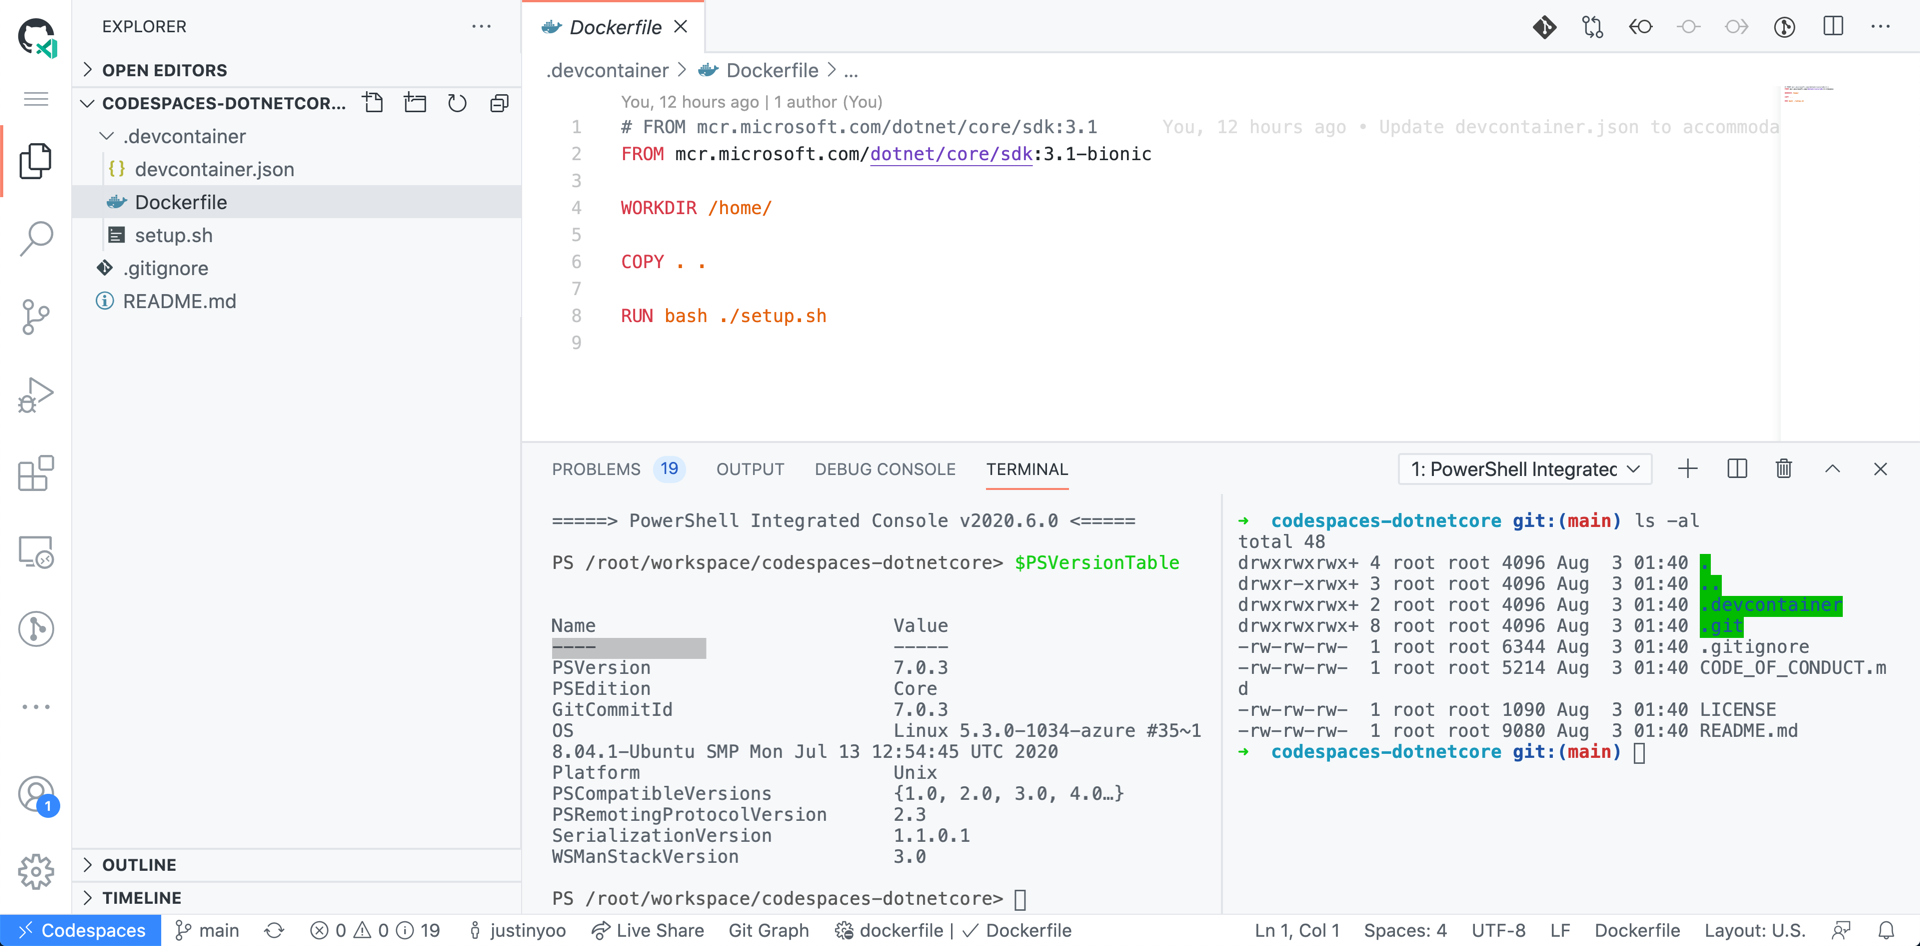
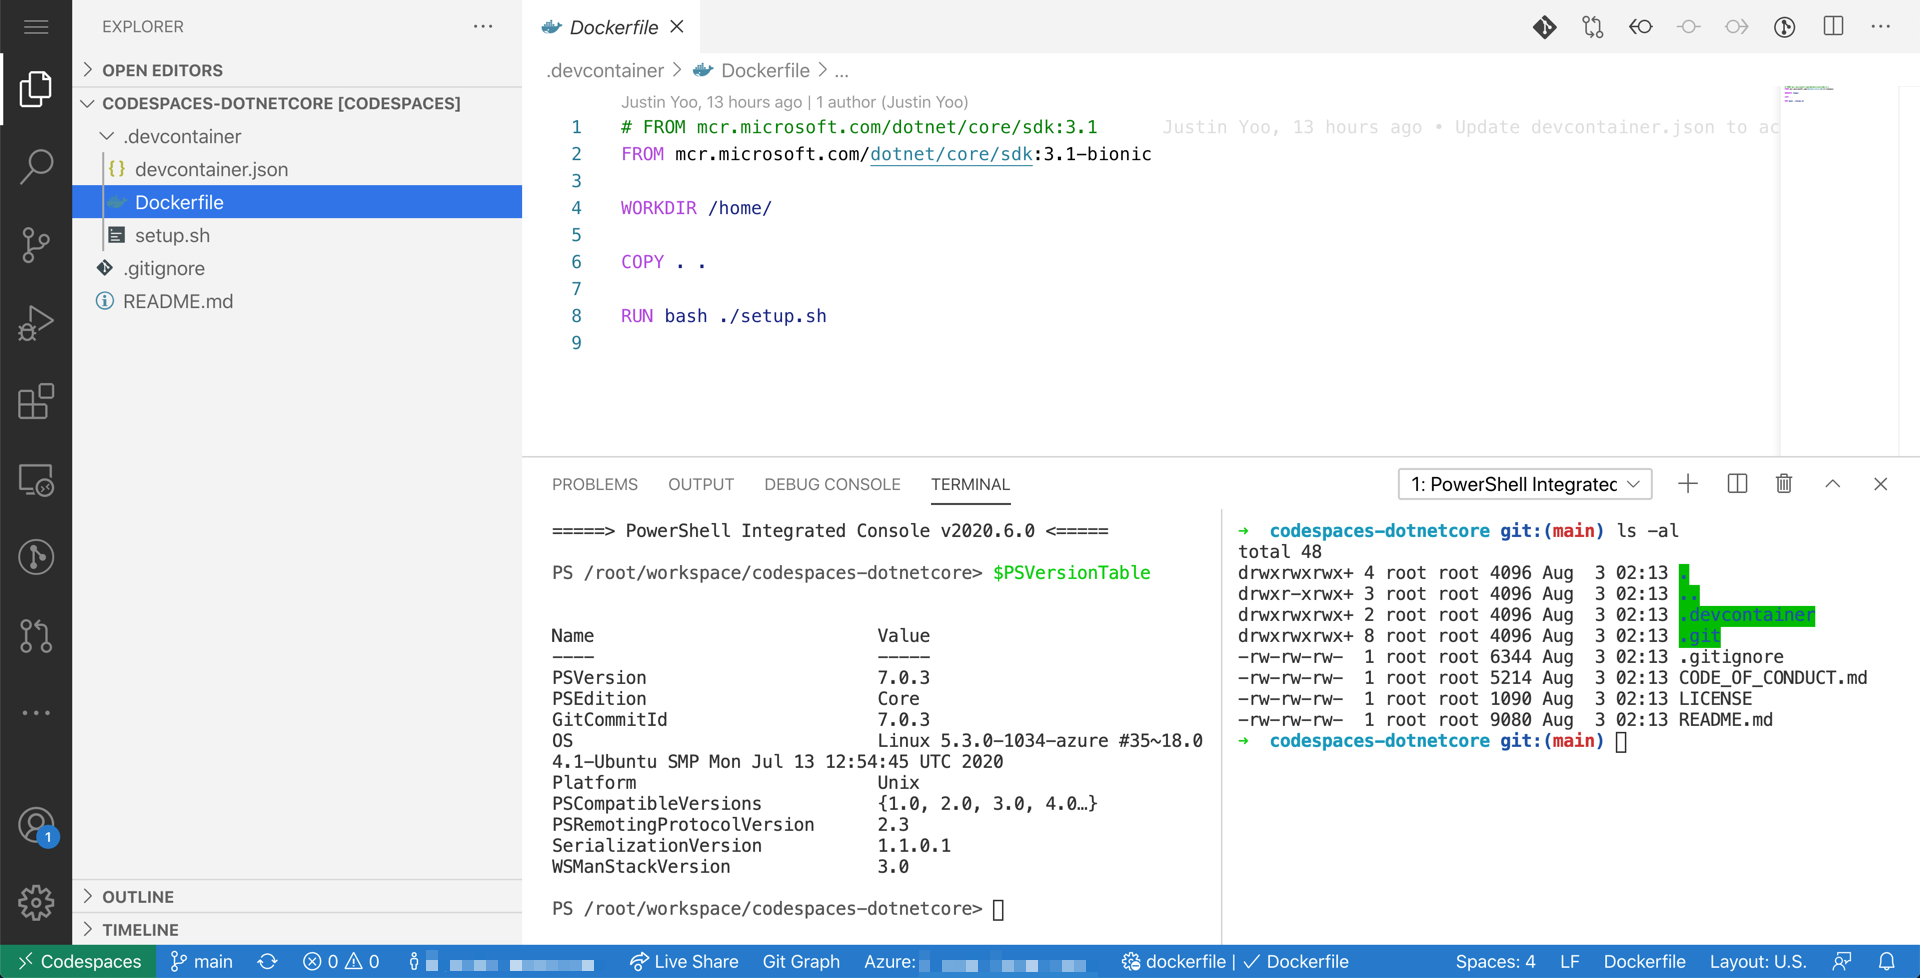
As there’s an official Docker image for .NET Core SDK, we just use it as a base image. Here’s the Dockerfile. The 3.1-bionic tag is for Ubuntu 18.04 LTS (line #1). If you want to use a different Linux distro, choose a different tag.
FROM mcr.microsoft.com/dotnet/core/sdk:3.1-bionic

WORKDIR /home/

COPY . .

RUN bash ./setup.sh
Now, let’s move on for setup.sh.
Configure setup.sh
In the setup.sh, we’re going to install several applications:
- Update the existing packages through the
apt-getcommand. If there’s a new package, the script will install the new ones. (line #1-9). - Install
nvmfor ASP.NET Core application development, which usesnode.js(line #12). - Install Docker CLI (line #15).
- The Docker image as on today includes PowerShell 7.0.2. If you want to install the latest version of PowerShell, run this part (line #18).
- Install Azure Functions Core Tools v3 (line #21-24).
- Enable local HTTPS connection (line #27).
- If you want to use zsh instead of bash, oh my zsh enhances developer experiences (line #30-34).
## Update and install some things we should probably have
apt-get update
apt-get install -y
  curl
  git
  gnupg2
  jq
  sudo
  zsh

## Instsall nvm
curl -o- https://raw.githubusercontent.com/nvm-sh/nvm/v0.35.3/install.sh | bash

## Install Docker CLI
curl -fsSL https://get.docker.com | bash

## Update to the latest PowerShell
curl -sSL https://raw.githubusercontent.com/PowerShell/PowerShell/master/tools/install-powershell.sh | bash

## Install Azure Functions Core Tools v3
wget -q https://packages.microsoft.com/config/ubuntu/18.04/packages-microsoft-prod.deb
dpkg -i packages-microsoft-prod.deb
apt-get update
apt-get install azure-functions-core-tools-3

## Enable local HTTPS
dotnet dev-certs https --trust

## Setup and install oh-my-zsh
sh -c "$(curl -fsSL https://raw.githubusercontent.com/robbyrussell/oh-my-zsh/master/tools/install.sh)"
cp -R /root/.oh-my-zsh /home/$USERNAME
cp /root/.zshrc /home/$USERNAME
sed -i -e "s//root/.oh-my-zsh//home/$USERNAME/.oh-my-zsh/g" /home/$USERNAME/.zshrc
chown -R $USER_UID:$USER_GID /home/$USERNAME/.oh-my-zsh /home/$USERNAME/.zshrc
We now have both Dockerfile and setup.sh for the container setting. It’s time to install extensions for VS CS to use for .NET Core application development.
List of Extensions
devcontainer.json is the entry point when a new VS CS instance is firing up. The Dockerfile we defined above is linked to this devcontainer.json so that the development environment is provisioned. Through this devcontainer.json file, we can install all the necessary extensions to use. I’m going to install the following extensions for .NET Core app development.
- Azure Tools
- C#
- C# Extensions
- C# Sort Usings
- C# XML Documentation Comments
- Docs Authoring Pack
- EditorConfig
- Git Graph
- Git History
- GitHub Pull Requests and Issues
- GitLens
- IntelliCode
- Live Share
- Markdown All in One
- PowerShell
Define those extensions in the devcontainer.json like:
{
  ...
  "extensions": [
    "docsmsft.docs-authoring-pack",
    "donjayamanne.githistory",
    "eamodio.gitlens",
    "editorconfig.editorconfig",
    "github.vscode-pull-request-github",
    "jongrant.csharpsortusings",
    "k--kato.docomment",
    "kreativ-software.csharpextensions",
    "mhutchie.git-graph",
    "ms-dotnettools.csharp",
    "ms-vscode.powershell",
    "ms-vscode.vscode-node-azure-pack",
    "ms-vsliveshare.vsliveshare",
    "visualstudioexptteam.vscodeintellicode",
    "yzhang.markdown-all-in-one"
  ],
  ...
}
All the environment setup is done!
Run GitHub Codespaces
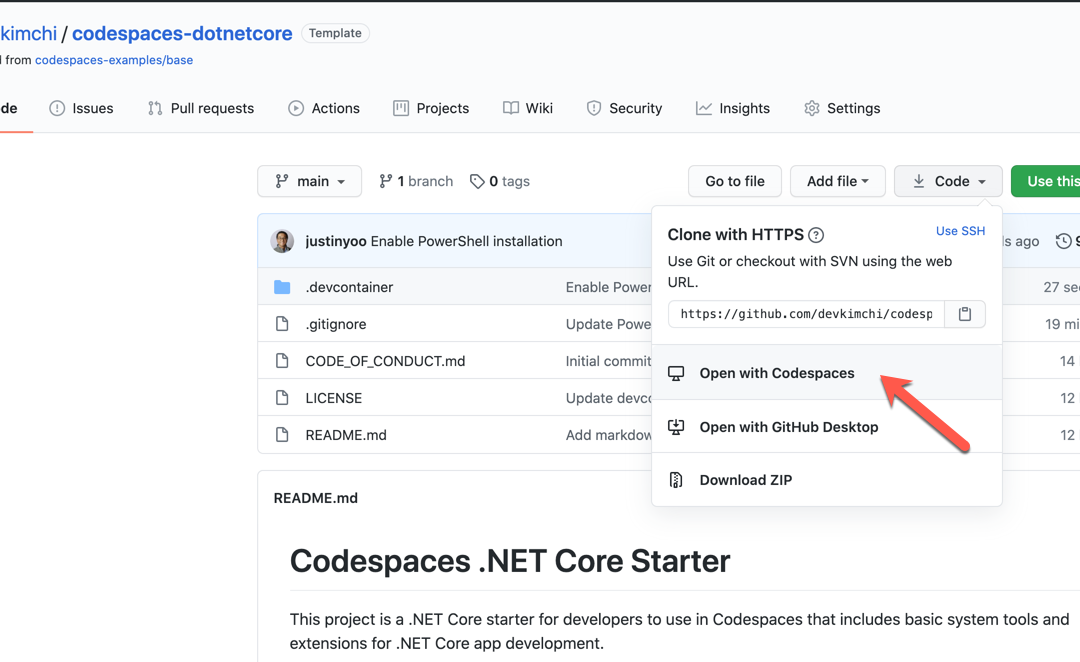
Push this .devcontainer directory back to the repository and run GitHub Codespaces. If you’ve already joined in the GitHub Codespaces Early Access Program, you’ll be able to see the menu like below:

Click the menu, and you’ll be able to access to all files within GitHub Codespaces.
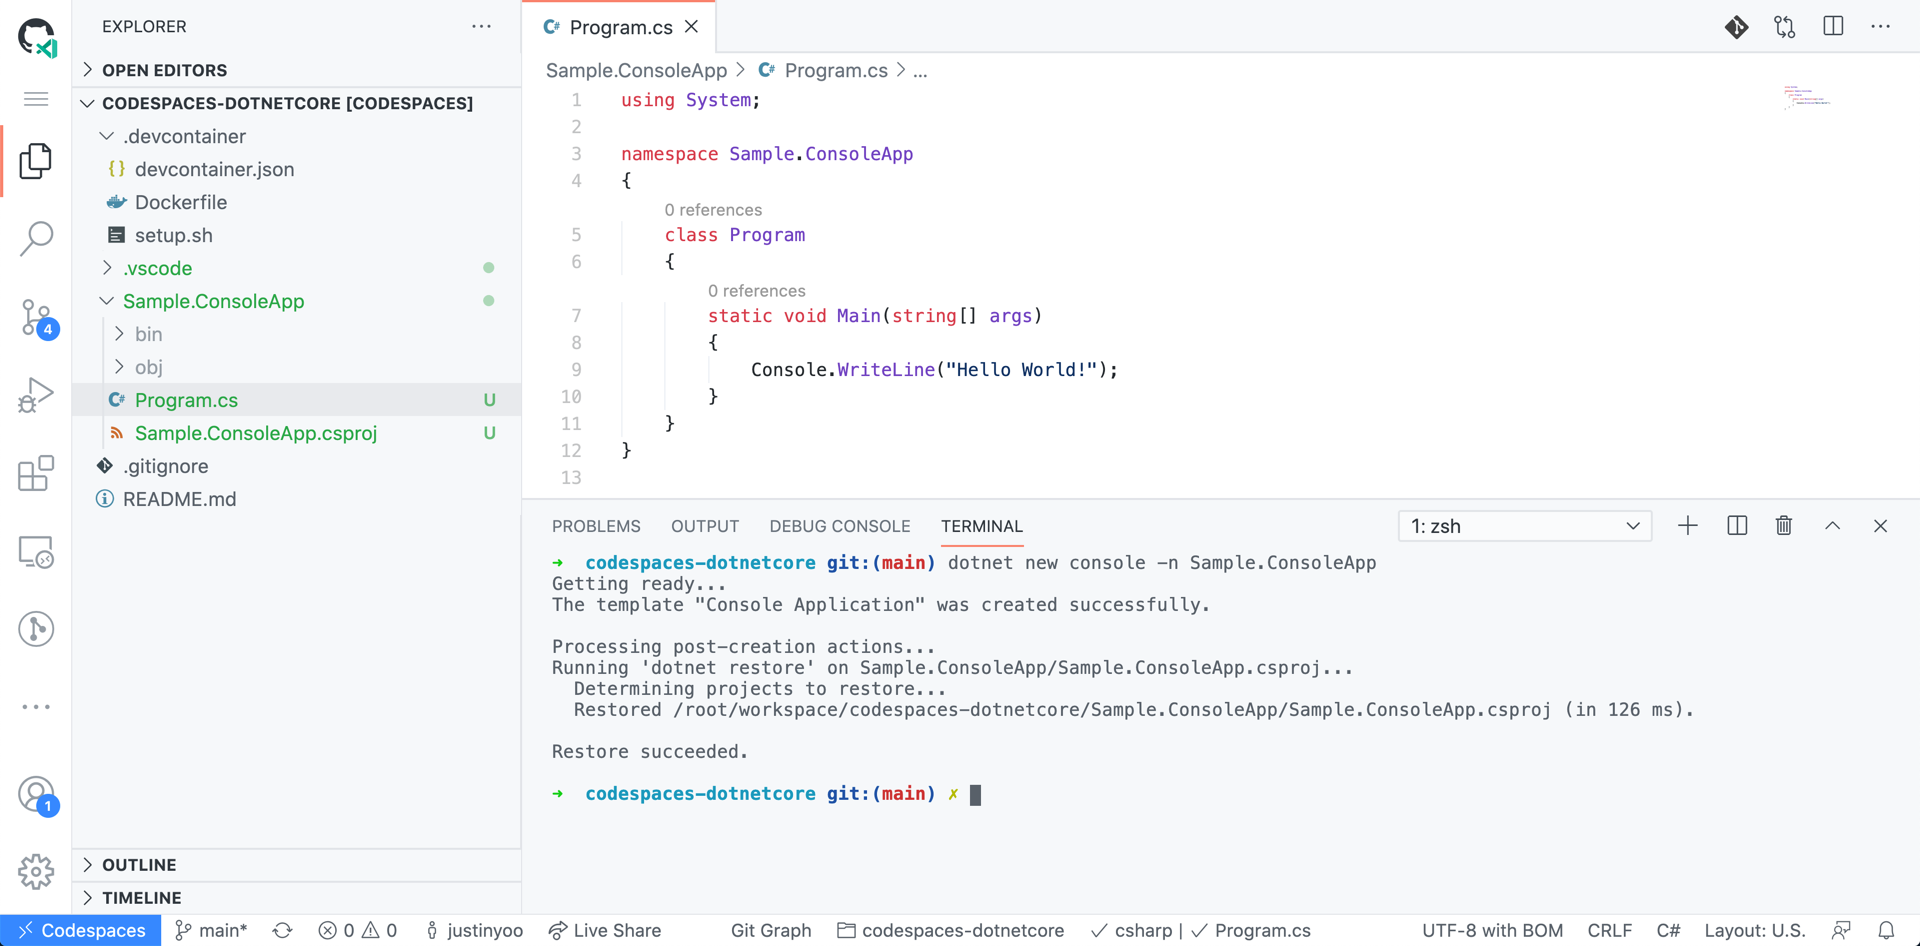
In addition to that, we have both a PowerShell console and zsh console. Run the following command to create a sample .NET Core console app to start writing the code!
dotnet new console -n Sample.ConsoleApp
The Program.cs should be looking like this!
Run Visual Studio Codespaces
This time, run the same repository on VS CS. First of all, visit https://online.visualstudio.com and login.
You MUST have an active Azure subscription to run a VS CS instance. If you don’t, create a free account and subscription through this Free Azure account page.
After the login, unless you have a billing plan, you should create it. VS CS takes the consumption-based model, which means that you only have to pay for what you have used. If you don’t need it any longer, delete it to avoid the further charge.
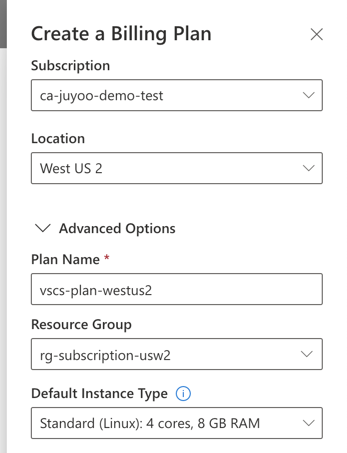
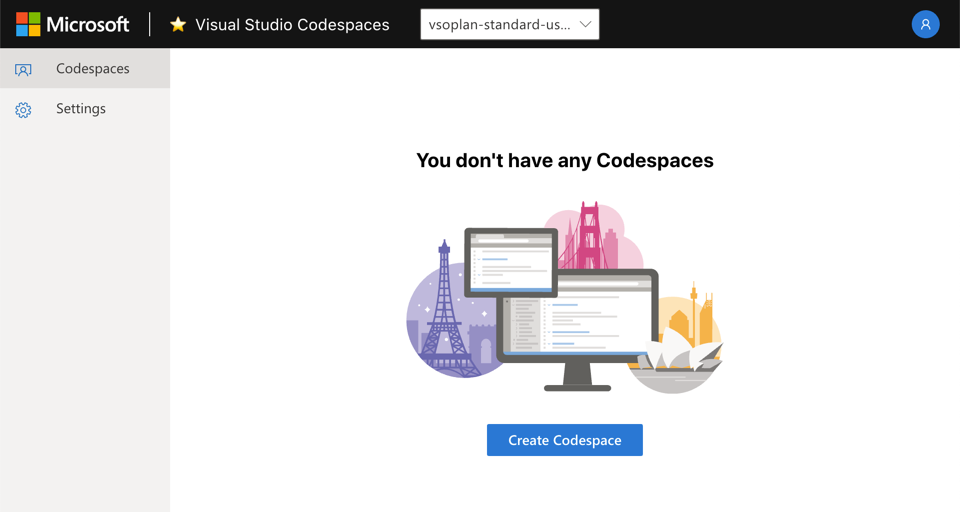
You will be asked to create a new instance if you don’t have one yet.
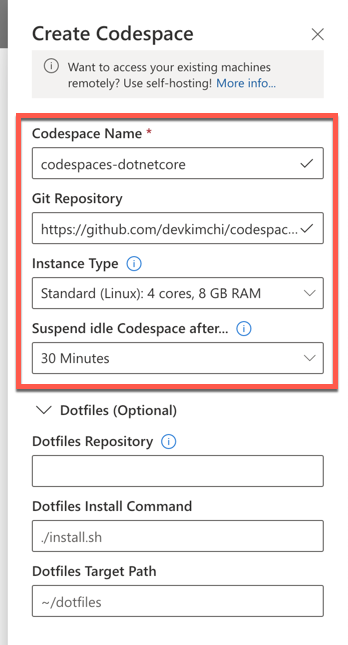
Enter the requested information and create a new VS CS instance. The screenshot below links the GitHub repository, which is dedicated to the repository. If you don’t link any of GitHub repository, it can be used for any repository.
The VS CS instance created looks like following. Although it uses the same repository as GitHub Codespaces uses, GitHub Codespaces has pushed nothing, VS CS doesn’t have the change.
So far, we’ve walked through how to set up the dev environment in VS CS for .NET Core application development. As this is the starting point of the team project efforts, it will significantly reduce the “It works on my machine” issue.
This post is originally posted on DevKimchi.
Brought to you by Dr. Ware, Microsoft Office 365 Silver Partner, Charleston SC.

Recent Comments