This article is contributed. See the original author and article here.
Would not be cool to engage your Modern Workplace users with content appearing like in your favourite social network? In my latest community sample, I built an SPFx webpart to do so. Here is how I did it, but first, this is how it looks:
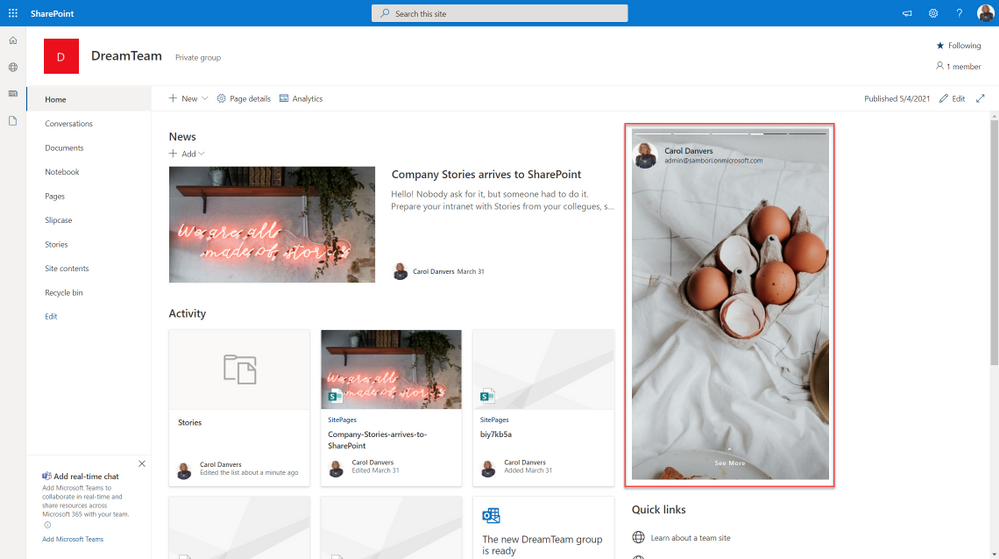 SharePoint stories webpart
What we need first, is a SharePoint list that will contain all the “story images”, with the author of that story, and some Text, if we want to show the “show more” option. This list will be something like this:
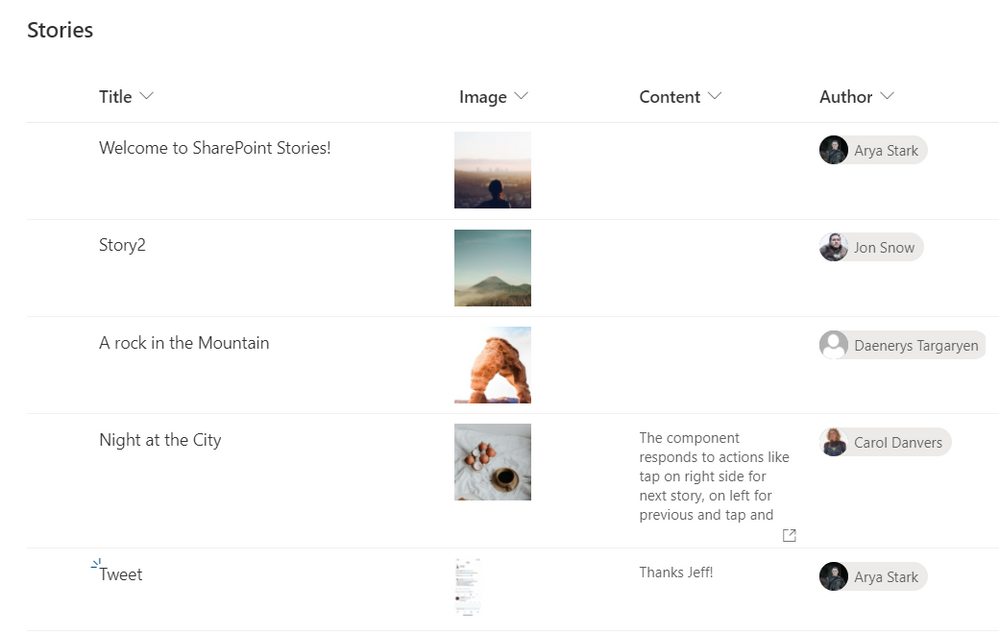 SP List
Now it is time to code our SPFx webpart.
Before starting, for all the UI thing, I am using an existing open-source React component called “react-insta-stories”, that you can find in its GitHub repository. This component does most of the hard work with the image slide and so on. In its most simple way, the component just needs an array of images:
 react package
But you can also specify an array of Story objects, where a Story can have the following properties:
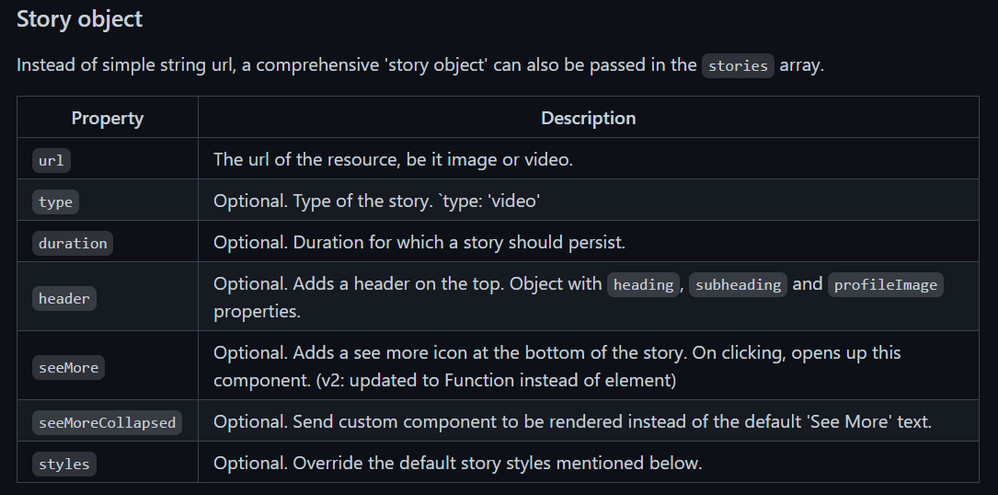 Story object properties
Now that we know how to use the Stories component, the webpart functionality is quite easy. We just need to get the Stories information from the SharePoint list, and compose the proper Stories array.
As usual when developing SPFx webparts, the webpart itself, just loads a React component, passing the information that we need, in this case, for simplicity, I am passing the entire WebPartContext object, but try to avoid this practice, and only pass what you need.
This is the main code in the Render webpart method:
 SPFx Webpart render
Once in the main React component, we are calling the SharePoint REST API to get the sotries from the list. To do so, I am using the endpoint:
/_api/web/lists/GetByTitle('Stories')/RenderListDataAsStream
As this endpoint is given me the Image URL in the format that I need (but pretty sure you can do the same with other endpoints, or using the PnP JS library). The code to do so is:
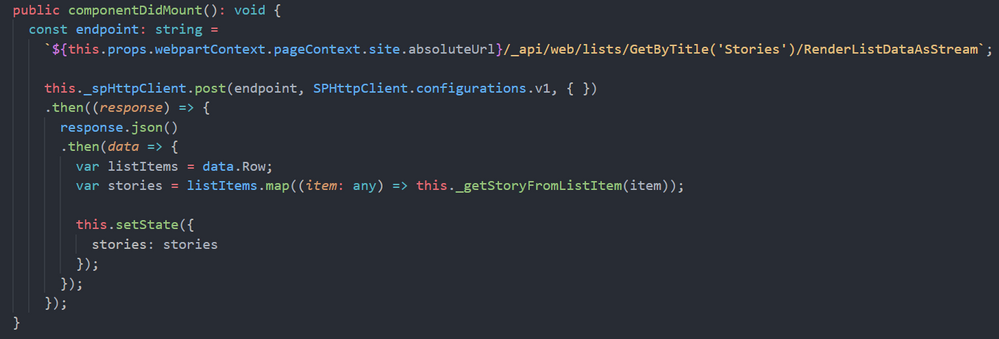 componentDidMount
The method “_getStoryFromListItem” will create a Story object for the “react-insta-stories” component, and here we have an interesting challenge. The Story object, has a Header property, aimed to render the Story author information, so you just provide the profile image, and a couple of texts for heading and subheading. Although we could get the Author profile image, username and email using Graph API, it is going to be much easier to make use of the MS Graph Toolkit library, and use the MGT Person component. In order to render the GMT Person component, we cannot use the Story Header property, however, the Story object allow us to specify a custom render function for the entire Story, and in that function, we can use the Person component. This is the relevant code to achieve it:
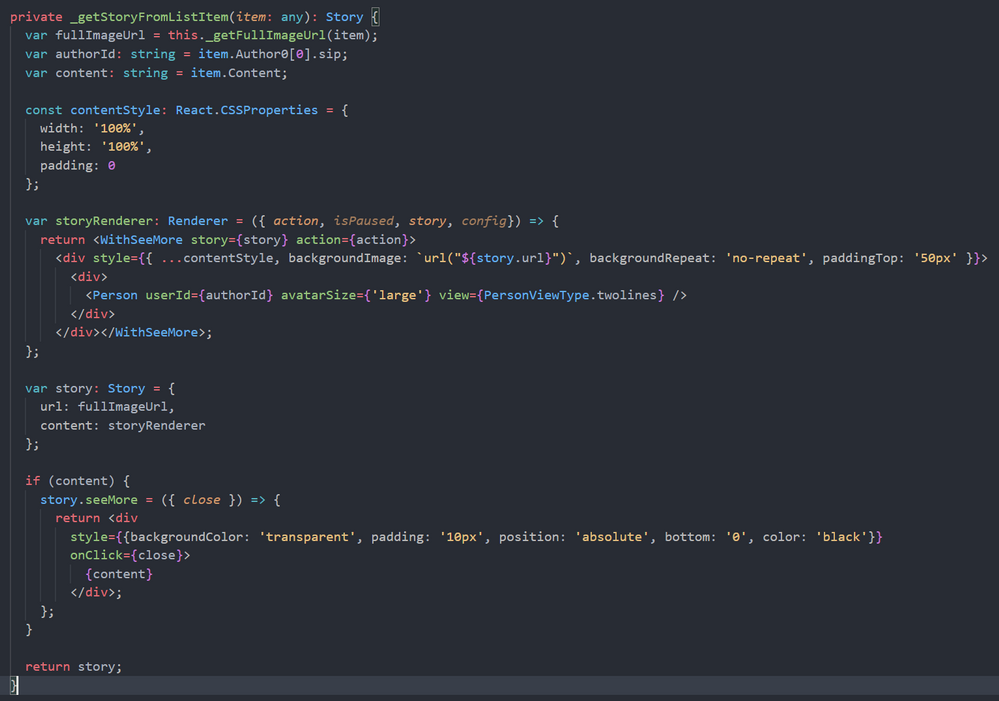 Story custom render function
The storyRenderer function is the one responsible for rendering the Story, and there, we use the GMT Person component. As you can see in the code above, we also use a React High Order Component called WithSeeMore, this component is from the react-insta-stories library and is the way to load a specific text when the “See more” link is clicked in the Story. So, if the list item has the Content field filled, we set the “seeMore” property of the Story object. This property is again a function, so you can customize how the content is rendered.
And that´s all!… you can get the full code sample in the PnP GitHub repository
Cheers!
Brought to you by Dr. Ware, Microsoft Office 365 Silver Partner, Charleston SC.


Recent Comments