by Contributed | Oct 1, 2020 | Uncategorized
This article is contributed. See the original author and article here.
Hi Everyone,
Zoheb here again with my colleague Simon Woolley from the beautiful city of Dubai and today we will be sharing some details on how we helped one of our SMC customer find a compromised user and remediate the impact.
If you haven’t read the 1st blog which covers the background do give it a read now before continuing here.
How the Microsoft Mission Critical Team helped secure AAD
Let me continue our story about Protecting the compromised user.
The Problem:
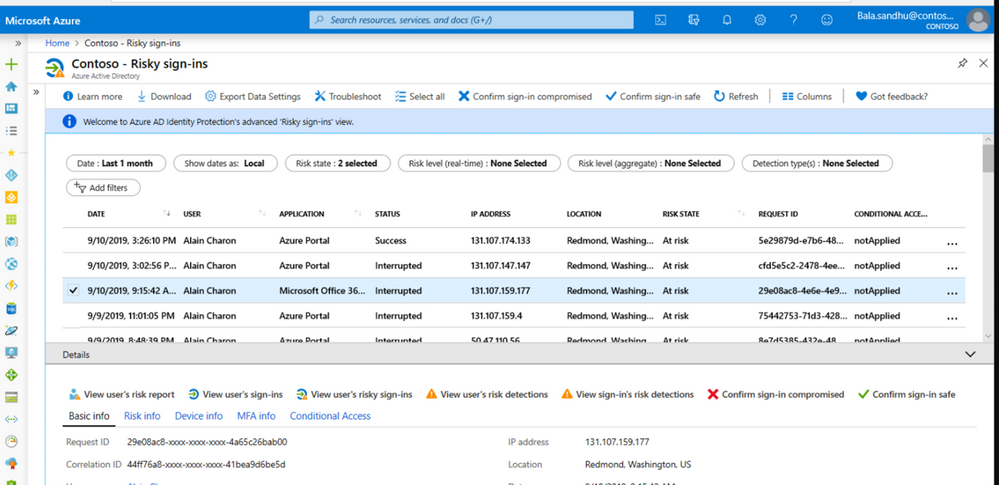
Our customer got alerted through Azure AD Risky Sign in Activity that the user is in high Risk and has done impossible travel.
This was an important user in the organization as he was from the CFO office.
The Solution:
The customer’s security team reached out to SMC to check why we are seeing such impossible travel alerts for this specific user.
SMC team checked and found that most of the Risky Sign ins were from multiple Geographies for Exchange Online, we made this user change password and enforced MFA.
See this blog to know How To Identity Investigate Risk

Based on the Sign in activities we were able to see Success in many of the Risky Sign in activities, unfortunately the customer did not have any Identity Protection enabled till then. To further investigate the issue, we involved the customer messaging team and Microsoft Incident Response team.
Simon found that several actions had been taken in this user’s mailbox, indicating that the users’ Identity had been compromised and was being used to gather additional credentials.
The attacker actions included the following:
- This user had sent emails to multiple users in the organization with a link to a malicious website.
- A new forwarding rule had been created to forward mail to an external address.
- A new inbox rule had been created to move items to RSS Subscriptions, and mark the mails as read.
Going back further we noted that a week before this the user had clicked on a URL that was determined by ATP to be malicious.
Basically, the attacker tried to compromise multiple users.
Our immediate response to this issue consisted of the following.
- We changed the user password.
- We enforced MFA on the user account.
- Removed the inbox rule using Exchange PowerShell commands.
- Removed the forwarding address.
- Used eDiscovery to find and remove the malicious mail from internal mailboxes.
- Reviewed all users that had clicked the URL, changed their passwords, and enforced MFA.
Reference for detailed information on similar remediation
https://docs.microsoft.com/en-us/microsoft-365/security/office-365-security/detect-and-remediate-outlook-rules-forms-attack?view=o365-worldwide
https://docs.microsoft.com/en-us/microsoft-365/security/office-365-security/responding-to-a-compromised-email-account
Being part of the Microsoft Mission Critical Solution team, we always go above and beyond to support our customers. The first step is always to quickly resolve the reactive issue, then identify the Root Cause, and finally through our Proactive Delivery Methodology, making sure this does not happen again.
In this case we helped our SMC customer identify the cause and gave all necessary recommendations to avoid any future certificate issues. Below are the reasons this issue occurred:
Detailed long-term solution
Identity Protection
Enforced MFA through an Identity Protection Policy based on the users Risk level.
Enabled MFA for any user not using a trusted IP.
See the blog below for more information on how we implemented this.
Risky Business in AzureAD
Azure Logic App
We developed a logic app in Azure that triggered when a user clicks on a malicious link.
This logic app then performs the following actions.
- Send the user a message in Teams to alert them that they had clicked a malicious link. This is a backup as the mailbox may be compromised and the user may not receive mail.
- Send the user an email to alert them.
- Send a mail to the security team for additional review.
- Send a mail to the Helpdesk to log a call.
- Send a mail to the Messaging team for further investigation.
- Add the user to a Security group which has MFA enforced through conditional access policies.
Anti-Spam Settings
Created a new outbound antispam policy to limit the number of recipients per hour internally, externally and a total number of recipients per day. This is to limit the scope of compromise.
Users that need to send more had to provide a business case and are added to a group to enforce MFA and this group was assigned to an outbound anti-spam policy with higher limits.
Please see this blog for more details on recommended settings for eop
This resulted in a drastic reduction in the number of risky users and risky sign-ins. Additionally we helped implement a process of investigation and remediation of these at- risk accounts from the service desk to the internal security department.
NOTE: The features and guidelines implemented in this case were specific to this customer’s requirements and environment, so this is not a “General” guideline to enable any of the mentioned features.
Regards,
Simon & Zoheb
by Contributed | Oct 1, 2020 | Azure, Technology, Uncategorized
This article is contributed. See the original author and article here.
Authors: Wolfgang M. Pauli and Manash Goswami

AI applications are designed to perform tasks that emulate human intelligence to make predictions that help us make better decisions for the scenario. This drives operational efficiency when the machine executes the task without worrying about fatigue or safety. But the effectiveness of the AI application is defined by the accuracy of the model used to address the end user scenario.
To build the accurate model, package in application and execute in the target environment requires many components to be integrated into one pipeline, e.g. data collection, training, packaging, deployment, and monitoring. Data scientists and IT engineers need to monitor this pipeline to adjust to changing conditions, rapidly make updates, validate, and deploy in the production environment.
This continuous integration and continuous delivery (CI/CD) process needs to be automated for efficient management and control. It also helps in developer agility to shorten the lifecycle to update and deploy the application.
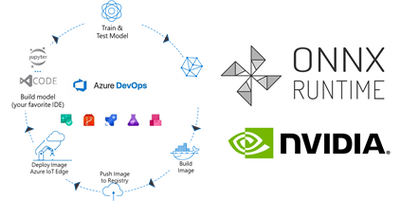
Today, we are introducing a reference implementation for a CI/CD pipeline built using Azure DevOps to train a CNN model, package the model in a docker image and deploy to a remote device using Azure IoT Edge for ML inference on the edge device. We will be training a TinyYolo Keras model with TensorFlow backend. The trained model is converted to ONNX and packaged with the ONNX Runtime to run on the edge device.
The sample is published here.

Before we get started, here are a few concepts about the tools we are using in this sample:
What is Azure DevOps?
Azure DevOps is the collection of tools that allows developers to setup the pipeline for the different steps in the development lifecycle. Developers can automate and iterate on software development to ship high quality applications.
ONNX and ONNX Runtime for ML on Edge device
ONNX (Open Neural Network Exchange) is the common format for neural networks that can be used as a framework-agnostic representation of the network’s execution graph. Models in ONNX format allow us to create a framework-independent pipeline for packaging and deployment across different hardware (HW) configurations on the edge devices.
ONNX Runtime is the inference engine used to execute models in ONNX format. ONNX Runtime is supported on different OS and HW platforms. The Execution Provider (EP) interface in ONNX Runtime enables easy integration with different HW accelerators. There are packages available for x86_64/amd64 and aarch64. Developers can also build ONNX Runtime from source for any custom configuration. The ONNX Runtime can be used across the diverse set of edge devices and the same API surface for the application code can be used to manage and control the inference sessions.
This flexibility, to train on any framework and deploy across different HW configuration, makes ONNX and ONNX Runtime ideal for our reference architecture, to train once and deploy anywhere.
Pre-requisites and setup
Before you get started with this sample, you will need to be familiar with Azure DevOps Pipelines, Azure IoT and Azure Machine Learning concepts.
Azure account: Create an Azure account in https://portal.azure.com. A valid subscription is required to run the jobs in this sample.
Devices: There are many options for Edge HW configurations. In our example, we will use two devices from the Jetson portfolio – they can be any of Nano / TX1 / TX2 / Xavier NX / AGX Xavier. One device will be the dev machine to run the self-hosted DevOps agent, and the other will be the test device to execute the sample.
-
Dev Machine: This machine will be used to run the jobs in the pipeline for CI/CD. This requires some tools to be installed on the device:
-
Azure DevOps agent: Since the test device is based on Ubuntu/ARM64 platform, we will setup a self-hosted Azure DevOps agent to build the ARM64 docker images in one of the devices. Another approach is to setup a docker cross-build environment in Azure which is beyond the scope of this tutorial.
-
Azure IoT Edge Dev Tool: The IoT Edge Dev Tool (iotedgedev) helps to simplify the development process for Azure IoT modules. Instead of setting up the dev machine as an IoT Edge endpoint with all the tools and dependencies, we will install the IoT Edge Dev container. This will greatly simplify the dev-debug-test loop to validate the inner loop of this CI/CD pipeline on the device before pushing the docker images to the remote IoT endpoint. You will need to manually setup the iotedgedev tool on this arm64 device.
-
AzureML SDK for Python: This SDK enables access to AzureML services and assets from the dev machine. This will be required to pull the re-trained model from the AzureML registry to package in the docker image for the IoT Edge module.
-
Test Device: This device is used to deploy the docker containers with the AI model. It will be setup as an IoT Edge endpoint
Training in TensorFlow and converting to ONNX
Our pipeline includes a training step using AzureML Notebooks. We will use a Jupyter notebook to setup the experiment and execute the training job in AzureML. This experiment produces the trained model that we will convert to ONNX and store the model in the model registry of our AzureML workspace.

Setup the Release Pipeline in Azure Dev Ops
A pipeline is setup in Azure DevOps to package the model and the application code in a container. The trained model is added as an Artifact in our pipeline. Everytime a new trained model is registered in the AzureML model registry it will trigger this pipeline.
The pipeline is setup to download the trained model to the dev machine using the azureml sdk.
Packaging the ONNX Model for arm64 device
In the packaging step, we will build the docker images for the NVIDIA Jetson device.
We will use the ONNX Runtime build for the Jetson device to run the model on our test device. The ONNX Runtime package is published by NVIDIA and is compatible with Jetpack 4.4 or later releases. We will use a pre-built docker image which includes all the dependent packages as the base layer to add the application code and the ONNX models from our training step.
Push docker images to Azure Container Registry (ACR)
The docker images are pushed to the container registry in Azure from the dev machine. This registry is accessible for other services like Azure IoT Edge to deploy the images to edge devices.
Deploy to IoT Edge device
The Azure IoT Hub is setup with the details of the container registry where the images are pushed in the previous step. This is defined in the deployment manifest – deployment.json. When new docker images are available in the ACR, they are automatically pushed to the IoT Edge devices.
This completes the deployment step for the sample.
Additional Notes
We can monitor the inference results in the IoT Hub built-in event point.
This sample can be enhanced to store the inference results in Azure Storage and then visualize in PowerBI.
The docker images can be built for other HW platforms by changing the base image in the Dockerfiles.

by Contributed | Oct 1, 2020 | Uncategorized
This article is contributed. See the original author and article here.
Turn content into knowledge with SharePoint Syntex
We are thrilled to announce that SharePoint Syntex, the first product from Project Cortex, is available today. SharePoint Syntex uses advanced AI and machine teaching to amplify human expertise, automate content processing, and transform content into knowledge.
SharePoint Syntex is generally available as a user-based add-on for Microsoft 365 plans for commercial customers. For more details, visit our Microsoft 365 Enterprise Licensing page.
SharePoint Syntex is the first product coming out of our investments in Project Cortex. In addition to SharePoint Syntex, we’ll be releasing other innovations later this year that help you organize information into topics and deliver knowledge across Microsoft 365 apps. We’ll have more details to share on Project Cortex topic experiences later this year.
Meet our Preferred partners

We’re proud to recognize our Preferred partners for the launch of Project Cortex, including SharePoint Syntex. Trained and prepared to deliver joint solutions for our customers, the Preferred partners of the Microsoft Content Services Partner Program (CSPP) span the globe and offer a broad range of software, consulting, training, and adoption solutions. Each has been recognized for proven customer success in envisioning and delivering customer content solutions in Microsoft 365, and for expertise with Project Cortex and SharePoint Syntex. Congratulations, and thank you.
Join us for Office Hours
Interested in how your company could use or benefit from Project Cortex, including SharePoint Syntex. Join us for the October 14 meeting (download invite), where we’ll highlight how Financial Services organizations can benefit from Project Cortex.
Learn more about the Office Hours series and view the recaps and recordings for all past meetings on the Office Hours page.
Catch up on Microsoft Ignite 2020

Discover more about SharePoint Syntex and Project Cortex by reading the SharePoint Syntex Ignite announcement and watching the following Microsoft Ignite 2020 sessions:
Dive deeper on the Virtual Hub
Visit the Virtual Hub for Knowledge to access 30 on-demand sessions on SharePoint Syntex, Project Cortex, and Knowledge in Microsoft 365, including the following:
- Connect people with knowledge and expertise in Microsoft 365
- Expertise & knowledge networks: Microsoft’s vision for a successful knowledge system in your organization
- Rolling out Project Cortex at DXC Technology, Mott MacDonald, and Protiviti
- How to successfully activate and adopt Project Cortex
- Adopting content capture and process automation services for content in Microsoft 365
- Step-by-Step: How to build a document understanding model using Project Cortex
Visit the SharePoint Syntex resource center and the Project Cortex resource center to learn more.

by Contributed | Oct 1, 2020 | Uncategorized
This article is contributed. See the original author and article here.
You and your team can now purchase Visio cloud subscriptions directly with your business domain. There’s no need to create a new account at onmicrosoft.com account or request a license through your IT department unless the self-service purchase is disabled for your organization. Aside from your credit card, all you need is an Azure Active Directory account to get Visio. Start using Visio when you need it and collaborate with your team right away!
Visio Plan 1 and Visio Plan 2 monthly commitment plans are available for self-service purchase by individuals at the Visio website.

Please note, self-service purchase capabilities aren’t currently available in India, Brazil, Democratic Republic of Congo (DRC), or to customers who are eligible for Government or Education offers.
The self-service purchase experience lets you purchase as many licenses as you’d like and then assign them to your colleagues at Microsoft 365 admin center in the limited admin mode. There’s more information about Visio self-service purchase for individuals on our Self-service purchase FAQ support page.
The new self-service purchase option doesn’t compromise IT oversight or control. If you have IT admin rights, you can disable or enable self-service purchases for users in your organization. You can also see all self-service purchases of Visio and related details in the Microsoft 365 admin center. Moreover, you can either take over self-service purchase subscriptions or assign existing licenses to users who purchased licenses on their own. See more details how to manage self-service purchases as an IT admin here.
This blog post is the first of four that dive into the update details from our Microsoft Ignite roundup blog. The remaining three will be published in the coming weeks, so keep checking our Tech Community Blogs site. In the meantime, please continue to send us your product feedback and ideas through UserVoice.

by Contributed | Oct 1, 2020 | Uncategorized
This article is contributed. See the original author and article here.
In SP2019 environment, sometime when trying to browse to pages that have SPFx Web Part in secure SharePoint site, error shows:
“Something went wrong….”

Or developer/admin tries to deploy the SPFx solution in the secure site and gets error:

Interestingly, some users find they can browse to the same pages and deploy the same SPFx web part with the corresponding Non-SSL URL just fine:


ULS log has following entries:
09/22/2020 21:03:38.57 w3wp.exe (0x2828) 0x3CAC SharePoint Foundation Site Cache bm4im High LookupHostHeaderSite: could not find SPSiteLookupInfo for host-header site-based multi-url lookup string https://sp2019 for request Uri https://sp2019/_api/web/GetOnePageContextAsStream in Database Using site lookup provider: Microsoft.SharePoint.Administration.SPConfigurationDatabaseSiteLookupProvider. UserAgent: Mozilla/5.0 (Windows NT 10.0; Win64; x64) AppleWebKit/537.36 (KHTML, like Gecko) Chrome/85.0.4183.102 Safari/537.36 Edg/85.0.564.51 45b47c9f-c217-10f4-a763-6e50045c7103
09/22/2020 21:03:38.57 w3wp.exe (0x2828) 0x3CAC SharePoint Foundation Configuration 8059 Warning Alternate access mappings have not been configured. Users or services are accessing the site http://sp2019 with the URL https://sp2019. This may cause incorrect links to be stored or returned to users. If this is expected, add the URL https://sp2019 as an AAM response URL.
In this case, the ULS log is quite helpful, it tells us that AAM has not be set correctly for the SSL site.
To fix this, go to Central Admin, add the SSL site URL as public URL of the AAM setting for the web application:

Now browsing to SSL pages and deployment in the SSL site should both work:

by Contributed | Oct 1, 2020 | Uncategorized
This article is contributed. See the original author and article here.
The 8th cumulative update release for SQL Server 2019 RTM is now available for download at the Microsoft Downloads site. Please note that registration is no longer required to download Cumulative updates.
To learn more about the release or servicing model, please visit:
Starting with SQL Server 2017, we adopted a new modern servicing model. Please refer to our blog for more details on Modern Servicing Model for SQL Server
Note: SQL Server 2019 CU8 contains the fix for the reliability issue that impacted SQL Server 2019 CU7.
- If you applied SQL Server 2019 CU7, and you are using the database snapshot feature explicitly with the CREATE DATABASE … AS SNAPSHOT OF syntax, please recreate the snapshot after applying CU8.


Recent Comments