by Scott Muniz | Jul 31, 2020 | Alerts, Microsoft, Technology, Uncategorized
This article is contributed. See the original author and article here.
The release of 20.07 brought along a range of security enhancements and changes to Azure Sphere. As head of the Operating System Platform (OSP) Security team, I want to provide more insights into the efforts to keep Azure Sphere secure as a platform while being as transparent as possible about all the improvements made since our 20.04 release.
The OSP Security team I run for Azure Sphere worked with a diverse group of people and companies to have three separate red team events happen on the platform over the last few months; an internal Microsoft team, Trail of Bits, and the currently active Azure Sphere Security Research Challenge (ASSRC). These efforts are on top of the continued work done by the OSP team over the last three months to harden and further the security of the platform.
Trail of Bits performed a private red team exercise on the system and identified a number of risks that have been fixed for 20.07:
- The /proc file system on Linux is mounted rw giving the ability to write to /proc/self/mem allowing unsigned code execution, /proc/self/mem is now read-only
- The internal GetRandom() function failed to properly fill in buffers that have a length that is not a multiple of 4, all current usage is a multiple of 4 so no risk and code was changed to avoid future impacts
- The Sysctl Linux kernel configuration flags can be hardened, following values enabled
- kernel.kptr_restrict = 1 – limit Linux kernel pointer leakage
- kernel.dmesg_restrict = 1 – prevent access to dmesg to unprivleged processes
- fs.protected_hardlinks = 1 – users cannot create hardlinks unless they own the source file
- fs.protected_symlinks = 1 – symlinks are only followed when not in a world-writable directory, the owner of the symlink and follower match, or the directory owner and fsymlink owner match
- fs.protected_fifos = 2 – limit FIFO creation options when dealing with world writable directories
- fs.protected_regular = 2 – limit regular file creation options when dealing with world writable directories
- The internal security library for setting process information used to return success even if failed to set a process’ capabilities
- DNS name expansion leaked stack memory
- Null pointer dereferences in DMA memory for mtk3620 in the Linux kernel
- Better filtering of the content-type for GatewayD to limit cross-site scripting abuse
Although the ASSRC is still on-going it has provided a range of great findings by the participants, some of which overlapped ToB’s findings like a writable /proc/self/mem. The Linux kernel related issues identified by ToB were not fixed in 20.05 or 20.06 due to the massive Linux kernel uprgade from 4.9 to 5.4, this oversight will be handled better in the future.
Cisco Talos reported the first 2 findings that are fixed in 20.07, ptrace used to bypass the unsigned code execution protections and the Linux kernel message ring buffer being user accessible allowing for information leakage. Along with reporting the first two findings, Cisco Talos also reported the /proc/self/mem finding and found a double free in the azspio Linux kernel driver that have been fixed. Cisco has a blog post up detailing their efforts so far for the ASSRC.
As an excellent example of findings from the ASSRC effort, I would like to describe a specific attack chain that McAfee Advanced Threat Research found for the device that has been fixed for 20.07. This attack chain did require physical access to a device and could not be done remotely due to the steps involved.
- We have multiple environments that devices can be part of, two of them are pre-production and production. McAfee ATR was able to claim a device to both preproduction and production across separate tenants. Due to an oversight in signature handling for device capability images on the cloud, an attacker that claimed a device they did not own to pre-production was allowed to request a capability image for the device that was production signed. This allowed obtaining a capability image for a device and gaining access to a locked down device, this was corrected immediately.
- With the ability to get a capability image for a device, McAfee ATR could unlock a locked down device and also obtain the development capability allowing them to upload their own package to the device. An application package is a signed ASXIPFS image, our file system that is a variation of CramFS with the ability to execute from flash. The original file system code allowed for special inode filesystem entries which McAfee ATR used to create a special inode pointing to the MTD flash giving them read-only access to the on-device flash. 20.07 removes the ability to create any special inodes in the ASXIPFS image.
- Although the user controlled special inode pointing to flash is read-only due to how the file system image is mounted, McAfee ATR found a 0-day in the Linux kernel for the MTD_WRITE ioctl. The ioctl function failed to check permissions before executing the ioctl call allowing flipping bits in flash from 1 to 0 allowing McAfee ATR to use this vulnerability to rewrite the uid_map file for the device. This is patched on our Linux kernel for 20.07 and publicly fixed with https://lkml.org/lkml/2020/7/16/430.
- With the ability to modify flash, McAfee ATR rewrote the uid_map file that maps user IDs to applications to have an application with a maximum user ID where all bits in the user ID are set. The maximum ID resulted in the setresuid and setresgid function calls being passed -1. A -1 value to these functions is a special flag to indicate that the user id and group id should not be modified resulting in an application being ran as the sys user. The uid map parsing code no longer allows for a maxium user ID where all bits are set.
- Under normal operation, a system package can not be uninstalled, however an application running as sys is allowed to modify and change symlinks in various directories resulting in the ability to abuse symlink confusion on packages and force the azcore package to be uninstalled when the uninstaller thinks it is uninstalling another application. From there a user package can be installed in it’s place. Symlinks are no longer allowed in user application packages as of 20.07.
- The user application that replaces azcore does have the proper uid and gid set when executed however because the Linux kernel executes it the capability bits were never cleared out. The user replaced azcore is then able to call setuid(0) and become root on the device. This will be fixed in 20.08.
McAfee ATR did a fantastic job putting together this attack chain and finding a 0-day in the core Linux kernel itself to make it work. The attack chain exposed a weakness in the cloud and multiple weakenesses on the device including a previously unknown Linux kernel vulnerability.
While the above changes were done as a result of external red team findings, the Operating System Platform team continued improving the security of Azure Sphere.
One effort we’ve been working on is minimizing the ability to use ptrace unless in development mode. PTrace is needed by gdb to properly provide debug information however normal customer applications do not have a need for it. Having ptrace be available to customer applications allows an attacker to ptrace the process being attacked and inject unsigned code into memory for execution. 20.07 brings along a Linux kernel change where ptrace is no longer possible unless in development which also brings along a few extra enhancements as a side effect, the largest being that /proc no longer shows any other process pid and is further restricted of what a process can know about itself.
Another security enhancement is moving to wolfSSL 4.4.0 bringing along additional side channel attack hardening. Along with the wolfSSL upgrade is work to begin exposing access to supported wolfSSL functionality, the first set of functions allowing customers to directly call wolfSSL for establishing TLS client connections.
We have added more fuzzing across 5 different components and additional static code analysis tools including extra static analysis tools on every pull request into our repositories. If the static analysis fails then the PR can not be completed, this further strengthens the system by making it more difficult to check in easy to abuse coding flaws. As we expand to add features and functionality more fuzzers are built for parts of the system being updated. The addition of the new static analysis tool detected an off by one calculation in DHCP message handling that allowed reading an extra byte of data past the end of the buffer, this was corrected in 20.07.
You may have noticed that our last couple quality releases did not have a Linux kernel patch bump, this time was used to allow the Linux kernel team to upgrade the Linux kernel from 4.9 to 5.4.44. By doing so we capture Linux kernel security enhancements done between the versions along with keeping up-to-date on the latest changes.
String manipulation functions are a very common way for leaking the stack cookie along with being able to write it when string buffers are not properly null terminated. GLibC helps limit string buffer attacks by forcing the first byte of the stack cookie in memory to be 0 however we use musl on the device for libc. Musl initializes all bytes in the stack cookie instead of leaving the first byte in memory 0 allowing for the potential of stack cookie leaks and abuses. Our version of musl in 20.07 sets the first byte to 0 and the patch was provided to the maintainer incase they wish to add this security measure to musl.
On top of our own changes, MediaTek provided a new version of the firmware for their WiFi subsystem of their MT3620 that is now being used on the platform to deal with a range of issues.
As you can see, a wide range of security improvements have been made to the platform as we continue to strive to be the best in the field. We will continue to be transparent about our efforts and are devoted to being the most secure platform for IoT.
Jewell Seay
Azure Sphere OSP Security Team Lead

by Scott Muniz | Jul 31, 2020 | Alerts, Microsoft, Technology, Uncategorized
This article is contributed. See the original author and article here.

Reduce polygon count
Akihiro Oyamada is a Web Front-End Engineer at PixelGrid inc. in Tokyo, Japan. He specializes in huge product-based websites where CSS scalability and maintainability, as well as performance, are paramount. He is also a community leader as well as an expert in Web graphics technologies, such as SVG, Canvas and WebGL. For more, see his Twitter @yomotsu

Deploy WordPress on Azure Kubernetes Service
Dave Rendón has been a Microsoft Azure MVP for 6 consecutive years. As an IT professional with more than 10 years of experience, he has a strong focus on Microsoft technologies and moreover on Azure since 2010. He supports the business developers and sales teams at Kemp from a technical level. I also support the account managers by developing a firm understanding of their customer’s technical dilemma(s) and providing a sound technical solution. Follow him on Twitter: @DaveRndn

What Is Entity Framework In ASP.NET MVC?
Asma Khalid is an Entrepreneur, ISV, Product Manager, Full Stack .Net Expert, Community Speaker, Contributor, and Aspiring YouTuber. Asma counts more than 7 years of hands-on experience in Leading, Developing & Managing IT related projects and products as an IT industry professional. Asma is the first woman from Pakistan to receive the MVP award three times, and the first to receive C-sharp corner online developer community MVP award four times. See her blog here.

Sergio Govoni is a graduate of Computer Science from “Università degli Studi” in Ferrara, Italy. Following almost two decades at Centro Software, a software house that produces the best ERP for manufacturing companies that are export-oriented, Sergio now manages the Development Product Team and is constantly involved on several team projects. For the provided help to technical communities and for sharing his own experience, since 2010 he has received the Microsoft Data Platform MVP award. During 2011 he contributed to writing the book: SQL Server MVP Deep Dives Volume 2. Follow him on Twitter or read his blogs in Italian and English.

Mohamed El-Qassas is a Microsoft MVP, SharePoint StackExchange (StackOverflow) Moderator, C# Corner MVP, Microsoft TechNet Wiki Judge, Blogger, and Senior Technical Consultant with +10 years of experience in SharePoint, Project Server, and BI.
In SharePoint StackExchange, he has been elected as the 1st Moderator in the GCC, Middle East, and Africa, and ranked as the 2nd top contributor of all the time. Check out his
blog here.
by Scott Muniz | Jul 31, 2020 | Alerts, Microsoft, Technology, Uncategorized
This article is contributed. See the original author and article here.
This week some important Windows Virtual Desktop features moved to be generally available (hello audio and video redirection!), the Android Remote Desktop client now also supports WVD and Azure AD App Proxy now supports the Remote Desktop Services web client,. Azure Blob storage announced (in preview) connectivity using the Network File System 3.0 protocol. And the Azure IoT Device Provisioning Service now supports locking down ingress access to devices connecting via a specified virtual network.
Windows Virtual Desktop and Remote Desktop
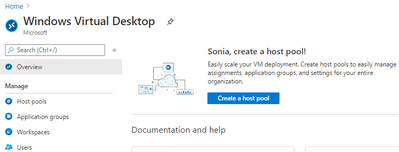
New Windows Virtual Desktop capabilities now generally available
New Windows Virtual Desktop capabilities now GA including Azure portal integration for deployment / management and new audio/video redirection capabilities providing seamless meeting and collaboration experience for Microsoft Teams.
 Windows Virtual Desktop blade in the Azure Portal
Remote Desktop client for Android now supports Windows Virtual Desktop connections
The new Remote Desktop client for Android now supports Windows Virtual Desktop connections. This new client (version 10.0.7 or later) features refreshed UI flows for an improved user experience.

The app also integrates with Microsoft Authenticator on the device to enable conditional access when subscribing to Windows Virtual Desktop workspaces. View the announcement here.
Azure AD Application Proxy now supports the Remote Desktop Services web client
You can now use the RDS web client even when App Proxy provides secure remote access to RDS. The web client works on any HTML5-capable browser such as Microsoft Edge, Internet Explorer 11, Google Chrome, Safari, or Mozilla Firefox (v55.0 and later). You can push full desktops or remote apps to the Remote Desktop web client. The remote apps are hosted on the virtualized machine but appear as if they’re running on the user’s desktop like local applications. The apps also have their own taskbar entry and can be resized and moved across monitors.
 How Azure AD App Proxy works in an RDS deployment
Learn about the requirement to update your App Proxy connectors and configure RDS to work with App Proxy.
NFS 3.0 support for Azure Blob storage is now in preview
Azure Blob storage is the only storage platform that supports the Network File System 3.0 protocol over object storage, natively (with no gateway or data copying required), with crucial object storage economics. This is great news if you need to preserve your legacy data access methods but want to migrate the underlying storage to Azure Blob storage. It also enables you to re-use the same code from on-premises solutions to access files. Learn more, including how to mount a blob container using NFS 3.0.
Azure IoT Device Provisioning Service VNET ingress support is now available
The Azure IoT Device Provisioning Service VNET ingress support feature enables users to lock down DPS ingress access to devices connecting through a specific VNET. DPS egress to IoT Hub uses an internal service-to-service mechanism and does not currently operate over a dedicated VNET.
This core new capability improves the connectivity security and is of special significance to those in the industrial and enterprise sectors with stringent network and compliance requirements. View the documentation Azure IoT Hub Device Provisioning Service (DPS) support for virtual networks.
MS Learn Module of the Week

This week we couldn’t decide, so it’s TWO modules of the week, both about Azure Resource Manager templates.
- Deploy to multiple Azure environments by using ARM templates
Now you understand how ARM templates work, in this module you make your ARM template reusable for different environments by adding variables and expressions via Resource Manager functions. You also add better tracking and organization of your deployed resources by using tags. You complete the goal of improving the flexibility of your deployments by using parameter files.
Those were our highlights this week – tell us about yours! Was something else on the Azure announcements blog relevant to you? Will these announcements help your organization this week? Let us know in the comments.
by Scott Muniz | Jul 30, 2020 | Alerts, Microsoft, Technology, Uncategorized
This article is contributed. See the original author and article here.
What is the issue?
We discovered an issue that affects verification of tenant certificates and we are resolving this by renewing the tenant CA certificates for all impacted tenants. As described in the blog Azure Sphere tenant CA certificate management: certificate rotation, the Azure Sphere tenant certificate authority (CA) certificates that were issued two years ago are being automatically renewed. The Azure Sphere 20.07 SDK, released on July 29, 2020, supports features with which you can download the renewed certificates for your tenants. For certificates created between June 16, 2020 21:00 UTC, and July 28, 2020 00:15 UTC, verification using OpenSSL may fail. The failure is due to a mismatched signature algorithm identifier in the certificate. The error does not compromise the security of these certificates.
Who is impacted?
If the tenant CA certificate issuance date is after June 16, 2020 and before July 28, 2020, the tenant CA certificate may fail to verify with OpenSSL. The Azure Sphere Security Service will renew and activate all impacted certificates as a corrective measure.
What actions should you take?
|
Condition
|
Instructions
|
|
You have not downloaded the tenant CA certificate or tenant CA certificate chain that was issued between June 16, 2020 and July 28, 2020
(If you run ‘azsphere ca list’ in your Azure Sphere Development command prompt, you will see this issue date listed as “Start date”)
|
You don’t have any actions to take and these instructions don’t apply to you.
|
|
You have downloaded the tenant CA certificate or tenant CA certificate chain that was issued between June 16, 2020 and July 28, 2020
|
Between August 5, 2020 and August 18, 2020, please follow the instructions below to ensure that there is no break in service.
- Run ‘azsphere ca list’ in your Azure Sphere Development command prompt
- Use the most recent certificate to register with Azure IoT Hub/Central or other third-party resources following instructions here
|
For tenants that are impacted by this issue, the new and valid tenant CA certificates will be created by August 5, 2020. The new certificates will be activated after August 18, 2020. If you have any additional questions, please reach out to Microsoft Support.
Documentation Resources:
by Scott Muniz | Jul 30, 2020 | Alerts, Microsoft, Technology, Uncategorized
This article is contributed. See the original author and article here.
Now, for the first time, with the Azure Sphere OS 20.07 release, Microsoft has licensed and exposed a subset of wolfSSL for use on Azure Sphere devices, allowing software developers to create client TLS connections directly using the Azure Sphere SDK. Software developers no longer need to package their own TLS library for this purpose. Using the wolfSSL support in Azure Sphere can save device memory space and programming effort, freeing developers to build new IoT solutions.
Microsoft Azure Sphere and wolfSSL have been long-time partners, striving for the very best in security. The Azure Sphere OS has long used wolfSSL for TLS connections to Microsoft Azure services. Azure Sphere also uses wolfSSL technology to enable secure interactions from developer apps to customer-owned services.
Partnerships with leaders like wolfSSL play an important role in Azure Sphere’s mission to empower every organization to connect, create, and deploy highly secured IoT devices. The unique Azure Sphere approach to security is based on years of vulnerability research, summarized in the seminal paper “Seven Properties of Highly Secure Devices.” These seven properties are the minimum requirement for any connected device to be considered highly secured. Azure Sphere implements all seven properties, providing a robust foundation for IoT devices.
Azure Sphere can be used with any customer cloud service, not just Microsoft’s own Azure. By providing a highly secured ecosystem, Microsoft and wolfSSL make security features more accessible and easier to use and can extend unmatched security to the frontiers in IoT where security has historically been sparse.
For information on how to use the wolfSSL API on Azure Sphere, please see Use wolfSSL for TLS connections in the online documentation. We plan to publish a related sample application, available at a later date. Check back here—we will update this post with the link to the sample once it is available.
If you have any questions, contact Microsoft at AzCommunity@microsoft.com or wolfSSL at facts@wolfSSL.com
by Scott Muniz | Jul 30, 2020 | Alerts, Microsoft, Technology, Uncategorized
This article is contributed. See the original author and article here.
In the last part of this two-part series, Shreya Verma takes a deeper dive into backup options by showing us point-in-time, long-term retention, and geo restore demos. To learn about the different backups options Azure SQL provides and how to effectively manage them, watch part one.
Watch on Data Exposed
Additional Resources:
Overview of Business Continuity
Automated Backups
Backup Cost Management
PiTR and Geo-Restore
Long-Term Retention
Recovery Drills
Azure SQL Blogs
View/share our latest episodes on Channel 9 and YouTube!

Recent Comments