This article is contributed. See the original author and article here.
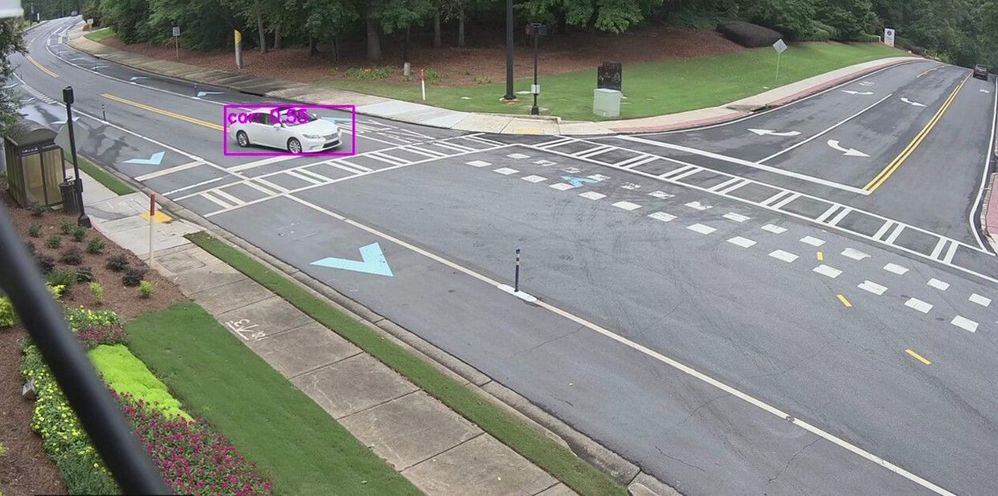
Many smart cities are thinking about generating traffic insights using edge AI and video as a sensor. These traffic insights can range from simpler insights such as vehicle counting and traffic pattern distribution over time to more advanced insights such as detecting stalled vehicles and alerting the authorities.
In this blog, I show how I am using an Azure Percept dev kit to build a sample traffic monitoring application using the reference sources and samples in GitHub provided by Microsoft along with the Azure IoT and Percept ecosystem.
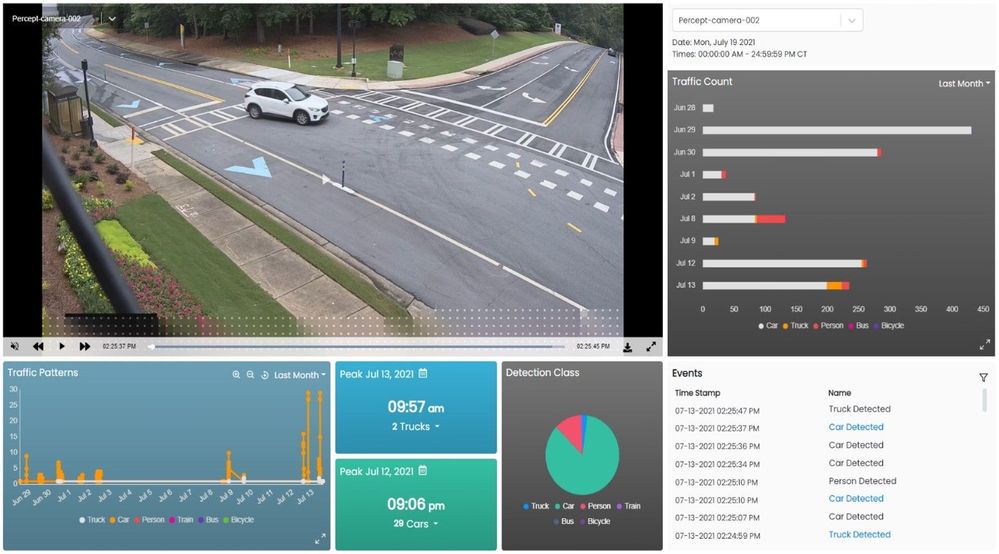
I wanted to build a traffic monitoring application that would classify vehicles into cars, trucks, bicycles etc. and count each vehicle category to generate insights such as traffic density and vehicle type distribution over time. I wanted the traffic monitoring AI application to show me the traffic pattern distribution in a dashboard updated in real-time. I also wanted to generate alerts and visualize a short video clip whenever an interesting event occurs (for example number of trucks exceed a threshold value). In addition, a smart city manager would be able to pull up a live video stream when heavy traffic congestion is detected.
Here’s what I needed to get started
- An Azure subscription (with full access to Azure services)
- An Azure Percept DK (Edge Vision/AI device with Azure IoT Edge)
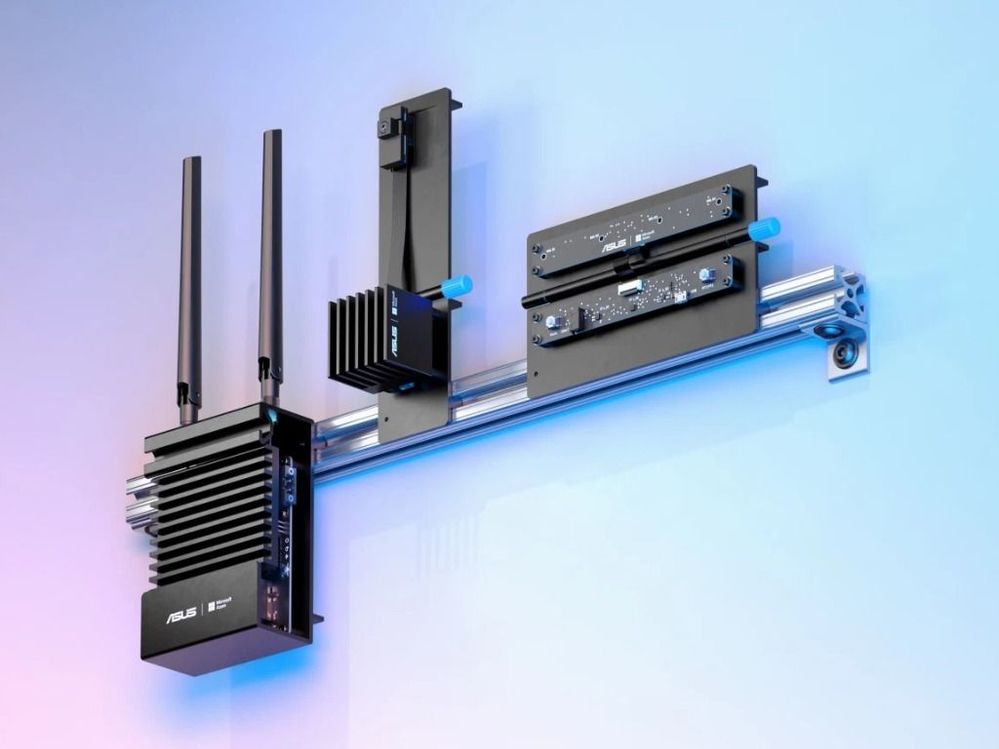
Azure Percept ($349 in the Microsoft store): https://www.microsoft.com/store/build/azure-percept/8v2qxmzbz9vc
HOST: NXP iMX8m processor
Vision AI: Intel Movidius Myriad X (MA2085) vision processing unit (VPU)
- Inseego 5G MiFi ® M2000 mobile hotspot (reliable cloud connection for uploading events and videos)
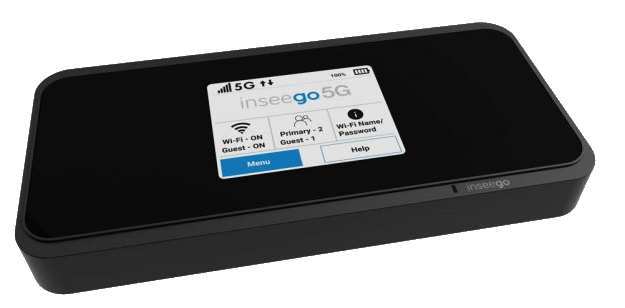
Radio: Qualcomm ® snapdragon ™ x55 modem
Carrier/plan: T-Mobile 5g Magenta plan
https://www.t-mobile.com/tablet/inseego-5g-mifi-m2000
Key Azure Services/Technologies used
- Azure IoT Hub
- Azure IoT Edge (edgeAgent, edgeHub docker containers)
- Azure Percept Eye Module (Azure Percept Module)
- Azure Video Analyzer (AVA)
- Azure Blob Storage
- Azure Container Registry (ACR)
- Azure Media Services (AMS)
Overall setup and description
Step 1: Unbox and setup the Azure Percept
This step takes about 5-10 minutes when all goes well. You can find the setup instructions here https://docs.microsoft.com/azure/azure-percept/quickstart-percept-dk-set-up.
Here are some screenshots that I captured as I went through my Azure Percept device setup process.
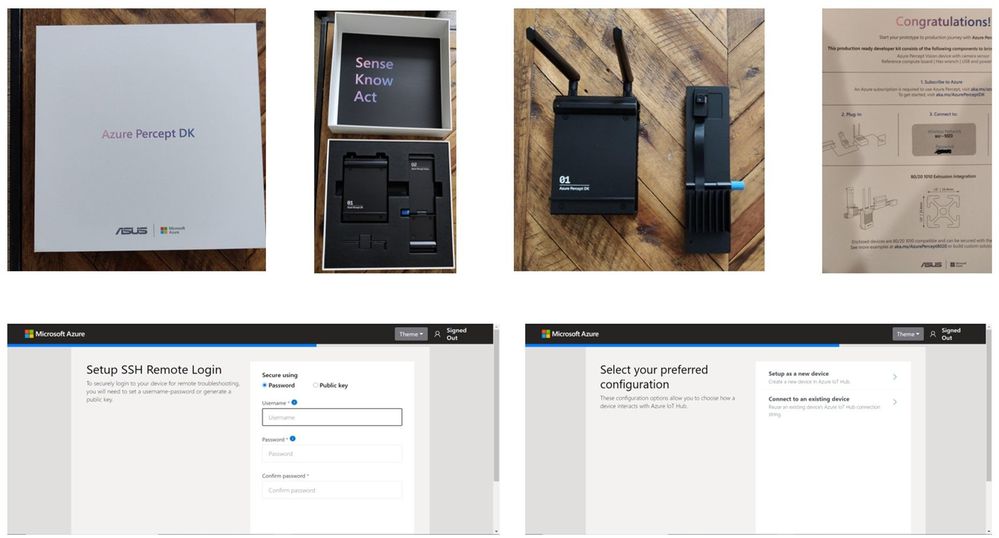
Key points to remember during the device setup are to make sure you note down the IP address of the Azure Percept and setup your ssh username and password so you can ssh into the Azure Percept from your host machine.
During the setup, you can create a new Azure IoT Hub instance in the Cloud or you can use an existing Azure IoT hub that you may already have in your Azure subscription.
Step 2: Ensure good cloud connectivity (uplink/downlink speed for events, videos and live streaming)
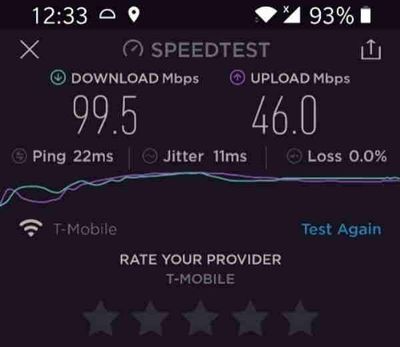
The traffic monitoring AI application I am building is intended for outdoor environments where wired connections are not always feasible or available. Video connectivity is necessary for live streaming or uploading video clips when network connectivity is available. For this demo, the Azure Percept device will be connecting to the cloud using a 5G device to upload events and video clips. Make sure that the video uplink speeds over 5G are good enough for video clip uploads as well as live streaming. Here is a screenshot of the speed test for the Inseego 5G MiFi ® M2000 mobile hotspot from T-Mobile that I am using for my setup.
Step 3: Reference architecture
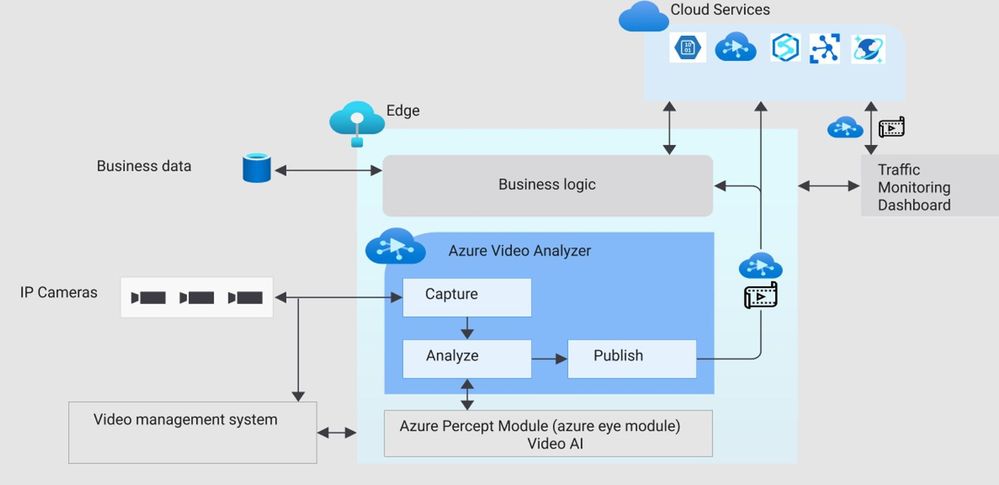
Here is a high-level architecture diagram of a traffic monitoring application built with Azure Percept and Azure services. For this project, I used the Azure Percept dev kit with the single USB-connected camera (as opposed to external IP cameras) and Azure Video Analyzer.
Step 4: Build Azure eye module docker container for ARM 64
You will want to make a few customizations to the Azure Eye Module C++ source code tailored to your traffic monitoring application (for example, you can make customizations to only send vehicle detection events to IoT hub or you can build your own custom parser class for custom vehicle detection models). For this project, I am using the SSD parser class with the default SSD object detection model in the Azure Eye Module.
To build a customized Azure Eye Module, first download the Azure Eye Module reference source code from GitHub. On your host machine, clone the following repo:
git clone https://github.com/microsoft/azure-percept-advanced-development.git
On your host machine, open a command shell and use the following command to build the Azure Eye Module docker container. Note that you will need docker desktop running prior to running this command (I am using a Windows host):
docker buildx build --platform linux/arm64 --tag azureeyemodule-xc -f Dockerfile.arm64v8 --load
Once docker image is built, tag it and push it to your ACR.
Step 5: Build Objectcounter docker container for arm64
Download the Object Counter reference source code from github. On your host machine, clone the following repo:
git clone https://github.com/Azure-Samples/live-video-analytics-iot-edge-python
Navigate to the folder live-video-analytics-iot-edge-pythonsrcedgemodulesobjectCounter
Build the docker container and push it to your ACR:
docker build  -f docker/Dockerfile.arm64 –no-cache .  -t objectcounter:0.0.1-arm64v8
docker login  -u <your_acr_name>  -p <your_acr_password>  <your_acr_name>.azurecr.io
docker push <your_acr_name>.azurecr.io/objectcounter:0.0.1-arm64v8
I made several source code changes to main.py in the objectCounter module to customize my own objectCounter docker container. For example, I only send a video event trigger to the signal gate processor (to capture video recording of a few seconds around an event) when a certain vehicle category exceeds a threshold count. I also made customizations so that object counter can understand inference events from SSD (in-built detection engine that comes with AzureEye Module) or a custom YOLOv3 model that is external to the AzureEye module (You can read about how to run an external YOLOv3 model in my previous blog post here
Step 6: Azure Video Analyzer For Edge Devices
To be able to save video recordings around interesting event detections, you will need the Azure Video Analyzer module.
You may choose to build your own custom AVA docker container from here:
https://github.com/Azure/video-analyzer.git
You can read more about the AVA and how to deploy it to an edge device here
Step 7: Configure message routes between the Azure IoT edge modules
The different modules (Azure Percept Module, ObjectCounter Module and AVA Module) interact with each other through MQTT messages.
Summary of the routes:
- Azure Percept module sends the inference detection events to IoT hub which is configured to further route the messages either to blob storage or a database (for dashboards and analytics in the cloud).
- Azure Percept module sends the detection events to objectCounter module that implements business logic (such as object counts and aggregations which are used to trigger video recordings via the AVA module)
- ObjectCounter module sends the aggregations and triggers to IoT hub which is configured to further route the messages either to blob storage or a database (for dashboards and analytics in the cloud).
- ObjectCounter module sends the event triggers to AVA so that AVA can start recording event clips
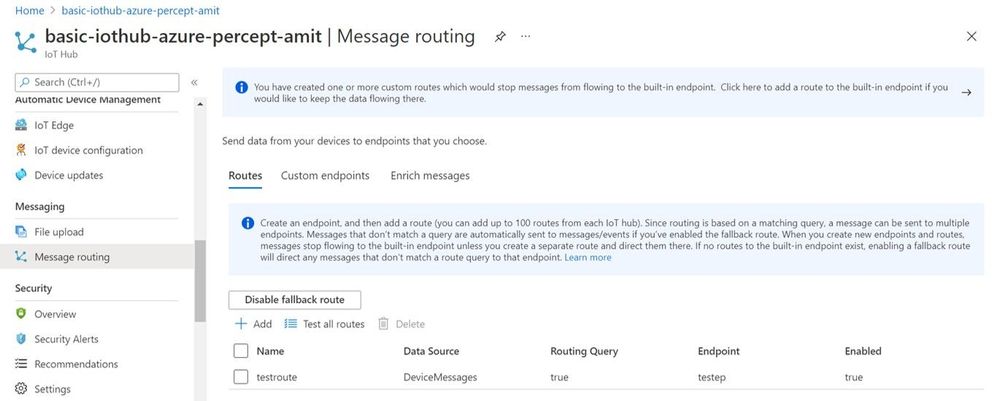
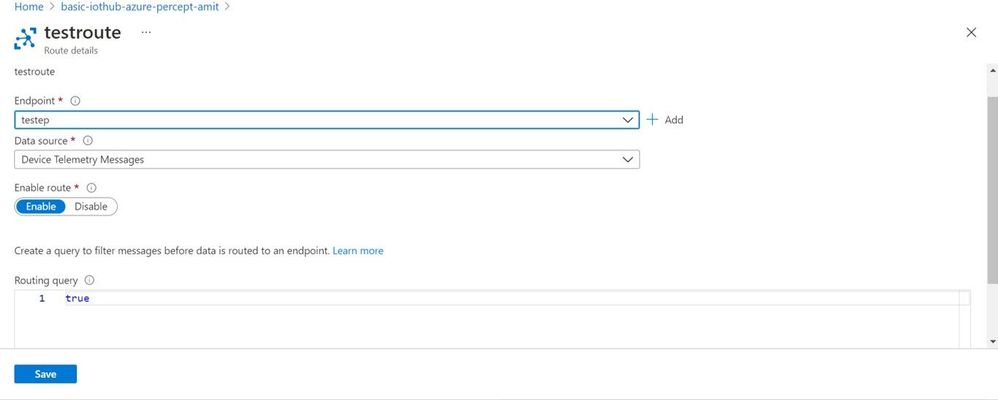
Here are a couple of screenshots to show how to route messages from IoT Hub to an endpoint:
Here is a sample inference detection event that IoT hub receives from the Azure Percept Module
Body":{
  "timestamp": 145831293577504,
  "inferences": [
    {
      "type": "entity",
      "entity": {
        "tag": {
          "value": "person",
          "confidence": 0.62337005
        },
        "box": {
          "l": 0.38108632,
          "t": 0.4768717,
          "w": 0.19651619,
          "h": 0.30027097
        }
      }
    }
  ]
Step 8: Set up the graph topology for AVA
There are multiple ways to build your own custom graph topology based on the use cases and application requirements. Here is how I configured the graph topology for my sample traffic monitoring AI application.
 "sources": [
        {
          "@type": "#Microsoft.Media.MediaGraphRtspSource",
          "name": "rtspSource",
          "endpoint": {
            "@type": "#Microsoft.Media.MediaGraphUnsecuredEndpoint",
            "url": "${rtspUrl}",
            "credentials": {
              "@type": "#Microsoft.Media.MediaGraphUsernamePasswordCredentials",
              "username": "${rtspUserName}",
              "password": "${rtspPassword}"
            }
          }
        },
        {
          "@type": "#Microsoft.Media.MediaGraphIoTHubMessageSource",
          "name": "iotMessageSource",
          "hubInputName": "${hubSourceInput}"
        }
      ],
      "processors": [
        {
          "@type": "#Microsoft.Media.MediaGraphSignalGateProcessor",
          "name": "signalGateProcessor",
          "inputs": [
            {
              "nodeName": "iotMessageSource"
            },
            {
              "nodeName": "rtspSource"
            }
          ],
          "activationEvaluationWindow": "PT3S",
          "activationSignalOffset": "-PT1S",
          "minimumActivationTime": "PT3S",
          "maximumActivationTime": "PT4S"
        }
      ],
      "sinks": [
        {
          "@type": "#Microsoft.Media.MediaGraphFileSink",
          "name": "fileSink",
          "inputs": [
            {
              "nodeName": "signalGateProcessor",
              "outputSelectors": [
                {
                  "property": "mediaType",
                  "operator": "is",
                  "value": "video"
                }
              ]
            }
          ],
          "fileNamePattern": "MP4-StreetViewAssetFromEVR-AVAEdge-${System.DateTime}",
          "maximumSizeMiB":"512",
          "baseDirectoryPath":"/var/media"
        }
      ]
    }
  }
If you are using a pre-recorded input video file (.mkv or .mp4) instead of live frames from the USB-connected camera module, then update the rtspUrl to grab frames via the RTSPsim module:
"name": "rtspUrl",
"value": "rtsp://rtspsim:554/media/inv.mkv"
I use the following RTSPSim container module provided by Microsoft to stream a pre-recorded video file:
mcr.microsoft.com/lva-utilities/rtspsim-live555:1.2
If you are using live frames from the USB-connected camera, then grab the live rtsp stream from Azure Percept Module:
"name": "rtspUrl",
"value": "rtsp://AzurePerceptModule:8554/h264"
Here is a brief explanation of the media graph topology that I use:
- There are two source nodes in the graph.
- First source node is the RTSP source (the RTSP source can either serve live video frames from the Percept camera module or pre-recorded video frames served via the RTSPsim)
- Second source node is the IoT message source (this is the output of the Object Counter Trigger)
- There is one Processor node which is the signal gate processor. This node takes the IoT message source and RTSP source as inputs and based on the object counter trigger, the signal gate requests the AVA module to create a 5 second video recording of the detected event (-PT1S to +PT4S)
- There is one Sink node, which is the fileSink. This could also be an AMS asset sink. However, currently, AMS asset sink has a limitation of minimum 30 seconds video clip duration. Hence, I used a fileSink to save a 5 second clip and then used an external thread to upload the locally saved .mp4 files to Azure blob storage. Note that for on-demand live streaming, I use Azure AMS.
You can learn more about Azure Media Graphs here:
https://docs.microsoft.com/azure/media-services/live-video-analytics-edge/media-graph-concept
You can learn more about how to configure signal gates for event based video recording here:
Step 9: Dashboard to view events, videos and insights
You can use any web app (e.g. react.js based) and create APIs to build a traffic monitoring dashboard that shows real-time detections and video recordings from Azure IoT hub and Azure blob storage. Here is an example of a dashboard:
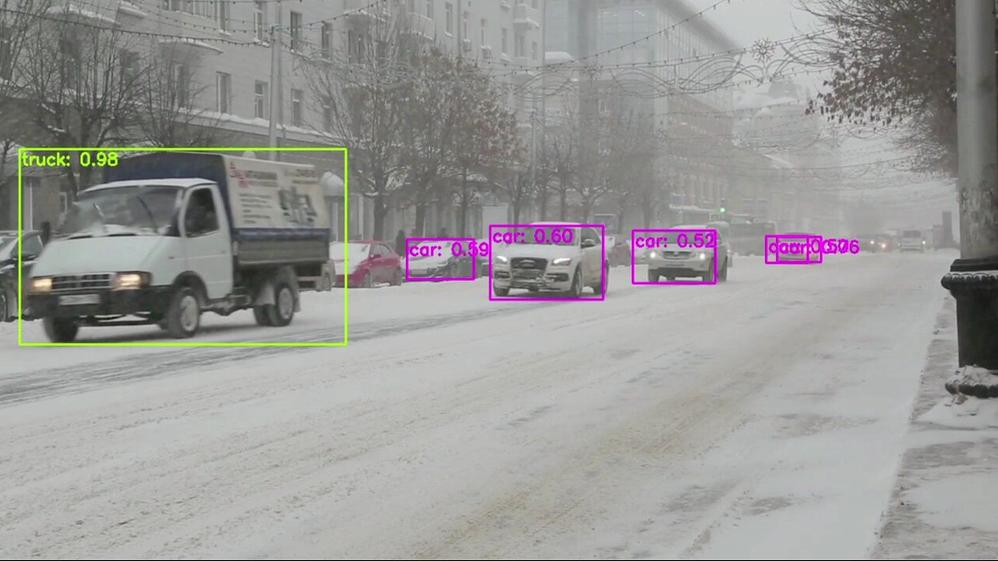
Here are some examples of what the Azure Percept detected for a few live and pre-recorded videos:
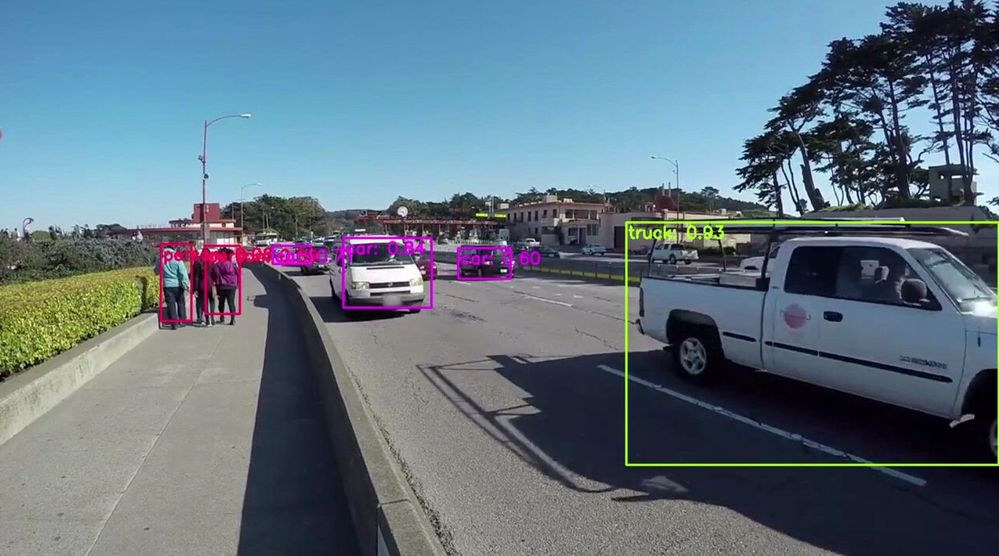
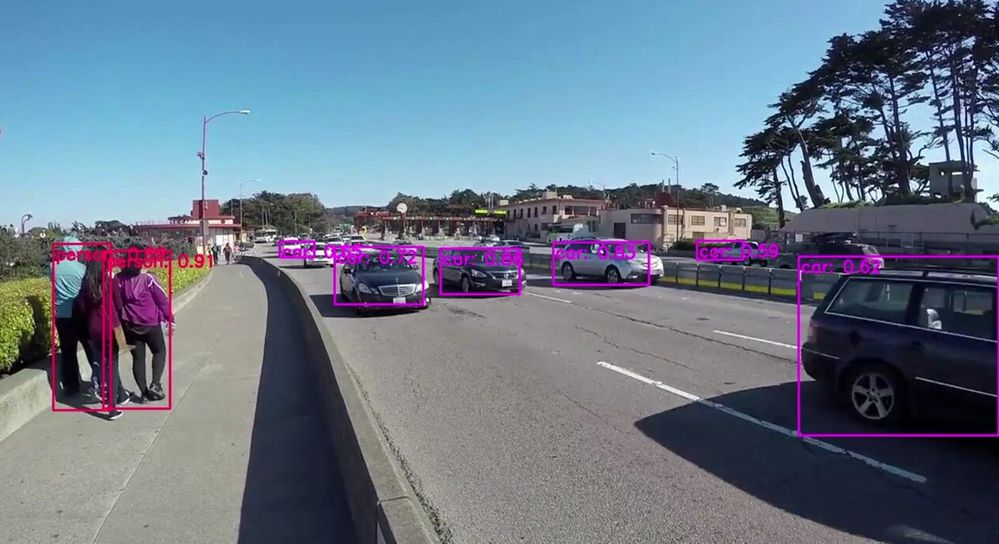
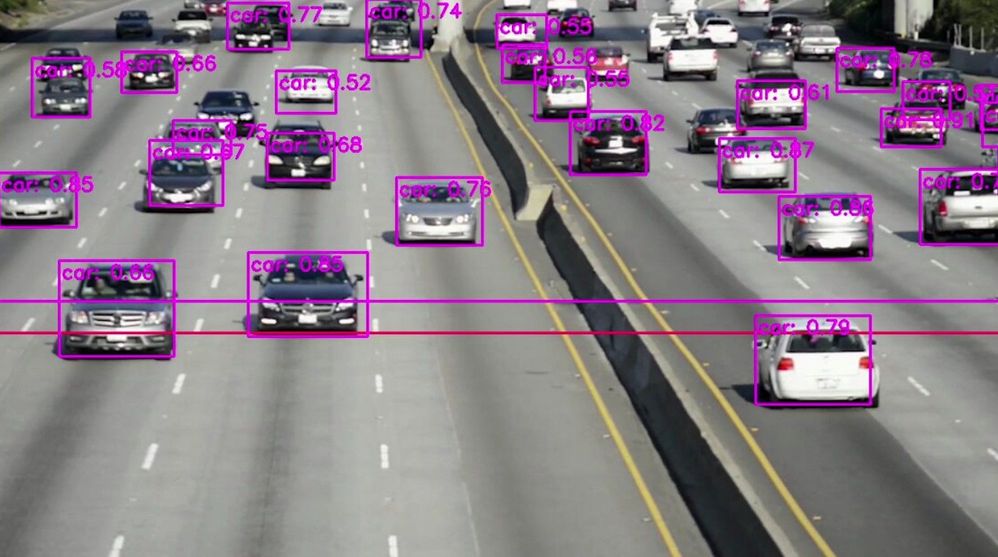
In conclusion, in just a few days, I was able to set up a quick Proof of Concept of a sample traffic monitoring AI application using Azure Percept, Azure services and Inseego 5G MiFi ® M2000 mobile hotspot!
Learn more about the Azure Percept at https://azure.microsoft.com/services/azure-percept/
Note: The views and opinions expressed in this article are those of the author and do not necessarily reflect an official position of Inseego Corp.
Brought to you by Dr. Ware, Microsoft Office 365 Silver Partner, Charleston SC.


Recent Comments