by Contributed | May 14, 2021 | Technology
This article is contributed. See the original author and article here.
Power BI (Peek into the future Part 1): Vision & Roadmap
You’ll hear about exciting new features as well as improvements in existing capabilities.
- Automated Insights – new feature, coming later this year
- Teams and Power BI – even more integration
- Excel and Power BI
- Power Automate and Power BI – new feature
- Power BI Goals – new feature
- Power BI Streaming Dataflows – new feature
- Mobile and Power BI
- Hololens and Power BI
by Scott Muniz | May 14, 2021 | Security, Technology
This article is contributed. See the original author and article here.
CISA has released an analysis report, AR21-134A Eviction Guidance for Networks Affected by the SolarWinds and Active Directory/M365 Compromise. The report provides detailed steps for affected organizations to evict the adversary from compromised on-premises and cloud environments.
Additionally, CISA has publicly issued Emergency Directive (ED) 21-01 Supplemental Direction Version 4: Mitigate SolarWinds Orion Code Compromise to all federal agencies that have—or had—networks that used affected versions of SolarWinds Orion and have evidence of follow-on threat actor activity.
Although the guidance in AR21-134A and ED 21-01 Supplemental Direction V.4 is tailored to federal agencies, CISA encourages critical infrastructure entities; state, local, territorial, and tribal government organizations; and private sector organizations to review and apply it, as appropriate.
Review the following resources for additional information:
Note: the U.S. Government attributes this activity to the Russian Foreign Intelligence Service (SVR). Additional information may be found in a statement from the White House and in the three Joint Cybersecurity Advisories summarized in the CISA Fact Sheet: Russian SVR Activities Related to SolarWinds Compromise.

by Contributed | May 14, 2021 | Technology
This article is contributed. See the original author and article here.
Augmented Reality 3D Photo Sphere in Xamarin, .NET and ARKit – Explained
Lee Englestone is an innovative Dev Manager who likes to operate in the area where technology, product, people and business strategy converge. Lee, from the UK, is constantly working on side projects, building things and looking for ways to educate the .NET community in great technologies. He is the creator of Visual Studio Tips, Hackathon Tips and Xamarin Arkit. For more, see Lee’s blog and Twitter @LeeEnglestone.

Send an Adaptive Card to Teams from Microsoft Lists using Power Automate
Norm Young is an Office Apps & Services MVP working as the Director of Collaborative Analytics at UnlimitedViz, the makers of tyGraph. He is focused on SharePoint and the Power Platform and shares his passion through his blog and speaking at conferences. Norm is also an active community contributor and helps to organize the Citizen Developers User Group. Follow him on Twitter @stormin_30 and visit his blog.

Firebase push notifications for dotnet. Advanced guide
Damien Doumer is a software developer and Microsoft MVP in development technologies, who from Cameroon and currently based in France. He plays most often with ASP.Net Core and Xamarin, and builds mobile apps and back-ends. He often blogs, and he likes sharing content on his blog at https://doumer.me. Though he’s had to deal with other programming languages and several frameworks, he prefers developing in C# with the .Net framework. Damien’s credo is “Learn, Build, Share and Innovate”. Follow him on Twitter @Damien_Doumer.

Teams Real Simple with Pictures: Custom Policy Packages
Chris Hoard is a Microsoft Certified Trainer Regional Lead (MCT RL), Educator (MCEd) and Teams MVP. With over 10 years of cloud computing experience, he is currently building an education practice for Vuzion (Tier 2 UK CSP). His focus areas are Microsoft Teams, Microsoft 365 and entry-level Azure. Follow Chris on Twitter at @Microsoft365Pro and check out his blog here.

Milestones – a new Dataverse for Teams ready-to-use template application
Vesku Nopanen is a Principal Consultant in Office 365 and Modern Work and passionate about Microsoft Teams. He helps and coaches customers to find benefits and value when adopting new tools, methods, ways or working and practices into daily work-life equation. He focuses especially on Microsoft Teams and how it can change organizations’ work. He lives in Turku, Finland. Follow him on Twitter: @Vesanopanen
by Scott Muniz | May 14, 2021 | Security, Technology
This article is contributed. See the original author and article here.
Since December 2020, the Cybersecurity and Infrastructure Security Agency (CISA) has been responding to a significant cyber incident. An advanced persistent threat (APT) actor added malicious code to multiple versions of SolarWinds Orion and, in some instances, leveraged it for initial access to enterprise networks of multiple U.S. government agencies, critical infrastructure entities, and private sector organizations. Once inside the network, the threat actor bypassed multi-factor authentication (MFA) and moved laterally to Microsoft Cloud systems by compromising federated identity solutions. Note: on April 15, 2021, the U.S. Government attributed this activity to the Russian Foreign Intelligence Service (SVR). See the statement from the White House for additional details.
For more information and resources on this activity, refer to us-cert.cisa.gov/remediating-apt-
compromised-networks.
For more information on CISA’s response to this activity, refer to cisa.gov/supply-chain-compromise.
CISA has provided this guidance to federal agencies with networks that used affected versions of SolarWinds Orion and have evidence of follow-on threat actor activity—CISA Alert AA20-352A: Advanced Persistent Threat Compromise of Government Agencies, Critical Infrastructure, and Private Sector Organizations labels these as Category 3 agencies. This guidance is intended to support Category 3 agencies in crafting their eviction plans in accordance with ED 21-01: Supplemental Direction Version 4. Note: agencies should refer to CISA Alert AA20-352A for guidance on determining if they are Category 3. CISA is aware of other initial access vectors; agencies should not assume they are not compromised by this APT actor solely because they have never used affected versions of SolarWinds Orion.
Those agencies should investigate to confirm they have not observed related threat actor tactics, techniques, and procedures (TTPs). CISA recommends any agency that detects related activity review this guidance as well as CISA Alert AA20-352A, and contact CISA for further assistance.
Although this guidance is tailored to federal agencies, CISA encourages critical infrastructure entities; state, local, territorial, and tribal government organizations; and private sector organizations to review and apply it, as appropriate.
The steps provided in this guidance are resource-intensive and highly complex and will require the enterprise network to be disconnected from the internet for 3–5 days. In order to have fully informed senior-level support, CISA recommends that agency senior leadership conduct planning sessions throughout this process to understand the resources needed and any potential disruption in business operations. CISA encourages agency leadership to review CISA Insights: SolarWinds and AD/M365 Compromise Risk Decisions for Leaders for more information.
By taking steps to evict this adversary from compromised on-premises and cloud environments, agencies will position themselves for long-term actions to build more secure, resilient networks.
For a PDF copy of this report, click here.
Important: Category 3 organizations should use out-of-band communications for all mitigation and remediation communications and documentation, i.e., do not use any compromised systems to internally or externally communicate remediation plans or actions.
Remediation plans for dealing with malicious compromises are necessarily unique to every organization, and success requires careful consideration. There are three phases for evicting the actor:
- Phase 1: Pre-Eviction. Actions to detect and identify APT activity and prepare the network for eviction. Note: for the purposes of this guidance, a network is defined as any computer network with hosts that share either a logical trust or any account credentials with affected versions of SolarWinds Orion.
- Phase 2: Eviction. Actions to remove the APT actor from on-premises and cloud environments. This phase includes rebuilding devices and systems.
- Phase 3: Post-Eviction. Actions to ensure eviction was successful and the network has good cyber posture.
Conducting each step in this guidance is necessary to fully evict the adversary from Category 3 networks. Failure to perform comprehensive and thorough remediation activity will expose enterprise networks and cloud environments to substantial risk for long-term undetected APT activity, and compromised organizations will risk further loss of sensitive data and erosion of public trust in their networks.
Although this guidance provides a level of detail that describes actions to be completed, it does not describe how these actions should be completed. To successfully evict the threat actor, these actions need to be conducted in the order specified. Additionally, this guidance clearly notes caveats and provides references to help agencies develop their plan.
Pre-Eviction Phase
- Define the true scope by identifying trust boundaries (including between Active Directory [AD] forests and domains) and determining the enterprise assets to which this guidance applies (i.e., determine what assets are within the trust boundary).
- For example, the organization needs to determine the identity provider (IdP) sources (such as Okta, Microsoft Active Directory Federation Services [ADFS], Duo) that it uses to issue single-sign on (SSO) credentials and it needs to identify assets that rely on the SSO credentials to allow access (i.e., what controlled data sources are accessible via that credential).
- Investigate suspicious account activity associated with your SolarWinds servers, especially service accounts used by SolarWinds Orion. Additionally, enumerate and investigate any credentials stored or used on the SolarWinds server, including network administration and device credentials. This can be conducted, for example, using a transitive mapping of all potentially compromised credentials to the systems that those credentials accessed. If—as a Category 3 agency—you cannot confirm that all your credential activity is benign, you should proceed as if the highest administrative level of credentials on your affected SolarWinds server has been compromised. In many cases, the adversary may have had this access for months. Refer to the following resources for more information.
- FireEye: Highly Evasive Attacker Leverages SolarWinds Supply Chain to Compromise Multiple Global Victims With SUNBURST Backdoor
- CISA Alert AA20-352A: Advanced Persistent Threat Compromise of Government Agencies, Critical Infrastructure, and Private Sector Organization
- Investigate potential Security Assertion Markup Language (SAML) abuse in your environment. Refer to the following resources.
- CISA Alert AA21-008A: Detecting Post-Compromise Threat Activity in Microsoft Cloud Environments
- National Security Agency: Detecting Abuse of Authentication Mechanisms
- FireEye: Remediation and Hardening Strategies for Microsoft 365 to Defend Against UNC2452
- Microsoft: Understanding “Solorigate”‘s Identity IOCs – for Identity Vendors and their customers
- Scope the intrusion.
- Look for the artifacts from known TTPs associated with this activity. Refer to SolarWinds and Active Directory/M365 Compromise: Detecting Advanced Persistent Threat Activity from Known Tactics, Techniques, and Procedures for TTPs and corresponding detection artifacts. Prioritize these by biggest value for the investment (e.g., prioritize these by techniques or technologies that cover multiple tactics or that provide visibility into shared data sources). After identifying the TTPs for which your organization has security controls to detect/stop/mitigate, you can make risk-based decisions on how to address visibility and protection strategies for the remaining MITRE Adversarial Tactics, Techniques, and Common Knowledge (ATT&CK)-based paths.
- Audit all network device configurations stored or managed on the SolarWinds monitoring server for signs of unauthorized or malicious configuration changes. Organizations should audit the current network device running configuration and any local configurations that could be loaded at boot time.
- Assess the current endpoint telemetry collection level and configure endpoint forensics and detection solutions for aggressive collection; prioritize this by value of asset and account.
- Harden the enterprise attack surface.
- Review and validate perimeter firewall rulesets. Remove all allow rules for which the organization does not have a clearly defined, understood, and documented need. “Deny all” statements that identify necessary connections and allow them as exceptions are the standard for perimeter devices.
- Reduce the number of systems that are able to access the internet directly. Note: this action may require analysis by network engineers with fundamental knowledge of (1) how network data communicates through agency trust boundaries and (2) the IP routing in the enterprise.
- For example, domain controllers should never be used for—or capable of— browsing the internet. (Microsoft’s analysis of domain controllers identified that privileged users often use Internet Explorer to browse the intranet or internet.
- For more information on designing networks where critical or security-related appliances and servers do not have access to the internet, refer to the United Kingdom’s National Cyber Security Centre (NCSC): Security Architecture Anti-Patterns.
- Reduce the number of egress ports at the enterprise perimeter. This requires a review of all perimeter firewall rulesets (rulesets may differ among firewalls).
- Implement host-based firewalls to make the work of moving laterally more challenging for the adversary, disrupting the ability to move from compromised workstations to domain resources. Consider blocking or closely monitoring workstation-to-workstation communications as much as possible, using Privileged Access Workstations (PAWs) and servers for administrative functions. Firewalls and endpoint detection and response functions may have similar capability, but both need to feature (1) filtering of allowed connections and (2) visibility/detection for connections.
- Close and/or monitor high-risk ports (e.g., Remote Desktop Protocol [RDP], Server Message Block [SMB], File Transfer Protocol [FTP], Trivial File Transfer Protocol [TFTP], Secure Shell [SSH], and WebDAV).
- Carefully employ application execution control (allowlisting), especially for systems providing remote access to the enterprise.
- Enforce enterprise Domain Name System (DNS) resolution for all systems. Do not allow internal systems to directly access internet DNS servers.
- Ensure that all endpoints that will need to be updated are powered on for as long as possible during the eviction phase. Note: this action is necessary for all vital changes to AD to be pushed to all systems in the environment prior to reconnection and also to verify that all systems are rebooted. This action is especially tricky given that many user endpoints are not connected 24/7 due to remote work. Organizations may want to look at “jailing” systems that connect in this way into minimal virtual local area networks (VLANs) until they can be verified to have received and implemented updates and any other mitigations (endpoint detection and response [EDR] agents, patches, antivirus definitions, specific scans, etc.) decided on by the organization.
- Agencies using Microsoft Defender for Endpoint or Microsoft 365 Defender should refer to Microsoft: Use attack surface reduction rules to prevent malware infection for more information on hardening the enterprise attack surface.
- Identify federation model for on-premises resources to cloud trust relationship and identify adversary activity in Microsoft 365 (M365)/Azure environment.
- Identify the Source Anchor for Azure AD Connect in the current Azure Tenant, if used. (This is required in order to sever the connection and restore later).
- Run Sparrow or similar tools to identify permission and credential changes to applications and service principals. Identify overly permissive applications, unusual credentials in applications, or modifications to federation trust settings. Refer to CISA Alert AA21-008A: Detecting Post-Compromise Threat Activity in Microsoft Cloud Environments for more information.
- Review M365 tenant configuration and perform a cloud security assessment for administrative accounts and applications. Specifically, review all accounts with privileged access and each application to determine if the rights and credentials are as intended and still necessary. This assessment should include shared trusts or identity relationships with third-party cloud service providers (CSPs) in which the identity is a resident on the CSP’s tenant but is also capable of performing actions in the organization’s M365 environment.
Eviction Phase
Note: to effectively the APT actor, the following steps should be completed fully and in the order listed. These steps may affect operations of critical business functions. CISA recommends agencies conduct a thorough risk assessment prior to starting eviction so that potential impacts on critical business functions are documented and understood. Given that these steps are complex, CISA also encourages agencies to use third-party help to support eviction efforts if needed.
- Sever the enterprise network from the internet.
Note: this step requires the agency to understand its internal and external connections. When making the decision to sever internet access, knowledge of connections must be combined with care to avoid disrupting critical functions.
-
Reset the Kerberos Ticket Granting Ticket account (krbtgt).
Note: krbtgt must be reset twice; the second time after the first has finished. The resets may take a long time to propagate fully on large AD environments. For more information, refer to Microsoft guidance: AD Forest Recovery – Resetting the krbtgt password.
-
Eradicate known malware/backdoors/implants discovered during pre-eviction steps.
Note: this can be done while waiting for the krbtgt resets to complete.
-
Apply network device mitigations identified in CISA Alert AA20-352A: Advanced Persistent Threat Compromise of Government Agencies, Critical Infrastructure, and Private Sector Organization.
For network devices managed by the SolarWinds monitoring server, the running firmware/software should be checked against known good hash values from the network vendor. CISA recommends that, if possible, organizations re-upload known good firmware/software to managed network devices and perform a reboot.
Note: be sure to wait until krbtgt reset completes to avoid interrupting the reset.
-
Unenroll any suspicious MFA Tokens. Audit all MFA tokens configured in your environment, especially those used for remote access. Unenroll any tokens that cannot be accounted for or are suspicious.
-
Rebuild and reimage systems.
Note: agencies should do an impact assessment for endpoints to determine if they need to be reimaged. An agency should identify (1) credentials observed on compromised machines as at risk and (2) any subsequent system accessed from the corresponding accounts as compromised. Consider:
- Was the endpoint altered by a known malicious actor action? If yes, reimage the system.
- Was data on the endpoint accessed but the endpoint shows no sign of being altered? If yes, you may not need to reimage the system.
-
Regain control of the AD and ADFS, by instituting Local Administrator Password Solution (LAPS), PAWs, and modified administrative accounts.
- Re-establish control of the ecosystem items that were most easily manipulated by the attacker. Start with the “lowest hanging fruit,” i.e., items that are low risk to operations, low administrative overhead, that do not require new skill sets to control. These actions block the most frequently used attack methods on a network. Refer to the Microsoft and Center for Internet Security joint presentation Critical Hygiene for Preventing Major Breaches for more information on prioritizing controls with the largest return on investment.
- Audit the privilege levels of accounts that were utilized on affected SolarWinds Orion servers. Consider only granting the minimal rights and accounts needed to function, following Just Enough Administration (JEA) principles. (Refer to Microsoft: Just Enough Administration for more information.)
- Ensure there are unique and distinct administrative accounts for each set of administrative tasks. Enforce the principle of least privilege. Remove all accounts that are unnecessary; remove privileges not expressly required by an account’s function or role. Institute a group policy that disables remote interactive logins, and use Domain Protected Users Group.Ensure there are unique and distinct administrative accounts for each set of administrative tasks. Enforce the principle of least privilege. Remove all accounts that are unnecessary; remove privileges not expressly required by an account’s function or role. Institute a group policy that disables remote interactive logins, and use Domain Protected Users Group.
- Enforce MFA for all administrative accounts and functions.
- Create and establish PAWs for administrative accounts and mandate use for administrative functions (AD Administrators first, at minimum).
- Enable unique local administrative accounts (e.g., LAPS) and a management function for those accounts. Note: for LAPS, if the endpoints are cloned, each individual endpoint’s local administrative account password needs to be changed afterward to enforce uniqueness.
- Rotate all the Secrets.
- Rotate secrets associated with remote access MFA token generation.
- Reset passwords for:
- All AD accounts with elevated privileges (such as administrators)
- All AD service accounts
- Directory Services Restore Mode (DSRM) account on domain controllers
- All AD accounts
- Accounts with suspicious activity or whose credentials existed on compromised systems, such as affected SolarWinds servers
- Any account where Smartcard/Personal Identity Verification (PIV) is not enforced (which are on an exception or similar exemption)
Note: the New Technology LAN Manager (NTLM) hashes of smartcard/PIV-enabled accounts can be used in pass-the-hash attacks and should be refreshed regularly. For more information, including guidance and scripts on rolling over these hashes, refer to the National Security Agency (NSA) Information Assurance Advisory: Long-Lived Hashes for AD Smartcard Required Accounts, NSA Cyber’s GitHub page on Pass the-Hash Guidance, and Microsoft: Passwordless Strategy.
- All AD user accounts
- All Windows local administrative accounts (including those that are renamed, especially those not managed by LAPS in environment)
- Non-AD application privileged accounts (e.g., elevated accounts on systems that are not joined to AD; some high value assets (HVAs) may fall into this category)
- Network device administrative accounts
- Non-AD HVA user accounts
- Change all credentials being used to manage network devices, including keys and strings used to secure network device functions (Simple Network Management Protocol [SNMP] strings/user credentials, IPsec/IKE preshared keys, routing secrets, TACACS/RADIUS secrets, RSA keys/certificates, etc.). Monitor for failed logins resulting from these resets.
- Sever Azure environment from on-premises, and conduct M365/Azure remediation.
- Evaluate IdP sources. Harden SSO features. (See FireEye’s white paper, Remediation and Hardening Strategies for Microsoft 365 to Defend Against UNC2452). Turn on advanced logging and establish a privileged access management (PAM) baseline (expected privileged account state) for cloud environments.
- Harden the Azure AD Connect Service. (See Trimarc Security’s post, Securing Microsoft Azure AD Connect).
- Review and adjust federation trust relationships. Note: Microsoft recommends severing federation trusts between on-premises networks and the cloud; organizations should migrate to an external IdP or use Azure AD to manage users and, if the latter, users should be “mastered” from Azure AD. Revoke unauthorized or unnecessary federation trusts if maintaining a federated identity solution. (CISA recommends avoiding federated enterprise environments whenever possible.) For more information review the following resources.
- Fully isolate your M365 admin accounts. Activities in this step include, but are not limited to (1) creating cloud-only administrators, controlled appropriately with role based access control (RBAC) and MFA, and (2) monitoring, in an automated fashion, any changes to the established baseline or unusual use. See the following resources for more information (Note: CISA will be releasing guidance on cloud remediation and hardening following dissemination of this guidance).
- After remediating privileged identities (step d), revoke all existing M365 tokens.
- Double check to ensure no on-premises accounts have administrative privileges in M365.
- Review and sanitize (i.e., remove unwelcome actions) compromised mailboxes using industry standard tooling and service portal manual review.
- Review, and adjust accordingly, Tenant settings and configurations. Use publicly available or open-source tools such as CrowdStrike Reporting Tool for Azure (CRT) and Hawk to review Tenant settings. Refer to CISA Alert AA21-008A: Detecting Post-Compromise Threat Activity in Microsoft Cloud Environments.
- Use tools—such as Sparrow or Azure AD Investigator—to review existing Azure applications. Remediate applications that have been compromised. Refer to CISA Alert AA21-008A: Detecting Post-Compromise Threat Activity in Microsoft Cloud Environments.
- Perform IdP review and eviction.
- Clear DNS cache on all servers, workstations, and non-Windows systems.
- Reduce the “Domain member: Maximum machine account password age” in Group Policy to 2–3 days during eviction; it can be set back to the default 30 days after eviction is complete. This will hasten the resetting of the Computer object passwords. For more information, refer to Microsoft: Machine Account Password Process.
- Reboot all servers and workstations, especially those joined to the AD.
- Verify eviction steps have been properly completed.
- Have all the tasks above been completed on all applicable systems and accounts? Note: CISA highly recommends implementing a process to verify you have completed each task.
- Have the endpoints that were not completely mitigated been removed from network communication, pending their completion?
- Have you applied all critical and high patches to the endpoints that lack them, especially any that needed re-imaging?
- Have you added enhanced visibility and monitoring capabilities for cloud environments—such as telemetry for cloud environments—into existing agency security information and event management (SIEM) technology?
- Have you implemented monitoring capability for highly privileged cloud identities and Service Principals?
Post Eviction
- Report to your senior leadership completed pre-eviction and eviction actions as well as those remaining to be completed; provide leadership an assessment of the risk remaining, including assumed residual risk.
- Reconnect to the internet. Note: the decision to reconnect to the internet depends on senior leadership’s confidence in the actions taken. It is possible—depending on the environment—that new information discovered during pre-eviction and eviction steps could add additional eviction tasks.
- Create an actionable and accountable plan for integrating the next 60 days of Active Directory privilege credential baselining guidance (i.e., completing the next step). Note: this next step has high overhead and will likely disrupt business operations; agencies must have a plan for testing breaks associated with the changes to administrative control schemes and will need to alter their policies and procedures to accommodate these disruptions.
- Establish and control baseline mechanisms for administrators. Note: this step should be completed over the next 60 days. While completing this task, agencies should move on to the next step.
- Implement PAWs for remaining administrative accounts.
- Perform additional hardening of administrative accounts.
- Implement Credential Guard. (Refer to Microsoft: Manage Windows Defender Credential Guard for more information). Introducing Credential Guard as an endpoint tool can be challenging for organizations due to hardware restrictions, but the impact on privileged identity credential management is significant. Chief information security officers (CISOs) should prioritize identity-focused solutions for immediate action.
- Restrict RDP usage to an exclusive list of necessary administrators and from only dedicated administrative workstations (such as PAWs) and identified necessary alternative locations. RDP access should be judiciously and carefully scoped and monitored.
- Establish time bound and temporal escalated Domain Privileges (require second factor for elevation and that access expires).
- Implement JEA for domain controller access and maintenance.
- Harden/reduce attack surface of domain controllers. Remove connection to the internet whenever possible, and remove all unnecessary protocols, services, and accounts (in accordance with the principle of least functionality). Consider implementing Windows Server Core for all domain controllers.
- Integrate detection mechanisms that focus on endpoints and changes to privileged identity sources. Solutions include pervasive use of endpoint security (such as the Microsoft Defender Suite of services, including Endpoint and Identity) as well as high value identity monitoring solutions. The view of user behavior should be unified across all platforms and behavioral analytics should be enabled. Note: behavioral analytics (with an understanding of what traditional administrative activity consists of, and what tools are used for it) combined with frequency analysis of activity is often the only avenue for network defenders to detect anomalous activity.
- Report to CISA. Post-eviction, all Category 3 agencies should report to CISA actions taken, any actions left incomplete, and their assessments of the residual risk. Following dissemination of this guidance, CISA will release a checklist to the Homeland Security Information Network (HSIN) for agencies to use to complete the steps in this guidance. Agencies should fill out and submit the checklist to CISA.
- Maintain vigilance. In the hours, days, and weeks after the network’s internet connection is restored, the agency’s detection capability will be important in verifying that all threat actor activity within the enterprise has stopped. Extended vigilance is necessary because this threat actor has demonstrated extreme patience with follow-on activity.
- Agencies should ensure their security operations center (SOC) has capabilities for enhanced visibility and monitoring of enterprise network and cloud environments. Refer to SolarWinds and Active Directory/M365 Compromise: Detecting APT Activity from Known Tactics, Techniques, and Procedures for known TTPs that agencies should look out for as part of network and environment monitoring.
- Configure endpoint forensics and detection solutions for aggressive collection; prioritize this by value of asset and account.
Frequently Asked Questions
Does my organization have to complete all the steps in this eviction guidance?
In accordance with ED 21-01: Supplemental Direction Version 4, agencies with networks that used affected versions of SolarWinds Orion and have evidence of follow-on threat actor activity, such as binary beaconing to avsvmcloud[.]com and secondary command and control (C2) activity to a separate domain or IP address, must execute and complete the pre-eviction phase of this guidance. Agencies that find additional adversarial activities must execute and complete the eviction and post eviction phases of this guidance. Conducting all of the steps in this guidance is necessary to fully evict the adversary from applicable networks. Failure to perform comprehensive and thorough remediation activity will expose enterprise networks and cloud environments to substantial risk for long-term undetected APT activity.
Is there a time limit to completing the eviction activities?
In accordance with ED 21-01: Supplemental Direction Version 4, agencies subject to the requirements must complete the applicable phases in this eviction guidance by July 16, 2021, or within 90 days of discovery of follow-on threat activity after issuance of ED 21-01 Supplemental Direction Version 4.
Given that severing the enterprise network from the internet will have significant operational impact, does the organization need to take all its endpoints offline?
If the affected organization can authoritatively and comprehensively identify compromised internet-connected endpoints, identities, and systems and is able to take those offline without affecting uncompromised or non-internet connected systems, then the agency does not need to disconnect non-compromised endpoints or non-internet-connected systems. This will still disrupt C2 activities while allowing the agency to keep as much of the system up as possible. Note: access to environments with pervasively compromised credentials will frequently appear to be standard user activity, as it will use “native” services and identities.
Will CISA provide agencies new TTPs in the event of a reinfection?
Refer to SolarWinds and Active Directory/M365 Compromise: Detecting Advanced Persistent Threat Activity from Known Tactics, Techniques, and Procedures for reinfection TTPs and corresponding detection artifacts.
Will CISA provide architectural recommendations for future rebuilds?
This current guidance is tailored to provide short-term remediation steps for agencies to evict this adversary from compromised on-premises and cloud environments and protect networks against additional compromise. CISA will be releasing long-term enterprise architecture and security operations guidance that incorporates updated credential/access management, monitoring, and detection guidance for a more secure, resilient federal enterprise.
May 13, 2021: Initial Version

by Scott Muniz | May 14, 2021 | Security
This article was originally posted by the FTC. See the original article here.

Have you wondered how you can help the older adults in your life — your parents, grandparents, and neighbors — avoid fraud? Here’s an easy answer: share. Share what you know about fraud, and share free materials from the FTC that alert people to scammers’ schemes. May is Older Americans Month, and a great time to help the people you care about learn how to avoid fraud.
Start with Pass It On, a group of materials designed to encourage older adults to talk about scams that often target them. You’ll learn about online dating scams, grandkid scams, and scams promising tech support or asking for charity donations. Visit Pass It On to download or order free materials, including articles, presentations that you can deliver, bookmarks, and activity sheets in English and Spanish.
Are you a blogger? Do you publish a newsletter, or post helpful information on social media? Maybe you’re a teacher, or work with older adults as a community service provider or volunteer. Here are other ways to use these free resources.
All FTC information is in the public domain, and free to share. Most information is English and Spanish. Order free publications at ftc.gov/bulkorder (in Spanish: ftc.gov/ordenar). Make them yours, pass them on, and thank you for helping older adults avoid fraud.
Brought to you by Dr. Ware, Microsoft Office 365 Silver Partner, Charleston SC.
by Contributed | May 14, 2021 | Technology
This article is contributed. See the original author and article here.
I recently encountered a scenario recently where I was looking to do a quick technical check on some advice I was giving to another member of the community regarding PowerShell – especially capturing the output of PnP PowerShell commands and store in a text file. When I responded to the tweet, I was away from my computer, but I did have my iPad (with keyboard) with me and wanted to see if I could use PnP PowerShell with Azure Shell – you may have guessed the result by – YES you can.
I was not using best security practice at the time to log in (username/password), which would not work if I had MFA on the account (which I should have ☹). I will include better practice configuration to include certificates and an Azure AD App in this article.
What you will need
So, let’s get started; you will need a few things to get going,
- Azure Subscription – this is necessary for a storage account that preserves your files between sessions and is mandatory for Azure cloud shell to work.
- Azure Resource Group – the grouping of resources in Azure
- Azure KeyVault – to store a certificate for a secure connection to M365 services.
- PnP PowerShell – the newest PnP power shell module, this article uses v1.5.0
- Permissions to consent an app as this uses an Azure AD app for the authentication.
- Windows Machine – for creating the app and certificate.
- If setting up services locally by PowerShell, then install the Az module.
Setting Up
There are a few tasks we are going to do to set up working with Azure Shell, Azure AD App and Certificates.
Activate Azure Shell
First, let’s go ahead and activate the Azure Shell; we will use this to set up the required resources as well:
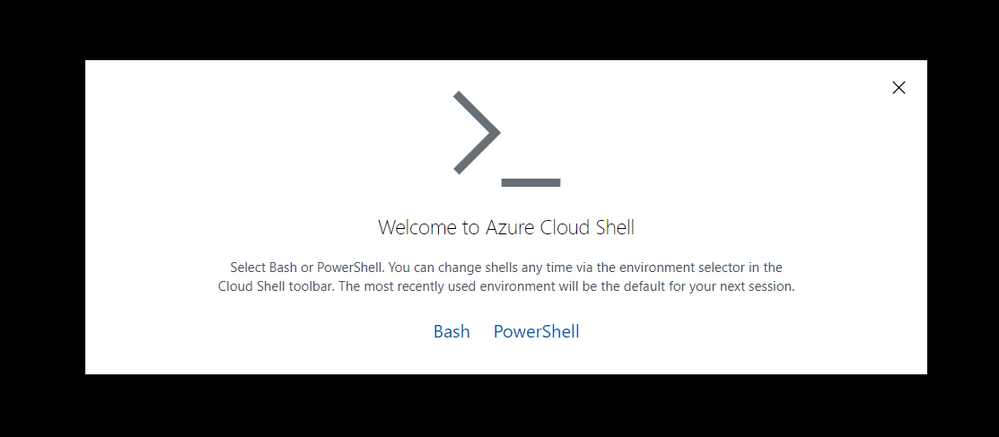
Navigate to https://shell.azure.com or click on the icon in the Azure Portal.
Then run through the first setup of the Azure Shell:
Welcome screen Azure Shell
Select PowerShell. Then run through the first setup of the Azure Shell:
 Simple setup screen for storage
If you choose “Create storage” at this point, then this will set up the storage account and resource group for you, using Azure’s naming standards and region. If you want to specify:
- Subscription
- Region
- Resource Group
- Storage account
- File share name
 Azure Shell Advanced Setup
Then select Advanced settings. I like to name resources myself in a standard manner. For this article, I am going to use the advanced options and specify:
- Region: “North Europe”
- Resource Group Name: “azure-cloud-shell”
- Storage Account: “pkbtenantcloudshell”
- File Share: “pkbtenantcloudshellfiles”
Note: the naming of some of these resources is very strict, e.g., 3 -24 characters, no spaces, lowercase.
Click “Create Storage”
 Azure Shell – Setup Complete
Now the Azure Shell is ready to use.
Installing PnP-PowerShell
Next, we need to install the PnP PowerShell module in Azure Cloud shell, enter:
Install-Module -Name PnP.PowerShell
The great thing about Azure Cloud Shell is the installation is persistent between sessions, so you will only have to do this once. However, you will need to upgrade the module periodically.
 Azure Shell – Install PnP PowerShell
For information on installing PnP-PowerShell, check out the documentation site for more details: https://pnp.github.io/powershell/
Create a KeyVault
Next, we want somewhere secure to store a certificate – Azure KeyVault.
A KeyVault is a secure method of storing keys, secrets and certificates. We intend to keep the certificate used for this setup in the vault. Another benefit of using this method, in larger organisations, where other teams manage apps or the security aspect of the tenant, they can set up this vault and retain control over the certificate and app creation.
You can, if you prefer, navigate to the Azure Portal and use the marketplace to create a new KeyVault resource; check out this quick start guide.
OR set this up in Azure Cloud Shell run the following commands:
Firstly, to check that the service is available in your preferred region, run the following:
New-AzKeyVault -VaultName 'pkbtenant-keyvault' -ResourceGroupName 'azure-cloud-shell' -Location 'North Europe'
Then, provision a new KeyVault (if you have one already, then skip this step) and give yourself access to Secrets and Certificates.
Set-AzKeyVaultAccessPolicy -VaultName 'pkbtenant-keyvault' -UserPrincipalName 'paul.bullock@tenant.co.uk' -PermissionsToCertificates All -PermissionsToSecrets All
 Azure Shell – Create KeyVault
Please refer to the documentation if you want to be more specific around the KeyVault – Azure Portal | PowerShell.
We will be importing a certificate in a later section.
Create Azure AD App with Register-PnPAzureApp
There are a few options when setting up the authentication to connect with PnP PowerShell:
- Azure AD App – using your app (recommended), which will use the APPLICATION permissions, meaning the connection will use the permissions the app does.
- PnP Management Shell – the multi-tenant app PnP provides – this uses DELEGATE permissions meaning the connection will need to log in as the user and will only have access to services THE user has access to.
If you need clarification on the difference between the types of permissions, I highly recommend checking out an awesome community call demo from Philippe Signoret, Program Manager of the Microsoft Identity team: https://youtu.be/_BfI4L7j1Po
So why are use an Azure AD app? Using the Azure Shell restricts some authentication options when connecting to services with PnP PowerShell, such as interactive login, because it cannot display a pop-up window.
 Azure Shell – doesn’t support interactive login
The “-PnPManagementShell” parameter is an option; this uses the device login method BUT will require you to navigate to another site/page to authenticate, including going back to grab the code – then enter your login credentials further steps if MFA is enabled. IMHO feels a bit cumbersome to do this each time I want to do a task in the Shell, especially on an iPad/phone.
Create an Azure AD App
To set up the app quickly with PnP PowerShell, you need to use a Windows machine to run the cmdlet “Register-PnPAzureApp” which generates the certificate, creates the Azure AD app, sets API permissions, will pop up to consent to the app permissions.
Note: you may have to install the PnP PowerShell locally if you do not already have it.
To set up the app, run the following command using the PnP PowerShell cmdlet:
$result = Register-PnPAzureADApp -ApplicationName "PnP PowerShell Azure Shell Access" -Tenant yourtenant.co.uk -OutPath . -DeviceLogin -ValidYears 2 -CertificatePassword (ConvertTo-SecureString -String "yourpassword" -AsPlainText -Force)

$result #output the result – Specifically grab the AzureAppId/ClientId – you will need this later
 PowerShell – Registering Azure App
During this operation, two windows will pop-up to authenticate with the device login method and consent to the app permissions.
If you want to check the app in Azure AD, navigate to: https://portal.azure.com/#blade/Microsoft_AAD_IAM/ActiveDirectoryMenuBlade/RegisteredApps and find the app called “PnP PowerShell Azure Shell Access”
Note: This app uses the minimum API permissions (APPLICATION) as the default; if you want to perform operations with groups or flow as an example, you will need to add these permissions to the app.
 Azure App – API permissions
For more details on generating the app, check out the authentication section of the documentation.
Adding Certificate to KeyVault
Now that we have the app setup, we need to upload the certificate to the KeyVault.
Navigate to the KeyVault in the portal
 Azure KeyVault – Navigating to Certificates
- Select “Import”
- Enter a name “azureshell-pnpps-connection”
- Select the generated certificate “PnP PowerShell Azure Shell Access.pfx”
- Enter the certificate password
Click Create
 Azure Key Vault – Upload Certificate
This is ready to use in a later section.
Reducing the time to get going on new sessions
When I start the Azure Shell, I want to minimize the number of lines, to connect to the services securely and get going quickly.
Parameter Splatting
Parameter splatting is a method to pass a collection of parameters for a PowerShell command into a variable and apply this to the cmdlet you intend to run. Example:
Get-NiceMessage -Param1 "good" -Param2 "morning" -Param3 "community"

# Splatting alternative
$MyParams = @{
	Param1 = "good",
	Param2 = "morning",
	Param3 = "community"
}
Get-NiceMessage @MyParams
This will save time if you repeatedly apply the same parameters on the cmdlets, reducing the time to write the command and your scripts cleaner to read. To read more about this PowerShell feature, check out the documentation.
PowerShell Profiles
Interestingly, I did not know about this feature until the MOTD message appeared on the Azure Shell. I wanted to understand this further so dug deeper and I have managed to find a way to create a startup script that will make it easier to connect to Office 365.
With profiles, we can setup a script to run when the Azure Shell is started, so this is an awesome opportunity to add all of the connection information when the Shell starts including retrieval, of the certificates from the KeyVault.
To create a profile that is used across sessions but for your user account use:
# Create Profile
mkdir (Split-Path $profile.CurrentUserAllHosts)
New-Item -ItemType File -Path $PROFILE.CurrentUserAllHosts -Force
 Azure Shell – Setup Profiles
Once created, you can open an editor in the path above to the new profile script location.
Then using the following example, using a combination of parameter splatting and profiles, you can setup everything you need to connect to the service:
# Connect to KeyVault Data
try{

    $vaultName = "pkbtenant-keyvault" # Replace with your KeyVault name
    $appName = "PnP PowerShell Azure Shell Access"
    $appId = (Get-AzADApplication -DisplayName $appName).ApplicationId
    $tenantId = (Get-AzContext).Tenant.Id
    $certName = "azureshell-pnpps-connection"
    $baseSite = "https://tenant.sharepoint.com" # Replace with your tenant
    $base64Cert = Get-AzKeyVaultSecret -VaultName $vaultName -Name $certName -AsPlainText

    # Use of parameter splatting
    $ConnectInfo = @{
        ClientId = $appId
        CertificateBase64Encoded = $base64Cert
        Tenant = $tenantId
    }

    Write-Host "Ready to connect to M365/SharePoint" -ForegroundColor Green
}catch{
    Write-Host "Failed to get the KeyVault data" -ForegroundColor Yellow
}
Editor – Ctrl-S (Save) then Ctrl-Q (Quit)
Restart Shell
After setting up the profile, reboot your Shell and you should see a prompt to indicate the prerequisites are ready to use for a connection (green text).
To learn more about profiles check out the documentation for profiles.
Connecting to the service
Once you have all these elements setup, you can connect with PnP PowerShell with one short line:
Connect-PnPOnline @ConnectInfo https://tenant.sharepoint.com

# -OR-

Connect-PnPOnline @ConnectInfo $baseSite
 Azure Shell – connecting with PnP PowerShell
The settings are persistent across sessions/devices (like an Azure app on iPad), so once setup, you can open Azure Shell and reconnect to the service and make the changes in the Shell quickly.
Btw, at the beginning I mentioned about capturing the output to the text file, this is particularly useful if you are grabbing a lot of info in your session or need to show the changes you made, here is how to do it:
Start-Transcript "log.txt"
Get-PnPWeb
Stop-Transcript
This will save the file to the current location in the Azure Shell. Use Export-File to download it, or the UI button.
Enjoy!
by Contributed | May 14, 2021 | Technology
This article is contributed. See the original author and article here.
Microsoft engineering teams have been busy taking your feedback resulting in a plethora of updates. Microsoft service updates in the news includes Webinar enablement made available in Microsoft Teams, Azure IoT Central feature updates, Enabling Azure Site Recovery (ASR) while creating Azure Virtual Machines, Attribute-based Access Control (ABAC) in Azure Storage, and the Bicep enabled Microsoft Learn Module of the Week.
Full-featured webinars for Microsoft Teams
Beginning this week, Microsoft has announced that Webinars and PowerPoint Live are beginning to rollout in Microsoft Teams. Additionally, Presenter mode will begin to roll out later in May. With these capabilities, you have new ways to deliver polished, professional presentations in meetings of all sizes, from small internal meetings to large customer-facing webinars and events—all from a single application.
Learn more about how to use these new capabilities in Microsoft Teams via the following guide: Introduction to Webinars in Microsoft Teams
Azure IoT Central new and updated features for April 2021
Microsoft has announced that the IoT Central API service is now generally available and can be accessed through the production v1.0 endpoint. These APIs and the breadth of the IoT Central extensibility surface can now be used to develop production-ready solutions.
Following customer feedback, Microsoft iterated on thier API surface and invested in new capabilities including the ability to:
- Manage API tokens.
- Create and manage DTDLv2 device templates.
- Create, onboard, and manage devices.
- List the user roles in your application.
- Add, update, and remove users.
Other added abilities made available in this update include the ability to create a link containing a device ID parameter populating a device dashboard, support for components in Edge modules and improvment in the ability to diagnose device health and connection via device connectivity events.
Further details surrounding the IoT Central April 2021 update can be found here: General availability: Azure IoT Central new and updated features—April 2021
Enable Azure Site Recovery (ASR) while creating Azure Virtual Machines
Microsoft recently announced a new capability in Azure Site Recovery (ASR) to further improve the Business Continuity and Disaster Recovery (BCDR) posture of Azure VMs – in-line enablement of ASR at the time of VM creation. This capability helps you avoid the hassle of separately configuring DR across regions (or zones) after the creation of VMs.
Please note that this offering is currently limited to Windows VMs and CentOS, Oracle Linux, and Red Hat Linux VMs. Microsoft also does not currently support zone to zone (in region) disaster recovery through the Create VM workflow. Support for pending Linux distros and zone to zone disaster recovery is coming soon.
Learn more how to create a Windows VM or a Linux VM via the portal.
Azure Storage: Attribute-based Access Control (ABAC) now in public preview
Attribute-based access control (ABAC) is an authorization strategy that defines access levels based on attributes associated with security principals, resources, requests, and the environment. Azure ABAC builds on role-based access control (RBAC) by adding conditions to Azure role assignments in the existing identity and access management (IAM) system. This preview includes support for role assignment conditions on Blobs and ADLS Gen2, and enables you to author conditions based on resource and request attributes.
Role-assignment conditions enable finer-grained access control for storage resources. They can also be used to simplify hundreds of role assignments for a storage resource. The preview enables you to author conditions for storage DataActions, and can be used with built-in or custom roles.
Learn more about testing the Attribute-based Access Control (ABAC) preview here: Authorize access to blobs using Azure role assignment conditions (preview)
Community Events
MS Learn Module of the Week

Introduction to infrastructure as code using Bicep
This module will enable you to describe the benefits of using infrastructure as code, Azure Resource Manager, and Bicep to quickly and confidently scale your cloud deployments. Determine the types of deployments for which Bicep is a good imperative deployment tool.

Learning objectives
After completing this module, you’ll be able to:
- Describe the benefits of infrastructure as code.
- Describe the difference between declarative and imperative infrastructure as code.
- Explain what Bicep is, and how it fits into an infrastructure as code approach.
Learn more here: Introduction to infrastructure as code using Bicep

Let us know in the comments below if there are any news items you would like to see covered in the next show. Be sure to catch the next AzUpdate episode and join us in the live chat.
by Contributed | May 14, 2021 | Technology
This article is contributed. See the original author and article here.
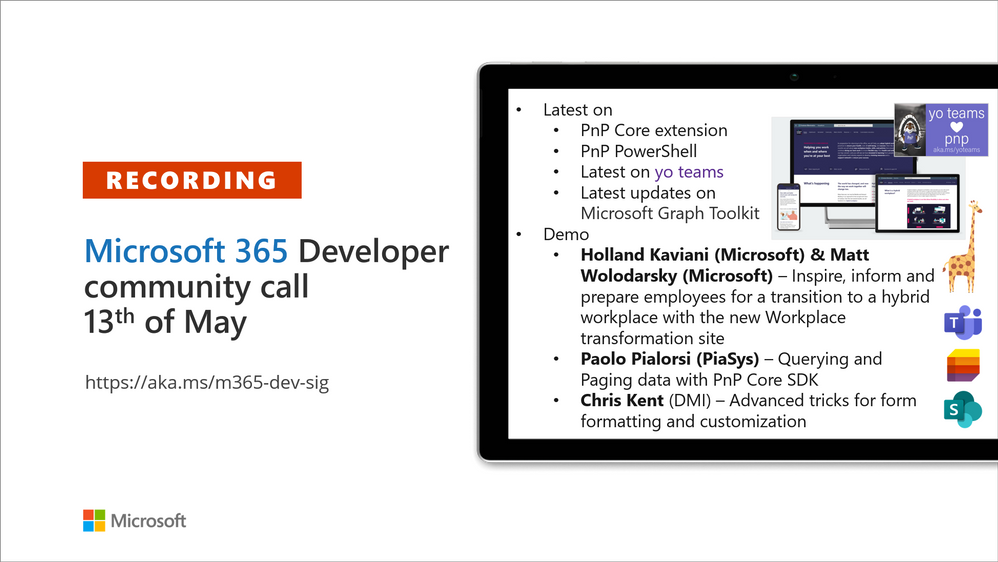
Recording of the Microsoft 365 – General M365 development Special Interest Group (SIG) community call from May 13, 2021.
Call Summary
Latest news from Microsoft 365 engineering and updates on open-source projects: PnP .NET libraries, PnP PowerShell, modernization tooling, on yo Teams, on Microsoft Graph Toolkit, and on Microsoft Teams Samples.
Check out the new Microsoft 365 Extensibility look book gallery, visit the Microsoft Teams samples gallery to get started with Microsoft Teams development, and register now for May trainings on Sharing-is-caring. Open-source project activity is focused on prepping for May releases in Microsoft Build time frame.
Open-source project status:
Project |
Current Version |
Release/Status |
PnP .NET Libraries – PnP Framework |
v1.4.0 |
Bug fixes, Prepping for v1.5.0 (May) |
PnP .NET Libraries – PnP Core SDK |
v1.1.0 |
Bug fixes, Prepping for v1.2.0 (May) |
PnP PowerShell |
v1.5.0 (just added Cmdlets for Viva Connections and Syntex) |
Prepping for v1.6.0 (May) |
Yo teams – generator-teams |
v3.0.3 GA, v3.1.0 Preview |
Preview with Viva Connections support |
Yo teams – yoteams-build-core |
v1.1.0 |
|
Yo teams – msteams-react-base-component |
v3.1.0 |
|
Microsoft Graph Toolkit (MGT) |
v2.1.0 GA, v2.2.0 Preview |
v2.2.0 planned Build release |
Additionally, one new Teams sample delivered. The host of this call was David Warner II (Catapult Systems) | @DavidWarnerII. Q&A takes place in chat throughout the call.
Actions:
- Register for Sharing is Caring Events:
- First Time Contributor Session – May 24th (EMEA, APAC & US friendly times available)
- Community Docs Session – May
- PnP – SPFx Developer Workstation Setup – June
- PnP SPFx Samples – Solving SPFx version differences using Node Version Manager – May 20th
- AMA (Ask Me Anything) – Microsoft Graph & MGT – June
- AMA (Ask Me Anything) – Microsoft Teams Dev – June
- First Time Presenter – May 25th
- More than Code with VSCode – May 27th
- Maturity Model Practitioners – May 18th
- PnP Office Hours – 1:1 session – Register
- Download the recurrent invite for this call – http://aka.ms/m365-dev-sig
- Call attention to your great work by using the #PnPWeekly on Twitter.
Microsoft Teams Development Samples: (https://aka.ms/TeamsSampleBrowser)

Great to see all the faces in the community. Hopefully soon we will get to see each other in person.
Demos delivered in this session
Inspire, inform and prepare employees transition to the new hybrid Workplace transformation site – learn about the customizable SharePoint Hybrid Workplace site template (in look book) and new end user training (available on support.microsoft.com and in Microsoft 365 Learning Pathways playlists) to help customers and colleagues’ transition to a new way of working. Article insights based on customer conversations and research by Microsoft. Training categories (playlists) – meetings & collaboration, wellness and productivity, security & data protection.
Querying and Paging data with PnP Core SDK – after downloading the PnPCoreAuth package, installing and configuring the needed services, obtain the PnPContext from PnPContextFactory and start using the library. There are multiple options for querying data. PnP Core SDK Query Model options – Load*, Get*, LINQ, and Nested/hierarchical queries. PnP Core SDK Paging Model options – Implicit asynchronous paging*, Full load of data/synchronous implicit paging, and Manual paging with Take/Skip. *Preferred.
Advanced tricks for form formatting and customization – some items in a list should not show up on a form. You can delete, hide or conditionally show values (based on entries in other fields) on a form. Column and Form formatting are vastly different. Learn ways to detect what values are in the list vs what values are on the form and also how to create read only sections on a form.
Thank you for your work. Samples are often showcased in Demos.
Topics covered in this call
- PnP .NET library updates – Paolo Pialorsi (PiaSys.com) @paolopia – 4:45
- PnP PowerShell updates – Paolo Pialorsi (PiaSys.com) @paolopia – 6:35
- yo Teams updates – Paolo Pialorsi (PiaSys.com) @paolopia – 7:24
- Microsoft Graph Toolkit updates – Beth Pan (Microsoft) | @beth_panx – 8:34
- Microsoft Teams Samples – Bob German (Microsoft) @Bob1German – 9:46
Demo: Inspire, inform and prepare employees transition to the new hybrid Workplace transformation site – Holland Kaviani (Microsoft) & Matt Wolodarsky (Microsoft) | @mwolodarsky – 12:34
Demo: Querying and Paging data with PnP Core SDK – Paolo Pialorsi (PiaSys) | @PaoloPia – 25:21
Demo: Advanced tricks for form formatting and customization – Chris Kent (DMI) | @theChrisKent – 43:22
Resources:
Additional resources around the covered topics and links from the slides.
General resources:
Upcoming Calls | Recurrent Invites:
General Microsoft 365 Dev Special Interest Group bi-weekly calls are targeted at anyone who’s interested in the general Microsoft 365 development topics. This includes Microsoft Teams, Bots, Microsoft Graph, CSOM, REST, site provisioning, PnP PowerShell, PnP Sites Core, Site Designs, Microsoft Flow, PowerApps, Column Formatting, list formatting, etc. topics. More details on the Microsoft 365 community from http://aka.ms/m365pnp. We also welcome community demos, if you are interested in doing a live demo in these calls!
You can download recurrent invite from http://aka.ms/m365-dev-sig. Welcome and join in the discussion. If you have any questions, comments, or feedback, feel free to provide your input as comments to this post as well. More details on the Microsoft 365 community and options to get involved are available from http://aka.ms/m365pnp.
“Sharing is caring”
Microsoft 365 PnP team, Microsoft – 14th of May 2021
by Contributed | May 14, 2021 | Technology
This article is contributed. See the original author and article here.
One of the major limitations with multi-tenant logic app was its inability to integrate with private resources (that are behind a firewall and/or deny public connections). Integration service environment (ISE) was one solution to achieve this task. But there is certain limitations in using ISE and that’s a different topic for discussion.
Let’s see how to integrate single tenant logic app with private resources.
- Create a Single tenant logic app and workflow. I am using a HTTP trigger to start the workflow.
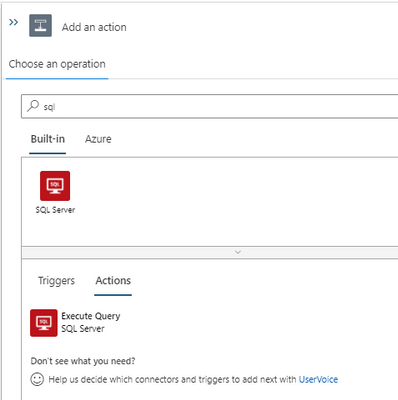
Add an action and search for SQL. We can see two connector options. Built-in and Azure.
Private connection is possible only using the built-in actions. If we use Azure action, we will have to whitelist the connector outbound IP ranges (public) in the destination system firewall.
At the moment, we have only one built-in action for SQL that is ‘Execute SQL query’. More built-in actions are expected to be added in the future.
- To create a built-in SQL connection we can use connection string. We can obtain the connection string from SQL database and add the password to create the action. For this example, I use a select query to one of the tables in the SQL database. I will add a response action to complete the workflow design. Let’s use the result of SQL action in the response using Dynamic content.
If the SQL server is currently not behind a firewall and ‘Allow Azure services and resources to access this server’ flag is set to Yes we can test the logic app and make sure it is working fine.
Let’s use the HTTP URL that is generated when the workflow is saved in an API testing tool (like Postman) to trigger the logic app. I tested and got the response with the SQL query results.
If the SQL server is already behind a firewall and (or) if it denies public connections, workflow would not be able to connect at the moment. We need to create a private endpoint for the Azure SQL server that we need to connect from logic app workflow.
We get below error in workflow (without a private endpoint).

- Let’s create a private endpoint in the SQL server.
Private endpoint enables connectivity between the consumers from the same VNet, regionally peered VNets, globally peered VNets and on premises using VPN or Express Route and services powered by Private Link.
Reference: https://docs.microsoft.com/en-us/azure/private-link/private-endpoint-overview

Select the resource.

Next step, choose a virtual network and subnet for the private endpoint. We need to integrate the private endpoint with a private DNS zone.

- After the private endpoint is created, let’s deny the public network access.

Test the logic app again. Now we are able to integrate a logic app with a private SQL server using private endpoint. Please let me know your questions or thoughts via comments below.
by Contributed | May 14, 2021 | Technology
This article is contributed. See the original author and article here.
One of my favorite features of (the now General Available) Azure Static Web Apps (SWA) is that in the Standard Tier you can now provide a custom OpenID Connect (OIDC) provider. This gives you a lot more control over who can and can’t access your app.
In this post, I want to look at how we can use Okta and an OIDC provider for Static Web Apps.
For this, you’ll need an Okta account, so if you don’t already have one go sign up and maybe have a read of their docs, just so you’re across everything.
Creating a Static Web App
For this demo, we’ll use the React template, but what we’re covering isn’t specific to React, it’ll be applicable anywhere.
Once you’ve created your app, we’re going to need to setup a configuration file, so add staticwebapp.config.json to the repo root.
This config file is used for controlling a lot of things within our SWA, but the most important part for us is going to be the auth section. Let’s flesh out the skeleton for it:
{
    "auth": {
        "identityProviders": {
            "customOpenIdConnectProviders": {}
        }
    }
}
Great! Now it’s time to setup Okta.
Creating an Okta application
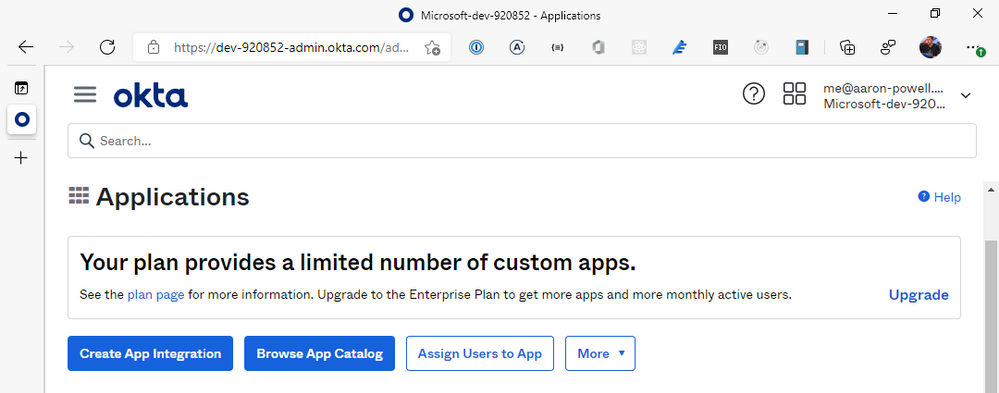
Log into the Okta dashboard and navigate through to the Applications section of the portal:
From here, we’re going to select Create App Integration and select OIDC – OpenID Connect for the Sign-on method and Web Application as the Application type. You might be tempted to select the SPA option, given that we’re creating a JavaScript web application, but the reason we don’t use that is that SWA’s auth isn’t handled by your application itself, it’s handled by the underlying Azure service, which is a “web application”, that then exposes the information out that you need.

With your application created, it’s time to configure it. Give it a name, something that’ll make sense when you see it in the list of Okta applications, a logo if you desire, but leave the Grant type information alone, the defaults are configured for us just fine.
We are going to need to provide the application with some redirect options for login/logout, so that SWA will know you’ve logged in and can unpack the basic user information.
For the Sign-in redirect URIs you will need to add https://<hostname>/.auth/login/okta/callback and for Sign-out redirect URIs add https://<hostname>/.auth/logout/okta/callback. If you haven’t yet deployed to Azure, don’t worry about this step yet, we’ll do it once the SWA is created.
Quick note – the okta value here is going to be how we name the provider in the staticwebapp.config.json, so it can be anything you want, I just like to use the provider name so the config is easy to read.
Click Save, and it’s time to finish off our SWA config file.

Completing our settings
With our Okta application setup, it’s time to complete our config file so it can use it. We’ll add a new configuration under customOpenIdConnectProviders for Okta and it’ll contain two core pieces of information, the information on how to register the OIDC provider and some login information on how to talk to the provider.
Inside registration, we’ll add a clientIdSettingName field, which will point to an entry in the app settings that the SWA has. Next, we’ll need a clientCredential object that has clientSecretSettingName that is the entry for the OIDC client secret. Lastly, we’ll provide the openIdConnectConfiguration with a wellKnownOpenIdConfiguration endpoint that is https://<your_okta_domain>/.well-known//openid-configuration.
The config should now look like this:
{
    "auth": {
        "identityProviders": {
            "customOpenIdConnectProviders": {
                "okta": {
                    "registration": {
                        "clientIdSettingName": "OKTA_ID",
                        "clientCredential": {
                            "clientSecretSettingName": "OKTA_SECRET"
                        },
                        "openIdConnectConfiguration": {
                            "wellKnownOpenIdConfiguration": "https://dev-920852.okta.com/.well-known/openid-configuration"
                        }
                    }
                }
            }
        }
    }
}
I use OKTA_ID and OKTA_SECRET as the names of the items I’ll be putting into app settings.
All this information will tell SWA how to issue a request against the right application in Okta, but we still need to tell it how to make the request and handle the response. That’s what we use the login config for. With the login config, we provide a nameClaimType, which is a fully-qualified path to the claim that we want SWA to use as the userDetails field of the user info. Generally speaking, you’ll want this to be http://schemas.xmlsoap.org/ws/2005/05/identity/claims/name, but if there’s a custom field in your response claims you want to use, make sure you provide that. The other bit of config we need here is what scopes to request from Okta. For SWA, you only need openid and profile as the scopes, unless you’re wanting to use a nameClaimType other than standard.
Let’s finish off our SWA config:
{
    "auth": {
        "identityProviders": {
            "customOpenIdConnectProviders": {
                "okta": {
                    "registration": {
                        "clientIdSettingName": "OKTA_ID",
                        "clientCredential": {
                            "clientSecretSettingName": "OKTA_SECRET"
                        },
                        "openIdConnectConfiguration": {
                            "wellKnownOpenIdConfiguration": "https://dev-920852.okta.com/.well-known/openid-configuration"
                        }
                    },
                    "login": {
                        "nameClaimType": "http://schemas.xmlsoap.org/ws/2005/05/identity/claims/name",
                        "scopes": ["openid", "profile"]
                    }
                }
            }
        }
    }
}
With the config ready you can create the SWA in Azure and kick off a deployment (don’t forget to update the Okta app with the login/logout callbacks). When the resource is created in Azure, copy the Client ID and Client secret from Okta and create app settings in Azure using the names in your config and the values from Okta.
Using the provider
Once the provider is registered in the config file, it is usable just like the other providers SWA offers, with the login being /.auth/login/<provider_name>, which in this case the provider_name is okta. The user information will then be exposed as standard to both the web and API components.
If you’re building a React application, check out my React auth helper and for the API there is a companion.
Conclusion
I really like that with the GA of Static Web Apps we are now able to use custom OIDC providers with the platform. This makes it a lot easier to have controlled user access and integration with a more complex auth story when needed. Setting this up with Okta only takes a few lines of config.
You can check out a full code sample on my GitHub and a live demo here (but I’m not giving you my Okta credentials :squinting_face_with_tongue:).

Recent Comments