by Scott Muniz | Jan 4, 2023 | Security, Technology
This article is contributed. See the original author and article here.
go — multiple_products
|
The RemoteAddr and LocalAddr methods on the returned net.Conn may call themselves, leading to an infinite loop which will crash the program due to a stack overflow. |
2022-12-27 |
not yet calculated |
CVE-2013-10005
MISC
MISC |
lz4 — lz4_bindings
|
LZ4 bindings use a deprecated C API that is vulnerable to memory corruption, which could lead to arbitrary code execution if called with untrusted user input. |
2022-12-27 |
not yet calculated |
CVE-2014-125026
MISC
MISC
MISC |
tbdev — tbdev
. |
A vulnerability has been found in Yuna Scatari TBDev up to 2.1.17 and classified as problematic. Affected by this vulnerability is the function get_user_icons of the file usersearch.php. The manipulation of the argument n/r/r2/em/ip/co/ma/d/d2/ul/ul2/ls/ls2/dl/dl2 leads to cross site scripting. The attack can be launched remotely. Upgrading to version 2.1.18 is able to address this issue. The name of the patch is 0ba3fd4be29dd48fa4455c236a9403b3149a4fd4. It is recommended to upgrade the affected component. The associated identifier of this vulnerability is VDB-217147. |
2022-12-31 |
not yet calculated |
CVE-2014-125027
MISC
MISC
MISC
MISC |
valtech — idp_test_client
|
A vulnerability was found in valtech IDP Test Client and classified as problematic. Affected by this issue is some unknown functionality of the file python-flask/main.py. The manipulation leads to cross-site request forgery. The attack may be launched remotely. The name of the patch is f1e7b3d431c8681ec46445557125890c14fa295f. It is recommended to apply a patch to fix this issue. The identifier of this vulnerability is VDB-217148. |
2022-12-31 |
not yet calculated |
CVE-2014-125028
MISC
MISC
MISC |
jwt — jwt
|
Token validation methods are susceptible to a timing side-channel during HMAC comparison. With a large enough number of requests over a low latency connection, an attacker may use this to determine the expected HMAC. |
2022-12-27 |
not yet calculated |
CVE-2015-10004
MISC
MISC
MISC |
markdown-it — markdown-it
|
A vulnerability was found in markdown-it up to 2.x. It has been classified as problematic. Affected is an unknown function of the file lib/common/html_re.js. The manipulation leads to inefficient regular expression complexity. Upgrading to version 3.0.0 is able to address this issue. The name of the patch is 89c8620157d6e38f9872811620d25138fc9d1b0d. It is recommended to upgrade the affected component. The identifier of this vulnerability is VDB-216852. |
2022-12-27 |
not yet calculated |
CVE-2015-10005
MISC
MISC
MISC
MISC |
golf — golf
|
CSRF tokens are generated using math/rand, which is not a cryptographically secure rander number generation, making predicting their values relatively trivial and allowing an attacker to bypass CSRF protections which relatively few requests. |
2022-12-27 |
not yet calculated |
CVE-2016-15005
MISC
MISC
MISC
MISC |
gorilla — gorilla_handlers
|
Usage of the CORS handler may apply improper CORS headers, allowing the requester to explicitly control the value of the Access-Control-Allow-Origin header, which bypasses the expected behavior of the Same Origin Policy. |
2022-12-27 |
not yet calculated |
CVE-2017-20146
MISC
MISC
MISC |
challenge_website –challenge_website
|
A vulnerability was found in challenge website. It has been rated as critical. This issue affects some unknown processing. The manipulation leads to sql injection. The name of the patch is f1644b1d3502e5aa5284f31ea80d2623817f4d42. It is recommended to apply a patch to fix this issue. The identifier VDB-216989 was assigned to this vulnerability. |
2022-12-28 |
not yet calculated |
CVE-2017-20150
MISC
MISC
MISC |
itext — rups
|
A vulnerability classified as problematic was found in iText RUPS. This vulnerability affects unknown code of the file src/main/java/com/itextpdf/rups/model/XfaFile.java. The manipulation leads to xml external entity reference. The name of the patch is ac5590925874ef810018a6b60fec216eee54fb32. It is recommended to apply a patch to fix this issue. VDB-217054 is the identifier assigned to this vulnerability. |
2022-12-30 |
not yet calculated |
CVE-2017-20151
MISC
MISC
MISC |
aerouk — imageserve
|
A vulnerability, which was classified as problematic, was found in aerouk imageserve. Affected is an unknown function of the file public/viewer.php of the component File Handler. The manipulation of the argument filelocation leads to path traversal. It is possible to launch the attack remotely. The exploit has been disclosed to the public and may be used. The name of the patch is bd23c784f0e5cb12f66d15c100248449f87d72e2. It is recommended to apply a patch to fix this issue. The identifier of this vulnerability is VDB-217056. |
2022-12-30 |
not yet calculated |
CVE-2017-20152
MISC
MISC
MISC
MISC |
aerouk — imageserve
|
A vulnerability has been found in aerouk imageserve and classified as problematic. Affected by this vulnerability is an unknown functionality. The manipulation of the argument REQUEST_URI leads to cross site scripting. The attack can be launched remotely. The exploit has been disclosed to the public and may be used. The name of the patch is 2ac3cd4f90b4df66874fab171376ca26868604c4. It is recommended to apply a patch to fix this issue. The identifier VDB-217057 was assigned to this vulnerability. |
2022-12-30 |
not yet calculated |
CVE-2017-20153
MISC
MISC
MISC
MISC |
phoenixcoin — phoenixcoin
|
A vulnerability was found in ghostlander Phoenixcoin. It has been classified as problematic. Affected is the function CTxMemPool::accept of the file src/main.cpp. The manipulation leads to denial of service. Upgrading to version 0.6.6.1-pxc is able to address this issue. The name of the patch is 987dd68f71a7d8276cef3b6c3d578fd4845b5699. It is recommended to upgrade the affected component. The identifier of this vulnerability is VDB-217068. |
2022-12-30 |
not yet calculated |
CVE-2017-20154
MISC
MISC
MISC
MISC |
sterc — google_analytics_dashboard_modx
|
A vulnerability was found in Sterc Google Analytics Dashboard for MODX up to 1.0.5. It has been declared as problematic. Affected by this vulnerability is an unknown functionality of the file core/components/analyticsdashboardwidget/elements/tpl/widget.analytics.tpl of the component Internal Search. The manipulation leads to cross site scripting. The attack can be launched remotely. Upgrading to version 1.0.6 is able to address this issue. The name of the patch is 855d9560d3782c105568eedf9b22a769fbf29cc0. It is recommended to upgrade the affected component. The identifier VDB-217069 was assigned to this vulnerability. |
2022-12-30 |
not yet calculated |
CVE-2017-20155
MISC
MISC
MISC
MISC
MISC
MISC |
exciting — printer
|
A vulnerability was found in Exciting Printer and classified as critical. This issue affects some unknown processing of the file lib/printer/jobs/prepare_page.rb of the component Argument Handler. The manipulation of the argument URL leads to command injection. The name of the patch is 5f8c715d6e2cc000f621a6833f0a86a673462136. It is recommended to apply a patch to fix this issue. The associated identifier of this vulnerability is VDB-217139. |
2022-12-31 |
not yet calculated |
CVE-2017-20156
MISC
MISC
MISC
MISC |
| ariadne –component_library |
A vulnerability was found in Ariadne Component Library up to 2.x. It has been classified as critical. Affected is an unknown function of the file src/url/Url.php. The manipulation leads to server-side request forgery. Upgrading to version 3.0 is able to address this issue. It is recommended to upgrade the affected component. The identifier of this vulnerability is VDB-217140. |
2022-12-31 |
not yet calculated |
CVE-2017-20157
MISC
MISC
MISC
MISC |
N/A — N/A
|
A vulnerability was found in rf Keynote up to 0.x. It has been rated as problematic. Affected by this issue is some unknown functionality of the file lib/keynote/rumble.rb. The manipulation of the argument value leads to cross site scripting. The attack may be launched remotely. Upgrading to version 1.0.0 is able to address this issue. The name of the patch is 05be4356b0a6ca7de48da926a9b997beb5ffeb4a. It is recommended to upgrade the affected component. VDB-217142 is the identifier assigned to this vulnerability. |
2022-12-31 |
not yet calculated |
CVE-2017-20159
MISC
MISC
MISC
MISC |
flitto –express_param
|
A vulnerability was found in flitto express-param up to 0.x. It has been classified as critical. This affects an unknown part of the file lib/fetchParams.js. The manipulation leads to improper handling of extra parameters. It is possible to initiate the attack remotely. Upgrading to version 1.0.0 is able to address this issue. The name of the patch is db94f7391ad0a16dcfcba8b9be1af385b25c42db. It is recommended to upgrade the affected component. The identifier VDB-217149 was assigned to this vulnerability. |
2022-12-31 |
not yet calculated |
CVE-2017-20160
MISC
MISC
MISC
MISC
MISC |
| opera –opera_mini_for_android |
The Opera Mini application 47.1.2249.129326 for Android allows remote attackers to spoof the Location Permission dialog via a crafted web site. |
2022-12-26 |
not yet calculated |
CVE-2018-16135
MISC |
archiver — archiver
|
Due to improper path santization, archives containing relative file paths can cause files to be written (or overwritten) outside of the target directory. |
2022-12-27 |
not yet calculated |
CVE-2018-25046
MISC
MISC
MISC |
email_existence — email_existence
|
A vulnerability was found in email-existence. It has been rated as problematic. Affected by this issue is some unknown functionality of the file index.js. The manipulation leads to inefficient regular expression complexity. The name of the patch is 0029ba71b6ad0d8ec0baa2ecc6256d038bdd9b56. It is recommended to apply a patch to fix this issue. VDB-216854 is the identifier assigned to this vulnerability. |
2022-12-27 |
not yet calculated |
CVE-2018-25049
MISC
MISC
MISC
MISC |
harvest — chosen
|
A vulnerability, which was classified as problematic, has been found in Harvest Chosen up to 1.8.6. Affected by this issue is the function AbstractChosen of the file coffee/lib/abstract-chosen.coffee. The manipulation of the argument group_label leads to cross site scripting. The attack may be launched remotely. Upgrading to version 1.8.7 is able to address this issue. The name of the patch is 77fd031d541e77510268d1041ed37798fdd1017e. It is recommended to upgrade the affected component. The identifier of this vulnerability is VDB-216956. |
2022-12-28 |
not yet calculated |
CVE-2018-25050
MISC
MISC
MISC
MISC
MISC |
pomash — pomash
|
A vulnerability, which was classified as problematic, was found in JmPotato Pomash. This affects an unknown part of the file Pomash/theme/clean/templates/editor.html. The manipulation of the argument article.title/content.title/article.tag leads to cross site scripting. It is possible to initiate the attack remotely. The name of the patch is be1914ef0a6808e00f51618b2de92496a3604415. It is recommended to apply a patch to fix this issue. The identifier VDB-216957 was assigned to this vulnerability. |
2022-12-28 |
not yet calculated |
CVE-2018-25051
MISC
MISC
MISC |
cpan –catalyst_plugin_session
|
A vulnerability has been found in Catalyst-Plugin-Session up to 0.40 and classified as problematic. This vulnerability affects the function _load_sessionid of the file lib/Catalyst/Plugin/Session.pm of the component Session ID Handler. The manipulation of the argument sid leads to cross site scripting. The attack can be initiated remotely. Upgrading to version 0.41 is able to address this issue. The name of the patch is 88d1b599e1163761c9bd53bec53ba078f13e09d4. It is recommended to upgrade the affected component. VDB-216958 is the identifier assigned to this vulnerability. |
2022-12-28 |
not yet calculated |
CVE-2018-25052
MISC
MISC
MISC
MISC |
json2html — json2html
|
A vulnerability was found in moappi Json2html up to 1.1.x and classified as problematic. This issue affects some unknown processing of the file json2html.js. The manipulation leads to cross site scripting. The attack may be initiated remotely. Upgrading to version 1.2.0 is able to address this issue. The name of the patch is 2d3d24d971b19a8ed1fb823596300b9835d55801. It is recommended to upgrade the affected component. The associated identifier of this vulnerability is VDB-216959. |
2022-12-28 |
not yet calculated |
CVE-2018-25053
MISC
MISC
MISC
MISC |
cilla — cilla
|
A vulnerability was found in shred cilla. It has been classified as problematic. Affected is an unknown function of the file cilla-xample/src/main/webapp/WEB-INF/jsp/view/search.jsp of the component Search Handler. The manipulation of the argument details leads to cross site scripting. It is possible to launch the attack remotely. The name of the patch is d345e6bc7798bd717a583ec7f545ca387819d5c7. It is recommended to apply a patch to fix this issue. The identifier of this vulnerability is VDB-216960. |
2022-12-28 |
not yet calculated |
CVE-2018-25054
MISC
MISC
MISC |
farcry_solr_pro_plugin — farcry_solr_pro_plugin
|
A vulnerability was found in FarCry Solr Pro Plugin up to 1.5.x. It has been declared as problematic. Affected by this vulnerability is an unknown functionality of the file packages/forms/solrProSearch.cfc of the component Search Handler. The manipulation of the argument suggestion leads to cross site scripting. The attack can be launched remotely. Upgrading to version 1.6.0 is able to address this issue. The name of the patch is b8f3d61511c9b02b781ec442bfb803cbff8e08d5. It is recommended to upgrade the affected component. The identifier VDB-216961 was assigned to this vulnerability. |
2022-12-28 |
not yet calculated |
CVE-2018-25055
MISC
MISC
MISC
MISC
MISC |
yolapi — yolapi
|
A vulnerability, which was classified as problematic, was found in yolapi. Affected is the function render_description of the file yolapi/pypi/metadata.py. The manipulation of the argument text leads to cross site scripting. It is possible to launch the attack remotely. The name of the patch is a0fe129055a99f429133a5c40cb13b44611ff796. It is recommended to apply a patch to fix this issue. VDB-216966 is the identifier assigned to this vulnerability. |
2022-12-28 |
not yet calculated |
CVE-2018-25056
MISC
MISC
MISC |
simple_php_link_shortener — simple_php_link_shortener
|
A vulnerability was found in simple_php_link_shortener. It has been classified as critical. Affected is an unknown function of the file index.php. The manipulation of the argument $link[“id”] leads to sql injection. The name of the patch is b26ac6480761635ed94ccb0222ba6b732de6e53f. It is recommended to apply a patch to fix this issue. The identifier of this vulnerability is VDB-216996. |
2022-12-28 |
not yet calculated |
CVE-2018-25057
MISC
MISC
MISC |
twitter_post_fetcher — twitter_post_fetcher
|
A vulnerability classified as problematic has been found in Twitter-Post-Fetcher up to 17.x. This affects an unknown part of the file js/twitterFetcher.js of the component Link Target Handler. The manipulation leads to use of web link to untrusted target with window.opener access. It is possible to initiate the attack remotely. Upgrading to version 18.0.0 is able to address this issue. The name of the patch is 7d281c6fb5acbc29a2cad295262c1f0c19ca56f3. It is recommended to upgrade the affected component. The identifier VDB-217017 was assigned to this vulnerability. |
2022-12-29 |
not yet calculated |
CVE-2018-25058
MISC
MISC
MISC
MISC
MISC |
pastebinit — pastebinit
|
A vulnerability was found in pastebinit up to 0.2.2 and classified as problematic. Affected by this issue is the function pasteHandler of the file server.go. The manipulation of the argument r.URL.Path leads to path traversal. Upgrading to version 0.2.3 is able to address this issue. The name of the patch is 1af2facb6d95976c532b7f8f82747d454a092272. It is recommended to upgrade the affected component. The identifier of this vulnerability is VDB-217040. |
2022-12-30 |
not yet calculated |
CVE-2018-25059
MISC
MISC
MISC
MISC
MISC |
macaron — csrf
|
A vulnerability was found in Macaron csrf and classified as problematic. Affected by this issue is some unknown functionality of the file csrf.go. The manipulation of the argument Generate leads to sensitive cookie without secure attribute. The attack may be launched remotely. The name of the patch is dadd1711a617000b70e5e408a76531b73187031c. It is recommended to apply a patch to fix this issue. VDB-217058 is the identifier assigned to this vulnerability. |
2022-12-30 |
not yet calculated |
CVE-2018-25060
MISC
MISC
MISC
MISC |
rgb2hex — rgb2hex
|
A vulnerability was found in rgb2hex up to 0.1.5. It has been rated as problematic. This issue affects some unknown processing. The manipulation leads to inefficient regular expression complexity. The attack may be initiated remotely. Upgrading to version 0.1.6 is able to address this issue. The name of the patch is 9e0c38594432edfa64136fdf7bb651835e17c34f. It is recommended to upgrade the affected component. The associated identifier of this vulnerability is VDB-217151. |
2022-12-31 |
not yet calculated |
CVE-2018-25061
MISC
MISC
MISC
MISC |
sierra_wireless — aleos
|
The ACENet service in Sierra Wireless ALEOS before 4.4.9, 4.5.x through 4.9.x before 4.9.5, and 4.10.x through 4.13.x before 4.14.0 allows remote attackers to execute arbitrary code via a buffer overflow. |
2022-12-26 |
not yet calculated |
CVE-2019-11851
CONFIRM
MISC |
sierra_wireless — mgos
|
Sierra Wireless MGOS before 3.15.2 and 4.x before 4.3 allows attackers to read log files via a Direct Request (aka Forced Browsing). |
2022-12-26 |
not yet calculated |
CVE-2019-13988
MISC
MISC |
hashicorp — nomad
|
HashiCorp Nomad 0.5.0 through 0.9.4 (fixed in 0.9.5) reveals unintended environment variables to the rendering task during template rendering, aka GHSA-6hv3-7c34-4hx8. This applies to nomad/client/allocrunner/taskrunner/template. |
2022-12-26 |
not yet calculated |
CVE-2019-14802
MISC
CONFIRM |
citrix — adc/gateway
|
In certain Citrix products, information disclosure can be achieved by an authenticated VPN user when there is a configured SSL VPN endpoint. This affects Citrix ADC and Citrix Gateway 13.0-58.30 and later releases before the CTX276688 update. |
2022-12-26 |
not yet calculated |
CVE-2019-18177
MISC |
cloud_native_computing — harbor
|
Cloud Native Computing Foundation Harbor before 1.10.3 and 2.x before 2.0.1 allows resource enumeration because unauthenticated API calls reveal (via the HTTP status code) whether a resource exists. |
2022-12-26 |
not yet calculated |
CVE-2019-19030
CONFIRM |
realtek — audio_drivers
|
Realtek Audio Drivers for Windows, as used on the Lenovo ThinkPad X1 Carbon 20A7, 20A8, 20BS, and 20BT before 6.0.8882.1 and 20KH and 20KG before 6.0.8907.1 (and on many other Lenovo and non-Lenovo products), mishandles DLL preloading. |
2022-12-26 |
not yet calculated |
CVE-2019-19705
MISC |
tendermint — core
|
Due to support of Gzip compression in request bodies, as well as a lack of limiting response body sizes, a malicious server can cause a client to consume a significant amount of system resources, which may be used as a denial of service vector. |
2022-12-27 |
not yet calculated |
CVE-2019-25072
MISC
MISC
MISC |
goa — goa
|
Improper path santiziation in github.com/goadesign/goa before v3.0.9, v2.0.10, or v1.4.3 allow remote attackers to read files outside of the intended directory. |
2022-12-27 |
not yet calculated |
CVE-2019-25073
MISC
MISC
MISC |
hide_files — hide_files
|
A vulnerability, which was classified as problematic, has been found in Hide Files on GitHub up to 2.x. This issue affects the function addEventListener of the file extension/options.js. The manipulation leads to cross site scripting. The attack may be initiated remotely. Upgrading to version 3.0.0 is able to address this issue. The name of the patch is 9de0c57df81db1178e0e79431d462f6d9842742e. It is recommended to upgrade the affected component. The associated identifier of this vulnerability is VDB-216767. |
2022-12-25 |
not yet calculated |
CVE-2019-25084
MISC
MISC
MISC
MISC
MISC |
gnome — gvdb
|
A vulnerability was found in GNOME gvdb. It has been classified as critical. This affects the function gvdb_table_write_contents_async of the file gvdb-builder.c. The manipulation leads to use after free. It is possible to initiate the attack remotely. The name of the patch is d83587b2a364eb9a9a53be7e6a708074e252de14. It is recommended to apply a patch to fix this issue. The identifier VDB-216789 was assigned to this vulnerability. |
2022-12-26 |
not yet calculated |
CVE-2019-25085
MISC
MISC
MISC |
iet-ou — open_media_player
|
A vulnerability was found in IET-OU Open Media Player up to 1.5.0. It has been declared as problematic. This vulnerability affects the function webvtt of the file application/controllers/timedtext.php. The manipulation of the argument ttml_url leads to cross site scripting. The attack can be initiated remotely. Upgrading to version 1.5.1 is able to address this issue. The name of the patch is 3f39f2d68d11895929c04f7b49b97a734ae7cd1f. It is recommended to upgrade the affected component. VDB-216862 is the identifier assigned to this vulnerability. |
2022-12-27 |
not yet calculated |
CVE-2019-25086
MISC
MISC
MISC
MISC
MISC
MISC |
httpserver — httpserver
|
A vulnerability was found in RamseyK httpserver. It has been rated as critical. This issue affects the function ResourceHost::getResource of the file src/ResourceHost.cpp of the component URI Handler. The manipulation of the argument uri leads to path traversal: ‘../filedir’. The attack may be initiated remotely. The name of the patch is 1a0de56e4dafff9c2f9c8f6b130a764f7a50df52. It is recommended to apply a patch to fix this issue. The associated identifier of this vulnerability is VDB-216863. |
2022-12-27 |
not yet calculated |
CVE-2019-25087
MISC
MISC
MISC |
oxidized_web — oxidized_web
|
A vulnerability was found in ytti Oxidized Web. It has been classified as problematic. Affected is an unknown function of the file lib/oxidized/web/views/conf_search.haml. The manipulation of the argument to_research leads to cross site scripting. It is possible to launch the attack remotely. The name of the patch is 55ab9bdc68b03ebce9280b8746ef31d7fdedcc45. It is recommended to apply a patch to fix this issue. VDB-216870 is the identifier assigned to this vulnerability. |
2022-12-27 |
not yet calculated |
CVE-2019-25088
MISC
MISC
MISC
MISC |
morgawr — muon
|
A vulnerability has been found in Morgawr Muon 0.1.1 and classified as problematic. Affected by this vulnerability is an unknown functionality of the file src/muon/handler.clj. The manipulation leads to insufficiently random values. The attack can be launched remotely. Upgrading to version 0.2.0-indev is able to address this issue. The name of the patch is c09ed972c020f759110c707b06ca2644f0bacd7f. It is recommended to upgrade the affected component. The identifier VDB-216877 was assigned to this vulnerability. |
2022-12-27 |
not yet calculated |
CVE-2019-25089
MISC
MISC
MISC
MISC |
freepbx — arimanager
|
A vulnerability was found in FreePBX arimanager up to 13.0.5.3 and classified as problematic. Affected by this issue is some unknown functionality of the component Views Handler. The manipulation of the argument dataurl leads to cross site scripting. The attack may be launched remotely. Upgrading to version 13.0.5.4 is able to address this issue. The name of the patch is 199dea7cc7020d3c469a86a39fbd80f5edd3c5ab. It is recommended to upgrade the affected component. VDB-216878 is the identifier assigned to this vulnerability. |
2022-12-27 |
not yet calculated |
CVE-2019-25090
MISC
MISC
MISC
MISC |
nsupdate.info — nsupdate.info
|
A vulnerability classified as problematic has been found in nsupdate.info. This affects an unknown part of the file src/nsupdate/settings/base.py of the component CSRF Cookie Handler. The manipulation of the argument CSRF_COOKIE_HTTPONLY leads to cookie without ‘httponly’ flag. It is possible to initiate the attack remotely. The name of the patch is 60a3fe559c453bc36b0ec3e5dd39c1303640a59a. It is recommended to apply a patch to fix this issue. The identifier VDB-216909 was assigned to this vulnerability. |
2022-12-27 |
not yet calculated |
CVE-2019-25091
MISC
MISC
MISC
MISC |
nakiami — mellivora
|
A vulnerability classified as problematic was found in Nakiami Mellivora up to 2.1.x. Affected by this vulnerability is the function print_user_ip_log of the file include/layout/user.inc.php of the component Admin Panel. The manipulation of the argument $entry[‘ip’] leads to cross site scripting. The attack can be launched remotely. Upgrading to version 2.2.0 is able to address this issue. The name of the patch is e0b6965f8dde608a3d2621617c05695eb406cbb9. It is recommended to upgrade the affected component. The associated identifier of this vulnerability is VDB-216955. |
2022-12-28 |
not yet calculated |
CVE-2019-25092
MISC
MISC
MISC
MISC |
pilz — pmc_programming_tool
|
In Pilz PMC programming tool 3.x before 3.5.17 (based on CODESYS Development System), an attacker can identify valid usernames. |
2022-12-26 |
not yet calculated |
CVE-2019-9011
MISC |
nexenta — nexenta_stor
|
An issue was discovered in Illumos in Nexenta NexentaStor 4.0.5 and 5.1.2, and other products. The SMB server allows an attacker to have unintended access, e.g., an attacker with WRITE_XATTR can change permissions. This occurs because of a combination of three factors: ZFS extended attributes are used to implement NT named streams, the SMB protocol requires implementations to have open handle semantics similar to those of NTFS, and the SMB server passes along certain attribute requests to the underlying object (i.e., they are not considered to be requests that pertain to the named stream). |
2022-12-26 |
not yet calculated |
CVE-2019-9579
MISC
MISC |
jackson-databind — jackson-databind
|
A deserialization flaw was discovered in jackson-databind through 2.9.10.4. It could allow an unauthenticated user to perform code execution via ignite-jta or quartz-core: org.apache.ignite.cache.jta.jndi.CacheJndiTmLookup, org.apache.ignite.cache.jta.jndi.CacheJndiTmFactory, and org.quartz.utils.JNDIConnectionProvider. |
2022-12-26 |
not yet calculated |
CVE-2020-10650
MISC
CONFIRM
MISC
MISC
CONFIRM
MISC |
sierra_wireless — airlink_mobility_manager
|
Sierra Wireless AirLink Mobility Manager (AMM) before 2.17 mishandles sessions and thus an unauthenticated attacker can obtain a login session with administrator privileges. |
2022-12-26 |
not yet calculated |
CVE-2020-11101
MISC
MISC |
pilz — pmc_programming_tool
|
In Pilz PMC programming tool 3.x before 3.5.17 (based on CODESYS Development System), a user’s password may be changed by an attacker without knowledge of the current password. |
2022-12-26 |
not yet calculated |
CVE-2020-12067
MISC |
pilz — pmc_programming_tool
|
In Pilz PMC programming tool 3.x before 3.5.17 (based on CODESYS Development System), the password-hashing feature requires insufficient computational effort. |
2022-12-26 |
not yet calculated |
CVE-2020-12069
MISC |
shilpi — cape_x_web
|
Shilpi CAPExWeb 1.1 allows SQL injection via a servlet/capexweb.cap_sendMail GET request. |
2022-12-26 |
not yet calculated |
CVE-2020-24600
MISC |
togglz — togglz
|
The console in Togglz before 2.9.4 allows CSRF. |
2022-12-26 |
not yet calculated |
CVE-2020-28191
CONFIRM
CONFIRM
CONFIRM |
httpengine.handle — httpengine.handle
|
Due to improper santization of user input, HTTPEngine.Handle allows for directory traversal, allowing an attacker to read files outside of the target directory that the server has permission to read. |
2022-12-27 |
not yet calculated |
CVE-2020-36559
MISC
MISC
MISC
MISC |
go-unzip — go-unzip
|
Due to improper path santization, archives containing relative file paths can cause files to be written (or overwritten) outside of the target directory. |
2022-12-27 |
not yet calculated |
CVE-2020-36560
MISC
MISC
MISC
MISC |
unzip — unzip
|
Due to improper path santization, archives containing relative file paths can cause files to be written (or overwritten) outside of the target directory. |
2022-12-27 |
not yet calculated |
CVE-2020-36561
MISC
MISC
MISC
MISC |
dht — dht
|
Due to unchecked type assertions, maliciously crafted messages can cause panics, which may be used as a denial of service vector. |
2022-12-28 |
not yet calculated |
CVE-2020-36562
MISC
MISC |
go-saml — go-saml
|
XML Digital Signatures generated and validated using this package use SHA-1, which may allow an attacker to craft inputs which cause hash collisions depending on their control over the input. |
2022-12-28 |
not yet calculated |
CVE-2020-36563
MISC
MISC |
nosurf — nosurf
|
Due to improper validation of caller input, validation is silently disabled if the provided expected token is malformed, causing any user supplied token to be considered valid. |
2022-12-27 |
not yet calculated |
CVE-2020-36564
MISC
MISC
MISC |
tar-utils — tar-utils
|
Due to improper path santization, archives containing relative file paths can cause files to be written (or overwritten) outside of the target directory. |
2022-12-27 |
not yet calculated |
CVE-2020-36566
MISC
MISC
MISC |
gin — gin
|
Unsanitized input in the default logger in github.com/gin-gonic/gin before v1.6.0 allows remote attackers to inject arbitrary log lines. |
2022-12-27 |
not yet calculated |
CVE-2020-36567
MISC
MISC
MISC |
revel — revel
|
Unsanitized input in the query parser in github.com/revel/revel before v1.0.0 allows remote attackers to cause resource exhaustion via memory allocation. |
2022-12-27 |
not yet calculated |
CVE-2020-36568
MISC
MISC
MISC
MISC |
golang-nanoauth — golang-nanoauth
|
Authentication is globally bypassed in github.com/nanobox-io/golang-nanoauth between v0.0.0-20160722212129-ac0cc4484ad4 and v0.0.0-20200131131040-063a3fb69896 if ListenAndServe is called with an empty token. |
2022-12-27 |
not yet calculated |
CVE-2020-36569
MISC
MISC
MISC |
panel-builder — panel-builder
|
A vulnerability classified as critical has been found in Modern Tribe Panel Builder Plugin. Affected is the function add_post_content_filtered_to_search_sql of the file ModularContent/SearchFilter.php. The manipulation leads to sql injection. It is possible to launch the attack remotely. The exploit has been disclosed to the public and may be used. The name of the patch is 4528d4f855dbbf24e9fc12a162fda84ce3bedc2f. It is recommended to apply a patch to fix this issue. VDB-216738 is the identifier assigned to this vulnerability. |
2022-12-27 |
not yet calculated |
CVE-2020-36626
MISC
MISC
MISC |
macaron — i18n
|
A vulnerability was found in Macaron i18n. It has been declared as problematic. Affected by this vulnerability is an unknown functionality of the file i18n.go. The manipulation leads to open redirect. The attack can be launched remotely. Upgrading to version 0.5.0 is able to address this issue. The name of the patch is 329b0c4844cc16a5a253c011b55180598e707735. It is recommended to upgrade the affected component. The identifier VDB-216745 was assigned to this vulnerability. |
2022-12-25 |
not yet calculated |
CVE-2020-36627
MISC
MISC
MISC |
calsign — apde
|
A vulnerability classified as critical has been found in Calsign APDE. This affects the function handleExtract of the file APDE/src/main/java/com/calsignlabs/apde/build/dag/CopyBuildTask.java of the component ZIP File Handler. The manipulation leads to path traversal. Upgrading to version 0.5.2-pre2-alpha is able to address this issue. It is recommended to upgrade the affected component. The associated identifier of this vulnerability is VDB-216747. |
2022-12-25 |
not yet calculated |
CVE-2020-36628
MISC
MISC
MISC |
simbco — httpster
|
A vulnerability classified as critical was found in SimbCo httpster. This vulnerability affects the function fs.realpathSync of the file src/server.coffee. The manipulation leads to path traversal. The exploit has been disclosed to the public and may be used. The name of the patch is d3055b3e30b40b65d30c5a06d6e053dffa7f35d0. It is recommended to apply a patch to fix this issue. The identifier of this vulnerability is VDB-216748. |
2022-12-25 |
not yet calculated |
CVE-2020-36629
MISC
MISC
MISC |
freepbx — cdr
|
A vulnerability was found in FreePBX cdr 14.0. It has been classified as critical. This affects the function ajaxHandler of the file ucp/Cdr.class.php. The manipulation of the argument limit/offset leads to sql injection. Upgrading to version 14.0.5.21 is able to address this issue. The name of the patch is f1a9eea2dfff30fb99d825bac194a676a82b9ec8. It is recommended to upgrade the affected component. The associated identifier of this vulnerability is VDB-216771. |
2022-12-25 |
not yet calculated |
CVE-2020-36630
MISC
MISC
MISC
MISC |
barronwaffles — dwc_network_server_emulator
|
A vulnerability was found in barronwaffles dwc_network_server_emulator. It has been declared as critical. This vulnerability affects the function update_profile of the file gamespy/gs_database.py. The manipulation of the argument firstname/lastname leads to sql injection. The attack can be initiated remotely. The name of the patch is f70eb21394f75019886fbc2fb536de36161ba422. It is recommended to apply a patch to fix this issue. The identifier of this vulnerability is VDB-216772. |
2022-12-25 |
not yet calculated |
CVE-2020-36631
MISC
MISC
MISC
MISC |
hughsk — flat
|
A vulnerability, which was classified as critical, was found in hughsk flat up to 5.0.0. This affects the function unflatten of the file index.js. The manipulation leads to improperly controlled modification of object prototype attributes (‘prototype pollution’). It is possible to initiate the attack remotely. Upgrading to version 5.0.1 is able to address this issue. The name of the patch is 20ef0ef55dfa028caddaedbcb33efbdb04d18e13. It is recommended to upgrade the affected component. The identifier VDB-216777 was assigned to this vulnerability. |
2022-12-25 |
not yet calculated |
CVE-2020-36632
MISC
MISC
MISC
MISC
MISC
MISC |
moodle-block_sitenews — moodle-block_sitenews
|
A vulnerability was found in moodle-block_sitenews 1.0. It has been classified as problematic. This affects the function get_content of the file block_sitenews.php. The manipulation leads to cross-site request forgery. It is possible to initiate the attack remotely. Upgrading to version 1.1 is able to address this issue. The name of the patch is cd18d8b1afe464ae6626832496f4e070bac4c58f. It is recommended to upgrade the affected component. The associated identifier of this vulnerability is VDB-216879. |
2022-12-27 |
not yet calculated |
CVE-2020-36633
MISC
MISC
MISC
MISC
MISC |
indeed_engineering — util
|
A vulnerability classified as problematic has been found in Indeed Engineering util up to 1.0.33. Affected is the function visit/appendTo of the file varexport/src/main/java/com/indeed/util/varexport/servlet/ViewExportedVariablesServlet.java. The manipulation leads to cross site scripting. It is possible to launch the attack remotely. Upgrading to version 1.0.34 is able to address this issue. The name of the patch is c0952a9db51a880e9544d9fac2a2218a6bfc9c63. It is recommended to upgrade the affected component. VDB-216882 is the identifier assigned to this vulnerability. |
2022-12-27 |
not yet calculated |
CVE-2020-36634
MISC
MISC
MISC
MISC |
openmrs — appointment_scheduling_module
|
A vulnerability was found in OpenMRS Appointment Scheduling Module up to 1.12.x. It has been classified as problematic. This affects the function validateFieldName of the file api/src/main/java/org/openmrs/module/appointmentscheduling/validator/AppointmentTypeValidator.java. The manipulation leads to cross site scripting. It is possible to initiate the attack remotely. Upgrading to version 1.13.0 is able to address this issue. The name of the patch is 34213c3f6ea22df427573076fb62744694f601d8. It is recommended to upgrade the affected component. The associated identifier of this vulnerability is VDB-216915. |
2022-12-27 |
not yet calculated |
CVE-2020-36635
MISC
MISC
MISC
MISC
MISC |
openmrs — admin_ui_module
|
A vulnerability classified as problematic has been found in OpenMRS Admin UI Module up to 1.4.x. Affected is the function sendErrorMessage of the file omod/src/main/java/org/openmrs/module/adminui/page/controller/systemadmin/accounts/AccountPageController.java of the component Account Setup Handler. The manipulation leads to cross site scripting. It is possible to launch the attack remotely. Upgrading to version 1.5.0 is able to address this issue. The name of the patch is 702fbfdac7c4418f23bb5f6452482b4a88020061. It is recommended to upgrade the affected component. VDB-216918 is the identifier assigned to this vulnerability. |
2022-12-27 |
not yet calculated |
CVE-2020-36636
MISC
MISC
MISC
MISC
MISC |
wordpress — wordpress
|
The Menu Item Visibility Control WordPress plugin through 0.5 doesn’t sanitize and validate the “Visibility logic” option for WordPress menu items, which could allow highly privileged users to execute arbitrary PHP code even in a hardened environment. |
2022-12-26 |
not yet calculated |
CVE-2021-24942
MISC |
wordpress — wordpress
|
php-mod/curl (a wrapper of the PHP cURL extension) before 2.3.2 allows XSS via the post_file_path_upload.php key parameter and the POST data to post_multidimensional.php. |
2022-12-26 |
not yet calculated |
CVE-2021-30134
MISC |
glob-parent — glob-parent
|
The glob-parent package before 6.0.1 for Node.js allows ReDoS (regular expression denial of service) attacks against the enclosure regular expression. |
2022-12-26 |
not yet calculated |
CVE-2021-35065
CONFIRM
CONFIRM
MISC |
fastrack — reflex_2.0_activity_tracker
|
fastrack Reflex 2.0 W307S_REFLEX_v90.89 Activity Tracker allows an Unauthenticated Remote attacker to send a malicious firmware update via BLE and brick the device. |
2022-12-26 |
not yet calculated |
CVE-2021-35951
MISC
MISC |
fastrack — reflex_2.0_activity_tracker
|
fastrack Reflex 2.0 W307S_REFLEX_v90.89 Activity Tracker allows a Remote attacker to change the time, date, and month via Bluetooth LE Characteristics on handle 0x0017. |
2022-12-26 |
not yet calculated |
CVE-2021-35952
MISC
MISC |
fastrack — reflex_2.0_activity_tracker
|
fastrack Reflex 2.0 W307S_REFLEX_v90.89 Activity Tracker allows a Remote attacker to cause a Denial of Service (device outage) via crafted choices of the last three bytes of a characteristic value. |
2022-12-26 |
not yet calculated |
CVE-2021-35953
MISC
MISC |
fastrack — reflex_2.0_activity_tracker
|
fastrack Reflex 2.0 W307S_REFLEX_v90.89 Activity Tracker allows physically proximate attackers to dump the firmware, flash custom malicious firmware, and brick the device via the Serial Wire Debug (SWD) feature. |
2022-12-26 |
not yet calculated |
CVE-2021-35954
MISC
MISC |
go — golang.org/x/text
|
golang.org/x/text/language in golang.org/x/text before 0.3.7 can panic with an out-of-bounds read during BCP 47 language tag parsing. Index calculation is mishandled. If parsing untrusted user input, this can be used as a vector for a denial-of-service attack. |
2022-12-26 |
not yet calculated |
CVE-2021-38561
MISC
MISC
CONFIRM
MISC |
philips — vue_pacs
|
In Philips (formerly Carestream) Vue MyVue PACS through 12.2.x.x, the VideoStream function allows Path Traversal by authenticated users to access files stored outside of the web root. |
2022-12-26 |
not yet calculated |
CVE-2021-39369
MISC
MISC
MISC |
go-yaml — yaml
|
Due to unbounded alias chasing, a maliciously crafted YAML file can cause the system to consume significant system resources. If parsing user input, this may be used as a denial of service vector. |
2022-12-27 |
not yet calculated |
CVE-2021-4235
MISC
MISC
MISC |
web — websockets
|
Web Sockets do not execute any AuthenticateMethod methods which may be set, leading to a nil pointer dereference if the returned UserData pointer is assumed to be non-nil, or authentication bypass. This issue only affects WebSockets with an AuthenticateMethod hook. Request handlers that do not explicitly use WebSockets are not vulnerable. |
2022-12-27 |
not yet calculated |
CVE-2021-4236
MISC
MISC |
goutils — goutils
|
Randomly-generated alphanumeric strings contain significantly less entropy than expected. The RandomAlphaNumeric and CryptoRandomAlphaNumeric functions always return strings containing at least one digit from 0 to 9. This significantly reduces the amount of entropy in short strings generated by these functions. |
2022-12-27 |
not yet calculated |
CVE-2021-4238
MISC
MISC |
noise — noise
|
The Noise protocol implementation suffers from weakened cryptographic security after encrypting 2^64 messages, and a potential denial of service attack. After 2^64 (~18.4 quintillion) messages are encrypted with the Encrypt function, the nonce counter will wrap around, causing multiple messages to be encrypted with the same key and nonce. In a separate issue, the Decrypt function increments the nonce state even when it fails to decrypt a message. If an attacker can provide an invalid input to the Decrypt function, this will cause the nonce state to desynchronize between the peers, resulting in a failure to encrypt all subsequent messages. |
2022-12-27 |
not yet calculated |
CVE-2021-4239
MISC
MISC |
dns-stats — hedgehog
|
A vulnerability was found in dns-stats hedgehog. It has been rated as problematic. Affected by this issue is the function DSCIOManager::dsc_import_input_from_source of the file src/DSCIOManager.cpp. The manipulation leads to sql injection. The attack may be launched remotely. The exploit has been disclosed to the public and may be used. The real existence of this vulnerability is still doubted at the moment. The name of the patch is 58922c345d3d1fe89bb2020111873a3e07ca93ac. It is recommended to apply a patch to fix this issue. VDB-216746 is the identifier assigned to this vulnerability. NOTE: This vulnerability only affects products that are no longer supported by the maintainer. NOTE: We do assume that the Data Manager server can only be accessed by authorised users. Because of this, we don’t believe this specific attack is possible without such a compromise of the Data Manager server. |
2022-12-25 |
not yet calculated |
CVE-2021-4276
MISC
MISC
MISC |
fredsmith — utils
|
A vulnerability, which was classified as problematic, has been found in fredsmith utils. This issue affects some unknown processing of the file screenshot_sync of the component Filename Handler. The manipulation leads to predictable from observable state. The name of the patch is dbab1b66955eeb3d76b34612b358307f5c4e3944. It is recommended to apply a patch to fix this issue. The identifier VDB-216749 was assigned to this vulnerability. |
2022-12-25 |
not yet calculated |
CVE-2021-4277
MISC
MISC |
cronvel — tree-kit
|
A vulnerability classified as problematic has been found in cronvel tree-kit up to 0.6.x. This affects an unknown part. The manipulation leads to improperly controlled modification of object prototype attributes (‘prototype pollution’). Upgrading to version 0.7.0 is able to address this issue. The name of the patch is a63f559c50d70e8cb2eaae670dec25d1dbc4afcd. It is recommended to upgrade the affected component. The identifier VDB-216765 was assigned to this vulnerability. |
2022-12-25 |
not yet calculated |
CVE-2021-4278
MISC
MISC
MISC
MISC |
json-patch — json-patch
|
A vulnerability has been found in Starcounter-Jack JSON-Patch up to 3.1.0 and classified as problematic. This vulnerability affects unknown code. The manipulation leads to improperly controlled modification of object prototype attributes (‘prototype pollution’). The attack can be initiated remotely. The exploit has been disclosed to the public and may be used. Upgrading to version 3.1.1 is able to address this issue. The name of the patch is 7ad6af41eabb2d799f698740a91284d762c955c9. It is recommended to upgrade the affected component. VDB-216778 is the identifier assigned to this vulnerability. |
2022-12-25 |
not yet calculated |
CVE-2021-4279
MISC
MISC
MISC
MISC
MISC |
stylerw — styler_praat_scripts
|
A vulnerability was found in styler_praat_scripts. It has been classified as problematic. Affected is an unknown function of the file file_segmenter.praat of the component Slash Handler. The manipulation leads to denial of service. It is possible to launch the attack remotely. The name of the patch is 0cad44aa4a3eb0ecdba071c10eaff16023d8b35f. It is recommended to apply a patch to fix this issue. The identifier of this vulnerability is VDB-216780. |
2022-12-25 |
not yet calculated |
CVE-2021-4280
MISC
MISC
MISC |
brave_ux — for-the-badge
|
A vulnerability was found in Brave UX for-the-badge and classified as critical. Affected by this issue is some unknown functionality of the file .github/workflows/combine-prs.yml. The manipulation leads to os command injection. The name of the patch is 55b5a234c0fab935df5fb08365bc8fe9c37cf46b. It is recommended to apply a patch to fix this issue. VDB-216842 is the identifier assigned to this vulnerability. |
2022-12-26 |
not yet calculated |
CVE-2021-4281
MISC
MISC
MISC
MISC |
freepbx — voicemail
|
A vulnerability was found in FreePBX voicemail. It has been declared as problematic. Affected by this vulnerability is an unknown functionality of the file page.voicemail.php. The manipulation leads to cross site scripting. The attack can be launched remotely. Upgrading to version 14.0.6.25 is able to address this issue. The name of the patch is 12e1469ef9208eda9d8955206e78345949236ee6. It is recommended to upgrade the affected component. The associated identifier of this vulnerability is VDB-216871. |
2022-12-27 |
not yet calculated |
CVE-2021-4282
MISC
MISC
MISC
MISC |
freepbx — voicemail
|
A vulnerability was found in FreeBPX voicemail. It has been rated as problematic. Affected by this issue is some unknown functionality of the file views/ssettings.php of the component Settings Handler. The manipulation of the argument key leads to cross site scripting. The attack may be launched remotely. Upgrading to version 14.0.6.25 is able to address this issue. The name of the patch is ffce4882016076acd16fe0f676246905aa3cb2f3. It is recommended to upgrade the affected component. The identifier of this vulnerability is VDB-216872. |
2022-12-27 |
not yet calculated |
CVE-2021-4283
MISC
MISC
MISC
MISC |
openmrs — html_form_entry_ui_framework_integration_module
|
A vulnerability classified as problematic has been found in OpenMRS HTML Form Entry UI Framework Integration Module up to 1.x. This affects an unknown part. The manipulation leads to cross site scripting. It is possible to initiate the attack remotely. Upgrading to version 2.0.0 is able to address this issue. The name of the patch is 811990972ea07649ae33c4b56c61c3b520895f07. It is recommended to upgrade the affected component. The identifier VDB-216873 was assigned to this vulnerability. |
2022-12-27 |
not yet calculated |
CVE-2021-4284
MISC
MISC
MISC
MISC
MISC
MISC |
nagiosenterprises — ncpa
|
A vulnerability classified as problematic was found in Nagios NCPA. This vulnerability affects unknown code of the file agent/listener/templates/tail.html. The manipulation of the argument name leads to cross site scripting. The attack can be initiated remotely. Upgrading to version 2.4.0 is able to address this issue. The name of the patch is 5abbcd7aa26e0fc815e6b2b0ffe1c15ef3e8fab5. It is recommended to upgrade the affected component. VDB-216874 is the identifier assigned to this vulnerability. |
2022-12-27 |
not yet calculated |
CVE-2021-4285
MISC
MISC
MISC
MISC
MISC |
cocagne — pysrp
|
A vulnerability, which was classified as problematic, has been found in cocagne pysrp up to 1.0.16. This issue affects the function calculate_x of the file srp/_ctsrp.py. The manipulation leads to information exposure through discrepancy. Upgrading to version 1.0.17 is able to address this issue. The name of the patch is dba52642f5e95d3da7af1780561213ee6053195f. It is recommended to upgrade the affected component. The associated identifier of this vulnerability is VDB-216875. |
2022-12-27 |
not yet calculated |
CVE-2021-4286
MISC
MISC
MISC
MISC
MISC |
refirm_labs — binwalk
|
A vulnerability, which was classified as problematic, was found in ReFirm Labs binwalk up to 2.3.2. Affected is an unknown function of the file src/binwalk/modules/extractor.py of the component Archive Extraction Handler. The manipulation leads to symlink following. It is possible to launch the attack remotely. Upgrading to version 2.3.3 is able to address this issue. The name of the patch is fa0c0bd59b8588814756942fe4cb5452e76c1dcd. It is recommended to upgrade the affected component. The identifier of this vulnerability is VDB-216876. |
2022-12-27 |
not yet calculated |
CVE-2021-4287
MISC
MISC
MISC
MISC
MISC |
openmrs — module-referenceapplication
|
A vulnerability was found in OpenMRS openmrs-module-referenceapplication up to 2.11.x. It has been rated as problematic. This issue affects some unknown processing of the file omod/src/main/webapp/pages/userApp.gsp. The manipulation leads to cross site scripting. The attack may be initiated remotely. Upgrading to version 2.12.0 is able to address this issue. The name of the patch is 35f81901a4cb925747a9615b8706f5079d2196a1. It is recommended to upgrade the affected component. The identifier VDB-216881 was assigned to this vulnerability. |
2022-12-27 |
not yet calculated |
CVE-2021-4288
MISC
MISC
MISC
MISC
MISC |
openmrs — module-referenceapplication
|
A vulnerability classified as problematic was found in OpenMRS openmrs-module-referenceapplication up to 2.11.x. Affected by this vulnerability is the function post of the file omod/src/main/java/org/openmrs/module/referenceapplication/page/controller/UserAppPageController.java of the component User App Page. The manipulation of the argument AppId leads to cross site scripting. The attack can be launched remotely. Upgrading to version 2.12.0 is able to address this issue. The name of the patch is 0410c091d46eed3c132fe0fcafe5964182659f74. It is recommended to upgrade the affected component. The associated identifier of this vulnerability is VDB-216883. |
2022-12-27 |
not yet calculated |
CVE-2021-4289
MISC
MISC
MISC
MISC
MISC
MISC |
dhbw — fallstudie
|
A vulnerability was found in DHBW Fallstudie. It has been declared as critical. Affected by this vulnerability is an unknown functionality of the file app/config/passport.js of the component Login. The manipulation of the argument id/email leads to sql injection. The name of the patch is 5c13c6a972ef4c07c5f35b417916e0598af9e123. It is recommended to apply a patch to fix this issue. The associated identifier of this vulnerability is VDB-216907. |
2022-12-27 |
not yet calculated |
CVE-2021-4290
MISC
MISC
MISC |
openmrs — admin_ui_module
|
A vulnerability was found in OpenMRS Admin UI Module up to 1.5.x. It has been declared as problematic. This vulnerability affects unknown code of the file omod/src/main/webapp/pages/metadata/locations/location.gsp. The manipulation leads to cross site scripting. The attack can be initiated remotely. Upgrading to version 1.6.0 is able to address this issue. The name of the patch is a7eefb5f69f6c50a3bffcb138bb8ea57cb41a9b6. It is recommended to upgrade the affected component. The identifier of this vulnerability is VDB-216916. |
2022-12-27 |
not yet calculated |
CVE-2021-4291
MISC
MISC
MISC
MISC
MISC |
openmrs — admin_ui_module
|
A vulnerability was found in OpenMRS Admin UI Module up to 1.4.x. It has been rated as problematic. This issue affects some unknown processing of the file omod/src/main/webapp/pages/metadata/privileges/privilege.gsp of the component Manage Privilege Page. The manipulation leads to cross site scripting. The attack may be initiated remotely. Upgrading to version 1.5.0 is able to address this issue. The name of the patch is 4f8565425b7c74128dec9ca46dfbb9a3c1c24911. It is recommended to upgrade the affected component. The identifier VDB-216917 was assigned to this vulnerability. |
2022-12-27 |
not yet calculated |
CVE-2021-4292
MISC
MISC
MISC
MISC
MISC |
openshift — osin
|
A vulnerability was found in OpenShift OSIN. It has been classified as problematic. This affects the function ClientSecretMatches/CheckClientSecret. The manipulation of the argument secret leads to observable timing discrepancy. The name of the patch is 8612686d6dda34ae9ef6b5a974e4b7accb4fea29. It is recommended to apply a patch to fix this issue. The associated identifier of this vulnerability is VDB-216987. |
2022-12-28 |
not yet calculated |
CVE-2021-4294
MISC
MISC
MISC
MISC |
onc_code-validator-api — onc_code-validator-api
|
A vulnerability classified as problematic was found in ONC code-validator-api up to 1.0.30. This vulnerability affects the function vocabularyValidationConfigurations of the file src/main/java/org/sitenv/vocabularies/configuration/CodeValidatorApiConfiguration.java of the component XML Handler. The manipulation leads to xml external entity reference. Upgrading to version 1.0.31 is able to address this issue. The name of the patch is fbd8ea121755a2d3d116b13f235bc8b61d8449af. It is recommended to upgrade the affected component. VDB-217018 is the identifier assigned to this vulnerability. |
2022-12-29 |
not yet calculated |
CVE-2021-4295
MISC
MISC
MISC
MISC
MISC |
w3c_unicorn –w3c_unicorn
|
A vulnerability, which was classified as problematic, has been found in w3c Unicorn. This issue affects the function ValidatorNuMessage of the file src/org/w3c/unicorn/response/impl/ValidatorNuMessage.java. The manipulation of the argument message leads to cross site scripting. The attack may be initiated remotely. The name of the patch is 51f75c31f7fc33859a9a571311c67ae4e95d9c68. It is recommended to apply a patch to fix this issue. The associated identifier of this vulnerability is VDB-217019. |
2022-12-29 |
not yet calculated |
CVE-2021-4296
MISC
MISC
MISC
MISC |
multiple_products — multiple_products
|
An issue was discovered in illumos before f859e7171bb5db34321e45585839c6c3200ebb90, OmniOS Community Edition r151038, OpenIndiana Hipster 2021.04, and SmartOS 20210923. A local unprivileged user can cause a deadlock and kernel panic via crafted rename and rmdir calls on tmpfs filesystems. Oracle Solaris 10 and 11 is also affected. |
2022-12-26 |
not yet calculated |
CVE-2021-43395
CONFIRM
CONFIRM
CONFIRM
MISC
MISC
MISC
MISC
CONFIRM
CONFIRM |
heimdal — heimdal
|
Heimdal before 7.7.1 allows attackers to cause a NULL pointer dereference in a SPNEGO acceptor via a preferred_mech_type of GSS_C_NO_OID and a nonzero initial_response value to send_accept. |
2022-12-26 |
not yet calculated |
CVE-2021-44758
MISC
CONFIRM |
mediawiki — mediawiki
|
An issue was discovered in MediaWiki before 1.35.5, 1.36.x before 1.36.3, and 1.37.x before 1.37.1. The REST API publicly caches results from private wikis. |
2022-12-26 |
not yet calculated |
CVE-2021-44854
MISC |
mediawiki — mediawiki
|
An issue was discovered in MediaWiki before 1.35.5, 1.36.x before 1.36.3, and 1.37.x before 1.37.1. There is Blind Stored XSS via a URL to the Upload Image feature. |
2022-12-26 |
not yet calculated |
CVE-2021-44855
MISC |
mediawiki — mediawiki
|
An issue was discovered in MediaWiki before 1.35.5, 1.36.x before 1.36.3, and 1.37.x before 1.37.1. A title blocked by AbuseFilter can be created via Special:ChangeContentModel due to the mishandling of the EditFilterMergedContent hook return value. |
2022-12-26 |
not yet calculated |
CVE-2021-44856
MISC |
control_web_panel/control_web_panel — control_web_panel/control_web_panel
|
In CWP (aka Control Web Panel or CentOS Web Panel) before 0.9.8.1107, attackers can make a crafted request to api/?api=add_server&DHCP= to add an authorized_keys text file in the /resources/ folder. |
2022-12-26 |
not yet calculated |
CVE-2021-45466
MISC
MISC |
control_web_panel/control_web_panel — control_web_panel/control_web_panel
|
In CWP (aka Control Web Panel or CentOS Web Panel) before 0.9.8.1107, an unauthenticated attacker can use %00 bytes to cause /user/loader.php to register an arbitrary API key, as demonstrated by a /user/loader.php?api=1&scripts= .%00./.%00./api/account_new_create&acc=guadaapi URI. Any number of %00 instances can be used, e.g., .%00%00%00./.%00%00%00./api/account_new_create could also be used for the scripts parameter. |
2022-12-26 |
not yet calculated |
CVE-2021-45467
MISC
MISC |
metersphere — metersphere
|
MeterSphere is a one-stop open source continuous testing platform, covering test management, interface testing, UI testing and performance testing. Versions prior to 2.5.0 are subject to a Server-Side Request Forgery that leads to Cross-Site Scripting. A Server-Side request forgery in `IssueProxyResourceService::getMdImageByUrl` allows an attacker to access internal resources, as well as executing JavaScript code in the context of Metersphere’s origin by a victim of a reflected XSS. This vulnerability has been fixed in v2.5.0. There are no known workarounds. |
2022-12-28 |
not yet calculated |
CVE-2022-23544
MISC
MISC |
alpine — alpine
|
Alpine is a scaffolding library in Java. Alpine prior to version 1.10.4 allows URL access filter bypass. This issue has been fixed in version 1.10.4. There are no known workarounds. |
2022-12-28 |
not yet calculated |
CVE-2022-23553
MISC
MISC
MISC |
alpine — alpine
|
Alpine is a scaffolding library in Java. Alpine prior to version 1.10.4 allows Authentication Filter bypass. The AuthenticationFilter relies on the request URI to evaluate if the user is accessing the swagger endpoint. By accessing a URL with a path such as /api/foo;%2fapi%2fswagger the contains condition will hold and will return from the authentication filter without aborting the request. Note that the principal object will not be assigned and therefore the issue wont allow user impersonation. This issue has been fixed in version 1.10.4. There are no known workarounds. |
2022-12-28 |
not yet calculated |
CVE-2022-23554
MISC
MISC
MISC |
authentik — authentik
|
authentik is an open-source Identity Provider focused on flexibility and versatility. Versions prior to 2022.11.4 and 2022.10.4 are vulnerable to Improper Authentication. Token reuse in invitation URLs leads to access control bypass via the use of a different enrollment flow than in the one provided. The vulnerability allows an attacker that knows different invitation flows names (e.g. `enrollment-invitation-test` and `enrollment-invitation-admin`) via either different invite links or via brute forcing to signup via a single invitation url for any valid invite link received (it can even be a url for a third flow as long as it’s a valid invite) as the token used in the `Invitations` section of the Admin interface does NOT change when a different `enrollment flow` is selected via the interface and it is NOT bound to the selected flow, so it will be valid for any flow when used. This issue is patched in authentik 2022.11.4,2022.10.4 and 2022.12.0. Only configurations that use invitations and have multiple enrollment flows with invitation stages that grant different permissions are affected. The default configuration is not vulnerable, and neither are configurations with a single enrollment flow. As a workaround, fixed data can be added to invitations which can be checked in the flow to deny requests. Alternatively, an identifier with high entropy (like a UUID) can be used as flow slug, mitigating the attack vector by exponentially decreasing the possibility of discovering other flows. |
2022-12-28 |
not yet calculated |
CVE-2022-23555
MISC |
general_electric — inet/inet_ii
|
Certain General Electric Renewable Energy products have inadequate encryption strength. This affects iNET and iNET II before 8.3.0. |
2022-12-26 |
not yet calculated |
CVE-2022-24116
MISC |
general_electric — inet/inet_ii
|
Certain General Electric Renewable Energy products download firmware without an integrity check. This affects iNET and iNET II before 8.3.0, SD before 6.4.7, TD220X before 2.0.16, and TD220MAX before 1.2.6. |
2022-12-26 |
not yet calculated |
CVE-2022-24117
MISC |
general_electric — inet/inet_ii
|
Certain General Electric Renewable Energy products allow attackers to use a code to trigger a reboot into the factory default configuration. This affects iNET and iNET II before 8.3.0, SD before 6.4.7, TD220X before 2.0.16, and TD220MAX before 1.2.6. |
2022-12-26 |
not yet calculated |
CVE-2022-24118
MISC |
general_electric — inet/inet_ii
|
Certain General Electric Renewable Energy products have a hidden feature for unauthenticated remote access to the device configuration shell. This affects iNET and iNET II before 8.3.0. |
2022-12-26 |
not yet calculated |
CVE-2022-24119
MISC |
general_electric — inet/inet_ii
|
Certain General Electric Renewable Energy products store cleartext credentials in flash memory. This affects iNET and iNET II before 8.3.0. |
2022-12-26 |
not yet calculated |
CVE-2022-24120
MISC |
aws — sdk
|
The AWS S3 Crypto SDK sends an unencrypted hash of the plaintext alongside the ciphertext as a metadata field. This hash can be used to brute force the plaintext, if the hash is readable to the attacker. AWS now blocks this metadata field, but older SDK versions still send it. |
2022-12-27 |
not yet calculated |
CVE-2022-2582
MISC
MISC |
golang — golang
|
A race condition can cause incorrect HTTP request routing. |
2022-12-27 |
not yet calculated |
CVE-2022-2583
MISC
MISC |
golang — dagpb
|
The dag-pb codec can panic when decoding invalid blocks. |
2022-12-27 |
not yet calculated |
CVE-2022-2584
MISC
MISC |
devolutions –remote_desktop_manager
|
Weak password derivation for export in Devolutions Remote Desktop Manager before 2022.1 allows information disclosure via a password brute-force attack. An error caused base64 to be decoded. |
2022-12-26 |
not yet calculated |
CVE-2022-26964
CONFIRM |
directus — directus
|
In Directus before 9.7.0, the default settings of CORS_ORIGIN and CORS_ENABLED are true. |
2022-12-26 |
not yet calculated |
CVE-2022-26969
MISC
CONFIRM
MISC
MISC
MISC |
open-xchange — app_suite
|
OX App Suite through 8.2 allows XSS because BMFreehand10 and image/x-freehand are not blocked. |
2022-12-26 |
not yet calculated |
CVE-2022-29852
MISC
CONFIRM |
open-xchange — app_suite
|
OX App Suite through 8.2 allows XSS via a certain complex hierarchy that forces use of Show Entire Message for a huge HTML e-mail message. |
2022-12-26 |
not yet calculated |
CVE-2022-29853
MISC
CONFIRM |
emerson — deltav_distributed_control_system
|
Emerson DeltaV Distributed Control System (DCS) has insufficient verification of firmware integrity (an inadequate checksum approach, and no signature). This affects versions before 14.3 of DeltaV M-series, DeltaV S-series, DeltaV P-series, DeltaV SIS, and DeltaV CIOC/EIOC/WIOC IO cards. |
2022-12-26 |
not yet calculated |
CVE-2022-30260
MISC
MISC |
reprise_software — rlm_license_administration
|
XSS in signing form in Reprise Software RLM License Administration v14.2BL4 allows remote attacker to inject arbitrary code via password field. |
2022-12-29 |
not yet calculated |
CVE-2022-30519
MISC |
go-yaml — go-yaml
|
Parsing malicious or large YAML documents can consume excessive amounts of CPU or memory. |
2022-12-27 |
not yet calculated |
CVE-2022-3064
MISC
MISC
MISC |
open-xchange — app_suite
|
OX App Suite through 7.10.6 allows XSS via a deep link, as demonstrated by class=”deep-link-app” for a /#!!&app=%2e./ URI. |
2022-12-26 |
not yet calculated |
CVE-2022-31469
CONFIRM
MISC |
rockwell_automation — studio_5000_logix_emulate_software
|
A remote code execution vulnerability exists in Rockwell Automation Studio 5000 Logix Emulate software. Users are granted elevated permissions on certain product services when the software is installed. Due to this misconfiguration, a malicious user could potentially achieve remote code execution on the targeted software. |
2022-12-27 |
not yet calculated |
CVE-2022-3156
MISC |
golang — golang
|
DNSSEC validation is not performed correctly. An attacker can cause this package to report successful validation for invalid, attacker-controlled records. The owner name of RRSIG RRs is not validated, permitting an attacker to present the RRSIG for an attacker-controlled domain in a response for any other domain. |
2022-12-28 |
not yet calculated |
CVE-2022-3346
MISC
MISC |
golang — golang
|
DNSSEC validation is not performed correctly. An attacker can cause this package to report successful validation for invalid, attacker-controlled records. Root DNSSEC public keys are not validated, permitting an attacker to present a self-signed root key and delegation chain. |
2022-12-28 |
not yet calculated |
CVE-2022-3347
MISC
MISC |
nvidia — gpu_display_driver
|
NVIDIA GPU Display Driver for Windows contains a vulnerability in the user mode layer, where an unprivileged regular user can access or modify system files or other files that are critical to the application, which may lead to code execution, denial of service, escalation of privileges, information disclosure, or data tampering. |
2022-12-30 |
not yet calculated |
CVE-2022-34669
MISC |
nvidia — gpu_display_driver
|
NVIDIA GPU Display Driver for Linux contains a vulnerability in the kernel mode layer handler, where an unprivileged regular user can cause truncation errors when casting a primitive to a primitive of smaller size causes data to be lost in the conversion, which may lead to denial of service or information disclosure. |
2022-12-30 |
not yet calculated |
CVE-2022-34670
MISC |
nvidia — gpu_display_driver
|
NVIDIA GPU Display Driver for Windows contains a vulnerability in the user mode layer, where an unprivileged regular user can cause an out-of-bounds write, which may lead to code execution, denial of service, escalation of privileges, information disclosure, or data tampering. |
2022-12-30 |
not yet calculated |
CVE-2022-34671
MISC |
nvidia — control_panel
|
NVIDIA Control Panel for Windows contains a vulnerability where an unauthorized user or an unprivileged regular user can compromise the security of the software by gaining privileges, reading sensitive information, or executing commands. |
2022-12-30 |
not yet calculated |
CVE-2022-34672
MISC |
nvidia — gpu_display_driver
|
NVIDIA GPU Display Driver for Linux contains a vulnerability in the kernel mode layer (nvidia.ko), where an out-of-bounds array access may lead to denial of service, information disclosure, or data tampering. |
2022-12-30 |
not yet calculated |
CVE-2022-34673
MISC |
nvidia — gpu_display_driver
|
NVIDIA GPU Display Driver for Linux contains a vulnerability in the kernel mode layer handler, where a helper function maps more physical pages than were requested, which may lead to undefined behavior or an information leak. |
2022-12-30 |
not yet calculated |
CVE-2022-34674
MISC |
nvidia — gpu_display_driver
|
NVIDIA Display Driver for Linux contains a vulnerability in the Virtual GPU Manager, where it does not check the return value from a null-pointer dereference, which may lead to denial of service. |
2022-12-30 |
not yet calculated |
CVE-2022-34675
MISC |
nvidia — gpu_display_driver
|
NVIDIA GPU Display Driver for Linux contains a vulnerability in the kernel mode layer handler, where an out-of-bounds read may lead to denial of service, information disclosure, or data tampering. |
2022-12-30 |
not yet calculated |
CVE-2022-34676
MISC |
nvidia — gpu_display_driver
|
NVIDIA GPU Display Driver for Linux contains a vulnerability in the kernel mode layer handler, where an unprivileged regular user can cause an integer to be truncated, which may lead to denial of service or data tampering. |
2022-12-30 |
not yet calculated |
CVE-2022-34677
MISC |
nvidia — gpu_display_driver
|
NVIDIA GPU Display Driver for Windows and Linux contains a vulnerability in the kernel mode layer, where an unprivileged user can cause a null-pointer dereference, which may lead to denial of service. |
2022-12-30 |
not yet calculated |
CVE-2022-34678
MISC |
nvidia — gpu_display_driver
|
NVIDIA GPU Display Driver for Linux contains a vulnerability in the kernel mode layer handler, where an unhandled return value can lead to a null-pointer dereference, which may lead to denial of service. |
2022-12-30 |
not yet calculated |
CVE-2022-34679
MISC |
nvidia — gpu_display_driver
|
NVIDIA GPU Display Driver for Linux contains a vulnerability in the kernel mode layer handler, where an integer truncation can lead to an out-of-bounds read, which may lead to denial of service. |
2022-12-30 |
not yet calculated |
CVE-2022-34680
MISC |
nvidia — gpu_display_driver
|
NVIDIA GPU Display Driver for Windows contains a vulnerability in the kernel mode layer (nvlddmkm.sys) handler, where improper input validation of a display-related data structure may lead to denial of service. |
2022-12-30 |
not yet calculated |
CVE-2022-34681
MISC |
nvidia — gpu_display_driver
|
NVIDIA GPU Display Driver for Linux contains a vulnerability in the kernel mode layer, where an unprivileged regular user can cause a null-pointer dereference, which may lead to denial of service. |
2022-12-30 |
not yet calculated |
CVE-2022-34682
MISC |
nvidia — gpu_display_driver
|
NVIDIA GPU Display Driver for Windows contains a vulnerability in the kernel mode layer (nvlddmkm.sys) handler for DxgkDdiEscape, where a null-pointer dereference occurs, which may lead to denial of service. |
2022-12-30 |
not yet calculated |
CVE-2022-34683
MISC |
nvidia — gpu_display_driver
|
NVIDIA GPU Display Driver for Linux contains a vulnerability in the kernel mode layer (nvidia.ko), where an off-by-one error may lead to data tampering or information disclosure. |
2022-12-30 |
not yet calculated |
CVE-2022-34684
MISC |
hazelcast — hazelcast/hazelcast_jet
|
The Connection handler in Hazelcast and Hazelcast Jet allows a remote unauthenticated attacker to access and manipulate data in the cluster with the identity of another already authenticated connection. The affected Hazelcast versions are through 4.0.6, 4.1.9, 4.2.5, 5.0.3, and 5.1.2. The affected Hazelcast Jet versions are through 4.5.3. |
2022-12-29 |
not yet calculated |
CVE-2022-36437
MISC |
password_manager — password_manager
|
Password Manager for IIS 2.0 has a cross-site scripting (XSS) vulnerability via the /isapi/PasswordManager.dll ResultURL parameter. |
2022-12-26 |
not yet calculated |
CVE-2022-36664
MISC
MISC |
open-xchange — app_suite
|
OX App Suite through 7.10.6 allows XSS via XHTML CDATA for a snippet, as demonstrated by the onerror attribute of an IMG element within an e-mail signature. |
2022-12-26 |
not yet calculated |
CVE-2022-37307
CONFIRM
MISC |
open-xchange — app_suite
|
OX App Suite through 7.10.6 allows XSS via HTML in text/plain e-mail messages. |
2022-12-26 |
not yet calculated |
CVE-2022-37308
CONFIRM
MISC |
open-xchange — app_suite
|
OX App Suite through 7.10.6 allows XSS via script code within a contact that has an e-mail address but lacks a name. |
2022-12-26 |
not yet calculated |
CVE-2022-37309
CONFIRM
MISC |
open-xchange — app_suite
|
OX App Suite through 7.10.6 allows XSS via a malicious capability to the metrics or help module, as demonstrated by a /#!!&app=io.ox/files&cap= URI. |
2022-12-26 |
not yet calculated |
CVE-2022-37310
CONFIRM
MISC |
open-xchange — app_suite
|
OX App Suite through 7.10.6 has Uncontrolled Resource Consumption via a large location request parameter to the redirect servlet. |
2022-12-26 |
not yet calculated |
CVE-2022-37311
CONFIRM
MISC |
open-xchange — app_suite
|
OX App Suite through 7.10.6 has Uncontrolled Resource Consumption via a large request body containing a redirect URL to the deferrer servlet. |
2022-12-26 |
not yet calculated |
CVE-2022-37312
CONFIRM
MISC |
open-xchange — app_suite
|
OX App Suite through 7.10.6 allows SSRF because the anti-SSRF protection mechanism only checks the first DNS AA or AAAA record. |
2022-12-26 |
not yet calculated |
CVE-2022-37313
CONFIRM
MISC |
enlightenment –enlightenment_sys
|
enlightenment_sys in Enlightenment before 0.25.4 allows local users to gain privileges because it is setuid root, and the system library function mishandles pathnames that begin with a /dev/.. substring. |
2022-12-25 |
not yet calculated |
CVE-2022-37706
MISC
MISC
MISC |
esri — arcgis
|
There is a path traversal vulnerability in Esri ArcGIS Server versions 10.9.1 and below. Successful exploitation may allow a remote, unauthenticated attacker traverse the file system to access files outside of the intended directory on ArcGIS Server. This could lead to the disclosure of sensitive site configuration information (not user datasets). |
2022-12-28 |
not yet calculated |
CVE-2022-38202
CONFIRM |
esri — arcgis
|
Protections against potential Server-Side Request Forgery (SSRF) vulnerabilities in Esri Portal for ArcGIS versions 10.8.1 and below were not fully honored and may allow a remote, unauthenticated attacker to forge requests to arbitrary URLs from the system, potentially leading to network enumeration or reading from hosts inside the network perimeter, a different issue than CVE-2022-38211 and CVE-2022-38212. |
2022-12-29 |
not yet calculated |
CVE-2022-38203
MISC |
esri — arcgis
|
There is a reflected XSS vulnerability in Esri Portal for ArcGIS versions 10.8.1 and 10.7.1 which may allow a remote, unauthenticated attacker to create a crafted link which when clicked could potentially execute arbitrary JavaScript code in the victim’s browser. |
2022-12-29 |
not yet calculated |
CVE-2022-38204
MISC |
esri — arcgis
|
In some non-default installations of Esri Portal for ArcGIS versions 10.9.1 and below, a directory traversal issue may allow a remote, unauthenticated attacker to traverse the file system and lead to the disclosure of sensitive data (not customer-published content). |
2022-12-29 |
not yet calculated |
CVE-2022-38205
MISC |
esri — arcgis
|
There is a reflected XSS vulnerability in Esri Portal for ArcGIS versions 10.9.1 and below which may allow a remote remote, unauthenticated attacker to create a crafted link which when clicked could execute arbitrary JavaScript code in the victim’s browser. |
2022-12-29 |
not yet calculated |
CVE-2022-38206
MISC |
esri — arcgis
|
There is a reflected XSS vulnerability in Esri Portal for ArcGIS versions 10.8.1 and 10.7.1 which may allow a remote remote, unauthenticated attacker to create a crafted link which when clicked which could execute arbitrary JavaScript code in the victim’s browser. |
2022-12-29 |
not yet calculated |
CVE-2022-38207
MISC |
esri — arcgis
|
There is an unvalidated redirect vulnerability in Esri Portal for ArcGIS 11 and below that may allow a remote, unauthenticated attacker to craft a URL that could redirect a victim to an arbitrary website, simplifying phishing attacks. |
2022-12-29 |
not yet calculated |
CVE-2022-38208
MISC |
esri — arcgis
|
There is a reflected XSS vulnerability in Esri Portal for ArcGIS versions 10.9.1 and below which may allow a remote, unauthenticated attacker to create a crafted link which when clicked could execute arbitrary JavaScript code in the victim’s browser. |
2022-12-29 |
not yet calculated |
CVE-2022-38209
MISC |
esri — arcgis
|
There is a reflected HTML injection vulnerability in Esri Portal for ArcGIS versions 10.9.1 and below that may allow a remote, unauthenticated attacker to create a crafted link which when clicked could render arbitrary HTML in the victim’s browser. |
2022-12-29 |
not yet calculated |
CVE-2022-38210
CONFIRM |
esri — arcgis
|
Protections against potential Server-Side Request Forgery (SSRF) vulnerabilities in Esri Portal for ArcGIS versions 10.9.1 and below were not fully honored and may allow a remote, unauthenticated attacker to forge requests to arbitrary URLs from the system, potentially leading to network enumeration or reading from hosts inside the network perimeter, a different issue than CVE-2022-38211 and CVE-2022-38212. |
2022-12-29 |
not yet calculated |
CVE-2022-38211
CONFIRM |
esri — arcgis
|
Protections against potential Server-Side Request Forgery (SSRF) vulnerabilities in Esri Portal for ArcGIS versions 10.8.1 and below were not fully honored and may allow a remote, unauthenticated attacker to forge requests to arbitrary URLs from the system, potentially leading to network enumeration or reading from hosts inside the network perimeter, a different issue than CVE-2022-38211 and CVE-2022-38203. |
2022-12-29 |
not yet calculated |
CVE-2022-38212
MISC |
wordpress — wordpress
|
The Kwayy HTML Sitemap WordPress plugin before 4.0 does not sanitise and escape some of its settings, which could allow high privilege users such as admin to perform Stored Cross-Site Scripting attacks even when the unfiltered_html capability is disallowed (for example in multisite setup). |
2022-12-26 |
not yet calculated |
CVE-2022-3835
MISC |
wordpress — wordpress
|
The Login for Google Apps WordPress plugin before 3.4.5 does not sanitise and escape some of its settings, which could allow high privilege users such as admin to perform Stored Cross-Site Scripting attacks even when the unfiltered_html capability is disallowed (for example in multisite setup). |
2022-12-26 |
not yet calculated |
CVE-2022-3840
MISC |
huawei — aslan_childrens_watch
|
Huawei Aslan Children’s Watch has an improper input validation vulnerability. Successful exploitation may cause the watch’s application service abnormal. |
2022-12-28 |
not yet calculated |
CVE-2022-39012
MISC |
wordpress — wordpress
|
The Broken Link Checker WordPress plugin before 1.11.20 does not sanitise and escape some of its settings, which could allow high privilege users such as admin to perform Stored Cross-Site Scripting attacks even when the unfiltered_html capability is disallowed (for example in multisite setup) |
2022-12-28 |
not yet calculated |
CVE-2022-3922
MISC |
intelbras — wifiber_120ac_inmesh
|
Intelbras WiFiber 120AC inMesh before 1-1-220826 allows command injection by authenticated users, as demonstrated by the /boaform/formPing6 and /boaform/formTracert URIs for ping and traceroute. |
2022-12-25 |
not yet calculated |
CVE-2022-40005
MISC
MISC |
wordpress — wordpress
|
The Paytium: Mollie payment forms & donations WordPress plugin through 4.3.6 does not sanitise and escape some of its settings, which could allow high privilege users such as admin to perform Stored Cross-Site Scripting attacks even when the unfiltered_html capability is disallowed (for example in multisite setup). |
2022-12-26 |
not yet calculated |
CVE-2022-4042
MISC |
wordpress — wordpress
|
The Return Refund and Exchange For WooCommerce WordPress plugin before 4.0.9 does not validate attachment files to be uploaded via an AJAX action available to unauthenticated users, which could allow them to upload arbitrary files such as PHP and lead to RCE |
2022-12-26 |
not yet calculated |
CVE-2022-4047
MISC |
wordpress — wordpress
|
The Eventify™ WordPress plugin through 2.1 does not sanitise and escape some of its settings, which could allow high privilege users such as admin to perform Stored Cross-Site Scripting attacks even when the unfiltered_html capability is disallowed (for example in multisite setup). |
2022-12-26 |
not yet calculated |
CVE-2022-4110
MISC |
wordpress — wordpress
|
The IWS WordPress plugin through 1.0 does not properly escape a parameter before using it in a SQL statement via an AJAX action available to unauthenticated users, leading to an unauthenticated SQL injection. |
2022-12-26 |
not yet calculated |
CVE-2022-4117
MISC |
wordpress — wordpress
|
The Stop Spammers Security | Block Spam Users, Comments, Forms WordPress plugin before 2022.6 passes base64 encoded user input to the unserialize() PHP function when CAPTCHA are used as second challenge, which could lead to PHP Object injection if a plugin installed on the blog has a suitable gadget chain |
2022-12-26 |
not yet calculated |
CVE-2022-4120
MISC |
squid — squid
|
An issue was discovered in Squid 4.9 through 4.17 and 5.0.6 through 5.6. Due to inconsistent handling of internal URIs, there can be Exposure of Sensitive Information about clients using the proxy via an HTTPS request to an internal cache manager URL. This is fixed in 5.7. |
2022-12-25 |
not yet calculated |
CVE-2022-41317
MISC
MISC
CONFIRM
MISC |
squid — squid
|
A buffer over-read was discovered in libntlmauth in Squid 2.5 through 5.6. Due to incorrect integer-overflow protection, the SSPI and SMB authentication helpers are vulnerable to reading unintended memory locations. In some configurations, cleartext credentials from these locations are sent to a client. This is fixed in 5.7. |
2022-12-25 |
not yet calculated |
CVE-2022-41318
MISC
MISC
MISC
CONFIRM |
wordpress — wordpress
|
The Contest Gallery WordPress plugin before 19.1.5.1, Contest Gallery Pro WordPress plugin before 19.1.5.1 do not escape the option_id POST parameter before concatenating it to an SQL query in order-custom-fields-with-and-without-search.php. This may allow malicious users with at least author privilege to leak sensitive information from the site’s database. |
2022-12-26 |
not yet calculated |
CVE-2022-4150
MISC
MISC |
wordpress — wordpress
|
The Contest Gallery WordPress plugin before 19.1.5.1, Contest Gallery Pro WordPress plugin before 19.1.5.1 do not escape the option_id GET parameter before concatenating it to an SQL query in export-images-data.php. This may allow malicious users with at least author privilege to leak sensitive information from the site’s database. |
2022-12-26 |
not yet calculated |
CVE-2022-4151
MISC
MISC |
wordpress — wordpress
|
The Contest Gallery WordPress plugin before 19.1.5, Contest Gallery Pro WordPress plugin before 19.1.5 do not escape the option_id POST parameter before concatenating it to an SQL query in edit-options.php. This may allow malicious users with at least author privilege to leak sensitive information from the site’s database. |
2022-12-26 |
not yet calculated |
CVE-2022-4152
MISC
MISC |
wordpress — wordpress
|
The Contest Gallery WordPress plugin before 19.1.5.1, Contest Gallery Pro WordPress plugin before 19.1.5.1 do not escape the upload[] POST parameter before concatenating it to an SQL query in get-data-create-upload-v10.php. This may allow malicious users with at least author privilege to leak sensitive information from the site’s database. |
2022-12-26 |
not yet calculated |
CVE-2022-4153
MISC
MISC |
wordpress — wordpress
|
The Contest Gallery Pro WordPress plugin before 19.1.5 does not escape the wp_user_id GET parameter before concatenating it to an SQL query in management-show-user.php. This may allow malicious users with at administrator privileges (i.e. on multisite WordPress configurations) to leak sensitive information from the site’s database. |
2022-12-26 |
not yet calculated |
CVE-2022-4154
MISC
MISC |
wordpress — wordpress
|
The Contest Gallery WordPress plugin before 19.1.5.1, Contest Gallery Pro WordPress plugin before 19.1.5.1 do not escape the wp_user_id GET parameter before concatenating it to an SQL query in management-show-user.php. This may allow malicious users with administrator privileges (i.e. on multisite WordPress configurations) to leak sensitive information from the site’s database. |
2022-12-26 |
not yet calculated |
CVE-2022-4155
MISC
MISC |
wordpress — wordpress
|
The Contest Gallery WordPress plugin before 19.1.5.1, Contest Gallery Pro WordPress plugin before 19.1.5.1 do not escape the user_id POST parameter before concatenating it to an SQL query in ajax-functions-backend.php. This may allow malicious users with at least author privilege to leak sensitive information from the site’s database. |
2022-12-26 |
not yet calculated |
CVE-2022-4156
MISC
MISC |
wordpress — wordpress
|
The Contest Gallery WordPress plugin before 19.1.5.1, Contest Gallery Pro WordPress plugin before 19.1.5.1 do not escape the cg_option_id POST parameter before concatenating it to an SQL query in export-votes-all.php. This may allow malicious users with administrator privileges (i.e. on multisite WordPress configurations) to leak sensitive information from the site’s database. |
2022-12-26 |
not yet calculated |
CVE-2022-4157
MISC
MISC |
huawei — multiple_products
|
There is an insufficient authentication vulnerability in some Huawei band products. Successful exploit could allow the attacker to spoof then connect to the band. |
2022-12-28 |
not yet calculated |
CVE-2022-41579
MISC |
wordpress — wordpress
|
The Contest Gallery WordPress plugin before 19.1.5.1, Contest Gallery Pro WordPress plugin before 19.1.5.1 do not escape the cg_Fields POST parameter before concatenating it to an SQL query in users-registry-check-registering-and-login.php. This may allow malicious visitors to leak sensitive information from the site’s database. |
2022-12-26 |
not yet calculated |
CVE-2022-4158
MISC
MISC |
wordpress — wordpress
|
The Contest Gallery WordPress plugin before 19.1.5.1, Contest Gallery Pro WordPress plugin before 19.1.5.1 do not escape the cg_id POST parameter before concatenating it to an SQL query in 0_change-gallery.php. This may allow malicious users with at least author privilege to leak sensitive information from the site’s database. |
2022-12-26 |
not yet calculated |
CVE-2022-4159
MISC
MISC |
wordpress — wordpress
|
The Contest Gallery WordPress plugin before 19.1.5.1, Contest Gallery Pro WordPress plugin before 19.1.5.1 do not escape the cg_copy_id POST parameter before concatenating it to an SQL query in cg-copy-comments.php and cg-copy-rating.php. This may allow malicious users with at least author privilege to leak sensitive information from the site’s database. |
2022-12-26 |
not yet calculated |
CVE-2022-4160
MISC
MISC |
wordpress — wordpress
|
The Contest Gallery WordPress plugin before 19.1.5.1, Contest Gallery Pro WordPress plugin before 19.1.5.1 do not escape the cg_copy_start POST parameter before concatenating it to an SQL query in copy-gallery-images.php. This may allow malicious users with at least author privilege to leak sensitive information from the site’s database. |
2022-12-26 |
not yet calculated |
CVE-2022-4161
MISC
MISC |
wordpress — wordpress
|
The Contest Gallery WordPress plugin before 19.1.5.1, Contest Gallery Pro WordPress plugin before 19.1.5.1 do not escape the cg_row POST parameter before concatenating it to an SQL query in 3_row-order.php. This may allow malicious users with at least author privilege to leak sensitive information from the site’s database. |
2022-12-26 |
not yet calculated |
CVE-2022-4162
MISC
MISC |
wordpress — wordpress
|
The Contest Gallery WordPress plugin before 19.1.5.1, Contest Gallery Pro WordPress plugin before 19.1.5.1 do not escape the cg_deactivate and cg_activate POST parameters before concatenating it to an SQL query in 2_deactivate.php and 4_activate.php, respectively. This may allow malicious users with at least author privilege to leak sensitive information from the site’s database. |
2022-12-26 |
not yet calculated |
CVE-2022-4163
MISC
MISC |
wordpress — wordpress
|
The Contest Gallery WordPress plugin before 19.1.5.1, Contest Gallery Pro WordPress plugin before 19.1.5.1 do not escape the cg_multiple_files_for_post POST parameter before concatenating it to an SQL query in 0_change-gallery.php. This may allow malicious users with at least author privilege to leak sensitive information from the site’s database. |
2022-12-26 |
not yet calculated |
CVE-2022-4164
MISC
MISC |
wordpress — wordpress
|
The Contest Gallery WordPress plugin before 19.1.5.1, Contest Gallery Pro WordPress plugin before 19.1.5.1 do not escape the cg_order POST parameter before concatenating it to an SQL query in order-custom-fields-with-and-without-search.php. This may allow malicious users with at least author privilege to leak sensitive information from the site’s database. |
2022-12-26 |
not yet calculated |
CVE-2022-4165
MISC
MISC |
wordpress — wordpress
|
The Contest Gallery WordPress plugin before 19.1.5.1, Contest Gallery Pro WordPress plugin before 19.1.5.1 do not escape the addCountS POST parameter before concatenating it to an SQL query in 4_activate.php. This may allow malicious users with at least author privilege to leak sensitive information from the site’s database. |
2022-12-26 |
not yet calculated |
CVE-2022-4166
MISC
MISC |
mediawiki — mediawiki
|
An issue was discovered in MediaWiki before 1.35.8, 1.36.x and 1.37.x before 1.37.5, and 1.38.x before 1.38.3. HTMLUserTextField exposes the existence of hidden users. |
2022-12-26 |
not yet calculated |
CVE-2022-41765
MISC |
mediawiki — mediawiki
|
An issue was discovered in MediaWiki before 1.35.8, 1.36.x and 1.37.x before 1.37.5, and 1.38.x before 1.38.3. When changes made by an IP address are reassigned to a user (using reassignEdits.php), the changes will still be attributed to the IP address on Special:Contributions when doing a range lookup. |
2022-12-26 |
not yet calculated |
CVE-2022-41767
MISC |
xstream — xstream
|
XStream serializes Java objects to XML and back again. Versions prior to 1.4.20 may allow a remote attacker to terminate the application with a stack overflow error, resulting in a denial of service only via manipulation the processed input stream. The attack uses the hash code implementation for collections and maps to force recursive hash calculation causing a stack overflow. This issue is patched in version 1.4.20 which handles the stack overflow and raises an InputManipulationException instead. A potential workaround for users who only use HashMap or HashSet and whose XML refers these only as default map or set, is to change the default implementation of java.util.Map and java.util per the code example in the referenced advisory. However, this implies that your application does not care about the implementation of the map and all elements are comparable. |
2022-12-28 |
not yet calculated |
CVE-2022-41966
MISC
MISC |
hyperadev — dragonfly
|
Dragonfly is a Java runtime dependency management library. Dragonfly v0.3.0-SNAPSHOT does not configure DocumentBuilderFactory to prevent XML external entity (XXE) attacks. This issue is patched in 0.3.1-SNAPSHOT. As a workaround, since Dragonfly only parses XML `SNAPSHOT` versions are being resolved, this vulnerability may be avoided by not trying to resolve `SNAPSHOT` versions. |
2022-12-28 |
not yet calculated |
CVE-2022-41967
MISC
MISC |
wordpress — wordpress
|
The Sliderby10Web WordPress plugin before 1.2.53 does not sanitise and escape some of its settings, which could allow high privilege users such as admin to perform Stored Cross-Site Scripting attacks even when the unfiltered_html capability is disallowed (for example in multisite setup). |
2022-12-26 |
not yet calculated |
CVE-2022-4197
MISC |
nvidia — gpu_display_driver
|
NVIDIA GPU Display Driver for Linux contains a vulnerability in the kernel mode layer (nvidia.ko), where an out-of-bounds array access may lead to denial of service, data tampering, or information disclosure. |
2022-12-30 |
not yet calculated |
CVE-2022-42254
MISC |
nvidia — gpu_display_driver
|
NVIDIA GPU Display Driver for Linux contains a vulnerability in the kernel mode layer (nvidia.ko), where an out-of-bounds array access may lead to denial of service, information disclosure, or data tampering. |
2022-12-30 |
not yet calculated |
CVE-2022-42255
MISC |
nvidia — gpu_display_driver
|
NVIDIA GPU Display Driver for Linux contains a vulnerability in the kernel mode layer (nvidia.ko), where an integer overflow in index validation may lead to denial of service, information disclosure, or data tampering. |
2022-12-30 |
not yet calculated |
CVE-2022-42256
MISC |
nvidia — gpu_display_driver
|
NVIDIA GPU Display Driver for Linux contains a vulnerability in the kernel mode layer (nvidia.ko), where an integer overflow may lead to information disclosure, data tampering or denial of service. |
2022-12-30 |
not yet calculated |
CVE-2022-42257
MISC |
nvidia — gpu_display_driver
|
NVIDIA GPU Display Driver for Linux contains a vulnerability in the kernel mode layer (nvidia.ko), where an integer overflow may lead to denial of service, data tampering, or information disclosure. |
2022-12-30 |
not yet calculated |
CVE-2022-42258
MISC |
nvidia — gpu_display_driver
|
NVIDIA GPU Display Driver for Linux contains a vulnerability in the kernel mode layer (nvidia.ko), where an integer overflow may lead to denial of service. |
2022-12-30 |
not yet calculated |
CVE-2022-42259
MISC |
wordpress — wordpress
|
The Simple Basic Contact Form WordPress plugin before 20221201 does not sanitise and escape some of its settings, which could allow high privilege users such as admin to perform Stored Cross-Site Scripting attacks even when the unfiltered_html capability is disallowed (for example in multisite setup). |
2022-12-26 |
not yet calculated |
CVE-2022-4226
MISC |
nvidia — gpu_display_driver
|
NVIDIA vGPU Display Driver for Linux guest contains a vulnerability in a D-Bus configuration file, where an unauthorized user in the guest VM can impact protected D-Bus endpoints, which may lead to code execution, denial of service, escalation of privileges, information disclosure, or data tampering. |
2022-12-30 |
not yet calculated |
CVE-2022-42260
MISC |
nvidia — vgpu_manager
|
NVIDIA vGPU software contains a vulnerability in the Virtual GPU Manager (vGPU plugin), where an input index is not validated, which may lead to buffer overrun, which in turn may cause data tampering, information disclosure, or denial of service. |
2022-12-30 |
not yet calculated |
CVE-2022-42261
MISC |
nvidia — vgpu_manager
|
NVIDIA vGPU software contains a vulnerability in the Virtual GPU Manager (vGPU plugin), where an input index is not validated, which may lead to buffer overrun, which in turn may cause data tampering, information disclosure, or denial of service. |
2022-12-30 |
not yet calculated |
CVE-2022-42262
MISC |
nvidia — gpu_display_driver
|
NVIDIA GPU Display Driver for Linux contains a vulnerability in the kernel mode layer handler, where an Integer overflow may lead to denial of service or information disclosure. |
2022-12-30 |
not yet calculated |
CVE-2022-42263
MISC |
nvidia — gpu_display_driver
|
NVIDIA GPU Display Driver for Linux contains a vulnerability in the kernel mode layer, where an unprivileged regular user can cause the use of an out-of-range pointer offset, which may lead to data tampering, data loss, information disclosure, or denial of service. |
2022-12-30 |
not yet calculated |
CVE-2022-42264
MISC |
nvidia — gpu_display_driver
|
NVIDIA GPU Display Driver for Linux contains a vulnerability in the kernel mode layer (nvidia.ko), where an integer overflow may lead to information disclosure or data tampering. |
2022-12-30 |
not yet calculated |
CVE-2022-42265
MISC |
nvidia — gpu_display_driver
|
NVIDIA GPU Display Driver for Windows contains a vulnerability in the kernel mode layer (nvlddmkm.sys) handler for DxgkDdiEscape, where an unprivileged regular user can cause exposure of sensitive information to an actor that is not explicitly authorized to have access to that information, which may lead to limited information disclosure. |
2022-12-30 |
not yet calculated |
CVE-2022-42266
MISC |
| nvidia — gpu_display_driver |
NVIDIA GPU Display Driver for Windows contains a vulnerability where a regular user can cause an out-of-bounds read, which may lead to code execution, denial of service, escalation of privileges, information disclosure, or data tampering. |
2022-12-30 |
not yet calculated |
CVE-2022-42267
MISC |
nvidia — trusted_os
|
NVIDIA Trusted OS contains a vulnerability in an SMC call handler, where failure to validate untrusted input may allow a highly privileged local attacker to cause information disclosure and compromise integrity. The scope of the impact can extend to other components. |
2022-12-30 |
not yet calculated |
CVE-2022-42269
MISC |
wordpress — wordpress
|
The Booster for WooCommerce WordPress plugin before 5.6.3, Booster Plus for WooCommerce WordPress plugin before 6.0.0, Booster Elite for WooCommerce WordPress plugin before 6.0.0 do not escape some URLs and parameters before outputting them back in attributes, leading to Reflected Cross-Site Scripting |
2022-12-26 |
not yet calculated |
CVE-2022-4227
MISC |
nvidia — multiple_products
|
NVIDIA distributions of Linux contain a vulnerability in nvdla_emu_task_submit, where unvalidated input may allow a local attacker to cause stack-based buffer overflow in kernel code, which may lead to escalation of privileges, compromised integrity and confidentiality, and denial of service. |
2022-12-30 |
not yet calculated |
CVE-2022-42270
MISC |
wordpress — wordpress
|
The Workreap WordPress theme before 2.6.4 does not verify that an addon service belongs to the user issuing the request, or indeed that it is an addon service, when processing the workreap_addons_service_remove action, allowing any user to delete any post by knowing or guessing the id. |
2022-12-26 |
not yet calculated |
CVE-2022-4239
MISC |
wordpress — wordpress
|
The WP Google Review Slider WordPress plugin before 11.6 does not sanitise and escape some of its settings, which could allow high privilege users such as admin to perform Stored Cross-Site Scripting attacks even when the unfiltered_html capability is disallowed (for example in multisite setup). |
2022-12-26 |
not yet calculated |
CVE-2022-4242
MISC |
wordpress — wordpress
|
The ImageInject WordPress plugin through TODO does not sanitise and escape some of its settings, which could allow high privilege users such as admin to perform Stored Cross-Site Scripting attacks even when the unfiltered_html capability is disallowed (for example in multisite setup). |
2022-12-26 |
not yet calculated |
CVE-2022-4243
MISC |
wordpress — wordpress
|
The Bulk Delete Users by Email WordPress plugin through 1.2 does not have CSRF check when deleting users, which could allow attackers to make a logged in admin delete non admin users by knowing their email via a CSRF attack |
2022-12-26 |
not yet calculated |
CVE-2022-4266
MISC |
wordpress — wordpress
|
The Bulk Delete Users by Email WordPress plugin through 1.2 does not sanitise and escape a parameter before outputting it back in the page, leading to a Reflected Cross-Site Scripting |
2022-12-26 |
not yet calculated |
CVE-2022-4267
MISC |
wordpress — wordpress
|
The Plugin Logic WordPress plugin through 1.0.7 does not sanitise and escape a parameter before using it in a SQL statement, leading to a SQL injection exploitable by high privilege users such as admin |
2022-12-26 |
not yet calculated |
CVE-2022-4268
MISC
MISC |
|
samba — kerberos/ad_dc
heimdal — heimdal
|
PAC parsing in MIT Kerberos 5 (aka krb5) before 1.19.4 and 1.20.x before 1.20.1 has integer overflows that may lead to remote code execution (in KDC, kadmind, or a GSS or Kerberos application server) on 32-bit platforms (which have a resultant heap-based buffer overflow), and cause a denial of service on other platforms. This occurs in krb5_pac_parse in lib/krb5/krb/pac.c. Heimdal before 7.7.1 has “a similar bug.” |
2022-12-25 |
not yet calculated |
CVE-2022-42898
CONFIRM
MISC
MISC
CONFIRM
CONFIRM
CONFIRM
CONFIRM |
zkteco — multiple_products
|
Certain ZKTeco products (ZEM500-510-560-760, ZEM600-800, ZEM720, ZMM) allow access to sensitive information via direct requests for the form/DataApp?style=1 and form/DataApp?style=0 URLs. The affected versions may be before 8.88 (ZEM500-510-560-760, ZEM600-800, ZEM720) and 15.00 (ZMM200-220-210). The fixed versions are firmware version 8.88 (ZEM500-510-560-760, ZEM600-800, ZEM720) and firmware version 15.00 (ZMM200-220-210). |
2022-12-25 |
not yet calculated |
CVE-2022-42953
MISC
MISC |
apache — kylin
|
In the fix for CVE-2022-24697, a blacklist is used to filter user input commands. But there is a risk of being bypassed. The user can control the command by controlling the kylin.engine.spark-cmd parameter of conf. |
2022-12-30 |
not yet calculated |
CVE-2022-43396
MISC |
curl — curl
|
A vulnerability exists in curl <7.87.0 HSTS check that could be bypassed to trick it to keep using HTTP. Using its HSTS support, curl can be instructed to use HTTPS instead of using an insecure clear-text HTTP step even when HTTP is provided in the URL. However, the HSTS mechanism could be bypassed if the host name in the given URL first uses IDN characters that get replaced to ASCII counterparts as part of the IDN conversion. Like using the character UTF-8 U+3002 (IDEOGRAPHIC FULL STOP) instead of the common ASCII full stop (U+002E) `.`. Then in a subsequent request, it does not detect the HSTS state and makes a clear text transfer. Because it would store the info IDN encoded but look for it IDN decoded. |
2022-12-23 |
not yet calculated |
CVE-2022-43551
MISC
MISC |
simmeth — lieferantenmanager
|
An issue was discovered in Simmeth Lieferantenmanager before 5.6. An attacker can inject raw SQL queries. By activating MSSQL features, the attacker is able to execute arbitrary commands on the MSSQL server via the xp_cmdshell extended procedure. |
2022-12-25 |
not yet calculated |
CVE-2022-44015
MISC |
simmeth — lieferantenmanager
|
An issue was discovered in Simmeth Lieferantenmanager before 5.6. Due to errors in session management, an attacker can log back into a victim’s account after the victim logged out – /LMS/LM/#main can be used for this. This is due to the credentials not being cleaned from the local storage after logout. |
2022-12-25 |
not yet calculated |
CVE-2022-44017
MISC |
sourcecodester — sanitization_management_system
|
SourceCodester Sanitization Management System 1.0 is vulnerable to SQL Injection. |
2022-12-30 |
not yet calculated |
CVE-2022-44137
MISC |
huawei — aslan_children_watch
|
Huawei Aslan Children’s Watch has a path traversal vulnerability. Successful exploitation may allow attackers to access or modify protected system resources. |
2022-12-28 |
not yet calculated |
CVE-2022-44564
MISC |
apache — kylin
|
Diagnosis Controller miss parameter validation, so user may attacked by command injection via HTTP Request. |
2022-12-30 |
not yet calculated |
CVE-2022-44621
MISC |
| heimdal — heimdal |
Heimdal before 7.7.1 allows remote attackers to execute arbitrary code because of an invalid free in the ASN.1 codec used by the Key Distribution Center (KDC). |
2022-12-25 |
not yet calculated |
CVE-2022-44640
CONFIRM |
slixmpp — slixmpp
|
Slixmpp before 1.8.3 lacks SSL Certificate hostname validation in XMLStream, allowing an attacker to pose as any server in the eyes of Slixmpp. |
2022-12-25 |
not yet calculated |
CVE-2022-45197
MISC
MISC
MISC
CONFIRM |
dahua — multiple_products
|
Some Dahua software products have a vulnerability of unauthenticated request of MQTT credentials. An attacker can obtain encrypted MQTT credentials by sending a specific crafted packet to the vulnerable interface (the credentials cannot be directly exploited). |
2022-12-27 |
not yet calculated |
CVE-2022-45423
MISC |
dahua — multiple_products
|
Some Dahua software products have a vulnerability of unauthenticated request of AES crypto key. An attacker can obtain the AES crypto key by sending a specific crafted packet to the vulnerable interface. |
2022-12-27 |
not yet calculated |
CVE-2022-45424
MISC |
dahua — multiple_products
|
Some Dahua software products have a vulnerability of using of hard-coded cryptographic key. An attacker can obtain the AES crypto key by exploiting this vulnerability. |
2022-12-27 |
not yet calculated |
CVE-2022-45425
MISC |
dahua — multiple_products
|
Some Dahua software products have a vulnerability of unrestricted download of file. After obtaining the permissions of ordinary users, by sending a specific crafted packet to the vulnerable interface, an attacker can download arbitrary files. |
2022-12-27 |
not yet calculated |
CVE-2022-45426
MISC |
dahua — multiple_products
|
Some Dahua software products have a vulnerability of unrestricted upload of file. After obtaining the permissions of administrators, by sending a specific crafted packet to the vulnerable interface, an attacker can upload arbitrary files. |
2022-12-27 |
not yet calculated |
CVE-2022-45427
MISC |
dahua — multiple_products
|
Some Dahua software products have a vulnerability of sensitive information leakage. After obtaining the permissions of administrators, by sending a specific crafted packet to the vulnerable interface, an attacker can obtain the debugging information. |
2022-12-27 |
not yet calculated |
CVE-2022-45428
MISC |
dahua — multiple_products
|
Some Dahua software products have a vulnerability of server-side request forgery (SSRF). An Attacker can access internal resources by concatenating links (URL) that conform to specific rules. |
2022-12-27 |
not yet calculated |
CVE-2022-45429
MISC |
dahua — multiple_products
|
Some Dahua software products have a vulnerability of unauthenticated enable or disable SSHD service. After bypassing the firewall access control policy, by sending a specific crafted packet to the vulnerable interface, an attacker could enable or disable the SSHD service. |
2022-12-27 |
not yet calculated |
CVE-2022-45430
MISC |
dahua — multiple_products
|
Some Dahua software products have a vulnerability of unauthenticated restart of remote DSS Server. After bypassing the firewall access control policy, by sending a specific crafted packet to the vulnerable interface, an attacker could unauthenticated restart of remote DSS Server. |
2022-12-27 |
not yet calculated |
CVE-2022-45431
MISC |
dahua — multiple_products
|
Some Dahua software products have a vulnerability of unauthenticated search for devices. After bypassing the firewall access control policy, by sending a specific crafted packet to the vulnerable interface, an attacker could unauthenticated search for devices in range of IPs from remote DSS Server. |
2022-12-27 |
not yet calculated |
CVE-2022-45432
MISC |
dahua — multiple_products
|
Some Dahua software products have a vulnerability of unauthenticated traceroute host from remote DSS Server. After bypassing the firewall access control policy, by sending a specific crafted packet to the vulnerable interface, an attacker could get the traceroute results. |
2022-12-27 |
not yet calculated |
CVE-2022-45433
MISC |
dahua — multiple_products
|
Some Dahua software products have a vulnerability of unauthenticated un-throttled ICMP requests on remote DSS Server. After bypassing the firewall access control policy, by sending a specific crafted packet to the vulnerable interface, an attacker could exploit the victim server to launch ICMP request attack to the designated target host. |
2022-12-27 |
not yet calculated |
CVE-2022-45434
MISC |
hillstone — firewall
|
https://www.hillstonenet.com.cn/ Hillstone Firewall SG-6000 <= 5.0.4.0 is vulnerable to Incorrect Access Control. There is a permission bypass vulnerability in the Hillstone WEB application firewall. An attacker can enter the background of the firewall with super administrator privileges through a configuration error in report.m. |
2022-12-27 |
not yet calculated |
CVE-2022-45778
MISC |
huawei — aslan_children_watch
|
Huawei Aslan Children’s Watch has an improper authorization vulnerability. Successful exploit could allow the attacker to access certain file. |
2022-12-28 |
not yet calculated |
CVE-2022-45874
MISC |
planet_estream — planet_estream
|
Planet eStream before 6.72.10.07 allows a remote attacker (who is a publisher or admin) to obtain access to all records stored in the database, and achieve the ability to execute arbitrary SQL commands, via Search (the StatisticsResults.aspx flt parameter). |
2022-12-25 |
not yet calculated |
CVE-2022-45889
MISC |
planet_estream — planet_estream
|
In Planet eStream before 6.72.10.07, a Reflected Cross-Site Scripting (XSS) vulnerability exists via any metadata filter field (e.g., search within Default.aspx with the r or fo parameter). |
2022-12-25 |
not yet calculated |
CVE-2022-45890
MISC |
planet_estream — planet_estream
|
Planet eStream before 6.72.10.07 allows attackers to call restricted functions, and perform unauthenticated uploads (Upload2.ashx) or access content uploaded by other users (View.aspx after Ajax.asmx/SaveGrantAccessList). |
2022-12-25 |
not yet calculated |
CVE-2022-45891
MISC |
planet_estream — planet_estream
|
In Planet eStream before 6.72.10.07, multiple Stored Cross-Site Scripting (XSS) vulnerabilities exist: Disclaimer, Search Function, Comments, Batch editing tool, Content Creation, Related Media, Create new user, and Change Username. |
2022-12-25 |
not yet calculated |
CVE-2022-45892
MISC |
planet_estream — planet_estream
|
Planet eStream before 6.72.10.07 allows a low-privileged user to gain access to administrative and high-privileged user accounts by changing the value of the ON cookie. A brute-force attack can calculate a value that provides permanent access. |
2022-12-25 |
not yet calculated |
CVE-2022-45893
MISC |
planet_estream — planet_estream
|
GetFile.aspx in Planet eStream before 6.72.10.07 allows .. directory traversal to read arbitrary local files. |
2022-12-25 |
not yet calculated |
CVE-2022-45894
MISC |
planet_estream — planet_estream
|
Planet eStream before 6.72.10.07 discloses sensitive information, related to the ON cookie (findable in HTML source code for Default.aspx in some situations) and the WhoAmI endpoint (e.g., path disclosure). |
2022-12-25 |
not yet calculated |
CVE-2022-45895
MISC |
planet_estream — planet_estream
|
Planet eStream before 6.72.10.07 allows unauthenticated upload of arbitrary files: Choose a Video / Related Media or Upload Document. Upload2.ashx can be used, or Ajax.asmx/ProcessUpload2. This leads to remote code execution. |
2022-12-25 |
not yet calculated |
CVE-2022-45896
MISC |
h3c_firewall — h3c_firewall
|
h3c firewall <= 3.10 ESS6703 has a privilege bypass vulnerability. |
2022-12-27 |
not yet calculated |
CVE-2022-45963
MISC |
authentik — authentik
|
authentik is an open-source Identity provider focused on flexibility and versatility. In versions prior to 2022.10.4, and 2022.11.4, any authenticated user can create an arbitrary number of accounts through the default flows. This would circumvent any policy in a situation where it is undesirable for users to create new accounts by themselves. This may also affect other applications as these new basic accounts would exist throughout the SSO infrastructure. By default the newly created accounts cannot be logged into as no password reset exists by default. However password resets are likely to be enabled by most installations. This vulnerability pertains to the user context used in the default-user-settings-flow, /api/v3/flows/instances/default-user-settings-flow/execute/. This issue has been fixed in versions 2022.10.4 and 2022.11.4. |
2022-12-28 |
not yet calculated |
CVE-2022-46172
MISC |
elrondnetwork — elrond-go
|
Elrond-GO is a go implementation for the Elrond Network protocol. Versions prior to 1.3.50 are subject to a processing issue where nodes are affected when trying to process a cross-shard relayed transaction with a smart contract deploy transaction data. The problem was a bad correlation between the transaction caches and the processing component. If the above-mentioned transaction was sent with more gas than required, the smart contract result (SCR transaction) that should have returned the leftover gas, would have been wrongly added to a cache that the processing unit did not consider. The node stopped notarizing metachain blocks. The fix was actually to extend the SCR transaction search in all other caches if it wasn’t found in the correct (expected) sharded-cache. There are no known workarounds at this time. This issue has been patched in version 1.3.50. |
2022-12-28 |
not yet calculated |
CVE-2022-46173
MISC
MISC
MISC |
amazon — elastic_file_system
|
efs-utils is a set of Utilities for Amazon Elastic File System (EFS). A potential race condition issue exists within the Amazon EFS mount helper in efs-utils versions v1.34.3 and below. When using TLS to mount file systems, the mount helper allocates a local port for stunnel to receive NFS connections prior to applying the TLS tunnel. In affected versions, concurrent mount operations can allocate the same local port, leading to either failed mount operations or an inappropriate mapping from an EFS customer’s local mount points to that customer’s EFS file systems. This issue is patched in version v1.34.4. There is no recommended work around. We recommend affected users update the installed version of efs-utils to v1.34.4 or later. |
2022-12-28 |
not yet calculated |
CVE-2022-46174
MISC
MISC
MISC |
metersphere — metersphere
|
MeterSphere is a one-stop open source continuous testing platform, covering test management, interface testing, UI testing and performance testing. Versions prior to 2.5.1 allow users to upload a file, but do not validate the file name, which may lead to upload file to any path. The vulnerability has been fixed in v2.5.1. There are no workarounds. |
2022-12-29 |
not yet calculated |
CVE-2022-46178
MISC |
liuos — liuos
|
LiuOS is a small Python project meant to imitate the functions of a regular operating system. Version 0.1.0 and prior of LiuOS allow an attacker to set the GITHUB_ACTIONS environment variable to anything other than null or true and skip authentication checks. This issue is patched in the latest commit (c658b4f3e57258acf5f6207a90c2f2169698ae22) by requiring the var to be set to true, causing a test script to run instead of being able to login. A potential workaround is to check for the GITHUB_ACTIONS environment variable and set it to “” (no quotes) to null the variable and force credential checks. |
2022-12-28 |
not yet calculated |
CVE-2022-46179
MISC
MISC |
gotify — gotify
|
Gotify server is a simple server for sending and receiving messages in real-time per WebSocket. Versions prior to 2.2.2 contain an XSS vulnerability that allows authenticated users to upload .html files. An attacker could execute client side scripts **if** another user opened a link. The attacker could potentially take over the account of the user that clicked the link. The Gotify UI won’t natively expose such a malicious link, so an attacker has to get the user to open the malicious link in a context outside of Gotify. The vulnerability has been fixed in version 2.2.2. As a workaround, you can block access to non image files via a reverse proxy in the `./image` directory. |
2022-12-29 |
not yet calculated |
CVE-2022-46181
MISC
MISC
MISC |
dedecms — dedecms
|
dedecms <=V5.7.102 is vulnerable to SQL Injection. In sys_ sql_ n query.php there are no restrictions on the sql query. |
2022-12-27 |
not yet calculated |
CVE-2022-46442
MISC |
trendnet — tew755AP_1.13B01
|
TRENDnet TEW755AP 1.13B01 was discovered to contain a stack overflow via the user_edit_page parameter in the wifi_captive_portal function. |
2022-12-30 |
not yet calculated |
CVE-2022-46580
MISC |
trendnet — tew755AP_1.13B01
|
TRENDnet TEW755AP 1.13B01 was discovered to contain a stack overflow via the cameo.cameo.nslookup_target parameter in the tools_nslookup function. |
2022-12-30 |
not yet calculated |
CVE-2022-46581
MISC |
trendnet — tew755AP_1.13B01
|
TRENDnet TEW755AP 1.13B01 was discovered to contain a stack overflow via the login_name parameter in the do_graph_auth (sub_4061E0) function. |
2022-12-30 |
not yet calculated |
CVE-2022-46582
MISC |
trendnet — tew755AP_1.13B01
|
TRENDnet TEW755AP 1.13B01 was discovered to contain a stack overflow via the reboot_type parameter in the wizard_ipv6 (sub_41C380) function. |
2022-12-30 |
not yet calculated |
CVE-2022-46583
MISC |
trendnet — tew755AP_1.13B01
|
TRENDnet TEW755AP 1.13B01 was discovered to contain a stack overflow via the qcawifi.wifi%d_vap%d.maclist parameter in the kick_ban_wifi_mac_deny (sub_415D7C) function. |
2022-12-30 |
not yet calculated |
CVE-2022-46584
MISC |
trendnet — tew755AP_1.13B01
|
TRENDnet TEW755AP 1.13B01 was discovered to contain a stack overflow via the REMOTE_USER parameter in the get_access (sub_45AC2C) function. |
2022-12-30 |
not yet calculated |
CVE-2022-46585
MISC |
trendnet — tew755AP_1.13B01
|
TRENDnet TEW755AP 1.13B01 was discovered to contain a stack overflow via the qcawifi.wifi%d_vap%d.maclist parameter in the kick_ban_wifi_mac_allow (sub_415B00) function. |
2022-12-30 |
not yet calculated |
CVE-2022-46586
MISC |
trendnet — tew755AP_1.13B01
|
TRENDnet TEW755AP 1.13B01 was discovered to contain a stack overflow via the sys_service parameter in the setup_wizard_mydlink (sub_4104B8) function. |
2022-12-30 |
not yet calculated |
CVE-2022-46588
MISC |
trendnet — tew755AP_1.13B01
|
TRENDnet TEW755AP 1.13B01 was discovered to contain a stack overflow via the cameo.cameo.netstat_option parameter in the tools_netstat (sub_41E730) function. |
2022-12-30 |
not yet calculated |
CVE-2022-46589
MISC |
trendnet — tew755AP_1.13B01
|
TRENDnet TEW755AP 1.13B01 was discovered to contain a stack overflow via the cameo.cameo.netstat_rsname parameter in the tools_netstat (sub_41E730) function. |
2022-12-30 |
not yet calculated |
CVE-2022-46590
MISC |
trendnet — tew755AP_1.13B01
|
TRENDnet TEW755AP 1.13B01 was discovered to contain a stack overflow via the reject_url parameter in the reject (sub_41BD60) function. |
2022-12-30 |
not yet calculated |
CVE-2022-46591
MISC |
trendnet — tew755AP_1.13B01
|
TRENDnet TEW755AP 1.13B01 was discovered to contain a stack overflow via the wps_sta_enrollee_pin parameter in the set_sta_enrollee_pin_5g function. |
2022-12-30 |
not yet calculated |
CVE-2022-46592
MISC |
trendnet — tew755AP_1.13B01
|
TRENDnet TEW755AP 1.13B01 was discovered to contain a stack overflow via the wps_sta_enrollee_pin parameter in the do_sta_enrollee_wifi function. |
2022-12-30 |
not yet calculated |
CVE-2022-46593
MISC |
trendnet — tew755AP_1.13B01
|
TRENDnet TEW755AP 1.13B01 was discovered to contain a stack overflow via the update_file_name parameter in the auto_up_fw (sub_420A04) function. |
2022-12-30 |
not yet calculated |
CVE-2022-46594
MISC |
trendnet — tew755AP_1.13B01
|
TRENDnet TEW755AP 1.13B01 was discovered to contain a stack overflow via the del_num parameter in the icp_delete_img (sub_41DEDC) function. |
2022-12-30 |
not yet calculated |
CVE-2022-46596
MISC |
trendnet — tew755AP_1.13B01
|
TRENDnet TEW755AP 1.13B01 was discovered to contain a command injection vulnerability via the sys_service parameter in the setup_wizard_mydlink (sub_4104B8) function. |
2022-12-30 |
not yet calculated |
CVE-2022-46597
MISC |
trendnet — tew755AP_1.13B01
|
TRENDnet TEW755AP 1.13B01 was discovered to contain a command injection vulnerability via the wps_sta_enrollee_pin parameter in the action set_sta_enrollee_pin_5g function. |
2022-12-30 |
not yet calculated |
CVE-2022-46598
MISC |
trendnet — tew755AP_1.13B01
|
TRENDnet TEW755AP 1.13B01 was discovered to contain a stack overflow via the setlogo_num parameter in the icp_setlogo_img (sub_41DBF4) function. |
2022-12-30 |
not yet calculated |
CVE-2022-46599
MISC |
trendnet — tew755AP_1.13B01
|
TRENDnet TEW755AP 1.13B01 was discovered to contain a stack overflow via the wps_sta_enrollee_pin parameter in the action set_sta_enrollee_pin_24g function. |
2022-12-30 |
not yet calculated |
CVE-2022-46600
MISC |
trendnet — tew755AP_1.13B01
|
TRENDnet TEW755AP 1.13B01 was discovered to contain a stack overflow via the setbg_num parameter in the icp_setbg_img (sub_41DD68) function. |
2022-12-30 |
not yet calculated |
CVE-2022-46601
MISC |
huawei — ws7100-20
|
There is a denial of service vulnerability in the Wi-Fi module of the HUAWEI WS7100-20 Smart WiFi Router.Successful exploit could cause a denial of service (DoS) condition. |
2022-12-28 |
not yet calculated |
CVE-2022-46740
MISC |
trueconf_server — trueconf_server
|
A SQL injection issue in a database stored function in TrueConf Server 5.2.0.10225 allows a low-privileged database user to execute arbitrary SQL commands as the database administrator, resulting in execution of arbitrary code. |
2022-12-27 |
not yet calculated |
CVE-2022-46763
MISC
MISC |
trueconf_server — trueconf_server
|
A SQL injection issue in the web API in TrueConf Server 5.2.0.10225 allows remote unauthenticated attackers to execute arbitrary SQL commands, ultimately leading to remote code execution. |
2022-12-27 |
not yet calculated |
CVE-2022-46764
MISC
MISC |
usememos — memos
|
Cross-site Scripting (XSS) – Stored in GitHub repository usememos/memos prior to 0.9.0. |
2022-12-27 |
not yet calculated |
CVE-2022-4691
MISC
CONFIRM |
usememos — memos
|
Cross-site Scripting (XSS) – Stored in GitHub repository usememos/memos prior to 0.9.0. |
2022-12-27 |
not yet calculated |
CVE-2022-4694
CONFIRM
MISC |
usememos — memos
|
Cross-site Scripting (XSS) – Stored in GitHub repository usememos/memos prior to 0.9.0. |
2022-12-27 |
not yet calculated |
CVE-2022-4695
CONFIRM
MISC |
tenda — a15
|
Tenda A15 V15.13.07.13 was discovered to contain a stack overflow via the wepauth parameter at /goform/WifiBasicSet. |
2022-12-30 |
not yet calculated |
CVE-2022-47115
MISC |
tenda — a15
|
Tenda A15 V15.13.07.13 was discovered to contain a stack overflow via the SYSPS parameter at /goform/SysToolChangePwd. |
2022-12-30 |
not yet calculated |
CVE-2022-47116
MISC |
tenda — a15
|
Tenda A15 V15.13.07.13 was discovered to contain a stack overflow via the security parameter at /goform/WifiBasicSet. |
2022-12-30 |
not yet calculated |
CVE-2022-47117
MISC |
tenda — a15
|
Tenda A15 V15.13.07.13 was discovered to contain a stack overflow via the wepkey1 parameter at /goform/WifiBasicSet. |
2022-12-30 |
not yet calculated |
CVE-2022-47118
MISC |
tenda — a15
|
Tenda A15 V15.13.07.13 was discovered to contain a stack overflow via the ssid parameter at /goform/WifiBasicSet. |
2022-12-30 |
not yet calculated |
CVE-2022-47119
MISC |
tenda — a15
|
Tenda A15 V15.13.07.13 was discovered to contain a stack overflow via the security_5g parameter at /goform/WifiBasicSet. |
2022-12-30 |
not yet calculated |
CVE-2022-47120
MISC |
tenda — a15
|
Tenda A15 V15.13.07.13 was discovered to contain a stack overflow via the wepkey parameter at /goform/WifiBasicSet. |
2022-12-30 |
not yet calculated |
CVE-2022-47121
MISC |
tenda — a15
|
Tenda A15 V15.13.07.13 was discovered to contain a stack overflow via the wrlPwd_5g parameter at /goform/WifiBasicSet. |
2022-12-30 |
not yet calculated |
CVE-2022-47122
MISC |
tenda — a15
|
Tenda A15 V15.13.07.13 was discovered to contain a stack overflow via the wepkey3 parameter at /goform/WifiBasicSet. |
2022-12-30 |
not yet calculated |
CVE-2022-47123
MISC |
tenda — a15
|
Tenda A15 V15.13.07.13 was discovered to contain a stack overflow via the wepkey4 parameter at /goform/WifiBasicSet. |
2022-12-30 |
not yet calculated |
CVE-2022-47124
MISC |
tenda — a15
|
Tenda A15 V15.13.07.13 was discovered to contain a stack overflow via the wrlEn_5g parameter at /goform/WifiBasicSet. |
2022-12-30 |
not yet calculated |
CVE-2022-47125
MISC |
tenda — a15
|
Tenda A15 V15.13.07.13 was discovered to contain a stack overflow via the wrlEn parameter at /goform/WifiBasicSet. |
2022-12-30 |
not yet calculated |
CVE-2022-47126
MISC |
tenda — a15
|
Tenda A15 V15.13.07.13 was discovered to contain a stack overflow via the wrlPwd parameter at /goform/WifiBasicSet. |
2022-12-30 |
not yet calculated |
CVE-2022-47127
MISC |
tenda — a15
|
Tenda A15 V15.13.07.13 was discovered to contain a stack overflow via the wepkey2 parameter at /goform/WifiBasicSet. |
2022-12-30 |
not yet calculated |
CVE-2022-47128
MISC |
ikus060 — rdiffweb
|
Business Logic Errors in GitHub repository ikus060/rdiffweb prior to 2.5.5. |
2022-12-27 |
not yet calculated |
CVE-2022-4719
MISC
CONFIRM |
ikus060 — rdiffweb
|
Open Redirect in GitHub repository ikus060/rdiffweb prior to 2.5.5. |
2022-12-27 |
not yet calculated |
CVE-2022-4720
CONFIRM
MISC |
ikus060 — rdiffweb
|
Failure to Sanitize Special Elements into a Different Plane (Special Element Injection) in GitHub repository ikus060/rdiffweb prior to 2.5.5. |
2022-12-27 |
not yet calculated |
CVE-2022-4721
CONFIRM
MISC |
ikus060 — rdiffweb
|
Authentication Bypass by Primary Weakness in GitHub repository ikus060/rdiffweb prior to 2.5.5. |
2022-12-27 |
not yet calculated |
CVE-2022-4722
MISC
CONFIRM |
ikus060 — rdiffweb
|
Allocation of Resources Without Limits or Throttling in GitHub repository ikus060/rdiffweb prior to 2.5.5. |
2022-12-27 |
not yet calculated |
CVE-2022-4723
MISC
CONFIRM |
ikus060 — rdiffweb
|
Improper Access Control in GitHub repository ikus060/rdiffweb prior to 2.5.5. |
2022-12-27 |
not yet calculated |
CVE-2022-4724
MISC
CONFIRM |
aws — sdk
|
A vulnerability was found in AWS SDK 2.59.0. It has been rated as critical. This issue affects the function XpathUtils of the file aws-android-sdk-core/src/main/java/com/amazonaws/util/XpathUtils.java of the component XML Parser. The manipulation leads to server-side request forgery. Upgrading to version 2.59.1 is able to address this issue. The name of the patch is c3e6d69422e1f0c80fe53f2d757b8df97619af2b. It is recommended to upgrade the affected component. The identifier VDB-216737 was assigned to this vulnerability. |
2022-12-27 |
not yet calculated |
CVE-2022-4725
MISC
MISC
MISC
MISC |
| sourcecodester — sanitization_management_system |
A vulnerability classified as critical was found in SourceCodester Sanitization Management System 1.0. Affected by this vulnerability is an unknown functionality of the component Admin Login. The manipulation of the argument username/password leads to sql injection. The attack can be launched remotely. The associated identifier of this vulnerability is VDB-216739. |
2022-12-27 |
not yet calculated |
CVE-2022-4726
MISC |
openmrs — appointment_scheduling_module
|
A vulnerability, which was classified as problematic, was found in OpenMRS Appointment Scheduling Module up to 1.16.x. This affects the function getNotes of the file api/src/main/java/org/openmrs/module/appointmentscheduling/AppointmentRequest.java of the component Notes Handler. The manipulation of the argument notes leads to cross site scripting. It is possible to initiate the attack remotely. Upgrading to version 1.17.0 is able to address this issue. The name of the patch is 2ccbe39c020809765de41eeb8ee4c70b5ec49cc8. It is recommended to upgrade the affected component. The identifier VDB-216741 was assigned to this vulnerability. |
2022-12-27 |
not yet calculated |
CVE-2022-4727
MISC
MISC
MISC
MISC |
graphite — web
|
A vulnerability has been found in Graphite Web and classified as problematic. This vulnerability affects unknown code of the component Cookie Handler. The manipulation leads to cross site scripting. The attack can be initiated remotely. The exploit has been disclosed to the public and may be used. The name of the patch is 2f178f490e10efc03cd1d27c72f64ecab224eb23. It is recommended to apply a patch to fix this issue. VDB-216742 is the identifier assigned to this vulnerability. |
2022-12-27 |
not yet calculated |
CVE-2022-4728
MISC
MISC
MISC
MISC |
graphite — web
|
A vulnerability was found in Graphite Web and classified as problematic. This issue affects some unknown processing of the component Template Name Handler. The manipulation leads to cross site scripting. The attack may be initiated remotely. The exploit has been disclosed to the public and may be used. The name of the patch is 2f178f490e10efc03cd1d27c72f64ecab224eb23. It is recommended to apply a patch to fix this issue. The associated identifier of this vulnerability is VDB-216743. |
2022-12-27 |
not yet calculated |
CVE-2022-4729
MISC
MISC
MISC
MISC |
graphite — web
|
A vulnerability was found in Graphite Web. It has been classified as problematic. Affected is an unknown function of the component Absolute Time Range Handler. The manipulation leads to cross site scripting. It is possible to launch the attack remotely. The exploit has been disclosed to the public and may be used. The name of the patch is 2f178f490e10efc03cd1d27c72f64ecab224eb23. It is recommended to apply a patch to fix this issue. The identifier of this vulnerability is VDB-216744. |
2022-12-27 |
not yet calculated |
CVE-2022-4730
MISC
MISC
MISC
MISC |
myapnea — myapnea
|
A vulnerability, which was classified as problematic, was found in myapnea up to 29.0.x. Affected is an unknown function of the component Title Handler. The manipulation leads to cross site scripting. It is possible to launch the attack remotely. Upgrading to version 29.1.0 is able to address this issue. The name of the patch is 99934258530d761bd5d09809bfa6c14b598f8d18. It is recommended to upgrade the affected component. VDB-216750 is the identifier assigned to this vulnerability. |
2022-12-25 |
not yet calculated |
CVE-2022-4731
MISC
MISC
MISC
MISC |
microweber — microweber
|
Unrestricted Upload of File with Dangerous Type in GitHub repository microweber/microweber prior to 1.3.2. |
2022-12-27 |
not yet calculated |
CVE-2022-4732
CONFIRM
MISC |
openemr — openemr
|
Cross-site Scripting (XSS) – Stored in GitHub repository openemr/openemr prior to 7.0.0.2. |
2022-12-27 |
not yet calculated |
CVE-2022-4733
MISC
CONFIRM |
usememos — memos
|
Exposure of Sensitive Information to an Unauthorized Actor in GitHub repository usememos/memos prior to 0.9.1. |
2022-12-27 |
not yet calculated |
CVE-2022-4734
CONFIRM
MISC |
asrashley — dash-live
|
A vulnerability classified as problematic was found in asrashley dash-live. This vulnerability affects the function ready of the file static/js/media.js of the component DOM Node Handler. The manipulation leads to cross site scripting. The attack can be initiated remotely. The name of the patch is 24d01757a5319cc14c4aa1d8b53d1ab24d48e451. It is recommended to apply a patch to fix this issue. VDB-216766 is the identifier assigned to this vulnerability. |
2022-12-25 |
not yet calculated |
CVE-2022-4735
MISC
MISC
MISC
MISC |
venganzas_del_pasado — venganzas_del_pasado
|
A vulnerability was found in Venganzas del Pasado and classified as problematic. Affected by this issue is some unknown functionality. The manipulation of the argument the_title leads to cross site scripting. The attack may be launched remotely. The name of the patch is 62339b2ec445692c710b804bdf07aef4bd247ff7. It is recommended to apply a patch to fix this issue. VDB-216770 is the identifier assigned to this vulnerability. |
2022-12-25 |
not yet calculated |
CVE-2022-4736
MISC
MISC
MISC
MISC |
sourcecodester — blood_management_system
|
A vulnerability was found in SourceCodester Blood Bank Management System 1.0. It has been rated as critical. This issue affects some unknown processing of the file login.php. The manipulation of the argument username/password leads to sql injection. The attack may be initiated remotely. The identifier VDB-216773 was assigned to this vulnerability. |
2022-12-25 |
not yet calculated |
CVE-2022-4737
MISC
MISC |
sourcecodester — blood_management_system
|
A vulnerability classified as problematic has been found in SourceCodester Blood Bank Management System 1.0. Affected is an unknown function of the file index.php?page=users of the component User Registration Handler. The manipulation of the argument Name leads to cross site scripting. It is possible to launch the attack remotely. VDB-216774 is the identifier assigned to this vulnerability. |
2022-12-25 |
not yet calculated |
CVE-2022-4738
MISC
MISC |
sourcecodester — blood_management_system
|
A vulnerability classified as critical was found in SourceCodester School Dormitory Management System 1.0. Affected by this vulnerability is an unknown functionality of the component Admin Login. The manipulation leads to sql injection. The attack can be launched remotely. The associated identifier of this vulnerability is VDB-216775. |
2022-12-25 |
not yet calculated |
CVE-2022-4739
MISC
MISC |
kkfileview — kkfileview
|
A vulnerability, which was classified as problematic, has been found in kkFileView. Affected by this issue is the function setWatermarkAttribute of the file /picturesPreview. The manipulation leads to cross site scripting. The attack may be launched remotely. The exploit has been disclosed to the public and may be used. The identifier of this vulnerability is VDB-216776. |
2022-12-25 |
not yet calculated |
CVE-2022-4740
MISC
MISC
MISC |
docconv — docconv
|
A vulnerability was found in docconv up to 1.2.0 and classified as problematic. This issue affects the function ConvertDocx/ConvertODT/ConvertPages/ConvertXML/XMLToText. The manipulation leads to uncontrolled memory allocation. The attack may be initiated remotely. Upgrading to version 1.2.1 is able to address this issue. The name of the patch is 42bcff666855ab978e67a9041d0cdea552f20301. It is recommended to upgrade the affected component. The associated identifier of this vulnerability is VDB-216779. |
2022-12-25 |
not yet calculated |
CVE-2022-4741
MISC
MISC
MISC
MISC
MISC |
json-pointer — json-pointer
|
A vulnerability, which was classified as critical, has been found in json-pointer. Affected by this issue is the function set of the file index.js. The manipulation leads to improperly controlled modification of object prototype attributes (‘prototype pollution’). The attack may be launched remotely. The name of the patch is 859c9984b6c407fc2d5a0a7e47c7274daa681941. It is recommended to apply a patch to fix this issue. VDB-216794 is the identifier assigned to this vulnerability. |
2022-12-26 |
not yet calculated |
CVE-2022-4742
MISC
MISC
MISC
MISC |
flatpress — flatpress
|
A vulnerability was found in FlatPress. It has been classified as critical. This affects the function doItemActions of the file fp-plugins/mediamanager/panels/panel.mediamanager.file.php of the component File Delete Handler. The manipulation of the argument deletefile leads to path traversal. The name of the patch is 5d5c7f6d8f072d14926fc2c3a97cdd763802f170. It is recommended to apply a patch to fix this issue. The identifier VDB-216861 was assigned to this vulnerability. |
2022-12-27 |
not yet calculated |
CVE-2022-4748
MISC
MISC
MISC
MISC |
flatpress — flatpress
|
A vulnerability was found in FlatPress and classified as problematic. This issue affects the function main of the file fp-plugins/mediamanager/panels/panel.mediamanager.file.php of the component Media Manager Plugin. The manipulation of the argument mm-newgallery-name leads to cross site scripting. The attack may be initiated remotely. The name of the patch is d3f329496536dc99f9707f2f295d571d65a496f5. It is recommended to apply a patch to fix this issue. The identifier VDB-216869 was assigned to this vulnerability. |
2022-12-27 |
not yet calculated |
CVE-2022-4755
MISC
MISC
MISC
MISC |
dolibarr_project_timesheet — dolibarr_project_timesheet
|
A vulnerability was found in dolibarr_project_timesheet up to 4.5.5. It has been declared as problematic. This vulnerability affects unknown code of the component Form Handler. The manipulation leads to cross-site request forgery. The attack can be initiated remotely. Upgrading to version 4.5.6.a is able to address this issue. The name of the patch is 082282e9dab43963e6c8f03cfaddd7921de377f4. It is recommended to upgrade the affected component. The identifier of this vulnerability is VDB-216880. |
2022-12-27 |
not yet calculated |
CVE-2022-4766
MISC
MISC
MISC
MISC
MISC |
usememos — memos
|
Denial of Service in GitHub repository usememos/memos prior to 0.9.1. |
2022-12-27 |
not yet calculated |
CVE-2022-4767
CONFIRM
MISC |
dropbox — merou
|
A vulnerability was found in Dropbox merou. It has been classified as critical. Affected is the function add_public_key of the file grouper/public_key.py of the component SSH Public Key Handler. The manipulation of the argument public_key_str leads to injection. It is possible to launch the attack remotely. The name of the patch is d93087973afa26bc0a2d0a5eb5c0fde748bdd107. It is recommended to apply a patch to fix this issue. VDB-216906 is the identifier assigned to this vulnerability. |
2022-12-27 |
not yet calculated |
CVE-2022-4768
MISC
MISC
MISC
MISC |
widoco — widoco
|
A vulnerability was found in Widoco and classified as critical. Affected by this issue is the function unZipIt of the file src/main/java/widoco/WidocoUtils.java. The manipulation leads to path traversal. It is possible to launch the attack on the local host. The name of the patch is f2279b76827f32190adfa9bd5229b7d5a147fa92. It is recommended to apply a patch to fix this issue. VDB-216914 is the identifier assigned to this vulnerability. |
2022-12-27 |
not yet calculated |
CVE-2022-4772
MISC
MISC
MISC
MISC |
elvexys — streamx
|
StreamX applications from versions 6.02.01 to 6.04.34 are affected by a path traversal vulnerability that allows authenticated users to get unauthorized access to files on the server’s filesystem. StreamX applications using StreamView HTML component with the public web server feature activated are affected. |
2022-12-29 |
not yet calculated |
CVE-2022-4778
MISC |
elvexys — streamx
|
StreamX applications from versions 6.02.01 to 6.04.34 are affected by a logic bug that allows to bypass the implemented authentication scheme. StreamX applications using StreamView HTML component with the public web server feature activated are affected. |
2022-12-29 |
not yet calculated |
CVE-2022-4779
MISC |
elvexys — streamx
|
ISOS firmwares from versions 1.81 to 2.00 contain hardcoded credentials from embedded StreamX installer that integrators are not forced to change. |
2022-12-29 |
not yet calculated |
CVE-2022-4780
MISC |
linux — kernel
|
An issue was discovered in ksmbd in the Linux kernel 5.15 through 5.19 before 5.19.2. There is an out-of-bounds read and OOPS for SMB2_WRITE, when there is a large length in the zero DataOffset case. |
2022-12-23 |
not yet calculated |
CVE-2022-47943
MISC
MISC
MISC
MLIST |
linux — kernel
|
An issue was discovered in the Linux kernel 5.10.x before 5.10.155. A use-after-free in io_sqpoll_wait_sq in fs/io_uring.c allows an attacker to crash the kernel, resulting in denial of service. finish_wait can be skipped. An attack can occur in some situations by forking a process and then quickly terminating it. NOTE: later kernel versions, such as the 5.15 longterm series, substantially changed the implementation of io_sqpoll_wait_sq. |
2022-12-23 |
not yet calculated |
CVE-2022-47946
MISC
MISC
MLIST |
usememos — memos
|
Incorrect Use of Privileged APIs in GitHub repository usememos/memos prior to 0.9.1. |
2022-12-28 |
not yet calculated |
CVE-2022-4796
MISC
CONFIRM |
heimdall — application_dashboard
|
Heimdall Application Dashboard through 2.5.4 allows reflected and stored XSS via “Application name” to the “Add application” page. The stored XSS will be triggered in the “Application list” page. |
2022-12-27 |
not yet calculated |
CVE-2022-47968
MISC
MISC |
usememos — memos
|
Improper Restriction of Excessive Authentication Attempts in GitHub repository usememos/memos prior to 0.9.1. |
2022-12-28 |
not yet calculated |
CVE-2022-4797
MISC
CONFIRM |
usememos — memos
|
Improper Authorization in GitHub repository usememos/memos prior to 0.9.1. |
2022-12-28 |
not yet calculated |
CVE-2022-4798
MISC
CONFIRM |
usememos — memos
|
Improper Authentication in GitHub repository usememos/memos prior to 0.9.1. |
2022-12-28 |
not yet calculated |
CVE-2022-4799
MISC
CONFIRM |
usememos — memos
|
Improper Verification of Source of a Communication Channel in GitHub repository usememos/memos prior to 0.9.1. |
2022-12-28 |
not yet calculated |
CVE-2022-4800
MISC
CONFIRM |
usememos — memos
|
Insufficient Granularity of Access Control in GitHub repository usememos/memos prior to 0.9.1. |
2022-12-28 |
not yet calculated |
CVE-2022-4801
MISC
CONFIRM |
usememos — memos
|
Improper Authorization in GitHub repository usememos/memos prior to 0.9.1. |
2022-12-28 |
not yet calculated |
CVE-2022-4802
MISC
CONFIRM |
usememos — memos
|
Improper Access Control in GitHub repository usememos/memos prior to 0.9.1. |
2022-12-28 |
not yet calculated |
CVE-2022-4803
MISC
CONFIRM |
usememos — memos
|
Improper Authorization in GitHub repository usememos/memos prior to 0.9.1. |
2022-12-28 |
not yet calculated |
CVE-2022-4804
MISC
CONFIRM |
usememos — memos
|
Incorrect Use of Privileged APIs in GitHub repository usememos/memos prior to 0.9.1. |
2022-12-28 |
not yet calculated |
CVE-2022-4805
CONFIRM
MISC |
usememos — memos
|
Improper Access Control in GitHub repository usememos/memos prior to 0.9.1. |
2022-12-28 |
not yet calculated |
CVE-2022-4806
MISC
CONFIRM |
usememos — memos
|
Improper Access Control in GitHub repository usememos/memos prior to 0.9.1. |
2022-12-28 |
not yet calculated |
CVE-2022-4807
MISC
CONFIRM |
usememos — memos
|
Improper Privilege Management in GitHub repository usememos/memos prior to 0.9.1. |
2022-12-28 |
not yet calculated |
CVE-2022-4808
MISC
CONFIRM |
usememos — memos
|
Improper Access Control in GitHub repository usememos/memos prior to 0.9.1. |
2022-12-28 |
not yet calculated |
CVE-2022-4809
MISC
CONFIRM |
usememos — memos
|
Improper Access Control in GitHub repository usememos/memos prior to 0.9.1. |
2022-12-28 |
not yet calculated |
CVE-2022-4810
MISC
CONFIRM |
usememos — memos
|
Improper Authorization in GitHub repository usememos/memos prior to 0.9.1. |
2022-12-28 |
not yet calculated |
CVE-2022-4811
MISC
CONFIRM |
usememos — memos
|
Comparison of Object References Instead of Object Contents in GitHub repository usememos/memos prior to 0.9.1. |
2022-12-28 |
not yet calculated |
CVE-2022-4812
MISC
CONFIRM |
usememos — memos
|
Insufficient Granularity of Access Control in GitHub repository usememos/memos prior to 0.9.1. |
2022-12-28 |
not yet calculated |
CVE-2022-4813
MISC
CONFIRM |
usememos — memos
|
Improper Access Control in GitHub repository usememos/memos prior to 0.9.1. |
2022-12-28 |
not yet calculated |
CVE-2022-4814
MISC
CONFIRM |
centic9 — jgit-cookbook
|
A vulnerability was found in centic9 jgit-cookbook. It has been declared as problematic. This vulnerability affects unknown code. The manipulation leads to insecure temporary file. The attack can be initiated remotely. The name of the patch is b8cb29b43dc704708d598c60ac1881db7cf8e9c3. It is recommended to apply a patch to fix this issue. The identifier of this vulnerability is VDB-216988. |
2022-12-28 |
not yet calculated |
CVE-2022-4817
MISC
MISC
MISC
MISC |
talend — open studio for mdm
|
A vulnerability was found in Talend Open Studio for MDM. It has been declared as problematic. Affected by this vulnerability is an unknown functionality of the file org.talend.mdm.core/src/com/amalto/core/storage/SystemStorageWrapper.java. The manipulation leads to xml external entity reference. Upgrading to version 20221220_1938 is able to address this issue. The name of the patch is 95590db2ad6a582c371273ceab1a73ad6ed47853. It is recommended to upgrade the affected component. The identifier VDB-216997 was assigned to this vulnerability. |
2022-12-28 |
not yet calculated |
CVE-2022-4818
MISC
MISC
MISC
MISC
MISC |
hotcrp — hotcrp
|
A vulnerability was found in HotCRP. It has been rated as problematic. Affected by this issue is some unknown functionality. The manipulation leads to cross site scripting. The attack may be launched remotely. The name of the patch is d4ffdb0ef806453c54ddca7fdda3e5c60356285c. It is recommended to apply a patch to fix this issue. VDB-216998 is the identifier assigned to this vulnerability. |
2022-12-28 |
not yet calculated |
CVE-2022-4819
MISC
MISC
MISC |
tp-link — tl-wr902ac
|
TP-Link TL-WR902AC devices through V3 0.9.1 allow remote authenticated attackers to execute arbitrary code or cause a Denial of Service (DoS) by uploading a crafted firmware update because the signature check is inadequate. |
2022-12-30 |
not yet calculated |
CVE-2022-48194
MISC |
mellium — mellium.im/sasl
|
An issue was discovered in Mellium mellium.im/sasl before 0.3.1. When performing SCRAM-based SASL authentication, if the remote end advertises support for channel binding, no random nonce is generated (instead, the nonce is empty). This causes authentication to fail in the best case, but (if paired with a remote end that does not validate the length of the nonce) could lead to insufficient randomness being used during authentication. |
2022-12-31 |
not yet calculated |
CVE-2022-48195
MISC |
N/A — N/A
|
Certain NETGEAR devices are affected by a buffer overflow by an unauthenticated attacker. This affects RAX40 before 1.0.2.60, RAX35 before 1.0.2.60, R6400v2 before 1.0.4.122, R6700v3 before 1.0.4.122, R6900P before 1.3.3.152, R7000P before 1.3.3.152, R7000 before 1.0.11.136, R7960P before 1.4.4.94, and R8000P before 1.4.4.94. |
2022-12-30 |
not yet calculated |
CVE-2022-48196
MISC
MISC |
netgear — multiple_products
|
A vulnerability classified as problematic has been found in FlatPress. This affects an unknown part of the file admin/panels/entry/admin.entry.list.php of the component Admin Area. The manipulation leads to cross site scripting. It is possible to initiate the attack remotely. The name of the patch is 229752b51025e678370298284d42f8ebb231f67f. It is recommended to apply a patch to fix this issue. The associated identifier of this vulnerability is VDB-216999. |
2022-12-28 |
not yet calculated |
CVE-2022-4820
MISC
MISC
MISC
MISC |
flatpress — flatpress
|
A vulnerability classified as problematic was found in FlatPress. This vulnerability affects the function onupload of the file admin/panels/uploader/admin.uploader.php of the component XML File Handler/MD File Handler. The manipulation leads to cross site scripting. The attack can be initiated remotely. The name of the patch is 3cc223dec5260e533a84b5cf5780d3a4fbf21241. It is recommended to apply a patch to fix this issue. The identifier of this vulnerability is VDB-217000. |
2022-12-28 |
not yet calculated |
CVE-2022-4821
MISC
MISC
MISC
MISC |
flatpress — flatpress
|
A vulnerability, which was classified as problematic, has been found in FlatPress. This issue affects some unknown processing of the file setup/lib/main.lib.php of the component Setup. The manipulation leads to cross site scripting. The attack may be initiated remotely. The name of the patch is 5f23b4c2eac294cc0ba5e541f83a6f8a26f9fed1. It is recommended to apply a patch to fix this issue. The identifier VDB-217001 was assigned to this vulnerability. |
2022-12-28 |
not yet calculated |
CVE-2022-4822
MISC
MISC
MISC
MISC |
flatpress — flatpress
|
A vulnerability, which was classified as problematic, was found in InSTEDD Nuntium. Affected is an unknown function of the file app/controllers/geopoll_controller.rb. The manipulation of the argument signature leads to observable timing discrepancy. It is possible to launch the attack remotely. The name of the patch is 77236f7fd71a0e2eefeea07f9866b069d612cf0d. It is recommended to apply a patch to fix this issue. VDB-217002 is the identifier assigned to this vulnerability. |
2022-12-28 |
not yet calculated |
CVE-2022-4823
MISC
MISC
MISC |
instedd — nuntium
|
Cross-site Scripting (XSS) – Stored in GitHub repository usememos/memos prior to 0.9.1. |
2022-12-29 |
not yet calculated |
CVE-2022-4839
CONFIRM
MISC |
usememos — memos
|
Cross-site Scripting (XSS) – Stored in GitHub repository usememos/memos prior to 0.9.1. |
2022-12-29 |
not yet calculated |
CVE-2022-4840
MISC
CONFIRM |
usememos — memos
|
Cross-site Scripting (XSS) – Stored in GitHub repository usememos/memos prior to 0.9.1. |
2022-12-29 |
not yet calculated |
CVE-2022-4841
MISC
CONFIRM |
radareorg — radare2
|
NULL Pointer Dereference in GitHub repository radareorg/radare2 prior to 5.8.2. |
2022-12-29 |
not yet calculated |
CVE-2022-4843
CONFIRM
MISC |
usememos — memos
|
Cross-Site Request Forgery (CSRF) in GitHub repository usememos/memos prior to 0.9.1. |
2022-12-29 |
not yet calculated |
CVE-2022-4844
CONFIRM
MISC |
usememos — memos
|
Cross-Site Request Forgery (CSRF) in GitHub repository usememos/memos prior to 0.9.1. |
2022-12-29 |
not yet calculated |
CVE-2022-4845
MISC
CONFIRM |
usememos — memos
|
Cross-Site Request Forgery (CSRF) in GitHub repository usememos/memos prior to 0.9.1. |
2022-12-29 |
not yet calculated |
CVE-2022-4846
MISC
CONFIRM |
usememos — memos
|
Incorrectly Specified Destination in a Communication Channel in GitHub repository usememos/memos prior to 0.9.1. |
2022-12-29 |
not yet calculated |
CVE-2022-4847
MISC
CONFIRM |
usememos — memos
|
Improper Verification of Source of a Communication Channel in GitHub repository usememos/memos prior to 0.9.1. |
2022-12-29 |
not yet calculated |
CVE-2022-4848
MISC
CONFIRM |
usememos — memos
|
Cross-Site Request Forgery (CSRF) in GitHub repository usememos/memos prior to 0.9.1. |
2022-12-29 |
not yet calculated |
CVE-2022-4849
CONFIRM
MISC |
usememos — memos
|
Cross-Site Request Forgery (CSRF) in GitHub repository usememos/memos prior to 0.9.1. |
2022-12-29 |
not yet calculated |
CVE-2022-4850
MISC
CONFIRM |
usememos — memos
|
Improper Handling of Values in GitHub repository usememos/memos prior to 0.9.1. |
2022-12-29 |
not yet calculated |
CVE-2022-4851
MISC
CONFIRM |
| sourcecodester — lead_management_system |
A vulnerability, which was classified as critical, was found in SourceCodester Lead Management System 1.0. Affected is an unknown function of the file login.php. The manipulation of the argument username leads to sql injection. It is possible to launch the attack remotely. The exploit has been disclosed to the public and may be used. The identifier of this vulnerability is VDB-217020. |
2022-12-30 |
not yet calculated |
CVE-2022-4855
MISC
MISC
MISC |
modbus_tools — modbus_slave
|
A vulnerability has been found in Modbus Tools Modbus Slave up to 7.5.1 and classified as critical. Affected by this vulnerability is an unknown functionality of the file mbslave.exe of the component mbs File Handler. The manipulation leads to buffer overflow. The attack can be launched remotely. The exploit has been disclosed to the public and may be used. The identifier VDB-217021 was assigned to this vulnerability. |
2022-12-30 |
not yet calculated |
CVE-2022-4856
MISC
MISC
MISC
MISC |
modbus_tools — modbus_slave
|
A vulnerability was found in Modbus Tools Modbus Poll up to 9.10.0 and classified as critical. Affected by this issue is some unknown functionality of the file mbpoll.exe of the component mbp File Handler. The manipulation leads to buffer overflow. The attack may be launched remotely. The exploit has been disclosed to the public and may be used. VDB-217022 is the identifier assigned to this vulnerability. |
2022-12-30 |
not yet calculated |
CVE-2022-4857
MISC
MISC
MISC
MISC |
m-files — server
|
Insertion of Sensitive Information into Log Files in M-Files Server before 22.10.11846.0 could allow to obtain sensitive tokens from logs, if specific configurations were set. |
2022-12-30 |
not yet calculated |
CVE-2022-4858
MISC |
joget — joget
|
A vulnerability, which was classified as problematic, has been found in Joget up to 7.0.33. This issue affects the function submitForm of the file wflow-core/src/main/java/org/joget/plugin/enterprise/UserProfileMenu.java of the component User Profile Menu. The manipulation of the argument firstName/lastName leads to cross site scripting. The attack may be initiated remotely. Upgrading to version 7.0.34 is able to address this issue. The name of the patch is 9a77f508a2bf8cf661d588f37a4cc29ecaea4fc8. It is recommended to upgrade the affected component. The associated identifier of this vulnerability is VDB-217055. |
2022-12-30 |
not yet calculated |
CVE-2022-4859
MISC
MISC
MISC
MISC |
kbase — metrics
|
A vulnerability was found in KBase Metrics. It has been classified as critical. This affects the function upload_user_data of the file source/daily_cron_jobs/methods_upload_user_stats.py. The manipulation leads to sql injection. The name of the patch is 959dfb6b05991e30b0fa972a1ecdcaae8e1dae6d. It is recommended to apply a patch to fix this issue. The associated identifier of this vulnerability is VDB-217059. |
2022-12-30 |
not yet calculated |
CVE-2022-4860
MISC
MISC
MISC
MISC |
m-files — client
|
Incorrect implementation in authentication protocol in M-Files Client before 22.5.11356.0 allows high privileged user to get other users tokens to another resource. |
2022-12-30 |
not yet calculated |
CVE-2022-4861
MISC |
usememos — memos
|
Improper Handling of Insufficient Permissions or Privileges in GitHub repository usememos/memos prior to 0.9.1. |
2022-12-30 |
not yet calculated |
CVE-2022-4863
MISC
CONFIRM |
froxlor — froxlor
|
Argument Injection in GitHub repository froxlor/froxlor prior to 2.0.0-beta1. |
2022-12-30 |
not yet calculated |
CVE-2022-4864
MISC
CONFIRM |
usememos — memos
|
Cross-site Scripting (XSS) – Stored in GitHub repository usememos/memos prior to 0.9.1. |
2022-12-31 |
not yet calculated |
CVE-2022-4865
CONFIRM
MISC |
usememos — memos
|
Cross-site Scripting (XSS) – Stored in GitHub repository usememos/memos prior to 0.9.1. |
2022-12-31 |
not yet calculated |
CVE-2022-4866
CONFIRM
MISC |
froxlor — froxlor
|
Cross-Site Request Forgery (CSRF) in GitHub repository froxlor/froxlor prior to 2.0.0-beta1. |
2022-12-31 |
not yet calculated |
CVE-2022-4867
MISC
CONFIRM |
froxlor — froxlor
|
Improper Authorization in GitHub repository froxlor/froxlor prior to 2.0.0-beta1. |
2022-12-31 |
not yet calculated |
CVE-2022-4868
CONFIRM
MISC |
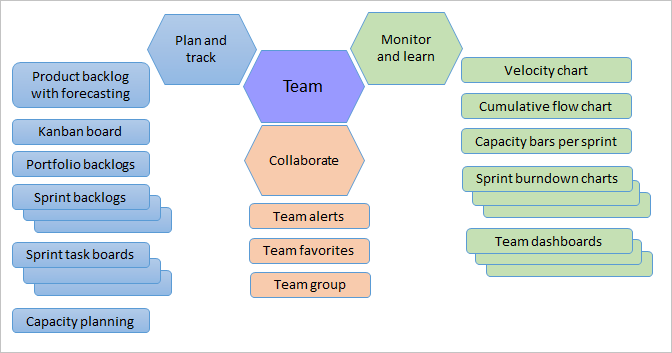
by Contributed | Dec 30, 2022 | Technology
This article is contributed. See the original author and article here.
In our daily work we constantly encounter what I like to call ‘The Time Thieves.’ These are the things that take away our ability to be proactive in our day-to-day job. They are the reasons we fall behind in our work and can’t always meet delivery dates. I’ve listed several of the time thieves that all of us can relate to:
- Unknown dependencies
- Too much work (WIP)
- Neglected Work
- Conflicting priorities
- Unplanned work
We are all too familiar with these items listed above. While I wish I had a magic bullet, I don’t, but we’re going to look at some ways in which we can help alleviate these. There very much needs to be a cultural change within your organization, but we can use tooling to assist us with this in our projects going forwards. I am going to focus on Azure Boards, which is part of the more widely known tool, Azure DevOps.
Firstly, we cannot plan for and prioritize what we cannot see. When starting a new project, we need to define our definite of done (DoD). A definition of done is a confirmed set of conditions that a project must complete in order to be accepted by the end users. A DoD is often made up of acceptance criteria, that ensure we complete our tasks, delivering higher quality work and eliminating the need to ‘re-do’ our work.
For example:
Definition of Done: In 3 months we will deploy the new website into Azure for the company global event.
Acceptance Criteria: The infrastructure is deployed using infrastructure as code (IaC) into Azure, with a resilient and scalable system in place, meeting our defined SLA. The website will be operational in time for end users to be able to register via the website and navigate all aspects successfully, also addressing all inclusion requirements for visibility.
While I just gave a high-level example, we now need to figure HOW we are going to achieve this in 3 months. This begins the planning phase where it is critical for all stakeholders to be involved. This includes, but not limited to: the operations team, the development team, the security team, project managers, etc. No one likes to get that email request or tap on the shoulder asking for a task to be done yesterday. We need everyone involved in this planning piece; it is crucial to the success of the project. This is a great time to bring in those subject matter experts who know what dependencies might exist, but this also allows for all of the teams to be involved and to prevent chasing them down and causing them to incur unplanned work.
We need to clearly define what we are trying to deliver, and we must delineate on what are the ‘must haves’ and the ‘nice to haves’ that can be fulfilled in the designated time frame. As a team, we are aware that we have 3 months to deliver our definition of done. We need to develop an agile methodology that sets milestones into our plan, providing checkpoints for the stakeholders.
Agile Methodology Planning
Now, we need to figure out HOW we get there. This is the planning phase where we need all stakeholders involved. We need to determine the ‘must haves’ and the ‘nice to haves’. As a team, we know that we have 3 months to achieve our definition of done, the planning part is key. We need to set some milestones in our planning as check in points for our stakeholders. From there we can fill in the tasks for each milestone.
 Structure of work items and tasks
Defining the milestones and tasks do not require you to be a project manager, instead it’s something that ALL of your technical team should be involved in. Give them ownership in their tasks, this also allows for them to bring forward their existing work in progress and what other conflicting priorities might exist. Bring in those subject matter experts to help pick apart and identify known dependencies that exist (remember that time thief, unknown dependencies?), giving your teams the best chance of success. Nobody likes a surprise, give your team a head start by addressing the issues in the planning phase.
When planning, you often hear ‘I have too much work to do and can’t be involved.’ Find the time. Whether it’s a time block of 30 mins, or even 15, get those folks involved. Help them become vested in the project and more importantly, align your priorities. Carving out even just 30 mins in the beginning can save hours, days and weeks in delays later on. Prioritization and involvement of the tasks need to be planned out. We constantly have too much work because priorities in our companies and in projects are not set. Everything is always on fire, and everyone always wanted it done yesterday. This is where we see constant conflicts of interest amongst various teams in projects.
The time thief conflicting priorities exist because teams are not incentivized to help on your project, or they don’t see the value that it will drive.
Using the planning time to align priorities across teams will break down those silos. Take the time to understand each others deliverables and priorities. This is a great opportunity to uncover common ground, understand the other teams’ pain points and maybe how you can help each other better. How we incentivize our teams cause these silos within our organizations. The operational teams are expected to keep the lights on 24/7, probably even delivering against an SLA. The development teams are expected to push new features, which in the past has hurt the operational teams’ SLA. These are conflicting priorities. This is a great opportunity in this project to come together to find better ways of working and deliver value together. We’ve talked about these time thieves and how they stop us from delivering successful projects. Now let’s focus on Azure Boards, how the tool itself can up us organize and plan our projects.
I LOVE Azure Boards because it is the key to organizing your project, it enables you to plan and track your work. It also improves communication within a project by providing visibility as to what is happening on the project, allowing your engineers to do their work, knowing what tasks are being worked on and who they are assigned to, as well as give visibility and full traceability of all the work being undertaken in a project.
Azure Boards allows you to organize your work using a triage and prioritization system. Remember those time thieves of ‘unplanned work’, ‘neglected work’ and ‘WIP’? Boards uses a Kanban style view to help you organize all the tasks in each milestone, also giving you the ability to triage incoming work and finding a place to tackle those tasks. Giving you the ability to prioritize all work items, with reporting that can visualize how the team is progressing on the project.
Azure Boards is part of Azure DevOps which has so many features and capabilities baked in. You can watch the video that myself and Nana from Techworld with Nana put together on Azure Boards.
Azure Boards – The Features
Azure Boards allows teams to organize their projects by enabling an agile process. It uses a Kanban style view, that includes calendar views, configurable dashboards, and integrated reporting. These tools can be used from any small project and easily scales to use with much larger projects.
 Project Delivery Analytics
Azure Boards enables your teams to track their work and track issues (such as tasks, bugs, dependency issues, etc) in a very easy to read format. The stakeholders can pull reports of how the project is progressing, it can also help the stakeholders to see how the teams tasks are prioritized. Boards holds your engineers accountable for their work but also giving insight to where those time thieves are interfering in the project delivery. Making it easier to evolve your project delivery methods and adjust timings to reach those milestones.
Looking at our project we outlined above, we can set up a delivery plan in Azure Boards that displays a calendar view of when our deliverables are due as well assisting us in planning the timings required to reach our milestones.
 Delivery Plan View
We can also track dependencies and add items to the backlog when they crop up, addressing unplanned work. For example, we notice a performance issue with the website. The development team is blaming the infrastructure team, but the infrastructure team does not see any performance issues. Instead of watching each team blame each other, we can the issues together, encouraging both teams to tackle the issue. In the end, they did find a dependency on the code and the scalability in the infrastructure. This dependency was marked and going forward both teams can work together to resolve these issues.
In Azure Boards we can setup Sprints, a set time (let’s say 2 weeks) where we deliver a specific part of our wider project. Several sprints make up a milestone (let’s assume 2 sprints per milestone in our existing project – assuming a milestone is a month long). Each engineer is responsible for creating and assigning their tasks for the sprint. This gives the engineers ownership of what is to be delivered, but also allows for them to plan around their existing priorities and other known dependencies that need to be addressed. Giving your engineers ownership over their tasks and priorities incentivizes them to deliver better quality work, but also addresses their many time thieves, giving them control over their work.
Planning work is critical to project success, it enables organization and visibility from every single stakeholders, creating a culture within the teams that they are also involved in the project and not brought in when everything is on fire and due yesterday.
Azure Boards – Tracking Work and Deployments
Automation removes human error, let’s face it, as humans, we make a lot of mistakes. The website that we’re building in our example is deployed with infrastructure as code (IaC) into Azure. Whether we choose Bicep, Terraform or Ansible, is negligible, Azure DevOps can support deployment of any IaC tool into Azure. All of the work creating infrastructure deployments (writing the IaC), maintaining the infrastructure and on-going monitoring is managed as tasks in Azure Boards. The operations team can be proactive around maintenance, issues or any other items that crop up. Giving the engineers full traceability into their work, enabling them to recover faster from mistakes.
Azure Boards and GitHub
Let’s take a scenario where your development team stores all of their source code in GitHub. That’s okay! Azure DevOps and GitHub work seamlessly together. GitHub and Azure DevOps integrate to support using both platforms, even if the existing code resides in GitHub, the ability to use Azure Boards to plan and track your work can still be configured and managed from Azure Boards! You can also link any commits made to GitHub to your work items in Azure Boards, giving you full visibility of the work being undertaken.
Azure DevOps and Microsoft Teams
Communication is crucial for any project. Giving status updates, reporting issues, progress and everything else can be time consuming, but also time prohibitive as we often spend a lot of time in meetings. With Azure Boards and Microsoft Teams we can enable the two to communicate. You can set up a channel in Teams and configure what types of notifications you want to receive.
One example, a user reports an issue with our project. We can easily create a work item directly from the Teams channel based on that conversation with our colleague. We can also configure Teams to subscribe to certain types of work items in Boards, or monitor work item activity from our Teams channel.
 Create a work item from a Teams channel
 Traceability of how the work item was created
There are many ways to integrate the two tools, increasing visibility of project work and keeping an open line of communication with your stakeholders and other technical teams.
Azure Boards – In Summary
Azure Boards has so many features built into it. Most importantly, it helps your team to get organized for any size project and implement better working practices. Let’s face it, Azure DevOps is just a tool, there needs to be a culture change that takes place to help your teams achieve more.
Watch the full Azure DevOps Zero to Hero video on YouTube. Good luck with your next project and tackle those time thieves!


.png")


.png")
.png")
.png")
.png")
.png")
.png")
.png")


Recent Comments