This article is contributed. See the original author and article here.
Introduction
Hello everyone, this is Andrew Coughlin again and I am a Customer Engineer at Microsoft. A question I get asked is can you use Distribute File System Namespaces (DFS-N) with an Azure File Share. In this blog I will explain how to do this by focusing on how to integrate DFS-N with Azure File Shares with AD DS Authentication over SMB. On June 11, 2020 Active Directory Domain Services (AD DS) authentication over SMB for Azure file shares was released.
Enabling AD DS authentication for your Azure Files Shares allows you to use your on-premises credentials. This does require the synchronization of on-premises users into Azure Active Directory, and gives the ability to control share level access via Azure Active Directory while controlling the file system permissions with Active Directory Domain Services.
Using Active Directory authentication for Azure Files over SMB gives the ability to use Azure Files as a replacement for traditional file servers. This gives customers the ability to shift their file services to Azure and retire their on-premises file servers.
Prerequisites
- Connectivity from your on-premises locations to Azure.
- Ensure these steps have been completed before setting up the storage account.
- Create a storage account as documented here, then create a Azure File Share as documented here.
- Storage account that has Active Directory Domain Services Enabled.
- DFS Namespace created as documented here.
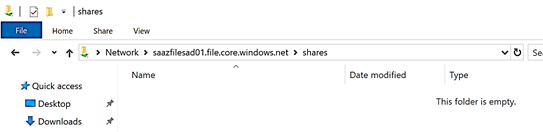
Verify Azure File Share
First, we want to confirm permissions are setup correctly and the share does exist. To do this we will do the following:
- Launch Windows Explorer.
- Type the storage account service endpoint with the share, example: storageaccountname.file.core.windows.netsharename

Create DFS Namespace
- Click Start > Click Server Manager.
- In Server Manager, click Tools > DFS Management.
- Right click on Namespaces and click Add Namespaces to Display…

- Select the Namespace you are going to add the Azure File share to.

- Right click the name space once added, then click New Folder.

- Provide the name of the new folder and click Add.

- Type the storage account service endpoint, then click OK.

NOTE: You should not click Browse as in doing so will generate an error message when trying to enumerate shares on the server. Since the storage account is not windows server, we won’t be able to enumerate the shares on the storage account as of writing this article.
- Click OK, on the New folder window.


With the above steps we just setup a new dfs namespace share that your end users can navigate to.
Verify DFS Namespace Share
- Next, we want to verify the DFS Namespace folder we just created.
- Launch File Explorer.
- Type the DFS Namespace and share name, example: dfsnamespace.localpublic

- Select the folder we just created in the above steps.

Conclusion
In this post I have covered how to integrate DFS-N with Azure File Shares with Active Directory Domain Services authentication over SMB.. I hope you have found this article helpful and thank you for taking the time to read this post.
Brought to you by Dr. Ware, Microsoft Office 365 Silver Partner, Charleston SC.

Recent Comments