
by Scott Muniz | Sep 16, 2020 | Azure, Technology, Uncategorized
This article is contributed. See the original author and article here.
Hi IT Pros,
Recently, I search the internet and could not find the document for Azure ATP Setup and Troubleshooting. So, I prepare the document for our convenient reference and deployment in the future.
Please check it out and give your feedback.

AZURE ADVANCED THREAT PROTECTION
DEPLOYMENT AND TROUBLESHOOTING
The setup procedure for Azure Advanced Threat Protection – AATP, includes the following steps:
- Prepare Domain for AATP operation.
- Install Sensors for Domain Controllers
- Configure AATP
- Troubleshoot and Test.
***********
A. Prepare Domain for Azure ATP (ATTP)
- Creating the group Managed Service Accounts (gMSA) for ATTP.
In Windows Server 2012 and later Domain, services or service administrators do not need to manage password synchronization between service instances when using group Managed Service Accounts (gMSA).
You provision the gMSA in AD and then configure the service which supports Managed Service Accounts.
You can provision a gMSA using the *-ADServiceAccount cmdlets which are part of the Active Directory module. Service identity configuration on the host is supported by:
- Same APIs as sMSA, so products which support sMSA will support gMSA
- Services which use Service Control Manager to configure logon identity
- Services which use the IIS manager for application pools to configure identity
- Tasks using Task Scheduler.
gMSA Prerequisite:
- gMSA required KDS Root Key. It is used by the KDS service on DCs (along with other information) to generate passwords. It is required only once per forest.
a) To Create KDS Root key:
Add-KdsRootKey -EffectiveImmediately

Will need time for key to be propagated to all other DCs,
b) To create a gMSA using the New-ADServiceAccount cmdlet
On the Windows Server 2012 domain controller or later, Run AD Powershell:
- New-ADServiceAccount ITFarm1 -DNSHostName ITFarm1.contoso.com
-PrincipalsAllowedToRetrieveManagedPassword DC01$
-KerberosEncryptionType RC4, AES128, AES256
-ServicePrincipalNames http/ITFarm1.contoso.com/contoso.com, http/ITFarm1.contoso.com/contoso, http/ITFarm1/contoso.com, http/ITFarm1/contoso
|
Name
|
ITFarm1
|
|
DNSHostName
|
DC01.contoso.com
|
|
KerberosEncryptionType
|
None, RC4, AES128, AES256
|
|
ManagedPasswordIntervalInDays
|
Password change interval in days (default is 30 days if not provided)
|
|
PrincipalsAllowedToRetrieveManagedPassword
|
The computer accounts of the member hosts or the security group that the member hosts are a member of
|
|
SamAccountName
|
NetBIOS name for the service if not same as Name
|
|
ServicePrincipalNames
|
Service Principal Names (SPNs) for the service http/ITFarm1.contoso.com/contoso.com, http/ITFarm1.contoso.com/contoso, http/ITFarm1/contoso.com, http/ITFarm1/contoso, MSSQLSvc/ITFarm1.contoso.com:1433, MSSQLSvc/ITFarm1.contoso.com:INST01
|
Note: The password change interval can only be set during creation and cannot change later.
To create a gMSA for outbound authentication only using the New-ADServiceAccount cmdlet
- New-ADServiceAccount ITFarm1 -RestrictToOutboundAuthenticationOnly – PrincipalsAllowedToRetrieveManagedPassword DC01$
c) Add member hosts to gMSA
- Get-ADServiceAccount [-Identity] ITFarm1 -Properties PrincipalsAllowedToRetrieveManagedPassword

- Set-ADServiceAccount [-Identity] ITFarm1
-PrincipalsAllowedToRetrieveManagedPassword DC01$,DC02$,DC03$
Better option:
You could create AD Security Group “SensorDCs” whose members are Sensor DCs and set AD service account to allow retrieving password:
- Set-ADServiceAccount ITFarm1 -PrincipalsAllowedToRetrieveManagedPassword SensorDCs

B. Installing Sensor for All Domain Controllers
Prerequisites for Domain Controllers:
- Make sure Microsoft .Net Framework 4.7 or later is installed on the machine. If Microsoft .Net Framework 4.7 or later isn’t installed, the Azure ATP sensor setup package installs it, which may require a reboot of the server.
- Quick check if the Domain Controllers have enough CPU and Memory for Sensor to collect traffic packets and analyze them. The following CPU and Random Access Memory (RAM) capacity refers to the sensor’s own consumption, not the domain controller capacity.
|
Packets per second
|
CPU (cores)*
|
Memory** (GB)
|
|
0-1k
|
0.25
|
2.50
|
|
1k-5k
|
0.75
|
6.00
|
|
5k-10k
|
1.00
|
6.50
|
|
10k-20k
|
2.00
|
9.00
|
|
20k-50k
|
3.50
|
9.50
|
|
50k-75k
|
3.50
|
9.50
|
|
75k-100k
|
3.50
|
9.50
|
* This includes physical cores, not hyper-threaded cores.
** Random-access memory (RAM)
a. Create Azue ATP Instance
Sign in to https://portal.atp.azure.com with the Azure Account been potentially used as AATP administrator
New AATP Instance will be created:
Your Azure ATP instance is automatically named with the Azure AD initial domain name and created in the data center located closest to your Azure AD.
Click Configuration, Manage role groups, and use the Azure AD Admin Center link to manage your role groups.
b. Connect AATP Instance to AD Forest
The first time you open the Azure ATP portal, the following screen appears:

c. Download and Install the Sensor to DC
Download and copy the Access key. The access key is required for the Azure ATP sensor to connect to your Azure ATP instance (one-time-password for sensor deployment).
Under Configure the sensor, enter the installation path and the access key that you copied from the previous step, based on your environment:
Azure ATP sensor service and Azure ATP sensor updater service are now available in Windows Services as shown:
Finish, reboot the DC Sensor Server.
If the domain controller is the first deployed sensor, you will need to wait at least 15 minutes to allow the database backend to finish initial deployment of the necessary microservices.
If you experience any error during installation process, please refer to the Troubleshooting section (section IV)
d. To check if Sensor is working correctly:
Sign in to portal.atp.azure.com and check if sensor is working:
Installing AATP Sensor on Core Server:
- Support for Windows 2016, 2019 Server Core (nano editions are not supported)
- “Azure ATP sensor Setup.exe” /quiet NetFrameworkCommandLineArguments=”/q” AccessKey=”<Access Key>”
- Or by Powershell
./”Azure ATP sensor Setup.exe” /quiet NetFrameworkCommandLineArguments=”/q” AccessKey=”<Access Key>”
“Azure ATP sensor Setup.exe” [/quiet] [/Help] [NetFrameworkCommandLineArguments=”/q”]
C. Configure AATP
a. To Configure detection Exclusions and Honeytoken
Honeytoken accounts, which are used as traps for malicious actors – any authentication associated with these honeytoken accounts (normally dormant), triggers an alert.
Honeytokens can exist in many forms, from a dead, fake account to a database entry that would only be selected by malicious queries, making the concept ideally suited to ensuring data integrity. A particular example of a honeytoken is a fake email address used to track if a mailing list has been stolen.
- From the Azure ATP portal, click on the settings icon.
- Under Detection, click Entity tags.
- Under Honeytoken accounts, enter the Honeytoken account name and click the + sign. The Honeytoken accounts field is searchable and automatically displays entities in your network. Click Save.
- Add Sensitive Accounts:
Sensitive Accounts: Enter the account you want to monitor lateral movement, modification change, high privilege accounts.
Sensitive groups: Enter the account you want to monitor lateral movement, modification change, high privilege administrative group.
- Click Exclusions. Enter a user account or IP address to be excluded from the detection, for each type of threat.
- Click the plus sign. The Add entity (user or computer) field is searchable and will autofill with entities in your network. For more information, see Excluding entities from detections and the security alert guide.
- Click Save.
b. To receive notifications to a specific email address:
- In the Azure ATP portal, select the “settings” icon
- Click Notifications.
- Under Mail notifications, specify which notifications should be sent via email – they can be sent for new alerts (suspicious activities) and new health issues.
- Click Save.
c. Configure the Collection of Audit Events in GPO
Azure Advanced Threat Protection (Azure ATP) detection relies on specific Windows Event log entries to enhance some detections and provide additional information on who performed specific actions such as NTLM logons, security group modifications and others.
You can use the Default Domain Controllers Policy or a dedicated GPO to set the following audit policies:
- go to Computer Configuration > Policies > Windows Settings > Security Settings
- Go to Advanced Audit Policy Configuration
- Audit Policies.
- Under Audit Policies, edit each of the following policies
- select Configure the following audit events for both Success and Failure events.
|
GPO SETTINGS
|
|
Audit policy
|
Subcategory
|
Triggers event IDs
|
|
Account Logon
|
Audit Credential Validation
|
4776
|
|
Account Management
|
Audit Computer Account Management
|
4743
|
|
Account Management
|
Audit Distribution Group Management
|
4753, 4763
|
|
Account Management
|
Audit Security Group Management
|
4728, 4729, 4730, 4732, 4733, 4756, 4757, 4758
|
|
Account Management
|
Audit User Account Management
|
4726
|
|
System
|
Audit Security System Extension
|
7045
|
c. Configure the Collection of Event 8004 NTLM Authentication:
- Go to Local Policies > Security Options.
- Under Security Options, configure the specified security policies, as follows:
|
Network security: Restrict NTLM: Outgoing NTLM traffic to remote servers
|
Audit all
|
|
Network security: Restrict NTLM: Audit NTLM authentication in this domain
|
Enable all
|
|
Network security: Restrict NTLM: Audit Incoming NTLM Traffic
|
Enable auditing for all accounts
|

D. Troubleshoot and Test AATP result
a. To Test AATP
You could simulate the attacks from fake virus script and files at the following link :
https://securitycenter.microsoft.com/tutorials/all
View responses from AATP portal at https://portal.cloudappsecurity.com
b. Troubleshooting
AATP logs ‘ locations:
- Azure ATP Deployment logs
The Azure ATP deployment logs are located in the temp directory for the user who installed the product. C:UsersAdministratorAppDataLocalTemp (or one directory above %temp%).
C:Program FilesAzure Advanced Threat Protection Sensorversion numberLogs.
- Microsoft.Tri.Sensor.log – This log contains everything that happens in the Azure ATP sensor (including resolution and errors).
- Microsoft.Tri.Sensor-Errors.log – This log contains just the errors that are caught by the ATP sensor.
- Microsoft.Tri.Sensor.Updater.log – This log is used for the sensor updater process (automatically updated).
The knowns issue related to AATP setup and Configuration as follow:
- Sensor Installation error, error ID 1068:
Solution: Reboot is needed to start sensor service.
- Sensor Installation error, “Sensor Failure Communication”
System.Net.Http.HttpRequestException: An error occurred while sending the request. —>
or System.Net.WebException: Unable to connect to the remote server —>
or System.Net.Sockets.SocketException: A connection attempt failed because the connected party did not properly respond after a period of time, or established connection failed because connected host has failed to respond…
Solution: Make sure that communication is not blocked for localhost, on TCP port 444
- Sensor Installation error on DC with NIC Teaming
NIC Teaming for AATP required Npcap driver with WinPcap mode.
Solution:
- Uninstall Sensor,
- Install the Npcap version 0.9984 installer from https://nmap.org/npcap/
- using the GUI installer, deselect the loopback support and
select WinPcap mode.
- Reinstall the sensor package.
- Sensor installation error on DC with Multi Processor Group mode
For Windows Operating systems 2008R2 and 2012, Azure ATP Sensor is not supported in a Multi Processor Group mode.
Suggested possible workarounds:
If hyper threading is on, turn it off. This may reduce the number of logical cores enough to avoid needing to run in Multi Processor Group mode.
If your machine has less than 64 logical cores and is running on a HP host, you may be able to change the NUMA Group Size Optimization BIOS setting from the default of Clustered to Flat.
- Create AD Service Account with “key does not exist” error
Solution: You will need to create KDS Root key if get error: “Key does not exist”
More info:
Azure ATP setup
Server Core setup:
https://docs.microsoft.com/en-us/azure-advanced-threat-protection/atp-silent-installation
Azure ATP Configuration
https://docs.microsoft.com/en-us/azure-advanced-threat-protection/install-atp-step5
Troubleshooting
https://docs.microsoft.com/en-us/azure-advanced-threat-protection/troubleshooting-atp-known-issues#:~:text=Troubleshooting%20Azure%20ATP%20Known%20Issues%201%20Sensor%20failure,virtual%20machine%20sensor%20issue.%20…%20More%20items…%20
******
Thanks for reading this blog. Our next discussion topic would be the “AATP Operation” blog article.
Happy AATP Monitoring!
Disclaimer
The sample scripts are not supported under any Microsoft standard support program or service. The sample scripts are provided AS IS without warranty of any kind. Microsoft further disclaims all implied warranties including, without limitation, any implied warranties of merchantability or of fitness for a particular purpose. The entire risk arising out of the use or performance of the sample scripts and documentation remains with you. In no event shall Microsoft, its authors, or anyone else involved in the creation, production, or delivery of the scripts be liable for any damages whatsoever (including, without limitation, damages for loss of business profits, business interruption, loss of business information, or other pecuniary loss) arising out of the use of or inability to use the sample scripts or documentation, even if Microsoft has been advised of the possibility of such damages.
by Scott Muniz | Sep 16, 2020 | Azure, Technology, Uncategorized
This article is contributed. See the original author and article here.
Azure Stream Analytics is a full managed service for real-time analytics. In addition to the experience in Azure portal we have developer tools which make development and debugging easier. This blog will introduce a new debugging feature in Azure Stream Analytics tools extension for Visual Studio Code.
Have you ever faced a situation where your streaming job produces no result or unexpected results and you don’t know how to trouble shoot which parts go wrong? We are happy to announce the roll out of the newest debugging feature – job diagram debugging in Visual Studio Code extension for Azure Stream Analytics. This feature brings together job diagrams, metrics, diagnostic logs, and intermediate results to help you quickly isolate the source of a problem. You can not only test your query on your local machine but also connect to live sources such as Event Hub, IoT Hub. The job diagram helps you to understand how data flows between each step, and you can view the intermediate result set and metrics to debug issues. You can iterate fast because each local test of the job only takes seconds.
This blog will use a real example to show you how to debug an Azure Stream Analytics job using job diagram in Visual Studio Code.
Note
This job diagram only shows the data and metrics for local testing in a single node on your own machine. It should not be used for performance and scalability tuning.
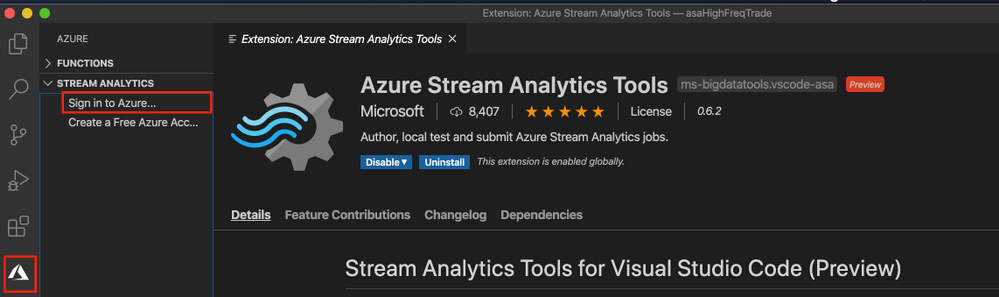
Step 1 Install the tools

Step 2 Open your job in Visual Studio Code
Please go to step 3 if you already have your Azure Stream Analytics project opened in Visual Studio Code.
Open the Azure Stream Analytics job you want to debug on the Query Editor on Azure portal. Select from drop down Open in Visual Studio and choose Visual Studio Code. Then choose Open job in Visual Studio Code. The job will be exported as an Azure Stream Analytics project in Visual Studio Code.


Step 3 Run job locally
Since the credentials are already auto-populated, only thing you need to do is to open the script and Run locally. Make sure the input data is sending to your job input sources.

Step 4 Debug using job diagram
The job diagram shown on the right window of the editor shows how data flows from input sources, like Event Hub or IoT Hub, through multiple query steps to output sinks. You can also view the data as well as metrics of each query step in each intermediate result set to find the source of an issue.
Now, let’s look at a real example job below. We have a job receiving stock quotes for different stocks. In the query there are filters on a few stocks but one output does not have any data.
We run the job locally against live input stream from Event Hub. Through job diagram we can see that the step ‘msftquotes’ does not have data flowing in.

To troubleshoot that, let’s zoom in the diagram and select the upstream step ‘typeconvertedquotes’ to see if there is any output. In the node it shows that there are 3135 output events. Also, from the Result tab below it is easy to find out that there are data been output from this step with symbol ‘MSFT’.

Then we select the step ‘msftquotes’ and locate to the corresponding script to take a closer look.

Now we find the root cause – there is a typo in the script, ‘%MSFT%’ is mistakenly typed as ‘%MSFA%’.
MSFTQuotes AS (
SELECT typeconvertedquotes.* FROM typeconvertedquotes
WHERE symbol like ‘%MSFA%’
AND bidSize > 0
),
Let’s fix the typo, stop the job and run again.
Look, the data is flowing into step ‘msftquotes’ and the other downstream steps.

Other than checking the result for each step, you can also view logs and metrics for the job.
Step 5 Submit to Azure
When local testing is done, submit the job to Azure to run in the cloud environment and further validate the job status in a distributed manner.
Hope you find these new features helpful, and please let us know what capabilities you’re looking for with regard to job debugging in Azure Stream Analytics!


Recent Comments