by Scott Muniz | Jul 27, 2020 | Alerts, Microsoft, Technology, Uncategorized
This article is contributed. See the original author and article here.
We are announcing public preview of a new capability that enables creation of Azure AD guest users directly as database users and setting Azure AD guest users as Active Directory admin for SQL for Azure SQL Database, Managed Instance and Synapse Analytics, without the requirement of adding them to an Azure AD group first.
This is applicable to:
- Azure SQL Database
- Azure SQL Managed Instance
- Synapse Analytics (formerly SQL DW)
What are Guest Users and how are they supported in Azure SQL
Guest users in Azure AD are users that have been imported into the current Azure Active Directory from other Azure Active Directories, or outside of it. Guest users include users invited from other Azure ADs, Microsoft accounts such as outlook.com, hotmail.com, live.com, or other accounts like gmail.com.
Previously, guest users could connect to SQL Database (SQL DB), Managed Instance (MI) and Synapse Analytics (formerly SQL DW) only as part of members of a group created in current Azure AD that was then mapped manually using the Transact-SQL CREATE USER and CREATE LOGIN statements in a given Similarly, to make a guest user the Active Directory Admin for the server, the guest user had to be added to an Azure AD group and the group would then have to be set as the Active Directory Admin.
What functionality does the Public Preview offer
This public preview extends previous functionality by allowing Azure AD guest users to be directly added as database users, without the requirement of adding them to an Azure AD group first and then creating a database user for that Azure AD group. Additionally, this enables Azure AD guest user to be set directly as Active Directory admin for SQL DB, MI and DW without being part of an Azure AD group.
Example
Consider user1@outlook.com is a guest user and belongs to the Azure AD group ‘external_group’ in the current Azure AD tenant.
Previously, we had to create this group as a database user using the T-SQL command below, allowing the guest user to connect to the database as user1@outlook.com
create user [external_group] from external provider
With this preview, the guest user can now be directly created as a database user using the T-SQL command below:
create user [user1@outlook.com] from external provider
In the same way, the guest user can now be directly added as the Active Directory Admin for the database server using the PowerShell command below (or equivalent CLI command):
Set-AzSqlServerActiveDirectoryAdministrator -ResourceGroupName <ResourceGroupName> -ServerName <ServerName> -DisplayName ‘user1@outlook.com’
Note – This works for all types of guest users, namely:
- Guest users invited from other Azure AD tenants
- Microsoft accounts such as outlook.com, hotmail.com, live.com
- Other accounts like gmail.com
Notes
This new capability does not impact existing functionality, rather it allows greater flexibility in managing guest users in SQL DB/MI/DW. Guest users can continue to be part of an Azure AD group in order to be added as a database user and/or Active Directory admin for the server.
Please refer our documentation for more details and for the PowerShell/T-SQL commands to be used for adding a guest user as a database user and as Active Directory Admin.
For feedback/questions on this preview, please reach out to the SQL AAD team at SQLAADFeedback@Microsoft.com
by Scott Muniz | Jul 27, 2020 | Uncategorized
This article is contributed. See the original author and article here.
Hello everyone, here is part 13 of a series focusing on Application Deployment in Configuration Manager. This series is recorded by @Steve Rachui, a Microsoft principal premier field engineer. These tutorials are from our library and uses Configuration Manager 2012 in the demos, however the concepts are still relevant for Configuration Manager current branch.
This session focuses on the App-V 5.0 sequencer and how it can be used to sequence packages to run in the App-V virtual environment. A couple of different scenarios are demonstrated.
Next in the series Steve shows how ConfigMgr together with App-V 5.0 work to deploy virtualized applications.
Posts in the series
Go straight to the playlist
by Scott Muniz | Jul 27, 2020 | Alerts, Microsoft, Technology, Uncategorized
This article is contributed. See the original author and article here.
We are announcing a public preview for Azure AD user creation support for Azure SQL Database and Azure Synapse Analytics on behalf of Azure AD Applications (service principals). See Azure Active Directory service principal with Azure SQL.
What support for Azure AD user creation on behalf of Azure AD Applications means?
Azure SQL Database, Azure Synapse Analytics (formerly SQL Data Warehouse), and SQL Managed Instance support the following Azure AD objects:
- Azure AD users (managed, federated and guest)
- Azure AD groups (managed and federated)
- Azure AD applications
For more information on Azure AD applications, see Application and service principal objects in Azure Active Directory and Create an Azure service principal with Azure PowerShell.
Formerly, only SQL Managed Instance supported the creation of those Azure AD object types on behalf of an Azure AD Application (using service principal). Support for this in Azure SQL Database and Azure Synapse Analytics is now in public preview.
This functionality is useful for automated processes where Azure AD objects are created and maintained in Azure SQL Database without human interaction by Azure AD applications. Since service principals could be an Azure AD admin for SQL DB as part of a group or an individual user, automated Azure AD object creation in SQL DB can be executed. This allows for a full automation of a database user creation. This functionality is also supported for system-assigned managed identity and user-assigned managed identity (see the article, What are managed identities for Azure resources?).
Prerequisites
To enable this feature, the following steps are required:
1) Assign a server identity during SQL logical server creation or after the server is created.
See the PowerShell example below:
- To create a server identity during the Azure SQL logical server creation, execute the following command:
New-AzureRmSqlServer -ResourceGroupName <resource group>
-Location <Location name> -ServerName <Server name>
-ServerVersion “12.0” -SqlAdministratorCredentials (Get-Credential)
-AssignIdentity
(See the New-AzureRmSqlServer command for more details)
- For existing Azure SQL logical servers, execute the following command:
Set-AzSqlServer -ResourceGroupName <resource group>
-ServerName <Server name> -AssignIdentity
(See the Set-AzSqlServer command for more details)
To check if a server identity is assigned to the Azure SQL logical
server, execute the following command:
Get-AzSqlServer -ResourceGroupName <resource group>
– ServerName <Server name>
(See the Get-AzSqlServer command for more details)
2) Grant the Azure AD “Directory Readers” permission to the server identity
created above
(For more information, see Provision Azure AD admin (SQL Managed Instance)
How to use it
Once steps 1 and 2 are completed, an Azure AD application with the right permissions can create an Azure AD object (user/group or service principal) in Azure SQL DB. For more information, see the step-by-step tutorial doc ( see Tutorial: Create Azure AD users using Azure AD applications ).
Example
Using SMI (System-assigned Managed Identity) set up as an Azure AD admin for SQL DB,
create an Azure AD application as a SQL DB user.
Preparation
Enable steps 1 and 2 indicated above for the Azure SQL logical server
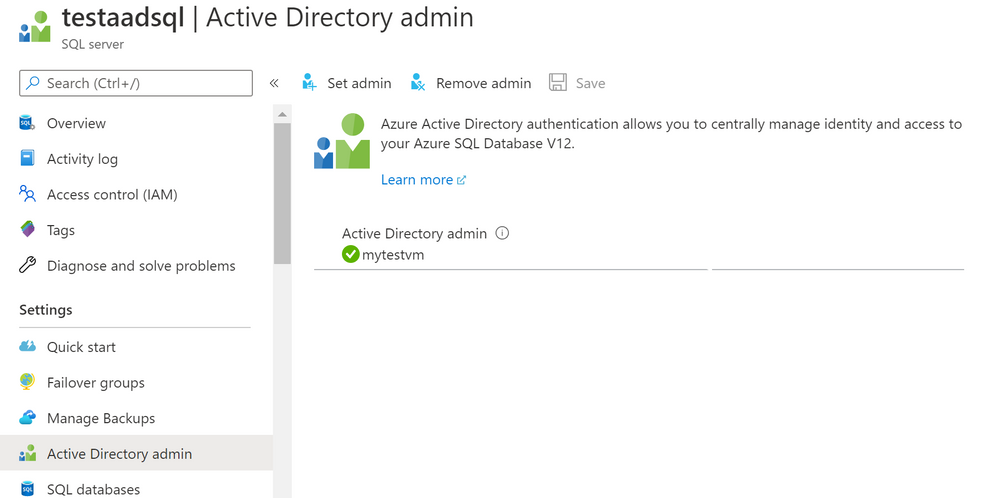
- In the example below, the server name is ‘testaadsql’
- The user database created under this serve is ‘testdb’
- Copy the display name of the application
- In the example below the app name is ‘myapp’
- Using the Azure portal, assign your SMI (display name) as an Azure AD admin for the Azure SQL logical server (see the screenshot below).

- Create Azure AD application user in SQL DB on behalf of the MSI
- To check that the user ‘myapp’ was created in the database ‘testdb’ you can execute the T-SQL command select * from sys.database_principals.
PowerShell Script
# PS script creating a SQL user myapp from an Azure AD application on behalf of SMI “mytestvm”
# that is also set as Azure AD admin for SQ DB
# Execute this script from the Azure VM with SMI name ‘mytestvm’
# Azure AD application – display name ‘myapp’
# This is the user name that is created in SQL DB ‘testdb’ in the server ‘testaadsql’
# Metadata service endpoint for SMI, accessible only from within the VM:
$response = Invoke-WebRequest -Uri ‘http://169.254.169.254/metadata/identity/oauth2/token?api-version=2018-02-01&resource=https%3A%2F%2Fdatabase.windows.net%2F‘ -Method GET -Headers @{Metadata=”true”}
$content = $response.Content | ConvertFrom-Json
$AccessToken = $content.access_token
# Specify server name and database name
# For the server name, the server identity must be assigned and “Directory Readers”
# permission granted to the identity
$SQLServerName = “testaadsql”
$DatabaseName = ‘testdb’
$conn = New-Object System.Data.SqlClient.SQLConnection
$conn.ConnectionString = “Data Source=$SQLServerName.database.windows.net;Initial Catalog=$DatabaseName;Connect Timeout=30”
$conn.AccessToken = $AccessToken
$conn.Open()
# Create SQL DB user [myapp] in the ‘testdb’ database
$ddlstmt = ‘CREATE USER [myapp] FROM EXTERNAL PROVIDER;’
$command = New-Object -TypeName System.Data.SqlClient.SqlCommand($ddlstmt, $conn)
Write-host ” “
Write-host “SQL DDL command was executed”
$ddlstmt
Write-host “results”
$command.ExecuteNonQuery()
$conn.Close()
For feedback/questions on this preview feature, please reach out to the SQL AAD team at SQLAADFeedback@Microsoft.com
by Scott Muniz | Jul 27, 2020 | Uncategorized
This article is contributed. See the original author and article here.
Introduction
With the advent of Artificial Intelligence and Internet of Things, a new paradigm of AIOT solutions is beginning to emerge. This is in part due to hardware advancements that allow for accelerated workloads to run on small form-factor edge devices in addition to software development kits that are targeted to these devices and AI use cases. In this post, we will specifically look at the NVIDIA Jetson family of devices and the NVIDIA DeepStream SDK, a platform that allows for optimized deployment of accelerated AI workloads to a device not much larger than a cell phone.
Video Analytics at the Edge
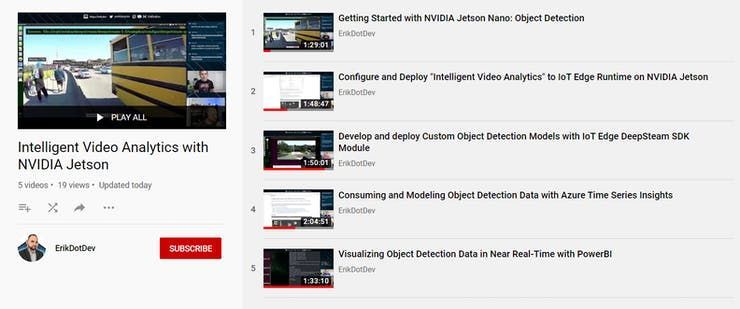
Video sources can be used in combination with Artificial Intelligence to perform a variety of useful tasks. These could include anomaly detection in manufacturing scenarios, self-driving vehicles, or even sorting Lego pieces. Intelligent Video Analytics solutions require a great deal of cross-domain knowledge in order to implement. For example, you need to optimize the acquisition and decoding of frames for the number of cameras involved, techniques for training, accelerating, and optimizing AI Inference workloads, and an ability to publish inference results out to local and remote reporting services. These problems are difficult, but with the use of tools like the NVIDIA DeepStream SDK, much of these problems are solved for you, allowing you to focus on developing a solution that meets your specific requirements. The diagram below depicts the solution we will be developing in this article, take note of the NVIDIA Jetson hardware and inclusion of the DeepStream SDK and Azure Services for reporting.
To demonstrate how to create an Intelligent Video Analytics solution, as part of #JulyOT, we have published a Github repository of best practices in the form of video content and code templates that can theoretically enable you to build an end-to-end custom object detection system with analytics and reporting to the Azure Cloud. The amazing thing about this content is that our videos were recorded live, while building out the entire solution from scratch with developer Erik St. Martin. The important thing to note here is that all of the topics that we will cover were brand new to him and may very well be completely new to you too! This has allowed us a unique opportunity to distill all of the various intricacies involved in developing a custom Intelligent Video Analytics solution into bite-sized chunks, resulting in approximately 8 hours of instructional content designed to teach anyone how to build their own solution!

To begin, you will want to head to the Github repository, then you can head back here to go over each of the modules contained within, with the benefit of some additional background info on the objectives of each module.
Module 1 – Introduction to NVIDIA DeepStream
The NVIDIA DeepStream SDK delivers a complete streaming analytics toolkit for AI based video and image understanding and multi-sensor processing. DeepStream SDK features hardware-accelerated building blocks, called plugins that bring deep neural networks and other complex processing tasks into a stream processing pipeline.
The deepstream offering contains the DeepStream SDK which include an app (deepstream-test5) that is configurable to handle multiple streams and multiple networks for inference. The app can be connected to the Azure IoT Edge runtime to send messages to a configured Azure IoT Hub.
The DeepStream SDK is offered in the Azure Marketplace as an IoT Edge Module. We will employ this mechanism to configure and run a DeepStream workload on an NVIDIA embedded device.
Before continuing, it is highly suggested to familiarize with the DeepStream SDK Documentation, as it will provide you with the details on how to customize the Intelligent Video Analytics solution to your needs.
We cover pretty much everything you need to know in this 90 minute livestream titled “Getting Started with NVIDIA Jetson: Object Detection”. We highly recommend that you give a watch before proceeding to the next section.
Module 2 – Configure and Deploy “Intelligent Video Analytics” to IoT Edge Runtime on NVIDIA Jetson
In this section we will install and configure the IoT Edge Runtime on an NVIDIA Jetson Device. This will require that we deploy a collection of Azure Services to support the modules that are defined in the associated IoT Edge Deployment for IoT Hub.
In this section, we will only need to deploy an Azure IoT Hub and Azure Storage Account. If you are curious about the pricing involved for these services, they are summarized below:
-
-
-
Azure Stream Analytics on Edge Pricing (Technically, even though we are using a job that is not contained in the end-users subscription, billing does occur per device that runs the DeepStreamAnalytics Module)
Module 3 – Develop and deploy Custom Object Detection Models with IoT Edge DeepStream SDK Module
At this point, you should have deployed a custom DeepStream Configuration that is able to consume input from your desired sources. We will now look into ways to customize the object detection model that is employed in that configuration to enable to you to create a fully customized Intelligent Video Analytics Pipeline.
This section will assume that you might be brand new to the world of Computer Vision / Artificial Intelligence and that you are interested in the end goal of using a Custom Object Detection model that detects objects that you train it to detect. If you are interested in obtaining accurate detection of common objects immediately, without the need to train up a custom model, we will also demonstrate how to employ an academic-grade pre-trained object detection model (YoloV3) which has been trained on 80 common objects.
Module 4 – Filtering Telemetry with Azure Stream Analytics at the Edge and Modeling with Azure Time Series Insights
In this module we will explain how to flatten, aggregate, and summarize DeepStream object detection results using Azure Stream Analytics on Edge and forward that telemetry to our Azure IoT Hub. We will then introduce a new Azure Service known as Time Series Insights. This service will take in input via an event-source from our IoT Hub to allow us to analyze, query, and detect anomalies within the object detection data produced by our IoT Edge device.
Module 5 – Visualizing Object Detection Data in Near Real-Time with PowerBI
Power BI is a business analytics service provided by Microsoft. It provides interactive visualizations with self-service business intelligence capabilities, where end users can create reports and dashboards by themselves, without having to depend on information technology staff or database administrators.
In this module, we will cover how to forward object detection telemetry from our Azure IoT Hub into a PowerBI dataset using a cloud-based Azure Stream Analytics job. This will allow us to build a report that can be refreshed to update as detections are produced. We will then Publish a PowerBI report and convert it to a live dashboard. From there, we can query our data with natural language and interact with our data in near real-time.
In order to complete this module, it will require that you have an active PowerBI account. If you need to create one, this video walks through the process.
Conclusion
At this point, assuming you have gone through all of the included materials, you now know how to develop DeepStream applications using a variety of video input sources (USB Camera / RTSP / Looping File), how to containerize a DeepStream Workload for deployment as an IoT Edge module, utilize various services to gather samples, train, and deploy a custom object detection model, and how to publish results into Cloud-based services like Azure Time Series Insights and PowerBI. This is a HUGE accomplishment, and likely a very employable skillset at this time. The ~8 hour time investment for learning these techniques is necessary to fully demonstrate all of the components that make up an Intelligent Video Analytics service. It is our hope that you have found this content valuable and able to apply it to your specific scenario. We want to know what you are building! If you have replicated this project and modified the architecture to your use case, we’d love to see a link or description in the comments.
Until next time…
Happy Hacking!

by Scott Muniz | Jul 27, 2020 | Alerts, Microsoft, Technology, Uncategorized
This article is contributed. See the original author and article here.

“Cybersecurity is all about combining the power of new technologies, like Azure Sentinel, with the power of people,” said Ann Johnson, CVP Security, Compliance, and Identity, BD at Microsoft. “The Azure Sentinel Hackathon is an opportunity to bring new cybersecurity ideas to life that will help address evolving cyber challenges.”
When we kicked off the first Azure Sentinel Hackathon a couple of months ago, we challenged participants to build end-to-end cybersecurity solutions for Azure Sentinel, and they delivered!
We were excited to receive diverse submissions that deliver enterprise value by collecting data, managing security, detecting, hunting, investigating, and responding to cybersecurity threats. It’s truly inspiring to see the immense creativity and effort that participants put into their solutions. Please join us in congratulating the winners of the Azure Sentinel Hackathon.
First place: Ops Brew
Ops Brew from Vishnu KS and team, enables enterprises to minimize time spent in log pipelines setup by facilitating log streaming from multiple disjointed systems to advanced platforms, including Azure Sentinel. This solution also supports data transformation, normalization and filtering before Azure Sentinel ingestion, helping with easy data onboarding and reduced bandwidth consumption for log data traffic. Definitely take a look at this solution at https://devpost.com/software/ops_brew
“A sophisticated solution for enterprises and service providers to ingest normalized data into Azure Sentinel!”, said John Lambert, Distinguished Engineer and General Manager, Microsoft Threat Intelligence Center.
 Ops Brew
Runner up: goPuff’s Sentry Platform
goPuff’s Sentry Platform from Chris Maenner and team is a server-less incident response platform to detect and alert on network and communication infrastructure. This solution is comprised of Slack and Cisco Meraki data ingestion into Azure Sentinel, followed by hunting queries, workbooks and playbooks to help IT Operations staff easily identify and remediate threats. See the solution at https://devpost.com/software/gopuff-s-sentry-platform
“Really lights up the Azure Sentinel response capabilities with their playbooks”, said Maarten Goet, Director of Cybersecurity, Wortell and Microsoft MVP.
 goPuff’s Sentry Platform
Popular Choice: MIDAS
MIDAS (Microcluster-Based Detector of Anomalies in Edge Streams) from Siddharth Bhatia, finds anomalies, intrusions, DoS attacks, financial fraud, fake ratings on dynamic graphs in real-time. It can be used to create analytics in Azure Sentinel to detect and alert on micro cluster suspicious patterns of data. Take a look at the solution at https://devpost.com/software/midas-5fw93u.
“This was truly a creative approach to anomaly detection”, said Ann Johnson.
 MIDAS
MIDAS
Honorable mention: Protect Slack with Azure Sentinel
We’d like to recognize Protect Slack with Azure Sentinel from Priyadarshini Murugan and team as an honorable mention. This is an end-to-end solution that includes data ingestion, analytics and hunting to secure and monitor Slack using Azure Sentinel. Try out this solution at https://devpost.com/software/azure-sentinel-project.
“Fully working solution for a Slack connector including analytics rules; bonus: full solution published on Github!”, said Maarten Goet.
 Protect Slack with Azure Sentinel
Again, congratulations to the winners and huge thanks to all the hackathon participants. We also wanted to take a moment to thank our all-star panel of judges for taking time out of their busy schedules to review and provide feedback on all the submissions. Many thanks for the support to Ann Johnson, John Lambert and Maarten Goet.
 Azure Sentinel Hackathon Judges
This Hackathon is just the beginning, and hopefully has inspired you to be a member of the Azure Sentinel Threat Hunters community. Get started now by joining the Azure Sentinel Threat Hunters GitHub community and follow the guidance. Let us know your feedback using any of the channels listed in the Resources.

Recent Comments