by Contributed | Jun 11, 2021 | Technology
This article is contributed. See the original author and article here.
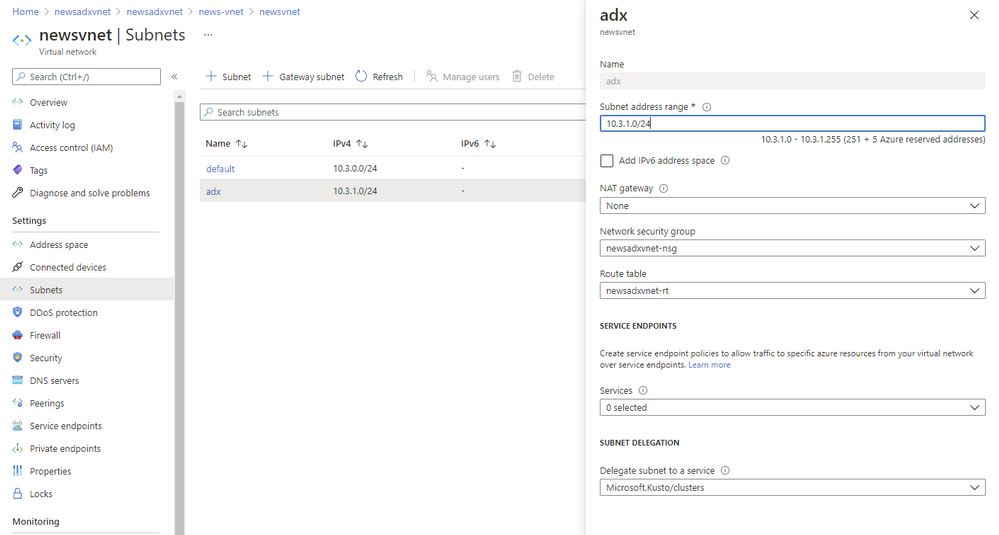
Subnet delegation enables you to designate a specific subnet for an Azure PaaS service of your choice that needs to be injected into your virtual network. When you delegate a subnet to Azure Data Explorer, you allow the service to establish some basic network configuration rules for that subnet, which help ADX to operate in a stable manner.
As a result, ADX adds a set of Network Intent Policies policies which are required for the service to work properly. In the past you had to create all of those Input and Output Network Security Group rules yourself and everytime we had to change some of the IPs you had to change some of them.

Benefits
Since beginning of June 2021 we are enforcing subnet delegation on the subnet you like to use for ADX. However we are aware of scenarios where customers need to opt-out because of certain requirements (Custom Private Link in the same subnet or company policies in general). For those situations we allow our customer to opt-out using the “preview features” configuration in the Azure portal. If you register for “Azure Data Explorer: opt out of subnet delegation” your ADX service deployments will not enforce subnet delegation to be enabled.


by Contributed | Jun 11, 2021 | Technology
This article is contributed. See the original author and article here.
Things are warming up in the northern hemisphere and heating up here at Microsoft with all the additional service updates becoming available. News the AzUpdate team will be covering this week includes Azure Migrate private endpoint support is now available in public preview, The need to upgrade to TLS 1.2 or above for secure MARS agent backups by September 1, 2020, updates in policy compliance for resource type policies and a powerful Microsoft Learn module of the week.
Azure Migrate private endpoint support available in public preview
Azure Migrate Private Link support enables organizations to securely connect to the Azure Migrate service over an ExpressRoute private peering or a site-to-site VPN connection. Azure Migrate: Discovery and Assessment and Azure Migrate: Server Migration tools can now be used to securely discover, assess, and migrate servers over a private network using Azure Private Link.
Azure Migrate Private Link support can now:
Leverage existing ExpressRoute private peering circuits for greater migration velocity.
Adhere to organizational policies and requirements to not traverse public endpoints.
Achieve additional network-level protection and guard against data exfiltration risks.
The functionality is now in public preview in all public regions. Get started on how to use Azure Migrate with private endpoints. Learn how to replicate data over ExpressRoute with Azure Migrate.
Sarah also has a great Azure Migrate overview video you can review.
Azure Backup: Upgrade to TLS 1.2 or above for secure MARS agent backups by September 1, 2021
As a part of Azure-wide initiative towards using TLS 1.2 by default and removing dependencies on older versions, the Azure Backup service is working towards shifting away from legacy protocols to ensure improved security for your backup data. Hence, older versions like TLS 1.0 and TLS 1.1 will no longer be supported. These changes are expected to take effect on September 1, 2021.
In order to continue using Azure Backup without any interruptions, please ensure all resources using the Microsoft Azure Recovery Services (MARS) agent are enabled to use TLS 1.2 or above. Please refer to the steps documented in our public documentation to take appropriate action to make sure your server configuration does not force use of legacy protocols.
General availability: Update in Policy Compliance for Resource Type Policies
Starting on June 16, 2021, policies where resource type is the only evaluation criterion (e.g. Allowed Resource Types, Disallowed Resource Types) will not have ‘compliant’ resources stored in compliance records. This means that if there are zero non-compliant resources, the policy will show 100% compliance. If there is one or more non-compliant resources, the policy will show 0% compliance, with the total resources equaling the non-compliant resources. This change is to address feedback that resource type policies skew overall compliance percentage data (which are calculated as compliant + exempt resources out of the total resources across all policies, deduped for unique resource IDs) due to a high number of total resources.
The resource type policy has a high total resource count, because it’s the only policy where all resources in the scope of the assignment count towards ‘total resources’. Other policies only consider applicable resource types to count towards total resources (i.e. VM extension policy would only count VMs in total resources).
Going forward, the resource type policies will only count the non-compliant resources (when ‘if’ statement evaluates to true) towards the total resources. So, if there are zero-non-compliant resources, the policy will show 100% compliance. Alternatively, if there are one or more non-compliant resources, the policy will show 0% compliance (since non-compliant resources = total resources). Aggregated with other policies, this logic would provide more accurate assessment of your overall environment.
If this is a concern, and if you’d like other resource types to be reflected as compliant resources, please include the statement ‘allOf:[ field: type in [list of resource types to be counted towards total]],’, as in the built-in policy definition ‘Storage accounts should be migrated to new Azure Resource Manager resources’.
If you have a support plan and need technical help, please create a support request.
Learn more.
Community Events
MS Learn Module of the Week
Introduction to Power Automate
Microsoft Power Automate is all about process automation. Power Automate allows anyone with knowledge of the business process to create repeatable flows that when triggered leap into action and perform the process for them.

Modules include:
- What is Power Automate and the business value it creates
- How two business are using Power Automate to provide better customer experiences
- See a video walkthrough of Power Automate
Learn more here: Introduction to Power Automate

Let us know in the comments below if there are any news items you would like to see covered in the next show. Be sure to catch the next AzUpdate episode and join us in the live chat.
by Contributed | Jun 11, 2021 | Technology
This article is contributed. See the original author and article here.
With the growth of internet and mobile, building the cross platform real-time chat experience into your application also becomes a very common need, for example patient and doctor chat in healthcare, customer support chat in eCommerce, student and teacher chat in remote education, players chat in eGaming, instant chat for social media or live video stream, and so on. The real-time chat experience offers several values to your application to help your customers success:
- Instant and efficient communication to faster problem resolution.
- Collaboration and purposeful conversation to overcome business challenges.
- Smooth built-in experience to improve the customer service and loyalty.
- Cross platform support to empower the customer to discovery easily.
In general, there are some fundamental and critical needs for an application with build-in real-time chat experience:
- Real-time chat experience with users.
- Management of user and group.
- Notification and popup.
- AI-enabled, e.g., language moderator, bot, etc.
- Typing indicator.
But it is not easy to build these functionalities into your application from scratch. You may have the issues to achieve the real-time performance, handles hosting, scalability, load balancing and other infrastructure related challenges, adapt with multiple client platforms, etc. Now, the Azure Web PubSub service which is a fully managed service give the opportunity to you to enable the real-time capability to your application with native and serverless WebSockets support.
Let’s follow with Ben Coleman together to build a serverless Chatr web application and learn how does he leverage the advantages of the Azure Web PubSub and Azure Static Web Apps to achieve this easily and quickly.
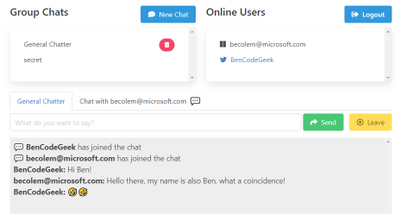
What’s the Chatr?
Chatr is a simple real-time, multi-user chat application, highlighting the ease of building applications on top of two of Azure services: Azure Web PubSub and Azure Static Web Apps. The Chatr application provides many of the features you might expect; a way to sign in and authenticate, group chats, user to user private chats, a global online user list, idle (away from keyboard) detection and more. However it was built to be a way to learn and showcase possibilities rather than a fully fledged and production grade chat system.
Chatr consists of four components:
- The client or frontend, which users interact with – This is written in JavaScript and uses Vue.js
- The backend service, which provides message processing & event handling, written in Node.js
- A globally available but secure Websockets service – provided by Azure Web PubSub
- Persistence state storage and key value store – provided by Azure Table Storage
A diagram will help illustrate how these all interact, and some of the main message & data flows. Let’s explore these components in more detail.

Use Web PubSub to build the scalable backend
The Azure WebPubSub service works hand in hand with the Chatr backend, to provide the core chat functionality. This is done through ‘event handlers’ within Azure WebPub sub, these handlers enable an upstream service to receive client side WebSocket messages as “events”. These events are HTTP messages, which the service can then react to. These events supports both a range of built-in system events (e.g. client connecting or disconnecting) but also custom application specific events, in the case of Chatr there are many of these such events, for example “joinChat” or “userEnterIdle” etc.
The backend uses the service client of the Web PubSub SDK for Node.js, which can be instantiated easily. Here we are storing configuration details such as the connection string in an Azure Function App Settings, and obtain it them securely through environmental variables.
const { WebPubSubServiceClient } = require('@azure/web-pubsub')
const CONN_STR = process.env.PUBSUB_CONNECTION_STRING
const HUB = process.env.PUBSUB_HUB
const serviceClient = new WebPubSubServiceClient(CONN_STR, HUB)
Within the Function itself we can handle any event sent to us from clients by binding to HTTP trigger POST requests and processing them as follows. For example, the code below shows how Chatr handles when a user has created a new shared group–chat. When doing so they send an event called “createChat”, when handling this we get the properties we require from both the headers and the HTTP body, (the special ‘ce’ headers are populated by Azure Web PubSub), then store into state and finally notify all clients about the new chat with an outbound message.
const eventName = req.headers['ce-eventname']
const userId = req.headers['ce-userid']

if (eventName === 'createChat') {
  // Build custom event payload
    const chatPayload = {
    id: req.body.id,
    name: req.body.name,
    owner: userId
    }

  // ... Update state, removed for brevity ...

  // Send message to all clients with custom JSON payload
  // Will be routed via Azure Web PubSub with WebSocket protocol
  serviceClient.sendToAll({
    chatEvent: 'chatCreated',
    data: JSON.stringify(chatPayload),
  })
}
Build frontend with extensive platform and host easily with Static Web Apps
The Chatr frontend consists of a JavaScript static app or SPA (single page application) built on the Vue.js framework, this is hosted using the Azure Static Web App service as a set of HTML and JS files. This Azure service aside from just hosting static content, also provides Chatr a means to sign in and authenticate users and also a way to host the backend Azure Function service. The frontend establishes a secure connection to Azure Web PubSub using WebSockets, no SDK or client libraries are required making it quick easy to use. Let’s walk through the frontend together.
Setup connection between application and backend service
The clients first request a way to access to Azure Web PubSub by calling a REST endpoint on our backend which in turn obtains a client access URL (which includes an access token) this is done using the same serviceClient described above, as this is done server side it provides a way to restrict access and secure the application. In the case of Chatr all users are permitted to request an access URL. The userId in the code below has been fetched previously through a call to Azure Static WebApps, for the purposes of Azure Web PubSub. It’s simply a string and has no special meaning.
// Get URL & token to connect to Azure Web Pubsub
res = await fetch(`/api/getToken?userId=${userId}`)
let token = await res.json()

// Now connect to Azure Web PubSub using the URL we obtained
let ws = new WebSocket(token.url, 'json.webpubsub.azure.v1')
We only use standard modern JavaScript APIs like fetch and WebSocket this means the Chatr frontend can be deployed without any bundling or WebPack stage. Also note how we use the ‘json.webpubsub.azure.v1′ subprotocol when establishing the connection, this extension to plain WebSockets provides a range of additional capabilities which are used by Chatr such as; client to client messaging (without a round trip to the server), a means to join send messages to groups (which is how Chatr provides group chats) and also a way to send custom events which are routed to the service as described above.
Send custom event or message
Sending a custom event from the client is very simple, for example.
ws.send(
  JSON.stringify({
    type: "event",
    event: "createChat",
    dataType: "json",
    data: { name: chatName, id: chatId },
  })
);
Chat messages between users are sent a very similar way, except leveraging the ‘sendToGroup‘ message type. Rather than plain text strings (which are also supported) we enrich the messages we send with meta data such as the userId of who sent the message and send a JSON payload. It’s important to note these messages are not relayed by the Chatr backend we described above, they are handled entirely by the Azure Web PubSub service without any backend or server code.
ws.send(
  JSON.stringify({
    type: "sendToGroup",
    group: chatId,
    dataType: "json",
    data: {
      message: message,
      fromUserId: userId,
    },
  })
);
Summary
We’ve just scratched the surface of what the Chatr sample app does, and we’ve not covered details such as how state is stored using Azure Tables or how the authentication wrappers of Azure Static WebApps are used. However I hope what we have shown illustrates some of the power and flexibility of Azure Web PubSub. If you are looking for more details about this application, you can refer to the Chatr repo on GitHub where the code is hosted, along with information and docs on how to deploy it to Azure and run it yourself.
Next Steps
If you are trying to build your first real-time application with Azure Web PubSub, you could also get more helpful resources from the getting stated contents. We are looking forward your feedback and ideas to help us become better via Azure Feedback Forum!
by Contributed | Jun 11, 2021 | Technology
This article is contributed. See the original author and article here.
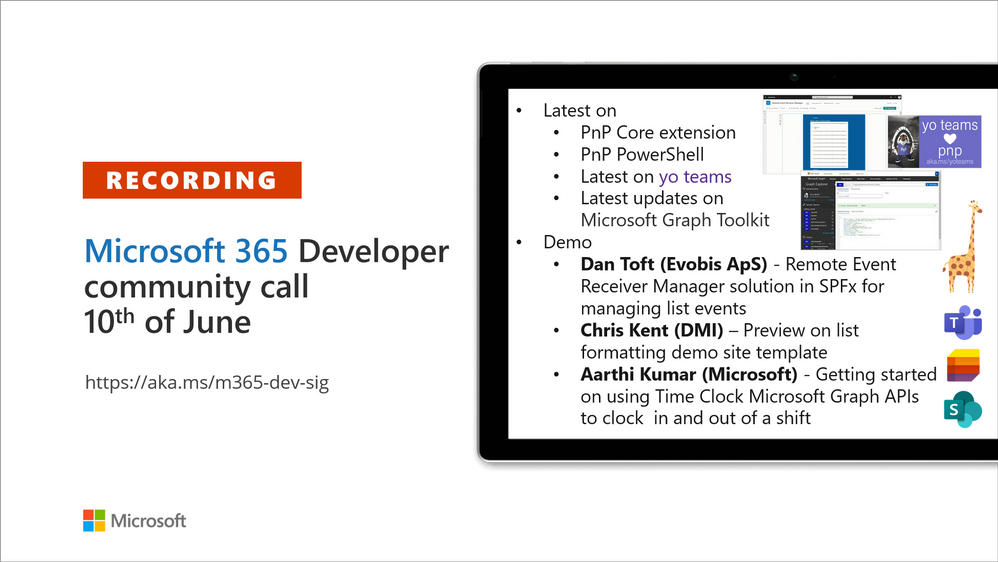
Recording of the Microsoft 365 – General M365 development Special Interest Group (SIG) community call from June 10, 2021.
Call Summary
Summer break and community call schedule updates reviewed. You are invited to join the Viva Connections private preview! Preview the new Microsoft 365 Extensibility look book gallery. Looking to get started with Microsoft Teams development? Don’t miss out our Teams samples gallery, and the new Microsoft 365 tenant – script samples gallery – scripts for PowerShell and CLIs. Sign up and attend one of a growing list of events hosted by Sharing is Caring this month. Check out the new PnP Teams Quickstart.
Recent PnP project releases include: PnP Core SDK v1.2.0 GA, PnP Framework v1.5.0 GA, PnP PowerShell v1.6.0 GA, Yo teams – generator-teams v3.2.0 GA, yoteams-build-core V1.2.0 GA + v1.2.1 Preview, yoteams-deploy v1.0.0 GA and finally component updates to Microsoft Graph Toolkit (MGT) v.2.2.0 GA.
Open-source project status: (Bold indicates new this call)
Project |
Current Version |
Release/Status |
PnP .NET Libraries – PnP Framework |
v1.5.0 GA |
Version 1.6.0 – Summer 2021 |
PnP .NET Libraries – PnP Core SDK |
v1.2.0 GA |
Version 1.3.0 – Summer 2021 |
PnP PowerShell |
v1.6.0 GA |
|
Yo teams – generator-teams |
v3.2.0 GA |
|
Yo teams – yoteams-build-core |
v1.2.0 GA, v1.2.1 Preview |
|
Yo teams – yoteams-deploy |
v1.1.0 GA |
|
Yo teams – msteams-react-base-component |
v3.1.0 |
|
Microsoft Graph Toolkit (MGT) |
v2.2.0 GA |
Regular component updates |
Additionally, 1 new Teams samples were delivered in the last 2 weeks. The host of this call was Vesa Juvonen (Microsoft) |@vesajuvonen. Q&A takes place in chat throughout the call.
Actions:
- Join on the Viva Connections private preview! | aka.ms/viva/connections/preview/register
- Feedback wanted: Regarding PnP PowerShell – “What if we did not return classic CSOM objects from the cmdlets?” Comments to: @erwinvanhunen.
- Save the date to the Microsoft Teams monthly community call on the 15th of June @ 8 AM PT | https://aka.ms/microsoftteamscommunitycall
- Register for Sharing is Caring Events:
- First Time Contributor Session – June 29th (EMEA, APAC & US friendly times available)
- Community Docs Session – June 23rd
- PnP – SPFx Developer Workstation Setup – June 17th
- PnP SPFx Samples – Solving SPFx version differences using Node Version Manager – June 24th
- Ask Me Anything – Teams Dev – July
- First Time Presenter – June 30th
- More than Code with VSCode – June 16th
- Maturity Model Practitioners – June 15th
- PnP Office Hours – 1:1 session – Register
- Download the recurrent invite for this call – http://aka.ms/m365-dev-sig
- Call attention to your great work by using the #PnPWeekly on Twitter.
Microsoft Teams Development Samples: (https://aka.ms/TeamsSampleBrowser)

Thank you for joining for today’s PnP Community call. The auditorium was packed.
Demos delivered in this session
Remote Event Receiver Manager solution in SPFx for managing list events –
A very simple web part that lets users view, add and delete remote event receivers in lists. Review what is a Remote Event Receiver, Strengths and Weaknesses, and when/not to consider using Power Automate to accomplish task. Use the sample to quickly identify Event Receivers in lists across a tenant without having to connect to PowerShell or go to a REST API.
Preview on list formatting demo site template – as an alternative to going to GitHub to pull samples, the Community team is experimenting with an additional layout option – List Formatting Sample Showcase pages that display fully functional samples Power Users can manipulate, drill in to view/customize data, and get additional details in GitHub – from within a browser! You may even adopt this formatting in your own tenant. Available soon.
Getting started on using Time Clock Microsoft Graph APIs to clock in and out of a shift – the time tracking component (Time Clock APIs) in the Teams Shifts Application provides clock in / out, timesheet edit and more capabilities that auto-syncs to Payroll / T&A apps like Cronos, Workday, ADP, Ceridian SAP. Call the APIs to integrate with your customer’s payroll and T&A systems using Time Clock APIs (beta). Supports CRUD operations and WebHooks. Request handling guidance in the documentation.
Thank you for your work. Samples are often showcased in Demos.
Topics covered in this call
- PnP .NET library updates – Bert Jansen (Microsoft) | @O365bert – 10:31
- PnP PowerShell updates – Erwin van Hunen (Valo Intranet) | @erwinvanhunen – 12:59
- yo Teams updates – Wictor Wilén (Avanade) | @wictor – 14:23
- Microsoft Graph Toolkit updates – Beth Pan (Microsoft) | @beth_panx – 16:42
- Microsoft Teams Samples – Bob German (Microsoft) | @Bob1German – 18:22
Demo: Remote Event Receiver Manager solution in SPFx for managing list events – Dan Toft (Evobis ApS) | @tanddant – 20:22
Demo: Preview on list formatting demo site template – Chris Kent (DMI) | @theChrisKent – 31:32
Demo: Getting started on using Time Clock Microsoft Graph APIs to clock in and out of a shift – Aarthi Kumar (Microsoft) – 41:20
Resources:
Additional resources around the covered topics and links from the slides.
General resources:
Upcoming Calls | Recurrent Invites:
General Microsoft 365 Dev Special Interest Group bi-weekly calls are targeted at anyone who’s interested in the general Microsoft 365 development topics. This includes Microsoft Teams, Bots, Microsoft Graph, CSOM, REST, site provisioning, PnP PowerShell, PnP Sites Core, Site Designs, Microsoft Flow, PowerApps, Column Formatting, list formatting, etc. topics. More details on the Microsoft 365 community from http://aka.ms/m365pnp. We also welcome community demos, if you are interested in doing a live demo in these calls!
You can download recurrent invite from http://aka.ms/m365-dev-sig. Welcome and join in the discussion. If you have any questions, comments, or feedback, feel free to provide your input as comments to this post as well. More details on the Microsoft 365 community and options to get involved are available from http://aka.ms/m365pnp.
“Sharing is caring”
Microsoft 365 PnP team, Microsoft – 11th of June 2021
by Contributed | Jun 11, 2021 | Technology
This article is contributed. See the original author and article here.
This article helps you to Deploy an existing Asp.net Core Web API project as Guest executable to Service Fabric Cluster.
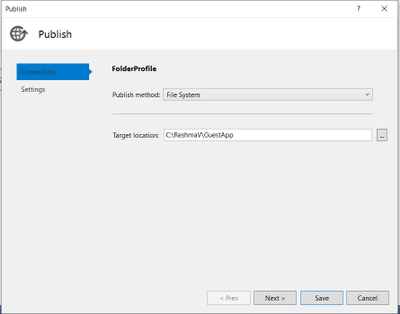
Step 1: Publish Asp.Net Core Application to Folder.
Right-click the .NET Core project and click Publish.
Create a custom publish target and name it appropriately to describe the final published service.

You have now published the service to a directory.
Go to the path where Project is published, you will see an exe created for your project.

Step 2: Creating a Guest Service Fabric Application
- Choose File -> New Project and Create a Service Fabric Application. The template can be found under Visual C# -> Cloud. Choose an appropriate project name as this will reflect the name of the application that is deployed on the Cluster.
- Choose the Guest Executable template. Under the Code Package Folder, browse to previously published directory of service.
- Under Code Package Behavior you can specify either Add link to external folder or Copy folder contents to Project. You can use the linked folders which will enable you to update the guest executable in its source as a part of the application package build.
- Choose the Program that needs to run as service and specify the arguments and working directory if they are different. In below example we are using Code Package.
- Click on Create.

If your Service needs an endpoint for communication, you can now add the protocol, port, and type to the ServiceManifest.xml
For example:
<Endpoint Protocol=”http” Name=”AccountServiceEndpoint” Type=”Input” Port=”5000″ />
The Application Url and Port can be verified from launchSettings.json of your Asp.Net Core Web API project.
Sample for reference:
{
“iisSettings”: {
“windowsAuthentication”: false,
“anonymousAuthentication”: true,
“iisExpress”: {
“applicationUrl”: “http://localhost:62871“,
“sslPort”: 0
}
},
“$schema”: “http://json.schemastore.org/launchsettings.json“,
“profiles”: {
“IIS Express”: {
“commandName”: “IISExpress”,
“launchBrowser”: true,
“launchUrl”: “weatherforecast”,
“environmentVariables”: {
“ASPNETCORE_ENVIRONMENT”: “Development”
}
},
“webapi2”: {
“commandName”: “Project”,
“launchBrowser”: true,
“launchUrl”: “weatherforecast”,
“environmentVariables”: {
“ASPNETCORE_ENVIRONMENT”: “Development”
},
“applicationUrl”: “https://localhost:5001;http://localhost:5000“
}
}
}
Service Manifest file:
<Endpoints>
<Endpoint Name=”GuestExecProjectTypeEndpoint” Protocol=”http” Type=”Input” Port=”5000″ />
</Endpoints>
Now, you are set to deploy the Guest Executable Project to Service Fabric cluster.
Step 3: Deploy the Guest Application to Azure Service Fabric cluster

From SFX:

Step 4: Accessing the Web API from Cluster Node
RDP inside the node and Hit the API endpoint.
Eg: http://localhost:5000/weatherforecast

In case you are not sure, in which port application is listening, please find an alternative way to check:
If deployed in Azure:
- RDP inside the node and get the Process ID of exe.
- Run netstat -ano

Reference: https://docs.microsoft.com/en-us/azure/service-fabric/service-fabric-deploy-existing-app
https://docs.microsoft.com/en-us/azure/service-fabric/service-fabric-guest-executables-introduction

Recent Comments