by Scott Muniz | Feb 23, 2023 | Security, Technology
This article is contributed. See the original author and article here.
| walrusirc — walrusirc |
A vulnerability was found in juju2143 WalrusIRC 0.0.2. It has been rated as problematic. This issue affects the function parseLinks of the file public/parser.js. The manipulation of the argument text leads to cross site scripting. The attack may be initiated remotely. Upgrading to version 0.0.3 is able to address this issue. The name of the patch is 45fd885895ae13e8d9b3a71e89d59768914f60af. It is recommended to upgrade the affected component. The associated identifier of this vulnerability is VDB-220751. |
2023-02-13 |
not yet calculated |
CVE-2015-10079
MISC
MISC
MISC
MISC |
|
mozilla — fierfox_for_ios
|
Scanning a QR code that contained a javascript: URL would have resulted in the Javascript being executed. |
2023-02-16 |
not yet calculated |
CVE-2019-17003
MISC |
|
mozilla — fierfox_esr
|
The Raccoon attack is a timing attack on DHE ciphersuites inherit in the TLS specification. To mitigate this vulnerability, Firefox disabled support for DHE ciphersuites. |
2023-02-16 |
not yet calculated |
CVE-2020-12413
MISC
MISC |
| mvp-player — mvp |
An issue in MPV v.0.29.1 fixed in v0.30 allows attackers to execute arbitrary code and crash program via the ao_c parameter. |
2023-02-17 |
not yet calculated |
CVE-2020-19824
MISC |
| kimai2 — kimai2 |
Cross Site Scripting (XSS) vulnerability in kevinpapst kimai2 1.30.0 in /src/Twig/Runtime/MarkdownExtension.php, allows attackers to gain escalated privileges. |
2023-02-15 |
not yet calculated |
CVE-2020-19825
MISC
MISC |
| kliqqi-cms — kliqqi-cms |
SQL Injection vulnerability in Kliqqi-CMS 2.0.2 in admin/admin_update_module_widgets.php in recordIDValue parameter, allows attackers to gain escalated privileges and execute arbitrary code. |
2023-02-15 |
not yet calculated |
CVE-2020-21119
MISC |
| uqcms — uqcms |
SQL Injection vulnerability in file homecontrolscart.class.php in UQCMS 2.1.3, allows attackers execute arbitrary commands via the cookie_cart parameter to /index.php/cart/num. |
2023-02-15 |
not yet calculated |
CVE-2020-21120
MISC
MISC |
| online_doctor_appointment_booking_system — online_doctor_appointment_booking_system |
SQL Injection vulnerability in Projectworlds Online Doctor Appointment Booking System, allows attackers to gain sensitive information via the q parameter to the getuser.php endpoint. |
2023-02-17 |
not yet calculated |
CVE-2020-29168
MISC
MISC
MISC |
| kong — lua-multipart |
A vulnerability was found in Kong lua-multipart 0.5.8-1. It has been declared as problematic. This vulnerability affects the function is_header of the file src/multipart.lua. The manipulation leads to inefficient regular expression complexity. Upgrading to version 0.5.9-1 is able to address this issue. The name of the patch is d632e5df43a2928fd537784a99a79dec288bf01b. It is recommended to upgrade the affected component. VDB-220642 is the identifier assigned to this vulnerability. |
2023-02-12 |
not yet calculated |
CVE-2020-36661
MISC
MISC
MISC
MISC
MISC |
| mozilla — bleach |
bleach.clean behavior parsing style attributes could result in a regular expression denial of service (ReDoS). Calls to bleach.clean with an allowed tag with an allowed style attribute are vulnerable to ReDoS. For example, bleach.clean(…, attributes={‘a’: [‘style’]}). |
2023-02-16 |
not yet calculated |
CVE-2020-6817
MISC
MISC |
| intel — 3rd_gen_intel_xeon_scalable_processor |
Improper access control in the BIOS firmware for some Intel(R) Processors may allow a privileged user to potentially enable an escalation of privilege via local access. |
2023-02-16 |
not yet calculated |
CVE-2021-0187
MISC |
|
mozilla — bleach
|
A mutation XSS affects users calling bleach.clean with all of: svg or math in the allowed tags p or br in allowed tags style, title, noscript, script, textarea, noframes, iframe, or xmp in allowed tags the keyword argument strip_comments=False Note: none of the above tags are in the default allowed tags and strip_comments defaults to True. |
2023-02-16 |
not yet calculated |
CVE-2021-23980
MISC
MISC |
| vivo — frame_service |
The framework service handles pendingIntent incorrectly, allowing a malicious application with certain privileges to perform privileged actions. |
2023-02-17 |
not yet calculated |
CVE-2021-26277
CONFIRM |
| phpfusion — phpfusion |
An issue in Php-Fusion v9.03.90 fixed in v9.10.00 allows authenticated attackers to cause a Distributed Denial of Service via the Polling feature. |
2023-02-17 |
not yet calculated |
CVE-2021-3172
MISC
MISC |
| libraw — libraw |
Buffer Overflow vulnerability in LibRaw linux/unix v0.20.0 allows attacker to escalate privileges via the LibRaw_buffer_datastream::gets(char*, int) in /src/libraw/src/libraw_datastream.cpp. |
2023-02-17 |
not yet calculated |
CVE-2021-32142
MISC
MISC
MISC
MISC |
| mosn — mosn |
Authentication vulnerability in MOSN v.0.23.0 allows attacker to escalate privileges via case-sensitive JWT authorization. |
2023-02-17 |
not yet calculated |
CVE-2021-32163
MISC
MISC |
| schism_tracker — schism_tracker |
An issue in Schism Tracker v20200412 fixed in v.20200412 allows attacker to obtain sensitive information via the fmt_mtm_load_song function in fmt/mtm.c. |
2023-02-17 |
not yet calculated |
CVE-2021-32419
MISC
MISC |
| exponent-cms — exponent-cms |
SQL Injection vulnerability in Exponent-CMS v.2.6.0 fixed in 2.7.0 allows attackers to gain access to sensitive information via the selectValue function in the expConfig class. |
2023-02-17 |
not yet calculated |
CVE-2021-32441
MISC
MISC |
| moby — hyperkit |
HyperKit is a toolkit for embedding hypervisor capabilities in an application. In versions 0.20210107 and prior of HyperKit, `virtio.c` has is a call to `vc_cfgread` that does not check for null which when called makes the host crash. This issue may lead to a guest crashing the host causing a denial of service. This issue is fixed in commit df0e46c7dbfd81a957d85e449ba41b52f6f7beb4. |
2023-02-17 |
not yet calculated |
CVE-2021-32843
MISC
MISC
CONFIRM |
| moby — hyperkit |
HyperKit is a toolkit for embedding hypervisor capabilities in an application. In versions 0.20210107 and prior of HyperKit, ` vi_pci_write` has is a call to `vc_cfgwrite` that does not check for null which when called makes the host crash. This issue may lead to a guest crashing the host causing a denial of service. This issue is fixed in commit 451558fe8aaa8b24e02e34106e3bb9fe41d7ad13. |
2023-02-17 |
not yet calculated |
CVE-2021-32844
MISC
MISC
CONFIRM |
| moby — hyperkit |
HyperKit is a toolkit for embedding hypervisor capabilities in an application. In versions 0.20210107 and prior of HyperKit, the implementation of `qnotify` at `pci_vtrnd_notify` fails to check the return value of `vq_getchain`. This leads to `struct iovec iov;` being uninitialized and used to read memory in `len = (int) read(sc->vrsc_fd, iov.iov_base, iov.iov_len);` when an attacker is able to make `vq_getchain` fail. This issue may lead to a guest crashing the host causing a denial of service and, under certain circumstance, memory corruption. This issue is fixed in commit 41272a980197917df8e58ff90642d14dec8fe948. |
2023-02-17 |
not yet calculated |
CVE-2021-32845
MISC
MISC
CONFIRM |
| moby — hyperkit |
HyperKit is a toolkit for embedding hypervisor capabilities in an application. In versions 0.20210107, function `pci_vtsock_proc_tx` in `virtio-sock` can lead to to uninitialized memory use. In this situation, there is a check for the return value to be less or equal to `VTSOCK_MAXSEGS`, but that check is not sufficient because the function can return `-1` if it finds an error it cannot recover from. Moreover, the negative return value will be used by `iovec_pull` in a while condition that can further lead to more corruption because the function is not designed to handle a negative `iov_len`. This issue may lead to a guest crashing the host causing a denial of service and, under certain circumstance, memory corruption. This issue is fixed in commit af5eba2360a7351c08dfd9767d9be863a50ebaba. |
2023-02-17 |
not yet calculated |
CVE-2021-32846
MISC
MISC
CONFIRM |
| intel — ofu_software |
Improper access control in the Intel(R) OFU software before version 14.1.28 may allow an authenticated user to potentially enable denial of service via local access. |
2023-02-16 |
not yet calculated |
CVE-2021-33104
MISC |
| saltstack — saltstack |
Buffer Overflow vulnerability in Saltstack v.3003 and before allows attacker to execute arbitrary code via the func variable in salt/salt/modules/status.py file. |
2023-02-17 |
not yet calculated |
CVE-2021-33226
MISC |
| ymfe — yapo |
Cross Site Scripting vulnerability in YMFE yapo v1.9.1 allows attacker to execute arbitrary code via the remark parameter of the interface edit page. |
2023-02-17 |
not yet calculated |
CVE-2021-33237
MISC |
| virtualsquare — pictotcp |
Double Free vulnerability in virtualsquare picoTCP v1.7.0 and picoTCP-NG v2.1 in modules/pico_fragments.c in function pico_fragments_reassemble, allows attackers to execute arbitrary code. |
2023-02-15 |
not yet calculated |
CVE-2021-33304
MISC |
| htacg — html_tidy |
An issue in HTACG HTML Tidy v5.7.28 allows attacker to execute arbitrary code via the -g option of the CleanNode() function in gdoc.c. |
2023-02-17 |
not yet calculated |
CVE-2021-33391
MISC |
| baijiacms — baijiacms |
Cross Site Request Forgery (CSRF) vulnerability in baijiacms 4.1.4, allows attackers to change the password or other information of an arbitrary account via index.php. |
2023-02-15 |
not yet calculated |
CVE-2021-33396
MISC |
cms-corephp — cms-corephp
|
SQL Injection vulnerability in nitinparashar30 cms-corephp through commit bdabe52ef282846823bda102728a35506d0ec8f9 (May 19, 2021) allows unauthenticated attackers to gain escilated privledges via a crafted login. |
2023-02-15 |
not yet calculated |
CVE-2021-33925
MISC |
plone — plone_cms
|
An issue in Plone CMS v. 5.2.4, 5.2.3, 5.2.2, 5.2.1, 5.2.0, 5.1rc2, 5.1rc1, 5.1b4, 5.1b3, 5.1b2, 5.1a2, 5.1a1, 5.1.7, 5.1.6, 5.1.5, 5.1.4, 5.1.2, 5.1.1 5.1, 5.0rc3, 5.0rc2, 5.0rc1, 5.0.9, 5.0.8, 5.0.7, 5.0.6, 5.0.5, 5.0.4, 5.0.3, 5.0.2, 5.0.10, 5.0.1, 5.0, 4.3.9, 4.3.8, 4.3.7, 4.3.6, 4.3.5, 4.3.4, 4.3.3, 4.3.20, 4 allows attacker to access sensitive information via the RSS feed protlet. |
2023-02-17 |
not yet calculated |
CVE-2021-33926
MISC
MISC
MISC |
| fantasticlbp — hotels_server |
SQL injection vulnerability in FantasticLBP Hotels Server v1.0 allows attacker to execute arbitrary code via the username parameter. |
2023-02-17 |
not yet calculated |
CVE-2021-33948
MISC |
feminer — wms
|
An issue in FeMiner WMS v1.1 allows attackers to execute arbitrary code via the filename parameter and the exec function. |
2023-02-17 |
not yet calculated |
CVE-2021-33949
MISC |
| openkm — document_management_system |
An issue discovered in OpenKM v6.3.10 allows attackers to obtain sensitive information via the XMLTextExtractor function. |
2023-02-17 |
not yet calculated |
CVE-2021-33950
MISC
MISC
MISC |
| dvidelabs — flatcc |
Buffer Overflow vulnerability in Dvidelabs flatcc v.0.6.0 allows local attacker to execute arbitrary code via the fltacc execution of the error_ref_sym function. |
2023-02-17 |
not yet calculated |
CVE-2021-33983
MISC |
| seopanel — seopanel |
SQL Injection vulnerability in SEO Panel 4.9.0 in api/user.api.php in function getUserName in the username parameter, allows attackers to gain sensitive information. |
2023-02-15 |
not yet calculated |
CVE-2021-34117
MISC
MISC
MISC |
| lizhifaka — lizhifaka |
Permissions vulnerability in LIZHIFAKA v.2.2.0 allows authenticated attacker to execute arbitrary commands via the set password function in the admin/index/email location. |
2023-02-17 |
not yet calculated |
CVE-2021-34164
MISC |
| ttyd — ttyd |
An issue in ttyd v.1.6.3 allows attacker to execute arbitrary code via default configuration permissions. |
2023-02-17 |
not yet calculated |
CVE-2021-34182
MISC |
| yupoxion — bearadmin |
File Upload Vulnerability in Yupoxion BearAdmin before commit 10176153528b0a914eb4d726e200fd506b73b075 allows attacker to execute arbitrary remote code via the Upfile function of the extend/tools/Ueditor endpoint. |
2023-02-17 |
not yet calculated |
CVE-2021-35261
MISC |
| dataease — dataease |
SQL Injection vulnerability in dataease before 1.2.0, allows attackers to gain sensitive information via the orders parameter to /api/sys_msg/list/1/10. |
2023-02-15 |
not yet calculated |
CVE-2021-38239
MISC |
| flatcore — flatcore-cms |
Cross site scripting (XSS) vulnerability in flatCore-CMS 2.2.15 allows attackers to execute arbitrary code via description field on the new page creation form. |
2023-02-16 |
not yet calculated |
CVE-2021-40555
MISC |
| fortinet — fortiweb |
Multiple stack-based buffer overflow vulnerabilities [CWE-121] in the proxy daemon of FortiWeb 5.x all versions, 6.0.7 and below, 6.1.2 and below, 6.2.6 and below, 6.3.16 and below, 6.4 all versions may allow an unauthenticated remote attacker to achieve arbitrary code execution via specifically crafted HTTP requests. |
2023-02-16 |
not yet calculated |
CVE-2021-42756
MISC |
| fortinet — fortiweb |
A condition for session fixation vulnerability [CWE-384] in the session management of FortiWeb versions 6.4 all versions, 6.3.0 through 6.3.16, 6.2.0 through 6.2.6, 6.1.0 through 6.1.2, 6.0.0 through 6.0.7, 5.9.0 through 5.9.1 may allow a remote, unauthenticated attacker to infer the session identifier of other users and possibly usurp their session. |
2023-02-16 |
not yet calculated |
CVE-2021-42761
MISC |
| fortinet — multiple_products |
An improper verification of cryptographic signature vulnerability [CWE-347] in FortiWeb 6.4 all versions, 6.3.16 and below, 6.2 all versions, 6.1 all versions, 6.0 all versions; FortiOS 7.0.3 and below, 6.4.8 and below, 6.2 all versions, 6.0 all versions; FortiSwitch 7.0.3 and below, 6.4.10 and below, 6.2 all versions, 6.0 all versions; FortiProxy 7.0.1 and below, 2.0.7 and below, 1.2 all versions, 1.1 all versions, 1.0 all versions may allow an attacker to decrypt portions of the administrative session management cookie if able to intercept the latter. |
2023-02-16 |
not yet calculated |
CVE-2021-43074
MISC |
| mozilla — thunderbird |
Thunderbird versions prior to 91.3.0 are vulnerable to the heap overflow described in CVE-2021-43527 when processing S/MIME messages. Thunderbird versions 91.3.0 and later will not call the vulnerable code when processing S/MIME messages that contain certificates with DER-encoded DSA or RSA-PSS signatures. |
2023-02-16 |
not yet calculated |
CVE-2021-43529
MISC |
| mruby — mruby |
An Untrusted Pointer Dereference was discovered in function mrb_vm_exec in mruby before 3.1.0-rc. The vulnerability causes a segmentation fault and application crash. |
2023-02-14 |
not yet calculated |
CVE-2021-46023
MISC |
| mozilla — mozilla_pollbot |
There was an open redirection vulnerability pollbot, which was used in https://pollbot.services.mozilla.com/ and https://pollbot.stage.mozaws.net/ An attacker could have redirected anyone to malicious sites. |
2023-02-16 |
not yet calculated |
CVE-2022-0637
MISC
MISC |
| cisco — clamav |
A vulnerability in the OLE2 file parser of Clam AntiVirus (ClamAV) versions 0.104.0 through 0.104.2 could allow an unauthenticated, remote attacker to cause a denial of service condition on an affected device.The vulnerability is due to incorrect use of the realloc function that may result in a double-free. An attacker could exploit this vulnerability by submitting a crafted OLE2 file to be scanned by ClamAV on the affected device. An exploit could allow the attacker to cause the ClamAV scanning process to crash, resulting in a denial of service condition. |
2023-02-17 |
not yet calculated |
CVE-2022-20803
CISCO |
| crypto — crypto_api_toolkit_for_intel_sgx |
Improper access control in the Crypto API Toolkit for Intel(R) SGX before version 2.0 commit ID 91ee496 may allow an authenticated user to potentially enable escalation of privilege via local access. |
2023-02-16 |
not yet calculated |
CVE-2022-21163
MISC |
| intel — atom/xeon_scalable_processors |
Insufficient granularity of access control in out-of-band management in some Intel(R) Atom and Intel Xeon Scalable Processors may allow a privileged user to potentially enable escalation of privilege via adjacent network access. |
2023-02-16 |
not yet calculated |
CVE-2022-21216
MISC |
| dell — emc_unity |
Dell EMC Unity versions before 5.2.0.0.5.173 , use(es) broken cryptographic algorithm. A remote unauthenticated attacker could potentially exploit this vulnerability by performing MitM attacks and let attackers obtain sensitive information. |
2023-02-14 |
not yet calculated |
CVE-2022-22564
MISC |
| intel — oneapi_data_analytics_library/oneapi_base_toolkit |
Uncontrolled search path element in the Intel(R) oneAPI Data Analytics Library (oneDAL) before version 2021.5 for Intel(R) oneAPI Base Toolkit may allow an authenticated user to potentially enable escalation of privilege via local access. |
2023-02-16 |
not yet calculated |
CVE-2022-25905
MISC |
| glance — glance |
Versions of the package glance before 3.0.9 are vulnerable to Directory Traversal that allows users to read files outside the public root directory. This is related to but distinct from the vulnerability reported in [CVE-2018-3715](https://security.snyk.io/vuln/npm:glance:20180129). |
2023-02-13 |
not yet calculated |
CVE-2022-25937
MISC
MISC |
| usememos — memos |
All versions of the package github.com/usememos/memos/server are vulnerable to Cross-site Scripting (XSS) due to insufficient checks on external resources, which allows malicious actors to introduce links starting with a javascript: scheme. |
2023-02-15 |
not yet calculated |
CVE-2022-25978
MISC
MISC
MISC |
| intel — c++_compiler_classic |
Improper handling of Unicode encoding in source code to be compiled by the Intel(R) C++ Compiler Classic before version 2021.6 for Intel(R) oneAPI Toolkits before version 2022.2 may allow an unauthenticated user to potentially enable escalation of privilege via network access. |
2023-02-16 |
not yet calculated |
CVE-2022-25987
MISC |
| intel — oneapi_toolkits_oneapi-cli |
Insecure inherited permissions in the Intel(R) oneAPI Toolkits oneapi-cli before version 0.2.0 may allow an authenticated user to potentially enable escalation of privilege via local access. |
2023-02-16 |
not yet calculated |
CVE-2022-25992
MISC |
| intel — distribution_for_python_programming_language_for_intel_oneapi_toolkits |
Uncontrolled search path element in the Intel(R) Distribution for Python programming language before version 2022.1 for Intel(R) oneAPI Toolkits may allow an authenticated user to potentially enable escalation of privilege via local access. |
2023-02-16 |
not yet calculated |
CVE-2022-26032
MISC |
| intel — mpi_library_for_intel_oneapi_hpc_toolkit |
Uncontrolled search path element in the Intel(R) MPI Library before version 2021.6 for Intel(R) oneAPI HPC Toolkit may allow an authenticated user to potentially enable escalation of privilege via local access. |
2023-02-16 |
not yet calculated |
CVE-2022-26052
MISC |
| intel — trace_analyzer_and_collector_for_intel_oneapi_hpc |
Uncontrolled search path element in the Intel(R) Trace Analyzer and Collector before version 2021.6 for Intel(R) oneAPI HPC Toolkit may allow an authenticated user to potentially enable escalation of privilege via local access. |
2023-02-16 |
not yet calculated |
CVE-2022-26062
MISC |
| intel — oneapi_deep_neural_network |
Uncontrolled search path element in the Intel(R) oneAPI Deep Neural Network (oneDNN) before version 2022.1 may allow an authenticated user to potentially enable escalation of privilege via local access. |
2023-02-16 |
not yet calculated |
CVE-2022-26076
MISC |
| fortinet — fortisandbox |
A use of password hash with insufficient computational effort vulnerability [CWE-916] in FortiSandbox before 4.2.0 may allow an attacker with access to the password database to efficiently mount bulk guessing attacks to recover the passwords. |
2023-02-16 |
not yet calculated |
CVE-2022-26115
MISC |
| intel — multiple_products |
Improper access control in the BIOS firmware for some Intel(R) Processors may allow a privileged user to potentially enable escalation of privilege via local access. |
2023-02-16 |
not yet calculated |
CVE-2022-26343
MISC |
| intel — oneapi_toolkit_openmp |
Uncontrolled search path element in the Intel(R) oneAPI Toolkit OpenMP before version 2022.1 may allow an authenticated user to potentially enable escalation of privilege via local access. |
2023-02-16 |
not yet calculated |
CVE-2022-26345
MISC |
| intel — dpc++/c++_compiler |
Uncontrolled search path element in the Intel(R) oneAPI DPC++/C++ Compiler Runtime before version 2022.0 may allow an authenticated user to potentially enable escalation of privilege via local access. |
2023-02-16 |
not yet calculated |
CVE-2022-26421
MISC |
| intel — oneapi_collective_communications_library/oneapi_base_toolkit |
Uncontrolled search path element in the Intel(R) oneAPI Collective Communications Library (oneCCL) before version 2021.6 for Intel(R) oneAPI Base Toolkit may allow an authenticated user to potentially enable escalation of privilege via local access. |
2023-02-16 |
not yet calculated |
CVE-2022-26425
MISC |
| intel — sgx_sdk |
Improper conditions check in the Intel(R) SGX SDK software may allow a privileged user to potentially enable information disclosure via local access. |
2023-02-16 |
not yet calculated |
CVE-2022-26509
MISC |
| intel — fpga_add-on_for_intel_oneapi_base_toolkit |
Uncontrolled search path element in the Intel(R) FPGA Add-on for Intel(R) oneAPI Base Toolkit before version 2022.2 may allow an authenticated user to potentially enable escalation of privilege via local access. |
2023-02-16 |
not yet calculated |
CVE-2022-26512
MISC |
| intel — multiple_products |
Improper input validation in the BIOS firmware for some Intel(R) Processors may allow a privileged user to potentially enable escalation of privilege via local access. |
2023-02-16 |
not yet calculated |
CVE-2022-26837
MISC |
| intel — quartus_prime_pro_and_standard_editions |
Improper neutralization in the Intel(R) Quartus Prime Pro and Standard edition software may allow an authenticated user to potentially enable escalation of privilege via local access. |
2023-02-16 |
not yet calculated |
CVE-2022-26840
MISC |
| intel — sgx_sdk_software_for_linux |
Insufficient control flow management for the Intel(R) SGX SDK software for Linux before version 2.16.100.1 may allow an authenticated user to potentially enable information disclosure via local access. |
2023-02-16 |
not yet calculated |
CVE-2022-26841
MISC |
| intel — dpc++/c++_compiler |
Insufficient visual distinction of homoglyphs presented to user in the Intel(R) oneAPI DPC++/C++ Compiler before version 2022.1 for Intel(R) oneAPI Toolkits before version 2022.2 may allow an unauthenticated user to potentially enable escalation of privilege via network access. |
2023-02-16 |
not yet calculated |
CVE-2022-26843
MISC |
| intel — quartus_prime_pro_and_standard_editions |
Cross-site scripting in the Intel(R) Quartus Prime Pro and Standard edition software may allow an authenticated user to potentially enable information disclosure via local access. |
2023-02-16 |
not yet calculated |
CVE-2022-26888
MISC |
| intel — media_sdk |
Protection mechanism failure in the Intel(R) Media SDK software before version 22.2.2 may allow an authenticated user to potentially enable escalation of privilege via local access. |
2023-02-16 |
not yet calculated |
CVE-2022-27170
MISC |
| intel — computer_vision_annotation_tool |
Server-side request forgery in the CVAT software maintained by Intel(R) before version 2.0.1 may allow an authenticated user to potentially enable information disclosure via network access. |
2023-02-16 |
not yet calculated |
CVE-2022-27234
MISC |
| fortinet — fortiadc |
A improper neutralization of special elements used in an os command (‘os command injection’) in Fortinet FortiADC version 7.0.0 through 7.0.1, 6.2.0 through 6.2.2, 6.1.0 through 6.1.6, 6.0.x, 5.x.x allows attacker to execute arbitrary shell code as `root` via CLI commands. |
2023-02-16 |
not yet calculated |
CVE-2022-27482
MISC |
| fortinet — fortiextender |
A improper neutralization of special elements used in an os command (‘os command injection’) in Fortinet FortiExtender 7.0.0 through 7.0.3, 5.3.2, 4.2.4 and below allows attacker to execute unauthorized code or commands via crafted HTTP requests. |
2023-02-16 |
not yet calculated |
CVE-2022-27489
MISC |
| intel — ethernet_controller_administrative_tools |
Insufficient control flow management in some Intel(R) Ethernet Controller Administrative Tools drivers for Windows before version 1.5.0.2 may allow an authenticated user to potentially enable escalation of privilege via local access. |
2023-02-16 |
not yet calculated |
CVE-2022-27808
MISC |
| palantir — atlasdb |
It was discovered that the sls-logging was not verifying hostnames in TLS certificates due to a misuse of the javax.net.ssl.SSLSocketFactory API. A malicious attacker in a privileged network position could abuse this to perform a man-in-the-middle attack. A successful man-in-the-middle attack would allow them to intercept, read, or modify network communications to and from the affected service. In the case of AtlasDB, the vulnerability was mitigated by other network controls such as two-way TLS when deployed as part of a Palantir platform. Palantir still recommends upgrading to a non-vulnerable version out of an abundance of caution. |
2023-02-16 |
not yet calculated |
CVE-2022-27890
MISC |
| palantir — gotham |
Palantir Gotham included an unauthenticated endpoint that listed all active usernames on the stack with an active session. The affected services have been patched and automatically deployed to all Apollo-managed Gotham instances. It is highly recommended that customers upgrade all affected services to the latest version. This issue affects: Palantir Gotham versions prior to 103.30221005.0. |
2023-02-16 |
not yet calculated |
CVE-2022-27891
MISC |
| palantir — gotham |
Palantir Gotham versions prior to 3.22.11.2 included an unauthenticated endpoint that would have allowed an attacker to exhaust the memory of the Gotham dispatch service. |
2023-02-16 |
not yet calculated |
CVE-2022-27892
MISC |
| palantir — gotham |
Palantir Gotham versions prior to 3.22.11.2 included an unauthenticated endpoint that would load portions of maliciously crafted zip files to memory. An attacker could repeatedly upload a malicious zip file, which would allow them to exhaust memory resources on the dispatch server. |
2023-02-16 |
not yet calculated |
CVE-2022-27897
MISC |
| fortinet — fortios |
A missing cryptographic steps vulnerability [CWE-325] in the functions that encrypt the DHCP and DNS keys in Fortinet FortiOS version 7.2.0, 7.0.0 through 7.0.5, 6.4.0 through 6.4.9, 6.2.x and 6.0.x may allow an attacker in possession of the encrypted key to decipher it. |
2023-02-16 |
not yet calculated |
CVE-2022-29054
MISC |
| integrated_bmc — integrated_bmc |
Uncaught exception in webserver for the Integrated BMC in some Intel(R) platforms before versions 2.86, 2.09 and 2.78 may allow a privileged user to potentially enable denial of service via network access. |
2023-02-16 |
not yet calculated |
CVE-2022-29493
MISC |
| openbmc — openbmc |
Improper input validation in firmware for OpenBMC in some Intel(R) platforms before versions egs-0.91-179 and bhs-04-45 may allow an authenticated user to potentially enable denial of service via network access. |
2023-02-16 |
not yet calculated |
CVE-2022-29494
MISC |
| intel — sur |
Improper access control in the Intel(R) SUR software before version 2.4.8902 may allow an unauthenticated user to potentially enable escalation of privilege via network access. |
2023-02-16 |
not yet calculated |
CVE-2022-29514
MISC |
| intel — open_cas |
Improper conditions check in the Open CAS software maintained by Intel(R) before version 22.3.1 may allow an authenticated user to potentially enable denial of service via local access. |
2023-02-16 |
not yet calculated |
CVE-2022-29523
MISC |
| lexisnexis_firco_compliance_link — lexisnexis_firco_compliance_link |
LexisNexis Firco Compliance Link 3.7 allows CSRF. |
2023-02-15 |
not yet calculated |
CVE-2022-29557
MISC |
| fortinet — fortiweb |
A path traversal vulnerability [CWE-23] in the API of FortiWeb 7.0.0 through 7.0.1, 6.3.0 through 6.3.19, 6.4 all versions, 6.2 all versions, 6.1 all versions, 6.0 all versions may allow an authenticated attacker to retrieve specific parts of files from the underlying file system via specially crafted web requests. |
2023-02-16 |
not yet calculated |
CVE-2022-30299
MISC |
| fortinet — fortiweb |
A relative path traversal vulnerability [CWE-23] in FortiWeb 7.0.0 through 7.0.1, 6.3.6 through 6.3.18, 6.4 all versions may allow an authenticated attacker to obtain unauthorized access to files and data via specifically crafted HTTP GET requests. |
2023-02-16 |
not yet calculated |
CVE-2022-30300
MISC |
| fortinet — fortiweb |
An improper neutralization of special elements used in an os command (‘OS Command Injection’) [CWE-78] in FortiWeb 7.0.0 through 7.0.1, 6.3.0 through 6.3.19, 6.4 all versions may allow an authenticated attacker to execute arbitrary shell code as `root` user via crafted HTTP requests. |
2023-02-16 |
not yet calculated |
CVE-2022-30303
MISC |
| fortinet — fortianalyzer |
An improper neutralization of input during web page generation vulnerability [CWE-79] in FortiAnalyzer versions prior to 7.2.1, 7.0.4 and 6.4.8 may allow a remote unauthenticated attacker to perform a stored cross site scripting (XSS) attack via the URL parameter observed in the FortiWeb attack event logview in FortiAnalyzer. |
2023-02-16 |
not yet calculated |
CVE-2022-30304
MISC |
| fortinet — fortiweb |
A stack-based buffer overflow vulnerability [CWE-121] in the CA sign functionality of FortiWeb version 7.0.1 and below, 6.4 all versions, version 6.3.19 and below may allow an authenticated attacker to achieve arbitrary code execution via specifically crafted password. |
2023-02-16 |
not yet calculated |
CVE-2022-30306
MISC |
| intel — integrated_sensor_solution |
Out-of-bounds read in firmware for the Intel(R) Integrated Sensor Solution before versions 5.4.2.4579v3, 5.4.1.4479 and 5.0.0.4143 may allow a privileged user to potentially enable denial of service via local access. |
2023-02-16 |
not yet calculated |
CVE-2022-30339
MISC |
| intel — dsa |
Protection mechanism failure in the Intel(R) DSA software before version 22.4.26 may allow an authenticated user to potentially enable escalation of privilege via local access. |
2023-02-16 |
not yet calculated |
CVE-2022-30530
MISC |
| intel — iris_xe max_drivers_for_windows |
Out-of-bounds read in the Intel(R) Iris(R) Xe MAX drivers for Windows before version 100.0.5.1474 may allow a privileged user to potentially enable information disclosure via local access. |
2023-02-16 |
not yet calculated |
CVE-2022-30531
MISC |
| intel — multiple_products |
Use after free in the BIOS firmware for some Intel(R) Processors may allow a privileged user to potentially enable escalation of privilege via local access. |
2023-02-16 |
not yet calculated |
CVE-2022-30539
MISC |
| intel — sur |
Improper conditions check in the Intel(R) SUR software before version 2.4.8902 may allow an unauthenticated user to potentially enable denial of service via network access. |
2023-02-16 |
not yet calculated |
CVE-2022-30692
MISC |
| intel — multiple_products |
Improper initialization in the Intel(R) TXT SINIT ACM for some Intel(R) Processors may allow a privileged user to potentially enable escalation of privilege via local access. |
2023-02-16 |
not yet calculated |
CVE-2022-30704
MISC |
| enocean — echelon_smartserver |
Echelon SmartServer 2.2 with i.LON Vision 2.2 stores cleartext credentials in a file, which could allow an attacker to obtain cleartext usernames and passwords of the SmartServer. If the attacker obtains the file, then the credentials could be used to control the web user interface and file transfer protocol (FTP) server. |
2023-02-13 |
not yet calculated |
CVE-2022-3089
MISC |
| intel — sur |
Improper access control in the Intel(R) SUR software before version 2.4.8902 may allow an authenticated user to potentially enable denial of service via local access. |
2023-02-16 |
not yet calculated |
CVE-2022-31476
MISC |
| siemens — sipass_integrated_ac5102 |
A vulnerability has been identified in SiPass integrated AC5102 (ACC-G2) (All versions < V2.85.44), SiPass integrated ACC-AP (All versions < V2.85.43). Affected devices improperly sanitize user input on the telnet command line interface. This could allow an authenticated user to escalate privileges by injecting arbitrary commands that are executed with root privileges. |
2023-02-14 |
not yet calculated |
CVE-2022-31808
MISC |
| intel — multiple_products |
Improper initialization in the BIOS firmware for some Intel(R) Processors may allow a privileged user to potentially enable escalation of privilege via local access. |
2023-02-16 |
not yet calculated |
CVE-2022-32231
MISC |
| insyde — insydeh2o |
An issue was discovered in Insyde InsydeH2O with kernel 5.0 through 5.5. DMA attacks on the PnpSmm shared buffer used by SMM and non-SMM code could cause TOCTOU race-condition issues that could lead to corruption of SMRAM and escalation of privileges. This attack can be mitigated using IOMMU protection for the ACPI runtime memory used for the command buffer. This attack can be mitigated by copying the firmware block services data to SMRAM before checking it. |
2023-02-15 |
not yet calculated |
CVE-2022-32469
MISC
MISC |
| insyde — insydeh2o |
An issue was discovered in Insyde InsydeH2O with kernel 5.0 through 5.5. DMA attacks on the FwBlockServiceSmm shared buffer used by SMM and non-SMM code could cause TOCTOU race-condition issues that could lead to corruption of SMRAM and escalation of privileges. This attack can be mitigated using IOMMU protection for the ACPI runtime memory used for the command buffer. This attack can be mitigated by copying the firmware block services data to SMRAM before checking it. |
2023-02-15 |
not yet calculated |
CVE-2022-32470
MISC
MISC |
| insyde — insydeh2o |
An issue was discovered in IhisiSmm in Insyde InsydeH2O with kernel 5.0 through 5.5. The IhisiDxe driver uses the command buffer to pass input and output data. By modifying the command buffer contents with DMA after the input parameters have been checked but before they are used, the IHISI SMM code may be convinced to modify SMRAM or OS, leading to possible data corruption or escalation of privileges. |
2023-02-15 |
not yet calculated |
CVE-2022-32471
MISC
MISC |
| insyde — insydeh2o |
An issue was discovered in Insyde InsydeH2O with kernel 5.0 through 5.5. DMA attacks on the HddPassword shared buffer used by SMM and non-SMM code could cause TOCTOU race-condition issues that could lead to corruption of SMRAM and escalation of privileges. This attack can be mitigated using IOMMU protection for the ACPI runtime memory used for the command buffer. This attack can be mitigated by copying the firmware block services data to SMRAM before checking it. |
2023-02-15 |
not yet calculated |
CVE-2022-32473
MISC
MISC |
| insyde — insydeh2o |
An issue was discovered in Insyde InsydeH2O with kernel 5.0 through 5.5. DMA attacks on the StorageSecurityCommandDxe shared buffer used by SMM and non-SMM code could cause TOCTOU race-condition issues that could lead to corruption of SMRAM and escalation of privileges. This attack can be mitigated using IOMMU protection for the ACPI runtime memory used for the command buffer. This attack can be mitigated by copying the firmware block services data to SMRAM before checking it. |
2023-02-15 |
not yet calculated |
CVE-2022-32474
MISC
MISC |
| insyde — insydeh2o |
An issue was discovered in Insyde InsydeH2O with kernel 5.0 through 5.5. DMA attacks on the VariableRuntimeDxe shared buffer used by SMM and non-SMM code could cause TOCTOU race-condition issues that could lead to corruption of SMRAM and escalation of privileges. This issue was fixed in the kernel, which also protected chipset and OEM chipset code. |
2023-02-15 |
not yet calculated |
CVE-2022-32475
MISC
MISC |
| insyde — insydeh2o |
An issue was discovered in Insyde InsydeH2O with kernel 5.0 through 5.5. DMA attacks on the AhciBusDxe shared buffer used by SMM and non-SMM code could cause TOCTOU race-condition issues that could lead to corruption of SMRAM and escalation of privileges. This attack can be mitigated using IOMMU protection for the ACPI runtime memory used for the command buffer. This attack can be mitigated by copying the firmware block services data to SMRAM before checking it. |
2023-02-15 |
not yet calculated |
CVE-2022-32476
MISC
MISC |
| insyde — insydeh2o |
An issue was discovered in Insyde InsydeH2O with kernel 5.0 through 5.5. DMA attacks on the FvbServicesRuntimeDxe shared buffer used by SMM and non-SMM code could cause TOCTOU race-condition issues that could lead to corruption of SMRAM and escalation of privileges. This attack can be mitigated using IOMMU protection for the ACPI runtime memory used for the command buffer. This attack can be mitigated by copying the firmware block services data to SMRAM before checking it. |
2023-02-15 |
not yet calculated |
CVE-2022-32477
MISC
MISC |
| insyde — insydeh2o |
An issue was discovered in Insyde InsydeH2O with kernel 5.0 through 5.5. DMA attacks on the IdeBusDxe shared buffer used by SMM and non-SMM code could cause TOCTOU race-condition issues that could lead to corruption of SMRAM and escalation of privileges. This attack can be mitigated using IOMMU protection for the ACPI runtime memory used for the command buffer. This attack can be mitigated by copying the firmware block services data to SMRAM before checking it. |
2023-02-15 |
not yet calculated |
CVE-2022-32478
MISC
MISC |
|
intel — quartus_prime_pro_and_standard_editions
|
Improper authentication in the Intel(R) Quartus Prime Pro and Standard edition software may allow an authenticated user to potentially enable escalation of privilege via local access. |
2023-02-16 |
not yet calculated |
CVE-2022-32570
MISC |
| intel — trace_analyzer_and collector |
Out-of-bounds write in the Intel(R) Trace Analyzer and Collector software before version 2021.5 may allow an authenticated user to potentially enable escalation of privilege via local access. |
2023-02-16 |
not yet calculated |
CVE-2022-32575
MISC |
| intel — dsa |
Description: Race condition in the Intel(R) DSA software before version 22.4.26 may allow an authenticated user to potentially enable escalation of privilege via local access. |
2023-02-16 |
not yet calculated |
CVE-2022-32764
MISC |
| insyde — insydeh2o |
An issue was discovered in Insyde InsydeH2O with kernel 5.0 through 5.5. DMA attacks on the SdHostDriver buffer used by SMM and non-SMM code could cause TOCTOU race-condition issues that could lead to corruption of SMRAM and escalation of privileges. This attack can be mitigated by using IOMMU protection for the ACPI runtime memory used for the command buffer. This attack can be mitigated by copying the link data to SMRAM before checking it and verifying that all pointers are within the buffer. |
2023-02-15 |
not yet calculated |
CVE-2022-32953
MISC
MISC |
| insyde — insydeh2o |
An issue was discovered in Insyde InsydeH2O with kernel 5.1 through 5.5. DMA attacks on the SdMmcDevice buffer used by SMM and non-SMM code could cause TOCTOU race-condition issues that could lead to corruption of SMRAM and escalation of privileges. This attack can be mitigated by using IOMMU protection for the ACPI runtime memory used for the command buffer. This attack can be mitigated by copying the link data to SMRAM before checking it and verifying that all pointers are within the buffer. |
2023-02-15 |
not yet calculated |
CVE-2022-32954
MISC
MISC |
| insyde — insydeh2o |
An issue was discovered in Insyde InsydeH2O with kernel 5.0 through 5.5. DMA attacks on the NvmExpressDxe buffer used by SMM and non-SMM code could cause TOCTOU race-condition issues that could lead to corruption of SMRAM and escalation of privileges. This attack can be mitigated by using IOMMU protection for the ACPI runtime memory used for the command buffer. This attack can be mitigated by copying the link data to SMRAM before checking it and verifying that all pointers are within the buffer. |
2023-02-15 |
not yet calculated |
CVE-2022-32955
MISC
MISC |
| intel — sur |
Improper authentication in the Intel(R) SUR software before version 2.4.8902 may allow a privileged user to potentially enable escalation of privilege via network access. |
2023-02-16 |
not yet calculated |
CVE-2022-32971
MISC |
| infoblox — bloxone_endpoint_for_windows |
Infoblox BloxOne Endpoint for Windows through 2.2.7 allows DLL injection that can result in local privilege escalation. |
2023-02-17 |
not yet calculated |
CVE-2022-32972
MISC
MISC |
| intel — sur |
Improper input validation in the Intel(R) SUR software before version 2.4.8902 may allow an authenticated user to potentially enable escalation of privilege via local access. |
2023-02-16 |
not yet calculated |
CVE-2022-33190
MISC |
| intel — xeon_processors_with_intelâ_software_guard_extensions |
Incorrect default permissions in some memory controller configurations for some Intel(R) Xeon(R) Processors when using Intel(R) Software Guard Extensions which may allow a privileged user to potentially enable escalation of privilege via local access. |
2023-02-16 |
not yet calculated |
CVE-2022-33196
MISC |
| fortinet — fortiwan |
An improper neutralization of special elements used in an OS command vulnerability [CWE-78] in the management interface of FortiWAN 4.0.0 through 4.5.9 may allow an authenticated attacker to execute unauthorized commands via specifically crafted arguments to existing commands. |
2023-02-16 |
not yet calculated |
CVE-2022-33869
MISC |
| fortinet — fortiweb |
A stack-based buffer overflow vulnerability [CWE-121] in FortiWeb version 7.0.1 and earlier, 6.4 all versions, version 6.3.19 and earlier may allow a privileged attacker to execute arbitrary code or commands via specifically crafted CLI `execute backup-local rename` and `execute backup-local show` operations. |
2023-02-16 |
not yet calculated |
CVE-2022-33871
MISC |
| intel — quartus_prime_pro_and_standard_editions |
Path traversal in the Intel(R) Quartus Prime Pro and Standard edition software may allow an authenticated user to potentially enable escalation of privilege via local access. |
2023-02-16 |
not yet calculated |
CVE-2022-33892
MISC |
| intel — quartus_prime_pro_and_standard_editions |
Insufficient control flow management in the Intel(R) Quartus Prime Pro and Standard edition software may allow an authenticated user to potentially enable escalation of privilege via local access. |
2023-02-16 |
not yet calculated |
CVE-2022-33902
MISC |
| intel — sur |
Improper authentication in the Intel(R) SUR software before version 2.4.8902 may allow an authenticated user to potentially enable escalation of privilege via local access. |
2023-02-16 |
not yet calculated |
CVE-2022-33946
MISC |
| intel — sur |
Improper input validation in the Intel(R) SUR software before version 2.4.8902 may allow an unauthenticated user to potentially enable escalation of privilege via network access. |
2023-02-16 |
not yet calculated |
CVE-2022-33964
MISC |
| intel — 3rd generation_xeon_scalable_processors |
Incorrect calculation in microcode keying mechanism for some 3rd Generation Intel(R) Xeon(R) Scalable Processors may allow a privileged user to potentially enable information disclosure via local access. |
2023-02-16 |
not yet calculated |
CVE-2022-33972
MISC |
| gitlab– gitlab |
A lack of length validation in GitLab CE/EE affecting all versions from 12.4 before 15.6.7, 15.7 before 15.7.6, and 15.8 before 15.8.1 allows an authenticated attacker to create a large Issue description via GraphQL which, when repeatedly requested, saturates CPU usage. |
2023-02-13 |
not yet calculated |
CVE-2022-3411
MISC
MISC
CONFIRM |
| intel — battery_life_diagnostic_tool |
Improper initialization in the Intel(R) Battery Life Diagnostic Tool software before version 2.2.0 may allow an authenticated user to potentially enable escalation of privilege via local access. |
2023-02-16 |
not yet calculated |
CVE-2022-34153
MISC |
| intel — quartus_prime_pro_and_standard_editions |
Improper access control in the Intel(R) FPGA SDK for OpenCL(TM) with Intel(R) Quartus(R) Prime Pro Edition software before version 22.1 may allow authenticated user to potentially enable escalation of privilege via local access. |
2023-02-16 |
not yet calculated |
CVE-2022-34157
MISC |
| intel — media_sdk |
Out-of-bounds read in the Intel(R) Media SDK software before version 22.2.2 may allow an authenticated user to potentially enable escalation of privilege via local access. |
2023-02-16 |
not yet calculated |
CVE-2022-34346
MISC |
| ibm — qradar_siem |
IBM QRadar SIEM 7.4 and 7.5 is vulnerable to information exposure allowing a non-tenant user with a specific domain security profile assigned to see some data from other domains. IBM X-Force ID: 230402. |
2023-02-17 |
not yet calculated |
CVE-2022-34351
MISC
MISC |
| dell — unisphere_for_powermax |
Dell Unisphere for PowerMax vApp, VASA Provider vApp, and Solution Enabler vApp version 10.0.0.5 and below contains an authorization bypass vulnerability, allowing users to perform actions in which they are not authorized. |
2023-02-13 |
not yet calculated |
CVE-2022-34397
MISC |
| intel — media_sdk |
Improper buffer restrictions in the Intel(R) Media SDK software before version 22.2.2 may allow an authenticated user to potentially enable escalation of privilege via local access. |
2023-02-16 |
not yet calculated |
CVE-2022-34841
MISC |
| intel — trace_analyzer_and collector |
Integer overflow in the Intel(R) Trace Analyzer and Collector software before version 2021.5 may allow an authenticated user to potentially enable escalation of privilege via local access. |
2023-02-16 |
not yet calculated |
CVE-2022-34843
MISC |
| intel — iris_xe max_drivers_for_windows |
Uncaught exception in the Intel(R) Iris(R) Xe MAX drivers for Windows before version 100.0.5.1436(v2) may allow a privileged user to potentially enable denial of service via local access. |
2023-02-16 |
not yet calculated |
CVE-2022-34849
MISC |
| intel — sur |
Improper access control in the Intel(R) SUR software before version 2.4.8902 may allow an authenticated user to potentially enable escalation of privilege via local access. |
2023-02-16 |
not yet calculated |
CVE-2022-34854
MISC |
| intel — trace_analyzer_and collector |
Out-of-bounds read in the Intel(R) Trace Analyzer and Collector software before version 2021.5 may allow an authenticated user to potentially enable escalation of privilege via local access. |
2023-02-16 |
not yet calculated |
CVE-2022-34864
MISC |
| openbmc — openbmc |
Out of bounds read in firmware for OpenBMC in some Intel(R) platforms before version 0.72 may allow unauthenticated user to potentially enable denial of service via network access. |
2023-02-16 |
not yet calculated |
CVE-2022-35729
MISC |
| siemens — multiple_products |
A vulnerability has been identified in TIA Multiuser Server V14 (All versions), TIA Multiuser Server V15 (All versions < V15.1 Update 8), TIA Project-Server (All versions < V1.1), TIA Project-Server V16 (All versions), TIA Project-Server V17 (All versions). Affected applications contain an untrusted search path vulnerability that could allow an attacker to escalate privileges, when tricking a legitimate user to start the service from an attacker controlled path. |
2023-02-14 |
not yet calculated |
CVE-2022-35868
MISC |
| intel — media_sdk |
NULL pointer dereference in the Intel(R) Media SDK software before version 22.2.2 may allow an authenticated user to potentially enable denial of service via local access. |
2023-02-16 |
not yet calculated |
CVE-2022-35883
MISC |
| intel — battery_life_diagnostic_tool |
Insufficient control flow management in the Intel(R) Battery Life Diagnostic Tool software before version 2.2.0 may allow an authenticated user to potentially enable escalation of privilege via local access. |
2023-02-16 |
not yet calculated |
CVE-2022-36278
MISC |
| intel — fcs_server |
Uncaught exception in the FCS Server software maintained by Intel before version 1.1.79.3 may allow a privileged user to potentially enable denial of service via physical access. |
2023-02-16 |
not yet calculated |
CVE-2022-36287
MISC |
| intel — media_sdk |
Protection mechanism failure in the Intel(R) Media SDK software before version 22.2.2 may allow an authenticated user to potentially enable denial of service via local access. |
2023-02-16 |
not yet calculated |
CVE-2022-36289
MISC |
| intel — sps_firmware |
Active debug code in some Intel (R) SPS firmware before version SPS_E5_04.04.04.300.0 may allow an authenticated user to potentially enable escalation of privilege via local access. |
2023-02-16 |
not yet calculated |
CVE-2022-36348
MISC |
| intel – qatzip |
Improper access control in some QATzip software maintained by Intel(R) before version 1.0.9 may allow an authenticated user to potentially enable escalation of privilege via local access. |
2023-02-16 |
not yet calculated |
CVE-2022-36369
MISC |
| intel — multiple_products |
Out-of-bounds write in firmware for some Intel(R) Ethernet Network Controllers and Adapters E810 Series before version 1.7.0.8 and some Intel(R) Ethernet 700 Series Controllers and Adapters before version 9.101 may allow a privileged user to potentially enable denial of service via local access. |
2023-02-16 |
not yet calculated |
CVE-2022-36382
MISC |
| intel — qat_drivers_for_linux |
Incorrect default permissions in the software installer for some Intel(R) QAT drivers for Linux before version 4.17 may allow an authenticated user to potentially enable escalation of privilege via local access. |
2023-02-16 |
not yet calculated |
CVE-2022-36397
MISC |
| intel — battery_life_diagnostic_tool |
Uncontrolled search path in the Intel(R) Battery Life Diagnostic Tool software before version 2.2.0 may allow an authenticated user to potentially enable escalation of privilege via local access. |
2023-02-16 |
not yet calculated |
CVE-2022-36398
MISC |
| intel –ethernet_500_series_controller_drivers_for_vmware |
Protection mechanism failure in the Intel(R) Ethernet 500 Series Controller drivers for VMware before version 1.10.0.13 may allow an authenticated user to potentially enable escalation of privilege via local access. |
2023-02-16 |
not yet calculated |
CVE-2022-36416
MISC |
| ibm — security verify access |
IBM Security Verify Access 10.0.0.0, 10.0.1.0, 10.0.2.0, 10.0.3.0, and10.0.4.0 is vulnerable to HTTP header injection, caused by improper validation of input by the HOST headers. This could allow an attacker to conduct various attacks against the vulnerable system, including cross-site scripting, cache poisoning or session hijacking. IBM X-Force ID: 233576. |
2023-02-17 |
not yet calculated |
CVE-2022-36775
MISC
MISC |
| intel — sps_firmware |
Improper condition check in some Intel(R) SPS firmware before version SPS_E3_06.00.03.300.0 may allow a privileged user to potentially enable denial of service via local access. |
2023-02-16 |
not yet calculated |
CVE-2022-36794
MISC |
| intel –ethernet_500_series_controller_drivers_for_vmware |
Protection mechanism failure in the Intel(R) Ethernet 500 Series Controller drivers for VMware before version 1.10.0.1 may allow an authenticated user to potentially enable denial of service via local access. |
2023-02-16 |
not yet calculated |
CVE-2022-36797
MISC |
| intel — quartus_prime_pro_and_standard_editions |
Uncontrolled search path in some Intel(R) Quartus(R) Prime Pro and Standard Edition software may allow an authenticated user to potentially enable escalation of privilege via local access. |
2023-02-16 |
not yet calculated |
CVE-2022-37329
MISC |
| intel — qat_drivers_for_windows |
Uncontrolled search path in some Intel(R) QAT drivers for Windows before version 1.6 may allow an authenticated user to potentially enable escalation of privilege via local access. |
2023-02-16 |
not yet calculated |
CVE-2022-37340
MISC |
| gitlab — gitlab |
An issue has been discovered in GitLab CE/EE affecting all versions starting from 14.3 before 15.6.7, all versions starting from 15.7 before 15.7.6, all versions starting from 15.8 before 15.8.1. An attacker may upload a crafted CI job artifact zip file in a project that uses dynamic child pipelines and make a sidekiq job allocate a lot of memory. In GitLab instances where Sidekiq is memory-limited, this may cause Denial of Service. |
2023-02-13 |
not yet calculated |
CVE-2022-3759
MISC
CONFIRM
MISC |
| intel — ema |
Improper neutralization in the Intel(R) EMA software before version 1.8.1.0 may allow a privileged user to potentially enable escalation of privilege via network access. |
2023-02-16 |
not yet calculated |
CVE-2022-38056
MISC |
| intel — multiple_products |
Improper isolation of shared resources in some Intel(R) Processors when using Intel(R) Software Guard Extensions may allow a privileged user to potentially enable information disclosure via local access. |
2023-02-16 |
not yet calculated |
CVE-2022-38090
MISC |
| solarwinds — platform |
SolarWinds Platform was susceptible to the Deserialization of Untrusted Data. This vulnerability allows a remote adversary with Orion admin-level account access to SolarWinds Web Console to execute arbitrary commands. |
2023-02-15 |
not yet calculated |
CVE-2022-38111
MISC
MISC |
| fortinet — fortinac |
An improper authorization vulnerability [CWE-285] in Fortinet FortiNAC version 9.4.0 through 9.4.1 and before 9.2.6 allows an unauthenticated user to perform some administrative operations over the FortiNAC instance via crafted HTTP POST requests. |
2023-02-16 |
not yet calculated |
CVE-2022-38375
MISC |
| fortinet — fortinac |
Multiple improper neutralization of input during web page generation (‘Cross-site Scripting’) vulnerabilities [CWE-79] in Fortinet FortiNAC portal UI before 9.4.1 allows an attacker to perform an XSS attack via crafted HTTP requests. |
2023-02-16 |
not yet calculated |
CVE-2022-38376
MISC |
| fortinet — multiple_products |
An improper privilege management vulnerability [CWE-269] in Fortinet FortiOS version 7.2.0 and before 7.0.7 and FortiProxy version 7.2.0 through 7.2.1 and before 7.0.7 allows an attacker that has access to the admin profile section (System subsection Administrator Users) to modify their own profile and upgrade their privileges to Read Write via CLI or GUI commands. |
2023-02-16 |
not yet calculated |
CVE-2022-38378
MISC |
|
qaelum — dose
|
Qaelum DOSE 18.08 through 21.1 before 21.2 allows Directory Traversal via the loadimages name parameter. It allows a user to specify an arbitrary location on the server’s filesystem from which to load an image. (Only images are displayed to the attacker. All other files are loaded but not displayed.) The Content-Type response header reflects the actual content type of the file being requested. This allows an attacker to enumerate files on the local system. Additionally, remote resources can be requested via a UNC path, allowing an attacker to coerce authentication out from the server to the attackers machine. |
2023-02-16 |
not yet calculated |
CVE-2022-38731
MISC
MISC |
| rttys — rttys |
SQL Injection vulnerability in rttys versions 4.0.0, 4.0.1, and 4.0.2 in api.go, allows attackers to execute arbitrary code. |
2023-02-15 |
not yet calculated |
CVE-2022-38867
MISC |
| ehoney — ehoney |
SQL Injection vulnerability in Ehoney version 2.0.0 in models/protocol.go and models/images.go, allows attackers to execute arbitrary code. |
2023-02-15 |
not yet calculated |
CVE-2022-38868
MISC |
|
wordpress — wordpress
|
The WP FullCalendar WordPress plugin before 1.5 does not ensure that the post retrieved via an AJAX action is public and can be accessed by the user making the request, allowing unauthenticated attackers to get the content of arbitrary posts, including draft/private as well as password-protected ones. |
2023-02-13 |
not yet calculated |
CVE-2022-3891
MISC |
|
niterforum — niterforum
|
An issue was discovered in NiterForum version 2.5.0-beta in /src/main/java/cn/niter/forum/api/SsoApi.java and /src/main/java/cn/niter/forum/controller/AdminController.java, allows attackers to gain escalated privileges. |
2023-02-15 |
not yet calculated |
CVE-2022-38935
MISC |
|
fortinet — multiple_products
|
An improper certificate validation vulnerability [CWE-295] in FortiOS 7.2.0 through 7.2.3, 7.0.0 through 7.0.7, 6.4 all versions, 6.2 all versions, 6.0 all versions and FortiProxy 7.0.0 through 7.0.6, 2.0 all versions, 1.2 all versions may allow a remote and unauthenticated attacker to perform a Man-in-the-Middle attack on the communication channel between the FortiOS/FortiProxy device and remote servers hosting threat feeds (when the latter are configured as Fabric connectors in FortiOS/FortiProxy) |
2023-02-16 |
not yet calculated |
CVE-2022-39948
MISC |
| fortinet — fortinac |
A external control of file name or path in Fortinet FortiNAC versions 9.4.0, 9.2.0 through 9.2.5, 9.1.0 through 9.1.7, 8.8.0 through 8.8.11, 8.7.0 through 8.7.6, 8.6.0 through 8.6.5, 8.5.0 through 8.5.4, 8.3.7 may allow an unauthenticated attacker to execute unauthorized code or commands via specifically crafted HTTP request. |
2023-02-16 |
not yet calculated |
CVE-2022-39952
MISC |
| fortinet — fortinac |
An improper restriction of xml external entity reference in Fortinet FortiNAC version 9.4.0 through 9.4.1, FortiNAC version 9.2.0 through 9.2.7, FortiNAC version 9.1.0 through 9.1.8, FortiNAC version 8.8.0 through 8.8.11, FortiNAC version 8.7.0 through 8.7.6, FortiNAC version 8.6.0 through 8.6.5, FortiNAC version 8.5.0 through 8.5.4, FortiNAC version 8.3.7 allows attacker to read arbitrary files or trigger a denial of service via specifically crafted XML documents. |
2023-02-16 |
not yet calculated |
CVE-2022-39954
MISC |
| ireader — media-server |
Use After Free (UAF) vulnerability in ireader media-server before commit 3e0f63f1d3553f75c7d4eb32fa7c7a1976a9ff84 in librtmp, allows attackers to cause a denial of service. |
2023-02-15 |
not yet calculated |
CVE-2022-40016
MISC |
| qvidium_technologies — amino_a140 |
QVidium Technologies Amino A140 (prior to firmware version 1.0.0-283) was discovered to contain a command injection vulnerability. |
2023-02-17 |
not yet calculated |
CVE-2022-40021
MISC |
| microsemi — syncserver_s650 |
Microchip Technology (Microsemi) SyncServer S650 was discovered to contain a command injection vulnerability. |
2023-02-13 |
not yet calculated |
CVE-2022-40022
MISC
MISC
MISC
MISC |
| sourcecodester — simple_task_managing_system |
SQL Injection vulnerability in Simple Task Managing System version 1.0 in login.php in ‘username’ and ‘password’ parameters, allows attackers to execute arbitrary code and gain sensitive information. |
2023-02-17 |
not yet calculated |
CVE-2022-40032
MISC
MISC
MISC |
| acer — aspire |
Stack overflow vulnerability in Aspire E5-475G ‘s BIOS firmware, in the FpGui module, a second call to GetVariable services allows local attackers to execute arbitrary code in the UEFI DXE phase and gain escalated privileges. |
2023-02-16 |
not yet calculated |
CVE-2022-40080
MISC
MISC |
|
ibm — sterling_b2b_integrator
|
IBM Sterling B2B Integrator Standard Edition 6.0.0.0 through 6.0.3.7 and 6.1.0.0 through 6.1.2.0 could allow an authenticated user to perform unauthorized actions due to improper access controls. IBM X-Force ID: 235533. |
2023-02-17 |
not yet calculated |
CVE-2022-40231
MISC
MISC |
|
ibm — sterling_b2b_integrator
|
IBM Sterling B2B Integrator Standard Edition 6.1.0.0 through 6.1.1.1, and 6.1.2.0 could allow an authenticated user to perform actions they should not have access to due to improper permission controls. IBM X-Force ID: 235597. |
2023-02-17 |
not yet calculated |
CVE-2022-40232
MISC
MISC |
| intern_record_system — intern_record_system |
SQL Injection vulnerability in Intern Record System version 1.0 in /intern/controller.php in ‘phone’, ’email’, ‘deptType’ and ‘name’ parameters, allows attackers to execute arbitrary code and gain sensitive information. |
2023-02-17 |
not yet calculated |
CVE-2022-40347
MISC
MISC
MISC |
| intern_record_system — intern_record_system |
Cross Site Scripting (XSS) vulnerability in Intern Record System version 1.0 in /intern/controller.php in ‘name’ and ’email’ parameters, allows attackers to execute arbitrary code. |
2023-02-18 |
not yet calculated |
CVE-2022-40348
MISC
MISC
MISC |
|
fortinet — fortinac
|
Some cryptographic issues in Fortinet FortiNAC versions 9.4.0 through 9.4.1, 9.2.0 through 9.2.7, 9.1.0 through 9.1.8, 8.8.0 through 8.8.11, 8.7.0 through 8.7.6, 8.6.0 through 8.6.5, 8.5.0 through 8.5.4, 8.3.7 may allow an attacker to decrypt and forge protocol communication messages. |
2023-02-16 |
not yet calculated |
CVE-2022-40675
MISC |
|
fortinet — fortinac
|
A improper neutralization of argument delimiters in a command (‘argument injection’) in Fortinet FortiNAC versions 9.4.0, 9.2.0 through 9.2.5, 9.1.0 through 9.1.7, 8.8.0 through 8.8.11, 8.7.0 through 8.7.6, 8.6.0 through 8.6.5, 8.5.0 through 8.5.4, 8.3.7 allows attacker to execute unauthorized code or commands via specially crafted input parameters. |
2023-02-16 |
not yet calculated |
CVE-2022-40677
MISC |
|
fortinet — fortinac
|
An insufficiently protected credentials in Fortinet FortiNAC versions 9.4.0, 9.2.0 through 9.2.5, 9.1.0 through 9.1.7, 8.8.0 through 8.8.11, 8.7.0 through 8.7.6, 8.6.0 through 8.6.5, 8.5.0 through 8.5.4, 8.3.7 may allow a local attacker with database access to recover user passwords. |
2023-02-16 |
not yet calculated |
CVE-2022-40678
MISC |
| fortinet — fortiweb |
A double free in Fortinet FortiWeb version 7.0.0 through 7.0.3 may allows attacker to execute unauthorized code or commands via specially crafted commands |
2023-02-16 |
not yet calculated |
CVE-2022-40683
MISC |
| optinlyhq — optinly |
Cross-Site Request Forgery (CSRF) in OptinlyHQ Optinly – Exit Intent, Newsletter Popups, Gamification & Opt-in Forms plugin <= 1.0.15 versions. |
2023-02-13 |
not yet calculated |
CVE-2022-41134
MISC |
| intel — network_adapter_installer_software |
Uncontrolled search path in some Intel(R) Network Adapter installer software may allow an authenticated user to potentially enable escalation of privilege via local access. |
2023-02-16 |
not yet calculated |
CVE-2022-41314
MISC |
|
fortinet — fortios
|
An improper neutralization of input during web page generation [CWE-79] vulnerability in FortiOS versions 7.0.0 to 7.0.7 and 7.2.0 to 7.2.3 may allow a remote, unauthenticated attacker to launch a cross site scripting (XSS) attack via the “redir” parameter of the URL seen when the “Sign in with FortiCloud” button is clicked. |
2023-02-16 |
not yet calculated |
CVE-2022-41334
MISC |
|
fortinet — multiple_products
|
A relative path traversal vulnerability [CWE-23] in Fortinet FortiOS version 7.2.0 through 7.2.2, 7.0.0 through 7.0.8 and before 6.4.10, FortiProxy version 7.2.0 through 7.2.1, 7.0.0 through 7.0.7 and before 2.0.10, FortiSwitchManager 7.2.0 and before 7.0.0 allows an authenticated attacker to read and write files on the underlying Linux system via crafted HTTP requests. |
2023-02-16 |
not yet calculated |
CVE-2022-41335
MISC |
| gitlab — gitlab |
A Cross Site Request Forgery issue has been discovered in GitLab CE/EE affecting all versions before 15.6.7, all versions starting from 15.7 before 15.7.6, and all versions starting from 15.8 before 15.8.1. An attacker could take over a project if an Owner or Maintainer uploads a file to a malicious project. |
2023-02-13 |
not yet calculated |
CVE-2022-4138
CONFIRM
MISC
MISC |
|
tibco — multiple_products
|
The Hawk Console component of TIBCO Software Inc.’s TIBCO Hawk and TIBCO Operational Intelligence Hawk RedTail contains a vulnerability that will return the EMS transport password and EMS SSL password to a privileged user. Affected releases are TIBCO Software Inc.’s TIBCO Hawk: versions 6.2.1 and below and TIBCO Operational Intelligence Hawk RedTail: versions 7.2.0 and below. |
2023-02-14 |
not yet calculated |
CVE-2022-41564
CONFIRM
CONFIRM |
| intel — on_event_series_android_application |
Insufficiently protected credentials in the Intel(R) ON Event Series Android application before version 2.0 may allow an authenticated user to potentially enable information disclosure via local access. |
2023-02-16 |
not yet calculated |
CVE-2022-41614
MISC |
| ibm — maximo_asset_management |
IBM Maximo Asset Management 7.6.1.2 and 7.6.1.3 could allow a remote attacker to obtain sensitive information when a detailed technical error message is returned in the browser. This information could be used in further attacks against the system. IBM X-Force ID: 237587. |
2023-02-17 |
not yet calculated |
CVE-2022-41734
MISC
MISC |
|
asus — ec_tool_driver
|
ASUS EC Tool driver (aka d.sys) 1beb15c90dcf7a5234ed077833a0a3e900969b60be1d04fcebce0a9f8994bdbb, as signed by ASUS and shipped with multiple ASUS software products, contains multiple IOCTL handlers that provide raw read and write access to port I/O and MSRs via unprivileged IOCTL calls. Local users can gain privileges. |
2023-02-15 |
not yet calculated |
CVE-2022-42455
MISC |
| fortinet — multiple_products |
A improper neutralization of crlf sequences in http headers (‘http response splitting’) in Fortinet FortiOS versions 7.2.0 through 7.2.2, 7.0.0 through 7.0.8, 6.4.0 through 6.4.11, 6.2.0 through 6.2.12, 6.0.0 through 6.0.16, FortiProxy 7.2.0 through 7.2.1, 7.0.0 through 7.0.7, 2.0.0 through 2.0.10, 1.2.0 through 1.2.13, 1.1.0 through 1.1.6 may allow an authenticated and remote attacker to perform an HTTP request splitting attack which gives attackers control of the remaining headers and body of the response. |
2023-02-16 |
not yet calculated |
CVE-2022-42472
MISC |
| apache — shenyu |
Improper Privilege Management vulnerability in Apache Software Foundation Apache ShenYu. ShenYu Admin allows low-privilege low-level administrators create users with higher privileges than their own. This issue affects Apache ShenYu: 2.5.0. Upgrade to Apache ShenYu 2.5.1 or apply patch https://github.com/apache/shenyu/pull/3958 https://github.com/apache/shenyu/pull/3958 . |
2023-02-15 |
not yet calculated |
CVE-2022-42735
MISC |
|
b&r-automation — system_diagnostics_manager
|
A reflected cross-site scripting (XSS) vulnerability exists in System Diagnostics Manager of B&R Automation Runtime versions >=3.00 and <=C4.93 that enables a remote attacker to execute arbitrary JavaScript in the context of the users browser session. |
2023-02-14 |
not yet calculated |
CVE-2022-4286
MISC |
|
fujifilm — driver_distributor
|
Driver Distributor v2.2.3.1 and earlier contains a vulnerability where passwords are stored in a recoverable format. If an attacker obtains a configuration file of Driver Distributor, the encrypted administrator’s credentials may be decrypted. |
2023-02-13 |
not yet calculated |
CVE-2022-43460
MISC
MISC |
| wordpress — wordpress |
Cross-Site Request Forgery (CSRF) vulnerability in Orchestrated Corona Virus (COVID-19) Banner & Live Data plugin <= 1.7.0.6 versions. |
2023-02-14 |
not yet calculated |
CVE-2022-43469
MISC |
| ibm — sterling_b2b_integrator |
IBM Sterling B2B Integrator Standard Edition 6.0.0.0 through 6.0.3.7 and 6.1.0.0 through 6.1.2.0 is vulnerable to cross-site scripting. This vulnerability allows users to embed arbitrary JavaScript code in the Web UI thus altering the intended functionality potentially leading to credentials disclosure within a trusted session. IBM X-Force ID: 238684. |
2023-02-17 |
not yet calculated |
CVE-2022-43579
MISC
MISC |
|
ibm — multiple_products
|
IBM Db2 for Linux, UNIX and Windows 10.5, 11.1, and 11.5 is vulnerable to information Disclosure due to improper privilege management when a specially crafted table access is used. IBM X-Force ID: 241671. |
2023-02-17 |
not yet calculated |
CVE-2022-43927
MISC
MISC |
|
ibm — multiple_products
|
IBM Db2 for Linux, UNIX and Windows 11.1 and 11.5 may be vulnerable to a Denial of Service when executing a specially crafted ‘Load’ command. IBM X-Force ID: 241676. |
2023-02-17 |
not yet calculated |
CVE-2022-43929
MISC
MISC |
|
ibm — multiple_products
|
IBM Db2 for Linux, UNIX and Windows 10.5, 11.1, and 11.5 is vulnerable to an Information Disclosure as sensitive information may be included in a log file. IBM X-Force ID: 241677. |
2023-02-17 |
not yet calculated |
CVE-2022-43930
MISC
MISC |
|
fortinet — fortiportal
|
An insertion of sensitive information into log file vulnerability [CWE-532] in the FortiPortal management interface 7.0.0 through 7.0.2 may allow a remote authenticated attacker to read other devices’ passwords in the audit log page. |
2023-02-16 |
not yet calculated |
CVE-2022-43954
MISC |
| ricoh — mp_c4504ex |
Ricoh mp_c4504ex devices with firmware 1.06 mishandle credentials. |
2023-02-16 |
not yet calculated |
CVE-2022-43969
MISC
MISC |
|
siteservercms — siteservercms
|
SiteServerCMS 7.1.3 sscms has a file read vulnerability. |
2023-02-16 |
not yet calculated |
CVE-2022-44299
MISC |
| wordpress — wordpress |
The FL3R FeelBox WordPress plugin through 8.1 does not properly sanitise and escape a parameter before using it in a SQL statement via an AJAX action available to unauthenticated users, leading to a SQL injection. |
2023-02-13 |
not yet calculated |
CVE-2022-4445
MISC |
| wordpress — wordpress |
The GiveWP WordPress plugin before 2.24.0 does not validate and escape some of its shortcode attributes before outputting them back in a page/post where the shortcode is embed, which could allow users with the contributor role and above to perform Stored Cross-Site Scripting attacks |
2023-02-13 |
not yet calculated |
CVE-2022-4448
MISC |
| wordpress — wordpress |
The amr shortcode any widget WordPress plugin through 4.0 does not validate and escape some of its shortcode attributes before outputting them back in the page, which could allow users with a role as low as contributor to perform Stored Cross-Site Scripting attacks which could be used against high privilege users such as admins. |
2023-02-13 |
not yet calculated |
CVE-2022-4458
MISC |
| wordpress — wordpress |
The YARPP WordPress plugin through 5.30.1 does not validate and escape some of its shortcode attributes before outputting them back in the page, which could allow users with a role as low as contributor to perform Stored Cross-Site Scripting attacks which could be used against high privilege users such as admins. |
2023-02-13 |
not yet calculated |
CVE-2022-4471
MISC |
| wordpress — wordpress |
The Widget Shortcode WordPress plugin through 0.3.5 does not validate and escape some of its shortcode attributes before outputting them back in the page, which could allow users with a role as low as contributor to perform Stored Cross-Site Scripting attacks which could be used against high privilege users such as admins. |
2023-02-13 |
not yet calculated |
CVE-2022-4473
MISC |
| wordpress — wordpress |
The Widgets on Pages WordPress plugin through 1.6.0 does not validate and escape some of its shortcode attributes before outputting them back in the page, which could allow users with a role as low as contributor to perform Stored Cross-Site Scripting attacks which could be used against high privilege users such as admins. |
2023-02-13 |
not yet calculated |
CVE-2022-4488
MISC |
| wordpress — wordpress |
The Better Font Awesome WordPress plugin before 2.0.4 does not validate and escape some of its shortcode attributes before outputting them back in a page/post where the shortcode is embed, which could allow users with the contributor role and above to perform Stored Cross-Site Scripting attacks. |
2023-02-13 |
not yet calculated |
CVE-2022-4512
MISC |
| suse — multiple_products |
An Incorrect Default Permissions vulnerability in saphanabootstrap-formula of SUSE Linux Enterprise Module for SAP Applications 15-SP1, SUSE Linux Enterprise Server for SAP 12-SP5; openSUSE Leap 15.4 allows local attackers to escalate to root by manipulating the sudo configuration that is created. This issue affects: SUSE Linux Enterprise Module for SAP Applications 15-SP1 saphanabootstrap-formula versions prior to 0.13.1+git.1667812208.4db963e. SUSE Linux Enterprise Server for SAP 12-SP5 saphanabootstrap-formula versions prior to 0.13.1+git.1667812208.4db963e. openSUSE Leap 15.4 saphanabootstrap-formula versions prior to 0.13.1+git.1667812208.4db963e. |
2023-02-15 |
not yet calculated |
CVE-2022-45153
CONFIRM |
| suse — multiple_products |
A Cleartext Storage of Sensitive Information vulnerability in suppportutils of SUSE Linux Enterprise Server 12, SUSE Linux Enterprise Server 15, SUSE Linux Enterprise Server 15 SP3 allows attackers that get access to the support logs to gain knowledge of the stored credentials This issue affects: SUSE Linux Enterprise Server 12 supportutils version 3.0.10-95.51.1CWE-312: Cleartext Storage of Sensitive Information and prior versions. SUSE Linux Enterprise Server 15 supportutils version 3.1.21-150000.5.44.1 and prior versions. SUSE Linux Enterprise Server 15 SP3 supportutils version 3.1.21-150300.7.35.15.1 and prior versions. |
2023-02-15 |
not yet calculated |
CVE-2022-45154
CONFIRM |
| ithacalabs –vsourz_digital |
Vsourz Digital Advanced Contact form 7 DB Versions 1.7.2 and 1.9.1 is vulnerable to Cross Site Scripting (XSS). |
2023-02-13 |
not yet calculated |
CVE-2022-45285
MISC
MISC |
| pandora_fms — artica |
Improper Neutralization of Input During Web Page Generation (‘Cross-site Scripting’) vulnerability in Artica PFMS Pandora FMS v765 on all platforms, allows Cross-Site Scripting (XSS). As a manager privilege user , create a network map containing name as xss payload. Once created, admin user must click on the edit network maps and XSS payload will be executed, which could be used for stealing admin users cookie value. |
2023-02-15 |
not yet calculated |
CVE-2022-45436
CONFIRM |
| pandora_fms — artica |
Improper Neutralization of Input During Web Page Generation (‘Cross-site Scripting’) vulnerability in Artica PFMS Pandora FMS v765 on all allows Cross-Site Scripting (XSS). A user with edition privileges can create a Payload in the reporting dashboard module. An admin user can observe the Payload without interaction and attacker can get information. |
2023-02-15 |
not yet calculated |
CVE-2022-45437
CONFIRM |
| acronis — multiple_products |
Sensitive information disclosure due to insecure folder permissions. The following products are affected: Acronis Agent (Windows) before build 30161, Acronis Cyber Protect 15 (Windows) before build 30984. |
2023-02-13 |
not yet calculated |
CVE-2022-45454
MISC |
| acronis — multiple_products |
Local privilege escalation due to incomplete uninstallation cleanup. The following products are affected: Acronis Cyber Protect Home Office (Windows) before build 40107, Acronis Agent (Windows) before build 30025, Acronis Cyber Protect 15 (Windows) before build 30984. |
2023-02-13 |
not yet calculated |
CVE-2022-45455
MISC |
| wordpress — wordpress |
The Mapwiz WordPress plugin through 1.0.1 does not properly sanitise and escape a parameter before using it in a SQL statement, leading to a SQL injection exploitable by high privilege users such as admin. |
2023-02-13 |
not yet calculated |
CVE-2022-4546
MISC
MISC |
| wordpress — wordpress |
The Rich Table of Contents WordPress plugin before 1.3.9 does not validate and escape some of its shortcode attributes before outputting them back in a page/post where the shortcode is embed, which could allow users with the contributor role and above to perform Stored Cross-Site Scripting attacks |
2023-02-13 |
not yet calculated |
CVE-2022-4551
MISC |
|
discuzx — discuzx
|
Cross site scripting (XSS) vulnerability in DiscuzX 3.4 allows attackers to execute arbitrary code via the datetline, title, tpp, or username parameters via the audit search. |
2023-02-15 |
not yet calculated |
CVE-2022-45543
MISC |
| screencheck_badgemaker — screencheck_badgemaker |
Information Disclosure in Authentication Component of ScreenCheck BadgeMaker 2.6.2.0 application allows internal attacker to obtain credentials for authentication via network sniffing. |
2023-02-15 |
not yet calculated |
CVE-2022-45546
MISC |
|
xpdfreader — xpdfreader
|
Stack overflow vulnerability in function Dict::find in xpdf/Dict.cc in xpdf 4.04, allows local attackers to cause a denial of service. |
2023-02-15 |
not yet calculated |
CVE-2022-45586
MISC |
|
xpdfreader — xpdfreader
|
Stack overflow vulnerability in function gmalloc in goo/gmem.cc in xpdf 4.04, allows local attackers to cause a denial of service. |
2023-02-15 |
not yet calculated |
CVE-2022-45587
MISC |
| wordpress — wordpress |
The Meks Flexible Shortcodes WordPress plugin before 1.3.5 does not validate and escape some of its shortcode attributes before outputting them back in the page, which could allow users with a role as low as contributor to perform Stored Cross-Site Scripting attacks which could be used against high privilege users such as admins. |
2023-02-13 |
not yet calculated |
CVE-2022-4562
MISC |
| arris — router |
Arris TG2482A firmware through 9.1.103GEM9 allow Remote Code Execution (RCE) via the ping utility feature. |
2023-02-17 |
not yet calculated |
CVE-2022-45701
MISC
MISC |
| comfast — router |
Incorrect Access Control in Comfast router CF-WR6110N V2.3.1 allows a remote attacker on the same network to perform any HTTP request to an unauthenticated page to force the server to generate a SESSION_ID, and using this SESSION_ID an attacker can then perform authenticated requests. |
2023-02-13 |
not yet calculated |
CVE-2022-45724
MISC
MISC
MISC |
| comfast — router |
Improper Input Validation in Comfast router CF-WR6110N V2.3.1 allows a remote attacker on the same network to execute arbitrary code on the target via an HTTP POST request |
2023-02-13 |
not yet calculated |
CVE-2022-45725
MISC
MISC
MISC |
| wordpress — wordpress |
The Twenty20 Image Before-After WordPress plugin through 1.5.9 does not validate and escape some of its shortcode attributes before outputting them back in a page/post where the shortcode is embed, which could allow users with the contributor role and above to perform Stored Cross-Site Scripting attacks |
2023-02-13 |
not yet calculated |
CVE-2022-4580
MISC |
|
open_solutions_for_education — opensis_community_edition
|
Open Solutions for Education, Inc openSIS Community Edition v8.0 and earlier is vulnerable to SQL Injection via CalendarModal.php. |
2023-02-13 |
not yet calculated |
CVE-2022-45962
MISC
MISC
MISC
CONFIRM
MISC |
| wordpress — wordpress |
The Easy PayPal Buy Now Button WordPress plugin before 1.7.4 does not validate and escape some of its shortcode attributes before outputting them back in a page/post where the shortcode is embed, which could allow users with the contributor role and above to perform Stored Cross-Site Scripting attacks |
2023-02-13 |
not yet calculated |
CVE-2022-4628
MISC |
| wordpress — wordpress |
The WP Visitor Statistics (Real Time Traffic) WordPress plugin before 6.5 does not validate and escape one of its shortcode attributes, which could allow users with a role as low as contributor to perform Stored Cross-Site Scripting attack. |
2023-02-13 |
not yet calculated |
CVE-2022-4656
MISC |
| wordpress — wordpress |
The TemplatesNext ToolKit WordPress plugin before 3.2.8 does not validate and escape some of its shortcode attributes before outputting them back in a page/post where the shortcode is embed, which could allow users with the contributor role and above to perform Stored Cross-Site Scripting attacks. |
2023-02-13 |
not yet calculated |
CVE-2022-4678
MISC |
| wordpress — wordpress |
The Lightbox Gallery WordPress plugin before 0.9.5 does not validate and escape some of its shortcode attributes before outputting them back in a page/post where the shortcode is embed, which could allow users with the contributor role and above to perform Stored Cross-Site Scripting attacks |
2023-02-13 |
not yet calculated |
CVE-2022-4682
MISC |
| wordpress — wordpress |
Cross-Site Request Forgery (CSRF) vulnerability in ExpressTech Quiz And Survey Master – Best Quiz, Exam and Survey Plugin for WordPress plugin <= 8.0.7 versions. |
2023-02-14 |
not yet calculated |
CVE-2022-46862
MISC |
| ampere_computing — multiple_products |
In Ampere AltraMax and Ampere Altra before 2.10c, improper access controls allows the OS to reinitialize a disabled root complex. |
2023-02-15 |
not yet calculated |
CVE-2022-46892
MISC |
| playsms — playsms |
A type juggling vulnerability in the component /auth/fn.php of PlaySMS v1.4.5 and earlier allows attackers to bypass authentication. |
2023-02-13 |
not yet calculated |
CVE-2022-47034
MISC
MISC |
pandora_fms — console
|
Stored cross-site scripting vulnerability in the Create event section in Pandora FMS Console v766 and lower. An attacker typically exploits this vulnerability by injecting XSS payloads on popular pages of a site or passing a link to a victim, tricking them into viewing the page that contains the stored XSS payload. |
2023-02-15 |
not yet calculated |
CVE-2022-47372
CONFIRM |
| pandora_fms — console |
Reflected Cross Site Scripting in Search Functionality of Module Library in Pandora FMS Console v766 and lower. This vulnerability arises on the forget password functionality in which parameter username does not proper input validation/sanitization thus results in executing malicious JavaScript payload. |
2023-02-15 |
not yet calculated |
CVE-2022-47373
CONFIRM |
wordpress — wordpress
|
The WP Customer Area WordPress plugin before 8.1.4 does not have CSRF checks when performing some actions such as chmod, mkdir and copy, which could allow attackers to make a logged-in admin perform them and create arbitrary folders, copy file for example. |
2023-02-13 |
not yet calculated |
CVE-2022-4745
MISC |
| solarwinds — platform |
SolarWinds Platform was susceptible to the Deserialization of Untrusted Data. This vulnerability allows a remote adversary with Orion admin-level account access to SolarWinds Web Console to execute arbitrary commands. |
2023-02-15 |
not yet calculated |
CVE-2022-47503
MISC
MISC |
| solarwinds — platform |
SolarWinds Platform was susceptible to the Deserialization of Untrusted Data. This vulnerability allows a remote adversary with Orion admin-level account access to SolarWinds Web Console to execute arbitrary commands. |
2023-02-15 |
not yet calculated |
CVE-2022-47504
MISC
MISC |
| solarwinds — platform |
SolarWinds Platform was susceptible to the Directory Traversal Vulnerability. This vulnerability allows a local adversary with authenticated account access to edit the default configuration, enabling the execution of arbitrary commands. |
2023-02-15 |
not yet calculated |
CVE-2022-47506
MISC
MISC |
| solarwinds — platform |
SolarWinds Platform was susceptible to the Deserialization of Untrusted Data. This vulnerability allows a remote adversary with Orion admin-level account access to SolarWinds Web Console to execute arbitrary commands. |
2023-02-15 |
not yet calculated |
CVE-2022-47507
MISC
MISC |
| solarwinds — platform |
Customers who had configured their polling to occur via Kerberos did not expect NTLM Traffic on their environment, but since we were querying for data via IP address this prevented us from utilizing Kerberos. |
2023-02-15 |
not yet calculated |
CVE-2022-47508
MISC
MISC |
| wordpress — wordpress |
The GigPress WordPress plugin before 2.3.28 does not validate and escape some of its shortcode attributes before outputting them back in a page/post where the shortcode is embed, which could allow users with the contributor role and above to perform Stored Cross-Site Scripting attacks |
2023-02-13 |
not yet calculated |
CVE-2022-4759
MISC |
| tianjie — cpe906-3 |
TIANJIE CPE906-3 is vulnerable to password disclosure. This is present on Software Version WEB5.0_LCD_20200513, Firmware Version MV8.003, and Hardware Version CPF906-V5.0_LCD_20200513. |
2023-02-16 |
not yet calculated |
CVE-2022-47703
MISC |
| wordpress — wordpress |
The Youtube Channel Gallery WordPress plugin through 2.4 does not validate and escape some of its shortcode attributes before outputting them back in a page/post where the shortcode is embed, which could allow users with the contributor role and above to perform Stored Cross-Site Scripting attacks |
2023-02-13 |
not yet calculated |
CVE-2022-4783
MISC |
| siemens — multiple_products |
A vulnerability has been identified in JT Open (All versions < V11.2.3.0), JT Utilities (All versions < V13.2.3.0), Parasolid V34.0 (All versions < V34.0.252), Parasolid V34.1 (All versions < V34.1.242), Parasolid V35.0 (All versions < V35.0.170), Parasolid V35.1 (All versions < V35.1.150). The affected application contains a stack overflow vulnerability while parsing specially crafted JT files. This could allow an attacker to execute code in the context of the current process. |
2023-02-14 |
not yet calculated |
CVE-2022-47936
MISC |
siemens — multiple_products
|
A vulnerability has been identified in JT Open (All versions < V11.2.3.0), JT Utilities (All versions < V13.2.3.0). The affected application contains a memory corruption vulnerability while parsing specially crafted JT files. This could allow an attacker to execute code in the context of the current process. |
2023-02-14 |
not yet calculated |
CVE-2022-47977
MISC |
| ibm — aspera_faspex |
IBM Aspera Faspex 4.4.2 Patch Level 1 and earlier could allow a remote attacker to execute arbitrary code on the system, caused by a YAML deserialization flaw. By sending a specially crafted obsolete API call, an attacker could exploit this vulnerability to execute arbitrary code on the system. The obsolete API call was removed in Faspex 4.4.2 PL2. IBM X-Force ID: 243512. |
2023-02-17 |
not yet calculated |
CVE-2022-47986
MISC
MISC |
| genymotion — desktop |
Genymotion Desktop v3.3.2 was discovered to contain a DLL hijacking vulnerability that allows attackers to escalate privileges and execute arbitrary code via a crafted DLL. |
2023-02-13 |
not yet calculated |
CVE-2022-48077
MISC
MISC |
| jspreadsheet — jspreadsheet |
The dropdown menu in jspreadsheet before v4.6.0 was discovered to be vulnerable to cross-site scripting (XSS). |
2023-02-17 |
not yet calculated |
CVE-2022-48115
MISC
MISC |
| wordpress — wordpress |
The Paid Memberships Pro WordPress plugin before 2.9.9 does not validate and escape some of its shortcode attributes before outputting them back in the page, which could allow users with a role as low as contributor to perform Stored Cross-Site Scripting attacks which could be used against high privilege users such as admins. |
2023-02-13 |
not yet calculated |
CVE-2022-4830
MISC |
palantir — gotham
|
Improper Validation of Certificate with Host Mismatch vulnerability in Gotham Chat IRC helper of Palantir Gotham allows A malicious attacker in a privileged network position could abuse this to perform a man-in-the-middle attack. A successful man-in-the-middle attack would allow them to intercept, read, or modify network communications to and from the affected service. This issue affects: Palantir Palantir Gotham Chat IRC helper versions prior to 30221005.210011.9242. |
2023-02-16 |
not yet calculated |
CVE-2022-48306
MISC |
| palantir — magritte-ftp |
It was discovered that the Magritte-ftp was not verifying hostnames in TLS certificates due to a misuse of the javax.net.ssl.SSLSocketFactory API. A malicious attacker in a privileged network position could abuse this to perform a man-in-the-middle attack. A successful man-in-the-middle attack would allow them to intercept, read, or modify network communications to and from the affected service. In the case of a successful man in the middle attack on magritte-ftp, an attacker would be able to read and modify network traffic such as authentication tokens or raw data entering a Palantir Foundry stack. |
2023-02-16 |
not yet calculated |
CVE-2022-48307
MISC |
| palantir — sls-logging |
It was discovered that the sls-logging was not verifying hostnames in TLS certificates due to a misuse of the javax.net.ssl.SSLSocketFactory API. A malicious attacker in a privileged network position could abuse this to perform a man-in-the-middle attack. A successful man-in-the-middle attack would allow them to intercept, read, or modify network communications to and from the affected service. |
2023-02-16 |
not yet calculated |
CVE-2022-48308
MISC |
| netgear — nighthawk_wifi_mesh |
NETGEAR Nighthawk WiFi Mesh systems and routers are affected by a stack-based buffer overflow vulnerability. This affects MR60 before 1.1.7.132, MS60 before 1.1.7.132, R6900P before 1.3.3.154, R7000P before 1.3.3.154, R7960P before 1.4.4.94, and R8000P before 1.4.4.94. |
2023-02-13 |
not yet calculated |
CVE-2022-48322
MISC |
| sunlogin — sunflower_simplified |
Sunlogin Sunflower Simplified (aka Sunflower Simple and Personal) 1.0.1.43315 is vulnerable to a path traversal issue. A remote and unauthenticated attacker can execute arbitrary programs on the victim host by sending a crafted HTTP request, as demonstrated by /check?cmd=ping../ followed by the pathname of the powershell.exe program. |
2023-02-13 |
not yet calculated |
CVE-2022-48323
MISC
MISC
MISC |
mapos — mapos
|
Multiple Cross Site Scripting (XSS) vulnerabilities in Mapos 4.39.0 allow attackers to execute arbitrary code. Affects the following parameters: (1) pesquisa, (2) data, (3) data2, (4) nome, (5) descricao, (6) idDocumentos, (7) id in file application/controllers/Arquivos.php; (8) senha, (9) nomeCliente, (10) contato, (11) documento, (12) telefone, (13) celular, (14) email, (15) rua, (16) numero, (17) complemento, (18) bairro, (19) cidade, (20) estado, (21) cep, (22) idClientes, (23) id in file application/controllers/Clientes.php; (24) id, (25) tipo, (26) forma_pagamento, (27) gateway_de_pagamento, (28) excluir_id, (29) confirma_id, (30) cancela_id in file application/controllers/Cobrancas.php; (31) vencimento_de, (32) vencimento_ate, (33) cliente, (34) tipo, (35) status, (36) valor_desconto, (37) desconto, (38) periodo, (39) per_page, (40) urlAtual, (41) vencimento, (42) recebimento, (43) valor, (44) recebido, (45) formaPgto, (46) desconto_parc, (47) entrada, (48) qtdparcelas_parc, (49) valor_parc, (50) dia_pgto, (51) dia_base_pgto, (52) comissao, (53) descricao_parc, (54) cliente_parc, (55) observacoes_parc, (56) formaPgto_parc, (57) tipo_parc, (58) pagamento, (59) pago, (60) valor_desconto_editar, (61) descricao, (62) fornecedor, (63) observacoes, (64) id in file application/controllers/Financeiro.php; (65) refGarantia, (66) textoGarantia, (67) idGarantias in file application/controllers/Garantias.php; (68) email, (69) senha in file application/controllers/Login.php. |
2023-02-16 |
not yet calculated |
CVE-2022-48324
MISC
MISC
MISC |
mapos — mapos
|
Multiple Cross Site Scripting (XSS) vulnerabilities in Mapos 4.39.0 allow attackers to execute arbitrary code. Affects the following parameters: (1) year, (2) oldSenha, (3) novaSenha, (4) termo, (5) nome, (6) cnpj, (7) ie, (8) cep, (9) logradouro, (10) numero, (11) bairro, (12) cidade, (13) uf, (14) telefone, (15) email, (16) id, (17) app_name, (18) per_page, (19) app_theme, (20) os_notification, (21) email_automatico, (22) control_estoque, (23) notifica_whats, (24) control_baixa, (25) control_editos, (26) control_edit_vendas, (27) control_datatable, (28) pix_key, (29) os_status_list, (30) control_2vias, (31) status, (32) start, (33) end in file application/controllers/Mapos.php; (34) token, (35) senha, (36) email, (37) nomeCliente, (38) documento, (39) telefone, (40) celular, (41) rua, (42) numero, (43) complemento, (44) bairro, (45) cidade, (46) estado, (47) cep, (48) idClientes, (49) descricaoProduto, (50) defeito in file application/controllers/Mine.php; (51) pesquisa, (52) status, (53) data, (54) data2, (55) dataInicial, (56) dataFinal, (57) termoGarantia, (58) garantias_id, (59) clientes_id, (60) usuarios_id, (61) idOs, (62) garantia, (63) descricaoProduto, (64) defeito, (65) observacoes, (66) laudoTecnico, (67) id, (68) preco, (69) quantidade, (70) idProduto, (71) idOsProduto, (72) produto, (73) idServico, (74) idOsServico, (75) desconto, (76) tipoDesconto, (77) resultado, (78) vencimento, (79) recebimento, (80) os_id, (81) valor, (82) recebido, (83) formaPgto, (84) tipo, (85) anotacao, (86) idAnotacao in file application/controllers/Os.php. |
2023-02-16 |
not yet calculated |
CVE-2022-48325
MISC
MISC
MISC |
mapos — mapos
|
Multiple Cross Site Scripting (XSS) vulnerabilities in Mapos 4.39.0 allow attackers to execute arbitrary code. Affects the following parameters: (1) nome, (2) aCliente, (3) eCliente, (4) dCliente, (5) vCliente, (6) aProduto, (7) eProduto, (8) dProduto, (9) vProduto, (10) aServico, (11) eServico, (12) dServico, (13) vServico, (14) aOs, (15) eOs, (16) dOs, (17) vOs, (18) aVenda, (19) eVenda, (20) dVenda, (21) vVenda, (22) aGarantia, (23) eGarantia, (24) dGarantia, (25) vGarantia, (26) aArquivo, (27) eArquivo, (28) dArquivo, (29) vArquivo, (30) aPagamento, (31) ePagamento, (32) dPagamento, (33) vPagamento, (34) aLancamento, (35) eLancamento, (36) dLancamento, (37) vLancamento, (38) cUsuario, (39) cEmitente, (40) cPermissao, (41) cBackup, (42) cAuditoria, (43) cEmail, (44) cSistema, (45) rCliente, (46) rProduto, (47) rServico, (48) rOs, (49) rVenda, (50) rFinanceiro, (51) aCobranca, (52) eCobranca, (53) dCobranca, (54) vCobranca, (55) situacao, (56) idPermissao, (57) id in file application/controllers/Permissoes.php; (58) precoCompra, (59) precoVenda, (60) descricao, (61) unidade, (62) estoque, (63) estoqueMinimo, (64) idProdutos, (65) id, (66) estoqueAtual in file application/controllers/Produtos.php. |
2023-02-16 |
not yet calculated |
CVE-2022-48326
MISC
MISC
MISC |
mapos — mapos
|
Multiple Cross Site Scripting (XSS) vulnerabilities in Mapos 4.39.0 allow attackers to execute arbitrary code. Affects the following parameters: (1) dataInicial, (2) dataFinal, (3) tipocliente, (4) format, (5) precoInicial, (6) precoFinal, (7) estoqueInicial, (8) estoqueFinal, (9) de_id, (10) ate_id, (11) clientes_id, (12) origem, (13) cliente, (14) responsavel, (15) status, (16) tipo, (17) situacao in file application/controllers/Relatorios.php; (18) preco, (19) nome, (20) descricao, (21) idServicos, (22) id in file application/controllers/Servicos.php; (23) senha, (24) permissoes_id, (25) idUsuarios, (26) situacao, (27) nome, (28) rg, (29) cpf, (30) cep, (31) rua, (32) numero, (33) bairro, (34) cidade, (35) estado, (36) email, (37) telefone, (38) celular in file application/controllers/Usuarios.php; (39) dataVenda, (40) observacoes, (41) observacoes_cliente, (42) clientes_id, (43) usuarios_id, (44) idVendas, (45) id, (46) idVendasProduto, (47) preco, (48) quantidade, (49) idProduto, (50) produto, (51) desconto, (52) tipoDesconto, (53) resultado, (54) vendas_id, (55) vencimento, (56) recebimento, (57) valor, (58) recebido, (59) formaPgto, (60) tipo in file application/controllers/Vendas.php; (61) situacao, (62) periodo, (63) vencimento_de, (64) vencimento_ate, (65) tipo, (66) status, (67) cliente in file application/views/financeiro/lancamentos.php; (68) year in file application/views/mapos/painel.php; (69) pesquisa in file application/views/os/os.php; (70) etiquetaCode in file application/views/relatorios/imprimir/imprimirEtiquetas.php. |
2023-02-16 |
not yet calculated |
CVE-2022-48327
MISC
MISC
MISC |
wordpress — wordpress
|
A vulnerability was found in UDX Stateless Media Plugin 3.1.1. It has been declared as problematic. This vulnerability affects the function setup_wizard_interface of the file lib/classes/class-settings.php. The manipulation of the argument settings leads to cross site scripting. The attack can be initiated remotely. Upgrading to version 3.2.0 is able to address this issue. The name of the patch is 6aee7ae0b0beeb2232ce6e1c82aa7e2041ae151a. It is recommended to upgrade the affected component. VDB-220750 is the identifier assigned to this vulnerability. |
2023-02-13 |
not yet calculated |
CVE-2022-4905
MISC
MISC
MISC
MISC
MISC |
| sap_se — grc |
In SAP GRC (Process Control) – versions GRCFND_A V1200, GRCFND_A V8100, GRCPINW V1100_700, GRCPINW V1100_731, GRCPINW V1200_750, remote-enabled function module in the proprietary SAP solution enables an authenticated attacker with minimal privileges to access all the confidential data stored in the database. Successful exploitation of this vulnerability can expose user credentials from client-specific tables of the database, leading to high impact on confidentiality. |
2023-02-14 |
not yet calculated |
CVE-2023-0019
MISC
MISC |
| sap_se — businessobjects_business_intelligence_platform |
SAP BusinessObjects Business Intelligence platform – versions 420, 430, allows an authenticated attacker to access sensitive information which is otherwise restricted. On successful exploitation, there could be a high impact on confidentiality and limited impact on integrity of the application. |
2023-02-14 |
not yet calculated |
CVE-2023-0020
MISC
MISC |
sap_se — solution_manager
|
SAP Solution Manager (BSP Application) – version 720, allows an authenticated attacker to craft a malicious link, which when clicked by an unsuspecting user, can be used to read or modify some sensitive information or craft a payload which may restrict access to the desired resources, resulting in Cross-Site Scripting vulnerability. |
2023-02-14 |
not yet calculated |
CVE-2023-0024
MISC
MISC |
| sap_se — solution_manager |
SAP Solution Manager (BSP Application) – version 720, allows an authenticated attacker to craft a malicious link, which when clicked by an unsuspecting user, can be used to read or modify some sensitive information or craft a payload which may restrict access to the desired resources. |
2023-02-14 |
not yet calculated |
CVE-2023-0025
MISC
MISC |
| wordpress — wordpress |
The JetWidgets For Elementor WordPress plugin through 1.0.13 does not validate and escape some of its shortcode attributes before outputting them back in a page/post where the shortcode is embed, which could allow users with the contributor role and above to perform Stored Cross-Site Scripting attacks |
2023-02-13 |
not yet calculated |
CVE-2023-0034
MISC |
| wordpress — wordpress |
The Responsive Gallery Grid WordPress plugin before 2.3.9 does not validate and escape some of its shortcode attributes before outputting them back in a page/post where the shortcode is embed, which could allow users with the contributor role and above to perform Stored Cross-Site Scripting attacks. |
2023-02-13 |
not yet calculated |
CVE-2023-0060
MISC |
| wordpress — wordpress |
The Judge.me Product Reviews for WooCommerce WordPress plugin before 1.3.21 does not validate and escape some of its shortcode attributes before outputting them back in a page/post where the shortcode is embed, which could allow users with the contributor role and above to perform Stored Cross-Site Scripting attacks. |
2023-02-13 |
not yet calculated |
CVE-2023-0061
MISC |
wordpress — wordpress
|
The Amazon JS WordPress plugin through 0.10 does not validate and escape some of its shortcode attributes before outputting them back in a page/post where the shortcode is embed, which could allow users with the contributor role and above to perform Stored Cross-Site Scripting attacks. |
2023-02-13 |
not yet calculated |
CVE-2023-0075
MISC |
| wordpress — wordpress |
The Customer Reviews for WooCommerce WordPress plugin before 5.16.0 does not validate one of its shortcode attribute, which could allow users with a contributor role and above to include arbitrary files via a traversal attack. This could also allow them to read non PHP files and retrieve their content. RCE could also be achieved if the attacker manage to upload a malicious image containing PHP code, and then include it via the affected attribute, on a default WP install, authors could easily achieve that given that they have the upload_file capability. |
2023-02-13 |
not yet calculated |
CVE-2023-0080
MISC |
| wordpress — wordpress |
The Simple URLs WordPress plugin before 115 does not escape some parameters before using them in various SQL statements used by AJAX actions available by any authenticated users, leading to a SQL injection exploitable by low privilege users such as subscriber. |
2023-02-13 |
not yet calculated |
CVE-2023-0098
MISC |
| wordpress — wordpress |
The Simple URLs WordPress plugin before 115 does not sanitise and escape some parameters before outputting them back in some pages, leading to Reflected Cross-Site Scripting which could be used against high privilege users such as admin. |
2023-02-13 |
not yet calculated |
CVE-2023-0099
MISC |
| ls_electric — xbc-dn32u |
LS ELECTRIC XBC-DN32U with operating system version 01.80 is missing authentication for its deletion command. This could allow an attacker to delete arbitrary files. |
2023-02-15 |
not yet calculated |
CVE-2023-0102
MISC |
| ls_electric — xbc-dn32u |
If an attacker were to access memory locations of LS ELECTRIC XBC-DN32U with operating system version 01.80 that are outside of the communication buffer, the device stops operating. This could allow an attacker to cause a denial-of-service condition. |
2023-02-15 |
not yet calculated |
CVE-2023-0103
MISC |
| wordpress — wordpress |
The uTubeVideo Gallery WordPress plugin before 2.0.8 does not validate and escape some of its shortcode attributes before outputting them back in a page/post where the shortcode is embed, which could allow users with the contributor role and above to perform Stored Cross-Site Scripting attacks. |
2023-02-13 |
not yet calculated |
CVE-2023-0151
MISC |
| gnutls — gnutls |
A timing side-channel in the handling of RSA ClientKeyExchange messages was discovered in GnuTLS. This side-channel can be sufficient to recover the key encrypted in the RSA ciphertext across a network in a Bleichenbacher style attack. To achieve a successful decryption the attacker would need to send a large amount of specially crafted messages to the vulnerable server. By recovering the secret from the ClientKeyExchange message, the attacker would be able to decrypt the application data exchanged over that connection. |
2023-02-15 |
not yet calculated |
CVE-2023-0361
MISC
MISC
MISC
MLIST |
| hashicorp — gogetter |
HashiCorp go-getter up to 1.6.2 and 2.1.1 is vulnerable to decompression bombs. Fixed in 1.7.0 and 2.2.0. |
2023-02-16 |
not yet calculated |
CVE-2023-0475
MISC |
| resteasy — resteasy |
In RESTEasy the insecure File.createTempFile() is used in the DataSourceProvider, FileProvider and Mime4JWorkaround classes which creates temp files with insecure permissions that could be read by a local user. |
2023-02-17 |
not yet calculated |
CVE-2023-0482
MISC |
| gitlab — gitlab |
An issue has been discovered in GitLab CE/EE affecting all versions starting from 14.0 before 15.6.7, all versions starting from 15.7 before 15.7.6, all versions starting from 15.8 before 15.8.1. It was possible to trigger a DoS attack by uploading a malicious Helm chart. |
2023-02-13 |
not yet calculated |
CVE-2023-0518
CONFIRM
MISC
MISC |
| php — php |
In PHP 8.0.X before 8.0.28, 8.1.X before 8.1.16 and 8.2.X before 8.2.3, core path resolution function allocate buffer one byte too small. When resolving paths with lengths close to system MAXPATHLEN setting, this may lead to the byte after the allocated buffer being overwritten with NUL value, which might lead to unauthorized data access or modification. |
2023-02-16 |
not yet calculated |
CVE-2023-0568
MISC |
| sonicwall — email_security |
SonicWall Email Security contains a vulnerability that could permit a remote unauthenticated attacker access to an error page that includes sensitive information about users email addresses. |
2023-02-14 |
not yet calculated |
CVE-2023-0655
CONFIRM |
| php — php |
In PHP 8.0.X before 8.0.28, 8.1.X before 8.1.16 and 8.2.X before 8.2.3, excessive number of parts in HTTP form upload can cause high resource consumption and excessive number of log entries. This can cause denial of service on the affected server by exhausting CPU resources or disk space. |
2023-02-16 |
not yet calculated |
CVE-2023-0662
MISC |
| multiple_vendors — inverter |
A vulnerability was found in Deye/Revolt/Bosswerk Inverter MW3_15U_5406_1.47/MW3_15U_5406_1.471. It has been rated as problematic. This issue affects some unknown processing of the component Access Point Setting Handler. The manipulation with the input 12345678 leads to use of hard-coded password. It is possible to launch the attack on the physical device. The exploit has been disclosed to the public and may be used. Upgrading to version MW3_16U_5406_1.53 is able to address this issue. It is recommended to upgrade the affected component. The identifier VDB-220769 was assigned to this vulnerability. |
2023-02-13 |
not yet calculated |
CVE-2023-0808
MISC
MISC
MISC |
| btcpayserver — btcpayserver |
Cross-site Scripting (XSS) – Stored in GitHub repository btcpayserver/btcpayserver prior to 1.7.11. |
2023-02-13 |
not yet calculated |
CVE-2023-0810
CONFIRM
MISC |
|
gpac — gpac
|
Buffer Over-read in GitHub repository gpac/gpac prior to v2.3.0-DEV. |
2023-02-13 |
not yet calculated |
CVE-2023-0817
MISC
CONFIRM |
|
gpac — gpac
|
Off-by-one Error in GitHub repository gpac/gpac prior to v2.3.0-DEV. |
2023-02-13 |
not yet calculated |
CVE-2023-0818
MISC
CONFIRM |
|
gpac — gpac
|
Heap-based Buffer Overflow in GitHub repository gpac/gpac prior to v2.3.0-DEV. |
2023-02-13 |
not yet calculated |
CVE-2023-0819
MISC
CONFIRM |
|
hashicorp — multiple_products
|
HashiCorp Nomad and Nomad Enterprise 1.2.15 up to 1.3.8, and 1.4.3 jobs using a maliciously compressed artifact stanza source can cause excessive disk usage. Fixed in 1.2.16, 1.3.9, and 1.4.4. |
2023-02-16 |
not yet calculated |
CVE-2023-0821
MISC |
|
delta_electronics — dianergie
|
The affected product DIAEnergie (versions prior to v1.9.03.001) contains improper authorization, which could allow an unauthorized user to bypass authorization and access privileged functionality. |
2023-02-17 |
not yet calculated |
CVE-2023-0822
MISC |
|
pimcore — pimcore
|
Cross-site Scripting (XSS) – Stored in GitHub repository pimcore/pimcore prior to 1.5.17. |
2023-02-14 |
not yet calculated |
CVE-2023-0827
MISC
CONFIRM |
|
easynas — easynas
|
A vulnerability classified as critical has been found in EasyNAS 1.1.0. Affected is the function system of the file /backup.pl. The manipulation leads to os command injection. It is possible to launch the attack remotely. The exploit has been disclosed to the public and may be used. It is recommended to upgrade the affected component. VDB-220950 is the identifier assigned to this vulnerability. |
2023-02-14 |
not yet calculated |
CVE-2023-0830
MISC
MISC
MISC |
|
phpcrazy — phpcrazy
|
A vulnerability classified as problematic was found in PHPCrazy 1.1.1. This vulnerability affects unknown code of the file admin/admin.php?action=users&mode=info&user=2. The manipulation of the argument username leads to cross site scripting. The attack can be initiated remotely. The exploit has been disclosed to the public and may be used. VDB-221086 is the identifier assigned to this vulnerability. |
2023-02-15 |
not yet calculated |
CVE-2023-0840
MISC
MISC
MISC |
|
gpac — gpac
|
A vulnerability, which was classified as critical, has been found in GPAC 2.3-DEV-rev40-g3602a5ded. This issue affects the function mp3_dmx_process of the file filters/reframe_mp3.c. The manipulation leads to heap-based buffer overflow. The attack may be initiated remotely. The exploit has been disclosed to the public and may be used. The associated identifier of this vulnerability is VDB-221087. |
2023-02-15 |
not yet calculated |
CVE-2023-0841
MISC
MISC
MISC |
|
netgear — wndr3700v2
|
A vulnerability was found in Netgear WNDR3700v2 1.0.1.14. It has been rated as problematic. This issue affects some unknown processing of the component Web Management Interface. The manipulation leads to denial of service. The attack may be initiated remotely. The exploit has been disclosed to the public and may be used. The associated identifier of this vulnerability is VDB-221147. |
2023-02-15 |
not yet calculated |
CVE-2023-0848
MISC
MISC |
|
netgear — wndr3700v2
|
A vulnerability has been found in Netgear WNDR3700v2 1.0.1.14 and classified as critical. This vulnerability affects unknown code of the component Web Interface. The manipulation leads to command injection. The attack can be initiated remotely. The exploit has been disclosed to the public and may be used. The identifier of this vulnerability is VDB-221152. |
2023-02-15 |
not yet calculated |
CVE-2023-0849
MISC
MISC |
|
netgear — wndr3700v2
|
A vulnerability was found in Netgear WNDR3700v2 1.0.1.14 and classified as problematic. This issue affects some unknown processing of the component Web Interface. The manipulation leads to denial of service. The attack may be initiated remotely. The exploit has been disclosed to the public and may be used. The identifier VDB-221153 was assigned to this vulnerability. |
2023-02-15 |
not yet calculated |
CVE-2023-0850
MISC
MISC |
|
modoboa –modoboa-installer
|
Improper Restriction of Excessive Authentication Attempts in GitHub repository modoboa/modoboa-installer prior to 2.0.4. |
2023-02-16 |
not yet calculated |
CVE-2023-0860
CONFIRM
MISC |
| netmodule — nsrw |
NetModule NSRW web administration interface executes an OS command constructed with unsanitized user input. A successful exploit could allow an authenticated user to execute arbitrary commands with elevated privileges. This issue affects NSRW: from 4.3.0.0 before 4.3.0.119, from 4.4.0.0 before 4.4.0.118, from 4.6.0.0 before 4.6.0.105, from 4.7.0.0 before 4.7.0.103. |
2023-02-16 |
not yet calculated |
CVE-2023-0861
MISC
MISC |
|
netmodule — nsrw
|
The NetModule NSRW web administration interface is vulnerable to path traversals, which could lead to arbitrary file uploads and deletion. By uploading malicious files to the web root directory, authenticated users could gain remote command execution with elevated privileges. This issue affects NSRW: from 4.3.0.0 before 4.3.0.119, from 4.4.0.0 before 4.4.0.118, from 4.6.0.0 before 4.6.0.105, from 4.7.0.0 before 4.7.0.103. |
2023-02-16 |
not yet calculated |
CVE-2023-0862
MISC
MISC |
|
gpac — gpac
|
Heap-based Buffer Overflow in GitHub repository gpac/gpac prior to 2.3.0-DEV. |
2023-02-16 |
not yet calculated |
CVE-2023-0866
CONFIRM
MISC |
|
froxlor — froxlor
|
Code Injection in GitHub repository froxlor/froxlor prior to 2.0.11. |
2023-02-17 |
not yet calculated |
CVE-2023-0877
CONFIRM
MISC |
|
nuxt — nuxt
|
Cross-site Scripting (XSS) – Generic in GitHub repository nuxt/framework prior to 3.2.1. |
2023-02-17 |
not yet calculated |
CVE-2023-0878
MISC
CONFIRM |
|
btcpayserver — btcpay_server
|
Cross-site Scripting (XSS) – Stored in GitHub repository btcpayserver/btcpayserver prior to 1.7.12. |
2023-02-17 |
not yet calculated |
CVE-2023-0879
CONFIRM
MISC |
| phpmyfaq — phpmyfaq |
Misinterpretation of Input in GitHub repository thorsten/phpmyfaq prior to 3.1.11. |
2023-02-17 |
not yet calculated |
CVE-2023-0880
MISC
CONFIRM |
|
kron_technologies –kron_tech_single_connect
|
Improper Input Validation, Authorization Bypass Through User-Controlled Key vulnerability in Kron Tech Single Connect on Windows allows Privilege Abuse. This issue affects Single Connect: 2.16. |
2023-02-17 |
not yet calculated |
CVE-2023-0882
MISC
MISC |
|
sourcecodester — online_pizza_ordering_system
|
A vulnerability has been found in SourceCodester Online Pizza Ordering System 1.0 and classified as critical. This vulnerability affects unknown code of the file /php-opos/index.php. The manipulation of the argument ID leads to sql injection. The attack can be initiated remotely. The exploit has been disclosed to the public and may be used. VDB-221350 is the identifier assigned to this vulnerability. |
2023-02-17 |
not yet calculated |
CVE-2023-0883
MISC
MISC
MISC |
|
tftpd64 — tftpd64
|
A vulnerability was found in phjounin TFTPD64-SE 4.64 and classified as critical. This issue affects some unknown processing of the file tftpd64_svc.exe. The manipulation leads to unquoted search path. An attack has to be approached locally. The associated identifier of this vulnerability is VDB-221351. |
2023-02-17 |
not yet calculated |
CVE-2023-0887
MISC
MISC |
|
wordpress — wordpress
|
The WP Coder – add custom html, css and js code plugin for WordPress is vulnerable to time-based SQL Injection via the ‘id’ parameter in versions up to, and including, 2.5.3 due to insufficient escaping on the user supplied parameter and lack of sufficient preparation on the existing SQL query. This makes it possible for authenticated attackers with administrative privileges to append additional SQL queries into already existing queries that can be used to extract sensitive information from the database. |
2023-02-17 |
not yet calculated |
CVE-2023-0895
MISC
MISC |
|
pixelfed — pixelfed
|
Exposure of Sensitive Information to an Unauthorized Actor in GitHub repository pixelfed/pixelfed prior to 0.11.4. |
2023-02-18 |
not yet calculated |
CVE-2023-0901
CONFIRM
MISC |
|
sourcecodester — simple_food_ordering_system
|
A vulnerability was found in SourceCodester Simple Food Ordering System 1.0. It has been classified as problematic. This affects an unknown part of the file process_order.php. The manipulation of the argument order leads to cross site scripting. It is possible to initiate the attack remotely. The exploit has been disclosed to the public and may be used. The associated identifier of this vulnerability is VDB-221451. |
2023-02-18 |
not yet calculated |
CVE-2023-0902
MISC
MISC
MISC |
|
sourcecodester — employee_task_management_system
|
A vulnerability was found in SourceCodester Employee Task Management System 1.0. It has been declared as critical. This vulnerability affects unknown code of the file edit-task.php. The manipulation of the argument task_id leads to sql injection. The attack can be initiated remotely. The exploit has been disclosed to the public and may be used. The identifier of this vulnerability is VDB-221452. |
2023-02-18 |
not yet calculated |
CVE-2023-0903
MISC
MISC
MISC |
|
sourcecodester — employee_task_management_system
|
A vulnerability was found in SourceCodester Employee Task Management System 1.0. It has been rated as critical. This issue affects some unknown processing of the file task-details.php. The manipulation of the argument task_id leads to sql injection. The attack may be initiated remotely. The exploit has been disclosed to the public and may be used. The identifier VDB-221453 was assigned to this vulnerability. |
2023-02-18 |
not yet calculated |
CVE-2023-0904
MISC
MISC
MISC |
|
sourcecodester — employee_task_management_system
|
A vulnerability classified as critical has been found in SourceCodester Employee Task Management System 1.0. Affected is an unknown function of the file changePasswordForEmployee.php. The manipulation leads to improper authentication. It is possible to launch the attack remotely. The exploit has been disclosed to the public and may be used. VDB-221454 is the identifier assigned to this vulnerability. |
2023-02-18 |
not yet calculated |
CVE-2023-0905
MISC
MISC
MISC |
| sourcecodester — online_pizza_ordering_system |
A vulnerability classified as critical was found in SourceCodester Online Pizza Ordering System 1.0. Affected by this vulnerability is the function delete_category of the file ajax.php of the component POST Parameter Handler. The manipulation leads to missing authentication. The attack can be launched remotely. The associated identifier of this vulnerability is VDB-221455. |
2023-02-18 |
not yet calculated |
CVE-2023-0906
MISC
MISC |
|
filseclab — twister_antivirus
|
A vulnerability, which was classified as problematic, has been found in Filseclab Twister Antivirus 8.17. Affected by this issue is some unknown functionality in the library ffsmon.sys of the component IoControlCode Handler. The manipulation leads to denial of service. An attack has to be approached locally. The exploit has been disclosed to the public and may be used. The identifier of this vulnerability is VDB-221456. |
2023-02-18 |
not yet calculated |
CVE-2023-0907
MISC
MISC
MISC |
|
xoslab — easy_file_locker
|
A vulnerability, which was classified as problematic, was found in Xoslab Easy File Locker 2.2.0.184. This affects the function MessageNotifyCallback in the library xlkfs.sys. The manipulation leads to denial of service. Local access is required to approach this attack. The exploit has been disclosed to the public and may be used. The identifier VDB-221457 was assigned to this vulnerability. |
2023-02-18 |
not yet calculated |
CVE-2023-0908
MISC
MISC
MISC |
|
snyk — cxasm/notepad
|
A vulnerability, which was classified as problematic, was found in cxasm notepad– 1.22. This affects an unknown part of the component Directory Comparison Handler. The manipulation leads to denial of service. The attack needs to be approached locally. The associated identifier of this vulnerability is VDB-221475. |
2023-02-18 |
not yet calculated |
CVE-2023-0909
MISC
MISC
MISC |
|
sourcecodester — online_pizza_ordering_system
|
A vulnerability has been found in SourceCodester Online Pizza Ordering System 1.0 and classified as critical. This vulnerability affects unknown code of the file view_prod.php of the component GET Parameter Handler. The manipulation of the argument ID leads to sql injection. The attack can be initiated remotely. The identifier of this vulnerability is VDB-221476. |
2023-02-18 |
not yet calculated |
CVE-2023-0910
MISC
MISC |
|
sourcecodester — auto_dealer_management_system
|
A vulnerability classified as critical has been found in SourceCodester Auto Dealer Management System 1.0. This affects an unknown part of the file /adms/admin/?page=vehicles/view_transaction. The manipulation of the argument id leads to sql injection. It is possible to initiate the attack remotely. The exploit has been disclosed to the public and may be used. The identifier VDB-221481 was assigned to this vulnerability. |
2023-02-18 |
not yet calculated |
CVE-2023-0912
MISC
MISC
MISC |
|
sourcecodester — auto_dealer_management_system
|
A vulnerability classified as critical was found in SourceCodester Auto Dealer Management System 1.0. This vulnerability affects unknown code of the file /adms/admin/?page=vehicles/sell_vehicle. The manipulation of the argument id leads to sql injection. The attack can be initiated remotely. The exploit has been disclosed to the public and may be used. VDB-221482 is the identifier assigned to this vulnerability. |
2023-02-18 |
not yet calculated |
CVE-2023-0913
MISC
MISC
MISC |
| google — androidmanifest.xml |
In permissions of AndroidManifest.xml, there is a possible way to grant signature permissions due to a permissions bypass. This could lead to local escalation of privilege with no additional execution privileges needed. User interaction is not needed for exploitation.Product: AndroidVersions: Android-13Android ID: A-244216503 |
2023-02-15 |
not yet calculated |
CVE-2023-20927
MISC |
| google — multiple_products |
In s2mpg11_pmic_probe of s2mpg11-regulator.c, there is a possible out of bounds read due to a heap buffer overflow. This could lead to local information disclosure with no additional execution privileges needed. User interaction is not needed for exploitation.Product: AndroidVersions: Android kernelAndroid ID: A-259323133References: N/A |
2023-02-15 |
not yet calculated |
CVE-2023-20949
MISC |
|
jtekt_electronics_corporation — screen_creator_advance_2
|
Out-of-bound write vulnerability exists in Screen Creator Advance 2 Ver.0.1.1.4 Build01 and earlier due to lack of error handling process when out of specification errors are detected. Having a user of Screen Creator Advance 2 to open a specially crafted project file may lead to information disclosure and/or arbitrary code execution. |
2023-02-13 |
not yet calculated |
CVE-2023-22345
MISC
MISC
MISC |
|
jtekt_electronics_corporation — screen_creator_advance_2
|
Out-of-bound read vulnerability exists in Screen Creator Advance 2 Ver.0.1.1.4 Build01 and earlier because the end of data cannot be verified when processing template information. Having a user of Screen Creator Advance 2 to open a specially crafted project file may lead to information disclosure and/or arbitrary code execution. |
2023-02-13 |
not yet calculated |
CVE-2023-22346
MISC
MISC
MISC |
|
jtekt_electronics_corporation — screen_creator_advance_2
|
Out-of-bound read vulnerability exists in Screen Creator Advance 2 Ver.0.1.1.4 Build01 and earlier because the end of data cannot be verified when processing file structure information. Having a user of Screen Creator Advance 2 to open a specially crafted project file may lead to information disclosure and/or arbitrary code execution. |
2023-02-13 |
not yet calculated |
CVE-2023-22347
MISC
MISC
MISC |
|
jtekt_electronics_corporation — screen_creator_advance_2
|
Out-of-bound read vulnerability exists in Screen Creator Advance 2 Ver.0.1.1.4 Build01 and earlier because the end of data cannot be verified when processing screen management information. Having a user of Screen Creator Advance 2 to open a specially crafted project file may lead to information disclosure and/or arbitrary code execution. |
2023-02-13 |
not yet calculated |
CVE-2023-22349
MISC
MISC
MISC |
|
jtekt_electronics_corporation — screen_creator_advance_2
|
Out-of-bound read vulnerability exists in Screen Creator Advance 2 Ver.0.1.1.4 Build01 and earlier because the end of data cannot be verified when processing parts management information. Having a user of Screen Creator Advance 2 to open a specially crafted project file may lead to information disclosure and/or arbitrary code execution. |
2023-02-13 |
not yet calculated |
CVE-2023-22350
MISC
MISC
MISC |
|
jtekt_electronics_corporation — screen_creator_advance_2
|
Out-of-bound read vulnerability exists in Screen Creator Advance 2 Ver.0.1.1.4 Build01 and earlier because the end of data cannot be verified when processing control management information. Having a user of Screen Creator Advance 2 to open a specially crafted project file may lead to information disclosure and/or arbitrary code execution. |
2023-02-13 |
not yet calculated |
CVE-2023-22353
MISC
MISC
MISC |
|
jtekt_electronics_corporation — screen_creator_advance_2
|
Use-after free vulnerability exists in Screen Creator Advance 2 Ver.0.1.1.4 Build01 and earlier due to lack of error handling process even when an error was detected. Having a user of Screen Creator Advance 2 to open a specially crafted project file may lead to information disclosure and/or arbitrary code execution. |
2023-02-13 |
not yet calculated |
CVE-2023-22360
MISC
MISC
MISC |
| akindo_sushiro_company_limited — sushiro_app_for_android |
SUSHIRO App for Android outputs sensitive information to the log file, which may result in an attacker obtaining a credential information from the log file. Affected products/versions are as follows: SUSHIRO Ver.4.0.31, Thailand SUSHIRO Ver.1.0.0, Hong Kong SUSHIRO Ver.3.0.2, Singapore SUSHIRO Ver.2.0.0, and Taiwan SUSHIRO Ver.2.0.1 |
2023-02-13 |
not yet calculated |
CVE-2023-22362
MISC
MISC
MISC
MISC
MISC
MISC |
| betrend_corporation/ichiran_incorporated — ichiran_app_for_ios/ichiran_app_for_android |
Ichiran App for iOS versions prior to 3.1.0 and Ichiran App for Android versions prior to 3.1.0 improperly verify server certificates, which may allow a remote unauthenticated attacker to eavesdrop on an encrypted communication via a man-in-the-middle attack. |
2023-02-13 |
not yet calculated |
CVE-2023-22367
MISC
MISC
MISC |
|
elecom — multiple_products
|
Untrusted search path vulnerability in ELECOM Camera Assistant 1.00 and QuickFileDealer Ver.1.2.1 and earlier allows an attacker to gain privileges via a Trojan horse DLL in an unspecified directory. |
2023-02-15 |
not yet calculated |
CVE-2023-22368
MISC
MISC |
| fujitsu_limited — tsclinical_define.xml_generator_and_tsclinical_metadata_desktop_tools |
Improper restriction of XML external entity reference (XXE) vulnerability exists in tsClinical Define.xml Generator all versions (v1.0.0 to v1.4.0) and tsClinical Metadata Desktop Tools Version 1.0.3 to Version 1.1.0. If this vulnerability is exploited, an attacker may obtain an arbitrary file which meets a certain condition by reading a specially crafted XML file. |
2023-02-15 |
not yet calculated |
CVE-2023-22377
MISC
MISC |
| github — enterprise_server |
A path traversal vulnerability was identified in GitHub Enterprise Server that allowed arbitrary file reading when building a GitHub Pages site. To exploit this vulnerability, an attacker would need permission to create and build a GitHub Pages site on the GitHub Enterprise Server instance. This vulnerability affected all versions of GitHub Enterprise Server since 3.7 and was fixed in version 3.7.6. This vulnerability was reported via the GitHub Bug Bounty program. |
2023-02-16 |
not yet calculated |
CVE-2023-22380
MISC |
| git — git |
Git is a revision control system. Using a specially-crafted repository, Git prior to versions 2.39.2, 2.38.4, 2.37.6, 2.36.5, 2.35.7, 2.34.7, 2.33.7, 2.32.6, 2.31.7, and 2.30.8 can be tricked into using its local clone optimization even when using a non-local transport. Though Git will abort local clones whose source `$GIT_DIR/objects` directory contains symbolic links, the `objects` directory itself may still be a symbolic link. These two may be combined to include arbitrary files based on known paths on the victim’s filesystem within the malicious repository’s working copy, allowing for data exfiltration in a similar manner as CVE-2022-39253. A fix has been prepared and will appear in v2.39.2 v2.38.4 v2.37.6 v2.36.5 v2.35.7 v2.34.7 v2.33.7 v2.32.6, v2.31.7 and v2.30.8. If upgrading is impractical, two short-term workarounds are available. Avoid cloning repositories from untrusted sources with `–recurse-submodules`. Instead, consider cloning repositories without recursively cloning their submodules, and instead run `git submodule update` at each layer. Before doing so, inspect each new `.gitmodules` file to ensure that it does not contain suspicious module URLs. |
2023-02-14 |
not yet calculated |
CVE-2023-22490
MISC
MISC
MISC |
| feathers-sequalize — sequelize.js |
Due to improper artibute filtering in the sequalize js library, can a attacker peform SQL injections. |
2023-02-16 |
not yet calculated |
CVE-2023-22578
MISC
MISC |
| feathers-sequalize — sequelize.js |
Due to improper parameter filtering in the sequalize js library, can a attacker peform injection. |
2023-02-16 |
not yet calculated |
CVE-2023-22579
MISC
MISC |
| feathers-sequalize — sequelize.js |
Due to improper input filtering in the sequalize js library, can malicious queries lead to sensitive information disclosure. |
2023-02-16 |
not yet calculated |
CVE-2023-22580
MISC
MISC |
|
south_river_technologies — titan_ftp
|
An issue was discovered in TitanFTP through 1.94.1205. The move-file function has a path traversal vulnerability in the newPath parameter. An authenticated attacker can upload any file and then move it anywhere on the server’s filesystem. |
2023-02-14 |
not yet calculated |
CVE-2023-22629
MISC
MISC
MISC |
|
fortinet — fortinac
|
Several improper neutralization of inputs during web page generation vulnerability [CWE-79] in FortiNAC 9.4.1 and below, 9.2.6 and below, 9.1.8 and below, 8.8.11 and below, 8.7.6 and below, 8.6.5 and below, 8.5.4 and below, 8.3.7 and below may allow an authenticated attacker to perform several XSS attacks via crafted HTTP GET requests. |
2023-02-16 |
not yet calculated |
CVE-2023-22638
MISC |
git_for_windows — git_for_windows
|
Git for Windows is the Windows port of the revision control system Git. Prior to Git for Windows version 2.39.2, by carefully crafting DLL and putting into a subdirectory of a specific name living next to the Git for Windows installer, Windows can be tricked into side-loading said DLL. This potentially allows users with local write access to place malicious payloads in a location where automated upgrades might run the Git for Windows installer with elevation. Version 2.39.2 contains a patch for this issue. Some workarounds are available. Never leave untrusted files in the Downloads folder or its sub-folders before executing the Git for Windows installer, or move the installer into a different directory before executing it. |
2023-02-14 |
not yet calculated |
CVE-2023-22743
MISC
MISC
MISC
MISC
MISC
MISC |
|
ls_electric — xbc-dn32u
|
LS ELECTRIC XBC-DN32U with operating system version 01.80 is missing authentication to perform critical functions to the PLC. This could allow an attacker to change the PLC’s mode arbitrarily. |
2023-02-15 |
not yet calculated |
CVE-2023-22803
MISC |
|
ls_electric — xbc-dn32u
|
LS ELECTRIC XBC-DN32U with operating system version 01.80 is missing authentication to create users on the PLC. This could allow an attacker to create and use an account with elevated privileges and take control of the device. |
2023-02-15 |
not yet calculated |
CVE-2023-22804
MISC |
|
ls_electric — xbc-dn32u
|
LS ELECTRIC XBC-DN32U with operating system version 01.80 has improper access control to its read prohibition feature. This could allow a remote attacker to remotely set the feature to lock users out of reading data from the device. |
2023-02-15 |
not yet calculated |
CVE-2023-22805
MISC |
|
ls_electric — xbc-dn32u
|
LS ELECTRIC XBC-DN32U with operating system version 01.80 transmits sensitive information in cleartext when communicating over its XGT protocol. This could allow an attacker to gain sensitive information such as user credentials. |
2023-02-15 |
not yet calculated |
CVE-2023-22806
MISC |
|
ls_electric — xbc-dn32u
|
LS ELECTRIC XBC-DN32U with operating system version 01.80 does not properly control access to the PLC over its internal XGT protocol. An attacker could control and tamper with the PLC by sending the packets to the PLC over its XGT protocol. |
2023-02-15 |
not yet calculated |
CVE-2023-22807
MISC |
|
mitel — micontact_center_business_server
|
The ccmweb component of Mitel MiContact Center Business server 9.2.2.0 through 9.4.1.0 could allow an unauthenticated attacker to download arbitrary files, due to insufficient restriction of URL parameters. A successful exploit could allow access to sensitive information. |
2023-02-13 |
not yet calculated |
CVE-2023-22854
MISC
MISC |
| mlog_mcc — mlog_mcc |
Kardex Mlog MCC 5.7.12+0-a203c2a213-master allows remote code execution. It spawns a web interface listening on port 8088. A user-controllable path is handed to a path-concatenation method (Path.Combine from .NET) without proper sanitisation. This yields the possibility of including local files, as well as remote files on SMB shares. If one provides a file with the extension .t4, it is rendered with the .NET templating engine mono/t4, which can execute code. |
2023-02-15 |
not yet calculated |
CVE-2023-22855
MISC
FULLDISC
MISC |
|
ibm — aspera_faspex
|
IBM Aspera Faspex 4.4.1 is vulnerable to cross-site scripting. This vulnerability allows users to embed arbitrary JavaScript code in the Web UI thus altering the intended functionality potentially leading to credentials disclosure within a trusted session. IBM X-Force ID: 244117. |
2023-02-17 |
not yet calculated |
CVE-2023-22868
MISC
MISC |
|
splunk — enterprise
|
In Splunk Enterprise versions below 8.1.13 and 8.2.10, the ‘createrss’ external search command overwrites existing Resource Description Format Site Summary (RSS) feeds without verifying permissions. This feature has been deprecated and disabled by default. |
2023-02-14 |
not yet calculated |
CVE-2023-22931
MISC
MISC |
| splunk — enterprise |
In Splunk Enterprise 9.0 versions before 9.0.4, a View allows for Cross-Site Scripting (XSS) through the error message in a Base64-encoded image. The vulnerability affects instances with Splunk Web enabled. It does not affect Splunk Enterprise versions below 9.0. |
2023-02-14 |
not yet calculated |
CVE-2023-22932
MISC
MISC |
| splunk — enterprise |
In Splunk Enterprise versions below 8.1.13, 8.2.10, and 9.0.4, a View allows for Cross-Site Scripting (XSS) in an extensible mark-up language (XML) View through the ‘layoutPanel’ attribute in the ‘module’ tag’. The vulnerability affects instances with Splunk Web enabled. |
2023-02-14 |
not yet calculated |
CVE-2023-22933
MISC
MISC |
| splunk — enterprise |
In Splunk Enterprise versions below 8.1.13, 8.2.10, and 9.0.4, the ‘pivot’ search processing language (SPL) command lets a search bypass [SPL safeguards for risky commands](https://docs.splunk.com/Documentation/Splunk/latest/Security/SPLsafeguards) using a saved search job. The vulnerability requires an authenticated user to craft the saved job and a higher privileged user to initiate a request within their browser. The vulnerability affects instances with Splunk Web enabled. |
2023-02-14 |
not yet calculated |
CVE-2023-22934
MISC
MISC |
| splunk — enterprise |
In Splunk Enterprise versions below 8.1.13, 8.2.10, and 9.0.4, the ‘display.page.search.patterns.sensitivity’ search parameter lets a search bypass [SPL safeguards for risky commands](https://docs.splunk.com/Documentation/Splunk/latest/Security/SPLsafeguards). The vulnerability requires a higher privileged user to initiate a request within their browser and only affects instances with Splunk Web enabled. |
2023-02-14 |
not yet calculated |
CVE-2023-22935
MISC
MISC |
| splunk — enterprise |
In Splunk Enterprise versions below 8.1.13, 8.2.10, and 9.0.4, the ‘search_listener’ parameter in a search allows for a blind server-side request forgery (SSRF) by an authenticated user. The initiator of the request cannot see the response without the presence of an additional vulnerability within the environment. |
2023-02-14 |
not yet calculated |
CVE-2023-22936
MISC
MISC |
| splunk — enterprise |
In Splunk Enterprise versions below 8.1.13, 8.2.10, and 9.0.4, the lookup table upload feature let a user upload lookup tables with unnecessary filename extensions. Lookup table file extensions may now be one of the following only: .csv, .csv.gz, .kmz, .kml, .mmdb, or .mmdb.gzl. For more information on lookup table files, see [About lookups](https://docs.splunk.com/Documentation/Splunk/latest/Knowledge/Aboutlookupsandfieldactions). |
2023-02-14 |
not yet calculated |
CVE-2023-22937
MISC
MISC |
| splunk — enterprise |
In Splunk Enterprise versions below 8.1.13, 8.2.10, and 9.0.4, the ‘sendemail’ REST API endpoint lets any authenticated user send an email as the Splunk instance. The endpoint is now restricted to the ‘splunk-system-user’ account on the local instance. |
2023-02-14 |
not yet calculated |
CVE-2023-22938
MISC |
| splunk — enterprise |
In Splunk Enterprise versions below 8.1.13, 8.2.10, and 9.0.4, the ‘map’ search processing language (SPL) command lets a search [bypass SPL safeguards for risky commands](https://docs.splunk.com/Documentation/Splunk/latest/Security/SPLsafeguards). The vulnerability requires a higher privileged user to initiate a request within their browser and only affects instances with Splunk Web enabled. |
2023-02-14 |
not yet calculated |
CVE-2023-22939
MISC
MISC |
| splunk — enterprise |
In Splunk Enterprise versions below 8.1.13, 8.2.10, and 9.0.4, aliases of the ‘collect’ search processing language (SPL) command, including ‘summaryindex’, ‘sumindex’, ‘stash’,’ mcollect’, and ‘meventcollect’, were not designated as safeguarded commands. The commands could potentially allow for the exposing of data to a summary index that unprivileged users could access. The vulnerability requires a higher privileged user to initiate a request within their browser, and only affects instances with Splunk Web enabled. |
2023-02-14 |
not yet calculated |
CVE-2023-22940
MISC
MISC |
| splunk — enterprise |
In Splunk Enterprise versions below 8.1.13, 8.2.10, and 9.0.4, an improperly-formatted ‘INGEST_EVAL’ parameter in a [Field Transformation](https://docs.splunk.com/Documentation/Splunk/latest/Knowledge/Managefieldtransforms) crashes the Splunk daemon (splunkd). |
2023-02-14 |
not yet calculated |
CVE-2023-22941
MISC
MISC |
| splunk — enterprise |
In Splunk Enterprise versions below 8.1.13, 8.2.10, and 9.0.4, a cross-site request forgery in the Splunk Secure Gateway (SSG) app in the ‘kvstore_client’ REST endpoint lets a potential attacker update SSG [App Key Value Store (KV store)](https://docs.splunk.com/Documentation/Splunk/latest/Admin/AboutKVstore) collections using an HTTP GET request. SSG is a Splunk-built app that comes with Splunk Enterprise. The vulnerability affects instances with SSG and Splunk Web enabled. |
2023-02-14 |
not yet calculated |
CVE-2023-22942
MISC
MISC |
| splunk — multiple_products |
In Splunk Add-on Builder (AoB) versions below 4.1.2 and the Splunk CloudConnect SDK versions below 3.1.3, requests to third-party APIs through the REST API Modular Input incorrectly revert to using HTTP to connect after a failure to connect over HTTPS occurs. The vulnerability affects AoB and apps that AoB generates when using the REST API Modular Input functionality through its user interface. The vulnerability also potentially affects third-party apps and add-ons that call the *cloudconnectlib.splunktacollectorlib.cloud_connect_mod_input* Python class directly. |
2023-02-14 |
not yet calculated |
CVE-2023-22943
MISC |
| espcms — p8.21120101 |
An issue was discovered in ESPCMS P8.21120101 after logging in to the background, there is a SQL injection vulnerability in the function node where members are added. |
2023-02-17 |
not yet calculated |
CVE-2023-23007
MISC |
| totolink — a720r_v4.1.5cu.532_b20210610 |
TOTOLINK A720R V4.1.5cu.532_ B20210610 is vulnerable to Incorrect Access Control. |
2023-02-17 |
not yet calculated |
CVE-2023-23064
MISC |
| canteen_management_system — canteen_management_system |
Canteen Management System 1.0 is vulnerable to SQL Injection via /php_action/getOrderReport.php. |
2023-02-17 |
not yet calculated |
CVE-2023-23279
MISC |
| sunell — dvr |
Sunell DVR, latest version, CWE-200: Exposure of Sensitive Information to an Unauthorized Actor through an unspecified request. |
2023-02-15 |
not yet calculated |
CVE-2023-23458
MISC |
| priority — windows |
Priority Windows may allow Command Execution via SQL Injection using an unspecified method. |
2023-02-15 |
not yet calculated |
CVE-2023-23459
MISC |
| priority — web |
Priority Web version 19.1.0.68, parameter manipulation on an unspecified end-point may allow authentication bypass. |
2023-02-15 |
not yet calculated |
CVE-2023-23460
MISC |
| libpeconv — libpeconv |
Libpeconv – access violation, before commit b076013 (30/11/2022). |
2023-02-15 |
not yet calculated |
CVE-2023-23461
MISC |
| libpeconv — libpeconv |
Libpeconv – integer overflow, before commit 75b1565 (30/11/2022). |
2023-02-15 |
not yet calculated |
CVE-2023-23462
MISC |
| sunell — dvr |
Sunell DVR, latest version, Insufficiently Protected Credentials (CWE-522) may be exposed through an unspecified request. |
2023-02-15 |
not yet calculated |
CVE-2023-23463
MISC |
| media_cp — control_panel |
Media CP Media Control Panel latest version. A Permissive Flash Cross-domain Policy may allow information disclosure. |
2023-02-15 |
not yet calculated |
CVE-2023-23464
MISC |
| media_cp — control_panel |
Media CP Media Control Panel latest version. CSRF possible through unspecified endpoint. |
2023-02-15 |
not yet calculated |
CVE-2023-23465
MISC |
| media_cp — control_panel |
Media CP Media Control Panel latest version. Insufficiently protected credential change. |
2023-02-15 |
not yet calculated |
CVE-2023-23466
MISC |
| media_cp — control_panel |
Media CP Media Control Panel latest version. Reflected XSS possible through unspecified endpoint. |
2023-02-15 |
not yet calculated |
CVE-2023-23467
MISC |
| control_by_web — x-600m_devices |
Control By Web X-600M devices run Lua scripts and are vulnerable to code injection, which could allow an attacker to remotely execute arbitrary code. |
2023-02-13 |
not yet calculated |
CVE-2023-23551
MISC |
| control_by_web — x-400m_devices |
Control By Web X-400 devices are vulnerable to a cross-site scripting attack, which could result in private and session information being transferred to the attacker. |
2023-02-13 |
not yet calculated |
CVE-2023-23553
MISC |
| eternal_terminal — eternal_terminal |
In Eternal Terminal 6.2.1, TelemetryService uses fixed paths in /tmp. For example, a local attacker can create /tmp/.sentry-native-etserver with mode 0777 before the etserver process is started. The attacker can choose to read sensitive information from that file, or modify the information in that file. |
2023-02-16 |
not yet calculated |
CVE-2023-23558
MISC
MISC
MLIST |
| linux — kernel |
Due to a vulnerability in the io_uring subsystem, it is possible to leak kernel memory information to the user process. timens_install calls current_is_single_threaded to determine if the current process is single-threaded, but this call does not consider io_uring’s io_worker threads, thus it is possible to insert a time namespace’s vvar page to process’s memory space via a page fault. When this time namespace is destroyed, the vvar page is also freed, but not removed from the process’ memory, and a next page allocated by the kernel will be still available from the user-space process and can leak memory contents via this (read-only) use-after-free vulnerability. We recommend upgrading past version 5.10.161 or commit 788d0824269bef539fe31a785b1517882eafed93 https://git.kernel.org/pub/scm/linux/kernel/git/stable/linux.git/commit/io_uring |
2023-02-17 |
not yet calculated |
CVE-2023-23586
MISC
MISC |
| git_for_windows — git |
Git for Windows is the Windows port of the revision control system Git. Prior to Git for Windows version 2.39.2, when `gitk` is run on Windows, it potentially runs executables from the current directory inadvertently, which can be exploited with some social engineering to trick users into running untrusted code. A patch is available in version 2.39.2. As a workaround, avoid using `gitk` (or Git GUI’s “Visualize History” functionality) in clones of untrusted repositories. |
2023-02-14 |
not yet calculated |
CVE-2023-23618
MISC
MISC
MISC
MISC |
| dell — secure_connect_gateway |
Dell Secure Connect Gateway (SCG) version 5.14.00.12 contains a broken cryptographic algorithm vulnerability. A remote unauthenticated attacker could potentially exploit this vulnerability by performing MitM attacks and let attackers obtain sensitive information. |
2023-02-17 |
not yet calculated |
CVE-2023-23695
MISC |
| dell — command |
Dell Command | Intel vPro Out of Band, versions before 4.4.0, contain an arbitrary folder delete vulnerability during uninstallation. A locally authenticated malicious user may potentially exploit this vulnerability leading to arbitrary folder deletion. |
2023-02-13 |
not yet calculated |
CVE-2023-23697
MISC |
| joomla!_project — joomla!_cms |
An issue was discovered in Joomla! 4.0.0 through 4.2.7. An improper access check allows unauthorized access to webservice endpoints. |
2023-02-16 |
not yet calculated |
CVE-2023-23752
MISC |
| fortinet — fortiweb |
A relative path traversal vulnerability [CWE-23] in FortiWeb version 7.0.1 and below, 6.4 all versions, 6.3 all versions, 6.2 all versions may allow an authenticated user to obtain unauthorized access to files and data via specifically crafted web requests. |
2023-02-16 |
not yet calculated |
CVE-2023-23778
MISC |
| fortinet — fortiweb |
Multiple improper neutralization of special elements used in an OS Command (‘OS Command Injection’) vulnerabilities [CWE-78] in FortiWeb version 7.0.1 and below, 6.4 all versions, version 6.3.19 and below may allow an authenticated attacker to execute unauthorized code or commands via crafted parameters of HTTP requests. |
2023-02-16 |
not yet calculated |
CVE-2023-23779
MISC |
| fortinet — fortiweb |
A stack-based buffer overflow in Fortinet FortiWeb version 7.0.0 through 7.0.1, Fortinet FortiWeb version 6.3.6 through 6.3.19, Fortinet FortiWeb 6.4 all versions allows attacker to escalation of privilege via specifically crafted HTTP requests. |
2023-02-16 |
not yet calculated |
CVE-2023-23780
MISC |
| fortinet — fortiweb |
A stack-based buffer overflow vulnerability [CWE-121] in FortiWeb version 7.0.1 and below, 6.4 all versions, version 6.3.19 and below SAML server configuration may allow an authenticated attacker to achieve arbitrary code execution via specifically crafted XML files. |
2023-02-16 |
not yet calculated |
CVE-2023-23781
MISC |
| fortinet — fortiweb |
A heap-based buffer overflow in Fortinet FortiWeb version 7.0.0 through 7.0.1, FortiWeb version 6.3.0 through 6.3.19, FortiWeb 6.4 all versions, FortiWeb 6.2 all versions, FortiWeb 6.1 all versions allows attacker to escalation of privilege via specifically crafted arguments to existing commands. |
2023-02-16 |
not yet calculated |
CVE-2023-23782
MISC |
| fortinet — fortiweb |
A use of externally-controlled format string in Fortinet FortiWeb version 7.0.0 through 7.0.1, FortiWeb 6.4 all versions allows attacker to execute unauthorized code or commands via specially crafted command arguments. |
2023-02-16 |
not yet calculated |
CVE-2023-23783
MISC |
| fortinet — fortiweb |
A relative path traversal in Fortinet FortiWeb version 7.0.0 through 7.0.2, FortiWeb version 6.3.6 through 6.3.20, FortiWeb 6.4 all versions allows attacker to information disclosure via specially crafted web requests. |
2023-02-16 |
not yet calculated |
CVE-2023-23784
MISC |
| siemens — mendix |
A vulnerability has been identified in Mendix Applications using Mendix 7 (All versions < V7.23.34), Mendix Applications using Mendix 8 (All versions < V8.18.23), Mendix Applications using Mendix 9 (All versions < V9.22.0), Mendix Applications using Mendix 9 (V9.12) (All versions < V9.12.10), Mendix Applications using Mendix 9 (V9.18) (All versions < V9.18.4), Mendix Applications using Mendix 9 (V9.6) (All versions < V9.6.15). Some of the Mendix runtime API’s allow attackers to bypass XPath constraints and retrieve information using XPath queries that trigger errors. |
2023-02-14 |
not yet calculated |
CVE-2023-23835
MISC |
| solarwinds — platform |
SolarWinds Platform version 2022.4.1 was found to be susceptible to the Deserialization of Untrusted Data. This vulnerability allows a remote adversary with Orion admin-level account access to the SolarWinds Web Console to execute arbitrary commands. |
2023-02-15 |
not yet calculated |
CVE-2023-23836
MISC
MISC |
| synopsys — jenkins_coverity_plugin |
A cross-site request forgery (CSRF) vulnerability in Synopsys Jenkins Coverity Plugin 3.0.2 and earlier allows attackers to connect to an attacker-specified HTTP server using attacker-specified credentials IDs obtained through another method, capturing credentials stored in Jenkins. |
2023-02-15 |
not yet calculated |
CVE-2023-23847
CONFIRM
CONFIRM |
| synopsys — jenkins_coverity_plugin |
Missing permission checks in Synopsys Jenkins Coverity Plugin 3.0.2 and earlier allow attackers with Overall/Read permission to connect to an attacker-specified HTTP server using attacker-specified credentials IDs obtained through another method, capturing credentials stored in Jenkins. |
2023-02-15 |
not yet calculated |
CVE-2023-23848
CONFIRM
CONFIRM |
| synopsys — jenkins_coverity_plugin |
A missing permission check in Synopsys Jenkins Coverity Plugin 3.0.2 and earlier allows attackers with Overall/Read permission to enumerate credentials IDs of credentials stored in Jenkins. |
2023-02-15 |
not yet calculated |
CVE-2023-23850
CONFIRM
CONFIRM |
| sap_se — business_planning_and_consolidation |
SAP Business Planning and Consolidation – versions 200, 300, allows an attacker with business authorization to upload any files (including web pages) without the proper file format validation. If other users visit the uploaded malicious web page, the attacker may perform actions on behalf of the users without their consent impacting the confidentiality and integrity of the system. |
2023-02-14 |
not yet calculated |
CVE-2023-23851
MISC
MISC |
| sap_se — solution_manager |
SAP Solution Manager (System Monitoring) – version 720, does not sufficiently encode user-controlled inputs, resulting in Cross-Site Scripting (XSS) vulnerability. |
2023-02-14 |
not yet calculated |
CVE-2023-23852
MISC
MISC |
| sap_se — netweaver_application_server_for_abap_and_abap_platform |
An unauthenticated attacker in AP NetWeaver Application Server for ABAP and ABAP Platform – versions 700, 702, 731, 740, 750, 751, 752, 753, 754, 755, 756, 757, 789, 790, can craft a link which when clicked by an unsuspecting user can be used to redirect a user to a malicious site which could read or modify some sensitive information or expose the victim to a phishing attack. Vulnerability has no direct impact on availability. |
2023-02-14 |
not yet calculated |
CVE-2023-23853
MISC
MISC |
| sap_se — netweaver_application_server_for_abap_and_abap_platform |
SAP NetWeaver Application Server for ABAP and ABAP Platform – versions 700, 701, 702, 731, 740, 750, 751, 752, does not perform necessary authorization checks for an authenticated user, resulting in escalation of privileges. |
2023-02-14 |
not yet calculated |
CVE-2023-23854
MISC
MISC |
| sap_se — solution_manager |
SAP Solution Manager – version 720, allows an authenticated attacker to redirect users to a malicious site due to insufficient URL validation. A successful attack could lead an attacker to read or modify the information or expose the user to a phishing attack. As a result, it has a low impact to confidentiality, integrity and availability. |
2023-02-14 |
not yet calculated |
CVE-2023-23855
MISC
MISC |
| sap_se — businessobjects_business_intelligence |
In SAP BusinessObjects Business Intelligence (Web Intelligence user interface) – version 430, some calls return json with wrong content type in the header of the response. As a result, a custom application that calls directly the jsp of Web Intelligence DHTML may be vulnerable to XSS attacks. On successful exploitation an attacker can cause a low impact on integrity of the application. |
2023-02-14 |
not yet calculated |
CVE-2023-23856
MISC
MISC |
| sap_se — netweaver_application_server_for_abap_and_abap_platform |
Due to insufficient input validation, SAP NetWeaver AS for ABAP and ABAP Platform – versions 740, 750, 751, 752, 753, 754, 755, 756, 757, 789, 790, allows an unauthenticated attacker to send a crafted URL to a user, and by clicking the URL, the tricked user accesses SAP and might be directed with the response to somewhere out-side SAP and enter sensitive data. This could cause a limited impact on confidentiality and integrity of the application. |
2023-02-14 |
not yet calculated |
CVE-2023-23858
MISC
MISC |
| sap_se — netweaver_application_server_for_abap_and_abap_platform |
SAP NetWeaver AS for ABAP and ABAP Platform – versions 740, 750, 751, 752, 753, 754, 755, 756, 757, 789, 790, allows an unauthenticated attacker to craft a malicious link, which when clicked by an unsuspecting user, can be used to read or modify some sensitive information. |
2023-02-14 |
not yet calculated |
CVE-2023-23859
MISC
MISC |
| sap_se — netweaver_application_server_for_abap_and_abap_platform |
SAP NetWeaver AS for ABAP and ABAP Platform – versions 740, 750, 751, 752, 753, 754, 755, 756, 757, 789, 790, allows an unauthenticated attacker to craft a link, which when clicked by an unsuspecting user can be used to redirect a user to a malicious site which could read or modify some sensitive information or expose the victim to a phishing attack. |
2023-02-14 |
not yet calculated |
CVE-2023-23860
MISC
MISC |
| hasthemes — extensions_for_cf7 |
Cross-Site Request Forgery (CSRF) vulnerability in HasThemes Extensions For CF7 plugin <= 2.0.8 versions leads to arbitrary plugin activation. |
2023-02-17 |
not yet calculated |
CVE-2023-23899
MISC |
| moodle — moodle |
The vulnerability was found Moodle which exists due to insufficient sanitization of user-supplied data in some returnurl parameters. A remote attacker can trick the victim to follow a specially crafted link and execute arbitrary HTML and script code in user’s browser in context of vulnerable website. This flaw allows a remote attacker to perform cross-site scripting (XSS) attacks. |
2023-02-17 |
not yet calculated |
CVE-2023-23921
MISC
MISC
MISC |
| moodle — moodle |
The vulnerability was found Moodle which exists due to insufficient sanitization of user-supplied data in blog search. A remote attacker can trick the victim to follow a specially crafted link and execute arbitrary HTML and script code in user’s browser in context of vulnerable website. This flaw allows a remote attacker to perform cross-site scripting (XSS) attacks. |
2023-02-17 |
not yet calculated |
CVE-2023-23922
MISC
MISC
MISC |
| moodle — moodle |
The vulnerability was found Moodle which exists due to insufficient limitations on the “start page” preference. A remote attacker can set that preference for another user. The vulnerability allows a remote attacker to gain unauthorized access to otherwise restricted functionality. |
2023-02-17 |
not yet calculated |
CVE-2023-23923
MISC
MISC
MISC |
| apoc — apoc |
APOC (Awesome Procedures on Cypher) is an add-on library for Neo4j. An XML External Entity (XXE) vulnerability found in the apoc.import.graphml procedure of APOC core plugin prior to version 5.5.0 in Neo4j graph database. XML External Entity (XXE) injection occurs when the XML parser allows external entities to be resolved. The XML parser used by the apoc.import.graphml procedure was not configured in a secure way and therefore allowed this. External entities can be used to read local files, send HTTP requests, and perform denial-of-service attacks on the application. Abusing the XXE vulnerability enabled assessors to read local files remotely. Although with the level of privileges assessors had this was limited to one-line files. With the ability to write to the database, any file could have been read. Additionally, assessors noted, with local testing, the server could be crashed by passing in improperly formatted XML. The minimum version containing a patch for this vulnerability is 5.5.0. Those who cannot upgrade the library can control the allowlist of the procedures that can be used in your system. |
2023-02-16 |
not yet calculated |
CVE-2023-23926
MISC
MISC
MISC
MISC |
| werkzeug — werkzeug |
Werkzeug is a comprehensive WSGI web application library. Browsers may allow “nameless” cookies that look like `=value` instead of `key=value`. A vulnerable browser may allow a compromised application on an adjacent subdomain to exploit this to set a cookie like `=__Host-test=bad` for another subdomain. Werkzeug prior to 2.2.3 will parse the cookie `=__Host-test=bad` as __Host-test=bad`. If a Werkzeug application is running next to a vulnerable or malicious subdomain which sets such a cookie using a vulnerable browser, the Werkzeug application will see the bad cookie value but the valid cookie key. The issue is fixed in Werkzeug 2.2.3. |
2023-02-14 |
not yet calculated |
CVE-2023-23934
MISC
MISC
MISC |
| undici — undici |
Undici is an HTTP/1.1 client for Node.js. Starting with version 2.0.0 and prior to version 5.19.1, the undici library does not protect `host` HTTP header from CRLF injection vulnerabilities. This issue is patched in Undici v5.19.1. As a workaround, sanitize the `headers.host` string before passing to undici. |
2023-02-16 |
not yet calculated |
CVE-2023-23936
MISC
MISC
MISC
MISC |
| git — git |
Git, a revision control system, is vulnerable to path traversal prior to versions 2.39.2, 2.38.4, 2.37.6, 2.36.5, 2.35.7, 2.34.7, 2.33.7, 2.32.6, 2.31.7, and 2.30.8. By feeding a crafted input to `git apply`, a path outside the working tree can be overwritten as the user who is running `git apply`. A fix has been prepared and will appear in v2.39.2, v2.38.4, v2.37.6, v2.36.5, v2.35.7, v2.34.7, v2.33.7, v2.32.6, v2.31.7, and v2.30.8. As a workaround, use `git apply –stat` to inspect a patch before applying; avoid applying one that creates a symbolic link and then creates a file beyond the symbolic link. |
2023-02-14 |
not yet calculated |
CVE-2023-23946
MISC
MISC |
| argo_cd — argo_cd |
Argo CD is a declarative, GitOps continuous delivery tool for Kubernetes. All Argo CD versions starting with 2.3.0-rc1 and prior to 2.3.17, 2.4.23 2.5.11, and 2.6.2 are vulnerable to an improper authorization bug which allows users who have the ability to update at least one cluster secret to update any cluster secret. The attacker could use this access to escalate privileges (potentially controlling Kubernetes resources) or to break Argo CD functionality (by preventing connections to external clusters). A patch for this vulnerability has been released in Argo CD versions 2.6.2, 2.5.11, 2.4.23, and 2.3.17. Two workarounds are available. Either modify the RBAC configuration to completely revoke all `clusters, update` access, or use the `destinations` and `clusterResourceWhitelist` fields to apply similar restrictions as the `namespaces` and `clusterResources` fields. |
2023-02-16 |
not yet calculated |
CVE-2023-23947
MISC
MISC |
| owncloud — andriod_app |
The ownCloud Android app allows ownCloud users to access, share, and edit files and folders. Version 2.21.1 of the ownCloud Android app is vulnerable to SQL injection in `FileContentProvider.kt`. This issue can lead to information disclosure. Two databases, `filelist` and `owncloud_database`, are affected. In version 3.0, the `filelist` database was deprecated. However, injections affecting `owncloud_database` remain relevant as of version 3.0. |
2023-02-13 |
not yet calculated |
CVE-2023-23948
MISC |
| fuguhub — fuguhub |
Real Time Logic FuguHub v8.1 and earlier was discovered to contain a remote code execution (RCE) vulnerability via the component /FuguHub/cmsdocs/. |
2023-02-17 |
not yet calculated |
CVE-2023-24078
MISC |
| chikoi — chikoi |
ChiKoi v1.0 was discovered to contain a SQL injection vulnerability via the load_file function. |
2023-02-13 |
not yet calculated |
CVE-2023-24084
MISC |
| slims — slims |
SLIMS v9.5.2 was discovered to contain a reflected cross-site scripting (XSS) vulnerability via the component /customs/loan_by_class.php?reportView. |
2023-02-13 |
not yet calculated |
CVE-2023-24086
MISC |
| totolink — ca300-poe |
TOTOLINK CA300-PoE V6.2c.884 was discovered to contain a command injection vulnerability via the admpass parameter in the setPasswordCfg function. |
2023-02-14 |
not yet calculated |
CVE-2023-24159
MISC |
| totolink — ca300-poe |
TOTOLINK CA300-PoE V6.2c.884 was discovered to contain a command injection vulnerability via the admuser parameter in the setPasswordCfg function. |
2023-02-14 |
not yet calculated |
CVE-2023-24160
MISC |
| totolink — ca300-poe |
TOTOLINK CA300-PoE V6.2c.884 was discovered to contain a command injection vulnerability via the webWlanIdx parameter in the setWebWlanIdx function. |
2023-02-14 |
not yet calculated |
CVE-2023-24161
MISC |
|
ureport2 — ureport2
|
An XML External Entity (XXE) vulnerability in ureport v2.2.9 allows attackers to execute arbitrary code via uploading a crafted XML file to /ureport/designer/saveReportFile. |
2023-02-14 |
not yet calculated |
CVE-2023-24187
MISC
MISC
MISC |
|
ureport2 — ureport2
|
ureport v2.2.9 was discovered to contain a directory traversal vulnerability via the deletion function which allows for arbitrary files to be deleted. |
2023-02-13 |
not yet calculated |
CVE-2023-24188
MISC
MISC
MISC |
|
luckyframeweb — luckyframeweb
|
LuckyframeWEB v3.5 was discovered to contain a SQL injection vulnerability via the dataScope parameter at /system/UserMapper.xml. |
2023-02-17 |
not yet calculated |
CVE-2023-24219
MISC |
|
luckyframeweb — luckyframeweb
|
LuckyframeWEB v3.5 was discovered to contain a SQL injection vulnerability via the dataScope parameter at /system/RoleMapper.xml. |
2023-02-17 |
not yet calculated |
CVE-2023-24220
MISC |
|
luckyframeweb — luckyframeweb
|
LuckyframeWEB v3.5 was discovered to contain a SQL injection vulnerability via the dataScope parameter at /system/DeptMapper.xml. |
2023-02-17 |
not yet calculated |
CVE-2023-24221
MISC |
|
totolink — a7100ru
|
TOTOlink A7100RU(V7.4cu.2313_B20191024) was discovered to contain a command injection vulnerability via the province parameter at setting/delStaticDhcpRules. |
2023-02-16 |
not yet calculated |
CVE-2023-24236
MISC |
|
totolink — a7100ru
|
TOTOlink A7100RU(V7.4cu.2313_B20191024) was discovered to contain a command injection vulnerability via the city parameter at setting/delStaticDhcpRules. |
2023-02-16 |
not yet calculated |
CVE-2023-24238
MISC |
|
python — python
|
An issue in the urllib.parse component of Python before v3.11 allows attackers to bypass blocklisting methods by supplying a URL that starts with blank characters. |
2023-02-17 |
not yet calculated |
CVE-2023-24329
MISC
MISC |
|
ujcms — ujcms
|
A cross-site scripting (XSS) vulnerability in UJCMS v4.1.3 allows attackers to execute arbitrary web scripts or HTML via injecting a crafted payload into the URL parameter under the Add New Articles function. |
2023-02-17 |
not yet calculated |
CVE-2023-24369
MISC |
|
wordpress — wordpress
|
Cross-Site Request Forgery (CSRF) vulnerability in Ecwid Ecommerce Ecwid Ecommerce Shopping Cart plugin <= 6.11.3 versions. |
2023-02-14 |
not yet calculated |
CVE-2023-24377
MISC |
|
wordpress — wordpress
|
Cross-Site Request Forgery (CSRF) vulnerability in Photon WP Material Design Icons for Page Builders plugin <= 1.4.2 versions. |
2023-02-14 |
not yet calculated |
CVE-2023-24382
MISC |
|
wordpress — wordpress
|
Cross-Site Request Forgery (CSRF) vulnerability in WpDevArt Booking calendar, Appointment Booking System plugin <= 3.2.3 versions affects plugin forms actions (create, duplicate, edit, delete). |
2023-02-17 |
not yet calculated |
CVE-2023-24388
MISC |
|
siemens — multiple_products
|
A vulnerability has been identified in COMOS V10.2 (All versions), COMOS V10.3.3.1 (All versions < V10.3.3.1.45), COMOS V10.3.3.2 (All versions < V10.3.3.2.33), COMOS V10.3.3.3 (All versions < V10.3.3.3.9), COMOS V10.3.3.4 (All versions < V10.3.3.4.6), COMOS V10.4.0.0 (All versions < V10.4.0.0.31), COMOS V10.4.1.0 (All versions < V10.4.1.0.32), COMOS V10.4.2.0 (All versions < V10.4.2.0.25). Cache validation service in COMOS is vulnerable to Structured Exception Handler (SEH) based buffer overflow. This could allow an attacker to execute arbitrary code on the target system or cause denial of service condition. |
2023-02-14 |
not yet calculated |
CVE-2023-24482
MISC |
|
citrix — multiple_products
|
A vulnerability has been identified that, if exploited, could result in a local user elevating their privilege level to NT AUTHORITYSYSTEM on a Citrix Virtual Apps and Desktops Windows VDA. |
2023-02-16 |
not yet calculated |
CVE-2023-24483
MISC |
|
citrix — multiple_products
|
A malicious user can cause log files to be written to a directory that they do not have permission to write to. |
2023-02-16 |
not yet calculated |
CVE-2023-24484
MISC |
|
citrix — multiple_products
|
Vulnerabilities have been identified that, collectively, allow a standard Windows user to perform operations as SYSTEM on the computer running Citrix Workspace app. |
2023-02-16 |
not yet calculated |
CVE-2023-24485
MISC |
| netgear — prosafe_24_port_10/100_fs726tp |
An uspecified endpoint in the web server of the switch does not properly authenticate the user identity, and may allow downloading a config page with the password to the switch in clear text. |
2023-02-15 |
not yet calculated |
CVE-2023-24498
MISC |
| butterfly_button_plugin — butterfly_button_plugin |
Butterfly Button plugin may leave traces of its use on user’s device. Since it is used for reporting domestic problems, this may lead to spouse knowing about its use. |
2023-02-15 |
not yet calculated |
CVE-2023-24499
MISC |
|
sap_se — multiple_products
|
Due to insufficient input sanitization, SAP NetWeaver AS ABAP (BSP Framework) – versions 700, 701, 702, 731, 740, 750, 751, 752, 753, 754, 755, 756, 757, allows an unauthenticated user to alter the current session of the user by injecting the malicious code over the network and gain access to the unintended data. This may lead to a limited impact on the confidentiality and the integrity of the application. |
2023-02-14 |
not yet calculated |
CVE-2023-24521
MISC
MISC |
|
sap_se — multiple_products
|
Due to insufficient input sanitization, SAP NetWeaver AS ABAP (Business Server Pages) – versions 700, 701, 702, 731, 740, allows an unauthenticated user to alter the current session of the user by injecting the malicious code over the network and gain access to the unintended data. This may lead to a limited impact on the confidentiality and the integrity of the application. |
2023-02-14 |
not yet calculated |
CVE-2023-24522
MISC
MISC |
|
sap_se — multiple_products
|
An attacker authenticated as a non-admin user with local access to a server port assigned to the SAP Host Agent (Start Service) – versions 7.21, 7.22, can submit a crafted ConfigureOutsideDiscovery request with an operating system command which will be executed with administrator privileges. The OS command can read or modify any user or system data and can make the system unavailable. |
2023-02-14 |
not yet calculated |
CVE-2023-24523
MISC
MISC |
|
sap_se — multiple_products
|
SAP S/4 HANA Map Treasury Correspondence Format Data does not perform necessary authorization check for an authenticated user, resulting in escalation of privileges. This could allow an attacker to delete the data with a high impact to availability. |
2023-02-14 |
not yet calculated |
CVE-2023-24524
MISC
MISC |
|
sap_se — multiple_products
|
SAP CRM WebClient UI – versions WEBCUIF 748, 800, 801, S4FND 102, 103, does not sufficiently encode user-controlled inputs, resulting in Cross-Site Scripting (XSS) vulnerability. On successful exploitation an authenticated attacker can cause limited impact on confidentiality of the application. |
2023-02-14 |
not yet calculated |
CVE-2023-24525
MISC
MISC |
|
sap_se — multiple_products
|
SAP Fiori apps for Travel Management in SAP ERP (My Travel Requests) – version 600, allows an authenticated attacker to exploit a certain misconfigured application endpoint to view sensitive data. This endpoint is normally exposed over the network and successful exploitation can lead to exposure of data like travel documents. |
2023-02-14 |
not yet calculated |
CVE-2023-24528
MISC
MISC |
| sap_se — netweaver_application_server_for_abap |
Due to lack of proper input validation, BSP application (CRM_BSP_FRAME) – versions 700, 701, 702, 731, 740, 750, 751, 752, 75C, 75D, 75E, 75F, 75G, 75H, allow malicious inputs from untrusted sources, which can be leveraged by an attacker to execute a Reflected Cross-Site Scripting (XSS) attack. As a result, an attacker may be able to hijack a user session, read and modify some sensitive information. |
2023-02-14 |
not yet calculated |
CVE-2023-24529
MISC
MISC |
| sap_se — multiple_products |
SAP BusinessObjects Business Intelligence Platform (CMC) – versions 420, 430, allows an authenticated admin user to upload malicious code that can be executed by the application over the network. On successful exploitation, attacker can perform operations that may completely compromise the application causing high impact on confidentiality, integrity and availability of the application. |
2023-02-14 |
not yet calculated |
CVE-2023-24530
MISC
MISC |
|
siemens — multiple_products
|
A vulnerability has been identified in Solid Edge SE2022 (All versions < V2210Update12), Solid Edge SE2023 (All versions < V2023Update2). The affected application is vulnerable to stack-based buffer while parsing specially crafted PAR files. An attacker could leverage this vulnerability to execute code in the context of the current process. |
2023-02-14 |
not yet calculated |
CVE-2023-24549
MISC |
|
siemens — multiple_products
|
A vulnerability has been identified in Solid Edge SE2022 (All versions < V2210Update12), Solid Edge SE2023 (All versions < V2023Update2). The affected application is vulnerable to heap-based buffer while parsing specially crafted PAR files. An attacker could leverage this vulnerability to execute code in the context of the current process. |
2023-02-14 |
not yet calculated |
CVE-2023-24550
MISC |
|
siemens — multiple_products
|
A vulnerability has been identified in Solid Edge SE2022 (All versions < V2210Update12), Solid Edge SE2023 (All versions < V2023Update2). The affected application is vulnerable to heap-based buffer underflow while parsing specially crafted PAR files. An attacker could leverage this vulnerability to execute code in the context of the current process. |
2023-02-14 |
not yet calculated |
CVE-2023-24551
MISC |
|
siemens — multiple_products
|
A vulnerability has been identified in Solid Edge SE2022 (All versions < V2210Update12), Solid Edge SE2023 (All versions < V2023Update2). The affected application contains an out of bounds read past the end of an allocated buffer while parsing a specially crafted PAR file. This could allow an attacker to to execute code in the context of the current process. |
2023-02-14 |
not yet calculated |
CVE-2023-24552
MISC |
|
siemens — multiple_products
|
A vulnerability has been identified in Solid Edge SE2022 (All versions < V2210Update12), Solid Edge SE2023 (All versions < V2023Update2). The affected applications contain an out of bounds read past the end of an allocated structure while parsing specially crafted PAR files. This could allow an attacker to execute code in the context of the current process. |
2023-02-14 |
not yet calculated |
CVE-2023-24553
MISC |
|
siemens — multiple_products
|
A vulnerability has been identified in Solid Edge SE2022 (All versions < V2210Update12), Solid Edge SE2023 (All versions < V2023Update2). The affected applications contain an out of bounds read past the end of an allocated structure while parsing specially crafted PAR files. This could allow an attacker to execute code in the context of the current process. |
2023-02-14 |
not yet calculated |
CVE-2023-24554
MISC |
|
siemens — multiple_products
|
A vulnerability has been identified in Solid Edge SE2022 (All versions < V2210Update12), Solid Edge SE2023 (All versions < V2023Update2). The affected applications contain an out of bounds read past the end of an allocated structure while parsing specially crafted PAR files. This could allow an attacker to execute code in the context of the current process. |
2023-02-14 |
not yet calculated |
CVE-2023-24555
MISC |
|
siemens — multiple_products
|
A vulnerability has been identified in Solid Edge SE2022 (All versions < V2210Update12), Solid Edge SE2023 (All versions < V2023Update2). The affected applications contain an out of bounds read past the end of an allocated structure while parsing specially crafted PAR files. This could allow an attacker to execute code in the context of the current process. |
2023-02-14 |
not yet calculated |
CVE-2023-24556
MISC |
|
siemens — multiple_products
|
A vulnerability has been identified in Solid Edge SE2022 (All versions < V2210Update12), Solid Edge SE2023 (All versions < V2023Update2). The affected applications contain an out of bounds read past the end of an allocated structure while parsing specially crafted PAR files. This could allow an attacker to execute code in the context of the current process. |
2023-02-14 |
not yet calculated |
CVE-2023-24557
MISC |
|
siemens — multiple_products
|
A vulnerability has been identified in Solid Edge SE2022 (All versions < V2210Update12), Solid Edge SE2023 (All versions < V2023Update2). The affected applications contain an out of bounds read past the end of an allocated structure while parsing specially crafted PAR files. This could allow an attacker to execute code in the context of the current process. |
2023-02-14 |
not yet calculated |
CVE-2023-24558
MISC |
|
siemens — multiple_products
|
A vulnerability has been identified in Solid Edge SE2022 (All versions < V2210Update12), Solid Edge SE2023 (All versions < V2023Update2). The affected applications contain an out of bounds read past the end of an allocated structure while parsing specially crafted PAR files. This could allow an attacker to execute code in the context of the current process. |
2023-02-14 |
not yet calculated |
CVE-2023-24559
MISC |
|
siemens — multiple_products
|
A vulnerability has been identified in Solid Edge SE2022 (All versions < V2210Update12), Solid Edge SE2023 (All versions < V2023Update2). The affected application contains an out of bounds write past the end of an allocated buffer while parsing a specially crafted PAR file. This could allow an attacker to to execute code in the context of the current process. |
2023-02-14 |
not yet calculated |
CVE-2023-24560
MISC |
|
siemens — multiple_products
|
A vulnerability has been identified in Solid Edge SE2022 (All versions < V2210Update12), Solid Edge SE2023 (All versions < V2023Update2). The affected application is vulnerable to uninitialized pointer access while parsing specially crafted PAR files. An attacker could leverage this vulnerability to execute code in the context of the current process. |
2023-02-14 |
not yet calculated |
CVE-2023-24561
MISC |
|
siemens — multiple_products
|
A vulnerability has been identified in Solid Edge SE2022 (All versions < V2210Update12), Solid Edge SE2023 (All versions < V2023Update2). The affected application is vulnerable to uninitialized pointer access while parsing specially crafted PAR files. An attacker could leverage this vulnerability to execute code in the context of the current process. |
2023-02-14 |
not yet calculated |
CVE-2023-24562
MISC |
|
siemens — multiple_products
|
A vulnerability has been identified in Solid Edge SE2022 (All versions < V2210Update12), Solid Edge SE2023 (All versions < V2023Update2). The affected application is vulnerable to uninitialized pointer access while parsing specially crafted PAR files. An attacker could leverage this vulnerability to execute code in the context of the current process. |
2023-02-14 |
not yet calculated |
CVE-2023-24563
MISC |
|
siemens — multiple_products
|
A vulnerability has been identified in Solid Edge SE2022 (All versions < V2210Update12), Solid Edge SE2022 (All versions), Solid Edge SE2023 (All versions < V2023Update2). The affected application contains a memory corruption vulnerability while parsing specially crafted DWG files. This could allow an attacker to execute code in the context of the current process. (ZDI-CAN-19069) |
2023-02-14 |
not yet calculated |
CVE-2023-24564
MISC |
|
siemens — multiple_products
|
A vulnerability has been identified in Solid Edge SE2022 (All versions < V2210Update12), Solid Edge SE2022 (All versions), Solid Edge SE2023 (All versions < V2023Update2). The affected application contains an out of bounds read past the end of an allocated buffer while parsing a specially crafted STL file. This vulnerability could allow an attacker to disclose sensitive information. (ZDI-CAN-19428) |
2023-02-14 |
not yet calculated |
CVE-2023-24565
MISC |
|
siemens — multiple_products
|
A vulnerability has been identified in Solid Edge SE2022 (All versions < V2210Update12), Solid Edge SE2022 (All versions), Solid Edge SE2023 (All versions < V2023Update2). The affected application is vulnerable to stack-based buffer while parsing specially crafted PAR files. An attacker could leverage this vulnerability to execute code in the context of the current process. (ZDI-CAN-19472) |
2023-02-14 |
not yet calculated |
CVE-2023-24566
MISC |
|
siemens — multiple_products
|
Dell Command | Integration Suite for System Center, versions before 6.4.0 contain an arbitrary folder delete vulnerability during uninstallation. A locally authenticated malicious user may potentially exploit this vulnerability leading to arbitrary folder deletion. |
2023-02-13 |
not yet calculated |
CVE-2023-24572
MISC |
|
django — django
|
An issue was discovered in the Multipart Request Parser in Django 3.2 before 3.2.18, 4.0 before 4.0.10, and 4.1 before 4.1.7. Passing certain inputs (e.g., an excessive number of parts) to multipart forms could result in too many open files or memory exhaustion, and provided a potential vector for a denial-of-service attack. |
2023-02-15 |
not yet calculated |
CVE-2023-24580
MISC
MISC
MISC
MISC
MLIST |
|
siemens — multiple_products
|
A vulnerability has been identified in Solid Edge SE2022 (All versions < V2210Update12), Solid Edge SE2022 (All versions), Solid Edge SE2023 (All versions < V2023Update2). The affected application contains a use-after-free vulnerability that could be triggered while parsing specially crafted STP files. An attacker could leverage this vulnerability to execute code in the context of the current process. (ZDI-CAN-19425) |
2023-02-14 |
not yet calculated |
CVE-2023-24581
MISC |
| redpanda — redpanda |
Redpanda before 22.3.12 discloses cleartext AWS credentials. The import functionality in the rpk binary logs an AWS Access Key ID and Secret in cleartext to standard output, allowing a local user to view the key in the console, or in Kubernetes logs if stdout output is collected. The fixed versions are 22.3.12, 22.2.10, and 22.1.12. |
2023-02-13 |
not yet calculated |
CVE-2023-24619
MISC |
| food_ordering_system — food_ordering_system |
An arbitrary file upload vulnerability in the component /fos/admin/ajax.php of Food Ordering System v2.0 allows attackers to execute arbitrary code via a crafted PHP file. |
2023-02-13 |
not yet calculated |
CVE-2023-24646
MISC |
| food_ordering_system — food_ordering_system |
Food Ordering System v2.0 was discovered to contain a SQL injection vulnerability via the email parameter. |
2023-02-13 |
not yet calculated |
CVE-2023-24647
MISC |
|
zstore — zstore
|
Zstore v6.6.0 was discovered to contain a cross-site scripting (XSS) vulnerability via the component /index.php. |
2023-02-13 |
not yet calculated |
CVE-2023-24648
MISC |
| changedetection.io — changedetection.io |
Changedetection.io before v0.40.1.1 was discovered to contain a stored cross-site scripting (XSS) vulnerability in the main page. This vulnerability allows attackers to execute arbitrary web scripts or HTML via a crafted payload injected into the URL parameter under the “Add a new change detection watch” function. |
2023-02-17 |
not yet calculated |
CVE-2023-24769
MISC
MISC |
|
peazip — peazip
|
An issue in Giorgio Tani peazip v.9.0.0 allows attackers to cause a denial of service via the End of Archive tag function of the peazip/pea UNPEA feature. |
2023-02-17 |
not yet calculated |
CVE-2023-24785
MISC |
| owncloud — andriod_app |
The ownCloud Android app allows ownCloud users to access, share, and edit files and folders. Prior to version 3.0, the app has an incomplete fix for a path traversal issue and is vulnerable to two bypass methods. The bypasses may lead to information disclosure when uploading the app’s internal files, and to arbitrary file write when uploading plain text files (although limited by the .txt extension). Version 3.0 fixes the reported bypasses. |
2023-02-13 |
not yet calculated |
CVE-2023-24804
MISC
MISC
MISC |
| undici — undici |
Undici is an HTTP/1.1 client for Node.js. Prior to version 5.19.1, the `Headers.set()` and `Headers.append()` methods are vulnerable to Regular Expression Denial of Service (ReDoS) attacks when untrusted values are passed into the functions. This is due to the inefficient regular expression used to normalize the values in the `headerValueNormalize()` utility function. This vulnerability was patched in v5.19.1. No known workarounds are available. |
2023-02-16 |
not yet calculated |
CVE-2023-24807
MISC
MISC
MISC
MISC |
|
nethack — nethack
|
NetHack is a single player dungeon exploration game. Starting with version 3.6.2 and prior to version 3.6.7, illegal input to the “C” (call) command can cause a buffer overflow and crash the NetHack process. This vulnerability may be a security issue for systems that have NetHack installed suid/sgid and for shared systems. For all systems, it may result in a process crash. This issue is resolved in NetHack 3.6.7. There are no known workarounds. |
2023-02-17 |
not yet calculated |
CVE-2023-24809
MISC
MISC |
|
ibm — infosphere_information_server
|
IBM InfoSphere Information Server 11.7 could allow a remote attacker to traverse directories on the system. An attacker could send a specially crafted URL request containing “dot dot” sequences (/../) to view arbitrary files on the system. IBM X-Force ID: 246333 |
2023-02-17 |
not yet calculated |
CVE-2023-24960
MISC
MISC |
|
ibm — infosphere_information_server
|
IBM InfoSphere Information Server 11.7 could allow a local user to obtain sensitive information from a log files. IBM X-Force ID: 246463. |
2023-02-17 |
not yet calculated |
CVE-2023-24964
MISC
MISC |
| siemens — tecnomatix_plant_simulation |
A vulnerability has been identified in Tecnomatix Plant Simulation (All versions < V2201.0006). The affected application is vulnerable to uninitialized pointer access while parsing specially crafted SPP files. An attacker could leverage this vulnerability to execute code in the context of the current process. (ZDI-CAN-19788) |
2023-02-14 |
not yet calculated |
CVE-2023-24978
MISC |
| siemens — tecnomatix_plant_simulation |
A vulnerability has been identified in Tecnomatix Plant Simulation (All versions < V2201.0006). The affected application contains an out of bounds write past the end of an allocated buffer while parsing a specially crafted SPP file. This could allow an attacker to execute code in the context of the current process. (ZDI-CAN-19789) |
2023-02-14 |
not yet calculated |
CVE-2023-24979
MISC |
| siemens — tecnomatix_plant_simulation |
A vulnerability has been identified in Tecnomatix Plant Simulation (All versions < V2201.0006). The affected application contains an out of bounds write past the end of an allocated buffer while parsing a specially crafted SPP file. This could allow an attacker to execute code in the context of the current process. (ZDI-CAN-19790) |
2023-02-14 |
not yet calculated |
CVE-2023-24980
MISC |
| siemens — tecnomatix_plant_simulation |
A vulnerability has been identified in Tecnomatix Plant Simulation (All versions < V2201.0006). The affected application contains an out of bounds write past the end of an allocated buffer while parsing a specially crafted SPP file. This could allow an attacker to execute code in the context of the current process. (ZDI-CAN-19791) |
2023-02-14 |
not yet calculated |
CVE-2023-24981
MISC |
| siemens — tecnomatix_plant_simulation |
A vulnerability has been identified in Tecnomatix Plant Simulation (All versions < V2201.0006). The affected application contains an out of bounds write past the end of an allocated buffer while parsing a specially crafted SPP file. This could allow an attacker to execute code in the context of the current process. (ZDI-CAN-19804) |
2023-02-14 |
not yet calculated |
CVE-2023-24982
MISC |
| siemens — tecnomatix_plant_simulation |
A vulnerability has been identified in Tecnomatix Plant Simulation (All versions < V2201.0006). The affected application contains an out of bounds write past the end of an allocated buffer while parsing a specially crafted SPP file. This could allow an attacker to execute code in the context of the current process. (ZDI-CAN-19805) |
2023-02-14 |
not yet calculated |
CVE-2023-24983
MISC |
| siemens — tecnomatix_plant_simulation |
A vulnerability has been identified in Tecnomatix Plant Simulation (All versions < V2201.0006). The affected application contains an out of bounds write past the end of an allocated buffer while parsing a specially crafted SPP file. This could allow an attacker to execute code in the context of the current process. (ZDI-CAN-19806) |
2023-02-14 |
not yet calculated |
CVE-2023-24984
MISC |
| siemens — tecnomatix_plant_simulation |
A vulnerability has been identified in Tecnomatix Plant Simulation (All versions < V2201.0006). The affected application contains an out of bounds write past the end of an allocated buffer while parsing a specially crafted SPP file. This could allow an attacker to execute code in the context of the current process. (ZDI-CAN-19807) |
2023-02-14 |
not yet calculated |
CVE-2023-24985
MISC |
| siemens — tecnomatix_plant_simulation |
A vulnerability has been identified in Tecnomatix Plant Simulation (All versions < V2201.0006). The affected application contains an out of bounds write past the end of an allocated buffer while parsing a specially crafted SPP file. This could allow an attacker to execute code in the context of the current process. (ZDI-CAN-19808) |
2023-02-14 |
not yet calculated |
CVE-2023-24986
MISC |
| siemens — tecnomatix_plant_simulation |
A vulnerability has been identified in Tecnomatix Plant Simulation (All versions < V2201.0006). The affected application contains an out of bounds write past the end of an allocated buffer while parsing a specially crafted SPP file. This could allow an attacker to execute code in the context of the current process. (ZDI-CAN-19809) |
2023-02-14 |
not yet calculated |
CVE-2023-24987
MISC |
| siemens — tecnomatix_plant_simulation |
A vulnerability has been identified in Tecnomatix Plant Simulation (All versions < V2201.0006). The affected application contains an out of bounds write past the end of an allocated buffer while parsing a specially crafted SPP file. This could allow an attacker to execute code in the context of the current process. (ZDI-CAN-19810) |
2023-02-14 |
not yet calculated |
CVE-2023-24988
MISC |
| siemens — tecnomatix_plant_simulation |
A vulnerability has been identified in Tecnomatix Plant Simulation (All versions < V2201.0006). The affected application contains an out of bounds write past the end of an allocated buffer while parsing a specially crafted SPP file. This could allow an attacker to execute code in the context of the current process. (ZDI-CAN-19811) |
2023-02-14 |
not yet calculated |
CVE-2023-24989
MISC |
| siemens — tecnomatix_plant_simulation |
A vulnerability has been identified in Tecnomatix Plant Simulation (All versions < V2201.0006). The affected application contains an out of bounds write past the end of an allocated buffer while parsing a specially crafted SPP file. This could allow an attacker to execute code in the context of the current process. (ZDI-CAN-19812) |
2023-02-14 |
not yet calculated |
CVE-2023-24990
MISC |
| siemens — tecnomatix_plant_simulation |
A vulnerability has been identified in Tecnomatix Plant Simulation (All versions < V2201.0006). The affected application contains an out of bounds write past the end of an allocated buffer while parsing a specially crafted SPP file. This could allow an attacker to execute code in the context of the current process. (ZDI-CAN-19813) |
2023-02-14 |
not yet calculated |
CVE-2023-24991
MISC |
| siemens — tecnomatix_plant_simulation |
A vulnerability has been identified in Tecnomatix Plant Simulation (All versions < V2201.0006). The affected application contains an out of bounds write past the end of an allocated buffer while parsing a specially crafted SPP file. This could allow an attacker to execute code in the context of the current process. (ZDI-CAN-19814) |
2023-02-14 |
not yet calculated |
CVE-2023-24992
MISC |
| siemens — tecnomatix_plant_simulation |
A vulnerability has been identified in Tecnomatix Plant Simulation (All versions < V2201.0006). The affected application contains an out of bounds write past the end of an allocated buffer while parsing a specially crafted SPP file. This could allow an attacker to execute code in the context of the current process. (ZDI-CAN-19815) |
2023-02-14 |
not yet calculated |
CVE-2023-24993
MISC |
| siemens — tecnomatix_plant_simulation |
A vulnerability has been identified in Tecnomatix Plant Simulation (All versions < V2201.0006). The affected application contains an out of bounds write past the end of an allocated buffer while parsing a specially crafted SPP file. This could allow an attacker to execute code in the context of the current process. (ZDI-CAN-19816) |
2023-02-14 |
not yet calculated |
CVE-2023-24994
MISC |
| siemens — tecnomatix_plant_simulation |
A vulnerability has been identified in Tecnomatix Plant Simulation (All versions < V2201.0006). The affected application contains an out of bounds write past the end of an allocated buffer while parsing a specially crafted SPP file. This could allow an attacker to execute code in the context of the current process. (ZDI-CAN-19817) |
2023-02-14 |
not yet calculated |
CVE-2023-24995
MISC |
| siemens — tecnomatix_plant_simulation |
A vulnerability has been identified in Tecnomatix Plant Simulation (All versions < V2201.0006). The affected application contains an out of bounds write past the end of an allocated buffer while parsing a specially crafted SPP file. This could allow an attacker to execute code in the context of the current process. (ZDI-CAN-19818) |
2023-02-14 |
not yet calculated |
CVE-2023-24996
MISC |
| nec — pc_settings_tool |
PC settings tool Ver10.1.26.0 and earlier, PC settings tool Ver11.0.22.0 and earlier allows a attacker to write to the registry as administrator privileges with standard user privileges. |
2023-02-15 |
not yet calculated |
CVE-2023-25011
MISC |
| wordpress — wordpress |
Cross-Site Request Forgery (CSRF) vulnerability in ShapedPlugin WP Tabs – Responsive Tabs Plugin for WordPress plugin <= 2.1.14 versions. |
2023-02-14 |
not yet calculated |
CVE-2023-25065
MISC |
| foliovision — fv_flowplayer_video_player |
Cross-Site Request Forgery (CSRF) vulnerability in FolioVision FV Flowplayer Video Player plugin <= 7.5.30.7212 versions. |
2023-02-14 |
not yet calculated |
CVE-2023-25066
MISC |
| siemens — parasolid/solid_edge |
A vulnerability has been identified in Parasolid V34.0 (All versions < V34.0.254), Parasolid V34.1 (All versions < V34.1.242), Parasolid V35.0 (All versions < V35.0.170), Parasolid V35.1 (All versions < V35.1.150), Solid Edge SE2022 (All versions < V2210Update12). The affected applications contain an out of bounds read past the end of an allocated structure while parsing specially crafted PAR files. This could allow an attacker to execute code in the context of the current process. |
2023-02-14 |
not yet calculated |
CVE-2023-25140
MISC
MISC |
|
apache — sling_jcr_base
|
Apache Sling JCR Base < 3.1.12 has a critical injection vulnerability when running on old JDK versions (JDK 1.8.191 or earlier) through utility functions in RepositoryAccessor. The functions getRepository and getRepositoryFromURL allow an application to access data stored in a remote location via JDNI and RMI. Users of Apache Sling JCR Base are recommended to upgrade to Apache Sling JCR Base 3.1.12 or later, or to run on a more recent JDK. |
2023-02-14 |
not yet calculated |
CVE-2023-25141
MISC |
|
timescaledb — timescaledb
|
TimescaleDB, an open-source time-series SQL database, has a privilege escalation vulnerability in versions 2.8.0 through 2.9.2. During installation, TimescaleDB creates a telemetry job that is runs as the installation user. The queries run as part of the telemetry data collection were not run with a locked down `search_path`, allowing malicious users to create functions that would be executed by the telemetry job, leading to privilege escalation. In order to be able to take advantage of this vulnerability, a user would need to be able to create objects in a database and then get a superuser to install TimescaleDB into their database. When TimescaleDB is installed as trusted extension, non-superusers can install the extension without help from a superuser. Version 2.9.3 fixes this issue. As a mitigation, the `search_path` of the user running the telemetry job can be locked down to not include schemas writable by other users. The vulnerability is not exploitable on instances in Timescale Cloud and Managed Service for TimescaleDB due to additional security provisions in place on those platforms. |
2023-02-14 |
not yet calculated |
CVE-2023-25149
MISC
MISC
MISC |
|
containerd — containerd
|
containerd is an open source container runtime. Before versions 1.6.18 and 1.5.18, when importing an OCI image, there was no limit on the number of bytes read for certain files. A maliciously crafted image with a large file where a limit was not applied could cause a denial of service. This bug has been fixed in containerd 1.6.18 and 1.5.18. Users should update to these versions to resolve the issue. As a workaround, ensure that only trusted images are used and that only trusted users have permissions to import images. |
2023-02-16 |
not yet calculated |
CVE-2023-25153
MISC
MISC
MISC
MISC |
|
kiwi_tcms — kiwi_tcms
|
Kiwi TCMS, an open source test management system, does not impose rate limits in versions prior to 12.0. This makes it easier to attempt brute-force attacks against the login page. Users should upgrade to v12.0 or later to receive a patch. As a workaround, users may install and configure a rate-limiting proxy in front of Kiwi TCMS. |
2023-02-15 |
not yet calculated |
CVE-2023-25156
MISC
MISC
MISC
MISC |
| nextcloud — multiple_products |
Nextcloud Server is the file server software for Nextcloud, a self-hosted productivity platform, and Nextcloud Office is a document collaboration app for the same platform. Nextcloud Server 24.0.x prior to 24.0.8 and 25.0.x prior to 25.0.1, Nextcloud Enterprise Server 24.0.x prior to 24.0.8 and 25.0.x prior to 25.0.1, and Nextcloud Office (Richdocuments) App 6.x prior to 6.3.1 and 7.x prior to 7.0.1 have previews accessible without a watermark. The download should be hidden and the watermark should get applied. This issue is fixed in Nextcloud Server 25.0.1 and 24.0.8, Nextcloud Enterprise Server 25.0.1 and 24.0.8, and Nextcloud Office (Richdocuments) App 7.0.1 (for 25) and 6.3.1 (for 24). No known workarounds are available. |
2023-02-13 |
not yet calculated |
CVE-2023-25159
MISC
MISC
MISC
MISC |
nextcloud — mail
|
Nextcloud Mail is an email app for the Nextcloud home server platform. Prior to versions 2.2.1, 1.14.5, 1.12.9, and 1.11.8, an attacker can access the mail box by ID getting the subjects and the first characters of the emails. Users should upgrade to Mail 2.2.1 for Nextcloud 25, Mail 1.14.5 for Nextcloud 22-24, Mail 1.12.9 for Nextcloud 21, or Mail 1.11.8 for Nextcloud 20 to receive a patch. No known workarounds are available. |
2023-02-13 |
not yet calculated |
CVE-2023-25160
MISC
MISC
MISC |
| nextcloud — server/enterprise_server |
Nextcloud Server is the file server software for Nextcloud, a self-hosted productivity platform. Nextcloud Server and Nextcloud Enterprise Server prior to versions 25.0.1 24.0.8, and 23.0.12 missing rate limiting on password reset functionality. This could result in service slowdown, storage overflow, or cost impact when using external email services. Users should upgrade to Nextcloud Server 25.0.1, 24.0.8, or 23.0.12 or Nextcloud Enterprise Server 25.0.1, 24.0.8, or 23.0.12 to receive a patch. No known workarounds are available. |
2023-02-13 |
not yet calculated |
CVE-2023-25161
MISC
MISC
MISC |
| nextcloud — server/enterprise_server |
Nextcloud Server is the file server software for Nextcloud, a self-hosted productivity platform. Nextcloud Server prior to 24.0.8 and 23.0.12 and Nextcloud Enterprise server prior to 24.0.8 and 23.0.12 are vulnerable to server-side request forgery (SSRF). Attackers can leverage enclosed alphanumeric payloads to bypass IP filters and gain SSRF, which would allow an attacker to read crucial metadata if the server is hosted on the AWS platform. Nextcloud Server 24.0.8 and 23.0.2 and Nextcloud Enterprise Server 24.0.8 and 23.0.12 contain a patch for this issue. No known workarounds are available. |
2023-02-13 |
not yet calculated |
CVE-2023-25162
MISC
MISC
MISC |
|
kiwi_tcms — kiwi_tcms
|
Kiwi TCMS, an open source test management system, does not impose rate limits in versions prior to 12.0. This makes it easier to attempt denial-of-service attacks against the Password reset page. An attacker could potentially send a large number of emails if they know the email addresses of users in Kiwi TCMS. Additionally that may strain SMTP resources. Users should upgrade to v12.0 or later to receive a patch. As potential workarounds, users may install and configure a rate-limiting proxy in front of Kiwi TCMS and/or configure rate limits on their email server when possible. |
2023-02-15 |
not yet calculated |
CVE-2023-25171
MISC
MISC
MISC
MISC |
|
containerd — containerd
|
containerd is an open source container runtime. A bug was found in containerd prior to versions 1.6.18 and 1.5.18 where supplementary groups are not set up properly inside a container. If an attacker has direct access to a container and manipulates their supplementary group access, they may be able to use supplementary group access to bypass primary group restrictions in some cases, potentially gaining access to sensitive information or gaining the ability to execute code in that container. Downstream applications that use the containerd client library may be affected as well. This bug has been fixed in containerd v1.6.18 and v.1.5.18. Users should update to these versions and recreate containers to resolve this issue. Users who rely on a downstream application that uses containerd’s client library should check that application for a separate advisory and instructions. As a workaround, ensure that the `”USER $USERNAME”` Dockerfile instruction is not used. Instead, set the container entrypoint to a value similar to `ENTRYPOINT [“su”, “-“, “user”]` to allow `su` to properly set up supplementary groups. |
2023-02-16 |
not yet calculated |
CVE-2023-25173
MISC
MISC
MISC
MISC
MISC
MISC
MISC
MISC
MISC |
|
ami — megarac_spx
|
AMI MegaRAC SPX devices allow Password Disclosure through Redfish. The fixed versions are SPx_12-update-7.00 and SPx_13-update-5.00. |
2023-02-15 |
not yet calculated |
CVE-2023-25191
MISC |
|
ami — megarac_spx
|
AMI MegaRAC SPX devices allow User Enumeration through Redfish. The fixed versions are SPx12-update-7.00 and SPx13-update-5.00. |
2023-02-15 |
not yet calculated |
CVE-2023-25192
MISC |
|
pimcore — pimcore
|
An improper SameSite Attribute vulnerability in pimCore v10.5.15 allows attackers to execute arbitrary code. |
2023-02-13 |
not yet calculated |
CVE-2023-25240
MISC
MISC |
|
bgerp — bgerp
|
bgERP v22.31 was discovered to contain a reflected cross-site scripting (XSS) vulnerability via the Search parameter. |
2023-02-13 |
not yet calculated |
CVE-2023-25241
MISC
MISC |
|
gss_ntlmssp — gss_ntlmssp
|
GSS-NTLMSSP is a mechglue plugin for the GSSAPI library that implements NTLM authentication. Prior to version 1.2.0, multiple out-of-bounds reads when decoding NTLM fields can trigger a denial of service. A 32-bit integer overflow condition can lead to incorrect checks of consistency of length of internal buffers. Although most applications will error out before accepting a singe input buffer of 4GB in length this could theoretically happen. This vulnerability can be triggered via the main `gss_accept_sec_context` entry point if the application allows tokens greater than 4GB in length. This can lead to a large, up to 65KB, out-of-bounds read which could cause a denial-of-service if it reads from unmapped memory. Version 1.2.0 contains a patch for the out-of-bounds reads. |
2023-02-14 |
not yet calculated |
CVE-2023-25563
MISC
MISC
MISC |
|
gss_ntlmssp — gss_ntlmssp
|
GSS-NTLMSSP is a mechglue plugin for the GSSAPI library that implements NTLM authentication. Prior to version 1.2.0, memory corruption can be triggered when decoding UTF16 strings. The variable `outlen` was not initialized and could cause writing a zero to an arbitrary place in memory if `ntlm_str_convert()` were to fail, which would leave `outlen` uninitialized. This can lead to a denial of service if the write hits unmapped memory or randomly corrupts a byte in the application memory space. This vulnerability can trigger an out-of-bounds write, leading to memory corruption. This vulnerability can be triggered via the main `gss_accept_sec_context` entry point. This issue is fixed in version 1.2.0. |
2023-02-14 |
not yet calculated |
CVE-2023-25564
MISC
MISC
MISC |
|
gss_ntlmssp — gss_ntlmssp
|
GSS-NTLMSSP is a mechglue plugin for the GSSAPI library that implements NTLM authentication. Prior to version 1.2.0, an incorrect free when decoding target information can trigger a denial of service. The error condition incorrectly assumes the `cb` and `sh` buffers contain a copy of the data that needs to be freed. However, that is not the case. This vulnerability can be triggered via the main `gss_accept_sec_context` entry point. This will likely trigger an assertion failure in `free`, causing a denial-of-service. This issue is fixed in version 1.2.0. |
2023-02-14 |
not yet calculated |
CVE-2023-25565
MISC
MISC
MISC |
|
gss_ntlmssp — gss_ntlmssp
|
GSS-NTLMSSP is a mechglue plugin for the GSSAPI library that implements NTLM authentication. Prior to version 1.2.0, a memory leak can be triggered when parsing usernames which can trigger a denial-of-service. The domain portion of a username may be overridden causing an allocated memory area the size of the domain name to be leaked. An attacker can leak memory via the main `gss_accept_sec_context` entry point, potentially causing a denial-of-service. This issue is fixed in version 1.2.0. |
2023-02-14 |
not yet calculated |
CVE-2023-25566
MISC
MISC
MISC |
|
gss_ntlmssp — gss_ntlmssp
|
GSS-NTLMSSP, a mechglue plugin for the GSSAPI library that implements NTLM authentication, has an out-of-bounds read when decoding target information prior to version 1.2.0. The length of the `av_pair` is not checked properly for two of the elements which can trigger an out-of-bound read. The out-of-bounds read can be triggered via the main `gss_accept_sec_context` entry point and could cause a denial-of-service if the memory is unmapped. The issue is fixed in version 1.2.0. |
2023-02-14 |
not yet calculated |
CVE-2023-25567
MISC
MISC
MISC |
|
backstage — backstage
|
Backstage is an open platform for building developer portals. `@backstage/catalog-model` prior to version 1.2.0, `@backstage/core-components` prior to 0.12.4, and `@backstage/plugin-catalog-backend` prior to 1.7.2 are affected by a cross-site scripting vulnerability. This vulnerability allows a malicious actor with access to add or modify content in an instance of the Backstage software catalog to inject script URLs in the entities stored in the catalog. If users of the catalog then click on said URLs, that can lead to an XSS attack. This vulnerability has been patched in both the frontend and backend implementations. The default `Link` component from `@backstage/core-components` version 1.2.0 and greater will now reject `javascript:` URLs, and there is a global override of `window.open` to do the same. In addition, the catalog model v0.12.4 and greater as well as the catalog backend v1.7.2 and greater now has additional validation built in that prevents `javascript:` URLs in known annotations. As a workaround, the general practice of limiting access to modifying catalog content and requiring code reviews greatly help mitigate this vulnerability. |
2023-02-14 |
not yet calculated |
CVE-2023-25571
MISC
MISC |
| react_admin — react_admin |
react-admin is a frontend framework for building browser applications on top of REST/GraphQL APIs. react-admin prior to versions 3.19.12 and 4.7.6, along with ra-ui-materialui prior to 3.19.12 and 4.7.6, are vulnerable to cross-site scripting. All React applications built with react-admin and using the “ are affected. “ outputs the field value using `dangerouslySetInnerHTML` without client-side sanitization. If the data isn’t sanitized server-side, this opens a possible cross-site scripting (XSS) attack. Versions 3.19.12 and 4.7.6 now use `DOMPurify` to escape the HTML before outputting it with React and `dangerouslySetInnerHTML`. Users who already sanitize HTML data server-side do not need to upgrade. As a workaround, users may replace the “ by a custom field doing sanitization by hand. |
2023-02-13 |
not yet calculated |
CVE-2023-25572
MISC
MISC
MISC
MISC
MISC |
|
fastify — fastify_multipart
|
@fastify/multipart is a Fastify plugin to parse the multipart content-type. Prior to versions 7.4.1 and 6.0.1, @fastify/multipart may experience denial of service due to a number of situations in which an unlimited number of parts are accepted. This includes the multipart body parser accepting an unlimited number of file parts, the multipart body parser accepting an unlimited number of field parts, and the multipart body parser accepting an unlimited number of empty parts as field parts. This is fixed in v7.4.1 (for Fastify v4.x) and v6.0.1 (for Fastify v3.x). There are no known workarounds. |
2023-02-14 |
not yet calculated |
CVE-2023-25576
MISC
MISC
MISC
MISC
MISC |
|
werkzeug — werkzeug
|
Werkzeug is a comprehensive WSGI web application library. Prior to version 2.2.3, Werkzeug’s multipart form data parser will parse an unlimited number of parts, including file parts. Parts can be a small amount of bytes, but each requires CPU time to parse and may use more memory as Python data. If a request can be made to an endpoint that accesses `request.data`, `request.form`, `request.files`, or `request.get_data(parse_form_data=False)`, it can cause unexpectedly high resource usage. This allows an attacker to cause a denial of service by sending crafted multipart data to an endpoint that will parse it. The amount of CPU time required can block worker processes from handling legitimate requests. The amount of RAM required can trigger an out of memory kill of the process. Unlimited file parts can use up memory and file handles. If many concurrent requests are sent continuously, this can exhaust or kill all available workers. Version 2.2.3 contains a patch for this issue. |
2023-02-14 |
not yet calculated |
CVE-2023-25577
MISC
MISC
MISC |
|
tenable — starlite
|
Starlite is an Asynchronous Server Gateway Interface (ASGI) framework. Prior to version 1.5.2, the request body parsing in `starlite` allows a potentially unauthenticated attacker to consume a large amount of CPU time and RAM. The multipart body parser processes an unlimited number of file parts and an unlimited number of field parts. This is a remote, potentially unauthenticated Denial of Service vulnerability. This vulnerability affects applications with a request handler that accepts a `Body(media_type=RequestEncodingType.MULTI_PART)`. The large amount of CPU time required for processing requests can block all available worker processes and significantly delay or slow down the processing of legitimate user requests. The large amount of RAM accumulated while processing requests can lead to Out-Of-Memory kills. Complete DoS is achievable by sending many concurrent multipart requests in a loop. Version 1.51.2 contains a patch for this issue. |
2023-02-15 |
not yet calculated |
CVE-2023-25578
MISC
MISC
MISC |
|
fortinet — fortiweb
|
A stack-based buffer overflow in Fortinet FortiWeb 6.4 all versions, FortiWeb versions 6.3.17 and earlier, FortiWeb versions 6.2.6 and earlier, FortiWeb versions 6.1.2 and earlier, FortiWeb versions 6.0.7 and earlier, FortiWeb versions 5.9.1 and earlier, FortiWeb 5.8 all versions, FortiWeb 5.7 all versions, FortiWeb 5.6 all versions allows attacker to execute unauthorized code or commands via specially crafted command arguments. |
2023-02-16 |
not yet calculated |
CVE-2023-25602
MISC |
| sap_se — netweaver_application_server_for_abap |
SAP NetWeaver AS ABAP (BSP Framework) application – versions 700, 701, 702, 731, 740, 750, 751, 752, 753, 754, 755, 756, 757, allow an unauthenticated attacker to inject the code that can be executed by the application over the network. On successful exploitation it can gain access to the sensitive information which leads to a limited impact on the confidentiality and the integrity of the application. |
2023-02-14 |
not yet calculated |
CVE-2023-25614
MISC
MISC |
|
node-jose — node-jose
|
node-jose is a JavaScript implementation of the JSON Object Signing and Encryption (JOSE) for web browsers and node.js-based servers. Prior to version 2.2.0, when using the non-default “fallback” crypto back-end, ECC operations in `node-jose` can trigger a Denial-of-Service (DoS) condition, due to a possible infinite loop in an internal calculation. For some ECC operations, this condition is triggered randomly; for others, it can be triggered by malicious input. The issue has been patched in version 2.2.0. Since this issue is only present in the “fallback” crypto implementation, it can be avoided by ensuring that either WebCrypto or the Node `crypto` module is available in the JS environment where `node-jose` is being run. |
2023-02-16 |
not yet calculated |
CVE-2023-25653
MISC
MISC |
| ruckus_wireless — admin |
Ruckus Wireless Admin through 10.4 allows Remote Code Execution via an unauthenticated HTTP GET Request, as demonstrated by a /forms/doLogin?login_username=admin&password=password$(curl substring. |
2023-02-13 |
not yet calculated |
CVE-2023-25717
MISC
MISC |
|
connectwise — connectwise_control
|
The cryptographic code signing process and controls on ConnectWise Control through 22.9.10032 (formerly known as ScreenConnect) are cryptographically flawed. An attacker can remotely generate or locally alter file contents and bypass code-signing controls. This can be used to execute code as a trusted application provider, escalate privileges, or execute arbitrary commands in the context of the user. The attacker tampers with a trusted, signed executable in transit. |
2023-02-13 |
not yet calculated |
CVE-2023-25718
MISC
MISC |
|
connectwise — connectwise_control
|
ConnectWise Control before 22.9.10032 (formerly known as ScreenConnect) fails to validate user-supplied parameters such as the Bin/ConnectWiseControl.Client.exe h parameter. This results in reflected data and injection of malicious code into a downloaded executable. The executable can be used to execute malicious queries or as a denial-of-service vector. |
2023-02-13 |
not yet calculated |
CVE-2023-25719
MISC
MISC |
|
haproxy — haproxy
|
HAProxy before 2.7.3 may allow a bypass of access control because HTTP/1 headers are inadvertently lost in some situations, aka “request smuggling.” The HTTP header parsers in HAProxy may accept empty header field names, which could be used to truncate the list of HTTP headers and thus make some headers disappear after being parsed and processed for HTTP/1.0 and HTTP/1.1. For HTTP/2 and HTTP/3, the impact is limited because the headers disappear before being parsed and processed, as if they had not been sent by the client. The fixed versions are 2.7.3, 2.6.9, 2.5.12, 2.4.22, 2.2.29, and 2.0.31. |
2023-02-14 |
not yet calculated |
CVE-2023-25725
MISC
CONFIRM
MLIST
DEBIAN |
|
phpmyadmin — phpmyadmin
|
In phpMyAdmin before 4.9.11 and 5.x before 5.2.1, an authenticated user can trigger XSS by uploading a crafted .sql file through the drag-and-drop interface. |
2023-02-13 |
not yet calculated |
CVE-2023-25727
MISC |
| onekey — touch/mini |
Onekey Touch devices through 4.0.0 and Onekey Mini devices through 2.10.0 allow man-in-the-middle attackers to obtain the seed phase. The man-in-the-middle access can only be obtained after disassembling a device (i.e., here, “man-in-the-middle” does not refer to the attacker’s position on an IP network). NOTE: the vendor states that “our hardware team has updated the security patch without anyone being affected.” |
2023-02-14 |
not yet calculated |
CVE-2023-25758
MISC
MISC
MISC |
| jenkins — junit_plugin_1166.va_436e268e972 |
Jenkins JUnit Plugin 1166.va_436e268e972 and earlier does not escape test case class names in JavaScript expressions, resulting in a stored cross-site scripting (XSS) vulnerability exploitable by attackers able to control test case class names in the JUnit resources processed by the plugin. |
2023-02-15 |
not yet calculated |
CVE-2023-25761
CONFIRM
MLIST |
|
jenkins — pipeline_build_step_plugin
|
Jenkins Pipeline: Build Step Plugin 2.18 and earlier does not escape job names in a JavaScript expression used in the Pipeline Snippet Generator, resulting in a stored cross-site scripting (XSS) vulnerability exploitable by attackers able to control job names. |
2023-02-15 |
not yet calculated |
CVE-2023-25762
CONFIRM
MLIST |
|
jenkins — email_extension_plugin
|
Jenkins Email Extension Plugin 2.93 and earlier does not escape various fields included in bundled email templates, resulting in a stored cross-site scripting (XSS) vulnerability exploitable by attackers able to control affected fields. |
2023-02-15 |
not yet calculated |
CVE-2023-25763
CONFIRM
MLIST |
|
jenkins — email_extension_plugin
|
Jenkins Email Extension Plugin 2.93 and earlier does not escape, sanitize, or sandbox rendered email template output or log output generated during template rendering, resulting in a stored cross-site scripting (XSS) vulnerability exploitable by attackers able to create or change custom email templates. |
2023-02-15 |
not yet calculated |
CVE-2023-25764
CONFIRM
MLIST |
|
jenkins — email_extension_plugin
|
In Jenkins Email Extension Plugin 2.93 and earlier, templates defined inside a folder were not subject to Script Security protection, allowing attackers able to define email templates in folders to bypass the sandbox protection and execute arbitrary code in the context of the Jenkins controller JVM. |
2023-02-15 |
not yet calculated |
CVE-2023-25765
CONFIRM
MLIST |
|
jenkins — azure_credentials_plugin
|
A missing permission check in Jenkins Azure Credentials Plugin 253.v887e0f9e898b and earlier allows attackers with Overall/Read permission to enumerate credentials IDs of credentials stored in Jenkins. |
2023-02-15 |
not yet calculated |
CVE-2023-25766
CONFIRM
MLIST |
enkins — azure_credentials_plugin
|
A cross-site request forgery (CSRF) vulnerability in Jenkins Azure Credentials Plugin 253.v887e0f9e898b and earlier allows attackers to connect to an attacker-specified web server. |
2023-02-15 |
not yet calculated |
CVE-2023-25767
CONFIRM
MLIST |
| enkins — azure_credentials_plugin |
A missing permission check in Jenkins Azure Credentials Plugin 253.v887e0f9e898b and earlier allows attackers with Overall/Read permission to connect to an attacker-specified web server. |
2023-02-15 |
not yet calculated |
CVE-2023-25768
CONFIRM
MLIST |
|
craftercms — craftercms
|
Improper Neutralization of Special Elements used in an SQL Command (‘SQL Injection’) vulnerability in Crafter Studio on Linux, MacOS, Windows, x86, ARM, 64 bit allows SQL Injection.This issue affects CrafterCMS v4.0 from 4.0.0 through 4.0.1, and v3.1 from 3.1.0 through 3.1.26. |
2023-02-17 |
not yet calculated |
CVE-2023-26020
MISC |


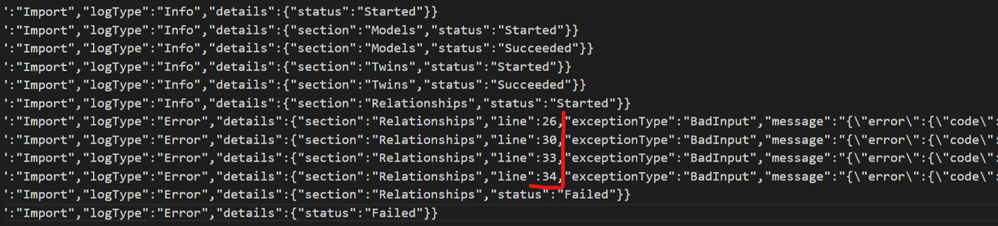


Recent Comments