by Contributed | Feb 12, 2024 | Technology
This article is contributed. See the original author and article here.
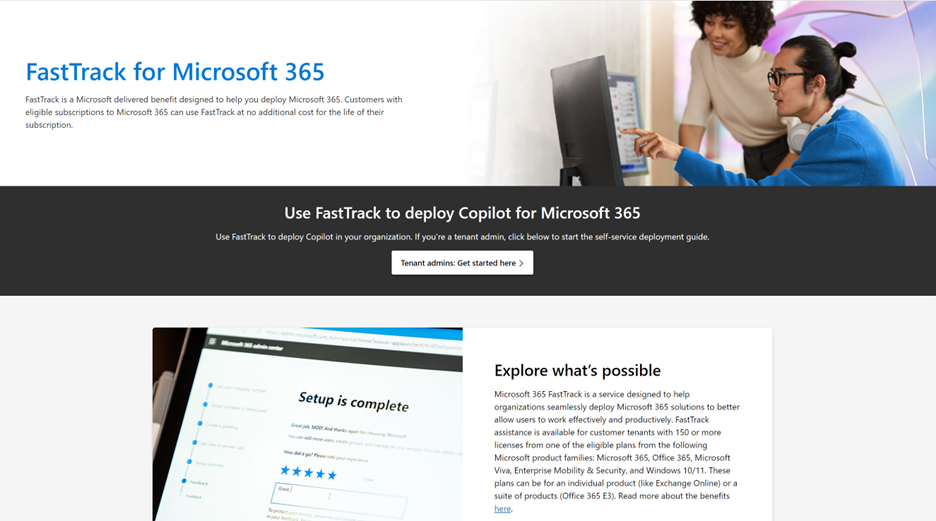
Ready to take your productivity to the next level with Copilot for Microsoft 365? FastTrack for Microsoft 365 is here to help you get started! FastTrack is a service designed to help organizations seamlessly deploy Microsoft 365 solutions to better allow users to work effectively and productively. FastTrack assistance is available for customer tenants with 150 or more licenses from one of the eligible plans from the following Microsoft product families: Microsoft 365, Office 365, Microsoft Viva, Enterprise Mobility & Security, and Windows 10/11. These plans can be for an individual product (like Exchange Online) or a suite of products (Office 365 E3).
FastTrack is a benefit that supports the readiness of customers to prepare for Copilot enablement. With FastTrack, you can confirm that you meet the minimum required prerequisites to enable Copilot across your users and find opportunities for optimizing the Copilot experience. This would include the deployment of Intune, Microsoft 365 Apps, Purview Information Protection, and Teams Meetings. As part of this process, FastTrack can also recommend best practices for driving healthy usage across your organization.
Tenant admins can click here to leverage the FastTrack self-service deployment guide for Copilot for Microsoft 365 to start implementing the pre-requisites, allowing your organization to transform collaboration and take advantage of AI to automate tasks such as writing, editing, and data visualization across Word, Excel, PowerPoint, Outlook, and Teams. Copilot also simplifies the creation of meeting summaries, making it easier to catch up and collaborate asynchronously. Our setup guide facilitates smooth integration, allowing your organization to automate work processes and enhance collaboration seamlessly.

Don’t miss out on the opportunity to unleash the power of generative AI at work with Copilot for Microsoft 365. Get started today with FastTrack and optimize your Copilot for Microsoft 365 experience.
Looking for self-service deployment guides for other Microsoft 365 apps and services? Check out our list of guides to learn more.
Additional resources:
FastTrack FAQs
FastTrack technical documentation

by Contributed | Feb 10, 2024 | Technology
This article is contributed. See the original author and article here.

Context
Provisioned Throughput Units (known as “PTUs”) have been all the rage over the past few months. Every enterprise customer has been wanting to get their hands on their own slice of Azure Open AI Service. With PTUs, they can run their GenAI workloads in production at scale with predictable latency and without having to worry about noisy neighbors. Customers of all sizes and from all verticals have been developing groundbreaking applications, usually starting with the ay-as-you-go (PayGo) flavor of Azure Open AI. When the time comes to deploy an enterprise–grade application to production however, most rely on reserving capacity with PTUs. These are deployed within your own Azure Subscription and allow you to enjoy unencumbered access to the latest models from Open AI such as GPT-4 Turbo. Because PTUs are available 24/7 throughout the month for use, customers need to shift the paradigm of utilizing tokens into utilizing time when considering cost. With this shift often comes the challenge of knowing how to right-size their PTUs.
To aid in that exercise, Microsoft provides tools such as the PTU calculator within the AI Studio experience. These tools, however, make assumptions such as PTUs being able to handle peak load. While this could be a valid approach in many cases, it’s only one way of thinking about choosing the right size for a deployment. Customers often need to consider more variables, including sophisticated architectures to get the best return on their investment.
One pattern that we have seen emerge is the spillover, or bursting, pattern. With this pattern, you do not provision PTUs for peak traffic. Instead, you define the amount of PTU serviced traffic that the business can agree upon, and you route the overflow to a yGo deployment. For example, your business may decide that it’s acceptable to have 90% of the traffic serviced by the PTU deployment with a known latency and to have 10% of overflow traffic serviced with unpredictable performance through a PayGo deployment. I’ll go into detail below on when to invoke this pattern more precisely, but i you are looking for a technical solution to implement this, you may check out this post: Enable GPT failover with Azure OpenAI and Azure API Management – Microsoft Community Hub .The twist is that depending on the profile of your application, this 10% performance can save you north of 50% in unused PTU cost.
If as you’re reading this, you have found yourself in this predicament, you have come to the right place. In this blog post, we try to convey the message that PTUs done right are not necessarily expensive by characterizing customer’s scenarios The three application scenarios we will review are known as: The Unicorn, The No-Brainer, and The Problem Child.
The Unicorn
We will go quickly over the unicorn since nobody has ever seen it and it might not even exist. But just in case, the Unicorn sends/receives token on a perfectly steady basis, weekdays, weekends, daytime, nighttime. If you ever have one of those, PTU makes perfect sense, you get maximum value and leave no crumb on the table. And if your throughput is meaningful in addition to being constant, you will likely also save lots of money compared to a PayGo deployment, in addition from reaping the predictable and low latency that comes with PTUs.

The No–Brainer
Next up is our No-Brainer application. The No-Brainer application profile has mild peaks and valleys. The application sends a constant baseline of tokens to the model, but perhaps there are a couple of peak hours during the day where the application sends a little more. In this case, you sure could provision your PTU deployment to cover the valley traffic and send anything extra to a PayGo deployment. However, in the No-Brainer application, the distance between our peak and valley is minimal, and, in this case, the juice might now be worth the squeeze. Do we want to add complexity to our application? Do we want to invest the engineering time and effort to add routing logic? Do we want to introduce possibly- service to our application and perhaps not even be able to provision a lesser amount of PTUs increments? Again, it all comes down the distance between your peaks and valleys. If those are close, purchase enough PTU to cover for peak. No brainer.

The Problem Child
The Problem Child is that application where the traffic is bursty in nature and the variance in throughput is high. Perhaps the end of the quarter is near, and the company is behind on revenue, so every seller is hitting their sales copilot hard for a couple days in an attempt to bridge the gap to quota. How do we best cover the Problem Child with PTUs?
Option 1: Provision for peak
As we discussed above, our first inclination could be to provision for peak and that is also what most calculators will assume that you want to do so that you can cover all demand conservatively In this instance, you maximize user experience because 100% of your traffic is covered by your PTU deployment and there is no such thing as degraded service. Everyone gets the same latency for the same request every time. However, this is the costly way to manage this application. If you cannot use your PTU deployment outside peak time, you are leaving PTU value on the table. Some customers are lucky enough to have both real-time and batch use cases. In this case, the real-time use cases utilize the PTU deployment during business hours; during downtime, the customer is then free to utilize the deployment for the batch inferencing use cases and still reap the PTU value. Other customers operate on several time zones and when one team goes offline for the day, somewhere 8 hours behind, another team comes online, and the application maintains a steady stream of tokens to the PTU deployment. But for a lot of customers, there isn’t a way to use the PTU deployment outside of peak time and provisioning for peak might not always be the soundest business decision. It depends on budgets, UX constraints and importantly, how narrow, tall and frequent the peak is.

Option 2: Provision for baseline
In option 2, the business is amenable to a trade-off. With this tradeoff, we bring our Azure Open AI cost significantly down at the expense of “some” user experience. And the hard part is to determine how much of the user experience we are willing to sacrifice and at what monetary gain. The idea here is to evaluate the application on a PayGo deployment and see how it performs. We can consider this to be our degraded user experience. If it so happens that our peaks are tall, narrow and rare, and if we are willing to say that it’s acceptable for a small slice of our traffic to experience degraded performance during peak time, then it is highly conceivable that sacrificing 5% of your requests by sending them to a Paygo deployment could yield, 30%, 40% maybe 50% savings compared to the option 1 and provisioning for peak.

The recognized savings will be a function of the area in green below.

Conclusion
PTUs can be perceived as expensive. But this could be that provisioning for peak is assumed. And this could be the best way to go if your business is such that you want to always ensure minimum latency and the best possible user experience. However, if you are willing to combine PTU with a little bit of PayGo (if your application profile lends itself to it), you could realize significant savings and reinvest the leftovers in your next GenAI project on Microsoft Azure… and also buy me a latte.
Much appreciation to my co-author Kit Papandrew
by Contributed | Feb 9, 2024 | Technology
This article is contributed. See the original author and article here.
More Speaking in Ciphers and other Enigmatic Tongues with a focus on SCHANNEL hardening.
Hi! Jim Tierney here again to talk to you about Cryptographic Algorithms, SCHANNEL and other bits of crypto excitement. I have elucidated at length on this topic in this post which had been updated a few years back to the aptly titled, Speaking in Ciphers and other Enigmatic tongues…update!
I am creating this brand-new piece of content in this crypto space to further discuss different Microsoft supported methods that can be used to disable weak cipher suites and protocols.
The scenario we are addressing is that your company is doing a vulnerability and compliance assessment, and they just ran a scanning tool against all your Windows Servers. The software reports back that you have weak ciphers enabled, highlighted in RED and including a link to the following Microsoft documentation –
KB245030 How to Restrict the Use of Certain Cryptographic Algorithms and Protocols in Schannel.dll:
http://support.microsoft.com/kb/245030/en-us
You immediately open a case with Microsoft asking…. What can I do? What can I do?
There are two Microsoft supported methods of configuring cipher suites:
Via GP: https://msdn.microsoft.com/en-us/library/windows/desktop/bb870930(v=vs.85).aspx
Via cmdlets: https://technet.microsoft.com/en-us/library/dn296632.aspx
How to limit the Cipher Suites that Windows will support
The Default location and ordering of Cipher Suites is located here:
HKEY_LOCAL_MACHINESYSTEMCurrentControlSetControlCryptographyConfigurationLocalSSL010002 |
NOTE: We strongly suggest NOT modifying the real registry location. Instead, we recommend leveraging the Group Policy setting below to manage the list of ciphers supported in the Operating System. If the Microsoft development team supports a new cipher, they could end up putting back ciphers you removed from this default location if you do this.
Configuring the Group Policy for Cipher suite ordering/content will overrule what is listed in this default location.
Here is the location of the Cipher Suite ordering group policy:
Computer ConfigurationAdministrative TemplatesNetworkSSL Configuration SettingsSSL Cipher Suite Order

Remember, when configuring the Cipher suite order policy, If the 1023 size is passed, Cipher suites will be truncated because the list exceeds the 1023-character limitation for the
*In addition, Windows Server 2016 and newer do not require the _PXXX suffixes, so the list of cipher suites is a lot shorter. Please note that Win10/2016 and above solves this problem in 2 ways:
- Elliptical Curve (EC) suffixes (also known as the _P values) are no longer part of the cipher suite names, therefore there is no more Cartesian explosion of cipher suite names (e. g. TLS_ECDHE_RSA_WITH_AES_256_CBC_SHA384_P256, TLS_ECDHE_RSA_WITH_AES_256_CBC_SHA384_P384, …)
In Windows 10, curves are prioritized separately from cipher suites, which means the cipher suite list in the GP Editor is much shorter.
NOTE: These EC suffixes ARE required for Windows Server 2012 operating systems to limit the ciphers on the OS. However, Windows 10/2016 OS DOES NOT support these cipher names. So, if you still need to support Windows Server 2012 (you have my sympathy) then you will need to have a GPO for this OS specifically, and then we would also recommend that the GPO be configured with a WMI Filter for the OS version.
Create WMI Filters for the GPO | Microsoft Learn
- PowerShell cmdlets are provided for cipher suites enumeration/enabling/disabling/prioritization as indicated earlier: https://learn.microsoft.com/en-us/powershell/module/tls/?view=windowsserver2022-ps
Specifically for Windows PowerShell, the article below mentions how to update PowerShell scripts or the related registry settings to ensure 1.2 is used:
https://learn.microsoft.com/en-us/security/engineering/solving-tls1-problem#update-windows-powershell-scripts-or-related-registry-settings
When the SSL Cipher Suite Order group policy is modified and applied successfully it modifies the following location in the registry:
HKEY_LOCAL_MACHINESOFTWAREPoliciesMicrosoftCryptographyConfigurationSSL010002 |
Also remember, you should be eliminating weak ciphers from the list, not adding them to accommodate older operating systems.
Please take some time and review my previous blog – https://techcommunity.microsoft.com/t5/ask-the-directory-services-team/speaking-in-ciphers-and-other-enigmatic-tongues-8230-update/ba-p/400362
And the following information as well – Protocols in TLS/SSL (Schannel SSP) – Win32 apps | Microsoft Docs
Words of Wisdom
Restricting supported TLS / SSL Protocols that are used.
If you have been using an old moldy script to configure SCHANNEL content on your Windows servers, you must seriously consider updating or rethinking this method and figure out the SCHANNEL protocols you want to disable on ALL these servers and configure ONLY WHAT YOU WANT DISABLED. TLS 1.2 is ENABLED by default in EVERY OS starting with WINDOWS 2012. YOU DO NOT NEED TO CREATE A REGISTRY SETTING FOR TLS 1.2
Enforcing the use of TLS 1.2 will require DISABLING any other protocol (i.e., TLS 1.0 and 1.1). Disabling SCHANNEL protocols and cipher suites can affect interoperability. Especially connectivity to applications, services and servers that are not current versions of their product.
What Ciphers should I leave enabled?
My advice regarding ciphers is to stick with the default cipher suites for their Windows version. These ciphers are carefully chosen and prioritized to provide a balance of interoperability, performance, and security. If there are specific security requirements, then a change to the list of the cipher suites and their priorities is needed. Some applications (third party, or Microsoft) may still need lesser TLS versions, so testing any SCHANNEL registry modifications is necessary.
Applications that might need older protocol versions.
.NET-based applications.
One glaringly apparent example of this is .NET.
Any .NET application written before 4.7 WILL have problems using TLS 1.2. By default, older versions of .NET prefer TLS 1.0 ONLY. See the following – https://learn.microsoft.com/en-us/dotnet/framework/network-programming/tls#configure-security-via-the-windows-registry
Example of the settings in the article above –
[HKEY_LOCAL_MACHINESOFTWAREWOW6432NodeMicrosoft.NETFrameworkv2.0.50727]
“SystemDefaultTlsVersions”=dword:00000001
“SchUseStrongCrypto”=dword:00000001
[HKEY_LOCAL_MACHINESOFTWAREWOW6432NodeMicrosoft.NETFrameworkv4.0.30319]
“SystemDefaultTlsVersions”=dword:00000001
“SchUseStrongCrypto”=dword:00000001
[HKEY_LOCAL_MACHINESOFTWAREMicrosoft.NETFrameworkv2.0.50727]
“SystemDefaultTlsVersions”=dword:00000001
“SchUseStrongCrypto”=dword:00000001
[HKEY_LOCAL_MACHINESOFTWAREMicrosoft.NETFrameworkv4.0.30319]
“SystemDefaultTlsVersions”=dword:00000001
“SchUseStrongCrypto”=dword:00000001
|
WinHTTP based applications.
WINHTTP – Typically this is services or applications that run as background services, and usually run as SYSTEM or NetworkService accounts.
https://learn.microsoft.com/en-us/windows-server/networking/configure-secure-protocol-options-winhttp?tabs=x86
HKEY_LOCAL_MACHINESOFTWAREMicrosoftWindowsCurrentVersionInternet SettingsWinHttp
DefaultSecureProtocols = (DWORD): 0xAA0
HKEY_LOCAL_MACHINESOFTWAREWow6432NodeMicrosoftWindowsCurrentVersionInternet SettingsWinHttp
DefaultSecureProtocols = (DWORD): 0xAA0
|
WinINET based applications.
WinINET – Typically this is a user base application like any Office application that runs as the user account logged onto the system. They are going to be applications that run with an interactive desktop. It would be Internet Explorer, Or Edge running in IE (Internet Explorer) Mode. It DOES not include Edge/Chromium browsers, however.
KB5017811—Manage Transport Layer Security (TLS) 1.0 and 1.1 after default behavior change on September 20, 2022
https://support.microsoft.com/en-us/topic/kb5017811-manage-transport-layer-security-tls-1-0-and-1-1-after-default-behavior-change-on-september-20-2022-e95b1b47-9c7c-4d64-9baf-610604a64c3e
Group Policy:
HKEY_LOCAL_MACHINESOFTWAREPoliciesMicrosoftWindowsCurrentVersionInternet Settings
SecureProtocols = (DWORD): 0xAA0
HKEY_CURRENT_USERSOFTWAREPoliciesMicrosoftWindowsCurrentVersionInternet Settings
SecureProtocols = (DWORD): 0xAA0
Registry:
HKEY_LOCAL_MACHINESOFTWAREMicrosoftWindowsCurrentVersionInternet Settings
SecureProtocols = (DWORD): 0xAA0
HKEY_CURRENT_USERSOFTWAREMicrosoftWindowsCurrentVersionInternet Settings
SecureProtocols = (DWORD): 0xAA0
|
Modifying Signature/Hashing Algorithms
If you are still with me and have been poking around in the registry (on a test computer), you may have noticed the following location and would like some information regarding –
HKLMSYSTEMCurrentControlSetControlCryptographyConfigurationLocalSSL0010003
|
The value content of this location only affects TLS 1.2
Operating systems prior to Windows 2008 SP2 standard do not support this value item.
The data in the Functions value refer to the signature/hash combinations that are supported on TLS 1.2 certificate chains (excluding the root) as well as the signature/hash combinations that can be used when signing TLS 1.2 messages such as the ServerKeyExchange message and the CertificateVerify message.
The value in the (Default) location, NCRYPT_SCHANNEL_SIGNATURE_INTERFACE tells the server which signatures it can use to sign the ServerKeyExchange message and which signatures are allowed when verifying the server certificate chain.
These settings have nothing to do with disabling weak protocols or ciphers and should not be modified EVER!

The same hold true for this location as well –
HKEY_LOCAL_MACHINESYSTEMCurrentControlSetControlCryptographyConfigurationLocalDefault |
Reference –
https://learn.microsoft.com/en-us/windows/win32/seccng/cng-interface-identifiershttps://learn.microsoft.com/en-us/windows/win32/api/bcrypt/nf-bcrypt-bcryptaddcontextfunction
I Just want the SCHANNEL Registry values to implement please.
If you are looking for just a quick list of SCHANNEL registry values to implement to help you pass a Security Scan/Audit here is an incredibly good list of values to implement to make sure the OS is not vulnerable to these older exploits.
HKEY_LOCAL_MACHINESYSTEMCurrentControlSetControlSecurityProvidersSCHANNELCiphersDES 56
Enabled = (DWORD): 0x0
HKEY_LOCAL_MACHINESYSTEMCurrentControlSetControlSecurityProvidersSCHANNELCiphersNULL
Enabled = (DWORD): 0x0
HKEY_LOCAL_MACHINESYSTEMCurrentControlSetControlSecurityProvidersSCHANNELCiphersRC2 40/128
Enabled = (DWORD): 0x0
HKEY_LOCAL_MACHINESYSTEMCurrentControlSetControlSecurityProvidersSCHANNELCiphersRC2 56/128
Enabled = (DWORD): 0x0
HKEY_LOCAL_MACHINESYSTEMCurrentControlSetControlSecurityProvidersSCHANNELCiphersRC2 128/128
Enabled = (DWORD): 0x0
HKEY_LOCAL_MACHINESYSTEMCurrentControlSetControlSecurityProvidersSCHANNELCiphersRC4 128/128
Enabled = (DWORD): 0x0
HKEY_LOCAL_MACHINESYSTEMCurrentControlSetControlSecurityProvidersSCHANNELCiphersRC4 40/128
Enabled = (DWORD): 0x0
HKEY_LOCAL_MACHINESYSTEMCurrentControlSetControlSecurityProvidersSCHANNELCiphersRC4 56/128
Enabled = (DWORD): 0x0
HKEY_LOCAL_MACHINESYSTEMCurrentControlSetControlSecurityProvidersSCHANNELCiphersRC4 64/128
Enabled = (DWORD): 0x0
HKEY_LOCAL_MACHINESYSTEMCurrentControlSetControlSecurityProvidersSCHANNELCiphersTriple DES 168
Enabled = (DWORD): 0x0
HKEY_LOCAL_MACHINESYSTEMCurrentControlSetControlSecurityProvidersSCHANNELCiphersTriple DES 168/168
Enabled = (DWORD): 0x0
HKEY_LOCAL_MACHINESYSTEMCurrentControlSetControlSecurityProvidersSCHANNELHashesMD5
Enabled = (DWORD): 0x0
HKEY_LOCAL_MACHINESYSTEMCurrentControlSetControlSecurityProvidersSCHANNELHashesSHA
Enabled = (DWORD): 0xFFFFFFFF
HKEY_LOCAL_MACHINESYSTEMCurrentControlSetControlSecurityProvidersSCHANNELProtocolsMulti-Protocol Unified HelloServer
Enabled = (DWORD): 0x0
HKEY_LOCAL_MACHINESystemCurrentControlSetControlSecurityProvidersSchannelProtocolsMulti-Protocol Unified HelloClient
Enabled = (DWORD): 0x0
HKEY_LOCAL_MACHINESystemCurrentControlSetControlSecurityProvidersSchannelProtocolsPCT 1.0Client
Enabled = (DWORD): 0x0
HKEY_LOCAL_MACHINESystemCurrentControlSetControlSecurityProvidersSchannelProtocolsPCT 1.0Server
Enabled = (DWORD): 0x0
KEY_LOCAL_MACHINESYSTEMCurrentControlSetControlSecurityProvidersSCHANNELProtocolsSSL 2.0Client
Enabled = (DWORD): 0x0
HKEY_LOCAL_MACHINESYSTEMCurrentControlSetControlSecurityProvidersSCHANNELProtocolsSSL 2.0Server
Enabled = (DWORD): 0x0
HKEY_LOCAL_MACHINESYSTEMCurrentControlSetControlSecurityProvidersSCHANNELProtocolsSSL 3.0Client
Enabled = (DWORD): 0x0
HKEY_LOCAL_MACHINESYSTEMCurrentControlSetControlSecurityProvidersSCHANNELProtocolsSSL 3.0Server
Enabled = (DWORD): 0x0
HKEY_LOCAL_MACHINESYSTEMCurrentControlSetControlSecurityProvidersSCHANNELProtocolsTLS 1.0Client
Enabled = (DWORD): 0x0
HKEY_LOCAL_MACHINESYSTEMCurrentControlSetControlSecurityProvidersSCHANNELProtocolsTLS 1.0Server
Enabled = (DWORD): 0x0
HKEY_LOCAL_MACHINESYSTEMCurrentControlSetControlSecurityProvidersSCHANNELProtocolsTLS1.1Client
Enabled = (DWORD): 0x0
HKEY_LOCAL_MACHINESYSTEMCurrentControlSetControlSecurityProvidersSCHANNELProtocolsTLS 1.1Server
Enabled = (DWORD): 0x0
HKLMSystemCurrentControlSetControlLSASecurityProvidersSchannelProtocolsTLS 1.2Client
DisabledByEnabled = (DWORD): 0x0
Enabled = (DWORD): 0x1
HKLMSystemCurrentControlSetControlLSASecurityProvidersSchannelProtocolsTLS 1.2Server
DisabledByEnabled = (DWORD): 0x0
Enabled = (DWORD): 0x1
HKEY_LOCAL_MACHINESOFTWAREWOW6432NodeMicrosoft.NETFrameworkv2.0.50727
SystemDefaultTlsVersions = (DWORD): 0x1
SchUseStrongCrypto = (DWORD): 0x1
HKEY_LOCAL_MACHINESOFTWAREWOW6432NodeMicrosoft.NETFrameworkv4.0.30319
SystemDefaultTlsVersions = (DWORD): 0x1
SchUseStrongCrypto = (DWORD): 0x1
HKEY_LOCAL_MACHINESOFTWAREMicrosoft.NETFrameworkv2.0.50727
SystemDefaultTlsVersions = (DWORD): 0x1
SchUseStrongCrypto = (DWORD): 0x1
HKEY_LOCAL_MACHINESOFTWAREMicrosoft.NETFrameworkv4.0.30319
SystemDefaultTlsVersions = (DWORD): 0x1
SchUseStrongCrypto = (DWORD): 0x1
HKEY_LOCAL_MACHINESOFTWAREMicrosoftWindowsCurrentVersionInternet SettingsWinHttp
DefaultSecureProtocols = (DWORD): 0x1
HKEY_LOCAL_MACHINESOFTWAREWow6432NodeMicrosoftWindowsCurrentVersionInternet SettingsWinHttp
DefaultSecureProtocols = (DWORD): 0x1
|
Vulnerabilities:
RC4 based Cipher Suites
SCHANNEL – RC4/Sweet32 Vulnerability information
These two updates are specific to RC4 based information here –
https://nvd.nist.gov/vuln/detail/CVE-2013-2566
https://nvd.nist.gov/vuln/detail/CVE-2015-2808
RC4 ciphers are NO LONGER SUPPORTED
See the following – Features that are removed or deprecated in Windows 10 Fall Creators Update
https://support.microsoft.com/en-us/help/4034825/features-that-are-removed-or-deprecated-in-windows-10-fall-creators-up
TLS RC4 Ciphers to be disabled by default. For more information, see the following Windows IT Center topic:
TLS (Schannel SSP) changes in Windows 10 and Windows Server 2016 –
https://docs.microsoft.com/en-us/windows-server/security/tls/tls-schannel-ssp-changes-in-windows-10-and-windows-server
DisabledByDefault change for the following cipher suites:
- TLS_DHE_DSS_WITH_AES_256_CBC_SHA256 (RFC 5246) in Windows 10, version 1703
- TLS_DHE_DSS_WITH_AES_128_CBC_SHA256 (RFC 5246) in Windows 10, version 1703
- TLS_DHE_DSS_WITH_AES_256_CBC_SHA (RFC 5246) in Windows 10, version 1703
- TLS_DHE_DSS_WITH_AES_128_CBC_SHA (RFC 5246) in Windows 10, version 1703
- TLS_DHE_DSS_WITH_3DES_EDE_CBC_SHA (RFC 5246) in Windows 10, version 1703
- TLS_RSA_WITH_RC4_128_SHA in Windows 10, version 1709
- TLS_RSA_WITH_RC4_128_MD5 in Windows 10, version 1709
Once again please refer to the previous blog I wrote that explains SCHANNEL and Cipher Suite changes and what is and is not supported in Windows operating systems – https://techcommunity.microsoft.com/t5/ask-the-directory-services-team/speaking-in-ciphers-and-other-enigmatic-tongues-8230-update/ba-p/400362
You should use this as a guide for modifying the SCHANNEL protocols, list of default ciphers, and removing the weaker ones completely. It should be a favorite in your browser settings and currently be open in the tab right next to the one you are using to read this article 
Regarding 3DES:
Sweet32 is a cryptographic attack against short block size (64-bit block) ciphers.
Vulnerability scanners will trigger this if a 3DES cipher suite is present. In Windows server, 3DES cannot be used as the only cipher but it is acceptable as an optional cipher suite for backward compatibility.
This is the minimum cipher in the negotiation list, so it is used only as a last resort.
TLS_RSA_WITH_3DES_EDE_CBC_SHA must not be offered on its own as it is considered inferior to the other cipher suites but should be offered for FIPS (Federal Information Processing Standards) constrained clients that do not have AES-based cipher suites available.
Microsoft also mitigates usage of this cipher by removing 3DES from available ciphers in the FalseStart list which prevents MiTM (Machine in the Middle) attack forcing encryption downgrade.
https://technet.microsoft.com/library/security/3155527.aspx
This mitigation is also listed on the website https://sweet32.info/
Vulnerability scanners should not be simply searching for registry keys indicating something is disabled (3DES). They should be reporting on configured Cipher Suites if they include 3DES.
Lucky Thirteen vulnerability mitigation
Disabling TLS 1.0 entirely.
The removal of all cipher block chaining (CBC) ciphers. EXAMPLE – TLS_RSA_WITH_AES_256_CBC_SHA256
There are a couple of CBC ciphers that are still supported in Windows 10
See the following – TLS Cipher Suites in Windows 10 v1903, v1909, and v2004 – Win32 apps | Microsoft Docs
3rd (non-Microsoft) party TLS implementations
I made all the changes to the SChannel registry values, and even rebooted my server but some endpoints are still showing as vulnerable when I run my security scanning software again. Why did this not fix all my problems?
Keep in mind that Microsoft is not the only TLS implementation on the scene. Java and OpenSSL are just a couple of third-party SSL/TLS implementations that do not leverage the Microsoft SCHANNEL Security Support Provider Interface (SSPI) at all. If you have implemented the above registry values and rebooted the server and the scanning tool is still showing a vulnerability it is time to start thinking that this may not be an application that is using Microsoft implementation of SSL/TLS. To investigate this:
- The first thing to do is look at your scan report and determine what network port or ports the scanning tool is indicating are still vulnerable.
- On the computer being reported as vulnerable open an elevated command prompt and type: NetStat –ANOB > %ComputerName%_Netstat.txt.
- Once it is done, then you can open the text file created, and search for the port determined from step 1.
- It will give you the process name that is listening on that port. If it is Java.exe/Javaw.exe or OpenSSL.exe then this is not something Microsoft support is going to be able to help with. We will redirect you to the vendor of your 3rd party application.
If this is the case, you will need to contact those vendors to get those configured applications configured properly.
Enabling verbose SCHANNEL logging may also help you determine what third party SCHANNEL applications are installed on your servers by configuring verbose logging. Verbose logging will show successful and failing connections providing the protocol and ciphers being used in addition to the computer from which the connection is coming from:
HKLMSYSTEMCurrentControlSetControlSecurityProvidersSCHANNEL
EventLogging (DWORD)
1 (Basic)
7 (Verbose)
|
You should also be aware that Intune policy can also be leveraged to manage cipher suites as well. These settings may interfere with your SCHANNEL policies and configurations.
HKEY_LOCAL_MACHINESYSTEMCurrentControlSetControlCryptographyMDMPoliciesSSL
CipherSuites REG_SZ
|
I trust you have found this content both illuminating and enjoyable in your efforts to secure your SCHANNEL environment without sacrificing the necessary functionality. If you should you encounter any hurdles along the way, please don’t hesitate to reach out to us for assistance. We’re here to support your continued success with Windows. Happy Hunting!
Jim “How I learned to stop worrying and ♥ Crypto” Tierney
by Contributed | Feb 9, 2024 | Technology
This article is contributed. See the original author and article here.
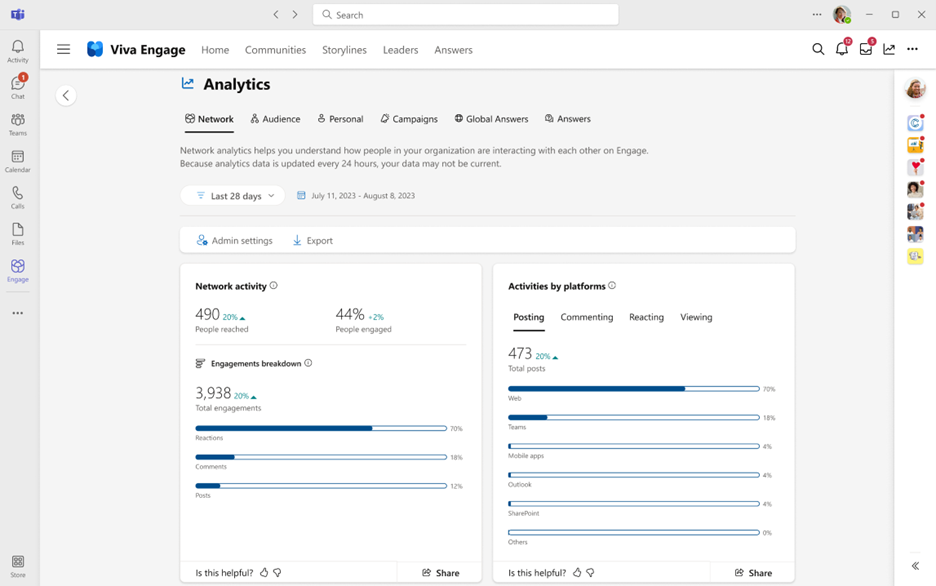
Listen to your employees, monitor their engagement, and understand the pulse of your organization better than ever before by using Network Analytics in Viva Engage. Network Analytics provides an at-a-glance overview of your organization’s top engagement trends across the entire network. This includes employee sentiment, cross-community insights and AI-powered conversation summarization to help you stay-up-to-date with all the activity happening in your network. Network admins and those assigned a corporate communicator role will be able to access these advanced analytics. In order to access Network Analytics, users must have a Viva suite or Employee Communications and Communities (C&C) license.
Gone are the days of manually searching for the most engaging conversations across your network or trying to tally up the most mentioned themes and hashtags. With Network Analytics, you can see detailed metrics that show you exactly where conversations are taking place, which themes employees are most passionate about, how effective announcements are, and which communities are most active.
Best Practices
Review top themes and top conversations – we’ve made triaging these conversations across your entire organization easier than ever. Now you can deep dive into the conversations that are occurring within your organization and quickly review themes related to the most critical commentary.

Network analytics helps you easily identify themes, trends, and engagement across the network.
You can even see daily trends by hovering over the graphs on the dashboard. To learn more about our sentiment analysis, see: Sentiment and theme analysis in Viva Engage – Microsoft Support.

Post sentiment is included in Network Analytics
Understand the effectiveness of broad communications within your organization by analyzing the announcements breakdown. You can also review which leaders and employees are most active on Engage by reviewing the Frequent Contributors panel. Acknowledge these employees directly from Network Analytics by praising their contributions to the organization.

Finally, if you’d like to review which Communities are implementing best practices, look no further than the popular communities table. Here you can sort communities by those with the most posts, or most active members. Understanding which community rituals are leading to high engagement can be a great way to pass along helpful tips to other Community admins.

Get started today!
To access Network Analytics, select the global analytics entry point (at the top of the web browser) and click on the “Network analytics” tab:

If you cannot see the tab, confirm that you have either the network admin or corporate communicator role assigned to your user profile on Viva Engage. If you need to be assigned as corporate communicator, contact your network admin to help you gain access to the role.
Learn more about setting up Network Analytics here: Viva Engage Network Analytics
What’s coming soon?
New! Employee retention analysis – we’ll help you understand how employees who use Engage are more likely to be retained at your organization. The Viva Engage employee retention metric in Network Analytics shows the difference in the 28-day employee retention rates of employees who do and don’t use Viva Engage. Learn more about our retention analysis here Viva Engage Employee Retention – Microsoft Support
Resources
Watch the recording of the Deep Dive Webinar! Demos and lots of Q&A shared during the webinar as well!

Interested in more analytics? See View and manage analytics in Viva Engage
Check out this Analytics Adoption guide for more about the analytics in Viva Engage.
FAQ
How is sentiment analysis determined?
Sentiment analysis is a Viva Engage premium feature that aggregates data across Viva Engage conversations to surface trends. To understand more, see Sentiment and theme analysis in Viva Engage – Microsoft Support
Who has access to view and manage network analytics?
Access to the data in this dashboard is restricted to include only network admins and corporate communicators. These users can change settings via the Engage admin center.
What admin controls are available? Can analytics features be turned off?
Yes, we provide the network admin and corporate communicator roles the ability to adjust which analytics features are enabled within the admin center.
What licensing requirements need to be met?
Network analytics is only available to Viva Suite or Employee Communications and Communities licensed users.
How often is data refreshed?
Analytics are refreshed daily. If you don’t see changes reflected immediately, check analytics the next day.
by Contributed | Feb 8, 2024 | Technology
This article is contributed. See the original author and article here.
Pursuant to Section 8 of Executive Order (EO) 14028, “Improving the Nation’s Cybersecurity”, Federal Chief Information Officers (CIOs) and Chief Information Security Officers (CISOs) aim to comply with the U.S. Office of Management and Budget (OMB) Memorandum 21-31, which centers on system logs for services both within authorization boundaries and deployed on Cloud Service Offerings (CSOs). This memorandum not only instructs Federal agencies to provide clear guidelines for service providers but also offers comprehensive recommendations on logging, retention, and management to increase the Government’s visibility before, during and after a cybersecurity incident. Additionally, OMB Memorandum 22-09, “Moving the U.S. Government Toward Zero Trust Cybersecurity Principles”, references M-21-31 in its Section 3.
While planning to address and execute these requirements, Federal CIO and CISO should explore the use of Cyber Data Lake (CDL). A CDL is a capability to assimilate and house vast quantities of security data, whether in its raw form or as derivatives of original logs. Thanks to its adaptable, scalable design, a CDL can encompass data of any nature, be it structured, semi-structured, or unstructured, all without compromising quality. This article probes into the philosophy behind the Federal CDL, exploring topics such as:
- The Importance of CDL for Agency Missions and Business
- Strategy and Approach
- CDL Infrastructure
- Application of CDL
The Importance of CDL for Agency Missions and Business
The overall reduction in both capital and operational expenditures for hardware and software, combined with enhanced data management capabilities, makes CDLs an economically viable solution for organizations looking to optimize their data handling and security strategies. CDLs are cost-effective due to their ability to consolidate various data types and sources into a single platform, eliminating the need for multiple, specialized data management tools. This consolidation reduces infrastructure and maintenance costs significantly. CDLs also adapt easily to increasing data volumes, allowing for scalable storage solutions without the need for expensive infrastructure upgrades. By enabling advanced analytics and efficient data processing, they reduce the time and resources needed for data analysis, further cutting operational costs. Additionally, improved accuracy in threat detection and reduction in false positives lead to more efficient security operations, minimizing the expenses associated with responding to erroneous alerts and increasing the speed of detection and remediation.
However, CDLs are not without challenges. As technological advancements and the big data paradigm evolve, the complexity of network, enterprise, and system architecture escalates. This complexity is further exacerbated by the integration of tools from various vendors into Federal ecosystem, managed by diverse internal and external teams. For security professionals, maintaining pace with this intricate environment and achieving real-time transparency into technological activities is becoming an uphill battle. These professionals require a dependable, almost instantaneous source that adheres to the National Institute of Standards and Technology (NIST) core functions—identify, protect, detect, respond, and recover. Such a source empowers them to strategize, prioritize, and address any anomalies or shifts in their security stance. The present challenge lies in acquiring a holistic view of security risk, especially when large agencies might deploy hundreds of applications across the US and in some cases globally. The security data logs, scattered across these applications, clouds and environments, often exhibit conflicting classifications or categorizations. Further complicating matters are logging maturity levels at different cloud deployment models, infrastructure, platform, and software.
It is vital to scrutinize any irregularities to ensure the environment is secure, aligning with zero-trust principles which advocate for a dual approach: never automatically trust and always operate under the assumption that breaches may occur. As security breaches become more frequent and advanced, malicious entities will employ machine learning to pinpoint vulnerabilities across expansive threat landscape. Artificial intelligence will leverage machine learning and large language models to further enhance organizations’ abilities to discover and adapt to changing risk environments, allowing security professionals to do more with less.
Strategy and Approach
The optimal approach to managing a CDL depends on several variables, including leadership, staff, services, governance, infrastructure, budget, maturity, and other factors spanning all agencies. It is debatable whether a centralized IT team can cater to the diverse needs and unique challenges of every agency. We are seeing a shift where departments are integrating multi-cloud infrastructure into their ecosystem to support the mission. An effective department strategy is pivotal for success, commencing with systems under the Federal Information Security Modernization Act (FISMA) and affiliated technological environments. Though there may be challenges at the departmental level in a federated setting, it often proves a more effective strategy than a checklist approach.
Regarding which logs to prioritize, there are several methods. CISA has published a guide on how to prioritize deployment: Guidance for Implementing M-21-31: Improving the Federal Government’s Investigative and Remediation Capabilities. Some might opt to begin with network-level logs, followed by enterprise and then system logs. Others might prioritize logs from high-value assets based on FISMA’s security categorization, from high to moderate to low. Some might start with systems that can provide logs most effortlessly, allowing them to accumulate best practices and insights before moving on to more intricate systems.
Efficiently performing analysis, enforcement, and operations across data repositories dispersed across multiple cloud locations in a departmental setting involves adopting a range of strategies. This includes data integration and aggregation, cross-cloud compatibility, API-based connectivity, metadata management, cloud orchestration, data virtualization, and the use of cloud-agnostic tools to ensure seamless data interaction. Security and compliance should be maintained consistently, while monitoring, analytics, machine learning, and AI tools can enhance visibility and automate processes. Cost optimization and ongoing evaluation are crucial, as is investing in training and skill development. By implementing these strategies, departments can effectively manage their multi-cloud infrastructure, ensuring data is accessible, secure, and cost-effective, while also leveraging advanced technologies for analysis and operations.
CDL Infrastructure
One of the significant challenges is determining how a CDL aligns with an agency’s structure. The decision between a centralized, federated, or hybrid approach arises, with cost considerations being paramount. Ingesting logs in their original form into a centralized CDL comes with its own set of challenges, including accuracy, privacy, cost, and ownership. Employing a formatting tool can lead to substantial cost savings in the extract, transform, and load (ETL) process. Several agencies have experienced cost reductions of up to 90% and significant data size reductions by incorporating formatting in tables, which can be reorganized as needed during the investigation phase. A federated approach means the logs remain in place, analyses are conducted locally, and the results are then forwarded to a centralized CDL for further evaluation and dissemination.
For larger and more complex agencies, a multi-tier CDL might be suitable. By implementing data collection rules (DCR), data can be categorized during the collection process, with department-specific information directed at the respective department’s CDL, while still ensuring that high value and timely logs are forwarded to a centralized CDL at the agency level, prioritizing privileged accounts. Each operating division or bureau could establish its own CDL, reporting on to the agency’s headquarters’ CDL. The agency’s Office of Inspector General (OIG) or a statistical component of a department may need to create their own independent CDL for independence purposes. This agency HQ CDL would then report to DHS. In contrast, smaller agencies might only need a single CDL. This could integrate with the existing Cloud Log Aggregation Warehouse (CLAW) a CISA-deployed architecture for collecting and aggregating security telemetry data from agencies using commercial CSP services — and align with the National Cybersecurity Protection System (NCPS) Cloud Interface Reference Architecture. This program ensures security data from cloud-based traffic is captured, analyzed, and enables CISA analysts to maintain situational awareness and provide support to agencies.
If data is consolidated in a central monolithic, stringent data stewardship is crucial, especially concerning data segmentation, access controls, and classification. Data segmentation provides granular access control based on a need-to-know approach, with mechanisms such as encryption, authorization, access audits, firewalls, and tagging. If constructed correctly, this can eliminate the need for separate CDL infrastructures for independent organizations. This should be compatible with role-based user access schemes, segment data based on sensitivity or criticality, and meet Federal authentication standards. This supports Zero Trust initiatives in Federal agencies and aligns with Federal cybersecurity regulations, data privacy laws, and current TLS encryption standards. Data must also adhere to retention standards outlined in OMB 21-31 Appendix C and the latest National Archives and Records Administration (NARA) publications, and comply with Data Loss Prevention requirements, covering data at rest, in transit, and at endpoints, in line with NIST 800-53 Revision 5.
In certain scenarios, data might require reclassification or recategorization based on its need-to-know status. Agencies must consider storage capabilities, ensuring they have a scalable, redundant and highly available storage system that can handle vast amounts of varied data, from structured to unstructured formats. Other considerations include interoperability, migrating an existing enterprise CDL to another platform, integrating with legacy systems, and supporting multi-cloud enterprise architectures that source data from a range of CSPs and physical locations. When considering data portability, the ease of transferring data between different platforms or services is crucial. This necessitates storing data in widely recognized formats and ensuring it remains accessible. Moreover, the administrative efforts involved in segmenting and classifying the data should also be considered.
Beyond cost and feasibility, the CDL model also provides the opportunity for CIOs and CISOs to achieve data dominance with their security and log data. This concept of data dominance allows them to gather data, quickly and securely, reduces processing time, which provides quicker time to respond. This quicker time to respond, the strategic goal of any security implementation, is only possible with the appropriate platform and infrastructure so organizations can get closer to real-time situational awareness.
The Application of CDL
With a solid strategy in place, it’s time to delve into the application of a CDL. Questions arise about its operation, making it actionable, its placement relative to the Security Operations Center (SOC), and potential integrations with agency Governance Risk Management, and Compliance (GRC) tools and other monitoring systems. A mature security program needs a comprehensive real-time view of an agency’s security posture, encompassing SOC activities and the agency’s governance, risk management, and compliance tasks. The CDL should interface seamlessly with existing or future Security Orchestration and Response (SOAR) and End Point Detection (EDR) tools, as well as ticketing systems.
CDLs facilitate the sharing of analyses within their agencies, as well as with other Federal entities like the Department of Homeland Security (DHS), Cybersecurity and Infrastructure Security Agency (CISA), Federal law enforcement agencies, and intelligence agencies. Moreover, CDLs can bridge the gaps in a Federal security program, interlinking entities such as the SOC, GRC tools, and other security monitoring capabilities. At the highest levels of maturity, the CDL will leverage Network Operations Center (NOC) and even potentially administration information such as employee leave schedules. The benefit of modernizing the CDL lies in eliminating the requirement to segregate data before ingestion. Data is no longer categorized as security-specific or operations-specific. Instead, it is centralized into a single location, allowing CDL tools and models to assess the data’s significance. Monolithic technology stacks are effective when all workloads are in the same cloud environment. However, in a multi-cloud infrastructure, this approach becomes challenging. With workloads spread across different clouds, selecting one as a central hub incurs egress costs to transfer log data between clouds. Departments are exploring options to store data in the cloud where it’s generated, while also considering if Cloud Service Providers (CSPs) offer tools for analysis, visibility, machine learning, and artificial intelligence.
The next step is for agencies to send actionable information to security personnel regarding potential incidents and provide mission owners with the intelligence necessary to enhance efficiency. Additionally, this approach eliminates the creation of separate silos for security data, mission data, financial information, and operations data. This integration extends to other Federal security initiatives such as Continuous Diagnostics and Mitigation (CDM), Authority to Operate (ATO), Trusted Internet Connection (TIC), and the Federal Risk and Authorization Management Program (FedRAMP).
It’s also pivotal to determine if the CDL aligns with the MITRE ATT&CK Framework, which can significantly assist in incident response. MITRE ATT&CK® is a public knowledge base outlining adversary tactics and techniques based on observed events. The knowledge base aids in developing specific threat models and methodologies across various sectors.
Lastly, to gauge the CDL’s applicability, one might consider creating a test case. Given the vast amount of log data — since logs are perpetual — this presents an ideal scenario for machine learning. Achieving real-time visibility can be challenging with the multiple layers of log aggregation, but timely insights might be within reach. For more resources from Microsoft Federal Security, please visit https://aka.ms/FedCyber.
Stay Connected
Connect with the Public Sector community to keep the conversation going, exchange tips and tricks, and join community events. Click “Join” to become a member and follow or subscribe to the Public Sector Blog space to get the most recent updates and news directly from the product teams.

Recent Comments