
by Contributed | Mar 2, 2024 | Technology
This article is contributed. See the original author and article here.
Artificial intelligence (AI) is transforming the world of work, creating new opportunities and challenges for businesses and workers alike. According to a recent report by Microsoft and PwC, AI could boost the UK economy by £232 billion by 2030, but it also requires a significant upskilling of the workforce to ensure that everyone can benefit from it.
If you are a technology student or a young professional who wants to develop AI skills and prepare for the future of work, here are some tips and resources that can help you: The Microsoft UK AI & Copilot Skills Challenge starts February 20, 2024 at 8:00 AM (8:00) GMT and ends on March 31, 2024 at 23:00 PM (11pm) GMT.
- Learn the basics of AI and its applications. AI is a broad field that encompasses many subdomains, such as machine learning, computer vision, natural language processing, and more. To get started, you can take online courses, such as Microsoft Learn, edX, or Coursera, that cover the fundamentals of AI and how it can be used to solve real-world problems. You can also explore Learn AI Microsoft Resources learning paths and hands-on labs for various AI scenarios and communities.
- Get hands-on experience with AI tools and platforms. To apply your AI knowledge and skills, you need to familiarize yourself with the tools and platforms that enable you to build, deploy, and manage AI solutions. For example, you can use Azure AI Studio, a cloud-based service that provides a comprehensive set of AI capabilities, such as cognitive services, machine learning, and conversational AI. You can also use Power Platform, a low-code/no-code platform that allows you to create AI-powered apps, workflows, and chatbots without writing code.
- Join AI communities and events. One of the best ways to learn and grow your AI skills is to connect with other AI enthusiasts and experts, who can offer you guidance, feedback, and inspiration. You can join online or local AI communities, such as the Gobal AI Community, where you can network, share ideas, and collaborate on projects. You can also attend AI events, where you can hear from industry leaders, discover the latest trends, and showcase your work.
- Keep up with the ethical and social implications of AI. As AI becomes more pervasive and powerful, it also raises important ethical and social questions, such as how to ensure fairness, accountability, transparency, and human dignity in AI systems. To be a responsible AI practitioner, you need to be aware of these issues and how to address them in your work. You can read books, articles, and reports, such as The Future Computed, AI Ethics, or Responsible AI, that explore the ethical and social dimensions of AI. You can also take courses, that teach you how to design and implement AI solutions that align with ethical principles and social values.
AI is a fast-growing and exciting field that offers many opportunities for technology students and professionals. By following these tips and resources, you can develop AI skills that will help you succeed in the future of work. Remember, AI is not only about technology, but also about people, society, and the world. So, be curious, be creative, and be ethical, and you will be ready to make a positive impact with AI.
Get ahead with immersive and curated AI, Generative AI and Copilot training content across Microsoft products and services with four engaging themed challenges. Once you complete a challenge, you will receive a Microsoft UK AI & Copilot Skills Challenge badge of completion. For more info refer to the official rules.
As you progress through the challenges, you’ll have the chance to explore additional experiences tailored to your learning preferences and goals. Join the vibrant technical community in your local region, attend live sessions, build a powerful network, and build in-demand AI skills for today’s job market.
Generative AI
This challenge focused on understanding Generative AI and Large Language Models. Discover the fundamentals of generative AI and get started with Azure OpenAI Service. You’ll learn more about prompt engineering, generating code with Azure OpenAI Services, large language models, and prompt flow to develop large language model apps.
Go to challenge
Copilot for Microsoft 365 – IT Pro Administration
This challenge is tailored for IT Pro Administrators seeking to leverage Copilot for Microsoft 365 effectively in their work environments. The series of modules covers a range of topics from basic introductions to advanced management techniques, ensuring a comprehensive learning experience.
Go to challenge
Copilot for Developers
This challenge is tailored for developers who want to learn how to build apps for Microsoft Teams and get to know Microsoft Copilot Studio. It includes a series of modules that will give you practical experience and valuable knowledge about creating, launching, and improving apps on these platforms.
Go to challenge
Machine Learning Challenge
Machine learning is at the core of artificial intelligence, and many modern services depend on predictive machine learning models. Learn how to use Azure Machine Learning to create and publish models without writing code. You’ll also explore the various developer tools you can use to interact with the workspace.
Go to challenge

by Contributed | Feb 29, 2024 | Technology
This article is contributed. See the original author and article here.
Welcome to the first edition of What’s new in Copilot for Microsoft 365. We are continuing to enhance Copilot to provide deeper experiences for users and tighter integration with your organization’s data to unlock even more capabilities. Whether you’re a Microsoft 365 admin for a large enterprise or smaller company or someone who uses Copilot for Microsoft 365 for their daily work, every month we’ll highlight updates to let you know about new and upcoming features and where you can find more information to help make your Copilot experience a great one. In addition to these monthly posts, we’ll continue to provide updates through our usual message center posts and on our public roadmap.
Today, we are highlighting Copilot support in 17 additional languages, expanded resources and coming features in Copilot Lab, the updated Copilot experience in Teams, Copilot in the Microsoft 365 mobile app, and a new feature that provides a single entry point to help you create content from scratch. We’ll also take a look at updates to Copilot in OneDrive, Stream, and Forms plus a new feature that generates content summaries when you share files with coworkers. Finally, we’ll share a bit on what’s new in the Copilot for Microsoft 365 Usage report for admins. Let’s take a closer look at what’s new this month:
- Experience Copilot support for more languages
- Begin your Copilot journey and build new skills with Copilot Lab
- Copilot now available in the Microsoft 365 mobile app
- Introducing Copilot in Forms
- Extract information quickly from your files with Copilot in OneDrive
- Include quick summaries when sharing documents
- Get instant video summaries and insights with Copilot in Stream
- Try new ways of working with Help me create
- Draft emails quicker and get coaching tips for your messages with Copilot in classic Outlook for Windows
- Experience the new Copilot experience in Microsoft Teams
- Check out the improved usage reports for Microsoft Copilot in the admin center
- Catch up on the Copilot for Microsoft 365 Tech Accelerator
Experience Copilot support for more languages
We are adding support for an additional 17 languages, further expanding access to Copilot worldwide. We will start rolling out Arabic, Chinese Traditional, Czech, Danish, Dutch, Finnish, Hebrew, Hungarian, Korean, Norwegian, Polish, Portuguese (Portugal), Russian, Swedish, Thai, Turkish and Ukrainian over March and April. Copilot is already supported in the following languages: English (US, GB, AU, CA, IN), Spanish (ES, MX), Japanese, French (FR, CA), German, Portuguese (BR), Italian, and Chinese Simplified. Check the public roadmap and message center to track roll out status.
Copilot in Excel (preview) is currently supported in English (US, GB, AU, CA, IN) and will be supported in Spanish (ES, MX), Japanese, French (FR, CA), German, Portuguese (BR), Italian, and Chinese Simplified starting in March.
Begin your Copilot journey and build new skills with Copilot Lab
Copilot Lab helps users get started with the art of prompting and helps organizations with onboarding and adoption by providing a single experience that meets Copilot users where they are in their journey. Today, we’re expanding Copilot Lab by transforming the current prompts library into a comprehensive learning resource that helps everyone begin their Copilot journey with confidence and to take greater advantage of Copilot in their daily work.
Start your Copilot journey with ease. We’ve learned from our earliest Copilot adopters that working with generative AI requires new skills and habits. Copilot Lab already shows up in Copilot for Microsoft 365, Word, PowerPoint, Excel, and OneNote via the small notebook icon that suggests relevant prompts to inspire you. Now, we have consolidated our best resources, training videos, ready-made prompts, and inspiration to make Copilot Lab the single resource to help you get started. To do this, we’ve brought together our own internal best practices, insights from our earliest customers, findings from the Microsoft Research team, and thought leadership published on WorkLab.
Achieve more together by sharing your favorite prompts. With Copilot Lab, we are making it even easier to create, save, and share your favorite prompts with colleagues inside your organization. Now you can share prompts with colleagues to prepare for a customer meeting or to generate ideas for a new product launch. And leaders across your organization can showcase how they’re using Copilot by sharing their favorite prompts to save time or tackle any task at hand, to help improve personal and team productivity and encourage community-centric learning and adoption. This feature is integrated into the Copilot Lab website and in-app experiences will begin rolling out by this summer.
You can access Copilot Lab today at copilot.cloud.microsoft/prompts or directly in app by selecting the notebook icon next to the Copilot prompt window.
Copilot now available in the Microsoft 365 mobile app
We’re extending Copilot to the Microsoft 365 mobile app and to the Word and PowerPoint mobile apps. With the new Microsoft 365 app look and feel, you can easily find Copilot alongside your content, apps, and shortcuts. You can use it to:
- Bring your content into Copilot to complete tasks on the go. Summarize documents, translate, explain, or ask questions, and have your answer grounded in the content you select.
- Start generating content wherever you work based on your ideas and existing information, and hand over to Microsoft 365 mobile apps to continue working.
- Interact with Copilot in Word mobile and PowerPoint mobile to comprehend content better and skim through only the most important slides on the go (requires a Copilot license).
The Microsoft 365 mobile app complements the Copilot mobile app rolled out earlier this month, and licensed users can continue to use the Copilot mobile app to have responses grounded in both web or work data. IT admins can easily deploy both the Microsoft 365 mobile app and the Copilot mobile app to corporate devices using Microsoft Intune or a third-party tool, or users can simply download the Microsoft 365 mobile app on any supported device and sign in.
Copilot integration in the Microsoft 365 mobile app and the Word and PowerPoint mobile apps is rolling out now. You can learn more here.
.png") The iOS layout of the Microsoft 365 mobile app, showing Copilot available on the taskbar.
The iOS layout of the Microsoft 365 mobile app, showing Copilot available on the taskbar.
Create compelling surveys, polls, and forms with Copilot in Forms
Use Copilot to simplify the process of creating surveys, polls, and forms, saving you time and effort. Go to forms.microsoft.com, select New, and tell Copilot your topic, length, and any additional context. Copilot will provide relevant questions and suggestions, and then you can refine the draft by adding extra details, editing text, or removing content. Once you’ve created a solid draft with Copilot, you can then customize the background with one of the many Forms style options. With Copilot in Forms, you’ll effortlessly create well-crafted forms that capture your audience’s attention, leading to better response rates.
Copilot in Forms will be available in March. You can learn more here.
 An image of a form draft with Copilot prompts displayed
Extract information quickly from your files with Copilot in OneDrive
Copilot in OneDrive gives you instant access to information contained deep within your files. Initially available from the OneDrive web experience, Copilot will provide you with smart and intuitive ways to interact with your documents, presentations, spreadsheets, and files. You can use Copilot in OneDrive to:
- Get information from your files: Ask questions about your content using natural language, and Copilot will fetch the information from your files, saving you the work and time of manually searching for what you need.
- Generate file summaries: Need a quick overview of a file? Copilot can summarize the contents of one or multiple files, offering you quick insights without having to even open the file.
- Find files using natural language: Find files in new ways by using Copilot prompts such as “Show me all the files shared with me in the past week” or “Show files that Kat Larson has commented in.”
Copilot in OneDrive will be available in late April on OneDrive for Web. You can learn more here.
Alt text: Video showing Copilot in OneDrive with a prompt to extract information from a collection of resumes.
Include quick summaries when sharing documents
Add Copilot-generated summaries when you share documents with your colleagues. These summaries, included in the document sharing notification, give your recipients immediate context around a document and a quick overview of its content without needing to open the file. Sharing summaries helps users prioritize work, increases engagement, and reduces cognitive burden.
Sharing summaries will be available in March 2024, starting when sharing a Word document from the web, with support in the desktop client and the mobile app later this year. Learn more here.
 GIF showing AI-generated sharing summary when sharing a Microsoft Word doc.
Get instant video summaries and insights with Copilot in Stream
By using Copilot in Microsoft Stream, you can quickly get the information you need about videos in your organization, whether you’re viewing the latest Teams meeting recording, town hall, product demo, how-to, or onsite videos from frontline workers. Copilot helps you get what you need from your videos in seconds. You can use it to:
- Summarize any video and identify relevant points you need to watch
- Ask questions to get insights from long or detailed videos
- Locate when people, teams, or topics are discussed so you can jump to that point in the video
- Identify calls to action and where you can get involved to help
Copilot in Stream will be available in late April. You can learn more here.
 Copilot in Stream can quickly summarize a video or answer your questions about the content in the video. Alt text: Screen shot showing Copilot in Microsoft Stream.
Try new ways of working with Help me create
In March, we’re rolling out a new Copilot capability in the Microsoft 365 web app that helps you focus on the substance of your content while Copilot suggests the best format: a white paper, a presentation, a list, an icebreaker quiz, and so on. In the Microsoft 365 app at microsoft365.com, simply tell Help me create what you want to work on and it will suggest the best app for you and give you a boost with generative AI suggestions. Learn more here.
 Help me create dialog box in the foreground, with the Microsoft 365 web app create screen in the background.
Draft emails quicker and get coaching tips for your messages with Copilot in classic Outlook for Windows
Customers of the new Outlook for Windows have been enjoying Copilot features like draft, coaching, and summary which we announced last year. Since November last year, summary by Copilot has also been available in classic Outlook for Windows. Soon, draft and coaching will be coming to classic Outlook too.
Draft with Copilot helps you reduce time spent on email by drafting new emails or responses for you with just a short prompt that explains what you want to communicate. Because you are always in control with Copilot, you can choose to adjust the proposed draft in length and tone or ask Copilot to generate a new message – and you can always go back to the previous options if you prefer.
Coaching by Copilot can help you get your point across in the best possible way, coaching you on tone (for example, too aggressive, too formal, and so on), reader sentiment (how a reader might perceive your message), and clarity. Copilot can provide coaching for drafts it created or drafts you wrote yourself.
Coaching will start rolling out in early March and draft by Copilot will start rolling out in late March.
 An image of a message composed in the classic Outlook for Windows with the Copilot icon being clicked to reveal options for draft and coaching.
Experience the new Copilot in Microsoft Teams
We have recently enabled a new Copilot experience in Microsoft Teams that offers better prompts, easier access, and more functionality than the previous version. Copilot in Teams will be automatically pinned above your chats, and you can use it to catch up, create, and ask anything related to Microsoft 365. Learn more about the new Copilot experience in Teams here.
 An image of the Copilot experience in Microsoft Teams, responding to a question based on the user’s Graph data
Check out the improved usage reports for Microsoft Copilot in the admin center
The Microsoft 365 admin center Usage reports offer a growing set of usage insights across your Microsoft 365 cloud services. Among these reports, the Copilot for Microsoft 365 Usage report (Preview) is built to help Microsoft 365 admins plan for rollout, inform adoption strategy, and make license allocation decisions.
The report now includes usage metrics for Microsoft Copilot with Graph-grounded chat. This allows you to see how Chat compares with usage of Copilot in other apps like Teams, Outlook, Word, PowerPoint, Excel, OneNote and Loop. You can review the enabled and active user time series chart to assess how usage is trending over time. The new metric has been added retroactively dating back to late November of 2023. To access the report, navigate to Reports > Usage and select the Copilot for Microsoft 365 product report. Learn more here.
 An image of the Copilot for Microsoft 365 Usage report highlighting the addition of a new metric for Microsoft Copilot with Graph-grounded chat
Learn more about the use of Copilot for Microsoft 365 in the Financial Services Industry
Today we are releasing the new white paper for the financial services industry (FSI) with information about use cases and benefits for the FSI, information about risks and regulations, guidance for managing and governing a generative AI solution, and more information about how to prepare for Copilot. Read the paper here.
Catch up on the Copilot for Microsoft 365 Tech Accelerator
In case you missed it, you can catch up on all the sessions from the Copilot for Microsoft 365 Tech Accelerator via recordings on the event page. The event covered a range of topics including how Copilot works, how to prepare your organization for Copilot, strategies for deploying, driving adoption, and measuring impact, and deep dives on how to extend Copilot with Copilot Studio and Graph connectors. Chat Q&A is open through Friday, March 1, 12:00 P.M. PT, so watch the recordings and get any questions you might have answered.
Did you know? The Microsoft 365 Roadmap is where you can get the latest updates on productivity apps and intelligent cloud services. Check out what features are in development or coming soon on the Microsoft 365 Roadmap. All future rollout dates assume the feature availability on the Current Channel. Customers should expect these features to be available on the Monthly Enterprise Channel the second Tuesday of the upcoming month.
by Contributed | Feb 27, 2024 | Technology
This article is contributed. See the original author and article here.
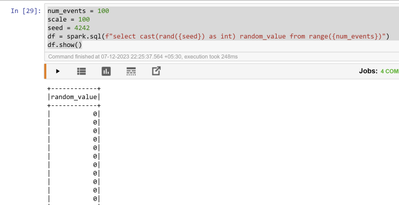
Azure HDInsight Spark 5.0 to HDI 5.1 Migration
A new version of HDInsight 5.1 is released with Spark 3.3.1. This release improves join query performance via Bloom filters, increases the Pandas API coverage with the support of popular Pandas features such as datetime.timedelta and merge_asof, simplifies the migration from traditional data warehouses by improving ANSI compliance and supporting dozens of new built-in functions.
In this article we will discuss about the migration of user applications from HDInsight 5.0(Spark 3.1) to HDInsight 5.1 (Spark 3.3). The sections include,
1. Changes which are compatible with minor changes
2. Changes in Spark that require application changes
Application Changes with backport.
The below changes are part of HDI 5.1 release. If these functions are used in applications, the given steps can be taken to avoid the changes in application code.
- Since Spark 3.3, the histogram_numeric function in Spark SQL returns an output type of an array of structs (x, y), where the type of the ‘x’ field in the return value is propagated from the input values consumed in the aggregate function. In Spark 3.2 or earlier, x’ always had double type. Optionally, use the configuration spark.sql.legacy.histogramNumericPropagateInputType since Spark 3.3 to revert to the previous behavior.
Spark 3.1 (pyspark)

Spark 3.3:

- In Spark 3.3, the timestamps subtraction expression such as timestamp ‘2021-03-31 23:48:00’ – timestamp ‘2021-01-01 00:00:00’ returns values of DayTimeIntervalType. In Spark 3.1 and earlier, the type of the same expression is CalendarIntervalType. To restore the behavior before Spark 3.3, you can set spark.sql.legacy.interval.enabled to true.

- Since Spark 3.3, the functions lpad and rpad have been overloaded to support byte sequences. When the first argument is a byte sequence, the optional padding pattern must also be a byte sequence and the result is a BINARY value. The default padding pattern in this case is the zero byte. To restore the legacy behavior of always returning string types, set spark.sql.legacy.lpadRpadAlwaysReturnString to true.
> SELECT hex(lpad(x’1020′, 5, x’05’))
0505051020
SELECT hex(rpad(x’1020′, 5, x’05’)) 1020050505
- Since Spark 3.3, Spark turns a non-nullable schema into nullable for API DataFrameReader.schema(schema: StructType).json(jsonDataset: Dataset[String]) and DataFrameReader.schema(schema: StructType).csv(csvDataset: Dataset[String]) when the schema is specified by the user and contains non-nullable fields. To restore the legacy behavior of respecting the nullability, set spark.sql.legacy.respectNullabilityInTextDatasetConversion to true.


- Since Spark 3.3, nulls are written as empty strings in CSV data source by default. In Spark 3.2 or earlier, nulls were written as empty strings as quoted empty strings, “”. To restore the previous behavior, set nullValue to “”, or set the configuration spark.sql.legacy.nullValueWrittenAsQuotedEmptyStringCsv to true.
Sample Data:

Spark 3.1:

Spark 3.3:

- Since Spark 3.3, Spark will try to use built-in data source writer instead of Hive serde in INSERT OVERWRITE DIRECTORY. This behavior is effective only if spark.sql.hive.convertMetastoreParquet or spark.sql.hive.convertMetastoreOrc is enabled respectively for Parquet and ORC formats. To restore the behavior before Spark 3.3, you can set spark.sql.hive.convertMetastoreInsertDir to false.
Spark logs:

INFO ParquetOutputFormat [Executor task launch worker for task 0.0 in stage 0.0 (TID 0)]: ParquetRecordWriter [block size: 134217728b, row group padding size: 8388608b, validating: false]INFO ParquetWriteSupport [Executor task launch worker for task 0.0 in stage 0.0 (TID 0)]: Initialized Parquet WriteSupport with Catalyst schema:{ “type” : “struct”, “fields” : [ { “name” : “fname”, “type” : “string”, “nullable” : true, “metadata” : { } }, {
- Since Spark 3.3.1 and 3.2.3, for SELECT … GROUP BY a GROUPING SETS (b)-style SQL statements, grouping__id returns different values from Apache Spark 3.2.0, 3.2.1, 3.2.2, and 3.3.0. It computes based on user-given group-by expressions plus grouping set columns. To restore the behavior before 3.3.1 and 3.2.3, you can set spark.sql.legacy.groupingIdWithAppendedUserGroupBy

- In Spark 3.3, spark.sql.adaptive.enabled is enabled by default. To restore the behavior before Spark 3.3, you can set spark.sql.adaptive.enabled to false.
In Spark3.1, AQE is set to false by default.

In Spark3.3, AQE is enabled by default.

Adaptive Query Execution (AQE) is an optimization technique in Spark SQL that makes use of the runtime statistics to choose the most efficient query execution plan, which is enabled by default since Apache Spark 3.3.0. Spark SQL can turn on and off AQE by spark.sql.adaptive.enabled as an umbrella configuration. As of Spark 3.0, there are three major features in AQE: including coalescing post-shuffle partitions, converting sort-merge join to broadcast join, and skew join optimization.
https://spark.apache.org/docs/latest/sql-performance-tuning.htm
- In Spark 3.3, the output schema of SHOW TABLES becomes namespace: string, tableName: string, isTemporary: boolean. In Spark 3.1 or earlier, the namespace field was named database for the builtin catalog, and there is no isTemporary field for v2 catalogs. To restore the old schema with the builtin catalog, you can set spark.sql.legacy.keepCommandOutputSchema to true.
In Spark3.1, Field is termed as database:-

In Spark3.3, Field is termed as Namespace: –

We can restore the behavior by setting the below property.

- In Spark 3.3, the output schema of SHOW TABLE EXTENDED becomes namespace: string, tableName: string, isTemporary: boolean, information: string. In Spark 3.1 or earlier, the namespace field was named database for the builtin catalog, and no change for the v2 catalogs. To restore the old schema with the builtin catalog, you can set spark.sql.legacy.keepCommandOutputSchema to true.
Show similar screenshot details in both spark-sql shell for spark3.1 and spark3.3 versions.

In Spark3.1, Field is termed as database:

In Spark3.3, Field is termed as Namespace: –

We can restore the behavior by setting the below property.

- In Spark 3.3, CREATE TABLE AS SELECT with non-empty LOCATION will throw AnalysisException. To restore the behavior before Spark 3.2, you can set spark.sql.legacy.allowNonEmptyLocationInCTAS to true.
In spark 3.3, we are able to CTAS with non-empty location, as shown below

In spark 3.3 also we are able to create tables without the above property change

- In Spark 3.3, special datetime values such as epoch, today, yesterday, tomorrow, and now are supported in typed literals or in cast of foldable strings only, for instance, select timestamp’now’ or select cast(‘today’ as date). In Spark 3.1 and 3.0, such special values are supported in any casts of strings to dates/timestamps. To keep these special values as dates/timestamps in Spark 3.1 and 3.0, you should replace them manually, e.g. if (c in (‘now’, ‘today’), current_date(), cast(c as date)).
In spark 3.3 and 3.1 below code works exactly same.

Application Changes Expected
There are some changes in the spark functions between HDI 5.0 and 5.1. The changes depend on whether the applications use below functionalities and APIs.
- Since Spark 3.3, DESCRIBE FUNCTION fails if the function does not exist. In Spark 3.2 or earlier, DESCRIBE FUNCTION can still run and print “Function: func_name not found”.
Spark 3.1:

Spark 3.3:

- Since Spark 3.3, DROP FUNCTION fails if the function name matches one of the built-in functions’ name and is not qualified. In Spark 3.2 or earlier, DROP FUNCTION can still drop a persistent function even if the name is not qualified and is the same as a built-in function’s name.
- Since Spark 3.3, when reading values from a JSON attribute defined as FloatType or DoubleType, the strings “+Infinity”, “+INF”, and “-INF” are now parsed to the appropriate values, in addition to the already supported “Infinity” and “-Infinity” variations. This change was made to improve consistency with Jackson’s parsing of the unquoted versions of these values. Also, the allowNonNumericNumbers option is now respected so these strings will now be considered invalid if this option is disabled.

- Since Spark 3.3, when reading values from a JSON attribute defined as FloatType or DoubleType, the strings “+Infinity”, “+INF”, and “-INF” are now parsed to the appropriate values, in addition to the already supported “Infinity” and “-Infinity” variations. This change was made to improve consistency with Jackson’s parsing of the unquoted versions of these values. Also, the allowNonNumericNumbers option is now respected so these strings will now be considered invalid if this option is disabled.
Spark 3.3:

Spark 3.1:

- Spark 3.3 introduced error handling functions like below:
TRY_SUBTRACT – behaves as an “-” operator but returns null in case of an error.
TRY_MULTIPLY – is a safe representation of the “*” operator.
TRY_SUM – is an error-handling implementation of the sum operation.
TRY_AVG – is an error handling-implementation of the average operation.
TRY_TO_BINARY – eventually converts an input value to a binary value.
Example of ‘try_to_binary’ function:
When correct value given for base64 decoding:
When wrong value given for base64 decoding it doesn’t throw any error.
- Since Spark 3.3, ADD FILE/JAR/ARCHIVE commands require each path to be enclosed by ” or ‘ if the path contains whitespaces.
In spark3.3:

In spark3.1: Multiple jars adding not working, only at a time can be added.

- 16.In Spark 3.3, the following meta-characters are escaped in the show() action. In Spark 3.1 or earlier, the following metacharacters are output as it is.
n (new line)
r (carrige ret)
t (horizontal tab)
f (form feed)
b (backspace)
u000B (vertical tab)
u0007 (bell)
In Spark3.3, meta-characters are escaped in the show() action.
In Spark3.1, the meta-characters are actually interpreted as their define functions.
- In Spark 3.3, the output schema of DESCRIBE NAMESPACE becomes info_name: string, info_value: string. In Spark 3.1 or earlier, the info_name field was named database_description_item and the info_value field was named database_description_value for the builtin catalog. To restore the old schema with the builtin catalog, you can set spark.sql.legacy.keepCommandOutputSchema to true.
In Spark 3.1, we see the below headers before we set the property to false and check.

In Spark 3.3, we see the Info name and Info value before we set the property to true.

- In Spark 3.3, DataFrameNaFunctions.replace() no longer uses exact string match for the input column names, to match the SQL syntax and support qualified column names. Input column name having a dot in the name (not nested) needs to be escaped with backtick `. Now, it throws AnalysisException if the column is not found in the data frame schema. It also throws IllegalArgumentException if the input column name is a nested column. In Spark 3.1 and earlier, it used to ignore invalid input column name and nested column name.

- In Spark 3.3, CREATE TABLE .. LIKE .. command can not use reserved properties. You need their specific clauses to specify them, for example, CREATE TABLE test1 LIKE test LOCATION ‘some path’. You can set spark.sql.legacy.notReserveProperties to true to ignore the ParseException, in this case, these properties will be silently removed, for example: TBLPROPERTIES(‘owner’=’yao’) will have no effect. In Spark version 3.1 and below, the reserved properties can be used in CREATE TABLE .. LIKE .. command but have no side effects, for example, TBLPROPERTIES(‘location’=’/tmp’) does not change the location of the table but only creates a headless property just like ‘a’=’b’.
In spark 3.3 we got the same parse exceptions, post setting the property we were able to create the table

In spark 3.1 , we didn’t get any exceptions or errors:

- In Spark 3.3, the unit-to-unit interval literals like INTERVAL ‘1-1’ YEAR TO MONTH and the unit list interval literals like INTERVAL ‘3’ DAYS ‘1’ HOUR are converted to ANSI interval types: YearMonthIntervalType or DayTimeIntervalType. In Spark 3.1 and earlier, such interval literals are converted to CalendarIntervalType. To restore the behavior before Spark 3.3, you can set spark.sql.legacy.interval.enabled to true.
In spark 3.3, post setting up this spark.sql.legacy.interval.enabled to true
these literals are converted to ANSI interval types: YearMonthIntervalType or DayTimeIntervalType.

In Spark 3.1, there are no changes due to the change in property.

- In Spark 3.3, the TRANSFORM operator can’t support alias in inputs. In Spark 3.1 and earlier, we can write script transform like SELECT TRANSFORM(a AS c1, b AS c2) USING ‘cat’ FROM TBL.
In Spark 3.1 we are able use direct transforms but ,
In spark 3.3, direct transform is prohibited , but can be use with below workaround.


Recent Comments