by Contributed | Mar 19, 2024 | Technology
This article is contributed. See the original author and article here.
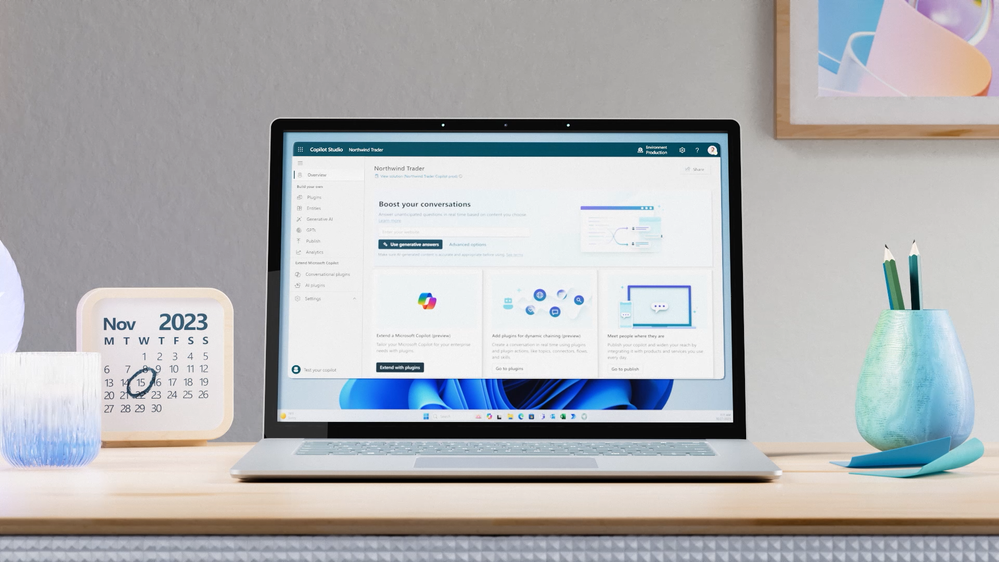
Copilot Studio app window open on the screen of a laptop on a table
Customizing Copilot for Microsoft 365 with Copilot Studio
Copilot for Microsoft 365 is your everyday AI companion that helps you create, find, and ask for information across Microsoft 365 apps. Whether you need to summarize a document, find relevant data, or generate content, Copilot can help you get things done faster and smarter. But what if you want to tailor Copilot to work the way you need, with your data, processes, and policies? That’s where Copilot Studio comes in.
Introduced in November 2023, Microsoft Copilot Studio is a low-code conversational AI platform that enables you to extend and customize Copilot for Microsoft 365 with plugins, as well as build your own copilots. Plugins are reusable building blocks that allow Copilot to access data from other systems of record, such as CRM, ERP, HRM and line-of-business apps, using 1200+ standard and premium connectors. You can also use plugins to incorporate your unique business processes into Copilot, such as expense management, HR onboarding, or IT support. And you can use plugins to control how Copilot responds to specific questions on topics like compliance, HR policies, and more.
Copilot Studio provides a visual canvas to create plugins, publish and manage them centrally, and secure them with the right access, data controls, and analytics. This is included in your Copilot for Microsoft 365 subscription and available in public preview today.
How Copilot Studio works
Let’s talk through how Copilot Studio in Copilot for Microsoft 365 works in action. Imagine you want to know how much of your team’s travel budget is left for the rest of the quarter. You ask Copilot in the chat, but it can’t answer because the data you’re looking for resides in your SAP system. With Copilot Studio, you can customize Copilot to connect to your SAP system and retrieve the information you need.
You start by launching Copilot Studio from within Copilot. You give your plugin a description, such as “providing richer details on expense questions”. You then choose the connectors you want to use, such as SAP or SharePoint (where perhaps your travel policy is stored). You can also use connectors to other data sources, such as websites, Azure services, or even OpenAI’s GPTs. You then design the logic and flow of your plugin, using conditions, variables, and actions. You can also specify how you want Copilot to generate responses, using natural language templates or expressions.
Once you’re done building your plugin, you hit publish. Copilot Studio will automatically create a metadata trigger for your plugin, so that Copilot knows when to use it. You can also manage your plugin settings, such as who can access it, what data is collected, and how it is monitored. And the best part is, you only need to build your plugin once, and it can be reused across your organization.
Now, when you go back to Copilot and ask the same question, Copilot will use your plugin to access your SAP data and give you the answer you were looking for. You can see how Copilot Studio can help you create rich and relevant experiences with Copilot, using your data and processes.
How Copilot studio will evolve in the future
Copilot Studio is a powerful tool for creating conversational plugins so you can tailor Copilot for Microsoft 365 to work the way you do, with the business data you use. While in preview, we are continuing to build Copilot Studio’s capabilities so you can enable richer and broader use cases. Over the next several months, Copilot Studio will evolve to include capabilities and features like –
- Plugins that can interact with the user – for example, by posing questions or presenting options and input boxes. Today, plugins are single-turn – Meaning, they can take in a user question and either, search over content to provide an answer, or possibly call a Power Platform Connector or flow to get information.
- Secure and seamless access to SharePoint and other Microsoft services, on behalf of the user. This will expand the range of scenarios Copilot Studio can support, such as accessing documents, calendars, emails, or other organization data that requires end-user credentials.
- More granular admin control on which users in the organization can use, create, or edit a plugin. Currently, plugin capability is controlled by the MAC Admin in an ‘all-or-none’ fashion and an admin can enable copilot studio plugins ‘as a category’ to a limited group of individuals for trials.
- Test control for plugins, so you can easily debug and validate plugins before publishing. This will also allow you to preview how your plugin will look and behave in Copilot for Microsoft 365 and make any adjustments as needed.
We are excited about the potential of Copilot Studio to create rich experiences with Copilot for Microsoft 365, using your data and processes and appreciate your ongoing feedback and suggestions as we continue to improve the experience. Stay tuned for more updates at Microsoft Build.
What else can you do with Copilot Studio?
Copilot Studio is a great way to customize Copilot for M365 to work with your data outside Microsoft 365. But that’s not all. If you’re interested in building your own custom copilot to provide generative AI experiences that Copilot for Microsoft 365 isn’t designed for, there is a separate Copilot Studio license, generally available, that allows you to build your own conversational copilots for customers or employees and publish it on any channel of your choice, such as websites, SharePoint sites, social media, and more. Organizations look to build their own copilot if they want to provide Gen AI experiences on channels not offered within Copilot for Microsoft 365 or would like to design employee and/or customer facing gen ai experiences. You can get started quickly designing a copilot with topics, plugins, automation and out of the box generative AI, allowing you to see value fast. You can even design the copilot with specific rules based dialog for greater control.
With Copilot Studio, you can create custom copilots for various scenarios, such as enhancing customer experiences, streamlining internal functions, or building innovative solutions. For example, you can create a copilot for your external website that can help customers check in-stock items, provide a quote, or book a service. Or you can create a copilot for your SharePoint site that can help employees with HR or IT requests, such as expenses or IT tickets. Or you can create a copilot that can leverage advanced AI services, such as vision, speech, or language, to create novel applications.
Copilot Studio makes it easy and fast to build your own copilots, using a low-code interface, drag-and-drop components, and pre-built templates. You can also test and debug your copilots, and publish them with a few clicks. And you can manage and monitor your copilots, using the same IT admin center as Copilot for Microsoft 365.
Get Inspired with Use Cases
If you are wondering how you can use Copilot Studio in your organization, here are some examples to get you started.
- Connect Copilot to your sales data in Salesforce and ask questions like “How many deals did I close this quarter?” or “What are the top opportunities in my pipeline?”
- Connect Copilot to your HR data in Workday and ask questions like “How many vacation days do I have left?” or “What is the process for requesting a leave of absence?”
- Connect Copilot to your finance data in SAP and ask questions like “What is the status of my expense report?” or “How much budget do I have left for this project?”
- Create custom topics for Copilot to respond to specific questions on compliance, legal, or policy matters, such as “What are the GDPR requirements for data retention?” or “What is the company’s policy on remote work?”
- Orchestrate workflows with Copilot using Power Automate, such as booking a meeting, sending an email, or creating a document.
Get started with Copilot Studio today
Copilot Studio is a powerful tool that can help you make the most of Copilot for Microsoft 365, and beyond. You can use it to connect Copilot to your data outside Microsoft 365, orchestrate workflows, and tailor Copilot responses to your business needs. You can also use it to build your own copilots, for customers or employees, and publish them on any channel of your choice. Whether you want to extend or customize Copilot, Copilot Studio can help you create conversational experiences that are rich, relevant, and intelligent.
To learn more about Copilot Studio, visit aka.ms/copilotstudio. To try it for yourself, go to aka.ms/trycopilotstudio. And don’t miss our Microsoft Build session, where we’ll share more announcements and demos.
We can’t wait to see what you create with Copilot Studio!
Additional Resources:
Continue the conversation by joining us in the Copilot for Microsoft 365 Community! Want to share best practices or join community events? Become a member by “Joining” the Microsoft 365 community. For tips & tricks or to stay up to date on the latest news and announcements directly from the product teams, make sure to Follow or Subscribe to the Copilot for Microsoft 365 Blog Space!
by Contributed | Mar 18, 2024 | Technology
This article is contributed. See the original author and article here.
The introduction of cross-tenant access settings for Microsoft Entra External ID marked a pivotal shift in how organizations manage security and collaboration across different tenants. This blog post dives into the essence of these settings, focusing on their significance for secure B2B collaboration.
Three key areas of focus, include:
- The critical aspect of trusting multifactor authentication (MFA) from business collaborators, including the exploration into the balance between maintaining high security standards and ensuring a seamless user experience for B2B guest users, plus highlighting a perspective to simplify authentication processes and reduce administrative burdens.
- Offering a closer look at the cross-tenant access settings and how these settings enable more granular control over cross-tenant collaborations. Real-world use cases illustrate the application of these policies in managing and restricting access to ensure security without hindering productivity and cooperation.
- Insights into leveraging Microsoft Entra cross-tenant access policies for improved security and collaboration and to ensure a smooth user experience.
Trust MFA from business collaborators (B2B collaboration) by default
In today’s interconnected digital landscape, organizations are increasingly embracing B2B collaboration to streamline workflows and facilitate cooperation with external partners. As part of this collaborative approach, many businesses routinely create guest user accounts within their Microsoft Entra tenants and grant trusted partners access to their resources.
To enhance security, many have already extended the requirement for MFA to B2B guest users. This, however, requires external users in cross-tenant access scenarios to register an additional authentication method in the foreign tenant.
The need for B2B guest users to register for an additional MFA method in the resource tenant basically increases the account security, but at the same time it adds layers of complexity.
User experience disruption in a B2B collaboration scenario
B2B guest users who have already implemented MFA in their home tenant and have become accustomed to the convenience of advanced MFA methods like Windows Hello for Business, encounter disruptions when attempting to access the resource tenant. Even if users have already provided strong authentication in their home tenant, they will still be prompted for authentication again in the resource tenant.
 Figure 1: MFA prompt for B2B guest user who access protected resource in foreign tenant
Administrative overhead for IT and users
Both the guest user and the resource tenant’s IT team face additional administrative tasks. For the guest user, navigating a new MFA setup and maintaining an additional MFA registration can be annoying. For the tenant administrator and the support team, managing these additional MFA registrations can increase overhead significantly.
In cases where a guest user loses access to their device or does not have a backup for a new device, regaining access to their account involves additional administrative tasks for both the guest user and the resource tenant’s IT team. The guest user may need to perform a new MFA setup, while the tenant support team need to manage the additional MFA registrations.
Are you wondering why guest users must register an additional authentication method per resource tenant when they already have one in their home tenant? Well, let’s talk about the trust settings in cross-tenant access settings.
Simplifying the authentication process
A more efficient approach to managing MFA in cross-tenant B2B collaborations is to trust the MFA from a guest’s home tenant. Doing so eliminates the need for additional MFA registration and maintenance in the resource tenant. This means that the user can continue to use his usual strong authentication method that he uses in his home tenant and does not have to register another method in the resource tenant. This is a considerable relief for the user and the support team of the resource tenant no longer has to deal with the MFA registrations of the guests.
The MFA default trust settings are configured in the Microsoft Entra admin center (https://entra.microsoft.com). In the default configuration, a Microsoft Entra ID tenant does not trust any incoming MFA from other tenants. To change the behavior, the inbound defaults must be edited. The following screenshots provide a walkthrough and show the desired configuration. The “Trust multifactor authentication from Microsoft Entra tenants” setting is disabled by default and must be enabled.
 Figure 2: Cross-tenant access settings in Microsoft Entra admin center
 Figure 3: Cross-tenant access settings – Default Trust settings
This simple configuration enables B2B guest users to use their existing MFA in their home tenant to satisfy existing MFA requirements in the resource tenant.
Once configured, B2B guest users can use additional authentication methods that have a higher authentication strength than MFA methods that are only available in a foreign resource tenant. This is a very important advantage because this configuration also enables the use of phishing-resistant authentication methods for B2B collaboration.
 Figure 4: Comparison of the authentication methods available in the home tenant and a resource tenant
For more information about available authentication methods, refer to the Microsoft Entra documentation about authentication strengths for external users.
While this configuration is designed to enhance the user experience and ease the administrative efforts, it can inadvertently create security risks. For instance, guest users might opt for simpler, less secure authentication methods in their home tenant compared to the authentication methods typically used in the resource tenant.
To avoid these risks, the cross-tenant access trust settings work seamlessly with Conditional Access and authentication strengths. Plus, with MFA trust, guest users can use the same phishing-resistant authentication methods used in their home tenant like Windows Hello for Business, FIDO2 keys, and certificate-based authentication to get access to the resource tenant.
This key advantage can be used to increase the login security of guest users. When the default trust settings are adjusted, the Conditional Access policies and authentication strengths should be reviewed at the same time.
We explored the benefits of using MFA trust to leverage the same strong authentication methods used by guest users in their home tenant to improve security, usability and efficiency. In the next chapter, we will look at how tenant administrators can control outbound collaboration settings.
Outbound access restrictions
With Microsoft Entra cross-tenant access settings, organizations can manage their collaboration with other Microsoft Entra organizations. These settings provide more granular control over access, allowing you to manage how you collaborate with external organizations. In this section, we will take a closer look at the outbound settings feature and its capabilities.
Tenant restrictions vs. inbound and outbound settings
Tenant restrictions and cross-tenant access settings are two powerful tools that can help you control access to your organization’s resources. While they are often configured together, it’s important to understand that they operate separately from one another.
As per this Microsoft Learn article:
“Although tenant restrictions are configured along with your cross-tenant access settings, they operate separately from inbound and outbound access settings.
Cross-tenant access settings give you control when users sign in with an account from your organization.
By contrast, tenant restrictions give you control when users are using an external account.”
Think of cross-tenant access settings this way:
- Inbound settings control external account access to your internal apps.
- Outbound settings control internal account access to external apps.
- Tenant restrictions control external account access to external apps.
To summarize, tenant restrictions allow you to create a policy to control access to external apps when users sign in with an external account from your networks or devices while the inbound and outbound access settings focus on guests accounts in your tenant or guest accounts in resource tenants (what your users is accessing and where).
With this all cleared up let’s focus on using an outbound access setting and a real-world application.
Real-world use case
Let’s have a look at a real-world use case to leverage the outbound settings control. The Contoso organization is used in the following use case:
Contoso would like to implement more detailed controls with B2B business collaborators.
- Contoso would like to only collaborate with specific organizations. This includes the ability to securely add or remove partner organizations as the need arises.
- Additionally, Contoso would need the ability to restrict applications that can be accessed in any partner resource tenant along with the ability to restrict and control user access to partner resource tenants.
Setup and configuration
To set up the outbound restriction for the needed use case, we will need to configure the outbound defaults. This essentially will block all outbound collaboration. Note that this can be scoped to either include all users, selected users or all or selected external applications.
From within the Microsoft Entra Admin center, navigate to the External Identities menu and select the cross-tenant access setting feature. From here select the default settings config followed by edit outbound defaults. Select Block access followed by the applies to option. We can either select a subset of users or apply this to all users. In this example all users are blocked and all external applications.
 Figure 5: Outbound defaults
 Figure 6: Outbound block access
Attempting any access in a resource tenant will result in the below notification. This is expected since the tenant wide outbound access default setting is in place explicitly blocking any resource tenant level access.
 Figure 7: Resource tenant blocked
By looking at the user sign-in logs, we can establish the same conclusion via the failure reasoned and the resource tenant accessed.
 Figure 8: Sign-in logs
To enable collaboration when the outbound access default setting is applied, a tenant ID or domain name of a resource tenant or origin must be included in the cross-tenant access settings of Microsoft Entra. In the example below, the tenant of Contoso’s partner organization “Wingtip Toys” is added and the outbound access configuration setup to allow collaboration with selected Contoso users. In this case, the users with group membership to “External-TR-ContosoAccess” will be allowed access to selected application as per figure 9.
In addition, a Privileged Access Group (PAG) can be used allowing no permeant standing access. Access must be requested via Privileged Identity Management (PIM). The PIM activation process can be set up to require an approver, MFA or additional authentication context via Conditional Access. E.g. step-up authentication or location-based policy restrictions.
 Figure 9: Outbound access settings users and groups
 Figure 10: Outbound access settings external applications
Upon configuring the needed outbound access settings any user that is part of the selected user or group outbound configuration setting will be allowed access to the selected external applications. In the below example we can see the demo user accessed a selected external application as per previous configuration.
 Figure 11: sign-in log successful
With cross-tenant access and outbound access settings, customers can granularly restrict and control collaboration with external resource tenants. This enables more control over what your internal accounts can access externally and where.
A word of caution: Before enabling, it’s important to understand this is a tenant wide configuration and you will need to understand and evaluate your organizations collaboration needs and scope the outbound access setting and allowed organizations accordingly.
More info can be found here.
Summary
In this blog post, we explored how to use cross-tenant access and outbound access settings in Microsoft Entra to manage and secure external collaboration. Cross-tenant access allows you to share your resources with users from other tenants, while outbound access settings and tenant restrictions let you control which external tenants your users can access. You can configure both features at the tenant level and specify the allowed or blocked organizations according to your business needs. Additionally, we have discussed how to use Default MFA Trust to use existing, strong authentication methods from foreign tenants in cross-tenant access scenarios and improve your security posture.
In the next blog, we will look more closely at tenant restrictions and authentication strengths and contexts. Keep following this blog series, post your feedback, and we hope you join us again.
Morne Naude, Senior Consultant
Heiko Bischoff, Senior Consultant
Learn more about Microsoft Entra:
by Contributed | Mar 17, 2024 | Technology
This article is contributed. See the original author and article here.
In a recent support case, our customer faced an intriguing issue where a query execution in a .NET application was unexpectedly canceled during asynchronous operations against Azure SQL Database. This experience highlighted the nuances of handling query cancellations, which could stem from either a CommandTimeout or a CancellationToken. Through this concise article, I aim to elucidate these two cancellation scenarios, alongside strategies for managing SQL errors, ensuring connection resilience through retries, and measuring query execution time. The accompanying code serves as a practical guide, demonstrating how to adjust timeouts dynamically in an attempt to successfully complete a query, should it face cancellation due to timeout constraints. This narrative not only shares a real-world scenario but also provides actionable insights for developers looking to fortify their .NET applications interacting with Azure SQL Database.
Introduction:
Understanding and managing query cancellations in asynchronous database operations are critical for maintaining the performance and reliability of .NET applications. This article stems from a real-world support scenario where a customer encountered unexpected query cancellations while interacting with Azure SQL Database. The issue brings to light the importance of distinguishing between cancellations caused by CommandTimeout and those triggered by CancellationToken, each requiring a distinct approach to error handling and application logic.
Cancellations: CommandTimeout vs. CancellationToken:
In asynchronous database operations, two primary types of cancellations can occur: one due to the command’s execution time exceeding the CommandTimeout limit, and the other due to a CancellationToken being invoked. Understanding the difference is crucial, as each scenario demands specific error handling strategies. A CommandTimeout cancellation typically indicates that the query is taking longer than expected, possibly due to database performance issues or query complexity. On the other hand, a cancellation triggered by a CancellationToken may be due to application logic deciding to abort the operation, often in response to user actions or to maintain application responsiveness.
Error Handling and Connection Resilience:
Errors during query execution, such as syntax errors or references to non-existent database objects, necessitate immediate attention and are not suitable for retry logic. The application must distinguish these errors from transient faults, where retry logic with exponential backoff can be beneficial. Moreover, connection resilience is paramount, and implementing a retry mechanism for establishing database connections ensures that transient network issues do not disrupt application functionality.
Measuring Query Execution Time:
Gauging the execution time of queries is instrumental in identifying performance bottlenecks and optimizing database interactions. The example code demonstrates using a Stopwatch to measure and log the duration of query execution, providing valuable insights for performance tuning.
Adaptive Timeout Strategy:
The code snippet illustrates an adaptive approach to handling query cancellations due to timeouts. By dynamically adjusting the CommandTimeout and CancellationToken timeout values upon encountering a timeout-related cancellation, the application attempts to afford the query additional time to complete in subsequent retries, where feasible.
Conclusion:
The intersection of CommandTimeout, CancellationToken, error handling, and connection resilience forms the crux of robust database interaction logic in .NET applications. This article, inspired by a real-world support case, sheds light on these critical aspects, offering a pragmatic code example that developers can adapt to enhance the reliability and performance of their applications when working with Azure SQL Database. The nuanced understanding and strategic handling of query cancellations, as discussed, are pivotal in crafting responsive and resilient .NET database applications.
Example C# code:
using System;
using System.Diagnostics;
using System.Data;
using System.Threading;
using System.Threading.Tasks;
using Microsoft.Data.SqlClient;

namespace CancellationToken
{
    class Program
    {
        private static string ConnectionString = "Server=tcp:servername.database.windows.net,1433;User Id=MyUser;Password=MyPassword;Initial Catalog=MyDB;Persist Security Info=False;MultipleActiveResultSets=False;Encrypt=True;TrustServerCertificate=False;Connection Timeout=30;Pooling=true;Max Pool size=100;Min Pool Size=1;ConnectRetryCount=3;ConnectRetryInterval=10;Application Name=ConnTest";
        private static string Query = "waitfor delay '00:00:20'";

        static async Task Main(string[] args)
        {
            SqlConnection connection = await EstablishConnectionWithRetriesAsync(3, 2000);
            if (connection == null)
            {
                Console.WriteLine("Failed to establish a database connection.");
                return;
            }

            await ExecuteQueryWithRetriesAsync(connection, 5, 1000, 30000,15);

            connection.Close();
        }

        private static async Task EstablishConnectionWithRetriesAsync(int maxRetries, int initialDelay)
        {
            SqlConnection connection = null;
            int retryDelay = initialDelay;

            for (int attempt = 1; attempt <= maxRetries; attempt++)
            {
                try
                {
                    connection = new SqlConnection(ConnectionString);
                    await connection.OpenAsync();
                    Console.WriteLine("Connection established successfully.");
                    return connection;
                }
                catch (SqlException ex)
                {
                    Console.WriteLine($"Failed to establish connection: {ex.Message}. Attempt {attempt} of {maxRetries}.");
                    if (attempt == maxRetries)
                    {
                        Console.WriteLine("Maximum number of connection attempts reached. The application will terminate.");
                        return null;
                    }

                    Console.WriteLine($"Waiting {retryDelay / 1000} seconds before the next connection attempt...");
                    await Task.Delay(retryDelay);

                    retryDelay *= 2;
                }
            }

            return null;
        }

        private static async Task ExecuteQueryWithRetriesAsync(SqlConnection connection, int maxRetries, int initialDelay, int CancellationTokenTimeout, int CommandSQLTimeout)
        {
            int retryDelay = initialDelay;

            for (int attempt = 1; attempt <= maxRetries; attempt++)
            {
                using (var cts = new CancellationTokenSource())
                {
                    cts.CancelAfter(CancellationTokenTimeout*attempt); // Set CancellationToken timeout

                    try
                    {
                        using (SqlCommand command = new SqlCommand(Query, connection))
                        {
                            command.CommandTimeout = CommandSQLTimeout*attempt;

                            Stopwatch stopwatch = Stopwatch.StartNew();

                            await command.ExecuteNonQueryAsync(cts.Token);

                            stopwatch.Stop();
                            Console.WriteLine($"Query executed successfully in {stopwatch.ElapsedMilliseconds} milliseconds.");

                            return;
                        }
                    }
                    catch (TaskCanceledException)
                    {
                        Console.WriteLine($"Query execution was canceled by the CancellationToken. Attempt {attempt} of {maxRetries}.");
                    }
                    catch (SqlException ex) when (ex.Number == -2)
                    {
                        Console.WriteLine($"Query execution was canceled due to CommandTimeout. Attempt {attempt} of {maxRetries}.");
                    }
                    catch (SqlException ex) when (ex.Number == 207 || ex.Number == 208 || ex.Number == 2627)
                    {
                        Console.WriteLine($"SQL error preventing retries: {ex.Message}");
                        return;
                    }
                    catch (Exception ex)
                    {
                        Console.WriteLine($"An exception occurred: {ex.Message}");
                        return;
                    }

                    Console.WriteLine($"Waiting {retryDelay / 1000} seconds before the next query attempt...");
                    await Task.Delay(retryDelay);

                    retryDelay *= 2;
                }
            }
        }
    }
}
Tests and Results:
In the course of addressing the query cancellation issue, we conducted a series of tests to understand the behavior under different scenarios and the corresponding exceptions thrown by the .NET application. Here are the findings:
Cancellation Prior to Query Execution:
- Scenario: The cancellation occurs before the query gets a chance to execute, potentially due to reasons such as application overload or a preemptive cancellation policy.
- Exception Thrown:
TaskCanceledException
- Internal Error Message: “A task was canceled.”
- Explanation: This exception is thrown when the operation is canceled through a
CancellationToken, indicating that the asynchronous task was canceled before it could begin executing the SQL command. It reflects the application’s decision to abort the operation, often to maintain responsiveness or manage workload.
Cancellation Due to CommandTimeout:
- Scenario: The cancellation is triggered by reaching the
CommandTimeout of SqlCommand, indicating that the query’s execution duration exceeded the specified timeout limit.
- Exception Thrown:
SqlException with an error number of -2
- Internal Error Message: “Execution Timeout Expired. The timeout period elapsed prior to completion of the operation or the server is not responding.”
- Explanation: This exception occurs when the query execution time surpasses the
CommandTimeout value, prompting SQL Server to halt the operation. It suggests that the query may be too complex, the server is under heavy load, or there are network latency issues.
Cancellation Before CommandTimeout is Reached:
- Scenario: The cancellation happens before the
CommandTimeout duration is met, not due to the CommandTimeout setting but possibly due to an explicit cancellation request or an unforeseen severe error during execution.
- Exception Thrown: General
Exception (or a more specific exception depending on the context)
- Internal Error Message: “A severe error occurred on the current command. The results, if any, should be discarded.rnOperation cancelled by user.”
- Explanation: This exception indicates an abrupt termination of the command, potentially due to an external cancellation signal or a critical error that necessitates aborting the command. Unlike the
TaskCanceledException, this may not always originate from a CancellationToken and can indicate more severe issues with the command or the connection.

by Contributed | Mar 15, 2024 | Technology
This article is contributed. See the original author and article here.
Azure Cognitive Search & OpenAI Output can be effectively restricted with the help of Azure Entra Security Groups. With Azure Entra Security Groups, organizations can limit access to an Azure search instance or an OpenAI Output instance based on group membership of the user. This ensures that users only have access to the data within the scope of their job responsibilities. Azure Entra Security Groups also provide advanced authentication and authorization services for Azure services, offering additional layers of security for organizations to protect their data.
Azure OpenAI service is being used to create more interactive & intelligent chatbots. A key use case is being able to have the OpenAI service respond to user requests using your own data.
Why filter search results from Azure Cognitive Search
Cognitive Search is a search engine that catalogues all the documents, databases, etc. you provide it. However, there may be situations where you want an index of large amounts of data, but you don’t want every user in healthcare organization to have access to everything.
- Protected Health Information (PHI) data
- HR data
- Classified data
For these situations, you need to adjust the search results based on the user’s identity (The medical professionals, such as doctors, nurses, and other health care workers should have access to PHI data, while other people who are not involved or not authorized should not see it).
With security filters, Azure Cognitive Search supports this use case. When you get search results, security filters let you give extra information to restrict results to only data the user can access.
There are three steps required to implement security filtering
- Create an index that includes a field for security filtering (such as Azure Entra security group IDs)
- Include which Azure Entra security group IDs are allowed to see the data on initial index of each document
- Include the list of Azure Entra security group IDs that the user is a part of so the security filtering can be applied on each query
Create an index that includes a field for security filtering
A security filtering field is required when you create a Cognitive Search index. This field should be filterable and not retrievable.
Example REST API call
POST https://[search service].search.windows.net/indexes/securedfiles/docs/index?api-version=2023-10-01-preview

{

     "name": "securedfiles",

     "fields": [

         {"name": "file_id", "type": "Edm.String", "key": true, "searchable": false },

         {"name": "file_name", "type": "Edm.String", "searchable": true },

         ...

         {"name": "group_ids", "type": "Collection(Edm.String)", "filterable": true, "retrievable": false }

     ]

 }
Example C#
var index = new SearchIndex(options.SearchIndexName)

{

    Fields =

    {

        new SimpleField("file_id", SearchFieldDataType.String) { IsKey = true, ... },

        new SimpleField("file_name", SearchFieldDataType.String) { ... },

        ...

        new SimpleField("group_ids", SearchFieldDataType.Collection(SearchFieldDataType.String))

            { IsFilterable = true, IsHidden = true },

    },

    ...

};
await indexClient.CreateIndexAsync(index);
Include which Azure Entra security group IDs are allowed to see the data on initial index of each document
Each time a new document is uploaded & indexed, you need to include the list of Azure Entra security group IDs that are allowed to have this document in their search results. These Azure Entra security group IDs are GUIDs.
Example REST API call
{

    "value": [

        {

            "@search.action": "upload",

            "file_id": "1",

            "file_name": "secured_file_a",

            "file_description": "File access is restricted to the medical professionals, such as doctors, nurses",

            "group_ids": ["entra_security_group_id1"]

        },

        {

            "@search.action": "upload",

            "file_id": "2",

            "file_name": "secured_file_b",

            "file_description": " File access is restricted to the medical professionals, such as doctors, nurses, and other health care workers.",

            "group_ids": ["entra_security_group_id1", " entra_security_group_id2"]

        },

        {

            "@search.action": "upload",

            "file_id": "3",

            "file_name": "secured_file_c",

            "file_description": "File access is restricted to third parties and law enforcements",

            "group_ids": ["entra_security_group_id3", " entra_security_group_id5"]

        }

    ]

}
Example C#
var searchClient = await GetSearchClientAsync(options);

var batch = new IndexDocumentsBatch();

foreach (var section in sections)

{

    batch.Actions.Add(new IndexDocumentsAction(

        IndexActionType.MergeOrUpload,

        new SearchDocument

        {

            ["file_id"] = section.Id,

            ["file_name"] = section.SourceFile,

            ["group_ids"] = section.GroupIds

        }

     ));


    IndexDocumentsResult result = await searchClient.IndexDocumentsAsync(batch);

    ...

}
Provide the IDs of the Azure Entra security groups that the user belongs to so that each query can have security filtering applied to it.
For every query, add the Azure Entra security group IDs that the user belongs to (that are relevant to this application) to the list. Use an OData query to format this.
Example REST API call
POST https://[service name].search.windows.net/indexes/securedfiles/docs/search?api-version=2023-10-01-preview

Content-Type: application/json

api-key: [admin or query key]

{

   "filter":"group_ids/any(g:search.in(g, ' entra_security_group_id1, entra_security_group_id2'))"

}
Example C#
...

var filter = $"group_ids/any(g:search.in(g, '{string.Join(", ", user.Claims.Where(x => x.Type == "groups").Select(x => x.Value))}'))";

 }


 SearchOptions searchOption = new SearchOptions

 {

     Filter = filter,

     QueryType = SearchQueryType.Semantic,

     QueryLanguage = "en-us",

     QuerySpeller = "lexicon",

     SemanticConfigurationName = "default",

     Size = top,

     QueryCaption = useSemanticCaptions ? QueryCaptionType.Extractive : QueryCaptionType.None,

 };


var searchResultResponse = await searchClient.SearchAsync(query, searchOption, cancellationToken);
My GitHub Reposiotry contains an example implementation (with security filtering using Azure Entra Security groups).
by Contributed | Mar 15, 2024 | Technology
This article is contributed. See the original author and article here.
Recording: As healthcare organizations invested heavily in traditional VDI on-premises solutions are found at a crossroads; continue with complex, costly infrastructure, management overhead or pivot to a future where agility, simplicity, and innovation lead. Windows 365 presents as the steppingstone to revolutionize healthcare experience for windows ecosystems.
This is a virtual webinar event series for healthcare focused on Microsoft Windows 365 Cloud PC Cloud Virtualization Desktop solution (a SaaS product), be sure to follow the full agenda for other sessions:
aka.ms/w365HealthcareVirtualWebinar
#W365HealthcareVirtualWebinar
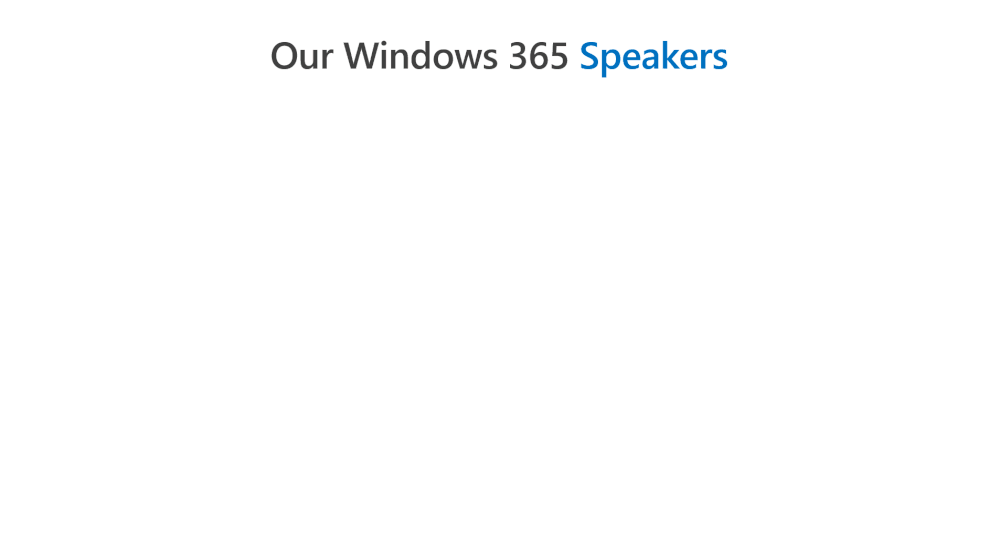
Our Speakers
We have the pleasure of delivering a selective experience with a broad range of speakers focused on healthcare from (technical, specialist and engineering), and make sure to follow them.
 Juan Sifuentes
Jesse Asmond
Sam Tulimat
Generated by Copilot.
Key Topics:
Introduction and agenda: Juan, Jesse and Sam introduced themselves and their roles and gave an overview of the session on Windows 365 and how it differs from traditional VDI.
Windows 365 vs traditional VDI: Juan explained how Windows 365 simplifies and automates the provisioning, management and security of cloud PCs, and how it can reduce complexity and cost compared to traditional VDI.
Windows 365 licensing models and use cases: Juan and Sam described the two licensing models for Windows 365: enterprise and frontline, and how they cater to different user scenarios and needs, such as shift workers, task workers, remote workers, etc.
Independent research and resources: Jesse shared some data and insights from Gartner and Forrester on the desktop as a service market and the business value of Windows 365, and also mentioned the availability of trials and partner assistance for customers.
Windows 365 frontline roadmap: Sam gave a preview of the upcoming features and enhancements for Windows 365 frontline, especially for the task worker scenario, such as faster login and resource sharing.
Video Recording
To see the rest of the post, including resources, visit:
https://aka.ms/w365HealthcareVirtualWebinar
#W365HealthcareVirtualWebinar
We will continue to target more webinars aimed at helping our healthcare customers, if you want to learn more be sure to follow these resources:
Thank you for stopping by; Juan Sifuentes | CETS | Healthcare.


Recent Comments