by Contributed | Apr 17, 2024 | Technology
This article is contributed. See the original author and article here.
Seattle—April 17, 2024—Today, we are pleased to announce the release of document translation (preview) and transliteration features for Azure AI Translator containers. All Translator container customers will get these new features automatically as part of the update.
Translator containers provide users with the capability to host the Azure AI Translator API on their own infrastructure and include all libraries, tools, and dependencies needed to run the service in any private, public, or personal computing environment. They are isolated, lightweight, portable, and are great for implementing specific security or data governance requirements.
As of today’s release, the following operations are now supported when using Azure AI Translator containers:
- Text translation: Translate the text phrases between supported source and target language(s) in real-time.
- Text transliteration: Converts text in a language from one script to another script in real-time. E.g. converting Russian language text written in Cyrillic script to Latin script.
- Document translation (Preview): Translate a document between supported source and target language while preserving the original document’s content structure and format.
When to consider using Azure AI Translator containers?
You may want to consider Azure AI Translator containers in cases where:
- there are strict data residency requirements to ensure that sensitive information remains within the company’s security boundary.
- you reside in industries such as government, military, banking, and security enforcement where the ability to translate data without exposing it to external networks is a must.
- you require the ability to maintain continuous translation capabilities while operating in disconnected environments or with limited internet access.
- optimization, cost management, and flexibility to run on-premises with existing infrastructure is a priority.
Getting started with Translator container.
Translator containers are a gated offering. You need to request container access and get approved. Refer to the prerequisites for a more detailed breakdown.
How do I get charged?
The document translation and transliteration features would be charged at different rates similar to the cloud offering.
Connected container: You’re billed monthly at the pricing tier of the Azure AI Translator resource, based on the usage and consumption. Below is an example of document translation billing metadata transmitted by Translator connected container to Azure for billing.
{
    "apiType": "texttranslation",
    "id": "f78748d7-b3a4-4aef-8f29-ddb394832219",
    "containerType": "texttranslation",
    "containerVersion": "1.0.0+2d844d094c930dc12326331b3e49515afa3635cb",
    "containerId": "4e2948413cff",
    "meter": {
        "name": "CognitiveServices.TextTranslation.Container.OneDocumentTranslatedCharacters",
        "quantity": 27.0
    },
    "requestTime": 638470710053653614,
    "customerId": "c2ab4101985142b284217b86848ff5db"
}
Disconnected container: As shown in the below usage records example, the aggregated value of ‘Billed Unit’ corresponding to the meters ‘One Document Translated Characters’ and ‘Translated Characters’ is counted towards the characters you licensed for your disconnected container usage.
{
    "type": "CommerceUsageResponse",
    "meters": [
        {
            "name": "CognitiveServices.TextTranslation.Container.OneDocumentTranslatedCharacters",
            "quantity": 1250000,
            "billedUnit": 1875000
        },
        {
            "name": "CognitiveServices.TextTranslation.Container.TranslatedCharacters",
            "quantity": 1250000,
            "billedUnit": 1250000
        }
    ],
    "apiType": "texttranslation",
    "serviceName": "texttranslation"
}
References

by Contributed | Apr 16, 2024 | Technology
This article is contributed. See the original author and article here.
The beginning of 2024 was filled with exciting new announcements and events all over the world. Coming up, we’ll be at Open Source Summit North America (16-18), LinuxFest Northwest (April 26-28), and Red Hat Summit (May 6-9). If you’ll be at any of these events, we’d love to meet you!
What’s new with Linux on Azure
Red Hat Enterprise Linux pricing update
Red Hat announced that it is updating its Red Hat Enterprise Linux (RHEL) royalty model to a scalable model, which is expected to affect all Red Hat resellers across the market. In response to Red Hat’s price changes, Azure will also be rolling out price changes for all Red Hat Enterprise Linux instances. These changes started occurring on April 1, 2024, with price decreases for Red Hat Enterprise Linux and RHEL for SAP Business Applications licenses for vCPU sizes less than 12. All other price updates will be effective July 1, 2024. Read the blog for more details.
Azure Red Hat OpenShift updates
Azure Red Hat OpenShift now offers Resource Health for clusters with integration with Azure Monitor via Signals and Alerts. Check out the following documentation to learn more: Azure Resources Health overview, Azure Red Hat OpenShift documentation, and Create Azure Monitor alert rules.
Azure Monitor VM Insights Dependency Agent support for RHEL 8.6 Linux VMs
Azure Monitor VM Insights now supports Dependency Agent for RHEL 8.6 Linux VMs, enabling you to monitor their network connections and processes in the Azure portal.

Azure IoT Edge supports Ubuntu Core Snaps
We announced that, in collaboration with Canonical, we addressed a longstanding request from our shared customers to support Ubuntu Core Snaps in Azure IoT Edge. The Tier 1 supported operating systems for Azure IoT Edge were expanded to include Ubuntu Core Snaps on AMD 64 and ARM 64. This expansion not only broadened the horizons for Azure IoT Edge applications, but also ensured seamless integration and development across a wider range of devices and systems. For more details, see documentation on Azure IoT Edge documentation.
End of support for Ubuntu 20.04 LTS for Batch pools
Batch pools with Ubuntu 20.04 LTS VM images and the Batch node agent SKU batch.node.ubuntu 20.04 will no longer be supported in Batch after 23 April 2025. If you are impacted, learn what required action you need to take and how you can get help and support if needed.
New features for Azure Linux
We’ve recently released new features for Azure Linux, including OSsku in-place migration which enables you to trigger a node image upgrade from one Linux distro to another on an existing nodepool. Read the blog from to learn about the latest Azure Linux features, upcoming feature features, and ways to stay connected with the Azure Linux team.
What’s new with Azure and open source
New documentation for capturing real-time insights (in just one click!) from your AKS cluster using Inspektor Gadget
We recently published new documentation outlining common use cases of how you can troubleshoot and debug your AKS cluster using the CNCF sandbox project, Inspektor Gadget. The documentation features a one-click experience where you can deploy Inspektor Gadget on an AKS cluster and easily experiment with the gadgets detailed in the documentation.
Microsoft open sources Retina
We released Retina as an open-source repository that helps with DevOps and SecOps related networking cases for your Kubernetes clusters. Retina is a cloud-agnostic, open-source Kubernetes Network Observability platform which helps with DevOps, SecOps and compliance use cases. It provides a centralized hub for monitoring application and network health and security, catering to Cluster Network Administrators, Cluster Security Administrators and DevOps Engineers. To learn more, visit our Retina page and read the announcement blog.

Linux and open source events

The last few months have been a busy time for events! Microsoft was speaking and attending events across the world, including FOSDEM, SCaLE 21x (Microsoft was a Gold sponsor), WASM I/O, Cloud Native Rejekts, and KubeCon Europe. Check out Brendan Burns’ blog to learn more about important enhancements and innovations in Azure, Azure Kubernetes Service (AKS), and our open-source projects. You’ll also find us at more events soon, we hope to see you there!
What’s coming up next
Open Source Summit North America (April 16-18)
Join Microsoft at Open Source North America in Seattle! Come meet us at booth P6 to connect with Microsoft experts and see the latest open-source technologies in action. Also, be sure to check out all the exciting Microsoft sessions to learn more about Microsoft’s contributions to the open source community, best practices for using open source technologies, and insights into emerging trends in open source. Read this blog to learn more.
LinuxFest Northwest (April 26-28)
Attending LinuxFest Northwest? Be sure to check out the session from Sudhanva Huruli, Senior Product Manager at Microsoft, who will share learnings from releasing Azure Linux, Microsoft’s open source Linux distribution.
Red Hat Summit (May 6-9)
Microsoft will be a Platinum sponsor at Red Hat Summit, which is taking place in Denver, Colorado on May 6-9. Visit the us at booth #202 to connect with experts and attend the Microsoft sessions to discover best practices for running Red Hat workloads on Azure.
Upcoming End of Life (EOL), End of Support (ES), and/or End of Maintenance (EOM)
- CentOS Linux 7: CentOS 7 will reach EOL on June 30, 2024. Customers will need to migrate to a new operating system to continue receiving updates, security patches, and new features. Read the documentation for CentOS migration options and paths in Azure.
- RHEL 7: RHEL 7 will reach EOM on June 30, 2024. Customers will need to upgrade to a newer version of RHEL or purchase Extended Lifecycle Support (ELS) from Red Hat to continue to receive security updates and bug fixes. We recommend upgrading to the latest version of RHEL if possible to take full advantage of new features, ongoing support and more.
- RHEL 6: RHEL 6 Extended Life Cycle Support (ELS) will end on June 30,2024. Customers will need to migrate to a newer version of RHEL to take full advantage of new features, security enhancements, bug fixes, ongoing support and more.
Bonus content
- Watch the Red Hat on Azure Microsoft Mechanics video to learn why Azure is the right place to run your Red Hat workloads
- Watch the Linux on Azure Mechanics Video discover why you should run your Linux workloads on Azure.
- Are you currently using CentOS and looking to migrate to a new operating system on Azure? Watch the on-demand webinar on navigating the end of CentOS with Ubuntu on Azure.
- Did you know you can use Inspektor Gadget on AKS clusters via VS Code? Check out the demo here.
If you have any feedback or questions, please drop them in the comments.
by Contributed | Apr 15, 2024 | Technology
This article is contributed. See the original author and article here.
With more than 800,000 organizations depending on Microsoft Entra to navigate the constantly evolving identity and network access threat landscape, the need for increased transparency regarding product updates — particularly changes you may need to take action on — is critical.
Today, I’m thrilled to announce the public preview of What’s New in Microsoft Entra. This new hub in the Microsoft Entra admin center offers you a centralized view of our roadmap and change announcements across the Microsoft Entra identity and network access portfolio. In this article, I’ll show you how admins can get the most from what’s new to stay informed about Entra product updates and actionable insights.
Discover what’s new in the Microsoft Entra admin center
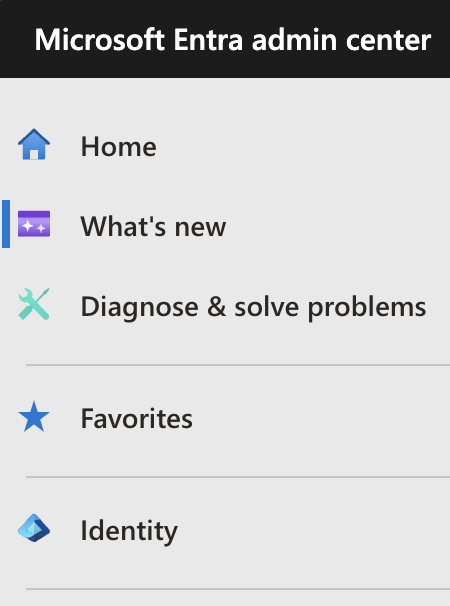
Because you’ll want visibility to product updates often, we’ve added what’s new to the top section of the Microsoft Entra admin center navigation pane.
Figure 1: What’s new is available from the top of the navigation pane in the Microsoft Entra admin center.
What’s new is not available in Azure portal, so we encourage you to migrate to the Microsoft Entra admin center if you haven’t already. It’s a great way to manage and gain cohesive visibility across all the identity and network access solutions.
Overview of what’s new functionality
What’s new offers a consolidated view of Microsoft Entra product updates categorized as Roadmap and Change announcements. The Roadmap tab includes public previews and recent general availability releases, while Change announcements detail modifications to existing features.
Highlights tab
To make your life easier, the Highlights tab summarizes important product launches and impactful changes.
 Figure 2: The highlights tab of what’s new is a quick overview of key product launches and impactful changes.
Clicking through the items on the highlights tab allows you to get details and links to documentation to configure policies.
 Figure 3: Click View details to learn more about an announcement.
Roadmap tab
The Roadmap tab allows you to explore the specifics of public previews and recent general availability releases.
 Figure 4: The Roadmap tab lists the current public preview and recent general availability releases.
To know more, you can click on a title for details of that release. Click ‘Learn more’ to open the related documentation.
 Figure 5: Learn more about an announcement by clicking its title.
Change Announcements tab
Change announcements include upcoming breaking changes, deprecations, retirements, UX changes and features becoming Microsoft-managed.
 Figure 6: Change announcements tab displays changes to the existing features.
You can customize your view according to your preferences, by sorting or by applying filters to prepare a change implementation plan.
 Figure 7: Apply filters, sort by columns to create a customized view.
What’s next?
We’ll continue to extend this transparency into Entra product updates and look forward to elevating your experience to new heights. We would love to hear your feedback on this new capability, as well as what would be most useful to you. Explore what’s new in Microsoft Entra now.
Best regards,
Shobhit Sahay
Learn more about Microsoft identity:
by Contributed | Apr 14, 2024 | Technology
This article is contributed. See the original author and article here.
Unleashing Your Potential with Cloud Ready Skills
Are you a student or professional looking to enhance your technical skills?
Are you looking to kickstart your employability & take part in some friendly rivalry against other students?
Register for the University AI Cloud Challenge 2024 for your Microsoft Professional certification in AI whilst competing with other university students to gain top spot on our leaderboard and win prizes!
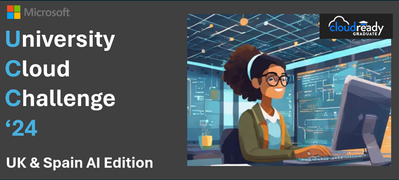
What: University Cloud Challenge ’24 UK & Spain AI Edition
Where: Online any student from UK or Spain based University or College
When: Live Webinar kick off session 2pm GMT 15th of April 2024 (available on demand after the 15th)
How: Register now: https://aka.ms/UCC24-AI
Register now to gain access to:
FREE access to live kick off webinar session
FREE practice assessment
FREE exam for the Microsoft Azure AI Fundamentals certification (AI-900)
Note: Exams to be taken between 15th April and 14th of May 2024

Help your university win the University AI Cloud Challenge!
Join the University AI Cloud Challenge 2024 and unlock your potential with cloud-ready skills. Gain a Microsoft Professional certification in AI, compete with students across the UK and Spain, and win exciting prizes. Register now to access our live webinar, free practice assessment, and free AI-900 exam. Help your university top our leaderboard and become the 2024 Student Learning Champion. Register, learn, and certify at no cost. Start your cloud journey today.
The race is on to find the 2024 champion Student Learning Campions for UK and Spain. Students Register, learn and certify at no cost!
University Leaderboard: You can view the current leaderboard here: (coming soon, after the first live webinar)
Scoring
Your university will score points for your activity. Points will be awarded as follows:
- Student Registration 1 point
- Student attends webinar 10 points
- Student access Microsoft Learn 10 points
- Student completed AI-900 exam – actual exam score converted to points (out of 1000)
Prizes
The University AI Cloud Challenge 2024 award will be presented to the university which scores the highest total score for all of their students that compete.
A box of Microsoft branded ‘swag’ will also be issued to the top 3 scoring universities.
Please review the terms and conditions here.
by Contributed | Apr 12, 2024 | Technology
This article is contributed. See the original author and article here.
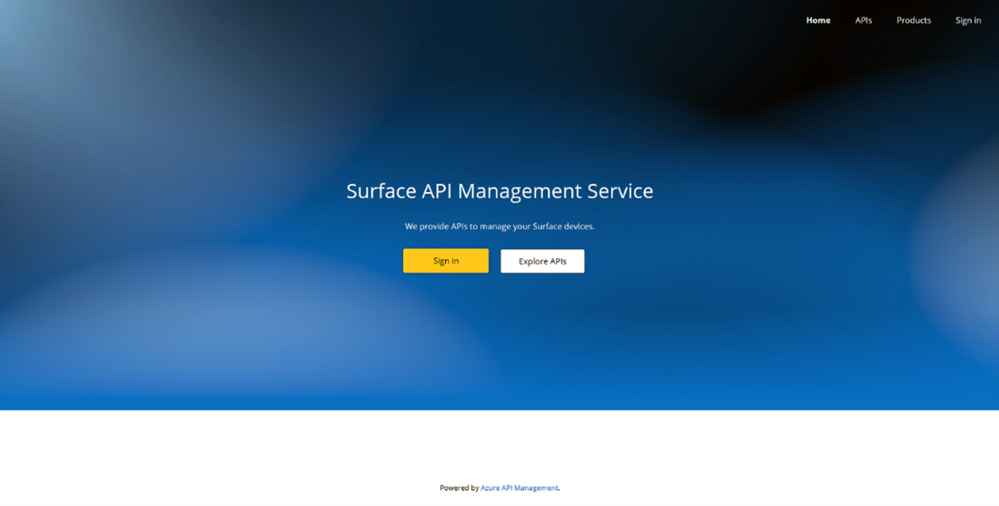
Our goal is to support our customers’ needs, wherever they might be. To this end, we’re introducing the Surface API Management Service, aimed at simplifying how you access information about your devices, coverage and insights.
Extend Surface Management Portal
This service builds on the familiar Surface Management Portal, enabling IT admins to directly access Microsoft coverage and entitlement information for their devices via API endpoints. It’s a practical enhancement for those already using the portal, designed to make device management more straightforward.
The service at a glance
The Surface API Management Service is an API management system that allows you to gain access to APIs that provide you with information about your devices.
These APIs serve as a direct conduit for customers seeking to streamline their asset management processes. By seamlessly connecting to the API, IT admins gain immediate access to critical device and warranty information, essential for effective asset oversight. Tailored specifically for Surface customers, this integration offers a hassle-free solution, eliminating the need for convoluted data acquisition methods. Now, with the simple integration of this API, customers can quickly retrieve pertinent details, empowering organizations to make informed decisions and optimize their asset management strategies.
Our first launch experience will allow current Surface Management Portal users to get their Microsoft coverage and entitlement information for their devices directly through API endpoints. Through our portal you can also see more of the performance and usage of the APIs across the globe with Surface API Management Service Reports.

Get access to Surface API Management Services
To access, you need an active Surface Management Portal Account and a completed customer validation check. (If you have access to create service requests within Surface Management Portal you have been approved.)
Email request to surfaceapimanagement@microsoft.com:
Subject: “Requesting Access to Surface API Management Service”
Include the following info:
- Company Name
- Tenant ID
- Tenant primary domain (e.g. contoso.onmicrosoft.com)
- Application (client) ID*
- Estimated quantity of Intune-registered Surface devices in your organization
|
Get started
To get started with using the APIs, see the Readme on GitHub.

Recent Comments