by Contributed | Sep 20, 2024 | Technology
This article is contributed. See the original author and article here.
What is Azure Policy?
Azure Policy is a service that allows you to create, assign, and manage policies that govern your Azure resources. Policies are rules that define the desired state and configuration of your resources, such as the location, size, tags, and properties. Policies can also audit the compliance status of your resources and report any violations.
With Azure Policy, you can ensure that your resources follow the best practices and standards that you define for your organization. You can also use Azure Policy to implement cost management, security, and regulatory compliance for your cloud environment.
How does Azure Policy work?
Azure Policy works by evaluating your resources against the policies that you assign to them. You can assign policies at different levels of scope, such as the management group, subscription, resource group, or resource level. You can also create policy initiatives, which are collections of policies that work together to achieve a specific goal.
When you assign a policy, you can choose to apply it in audit mode or enforce mode. Audit mode will only monitor and report the compliance status of your resources, while enforce mode will prevent any non-compliant actions from taking place. For example, you can create a policy that restricts the allowed locations for your resources, and assign it in enforce mode. This will prevent any users from creating or moving resources to locations that are not allowed by the policy.
Azure Policy evaluates your resources periodically and whenever there is a change in the resource or the policy. You can view the compliance status of your resources and policies in the Azure portal, or use the Azure Policy APIs to integrate with other tools and services. You can also use Azure Policy to remediate any non-compliant resources by applying the desired configuration automatically or manually.
Why is Azure Policy useful for cloud governance?
Azure Policy is a powerful tool for cloud governance, because it enables you to define and enforce the rules and standards that you want your resources to follow. With Azure Policy, you can:
– Achieve consistency and compliance across your cloud environment, by ensuring that your resources are configured according to your policies.
– Reduce costs and optimize resource utilization, by limiting the types and sizes of resources that can be created or used.
– Enhance security and reduce risks, by restricting access and actions that can be performed on your resources.
– Meet regulatory and legal requirements, by complying with the policies that align with the industry standards and frameworks that apply to your organization.
Azure Policy is one of the key components of the Azure governance methodology, which provides a comprehensive approach to managing your cloud resources. By using Azure Policy, along with other services such as Azure Management Groups, Azure Blueprints, and Azure Resource Graph, you can achieve effective and efficient cloud governance for your organization.
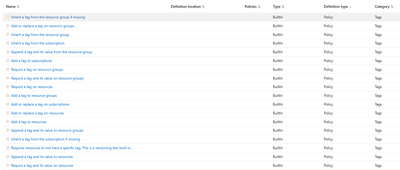
Common Azure Policies
- Enforce tag and its value: This policy enforces a required tag and its value to a resource group or a subscription.
- Allowed locations: This policy enables you to restrict the locations that your organization can specify when deploying resources.

- Audit VMs that do not use managed disks: This policy audits any virtual machines that are not configured with managed disks, which are the recommended disk storage offering for virtual machines in Azure.

- Allowed resource types: This policy enables you to specify the resource types that your organization can deploy. For example, you can allow only virtual machines and storage accounts, and deny all other resource types.

- Audit insecure SSL protocols: This policy audits the usage of SSL protocols that are considered insecure, such as SSLv2 and SSLv3, and recommends using TLS protocols instead.

What if I don’t see a policy I need to define my rules? In that case you may create a custom policy.
How to create a custom Azure policy?
- To create a custom Azure policy, you need to define a policy definition and a policy assignment.
- A policy definition is a JSON file that specifies the logic and effect of the policy.
- A policy definition consists of the following elements:
- Metadata: information about the policy, such as name, description, category, and mode.
- Parameters: optional inputs that can be used to customize the policy.
- Policy rule: the core logic of the policy, which defines the conditions and actions to evaluate the resources.
- A policy assignment is the link between a policy definition and a scope, which can be a subscription, a resource group, or a resource.
- A policy assignment can also specify parameters, exclusions, and enforcement modes for the policy.
- To create a custom Azure policy, you can use one of the following methods:
- Azure portal: a graphical user interface that allows you to create and manage policies.
- Azure PowerShell: a command-line tool that allows you to create and manage policies using scripts.
- Azure CLI: a cross-platform command-line tool that allows you to create and manage policies using commands.
- Azure Resource Manager templates: a declarative way of defining and deploying policies using JSON files.
Example of a custom Azure policy
- In this example, we will create a custom Azure policy that denies the creation of public IP addresses in a resource group.
- We will use the Azure portal to create the policy definition and the policy assignment.
- Here are the steps to follow:
- Sign in to the Azure portal and navigate to the Policy service.
- Click on Definitions and then click on + Policy definition.
- Enter a name, description, and category for the policy definition.
- Copy and paste the following JSON code in the Policy rule section:
- {
- “if”: {
- “allOf”: [
- {
- “field”: “type”,
- “equals”: “Microsoft.Network/publicIPAddresses”
- },
- {
- “field”: “Microsoft.Network/publicIPAddresses/publicIPAllocationMethod”,
- “equals”: “Dynamic”
- }
- ]
- },
- “then”: {
- “effect”: “deny”
- }
- }
- This policy rule denies the creation of public IP addresses with dynamic allocation method.
- Click on Save to create the policy definition.
- Click on Assignments and then click on + Assign policy.
- Select the scope of the policy assignment, which is the resource group where you want to apply the policy.
- Select the policy definition that you just created from the list of available policies.
- Enter a name and description for the policy assignment.
- Click on Review + create and then click on Create to create the policy assignment.
- The policy is now assigned to the resource group and will evaluate any new or existing resources in that scope.
- You can view the compliance status and details of the policy assignment in the Policy service.
Example of creating a Policy for non-compliant resources
Below is the procedure of creating a policy for identifying non-compliance resources for auditing purposes, however in certain situations you may want to enforce Azure Policy as described in the link below
Tutorial: Build policies to enforce compliance – Azure Policy | Microsoft Learn
- Create a Policy assignment
- In the search bar, type Policy and navigate to Assignment

- Select Assign Policy from the Policy Assignments pane.

- Under Available Definitions, select the appropriate policy
- Choose the correct scope for the policy (such as subscription or resource group, as an example). You also get to decide which resources are excluded from applying the policy in the Exclusions window.

- Decide whether you want to Enforce this policy (Under Policy Enforcement – leave as Enabled or if not – Disable which will still allow for compliance assessment reports which is our case for now, as we only need to know which network interfaces have public IPs assigned)
- d) Click Next – specify a managed identity under Remediation (not needed in our case),
move to Non-Compliant message

- Complete the process by clicking Review + create > Create

- View non-compliant resources
- In the Policy search bar type the name of the policy

- Click View Compliance

- Observe non-compliant resources

Based on the requirements, you may need to enforce the policy and remediate.
Follow for more blogs where options for remediations will be covered.
Disclaimer
The sample scripts are not supported under any Microsoft standard support program or service. The sample scripts are provided AS IS without warranty of any kind. Microsoft further disclaims all implied warranties including, without limitation, any implied warranties of merchantability or of fitness for a particular purpose. The entire risk arising out of the use or performance of the sample scripts and documentation remains with you. In no event shall Microsoft, its authors, or anyone else involved in the creation, production, or delivery of the scripts be liable for any damages whatsoever (including, without limitation, damages for loss of business profits, business interruption, loss of business information, or other pecuniary loss) arising out of the use of or inability to use the sample scripts or documentation, even if Microsoft has been advised of the possibility of such damages.
by Contributed | Sep 19, 2024 | Technology
This article is contributed. See the original author and article here.
Today, customers can create Diagnostic Settings in their resources to export metric data for their resources to a set of destinations. Currently, export of metrics supported via Diagnostic Settings is limited. Customers cannot export metrics with dimensions, not all metrics are supported, and it incur a few minutes of latency.
We are excited to announce a platform metrics from Azure Monitor. This powerful addition allows customers to export metrics for their Azure resources on a large scale with full fidelity and low latency, along with the new added ability to filter particular metrics while configuring exports.
Azure Monitor Metrics Export is configurable through Data Collection Rules (DCR), which provides the capability to route Azure resource metrics data to Azure Storage Accounts, Azure Event Hubs and Azure Log Analytics Workspace for 18 resource types and 10 Azure public regions.
Here are some key features and benefits of Azure Monitor Metrics Export –
- Easily scalable: DCR is the de facto collection configuration mechanism in Azure Monitor; it allows setting a collection config once and applying it at scale to many resources. DCR now provides an easier solution to span across subscriptions to export resources metrics at scale and provides flexibility if more resources need to be added in an existing DCR configuration.
- Flexibility on what to collect: Customers can filter collection with a few select metrics or all metrics for a given set of resources, allowing for volume and cost control. With the new enhanced experience, customers can easily access the metrics they deem most important.
- Export with full fidelity and low latency: Resource metric data is exported with dimensional information which provides ease of correlation. This feature significantly improves the metrics export latency.
By using Azure Monitor Metrics export, organizations can streamline their monitoring processes and improve their infrastructure’s overall performance. We look forward to seeing the innovative solutions and exciting use cases that developers and organizations will create using this feature.
Azure Monitor Metrics Export is being used by several customers in Private Preview. Here is what some of them have to say about their experience:
Customer Quote
“Previously, running out of disk space caused support teams to halt their work to clear space, but the feature now enables them to be warned beforehand, reducing manual intervention and outages doublefold (2X).– Franscois Piennaar (Cloud/Database Engineer; Tata Steel NL)
The new Azure Monitor Metrics Export will be charged at a rate of $0.003/1000 metrics samples (Refer to pricing details here). Please note current users of the Diagnostic Settings will see no change in pricing.
Learn more about Azure Monitor Metrics Export – https://learn.microsoft.com/en-us/azure/azure-monitor/essentials/data-collection-metrics
by Contributed | Sep 18, 2024 | Technology
This article is contributed. See the original author and article here.
Build a security-first organization with up-to-date cybersecurity skills
Like others around the globe, your organization is likely dealing with an ever-increasing number of cyberthreats and you need skilled team members to help address them. According to the World Economic Forum Future of Jobs Report 2023, cybersecurity is near the top of the list of the fastest-growing job roles. There’s an increasing need for professionals with cybersecurity skills—a need that will continue to grow in the future. In the world of business today, every member of every team must be ready to address cyberthreats.
At Microsoft, one of the ways that we help counter these threats is to promote a security-first culture—security above all else. We continuously apply what we’ve learned from security incidents to improve our methods and practices. To that end, we’ve created the Microsoft Secure Future Initiative (SFI), our commitment to advance the way we design, build, test, and operate our technology so our solutions can meet the highest possible security standards.
Empower your workforce to counter cyberthreats
Strengthening your organization’s cybersecurity posture and supporting a security-first culture involves upskilling across all roles to handle cyberthreats. Get started on Microsoft Learn for Organizations, where you can find the latest team training resources and opportunities, including cybersecurity training to build skills that your teams can put to work right away. Check out the self-paced, on-demand, Microsoft Official Plans highlighted there, including:
Plus, Microsoft Learn for Organizations offers a variety of practical insights, inspiring success stories, and additional resources for teams that are skilling up to keep pace with fast-evolving technologies and close the skills gap.
Join us for an important cybersecurity skills webinar
Jump-start a skill-building plan to help your organization address threats to your data, assets, systems, and more. Join us online for the Microsoft Secure Future Initiative Master Class: Red vs. blue skills to counter cyberthreats, on September 25, 2024, from 9:00 AM to 11:00 AM Pacific Time, a webinar that focuses on monitoring and detecting threats and accelerating remediation—all part of the SFI pillars. In this important webinar, you can:
- Learn from experts. Hear from Microsoft Security experts, along with Microsoft Certified Trainers from our Training Services Partner NetCom Learning.
- Experience a red versus blue team demonstration. See Microsoft Security solutions, like Microsoft Sentinel, Microsoft Defender for Endpoint, and Defender XDR in action through real-world cyberattack scenarios.
- Discover skills to help secure your organization. Explore learning paths to upskill your team and protect against evolving cyberthreats.
- Join a live Q&A with experts. Get answers to your security training questions from some of the best in the industry.
Reserve your spot for this webinar, and let’s build a more secure future together!

by Contributed | Sep 17, 2024 | Technology
This article is contributed. See the original author and article here.
With the slate of enhancements for Microsoft 365 Copilot just announced, I thought it’d be interesting to take a look at some everyday use cases and see how you can take advantage of some of them. Today, we’ll briefly examine what enterprise data protection (EDP) in Microsoft 365 Copilot and Microsoft Copilot can help you to confidently do, and why we think it’s so important.
First, what is EDP? It refers to controls and commitments, under the Data Protection Addendum (DPA) and Product Terms, that apply to customer data for users of Microsoft 365 Copilot and Microsoft Copilot. It applies to both Microsoft 365 Copilot and Microsoft Copilot when you’re signed in with your Entra ID.
Check out the link to get the details, but at a high level, it means your data is private and secure and is not used to train the foundation models. This allows you to confidently leverage Copilot to get your job done without risking data leakage. Now let’s take a look at how this can come in handy!
Tip 1: Find out how your product stacks up with competitors
Let’s say you have an internal document that lays out the specifications for your latest product and you need to figure out how to bring it to the market. EDP means that I can attach the file to my prompt knowing it will stay secure as Copilot reasons over it, combining information from my data with the latest information on the web, to provide me with a response.
1. Here I am, in the “Web” scope of Microsoft 365 Copilot.
 A screenshot of Microsoft Copilot
2. I enter the prompt,
“ Use the product specifications from this document, and create a table comparing my new ebike to other offerings on the market. I want to find out how my product stacks up, and get ideas for what I should price my bike at.”
3. I select the paperclip icon on the bottom right of the chat window and select the product specification document from my files.
 A screenshot of the chat window with a prompt and file linked
 A screenshot of the results returned by Copilot in a table
 A screenshot of the response provided by Copilot with analysis on competitor offerings
Copilot provides me with the table I asked for, while also providing some of the analysis and pricing strategy I had asked about and the information in my exchange with Copilot is not going to train foundation models or be risk being leaked.
Tip 2: Simplify collaboration further with Microsoft 365 Copilot
If you have a Microsoft 365 Copilot license, you can further simplify collaboration with your coworkers using Copilot Pages.
1. In the work scope of Business Chat, I put in the same prompt, this time in the Work scope of Microsoft 365 Copilot. This time, to link my file to the prompt, I simply use the forward slash button.
 A screenshot of Microsoft 365 Copilot Business Chat
2. With the response from Copilot, I then select “Edit in page”. Copilot automatically brings over its response to a Page.
 A screenshot of the response from Copilot, with the button “Edit in Page”
3. On the page, I’m able to either select share on the top right, or directly tag my coworkers by @ mentioning them and immediately collaborate on the content.
 A screenshot of Business Chat and a Page component
Alternatively, I could share either a link to the page, or copy the page component into an email, the same way I would a Loop component (If you want to learn more the experience, we explored using Copilot in Loop in my previous blog here).
For instance, I could @ mention Bri, and ask her to take a look and add her thoughts and ideas. She could do this directly on the page, and even ask Copilot to help her.
These small but simple ways to use Copilot have significantly improved and changed the way I work, tackle challenges, and collaborate.
I’d love to hear what other ways you might find this helpful to you!

by Contributed | Sep 16, 2024 | Technology
This article is contributed. See the original author and article here.
Microsoft 365 offers the cloud-backed apps, security, and storage that customers worldwide rely on to achieve more in a connected world – and lays a secure foundation for leveraging generative AI to go even further. Investing in our cloud productivity solutions and the AI-powered innovation they support will continue to be Microsoft’s priority.
Still, we know that some customer scenarios require a different approach. Some devices must never be connected to the internet; others need to remain unchanged for years at a time. We remain committed to supporting our customers and these scenarios. Earlier this year, we offered a public preview of Microsoft Office Long Term Servicing Channel (LTSC) 2024. Today, we’re announcing the general availability of this next perpetual version of Office for commercial and government customers.
An updated solution for specialized needs
Office LTSC 2024 offers a locked-in-time version of familiar productivity tools, updated with a subset of the features that have been added to Microsoft 365 Apps for enterprise over the last three years. New features for this release include Dynamic Charts and more than a dozen new text and array functions in Excel, enhanced search and meeting creation options in Outlook, and improvements to performance, security, and accessibility. Learn more about what’s new.
Office LTSC 2024 will be supported for five years under the Fixed Lifecycle Policy, and – like prior versions – will be deployable alongside Microsoft 365 Apps using a common set of tools to enable customers to more easily manage hybrid environments. Learn more about how to deploy and manage Office LTSC at Overview of Office LTSC 2024.
Choosing the best productivity suite for your organization
While Office LTSC 2024 offers many significant improvements over the previous Office LTSC release, as an on-premises product it does not include the cloud-based capabilities of Microsoft 365 Apps, like real-time collaboration, AI-driven automation, or cloud-backed security and compliance capabilities. And for customers who need additional flexibility on deployment and connectivity – but not a fully disconnected solution – Microsoft 365 has options that can help. For example, device-based licensing can simplify management of Microsoft 365 Apps in settings like computer labs or hospitals where devices are shared by many users. And extended offline access can be used to maintain access to Microsoft 365 Apps on devices that need to be disconnected from the internet for up to six months at a time. Microsoft 365 (or Office 365) is also required to subscribe to Microsoft 365 Copilot; as a disconnected product, Office LTSC does not qualify.
|
Microsoft 365 Apps [1] |
Office LTSC 2024 |
Apps included |
Word, Excel, PowerPoint, Outlook, OneNote, OneDrive, Microsoft Access (Windows Only), Microsoft Publisher (Windows Only) [2], Sway, Microsoft Forms |
Word, Excel, PowerPoint, Outlook, OneDrive, OneNote, Microsoft Access (Windows Only) [3] |
Desktop apps |
Premium apps installed on up to 5 PCs or Macs |

Classic apps installed on 1 PC or Mac |
Mobile apps |

Create & edit on up to 5 phones + 5 tablets |
 |
Web apps |

Create & edit online |
 |
Eligible for Microsoft 365 Copilot add-on [4] |
 |
 |
Cloud storage |

1 TB per user |
 |
Feature updates |

New features and security updates delivered via Current, Monthly, or Semi-Annual channels |

Security updates only |
Shared devices |

Shared computer activation or device-based licensing available |

Device-based licensing only |
Connectivity requirements |
Internet connection required for activation, license validation, and internet-based functionality. Extended offline access available to enable devices to stay disconnected for up to six months at a time. |
No internet connection required |
Embracing the future of work
Microsoft 365 offers the most secure, productive, and cost-effective solution for most organizations, and positions customers to unlock the transformative power of AI with Microsoft 365 Copilot. Especially as we approach the end of support for Office 2016 and Office 2019 on October 14, 2025, we encourage customers still using these solutions to transition to a Microsoft 365 subscription that suits their needs as a small business or a larger organization. And for scenarios where that is not possible – where a disconnected, locked-in-time solution is required – this new release reflects our commitment to supporting that need.
Learn more
Office LTSC 2024 is available to existing commercial and government volume-licensed customers today, along with new on-premises versions of Project and Visio. These products will be generally available to all customers on October 1. We will share more about Office 2024 for consumers in the coming weeks. For more information about Office LTSC 2024 and how it compares to Microsoft 365 Apps for enterprise, please visit the Office LTSC plan comparison page. If your organization is ready to take the next step toward the AI-powered future, find out how to get started with Microsoft 365 today.
Notes:
[1] Applies to Microsoft 365 Apps for enterprise and Microsoft 365 Apps for business. All Microsoft 365 and Office 365 suites that include desktop apps also include everything listed here – and more. Learn about the available options.
[2] Microsoft Publisher will be retiring in October 2026.
[3] Microsoft Access is included only with Office LTSC Professional Plus.
[4] Microsoft 365 Copilot may not be available for all markets and languages. To purchase, customers must have a qualifying Microsoft 365 plan for enterprise or business.

Recent Comments