by Contributed | Mar 4, 2022 | Technology
This article is contributed. See the original author and article here.
Microsoft Defender for Cloud provides advanced threat detection capabilities across your cloud workloads. This includes comprehensive coverage plans for compute, PaaS and data resources in your environment. Before enabling Defender for Cloud across subscriptions, customers are often interested in having a cost estimation to make sure the cost aligns with the team’s budget. We previously released the Microsoft Defender for Storage Price Estimation Workbook, which was widely and positively received by customers. Based on customer feedback, we have extended this offering by creating one comprehensive workbook that covers most Microsoft Defender for Cloud plans. This includes Defender for Key Vault, Containers, App Service, Servers, Storage and Databases. After reading this blog, you can deploy the workbook from our GitHub community and be sure to leave your feedback to be considered for future enhancements. Please remember these numbers are only estimated based on retail prices and do not provide actual billing data. For reference on how these prices are calculated, visit the Pricing—Microsoft Defender | Microsoft Azure.
Overview
When first opening the workbook, an overview page is shown that displays your overall Microsoft Defender for Cloud coverage across all selected subscriptions. The coverage is represented through the green and gray “on/off” tabs. If the plan is enabled on that subscription, the tab shows green. If the plan is not enabled, the tab shows gray. When clicking on “on/off” in this table, you will be redirected to a subscription’s Defender for Cloud plans page from where you can directly enable additional plans.

Defender for App Service

This workbook considers all App Services with and without Microsoft Defender for App Services enabled across your selected subscription. It is based on the retail price of $0.02 USD per App Service per hour. The column “Weekly Runtime” is showing CPU time pulled from the past 7 days. In the column “Estimated Price (7 days)”, the CPU time is multiplied by .02 to give an estimated weekly price. The “Estimated Monthly Price” uses the results of the “Estimated Price (7 days) to give the estimated price for one month.
Defender for Containers
 The Defender for Containers blade shows price estimations for two different environments: Azure Kubernetes Services (AKS) clusters, and Azure Arc-enabled Kubernetes clusters. For AKS, price estimation is calculated based on the average number of worker nodes in this cluster during the past 30 days. Defender for Containers pricing is based on the average number of vCores used in a cluster so based on the average number of nodes and the VM size, we can calculate a valid price estimation. In case the workbook cannot access telemetry for average node numbers, the table will show a price estimation based on the current number of vCores used in the AKS cluster.
For Azure Arc-enabled Kubernetes clusters, price estimation is based on the number of vCores that are configured in this cluster. Both tables will also show the number of container images that can be scanned at no additional cost based on the number of vCores used in both, AKS and Azure Arc-enabled Kubernetes clusters.
Defender for Databases

The Defender for Databases dashboard covers three key environments: Defender for SQL on Azure SQL Databases, Defender for SQL servers on machines and Open-source relational databases.

All estimations are based on the retail price of $15 USD per resource per month. “Defender for SQL on Azure SQL databases” includes Azure SQL Database’s Single databases and Elastic pools, Azure SQL Managed Instances and Azure Synapse (formerly SQL DW). “Defender for SQL servers on machines” includes all SQL servers on Azure Virtual Machines and Arc Enabled SQL server. Lastly, “Open-source relational databases” looks at Azure Database for PostgreSQL, Azure Database for MySQL single server and Azure Database for MariaDB single server. The logic and calculation for all three environments are the same. On the backend, the workbook runs a query to find all SQL or database resources in the selected environment and multiplies each one by 15 to get the estimated monthly cost.
Defender for Key Vault

The Defender for Key Vault dashboard considers all Key Vaults with or without Defender for Key Vault enabled on the selected subscriptions. The calculations are based on the retail price of $0.02 USD per 10k transactions. The “Estimated Cost (7 days)” column takes the total Key Vault transactions of the last 7 days, divides them by 10K and multiples them by 0.02. In “Estimated Monthly Price”, the results of “Estimated Cost (7 days)” are multiplied by 4.35 to get the monthly estimate.
Defender for Servers

The Defender for Servers dashboard considers all servers on your subscriptions with or without Defender for Servers enabled. This dashboard includes estimations for Azure and hybrid servers connected through Azure Arc. The estimation is based on the retail price of $0.02 USD per server per hour. This dashboard includes the option to select a Log Analytics Workspaces. By selecting a workspace, the workbook can retrieve historical data for how many hours the machine has been running in the past seven days. If there is no historical data for the machine, the workbook assumes the machine has been running for 24hrs in the past 7 days. The column “Weekly Runtime” presents the total number of running hours from the past 7 days using the aforementioned strategies. The column “Estimated Cost (7 days)” takes the weekly hours and multiplies them by .02. Finally, in “Estimated Monthly Cost”, the result from “Estimated Cost (7 days)” is multiplied by * 4.35 to give the estimated monthly cost.
Defender for Storage

The Defender for Storage workbook looks at historical file and blob transaction data on supported storage types such as Blob Storage, Azure Files and Azure Data Lake Storage Gen 2. To learn more about the storage workbook, visit Microsoft Defender for Storage – Price Estimation Dashboard – Microsoft Tech Community.
Known Issues
Azure Monitor Metrics data backends have limits and the number of requests to fetch data might time out. To solve this, narrow your scope by reducing the selected subscriptions or resource types.
Acknowledgements
Special thanks to Fernanda Vela, Helder Pinto, Lili Davoudian, Sarah Kriwet and Tom Janetscheck for contributing their code to this consolidated workbook.
References:
by Contributed | Mar 3, 2022 | Technology
This article is contributed. See the original author and article here.
Over the past several SQL Server releases Microsoft has improved the concurrency and scalability of the tempdb database. Starting in SQL Server 2016 several improvements address best practices in the setup process, i.e. when there are multiple tempdb data files all files autogrow and grow by the same amount.
Additionally, starting in SQL Server 2019 we added the memory optimized metadata capability to tempdb and eliminated most PFS contention with concurrent PFS updates.
In SQL Server 2022 we are now addressing another common area of contention by introducing concurrent GAM and SGAM updates.
In previous releases, we may witness GAM contention different threads want to allocate or deallocate extents represented on the same GAM pages. Because of this contention, throughput is decreased and workloads that require many updates to the GAM page will take longer to complete. This is due to the workload volume and the use of repetitive create-and-drop operations, table variables, worktables that are associated with CURSORS, ORDER BYs, GROUP BYs, and work files that are associated with HASH PLANS.
The Concurrent GAM Updates feature in SQL Server 2022 adds the concurrent GAM and SGAM updates capability to avoid tempdb contention.
With GAM and SGAM contention being addressed, customer workloads will be much more scalable and will provide even better throughput.
SQL Server has improved tempdb in every single release and SQL Server 2022 is no exception.
Resources:
tempdb database
Recommendations to reduce allocation contention in SQL Server tempdb database
Learn more about SQL Server 2022
Register to apply for the SQL Server 2022 Early Adoption Program and stay informed
Watch technical deep-dives on SQL Server 2022
SQL Server 2022 Playlist
by Contributed | Mar 2, 2022 | Technology
This article is contributed. See the original author and article here.
Watchlists are a critical component to enhance security operations and provide data correlation. Up till now, watchlist files have been limited to 3.8 MB per upload. We are excited to announce that Watchlists now support up to 500 MB file size per upload!
There are many scenarios where you will need to reference and look up a larger dataset in your detection rules or investigation. Here are some sample use cases you can use the large watchlists for.
- Map database of IPv4 address networks with their respective geographical location from known sources such as MaxMind or IP2Location.
- Leverage the CVE vulnerability database to help enrich incidents and alerts that may be related to a known exploit.
- Enrich alerts and incidents with custom datasets that are larger than 3.8MB in size.
How to create a large watchlist
To create a large watchlist, you will need to upload a watchlist file in an Azure Storage account. Then create a shared access signature (SAS) URL for Microsoft Sentinel to securely retrieve the watchlist data. Finally upload the watchlist to your workspace in Microsoft Sentinel.
Check out our step-by-step instructions to create a large watchlist.
Upload the watchlist file in an Azure Storage account and generate a secure SAS URL
 Upload a large watchlist in Microsoft Sentinel portal
Considerations:
- Creating a watchlist from a local file is still limited to 3.8 MB per upload. The increased limit applies only to watchlist files stored in Azure Storage.
- Microsoft Sentinel will require an Azure Storage Blob SAS URL to access and download the file for processing and ingestion into the watchlist table. The SAS URL must have at least 6 hours away from its expiry time.
- An entry in the CSV file must not exceed 10,240 characters per line.
Further reading resources:
Try out this new watchlist capability and let us know your feedback!

by Contributed | Mar 1, 2022 | Business, Microsoft 365, Microsoft Teams, Technology, Windows 365
This article is contributed. See the original author and article here.
Over the past two years, businesses of all industries and sizes have had to adapt to new ways of working, a challenging operating environment, and ever-changing customer expectations. With all this change, it’s hard to overstate the impact of having secure and reliable productivity and collaboration tools.
The post Unleash the power of your small business with Microsoft 365 appeared first on Microsoft 365 Blog.
Brought to you by Dr. Ware, Microsoft Office 365 Silver Partner, Charleston SC.
by Contributed | Feb 28, 2022 | Technology
This article is contributed. See the original author and article here.
We are happy to announce self-service trials for Microsoft Visio. As of today, you can sign up for free 30-day trials of Visio Plan 1 or Visio Plan 2 on existing Microsoft 365 tenants managed by your organization using your business login. Then, test out the full functionality of the Visio web and desktop apps before directly purchasing subscriptions.
With self-service trials, you can sign up for trial licenses for up to five users and then, with a limited admin role, assign the trial licenses to your colleagues in the Microsoft 365 admin center. If you run in to any issues signing up for your trial licenses, please contact your IT department.
These new self-service trial capabilities are available worldwide except for India. They are not available for Education or Government customers.
Please note: You will be asked to provide credit card details at signup. At the end of your 30-day trial, you will be charged the applicable subscription fee to continue using Visio. Cancel at any time to stop future charges.
Determine which Visio trial is right for you
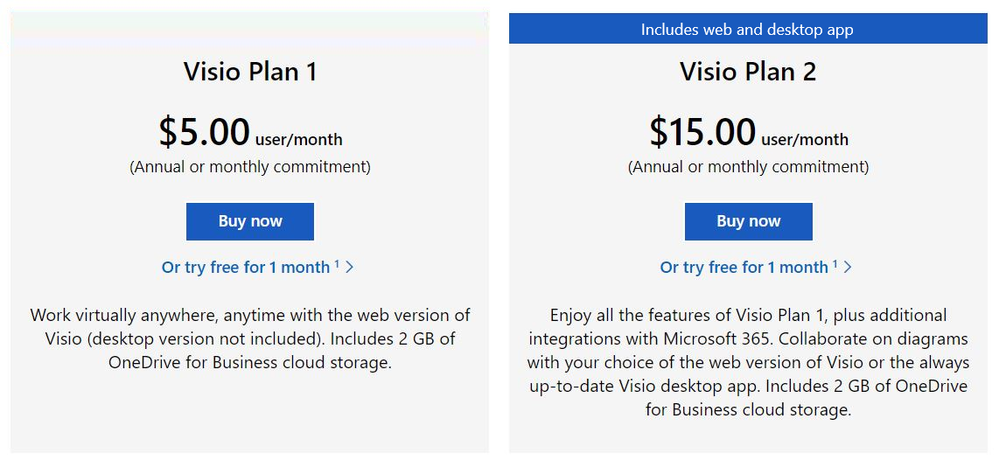
With the Visio Plan 1 trial, you and your team members will have full access to the Visio web app—including dozens of diagram templates and hundreds of shapes—and 2 GB of OneDrive for Business cloud storage. The Visio Plan 2 trial includes all the features in the Visio Plan 1 trial, plus additional templates, shapes, and advanced features in the Visio desktop app. During both trials, you’ll be able to create, edit, share, and collaborate on diagrams and flowcharts using Visio or Microsoft Teams (requires a Microsoft 365 subscription to use Teams).
How to sign up
The 30-day trials of Visio Plan 1 and Visio Plan 2 are available for self-service signup by individuals and departments from the Visio plans and pricing comparison page. Select the corresponding trial link below the Buy Now button and complete the necessary steps.
Screenshot of Visio Plan 1 and Visio Plan 2: Click on “Or try free for 1 month” to complete the steps to start your trial
Manage trial licenses as a Global or Billing admin
The self-service trial capabilities do not compromise IT oversight or control. If you are an admin, you can use the same self-service purchase controls to disable self-service trials while making use of subscription management capabilities to oversee and manage trial licenses on the licensing page in the Microsoft 365 admin center.
If you’ve disabled the self-service purchase functionality for Visio in the past, self-service trials signup for individuals or departments will automatically allow users to request licenses directly from you. Learn more about managing self-service licenses acquired by individuals or departments in your organization.
Give us feedback about your trial experience! Please tell us what you think in the comments below or send feedback via the Visio Feedback portal.
Continue the conversation by joining us in the Microsoft 365 Tech Community! Whether you have product questions or just want to stay informed with the latest updates on new releases, tools, and blogs, Microsoft 365 Tech Community is your go-to resource to stay connected!

Recent Comments