by Contributed | Mar 20, 2022 | Technology
This article is contributed. See the original author and article here.
Greetings Access Community, I had a great question from Klaus Oberdalhoff in the Denver User Group last month, as well as numerous questions from the community on IE11 and its impending retirement. I wanted post this to help clear the air on these concerns.
Here is a quick set of Q&A we have put together on many of the questions we have seen across our MVPs and community.
Q&A on IE 11 retirement
Q: Is it true according to Microsoft, the old internet browser and thus the web browser control will soon be disabled / disconnected?
A: No this is not the case. The Webview (trident) control is still being supported as part of Windows. The MSHTML (Trident) engine is the underlying platform for Internet Explorer 11. This is the same engine used by IE mode and it will continue to be supported (in other words, unaffected by this announcement). Both WebOC and the MSHTA app will continue to be supported as they rely on the MSHTML engine which is unaffected by this announcement. If you have a custom or third-party app that relies on the MSHTML platform, you can expect it to continue to work. For future app development, we recommend using WebView2.
We recommend you review this detailed Q&A on the IE 11 Desktop App Retirement
Q: Does that mean that the existing Access applications that use the IE11 (Trident) web browser control no longer work?
A: No this does not mean existing applications no longer work. Existing applications will continue to be able to run using the MSHTML engine that is still supported
Q: Does this mean Access applications will be stranded without a new web browser control in place for Access using Webview2 aka Anaheim?
A: No. The MSHTML (Trident) engine is still supported until 2029. Eventually we will have a new browser control in place that supports Webview2.
Q: How long do I have before I have to worry about updating my Access applications to support webview2
A: You have until 2029 before the MSHTML (Trident) engine no longer supported. But once we have a new forms control supporting the new Webview2 browser control for Access we recommend all developers move to that in line with Microsoft guidelines to ensure your experience compliance with modern web standards and security.
Q: When are you going to have a new Access browser control that supports Edge and Webview 2?
A: We are planning and specing this work now working with teams across Office Platforms to enable a totally new browser control with Webview 2 support. Our hope is to have this done by the end of the 2022 calendar year or beginning of 2023. When this work is completed custom or 3rd party apps will be able to use either the legacy or new control. Once we release, we will recommend all apps move to the Webview2 control to ensure the most up to date technology and security.
We would love to get your feedback on what you need here and use cases you see we need to address in our new forms control as we are refining the specs now for this work.
Please send your feedback with the name “New Browser Control Feature Request” in the description title at Microsoft Q&A using the office-access-dev tag

by Contributed | Mar 18, 2022 | Technology
This article is contributed. See the original author and article here.
I am encountering two overriding themes when talking to data architects today about their data and analytics strategy – which take very different sides, practically at the extreme ends of the discussion about the future design of the data platform.
- The Data Lakehouse. The focus here is how traditional Data Lakes have now advanced so that the capabilities previously provided by the Data Warehouse can now be replicated within the Data Lake. The Data Lakehouse approach proposes using data structures and data management features in a data lake that are similar to those previously found in a data warehouse:
Databricks – What is a data lakehouse
- Snowflake as your data platform. Snowflake has quickly become a major player in the data warehousing market, making use of its cloud native architecture to drive market share. They have taken this a step further now though and are now pushing the concept of “Make Snowflake Your Data Lake”
 Snowflake for Data Lakes
So on one-hand, the Data Lakehouse advocates says “There is no longer a need for a relational database, do it all in the data lake”, while Snowflake is saying “Build your data lake in a relational database”. Is there really such a stark divergence of views about how to architect a modern data platform?
While both of these architectures have some merit, a number of questions immediately spring to mind. Both of these are driven with a focus on a single technology – which immediately should ring alarm bells for any architect. Both concepts also bring baggage from the past:
- the Data Lakehouse pitch feels uncomfortably close to the “Hadoop can do it all” hype from 10 years ago, which led to vast sums being spent by organisations jumping onto this big data bandwagon; they believed the hype, invested huge amount of money into this wonder platform, only to find that it wasn’t as effective as it promised and that many of the problems with the “data warehouse” were actually due to their processes and governance that were simply replicated in the new technology.
- some of the Snowflake marketing seems to be morphing into similar concepts of the Enterprise Data Warehouse vendors of 20-30 years ago – the concept of a single data repository and technology being all you need for all your enterprise data needs – which follows a very legacy logical architecture for a product that so heavily hypes its modern physical architecture.
So how do we make sense of these competing patterns? Why is there such a big disparity between two approaches, and is there really such a major decision needed between open (spark/delta) v proprietary code (snowflake/relational) bases and repositories ? I believe that if you drill into the headline propositions, the reality is that any architecture isn’t an “either/or” but a “better together” and that a pragmatic approach should be taken. As such, whenever starting any conversation today, I tend to lead with three areas of assessment:
- What data do you have and what are your big data, BI and advanced analytical requirements? An organisation that requires mainly machine learning and anomaly detection against semi-structured data requires a very different approach to one that has more traditional BI and next best action needs driven from structured data. Also consider what works well for your data; if it is mostly structured and sourced from relational systems, why not keep it that way rather than putting it into a semi-structured form in a Lake and then layering structures back over the top; alternatively for semi-structured or constantly changing data, why force this into a relational environment that wasn’t designed for this type of data and which then requires the data to be exported out to the compute?
- What skills base do you have in IT and the business? If your workforce are relational experts and have great SQL skills, it could be a big shift for them to become Spark developers; alternatively if your key resources are teams of data scientists used to working in their tools of choice, they are unlikely to embrace a relational engine and will end up exporting all the data back out into their preferred environments.
- Azure – and any modern cloud ecosystem – is extremely flexible, it redefines the way modern compute architectures work by completely disconnecting compute and storage and provides the ability to build processes that use the right tool for the right job on a pay for what you use basis. The benefits are huge – workloads can be run much faster, more effectively and at massively reduced costs compared to “traditional” architectures, but it requires a real paradigm shift in thinking from IT architects and developers to think about using the right technology for the job and not just following their tried and tested approaches in one technology.
The responses to these 3 areas, especially 1 and 2, should determine the direction of any data platform architecture for your business. The concepts from item 3 should be front and centre for all architects and data platform decision makers though, as getting the best from your cloud investment requires new ways of thinking. What surprises me most today is that many people seem reticent to change their thinking to take advantage of these capabilities – often through a combination of not understanding what is possible, harking back to what they know, and of certain technology providers pushing the concept of “why do you need this complexity when you can do everything in one (our) tool”. While using multiple tools and technologies may seem like adding complexity if they don’t work well together, the capabilities of a well-integrated ecosystem will usually be easier to use and manage than trying to bend a single technology to do everything.
Why does Microsoft propose Azure Synapse Analytics in this area? We believe that this hybrid approach is the right way forward – that enabling efficient and effective BI, Analytics, ML and AI is possible when all your data assets are connected and managed in a cohesive fashion. A true Enterprise Data platform architecture enables better decisions and transformative processes, enabling a digital feedback loop within your organization and provide the foundation for successful analytics. One constant area of feedback we received from customers though was that while building a modern data platform was the right strategy, they wanted it to be easier to implement. IT architects and developers wanted to spend less time worrying about the plumbing – integrating the components, getting them to talk to each other – and more time building the solution. We thus set out to rearchitect and create the next generation of query processing and data management with Synapse to meet the needs of the modern, high scale, volume, velocity, and variety of data workloads. As opposed to limiting customers only to one engine, Synapse provides SQL, Spark, and Log Analytics engines within a single integrated development environment, a cloud-native analytics service engine that converges big data and data warehousing to achieve limitless scale on structured, semi-structured, and un-structured data. Purpose built engines optimized for different scenarios enable customers to yield more insights faster and with fewer resources and less cost.
 Azure Synapse Analytics
Azure Synapse Analytics is a limitless analytics service with a unified experience to ingest, explore, prepare, manage and serve data for immediate BI and machine-learning needs. So Azure Synapse Analytics isn’t a single technology, but an integrated combination of the different tools and capabilities you need to build your modern data platform, allowing you to choose the right tool for each job/step/process while removing the complexity of integrating these tools.
While Synapse can provide this flexible modern data platform architecture in a single service, the concept is open. Synapse provides Spark and dedicated SQL pool engines, but alternatively Databricks and Snowflake could replace these components within this architecture. Alternatively any combination of Synapse, other first-party, third-party, or open-source components can be used to create the modern data platform, the vast majority of which are supported within Azure.
This open combination of individual technologies should be combined within a Modern Data platform architecture to give you the ability to build the right modern data platform for your business. Take advantage of the flexibility of Azure and use the best tools and techniques to construct the most effective data platform for your business.
by Contributed | Mar 18, 2022 | Technology
This article is contributed. See the original author and article here.
This article is focused on creating an ARM template which will create a storage account resource in the resource group and will assign role at both RG (Resource Group) scope and created storage account resource level
This article is divided into following 5 sections.
- Fetch User Object ID
- Fetch Built-in Role ID
- Create ARM template to provision storage account
- Role assignment in ARM template
- Deploying ARM template to Azure Portal
Let’s start step by step as mentioned above, we will fetch the user object ID which will be used in deploying ARM template
- So firstly, lets fetch the user’s object id
Use the PowerShell script to fetch user’s object id by its email id.
PS Script: Get-AzADUser | Where-Object { $_.UserPrincipalName -eq “testuser@testdomain.xyz.com” }
This will show the user details like, DisplayName, Id, Mail, UserPrincipalName, Grab the Id and save it for further use
You can also fetch the user object Id from Azure Portal, Navigate to Azure Active Director > Users > Select the user you want to fetch the Id of > Copy the Object Id
- Similarly, we will fetch the built-in role Id using PowerShell script, for this article I will fetch the “Reader” role id but you can fetch your required role id,
PS Script: Get-AzRoleDefinition -Name Reader
This script will output few of the Role details, grab the Id from the output and save it for further use
- Now it’s time to create the ARM Template which will create the Storage account and assign user with Reader role to the created storage account also, we will assign user with Reader role to the Resource group using scope.
Follow the template mentioned below for creating storage account and role assignment.
Refer Microsoft documentation to know more on ARM Template syntax and details and to know more details on role assignment
{
“$schema”: “https://schema.management.azure.com/schemas/2015-01-01/deploymentTemplate.json#“,
“contentVersion”: “1.0.0.0”,
“parameters”: {
“AAD_Object_ID”: {
“metadata”: {
“description”: “Object ID of the User, Group or Service Principal”
},
“type”: “string”
},
“Role_Definition_ID”: {
“metadata”: {
“description”: “Identifier (GUID) of the role definition to map to service principal”
},
“type”: “string”
}
},
“variables”: {
“Full Role_Definition_ID”: “[concat(‘/subscriptions/’, subscription().subscriptionId, ‘/providers/Microsoft.Authorization/roleDefinitions/’, parameters(‘Role_Definition_ID’))]”,
“StorageAccountName”: “shrstrgacc”,
“StorageAccountAssignmentName”: “[concat(variables(‘StorageAccountName’), ‘/Microsoft.Authorization/’, guid(concat(resourceGroup().id), variables(‘Full Role_Definition_ID’)))]”
},
“resources”: [
{
“type”: “Microsoft.Storage/storageAccounts”,
“apiVersion”: “2018-07-01”,
“name”: “[variables(‘StorageAccountName’)]”,
“comments”: “Storage account used to store VM disks”,
“location”: “[resourceGroup().location]”,
“sku”: {
“name”: “Standard_LRS”
},
“kind”: “Storage”,
“properties”: {
“roleDefinitionId”: “[variables(‘Full Role_Definition_ID’)]”,
“principalId”: “[parameters(‘AAD_Object_ID’)]”
}
},
{
“type”: “Microsoft.Authorization/roleAssignments”,
“apiVersion”: “2017-09-01”,
“name”: “[guid(concat(resourceGroup().id), resourceId(‘Microsoft.Storage/storageAccounts’, ‘shrstrgacc’), variables(‘Full Role_Definition_ID’))]”,
“dependsOn”: [
“[resourceId(‘Microsoft.Storage/storageAccounts’, ‘shrstrgacc’)]”
],
“properties”: {
“roleDefinitionId”: “[variables(‘Full Role_Definition_ID’)]”,
“principalId”: “[parameters(‘AAD_Object_ID’)]”,
“scope”: “[resourceGroup().id]”
}
},
{
“type”: “Microsoft.Storage/storageAccounts/providers/roleAssignments”,
“apiVersion”: “2017-05-01”,
“name”: “[variables(‘StorageAccountAssignmentName’)]”,
“dependsOn”: [
“[resourceId(‘Microsoft.Storage/storageAccounts’, ‘shrstrgacc’)]”
],
“properties”: {
“roleDefinitionId”: “[variables(‘Full Role_Definition_ID’)]”,
“principalId”: “[parameters(‘AAD_Object_ID’)]”
}
}
],
“outputs”: {}
}
As you can see from the above ARM template, we have given 2 input parameters which are, “AAD_Object_ID” & “Role_Definition_ID”, so to give a brief about what this input parameter will hold, AAD_Object_ID will be the User object Id fetched from Step 1 and Role_Definitation_ID will be the built in Reader Role ID fetched from Step 2
To further drill down to the ARM Template resources, we will be using;
Type: Microsoft.Storage/storageAccounts to provision storage account with the mentioned properties in the ARM Template
Type: Microsoft.Authorization/roleAssignments to assign role at Resource group scope
Type: Microsoft.Storage/storageAccounts/providers/roleAssignments to assign role to the storage account resource
Also, save the above mentioned template code in a file with .json extension for example armtest.json and copy the file path as we will need it while deploying it to Azure in the final step
- Now it’s the time to deploy ARM Template to Azure Portal use the following script
#Connect to Azure Account
Connect Az-Account
# Use PowerShell command New-AzResourceGroupDeployment, this command deploys azure resources to the Resource group
Refer, Microsoft documentation on deploying using New-AzResourceGroupDeployment
New-AzResourceGroupDeployment -ResourceGroupName <your- resource-group-name>`
-TemplateFile <ARMTemplateFilePath > `
-AAD_Object_ID <user object Id> `
-Role_Definition_ID <Built in Reader role Id>
Note – Pass the copied path of the saved ARM Template file to the TemplateFile parameter in the script
Now it’s time to verify the outcome in the Azure Portal,
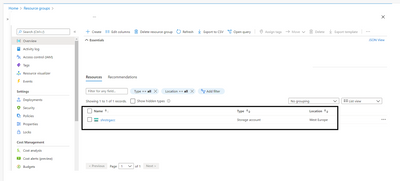
Wohoo, Storage is created in the Resource group mentioned in the New- AzResourceGroupDeployment
Fig 1.1: Storage Account created using ARM Template
Now, Lets check if the Reader role to the testuser is assigned to the Resource Group
Navigate to Azure Portal > Resource Group > Select the Resource group you added in the ARM deployment script > Access Control > Role Assignments
Wohoo, we can see the Reader role to the test user is assigned access to the Resource Group scope

Fig 1.2: Role Assignment to the Resource Group using ARM Template
It’s time to verify the role access at the storage account resource level,
Navigate to Azure Portal > Resource Group > Select the Resource group you added in the ARM deployment script > Select the created storage account > Access control > Role Assignments
Wohoo, at storage account level we can see the reader role is assigned to the test user and the same is inherited from the Resource Group.

Fig 1.3: Role assigned to created storage account using ARM Template
I hope this article seems useful for all the Azure enthusiasts on how they can assign RBAC to the users/groups/SPNs/Managed Identities using ARM Template.
Keep Learning!
Keep Sharing!

by Contributed | Mar 17, 2022 | Technology
This article is contributed. See the original author and article here.
Web activity is helpful when invoking an external endpoint from within an ADF pipeline. While Azure Data Factory/ Synapse pipelines offer various orchestration activities, web activity helps provide extensibility when building data pipelines that span across different services.
Web activities work exceptionally well with APIs that follow the asynchronous request-reply pattern, a suggested approach for building scalable web APIs/ services. In such scenarios, it automatically polls for the status endpoint (when it receives HTTP 202) till the API returns HTTP 200. It behaves synchronously and waits till the response is HTTP 200 before kicking off the down-stream activities.
Most Azure-based APIs are async request-reply pattern and gels with the existing web activity behavior.
Problem
But in case you have API endpoints that do not follow the above pattern and expect the caller to wait for a response till the processing/ actions are done. As default action, the web activity will timeout within 1 minute if it does not receive any response.
Improvement
We are introducing a response timeout property ‘httpRequestTimeout’ in Web activity that will let you provide larger timeouts for such synchronous APIs.

Reference:
Web Activity – Azure Data Factory & Azure Synapse | Microsoft Docs


Recent Comments