This article is contributed. See the original author and article here.
In Dynamics 365, “My” views show records owned by the System Users themselves. Let’s look at how you can have views that let’s you filter records based on the Owner Team which you are a part of.
Scenario
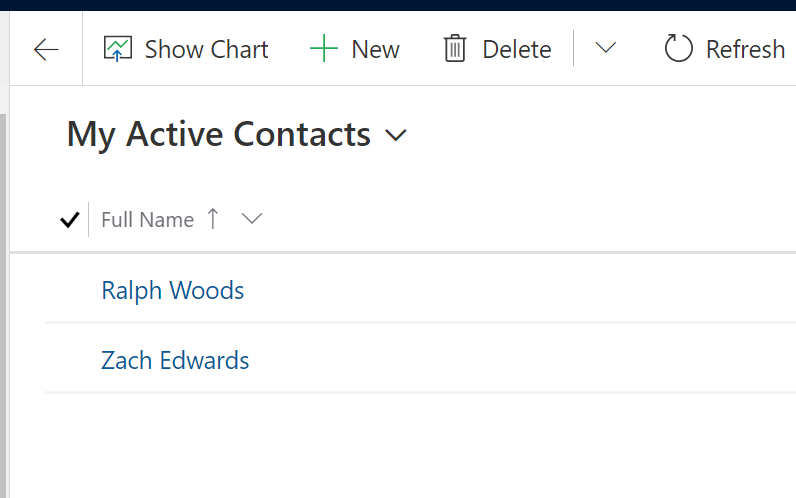
Let’s assume the below scenario in terms of Contacts entity. All users have Contacts owned by them. Out-of-the-box views show filter “My” views only by Owner field.
- Default My Active Contacts view will show you Contacts you are Owner of. (Similarly, this could apply to every other record as well)
Example: Amit is logged in and he is seeing his Contacts under My Active Contacts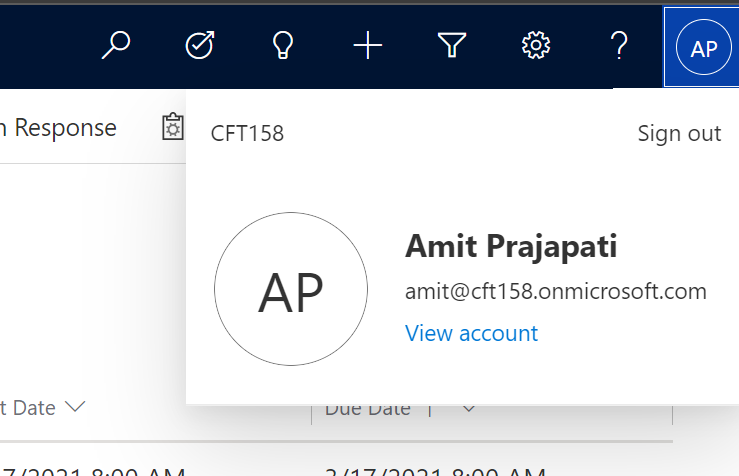
- Now, Amit is also part of a Sales Team which is an Owner Team in Dynamics 365 CRM/CE
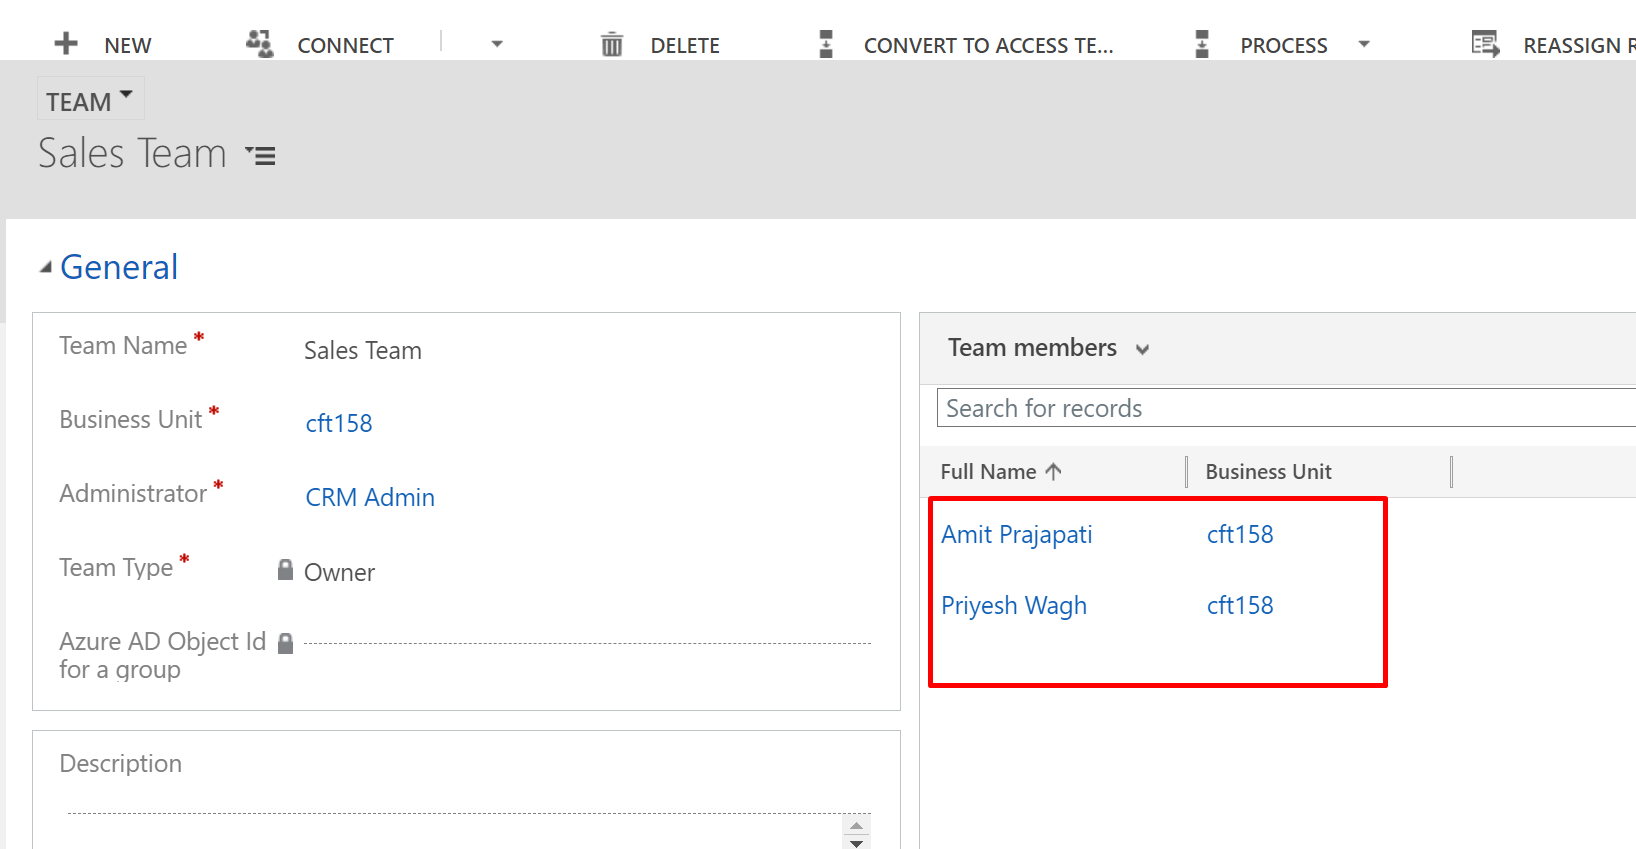
- And, there is a Contact which is assigned to the Sales Team itself and not an individual user.
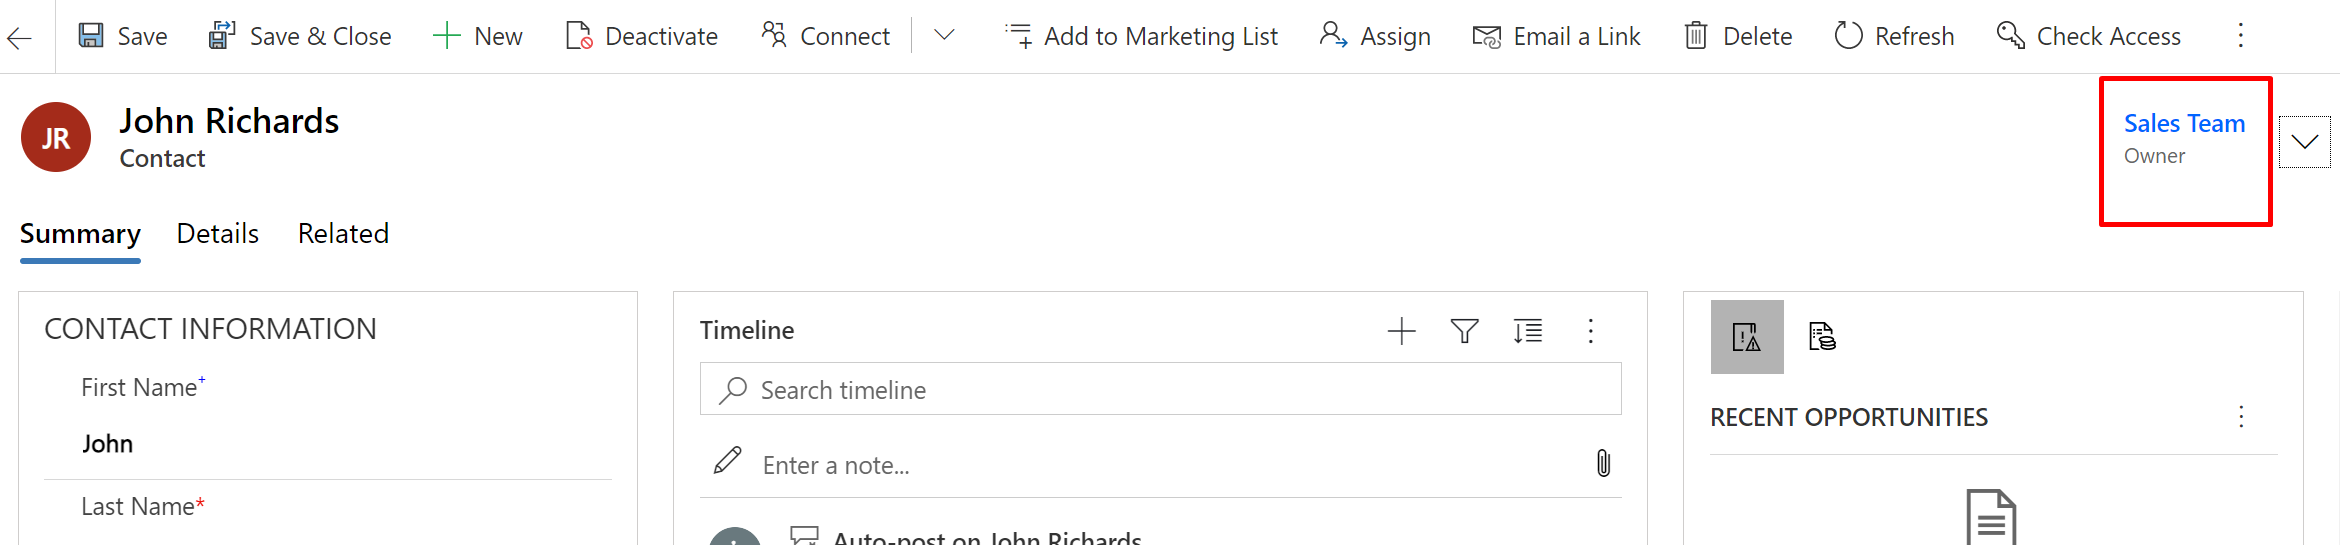
I’ll just expand the header and show you the Owner

- So, we’ll make this Contact also appear for Amit on his new My Team(s) Contacts’ view. You can call your view something else as well.
So let’s see we can do this.
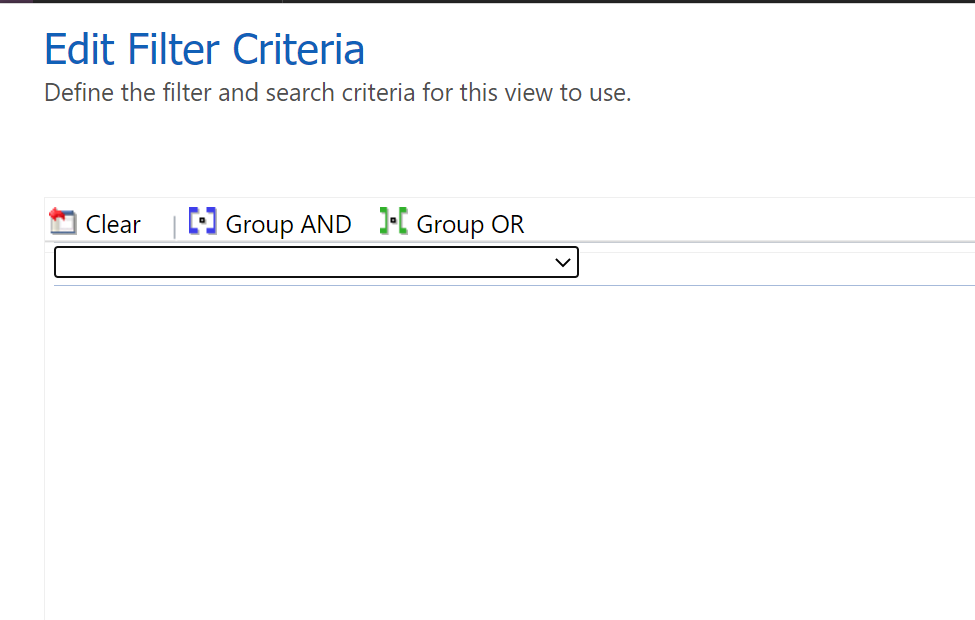
Create a new View – Edit Filter Criteria
In order to make the Owner Team’s record available, we’ll have to work by creating a new view and editing the Filter Criteria of the new view. Let’s see how –
- I’ve created a new view called as My Team(s) Contacts. And I’ll start by editing the criteria itself.

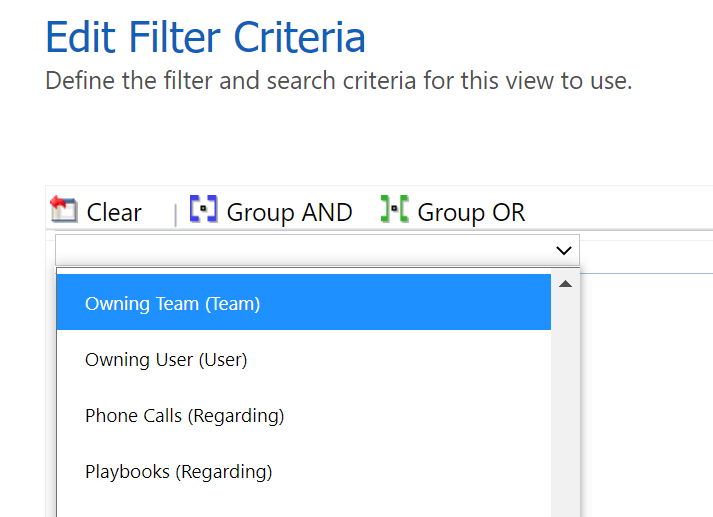
- Start by selecting Owning Team (Team) under the Related section of the fields selection drop-down.
Under that, open the drop down to expand it’s related records.
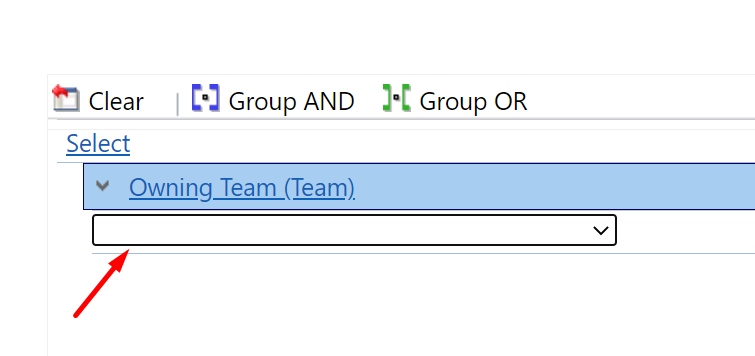
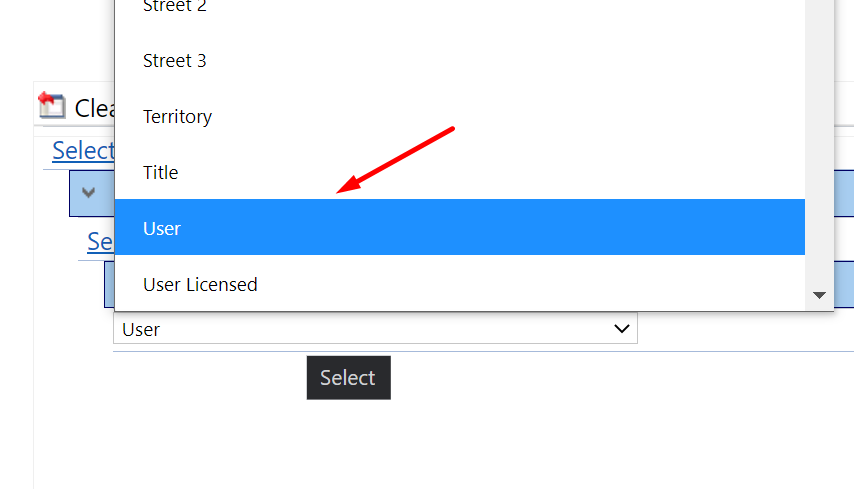
- Under Owning Team (Team), look for Users. Notice that it doesn’t have any entity name mentioned in brackets like other fields in the list. Meaning, it is the sub-grid i.e. Child Record list under the Team record.

- Once you select the Users, expand the dropdown under Users which will be the fields of the System User record itself.
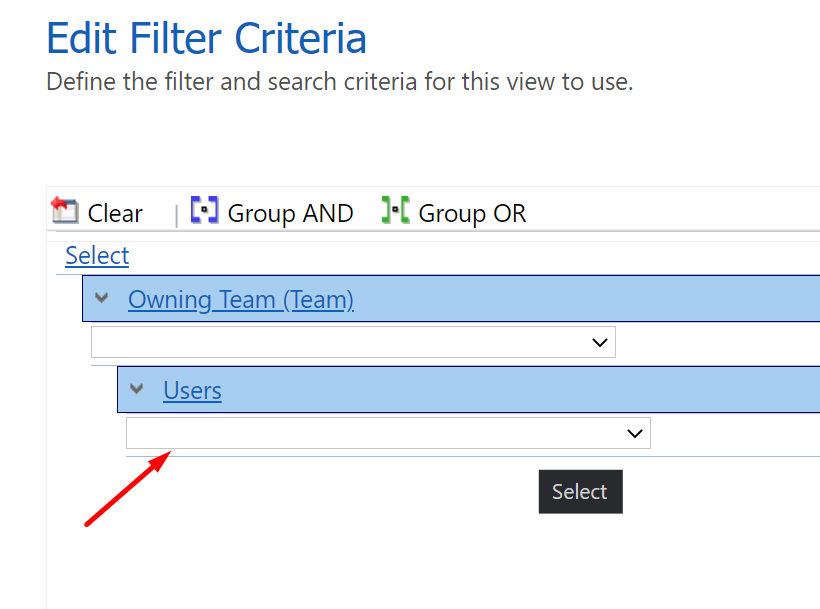
- In this list, select User itself. This is the GUID of the User record. Pro Tip: Any field with the name of the entity itself is a GUID/Primary Key of the entity record itself.
- And in this last selection, you’ll notice that the Current User is already selected for you.
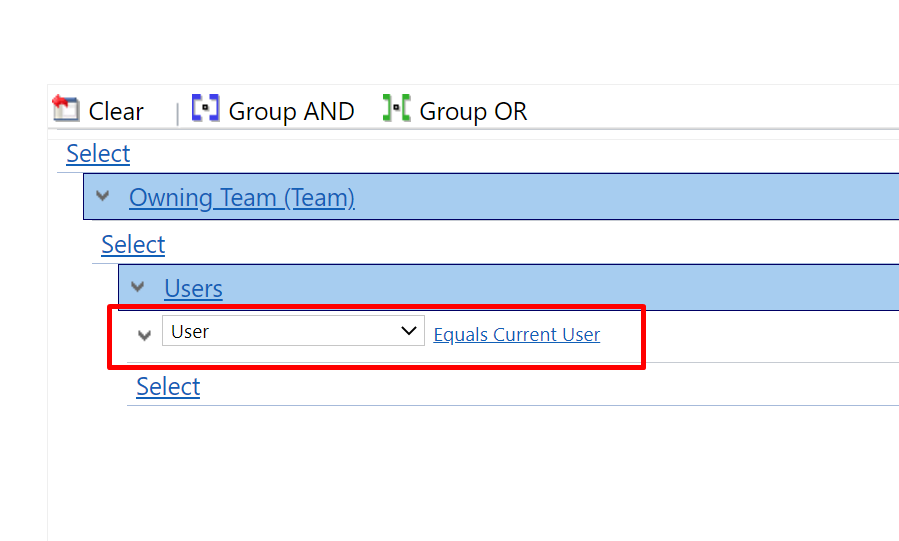
- That’s it. Save your criteria and publish the changes.
Let’s see the results.
Result
Now, if you navigate to the new view you created with the selected criteria, you’ll see the records Owned by Teams which the logged in user is a part of –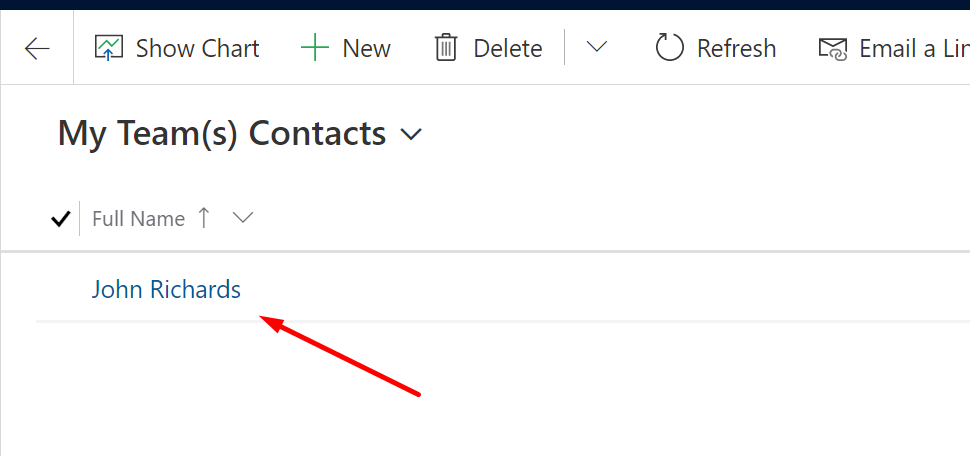
Caveat – Clubbing into 1 view (Owner + Owning Team’s Member) is not possible
Let me point out a caveat right away before we proceed – In case if you are wondering that we can do this in the same view by adding more ‘Related’ entity criteria which will look like the below – it won’t work! 
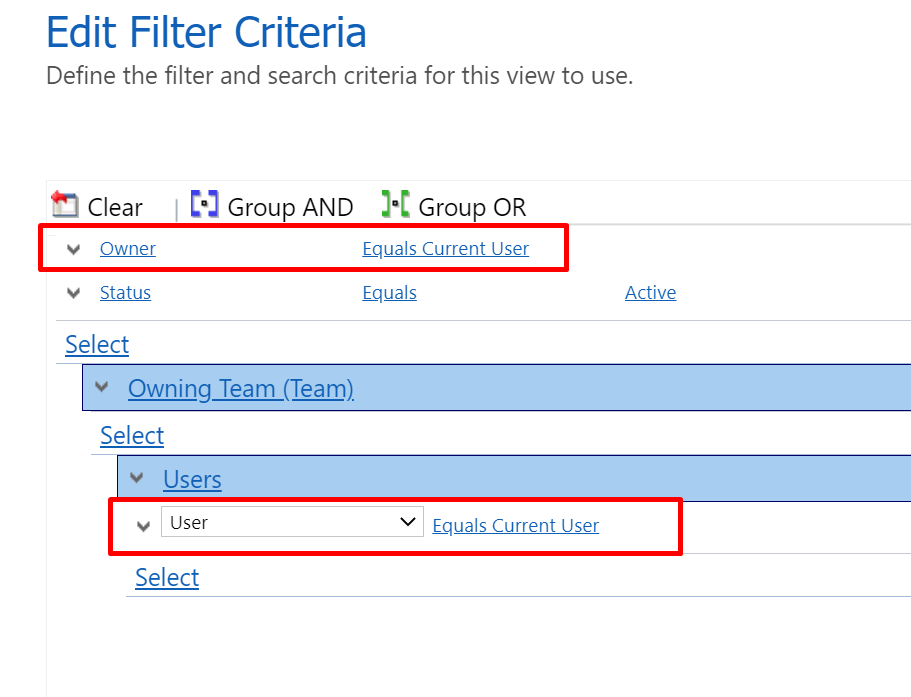
Because, the Filter Criteria will not consider (or let you select these rows in any order) and let you make it in an OR group.
By Default, this is an AND group i.e. a Field + Related criteria can’t be grouped together.
If you set the above criteria in any order, it’ll end up returning 0 results.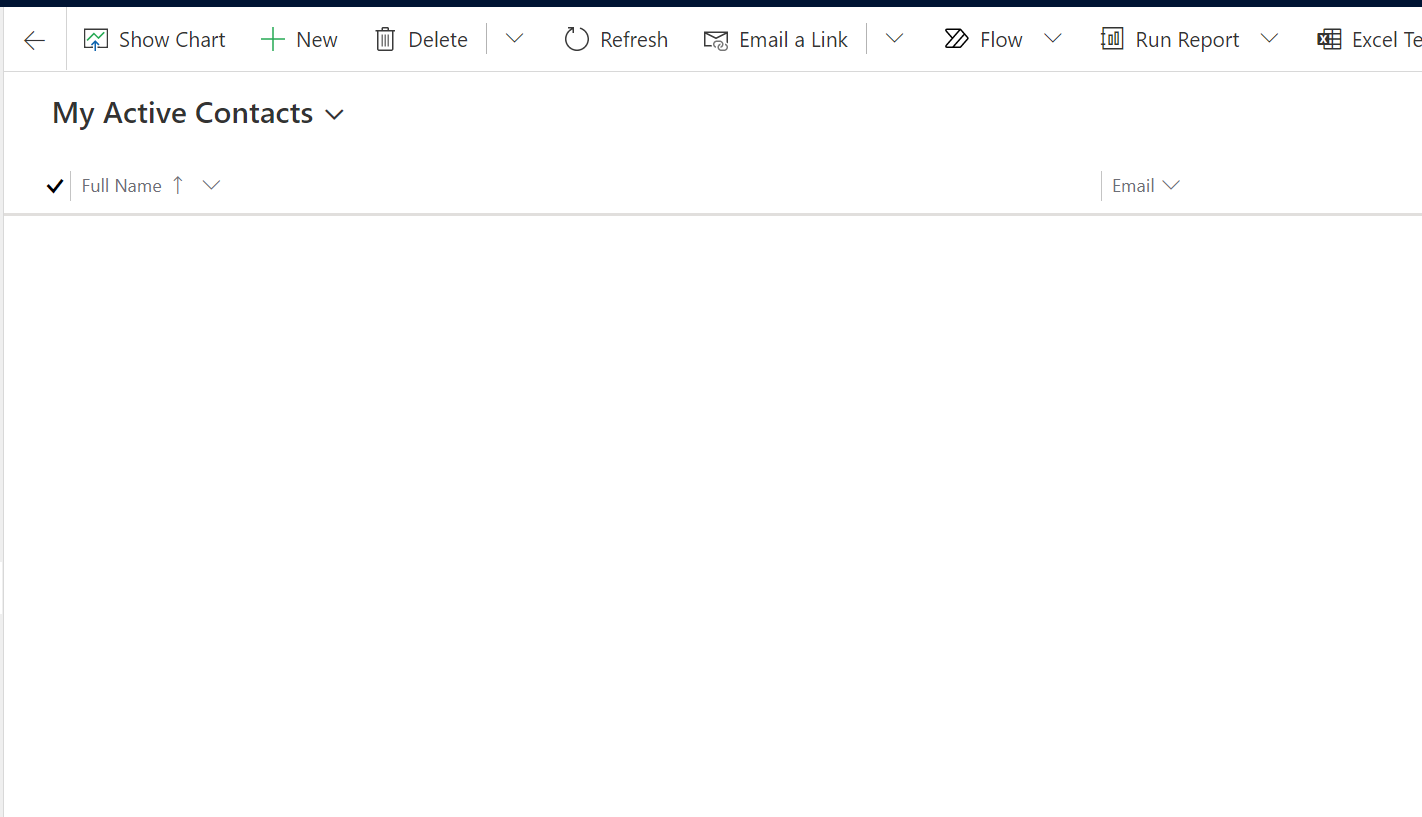
Hope this was useful!
Here are some more Dynamics 365 related posts you might want to check –
- Use Rich-Text Control for Multiple Lines of Text in Dynamics 365 CE | Quick TipDuration field in Dynamics 365 converts Hours value to Days in Dynamics 365 | [Flow Workaround to convert in Hours and Mins]
- Import lookup referencing records together in Dynamics 365 CRM | [Linking related entity data during Excel Import]
- Show custom ribbon button based on Security Role of the logged in User in Dynamics 365 | Ribbon Workbench in XrmToolbox
- Connecting XrmToolBox to an MFA enabled Dynamics 365 environment | Azure AD
- Form Access Checker in new Power Apps Form Designer | Model-Driven Apps in Dynamics 365
- Use Rich-Text Control for Multiple Lines of Text in Dynamics 365 CE | Quick Tip
- Ribbon button visibility based on a field value in Dynamics 365 | Ribbon Workbench
- Make On-Demand Flow to show up in Dynamics 365 | Power Automate
- Find deprecated JS code used in your Dynamics 365 environment | Dynamics 365 v9 JS Validator tool | XrmToolBox
- Remove ‘This Email has been blocked due to potentially harmful content.’ message in Dynamics 365 Emails | OrgDbSettings utility
Thank you!
Brought to you by Dr. Ware, Microsoft Office 365 Silver Partner, Charleston SC.

Recent Comments