This article is contributed. See the original author and article here.

01-overview.png


Many organizations have an on premises Active Directory infrastructure that is synced to Azure cloud. However, given that the on-prem side is the authoritative source of truth, any changes, such as disabling a user in the cloud (Azure AD), are overridden by the setting defined in the on-prem AD in the next scheduled sync. This presents challenges when you want to orchestrate a user property change from Azure that needs to persist even after the sync happens. To address the problem, this solution leverages Azure Automation Accounts and Hybrid Worker features across Windows & Azure. Automation Accounts are used to perform cloud-based automation across Azure and non-Azure environments. For non-Azure environments such as an On-Premises Active Directory, an Automation Hybrid Worker is required in addition to the Automation Account to be able to issue commands to the On-Premises Active Directory from Azure. Hybrid Workers can be used in Linux and Windows environments and if one has deployed  Azure Arc , then they can also be used with the same OS types running in AWS or GCP so long as those machines are reporting to a Log Analytics workspace.


Deployment Steps


Create an Automation Account and link it with the Log Analytics Workspace


  1. Create an Automation Account from the Azure Portal


02-Automationacc.png


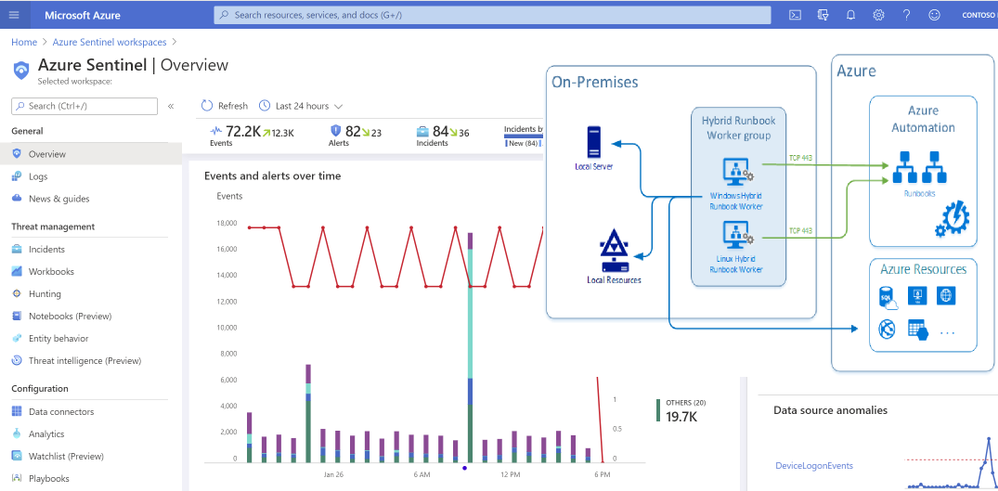
2. Deploy the Automation Hybrid Worker solution from the Azure Market place


03-marketplace.png


Link a Log Analytics Workspace to your Automation Account.


Link the LA workspace to an automation account using the “Change Tracking” menu item on the list. If the Log Analytics workspace is in either East US or East US2 then you need to use the region mapping in the following link to select the location of your automation account: Supported regions for linked Log Analytics workspace | Microsoft Docs


02-linkLA.png


04-Linkautotola.png


From the same Automation Account menu, create a Hybrid Worker Group


06-HybridWorkerGroup.png


05-credentials.png


It is highly recommended that the permissions of the account used above be restricted to the minimum required to disable user accounts using the Delegation userAccountControl bit mask. More details can be found here: UserAccountControl property flags – Windows Server | Microsoft Docs


To create a new PowerShell Runbook navigate to you Automation Account and select the Runbooks blade. 

05-createrunbook.png


Select PowerShell from the Runbook type menu and paste the below script in the resulting window. Click save then publish to activate the Runbook. 

Note: the script also includes code to report an error in case of a failure in the process of disabling the account:


Param (

[string] $SAMAccountName

)

if (Get-Module -ListAvailable -Name ActiveDirectory) {
    Write-Output "ActiveDirectory PowerShell module already exists on host."
} 
else {
    Write-Output "ActiveDirectory PowerShell module does not exist on host. Installing..."
    try {
        Import-Module ActiveDirectory
    }
    catch{
        Write-Error "Error installing ActiveDirectory PowerShell module."
        throw $_
        break
    }

    Write-Output "ActiveDirectory PowerShell module installed."
}

Write-Output "Finding and disabling user $SAMAccountName"
try {
    Get-ADUser -Identity $SAMAccountName | Disable-ADAccount
}
catch {
    Write-Error "Error disabling user account $SAMAccountName"
    throw $_
    break
}
Write-Output "Successfully disabled user account $SAMAccountName"


The script takes in a SAMAccountName parameter which it uses to find the appropriate user and disable the account. This script can be modified to do a variety of other tasks, such as password resets, adding/removing users to/from groups, etc.


Create a test user in Active Directory then perform the steps in the on-prem machine to install the Hybrid Worker feature 


Deploy the below script from this URL: PowerShell Gallery | New-OnPremiseHybridWorker 1.7 . Depending on the PowerShell module currently installed on your machine you may need manually download the file. If you do so, you will need to rename the extension to a .zip file first then extract to the directory where you’ll execute the script from.


This script performs the following actions:

1) Install the necessary modules

2) Login to an Azure account

3) Check for the resource group and automation account

4) Create references to automation account attributes

5) Create an Log Analytics Workspace if needed

6) Enable the Azure Automation solution in Log Analytics

7) Download and install the Microsoft Monitoring Agent

8). Register the machine as hybrid worker


To register your HybridWorker in Azure add the details of your hybrid runbook into the parameters to be passed to the creation command execute the below statement at your PowerShell prompt:

$NewOnPremiseHybridWorkerParameters = @{

  AutomationAccountName = “iwauto”

  AAResourceGroupName   = “AD-Onprem”

  OMSResourceGroupName  = “AD-Onprem”

  HybridGroupName       = “AutoGroup”

  SubscriptionID        = “xxxxxxxxxxxxxxxx”

  WorkspaceName         = “iwautola”}


From the same PowerShell command prompt type: Install-Script -Name New-OnPremiseHybridWorker which will use parameters specified above 

This command will open a log on screen to Azure Portal to register the Hybrid Worker in Azure.


The command will use parameters specified above to register your Hybrid Worker Group in your Azure Subscription. You can learn more about the process of deploying Hybrid Workers here: Deploy a Windows Hybrid Runbook Worker in Azure Automation | Microsoft Docs


The command will open a log on screen in Azure Portal to register the Hybrid Worker in Azure


07-azurereg.png


To confirm successful registration, navigate to your automation account then select Hybrid worker groups. You should see the recently registered Hybrid Worker Group in the list per below screen shot.


08-HybridWorker.png


If you get the error indicating that the PowerShell file is not digitally signed, then you will need to execute the command below:

Set-ExecutionPolicy RemoteSigned

You may still have to unblock the file in case changing the execution policy alone does not work. The command to do this is from a PowerShell prompt is: 

Unblock-File -Path .New-OmPremiseHybridWorker.ps1


It is also recommended that you use TLS versions more recent than 1.0 and 1.1. For this reason you may be required to run the below command as well:


[Net.ServicePointManager]::SecurityProtocol = [Net.SecurityProtocolType]::Tls12


You can learn more about the process of deploying Hybrid Workers here:


On successful registration you should see an output similar to the below:

08-successoutput.png


To confirm successful registration, navigate to your automation account then select Hybrid worker groups. You should see the recently registered hybrid worker group in the list per below screen shot.


08-HybridWorker.png


Test the Runbook 

To ensure the Runbook is working ok before integrating with a Logic App, execute the Runbook manually from the Azure Portal and specify a test account in the SAMAccountName box, select HybridWorker in the Run Settings section and then choose your Hybrid Worker group name from the drop-down list:


09-manualtest.png


Steps to orchestrate from Azure Sentinel/Logic Apps


Below is the structure of the orchestration Logic App that triggers the runbook to disable qualifying accounts from the On-Prem AD. With this action the next on-prem to cloud AD sync will maintain the state on the account – in this case disabled, until the setting is reversed from the on-prem AD Users & Computers management console.


High-Level structure of the Playbook


 10-LogicAppOverview.png


Detailed structure of the Playbook:

Extract entity details (to capture user ID) following trigger execution


Createjob.png


Parse the JSON output from the Entities-Get Actions step above in order to extract the Azure User ID and SAM Account name needed to perform disable operations-first on Azure then on the On-Prem Active directory.


ParseJSON.png


Disable Account in Azure AD


DisableonAzureAD.png


Create Hybrid Automation Job 

Createjob.png


The string function below is contained in the ‘Runbook Parameter SamAccountName’ above and is needed to extract the SAMAccount from the UPN of the user as the On-Prem AD can only act on the User ID when specified in this format:


    substring(body(‘Parse_JSON’)?[‘Name’], 0, sub(length(body(‘Parse_JSON’)?[‘Name’]),indexOf(body(‘Parse_JSON’)?[‘Name’],’@’)))


To simulate the block orchestration from Azure Sentinel, you may use the below sample query to create an Analytics rule that will detect a failed log on due to a wrong password entered on Azure AD portal. You can then simulate failed log on attempts with the account you wish to test with.


    SigninLogs

    | where Location == “KE” and Identity contains “mytestaccount” and ResultType ==”50126″

    | extend AccountCustomEntity = AlternateSignInName


Troubleshooting guide for Hybrid Runbook Workers can be found here : Troubleshoot Azure Automation Hybrid Runbook Worker issues | Microsoft Docs


This Playbook can be deployed directly from GitHub on this link: Azure-Sentinel/Playbooks/Block-OnPremADUser at master · Azure/Azure-Sentinel (github.com)


Troubleshooting guide: Troubleshoot Azure Automation Hybrid Runbook Worker issues | Microsoft Docs


Special thanks to @haelshab  for his valuable collaboration in this project & @YanivS  for suggestions to enhance the solution


Brought to you by Dr. Ware, Microsoft Office 365 Silver Partner, Charleston SC.