Microsoft Entra ID Beginner’s Tutorial (Azure Active Directory)
This article is contributed. See the original author and article here.
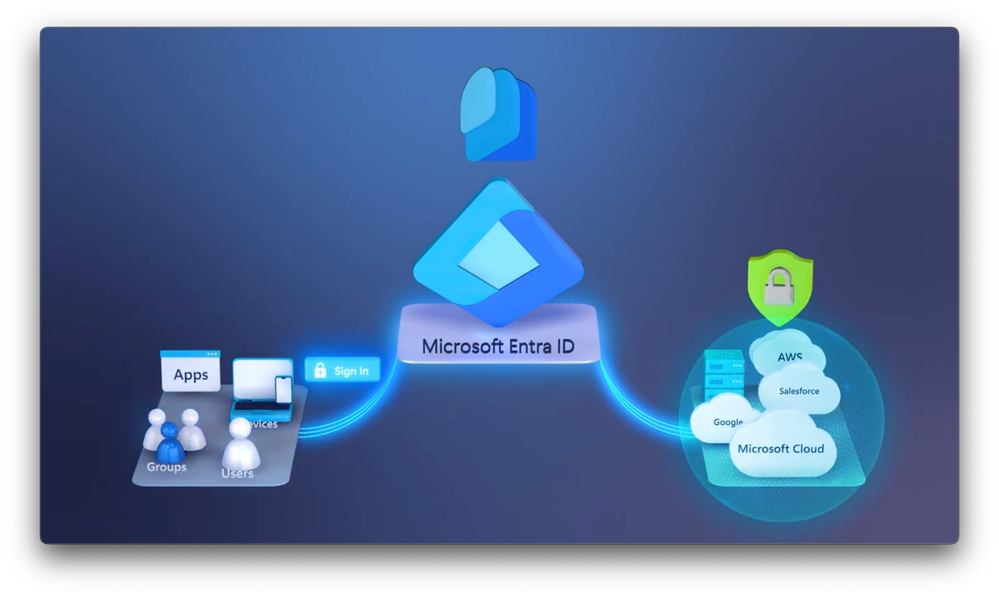
Simplify and improve security for sign-in experiences with Microsoft Entra ID, the new name for Azure Active Directory. Microsoft Entra ID is a unified identity provider to sign into your non-Microsoft services, like Google, AWS, Salesforce, and ServiceNow.
See how it’s used to manage service licensing for Microsoft 365, Office 365, Enterprise Mobility + Security, and Microsoft Purview. It features unique capabilities like conditional access, passwordless authentication, Single Sign-on, and Dynamic Groups. Perform the most common day-to-day tasks, like adding and editing user accounts, options for groups and what each do, as well as managed identities, role assignment, admin units, and additional core capabilities.
Jeremy Chapman, director of Microsoft 365 and a long-time endpoint management and directory services admin, explains the setup and configuration.
Just one email address to remember.

Access ALL your work services and apps. Enhanced security with multi-factor authentication and Conditional Access. Take a tour of Microsoft Entra ID.
Go beyond password-only authentication.

It just isn’t safe. Choose from multiple authentication strengths — like FIDO2 keys, Windows Hello, biometric sign-in & Microsoft’s Authenticator app. See the Microsoft Entra admin center.
Single Sign-On across devices and apps.

Microsoft Entra ID integrates with device management. Get started.
Watch our video here:
QUICK LINKS:
00:00 — Simplify identity management
01:05 — Consolidate identity services
02:52 — Admin experience
05:09 — Conditional Access
05:39 — Manage user accounts
07:09 — Edit users
08:16 — Dynamic Groups
10:22 — Admin Roles & Admin Units
11:45 — Single Sign-On
12:34 — Wrap up
Link References
For more information, check out https://aka.ms/EntraDocs
Unfamiliar with Microsoft Mechanics?
As Microsoft’s official video series for IT, you can watch and share valuable content and demos of current and upcoming tech from the people who build it at Microsoft.
- Subscribe to our YouTube: https://www.youtube.com/c/MicrosoftMechanicsSeries
- Talk with other IT Pros, join us on the Microsoft Tech Community: https://techcommunity.microsoft.com/t5/microsoft-mechanics-blog/bg-p/MicrosoftMechanicsBlog
- Watch or listen from anywhere, subscribe to our podcast: https://microsoftmechanics.libsyn.com/podcast
Keep getting this insider knowledge, join us on social:
- Follow us on Twitter: https://twitter.com/MSFTMechanics
- Share knowledge on LinkedIn: https://www.linkedin.com/company/microsoft-mechanics/
- Enjoy us on Instagram: https://www.instagram.com/msftmechanics/
- Loosen up with us on TikTok: https://www.tiktok.com/@msftmechanics
Video Transcript:
-Imagine being able to use the same sign-in credentials to securely access all of your online services for work, not only the ones hosted by Microsoft, but even other cloud apps and service providers just using your work email address and without needing to remember your passwords. Well, all of that is possible with Microsoft Entra ID. As a common identity and access management solution, its primary job is to help you prove you are who you say you are. And once that’s verified, which is a process called authentication, you can access services that you have permissions to use, which we refer to as authorization.
-So today, I’m going to walk you through all the fundamentals of Microsoft Entra ID, what it is and how it works. First, as a user to access services even from non-Microsoft clouds, like Google, Salesforce, AWS, and others. Then if you’re an identity admin, I’ll walk through the basics with a focus on users, groups, and roles. And the good news is if you’re familiar with Azure Active Directory, Microsoft Entra ID is its new name. And while there are a few new updates, it’s going to look pretty familiar.
-So let’s start by looking at why you would even consolidate identity services into a single provider. And there are really quite a few reasons. First, it’s not easy to remember all the different logins that you use to access multiple apps and services. And related to that, the reality is many people will reuse their username and password across different services.
-So when one of those services gets hacked and leaks your credentials, without you even knowing it, adversaries will use those leaked credentials to access other services. And what if you’re one of the responsible ones, and you don’t reuse passwords or you make a point of setting up second factor of authentication whenever possible? Well, that’s one step better from a security point of view, but for the organizations you work for, it would still mean that they need to manage each service that you’re accessing separately, for everything from account creation, changes associated with your identity, password resets, and more.
-So if you could just have one username and a unified system to log into all your work services, where it’s more secure with two factors of authentication, works with passwordless login so you don’t need to remember multiple passwords, just your email address. It assesses sign-in risk in real-time. Like if someone from another country has stolen your credentials and is trying to use your account, so it can block them. You can get to all of your assigned web or line of business apps from one central location instead of managing this yourself with lots of browser bookmarks and favorites. And for IT and your help desk, all of this can be managed in one place. Doesn’t that sound like a better option? And that’s what Microsoft Entra ID is all about. Multi-cloud identity and access management, enabling secure access to your work applications and protecting your identity, which then in turn helps protect the information and services you use.
-Now let’s switch gears to the identity admin experience and a few important things you should know about before you get started. These will become prerequisites and dependencies as you work with core capabilities. So I’ll start in the Microsoft Entra Admin Center. You can get to it by navigating to entra.microsoft.com. By the way, for Microsoft Cloud services like Microsoft 365 or Intune, an instance of Microsoft Entra is set up behind the scenes for your organization automatically. And even though the same information is presented in these different admin experiences, you can make changes in any of these locations to the same shared backend service.
-For today though, I’ll keep things simple and I’ll do everything from the Microsoft Entra Admin Center. First, and as I mentioned before, with things like Google, Salesforce, and AWS services, you can manage identities for non-Microsoft services in addition to those offered by Microsoft. In enterprise applications, you can see that my environment has quite a few of these already set up. In most cases, there is a one-time operation to set each of these up where you’ll configure Microsoft Entra ID as the identity provider for that app or service, its integration details, and which users or groups can access it.
-Next, if you currently have an on-premises directory service like Active Directory, you can configure it within hybrid management to work directly with Microsoft Entra ID to synchronize services from basic topologies to even more advanced ones. Then of course, as shown and mentioned, you’ll use Microsoft Entra to manage identities. Now these can be users, they can also be devices, then groups that can consist of users, devices, and managed identities. And these managed identities can include applications or other resources like a cloud-hosted virtual machine.
-In protections, you’ll find authentication methods, which you’ll want to use for multifactor authentication. That’s because password-only authentication is not safe or recommended and Microsoft Entra ID makes it simple to standardize on more secure passwordless multifactor sign-ins. And Microsoft Entra supports multiple authentication methods, including biometric sign-in options with Windows Hello for Business, FIDO2 security keys, as well as mobile phones with the Authenticator app, along with other options that go beyond basic authentication using just passwords.
-And another major benefit of Microsoft Entra ID is its ability to assess risk in real-time using Conditional Access. So here, we base access decisions on user risk level, the IP location, where the sign-in attempt is coming from, whether the device trying to sign in is compliant, and the applications. After that, as you sign into those services, conditional access can decide to allow, block, or require additional authentication strength based on the controls that you set for granting access. So now you know a few of the core capabilities.
-Let’s look at a few of the basics that you’ll need to know when running the service on a day-to-day basis. And then once you have an instance of Microsoft Entra ID running, the most common tasks you’ll have is to manage user accounts. So here, you can see that I already have a few users added, but I’ll add another to show you how that process works. And immediately, you’ll see that I have options for users both internal to my organization and external to my organization.
-When you get started, you’ll typically want to add internal users as members of your organization. The user principle name, often referred to as a UPN, is normally the same as an email address and you can use whatever standard construct you have in place. So I’ll use first initial and last name. The display name then is usually the fully spelled out first and last name. And even though ultimately, this account will be used with passwordless multifactor authentication later, we’ll let the system generate a password. Then in properties, you’ll input all the user’s details, and these are important to fill in because you’ll need them later for filtering and dynamic grouping that I’ll show you in a moment.
-So now I have all their details inputted. Then next in assignments, I can manually add this user account to an existing group. So I’ll do that here. And the same is true for adding roles, as I scroll down this list of built-in roles, you’ll see they can be pretty specialized with lots of administrator roles. Now for many user types, you won’t need to define a role. You can add them later if you want to, but for my case, I’ll just close this out and I’ll create the user account. And now we have our new user, and what’s often just as common for managing users is editing them.
-So I’m going to click into this user account. Right on the top, you’ll find some of the most common tasks for editing properties, deleting the account, resetting the password, or revoking the sessions that the selected user is currently logged into. And this will come in handy if a user, say, reports a lost or stolen device. On the left, you’ll find the applications that each user has assigned to them. Importantly, Microsoft Entra ID is often also used for license assignment with Microsoft services. And here, you can see the top level products.
-And if I click into assignments, you can even control access to lots of the underlying apps and services within each of those top level product plans. This allows you to curate exactly which app experiences users have access to, so it’s not all or nothing. Then in devices, you can see which devices and the details for each device that this user has joined to Microsoft Entra. And for each user account, you can access a full set of audit logs with different events related to their identity, as well as detailed sign-in logs to see which apps they’ve recently signed into, along with their locations. Okay, so now with our users configured, let’s dig into how you’d group them together using groups. These can comprise of users, other groups, devices, and also managed identities.
-In fact, here, you can see a few different groups and types spanning Microsoft 365, distribution, and security groups. These are all based on roles, devices, locations, and more. So I’ll create a new group, and you’ll see that these can be security groups, or Microsoft 365 groups. And I’ll explain what each one of them does and we’ll start with security groups. So you’ll see from these controls that security groups are simply a logical grouping of objects in the directory. As I click into members, you’ll also see these can be users, other groups, devices, and enterprise applications. And that’s it.
-Conversely though, if I back out of the process and start a Microsoft 365 group, you’ll see the difference here is that it provisions a shared set of resources, like a shared inbox, and calendar in Exchange as indicated here. And behind the scenes, it’s also creating a SharePoint document library along with a few other Microsoft 365 resources. Then for member types, this time, you’ll only see users which can be people or things like meeting rooms. And something else that you can set up for both users and devices are Dynamic Groups.
-Now, pay attention as I change the membership type here from assigned, where you or others will manually assign members as is indicated at the bottom, to dynamic in this case. And you’ll see that members down below just change to add dynamic query. Now this is super useful because it will automatically enroll, or conversely unenroll users or devices into groups based on their individual properties. In this case, I want to group everyone from the city where the value equals, and then I’ll type Bellevue and save it. Now go ahead and name my group Bellevue Users and hit create. And that takes a moment to provision the group and its underlying services. Then if I open up the group, you’ll see that in members, it’s already found and added three people already working in the city of Bellevue automatically. So now let’s move into something a bit more admin-focused and how you and your fellow admins can manage resources using admin roles.
-So I’m going to move into roles and admins. And if you’re familiar with the concept of role-based access control, or RBAC, this is how you can right-size admin level permissions to only the things that you need to access. Of course, it’s a huge risk if you just give everyone global admin rights, especially if you have a larger IT team. So these roles can pinpoint permissions based on the resources that each admin needs to manage. So now if I jump back over to a user like Christie here, in assigned roles, I can add one, and now she can perform that function. So now let’s talk about admin units, which are another way to restrict permissions in a role, similar to an organizational unit, if you’re familiar with Active Directory, for example, to certain departments, regions, or other segments in your organization.
-Let show you an example. So here, I’m going to create a new admin unit. Now I’ll give it a name, Help Desk. And this restricted management control is important because it means the tenant level admins won’t simply inherit this role if you don’t want them to. Then I’ll assign roles, and I’ll pick a Teams administrator in this case, which will allow these users that I’ll pick next to manage Microsoft Teams settings. So now I’ll pick a few people working as Microsoft Teams admins. And from there, I can create it. Again, just those people that I defined have access to manage the Teams service. And one more component I’ll touch on today is how Microsoft Entra integrates with device management.
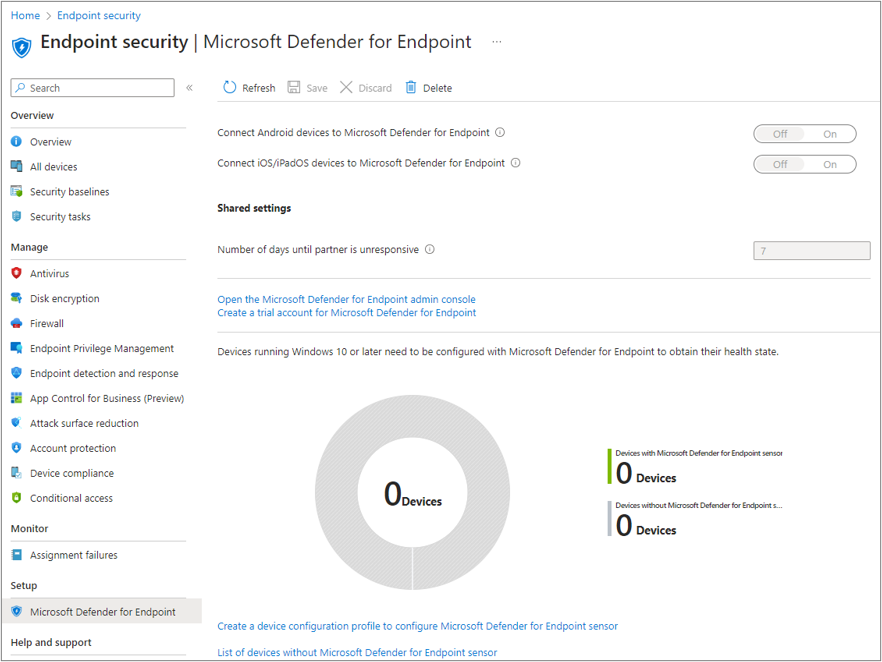
-So as I mentioned before, device state can be used to assess sign-in risk in real-time with Conditional Access. And it also works to enable single sign-on with something called Microsoft Entra join, so that as you sign into your device running Windows, and now even macOS, that single sign-on can transfer to local and web apps you use to access work resources. You can enable this from device settings, and importantly, require multi-factor authentication be used to register or join devices with Microsoft Entra.
-And by the way, all of this works seamlessly with Microsoft Intune and other endpoint management tools as you use those to manage the broader tasks of device management from provisioning, to app distribution, and device configuration.
-So those are a few of the core concepts to manage users, groups, applications, and devices. Now to learn more, check out aka.ms/EntraDocs. And keep following Microsoft Mechanics for latest tech updates. And thanks for watching.


Recent Comments